Author

Ryan

Browsing

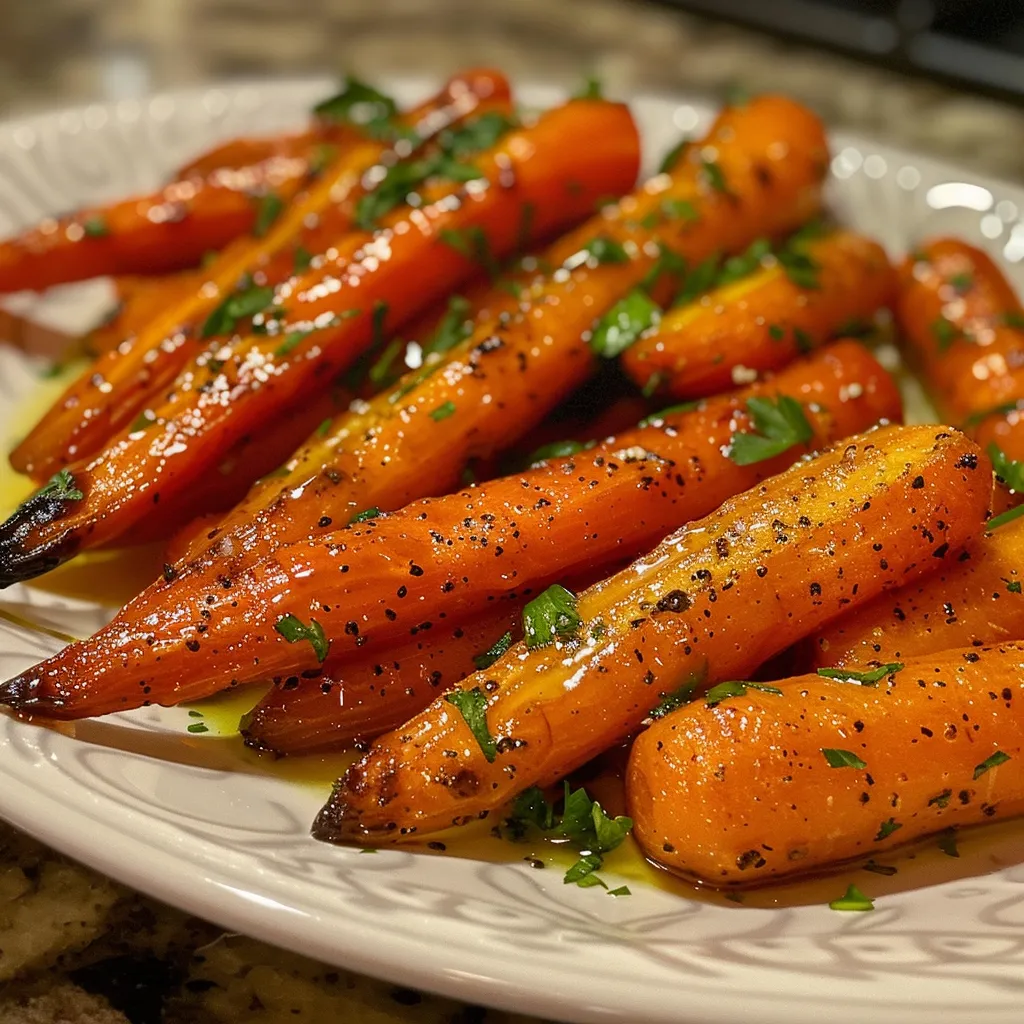
Elevate Your Meals with Sweet and Savory Honey Glazed Carrots!

If you’re looking to add a pop of flavor and color to your dishes, look no further than these Sweet and Savory Honey Glazed Carrots. This recipe is a delightful way to transform a simple vegetable into a side dish that not only looks stunning on your plate but also tantalizes your taste buds. Quick to prepare and bursting with flavor, these carrots are perfect for busy weeknights or festive gatherings.

Why You’ll Love This Recipe

  • Quick and Easy: This recipe takes less than 30 minutes from prep to plate, making it ideal for those hectic weeknights.
  • Flavor Balance: The combination of sweet honey and savory butter creates a perfect harmony that complements any main dish.
  • Colorful Presentation: The vibrant orange of the carrots adds a splash of color to your meal, making it visually appealing.
  • Customizable: You can easily adapt the recipe to include your favorite herbs and spices for a unique twist.
  • Kid-Friendly: With their sweet glaze, these carrots are a hit among children, making it easier to encourage healthy eating.

Ingredients Breakdown

Here’s what you’ll need to whip up these delicious honey glazed carrots:

  • 1 pound baby carrots: If you can’t find baby carrots, regular carrots work great too—just peel and slice them into uniform pieces.
  • 2 tablespoons butter: For a vegan option, substitute with coconut oil or vegan butter.
  • 2 tablespoons honey: Maple syrup is a fantastic alternative for a vegan-friendly version.
  • 1 tablespoon olive oil: This adds richness; however, you can use any light cooking oil you prefer.
  • Salt and pepper to taste: Essential for enhancing the flavors.
  • Fresh parsley for garnish: Optional, but it adds a fresh, vibrant touch.

Expert Tips for Perfect Honey Glazed Carrots

Side perspective of vibrant honey glazed carrots, showcasing their shiny texture.
  • Uniform Size: Cut your carrots into similar sizes for even cooking.
  • Don’t Overcrowd: Ensure the pan isn’t overcrowded; this helps the carrots roast rather than steam.
  • Watch the Glaze: Keep an eye on the honey glaze; it can burn quickly—stir frequently!
  • Fresh Herbs: Experiment with thyme or rosemary for an aromatic twist.
  • Leftover Magic: These glazed carrots pair excellently in salads or wraps the next day.
  • Roast for Depth: For a deeper flavor, consider roasting the carrots instead of sautéing.
  • Seasoning Variations: Add a pinch of cinnamon or nutmeg for a warm, spicy flavor.
  • Cooking Time: Adjust the cooking time based on the size of your carrots—small ones will need less time!

Common Mistakes and Troubleshooting

Even the best cooks can make mistakes. Here are some common pitfalls and how to avoid them:

  • Burnt Carrots: If you notice the carrots are browning too quickly, lower the heat and add a splash of water to the pan.
  • Too Sweet: Balance out the sweetness with a splash of lemon juice for acidity.
  • Undercooked Carrots: If your carrots are still firm after cooking, cover them and let them steam for a few minutes.
  • Flavorless Glaze: Don’t skip the salt and pepper; they are crucial for enhancing the dish’s overall flavor.

Variations of Honey Glazed Carrots

Feeling adventurous? Here are some creative variations to try:

  • Spicy Honey Glazed Carrots: Add a pinch of cayenne pepper or red pepper flakes for a kick.
  • Maple Glazed Carrots: Substitute honey with maple syrup for a unique flavor profile.
  • Garlic Honey Glazed Carrots: Toss in minced garlic during the last few minutes of cooking for an aromatic twist.
  • Herbed Honey Glazed Carrots: Incorporate fresh herbs like dill or basil for a fresh burst of flavor.

Storage and Make-Ahead Instructions

Planning ahead? Here’s how to store your honey glazed carrots:

  • Refrigeration: Store leftovers in an airtight container in the fridge for up to 3 days.
  • Reheating: Reheat in a skillet over low heat, adding a splash of water to revive the glaze.
  • Make-Ahead: You can prep the carrots and glaze a day in advance; just combine them before cooking.

Frequently Asked Questions

  • Can I use frozen carrots? Yes! Just thaw and drain them before cooking.
  • What can I serve with these carrots? They pair beautifully with roasted chicken, grilled steaks, or fish.
  • Can I make these carrots vegan? Absolutely! Use maple syrup and coconut oil instead of honey and butter.
  • How long do cooked carrots last in the fridge? They can last up to 3 days in an airtight container.
  • Are these carrots healthy? Yes! They are low in calories and packed with vitamins.
  • Can I add nuts? Yes! Toasted walnuts or almonds add a delightful crunch.
  • How do I make them spicier? Add more cayenne or drizzle with hot sauce before serving.
  • What’s the best way to peel carrots? Use a vegetable peeler for easy, quick peeling.

Nutritional Tips and Dietary Adaptations

These honey glazed carrots are not only delicious but also nutritious. Carrots are an excellent source of beta-carotene, fiber, and antioxidants. For those following specific diets, consider these adaptations:

  • Gluten-Free: This recipe is naturally gluten-free.
  • Low-Carb: Use fewer carrots and balance with more greens for a lower-carb option.
  • Keto-Friendly: Substitute with turnips or zucchini for a keto-friendly twist.

Essential Equipment Recommendations

To make this recipe, you’ll need:

  • Large Skillet: A non-stick skillet works best for even cooking.
  • Vegetable Peeler: Essential for prepping your carrots quickly.
  • Spatula: For flipping and stirring the carrots without damaging them.

Serving Suggestions

Make your honey glazed carrots the star of the show by serving them alongside:

  • Roast Chicken: The sweetness of the carrots complements the savory flavors perfectly.
  • Grilled Salmon: The glaze enhances the rich taste of the fish.
  • Vegetarian Quinoa Bowl: A colorful addition to a hearty vegetarian meal.
  • Holiday Spread: They make an excellent side at any festive gathering.

In conclusion, these Sweet and Savory Honey Glazed Carrots are not just a side dish; they’re a magical addition to any meal. With their vibrant color and delicious flavor, they’ll steal the show at your dinner table. Remember, cooking should be fun and effortless. So, grab your carrots, follow this recipe, and let the tasty adventure begin!

Honey Glazed Carrots

Prep Time 5 minutes
Cook Time 15 minutes
Total Time 20 minutes
Servings 4 servings
Calories 150
A simple and delicious side dish featuring tender carrots coated in a sweet honey glaze, perfect for any meal.

Ingredients

Main

  • 1 pound baby carrots (or regular carrots, peeled and sliced)
  • 2 tablespoons butter
  • 2 tablespoons honey
  • 1 tablespoon olive oil
  • Salt and pepper Salt and pepper (to taste)
  • Fresh parsley Fresh parsley (for garnish (optional))

Instructions 

  • Melt butter and olive oil in a skillet over medium heat.
  • Add carrots and sauté for 5 minutes.
  • Drizzle honey, season with salt and pepper, and cook for 5-7 minutes until glazed.
  • Remove from heat, garnish with parsley if desired, and serve warm.

Notes

For extra flavor, add a pinch of cinnamon or a squeeze of lemon.
Calories: 150kcal
Cost: $8
Course: Side Dish
Cuisine: American
Keyword: Carrots

The Zesty Quinoa and Black Bean Salad: Your Ultimate Guide to Vibrant Nutrition!

Welcome to a culinary adventure where flavor meets nutrition! This quinoa salad is not just another dish; it’s a celebration of health and taste that’s perfect for any occasion. Packed with protein, fiber, and a zesty kick, our Zesty Quinoa and Black Bean Salad is the ultimate energizer you didn’t know you needed. Whether you’re prepping for a busy week or looking for a fresh side dish, this salad is here to elevate your meals with its vibrant colors and delightful textures.

In just a few minutes, you can whip up a dish that’s not only delicious but also brimming with health benefits. So, let’s dive into why this recipe deserves a spot in your kitchen!

Why You’ll Love This Recipe

  • Quick and Easy to Make: This salad comes together in under 30 minutes, making it a fantastic option for busy weeknights or last-minute gatherings.
  • Nutritious Powerhouse: With ingredients like quinoa and black beans, this salad is loaded with protein, fiber, and essential nutrients that will keep you energized throughout the day.
  • Versatile Meal Prep: Perfect for meal prep, this salad stays fresh in the fridge, allowing you to enjoy it at any time during the week.
  • Customizable Flavors: Feel free to play around with the ingredients! Add your favorite veggies or proteins to make it unique to your taste.
  • Great for Any Occasion: Whether it’s a potluck, picnic, or a simple lunch at home, this salad is sure to impress your guests and family alike!

Ingredient Breakdown

Let’s take a closer look at the ingredients that make this salad a flavor-packed delight:

  • 1 cup quinoa, rinsed: A complete protein that’s gluten-free and full of fiber. Quinoa is the perfect base for this salad.
  • 2 cups water: Essential for cooking the quinoa to fluffy perfection.
  • 1 can (15 oz) black beans, drained and rinsed: Rich in protein and fiber, these beans add a hearty texture.
  • 1 red bell pepper, diced: Sweet and crunchy, it adds a pop of color and vitamins A and C.
  • 1 cup corn (fresh or frozen): Adds sweetness and a hint of crunch. Fresh corn is delightful in summer, while frozen works perfectly year-round.
  • 1/2 cup red onion, finely chopped: Provides a sharp contrast to the sweetness of the corn and peppers.
  • 1/4 cup fresh cilantro, chopped: Brings a refreshing flavor that brightens the entire dish.
  • 1/4 cup olive oil: A heart-healthy fat that brings everything together beautifully.
  • Juice of 2 limes: Adds acidity and zest, balancing out the flavors perfectly.
  • Salt and pepper to taste: Enhances all the flavors in the salad.

Pro Tips for the Best Salad

Colorful quinoa salad featuring black beans, corn, and fresh herbs.
  • Rinse the Quinoa: Always rinse quinoa before cooking to remove its natural coating, which can taste bitter.
  • Let Your Quinoa Cool: Allow the quinoa to cool before mixing it with other ingredients to avoid wilting your veggies.
  • Adjust Seasoning: Taste your salad before serving and adjust the lime juice, salt, or pepper to suit your palate.
  • Fresh Ingredients Matter: Use fresh ingredients whenever possible for the best flavor and nutrition.
  • Add Some Heat: For a spicy kick, toss in some chopped jalapeños or a dash of hot sauce.
  • Chill Before Serving: Refrigerating the salad for at least 30 minutes allows the flavors to meld beautifully.
  • Experiment with Dressings: While the lime and olive oil dressing is fantastic, try adding a splash of balsamic vinegar or a dollop of Greek yogurt for a creamy twist.
  • Mind Your Portions: This salad is filling! Keep portion sizes in check, especially if you’re pairing it with other dishes.

Common Mistakes and Troubleshooting

Even the best of us can make mistakes in the kitchen. Here are some common pitfalls and how to avoid them:

  • Overcooking Quinoa: Keep an eye on the cooking time! Overcooked quinoa can become mushy, losing its delightful texture.
  • Not Enough Flavor: If your salad tastes bland, it’s likely under-seasoned. Don’t be shy with the lime juice, salt, and pepper!
  • Too Many Ingredients: While it’s tempting to add lots of extras, stick to the recipe for balance. Too many flavors can overwhelm the salad.
  • Ignoring Chill Time: Skipping the chill time means missing out on that flavor infusion. Make sure to refrigerate!

Variations to Try

Feeling adventurous? Here are some fun variations of this salad to keep your meals exciting:

  • Mexican Quinoa Salad: Add diced avocado, corn salsa, and swap lime with lemon juice for a refreshing twist.
  • Southwestern Style: Incorporate diced jalapeños, grilled corn, and substitute lime dressing with a ranch-style dressing.
  • Greek Quinoa Salad: Use feta cheese, olives, and replace cilantro with parsley for a Mediterranean flair.
  • Protein-Packed Version: Add grilled chicken or shrimp for a protein boost that makes this salad even heartier!

Storage and Make-Ahead Instructions

This salad is perfect for meal prep! Here’s how to store it:

  • Refrigerate: Store in an airtight container for up to 5 days. The flavors will continue to develop over time!
  • Freeze for Later: While not ideal, you can freeze the quinoa and black bean mixture. Thaw in the fridge and mix with fresh veggies and dressing before serving.
  • Make Ahead: Prepare the quinoa and dressing a day in advance. Mix everything together just before serving for optimal freshness.

Comprehensive FAQ

  • Can I use other beans? Absolutely! Feel free to substitute black beans with kidney beans or chickpeas for a different flavor profile.
  • Is quinoa gluten-free? Yes, quinoa is naturally gluten-free, making it a great choice for those with gluten sensitivities.
  • How do I make this salad vegan? This recipe is already vegan! Just ensure your dressing is plant-based.
  • Can I add cheese? Of course! Crumbled feta or shredded cheddar can add creaminess and flavor.
  • What other vegetables can I add? Feel free to add diced cucumbers, cherry tomatoes, or roasted veggies for more variety.
  • How can I make this salad spicier? Add diced jalapeños or a pinch of cayenne pepper to give it a kick!
  • Can I use cooked quinoa? Yes! If you have leftover cooked quinoa, it’s perfect for this salad.
  • How should I serve this salad? This salad can be served chilled or at room temperature, making it versatile for any occasion!

Nutritional Tips and Dietary Adaptations

This salad is not only delicious but also packed with nutrients! Here are some tips to enhance its nutritional profile:

  • Add Healthy Fats: Incorporate avocado for extra healthy fats and a creamy texture.
  • Boost Fiber: Add more vegetables like kale or spinach for additional fiber and vitamins.
  • Protein Power: For a heartier meal, include grilled chicken, tofu, or tempeh.
  • Watch Your Portions: While healthy, be mindful of portion sizes, especially when adding dressings or extras.

Recommended Equipment

To make your cooking experience smooth and enjoyable, here’s a list of essential equipment:

  • Medium saucepan: For cooking quinoa to fluffy perfection.
  • Large mixing bowl: To combine all your delicious ingredients.
  • Whisk: For mixing dressing ingredients smoothly.
  • Measuring cups and spoons: To ensure accurate ingredient ratios.
  • Airtight container: For storing leftovers and keeping them fresh.

Serving Suggestions

Ready to serve? Here are some delicious ways to enjoy your Zesty Quinoa and Black Bean Salad:

  • As a main dish: Enjoy it on its own for a filling, nutritious meal.
  • As a side dish: Pair it with grilled meats or fish for a balanced plate.
  • In wraps or tacos: Use it as a stuffing for wraps or tacos for a fun twist.
  • On top of greens: Serve it over a bed of fresh greens for extra crunch and nutrition.

In conclusion, our Zesty Quinoa and Black Bean Salad is more than just a meal; it’s a celebration of flavor, nutrition, and creativity in the kitchen. With its vibrant colors and robust flavors, this salad is sure to be a hit at your table. So gather your ingredients, get cooking, and most importantly, enjoy every bite! Thank you for joining me on this delicious journey—happy cooking!

Quinoa and Black Bean Salad

Prep Time 15 minutes
Cook Time 15 minutes
Total Time 30 minutes
Servings 4 servings
Calories 350
A vibrant, healthy salad combining quinoa, black beans, and fresh vegetables, perfect for a light meal or side dish.

Ingredients

Grains

  • 1 cup quinoa, rinsed
  • 2 cups water

Legumes

  • 1 can (15 oz) black beans, drained and rinsed

Vegetables

  • 1 red bell pepper red bell pepper, diced
  • 1 cup corn (fresh or frozen)
  • 1/2 cup red onion, finely chopped

Herbs

  • 1/4 cup fresh cilantro, chopped

Dressing

  • 1/4 cup olive oil
  • Juice of 2 limes lime juice
  • to taste salt and pepper

Instructions 

  • Cook quinoa in water until fluffy, then let cool.
  • Mix cooled quinoa with black beans, red bell pepper, corn, red onion, and cilantro.
  • Whisk olive oil, lime juice, salt, and pepper; pour over salad and toss.
  • Adjust seasoning as needed and refrigerate for at least 30 minutes before serving.

Notes

This salad is best served chilled and can be stored in the refrigerator for up to 2 days.
Calories: 350kcal
Cost: $10
Course: Salad
Cuisine: international
Keyword: Black Beans, Quinoa

Experience the Ultimate Refreshment with a Creamy Cucumber Dill Salad!

When summer hits and the heat is on, there’s nothing quite like a creamy cucumber dill salad to keep you cool and refreshed! This vibrant dish combines crisp cucumbers with a zesty, velvety dressing made from Greek yogurt and fresh dill, making it the perfect side or light meal. Whether you’re hosting a barbecue, picnicking in the park, or just looking for a quick, nutritious snack, this salad is your go-to. Let’s dive into why you’ll love this recipe and how to make it uniquely your own!

Why You’ll Love This Recipe

  • Quick and Easy: With minimal prep time, this salad can be whipped up in under 20 minutes, making it ideal for busy days.
  • Nutritious and Satisfying: Packed with vitamins and healthy fats, this creamy cucumber salad is low in calories but high in flavor.
  • Customizable: This recipe invites creativity—add your favorite herbs, substitute ingredients, or make it dairy-free!
  • Perfect for Meal Prep: It stores well in the refrigerator, making it a fantastic option for healthy lunches throughout the week.
  • Deliciously Versatile: Serve it as a side dish, a topping for grilled meats, or even as a light main course on a hot day.

Ingredients Breakdown: Fresh and Flavorful

Here’s what you’ll need to create this luscious salad:

  • 1 ½ lb cucumbers: Thinly sliced; English cucumbers are ideal for their crisp texture.
  • ½ red onion: Finely sliced; adds a sweet and tangy bite!
  • ¼ cup fresh dill: Finely chopped; a must for that authentic Mediterranean flavor.
  • ¾ cup full-fat Greek yogurt: Provides creaminess without heaviness.
  • 1 ½ tablespoons extra-virgin olive oil: For a hint of richness.
  • 1 ½ tablespoons fresh lemon juice: Brightens up the flavors beautifully.
  • ¼ teaspoon garlic: Finely minced or as paste; a subtle kick to the dressing.
  • ½ teaspoon fine salt: Enhances all the flavors in the salad.
  • ¼ teaspoon black pepper: For added depth.

Pro Tips for the Best Creamy Cucumber Dill Salad

A vibrant cucumber dill salad featuring a creamy dressing, fresh herbs, and sliced vegetables.
  • Chill the ingredients: For an extra-refreshing salad, chill the cucumbers and dressing before mixing.
  • Use quality ingredients: Fresh, organic produce and high-quality yogurt will significantly elevate your dish.
  • Don’t skip the lemon juice: It balances the creaminess and prevents the cucumbers from becoming watery.
  • Experiment with herbs: Try mixing in fresh mint or parsley for a unique twist.
  • Let it marinate: Allowing the salad to sit for about 30 minutes before serving helps the flavors meld beautifully.
  • Watch the salt: Be cautious with salt, especially if you plan to add salty toppings like feta or olives.
  • Prep in advance: This salad can be made a day ahead; just give it a good stir before serving.
  • Garnish creatively: Top with toasted nuts or seeds for added crunch!

Common Mistakes and Troubleshooting

Even the best chefs have their off days! Here are some common pitfalls and how to avoid them:

  • Watery salad: Ensure cucumbers are patted dry after slicing to prevent excess moisture.
  • Overpowering garlic: Adjust the garlic amount to your taste; a little goes a long way!
  • Too thick dressing: If your dressing is too thick, thin it out with a splash of water or additional lemon juice.
  • Flavorless salad: Always taste and adjust seasoning before serving. A pinch more salt or lemon can make a big difference.

Delicious Variations to Try

Get creative with your creamy cucumber dill salad! Here are a few variations:

  • Greek Style: Add crumbled feta cheese, kalamata olives, and chopped tomatoes for a Mediterranean twist.
  • Spicy Kick: Incorporate diced jalapeños or a dash of cayenne pepper into the dressing.
  • Vegan Option: Substitute Greek yogurt with a plant-based yogurt for a dairy-free delight.
  • Colorful Additions: Toss in diced bell peppers, cherry tomatoes, or radishes for added crunch and color.

Storage and Make-Ahead Instructions

This salad is perfect for make-ahead meals! Here’s how to store it:

  • Refrigerate: Store in an airtight container for up to 3 days. The flavors will continue to develop, but for the best texture, enjoy within 24 hours.
  • Make-ahead: Prep the ingredients (slice cucumbers and onion) a day in advance. Mix the dressing separately and combine just before serving.

Frequently Asked Questions

  • Can I use other types of cucumbers? Absolutely! While English cucumbers are ideal, Persian or Kirby cucumbers work well too. Just remove the seeds if they are too watery.
  • How can I prevent the salad from getting watery? Salt the cucumbers, let them sit for 10 minutes, then drain excess liquid before mixing with the dressing.
  • What can I serve with creamy cucumber salad? It pairs excellently with grilled meats, sandwiches, or as part of a summer buffet.
  • How long does creamy cucumber salad last? It can last up to 3 days in the fridge, but for the best texture, consume within 24 hours.
  • Can I make this salad dairy-free? Yes! Swap the Greek yogurt with a dairy-free yogurt alternative for a vegan version.
  • Is this salad suitable for meal prep? Definitely! Just store the dressing separately to maintain the crispness of the cucumbers.
  • Can I add protein to this salad? Yes! Grilled chicken, chickpeas, or tofu can easily turn this salad into a more filling main course.
  • What’s the best way to serve this salad? Serve chilled as a side dish or appetizer. Garnish with extra dill or a sprinkle of paprika for added flair.

Nutritional Tips and Dietary Adaptations

This creamy cucumber dill salad is not only delicious but nutritious! Here’s how to make it even healthier:

  • Opt for low-fat yogurt: If you’re looking to reduce calories, use low-fat Greek yogurt instead.
  • Add more veggies: Incorporate additional vegetables like bell peppers or carrots for extra vitamins and minerals.
  • Consider portion sizes: While healthy, be mindful of serving sizes to maintain a balanced diet.
  • Gluten-free: This recipe is naturally gluten-free, making it suitable for those with gluten sensitivities.

Equipment Recommendations

Having the right tools can make preparation smoother:

  • Sharp knife: A good knife makes slicing cucumbers effortless.
  • Cutting board: A sturdy cutting board ensures safety and stability while chopping.
  • Mixing bowl: A large bowl allows easy mixing and tossing of ingredients.
  • Measuring cups and spoons: Essential for precise ingredient measurements.

Serving Suggestions

Now that your creamy cucumber dill salad is ready, here are some fun serving ideas:

  • As a side dish: Serve alongside grilled chicken, lamb, or fish for a refreshing complement.
  • On a wrap: Use as a filling in wraps or pitas with grilled veggies or meats.
  • In a bowl: Layer with quinoa or brown rice for a hearty meal.
  • As a dip: Serve with whole-grain crackers or fresh veggies for a delightful appetizer.

With its refreshing flavors and creamy texture, this creamy cucumber dill salad is sure to become a summer staple in your kitchen. So grab those cucumbers, channel your inner chef, and let’s get cooking! Enjoy the vibrant burst of flavors, and remember, healthy eating can be fun and exciting!

Creamy Cucumber Dill Salad — Fresh, Cooling, and Mediterranean-Inspired

Prep Time 10 minutes
Total Time 10 minutes
Servings 4 servings
Calories 150
A refreshing and creamy cucumber salad infused with fresh dill and lemon, perfect for a light Mediterranean-inspired dish.

Ingredients

Main ingredients

  • 1 ½ lb cucumbers (thinly sliced)
  • ½ red onion red onion (very thinly sliced)
  • ¼ cup fresh dill (finely chopped)
  • ¾ cup full-fat plain Greek yogurt (creates a rich, velvety dressing)
  • 1 ½ tablespoons extra-virgin olive oil
  • 1 ½ tablespoons fresh lemon juice
  • ¼ teaspoon garlic (finely minced or paste)
  • ½ teaspoon fine salt
  • ¼ teaspoon black pepper

Instructions 

  • Combine sliced cucumbers, red onion, and chopped dill in a bowl.
  • In a separate bowl, whisk together Greek yogurt, olive oil, lemon juice, garlic, salt, and pepper.
  • Pour the dressing over the vegetables and toss gently to combine.
  • Chill for at least 10 minutes before serving for flavors to meld.

Notes

Use full-fat Greek yogurt for a creamier texture and richer flavor.
Calories: 150kcal
Cost: $12
Course: Salad
Cuisine: Mediterranean
Keyword: cucumber

Discover the Vibrant Cucumber Avocado Salad: A Refreshing Delight!

Dive into the vibrant world of flavors with our Cucumber Avocado Salad! This quick and easy recipe combines crisp cucumbers, creamy avocados, and zesty lemon for a refreshing dish that’s perfect for any occasion. Get ready to delight your senses and fuel your body with this colorful salad! In this article, we’ll guide you through every step of creating the perfect cucumber avocado salad, from ingredient selection to expert tips and variations.

Why You’ll Love This Recipe

Here are five reasons why this cucumber avocado salad will quickly become a favorite in your kitchen:

  • Nutritious Powerhouse: Packed with vitamins, healthy fats, and antioxidants, this salad boosts your health while tantalizing your taste buds.
  • Quick and Easy: With just a few fresh ingredients and minimal prep time, this salad is perfect for busy weeknights or last-minute gatherings.
  • Customizable Flavor: Whether you prefer a kick of spice or a classic dressing, this recipe allows you to tailor flavors to your liking.
  • Perfect for Meal Prep: Make a batch ahead of time for a quick, healthy lunch option throughout the week.
  • Visually Appealing: The vibrant colors and textures make this salad not only delicious but a feast for the eyes!

Ingredient Breakdown: What You Need

Here’s a detailed look at the ingredients for your cucumber avocado salad, along with some delicious substitutions:

  • Cucumbers: 2 medium cucumbers, thinly sliced. Choose firm, fresh cucumbers for the best crunch.
  • Avocados: 2 large avocados, diced. Opt for ripe avocados for a creamy texture.
  • Red Onion: ¼ cup, thinly sliced. This adds a bit of sharpness; you can substitute with green onions for a milder taste.
  • Fresh Herbs: ¼ cup of chopped cilantro or parsley. These herbs enhance flavor and freshness.
  • Lemon Juice: 2 tablespoons. Fresh lemon juice brightens the dish, but lime juice works beautifully too!
  • Extra-Virgin Olive Oil: 1 tablespoon. This adds richness; feel free to use avocado oil for a different flavor.
  • Salt and Pepper: to taste. Essential for balancing flavors.
  • Optional Red Pepper Flakes: ¼ teaspoon for a hint of heat.

Pro Tips for the Perfect Cucumber Avocado Salad

A colorful salad with green avocado cubes, thin cucumber slices, and red onion, garnished with herbs.

To ensure your salad is a hit every time, check out these expert tips:

  • Choose Perfectly Ripe Avocados: Gently press the outside; if it yields slightly, it’s ready to use.
  • Slice Cucumbers Just Before Serving: To maintain crispness, slice cucumbers right before you mix the salad.
  • Mix Gently: When combining ingredients, be careful not to mash the avocados.
  • Experiment with Dressings: Try balsamic vinegar or a yogurt-based dressing for a different flavor profile.
  • Enhance with Cheese: For a creamy twist, add crumbled feta or goat cheese.
  • Chill Before Serving: Letting the salad sit in the fridge for 30 minutes allows the flavors to meld beautifully.
  • Use Seasonal Ingredients: Incorporate seasonal vegetables for freshness and variety.
  • Prepare and Store Separately: If meal prepping, store dressing and salad components separately to keep everything fresh.

Common Mistakes and Troubleshooting

Even the best cooks can encounter hiccups! Here’s how to troubleshoot:

  • Avocados Turned Brown: To prevent browning, use lemon juice immediately after cutting.
  • Soggy Salad: If your cucumbers are too watery, remove excess moisture by salting them and letting them drain.
  • Flavor Lacking: Always taste and adjust seasoning before serving. Sometimes a pinch more salt or lemon can elevate the dish.
  • Overly Soft Avocados: If they’re too ripe, use them in smoothies or spreads instead.

Variations to Try

Feel free to get creative! Here are some tasty variations to switch things up:

  • Spicy Kick: Add sliced jalapeños or sprinkle with chili powder for heat.
  • Protein Boost: Toss in some grilled chicken or chickpeas for added protein.
  • Fruit Fusion: Add diced mango or pineapple for a tropical twist.
  • Grain Bowl Addition: Serve over quinoa or brown rice for a heartier meal.

Storage and Make-Ahead Instructions

Want to prep this salad ahead of time? Here’s how:

  • Refrigerate: Store your salad in an airtight container in the fridge for up to 2 days. However, best enjoyed fresh!
  • Make Ahead Guide: Pre-chop cucumbers and onions, and store them separately from the avocado and dressing to maintain freshness.

Frequently Asked Questions (FAQs)

Got questions? We’ve got answers! Here are some common questions about cucumber avocado salad:

  • Can I use other vegetables? Absolutely! Bell peppers and cherry tomatoes are great additions.
  • Is this salad vegan? Yes! All ingredients are plant-based and packed with nutrients.
  • What’s the best way to serve this salad? It’s perfect as a side dish, a light lunch, or even as a topping for tacos!
  • How can I make it lower in fat? Use less olive oil or skip it entirely for a lighter salad.
  • Can I freeze this salad? We don’t recommend freezing as the texture of cucumbers and avocados changes significantly.
  • What dressing pairs well? A simple lemon vinaigrette or a creamy ranch dressing works wonderfully!
  • How many servings does this recipe yield? This recipe makes about 4 servings, perfect for sharing!
  • Can I add nuts or seeds? Yes! Toasted sunflower seeds or walnuts add a nice crunch.

Nutrition Tips and Dietary Adaptations

This cucumber avocado salad is not only delicious but also a nutritious choice. Here’s how to adapt it:

  • Low-Carb Option: Skip grains and serve it as a standalone salad.
  • Gluten-Free: Naturally gluten-free, making it safe for those with gluten sensitivities.
  • Heart-Healthy: Packed with healthy fats, this salad supports cardiovascular health.

Equipment Recommendations

To whip up this salad, you’ll need:

  • Sharp Knife: For easily slicing your cucumbers and avocados.
  • Cutting Board: A sturdy surface for all your chopping.
  • Mixing Bowl: A large bowl to combine all ingredients without spilling!
  • Measuring Spoons: For precise dressing measurements.

Serving Suggestions

Ready to serve your salad? Here are some ideas:

  • As a Light Lunch: Pair it with whole-grain crackers or a slice of toasted bread.
  • At a BBQ: Serve it alongside grilled meats or veggie skewers for a refreshing contrast.
  • As a Snack: Enjoy it on its own or with pita chips for a nutritious bite.

Conclusion

In conclusion, this Cucumber Avocado Salad is a vibrant, nutritious dish that’s adaptable and easy to make. With its refreshing flavors and health benefits, it’s a perfect addition to your meal rotation. So grab your ingredients, get creative, and enjoy a delightful salad that dances on your taste buds!

Cucumber Avocado Salad

Prep Time 10 minutes
Total Time 10 minutes
Servings 4 servings
Calories 150
A fresh and vibrant salad combining crisp cucumbers, creamy avocados, and zesty lemon dressing, perfect for a light snack or side dish.

Ingredients

Vegetables

  • 2 medium cucumbers (thinly sliced)
  • 2 large avocados (diced)
  • ¼ cup red onion (thinly sliced)
  • ¼ cup fresh cilantro or parsley (chopped)
  • 2 tablespoons lemon juice (or lime juice)
  • 1 tablespoon extra-virgin olive oil
  • to taste Salt and pepper
  • ¼ teaspoon red pepper flakes (optional)

Instructions 

  • Slice cucumbers and red onion; dice avocados and chop herbs.
  • Combine all vegetables and herbs in a large bowl.
  • Drizzle with lemon juice and olive oil; toss gently.
  • Add salt, pepper, and red pepper flakes to taste.
  • Serve immediately as a refreshing salad or side.

Notes

Use ripe avocados for best creaminess.
Calories: 150kcal
Cost: $10
Course: Salad
Cuisine: fusion
Keyword: avocado, cucumber

Welcome, food lovers! Are you ready to transform your meals into vibrant culinary adventures? Dive into the world of flavor with this **Strawberry Chicken Salad** that’s bursting with freshness and nutrition! With juicy strawberries, tender grilled chicken, and a delightful crunch, this salad is your new go-to for a quick, healthy meal that’s anything but ordinary. Let’s make healthy eating fun and exciting!

Why You’ll Love This Strawberry Chicken Salad

This isn’t just any salad; it’s an experience! Here’s why you’ll be head over heels in love with this dish:

  • Flavor Explosion: The combination of sweet strawberries and savory chicken creates a perfect balance in every bite.
  • Visual Appeal: The vibrant colors of fresh ingredients make your plate pop, enticing everyone to dig in!
  • Quick & Easy: In just 20 minutes, you can whip up a nutritious meal that’s perfect for busy weeknights.
  • Customizable: This salad is a blank canvas. Add your favorite nuts, fruits, or proteins for a personal touch!
  • Nutrient-Packed: With lean protein and vitamin-rich fruits and greens, this dish fuels your body without the fuss.

Ingredients Breakdown

Let’s talk about what makes this salad so special! Here’s what you’ll need:

  • 6 cups chopped romaine lettuce: A crunchy base that adds a refreshing bite.
  • 2 small boneless skinless chicken breasts: A lean protein that’s easy to grill and packed with flavor.
  • 1 cup fresh strawberries: Sweet and juicy, these berries brighten up your salad.
  • 1 gala apple: Adds a delightful crunch and sweetness that complements the strawberries.
  • 1/3 cup craisins (dried cranberries): These little gems add a chewy texture and a pop of sweetness.
  • 1/2 cup shredded mozzarella cheese: Creamy and delicious, but feel free to substitute with a dairy-free alternative!
  • 3 tablespoons crushed walnuts: For a satisfying crunch and healthy fats.
  • Olive oil, salt, and pepper (to taste): Essential seasonings to enhance the flavors.
  • Dressing: creamy poppyseed or raspberry vinaigrette: Choose your favorite dressing to tie everything together!

How to Make This Strawberry Chicken Salad

Now, let’s get cooking! Follow these simple steps for a delicious salad:

  1. Prepare the lettuce by dividing it among two bowls and chilling in the refrigerator for an extra crisp bite.
  2. Season the chicken with olive oil, salt, and pepper; grill until cooked through (165°F). Rest for a few minutes before slicing.
  3. While the chicken rests, slice the strawberries and apple. Distribute evenly in bowls with the chilled lettuce.
  4. Top each bowl with craisins, mozzarella cheese, walnuts, and sliced chicken. Drizzle with your chosen dressing and enjoy!

Pro Tips for Success

Close-up view of a colorful salad featuring chicken, strawberries, and mixed greens with nuts.

Let’s ensure your salad is a showstopper! Here are some expert tips:

  • Marinate the Chicken: For added flavor, marinate the chicken in a mix of olive oil, lemon juice, and herbs for at least 30 minutes before grilling.
  • Use Fresh Ingredients: Always opt for fresh, in-season strawberries and apples for the best flavor.
  • Chill Your Salad: A chilled salad is always more refreshing! Store it in the fridge for a few minutes before serving.
  • Layer Your Ingredients: For a beautiful presentation, layer your ingredients rather than mixing them all together.
  • Experiment with Dressings: Try different dressings like balsamic vinaigrette or a zesty citrus dressing to switch things up.
  • Go Nuts!: Feel free to substitute walnuts with almonds or pecans for a different texture.
  • Make It Vegan: Substitute grilled chicken with grilled tofu for a plant-based version that’s equally delicious!
  • Pack It Up: This salad keeps well for lunch the next day. Just keep the dressing separate until you’re ready to eat.

Common Mistakes and Troubleshooting

Let’s ensure your salad is a hit! Avoid these common pitfalls:

  • Overcooked Chicken: Make sure to monitor the chicken closely while grilling to prevent it from drying out.
  • Too Much Dressing: Start with a small amount of dressing and add more gradually. You can always add more, but it’s hard to take it away!
  • Using Old Ingredients: Check the freshness of your fruits and vegetables. Wilting leaves or mushy strawberries can ruin your salad.
  • Skipping the Chill: Don’t skip chilling your salad; it truly enhances the flavors!

Variations to Try

Tired of the same old salad? Here are some fun variations to keep your meals exciting:

  • Strawberry Spinach Salad: Swap romaine for fresh spinach and add feta cheese for a tangy twist.
  • Grilled Peach Chicken Salad: Replace strawberries with grilled peaches for a summery vibe.
  • Asian-Inspired Salad: Incorporate shredded carrots, edamame, and sesame dressing for a unique flavor profile.
  • Quinoa Salad: Add cooked quinoa for extra protein and fiber, making it a hearty meal!

Storage and Make-Ahead Instructions

Planning ahead? Here’s how to store your salad:

  • **Storage**: Keep the salad in an airtight container in the refrigerator for up to 2 days. Store the dressing separately to maintain freshness.
  • **Make-Ahead**: Prepare the ingredients a day in advance. Grill the chicken and chop the fruits and veggies, then assemble when ready to serve.

Frequently Asked Questions

Got questions? We’ve got answers!

  • Can I use frozen strawberries? Yes, but fresh strawberries are best for texture and flavor.
  • How can I make this salad gluten-free? This recipe is naturally gluten-free! Just ensure your dressing is gluten-free as well.
  • What’s the best dressing for this salad? A creamy poppyseed or raspberry vinaigrette pairs beautifully, but feel free to experiment!
  • Can I prepare this salad the night before? Yes! Just keep the dressing separate until ready to serve to prevent sogginess.
  • Is this salad suitable for meal prep? Absolutely! Just store the components separately and assemble when you’re ready to eat.
  • Can I add protein other than chicken? Definitely! Grilled shrimp, tofu, or even chickpeas work wonderfully.
  • What can I substitute for mozzarella cheese? Try goat cheese, feta, or a dairy-free cheese for a different flavor.
  • How many servings does this recipe make? This recipe is designed for two hearty servings, perfect for a light lunch or dinner!

Nutritional Tips and Dietary Adaptations

Want to boost the nutrition of your salad? Here are some tips:

  • Add More Greens: Incorporate kale, arugula, or mixed greens to boost vitamins and minerals.
  • Protein Power: Incorporate beans or lentils for plant-based protein that’s filling and nutritious.
  • Healthy Fats: Include avocado slices for creamy texture and healthy fats.
  • Low-Calorie Dressings: Opt for vinegar-based dressings to cut calories while still enjoying flavor.

Equipment Recommendations

Let’s make cooking a breeze! Here’s what you’ll need:

  • Grill Pan or Outdoor Grill: For perfectly grilled chicken every time.
  • Chef’s Knife: A sharp knife makes slicing fruits and vegetables easier and safer.
  • Cutting Board: A sturdy cutting board is essential for prep work.
  • Mixing Bowls: Use these for assembling your salad and mixing dressings.

Serving Suggestions

Ready to serve up this beauty? Here are some ideas:

  • Perfect Pairing: Serve with a side of whole-grain bread or a light soup for a complete meal.
  • Picnic Friendly: Pack this salad for a picnic; it travels well and is sure to impress!
  • Great for Entertaining: Serve it at gatherings or potlucks to wow your friends and family.

So there you have it! A **Strawberry Chicken Salad** that’s not only delicious but also a feast for the eyes and a boost for your health. Remember, cooking should be fun, so don’t be afraid to experiment and make this recipe your own. Enjoy every bite, and let your kitchen be your playground!

Strawberry Chicken Salad

Prep Time 15 minutes
Cook Time 15 minutes
Total Time 30 minutes
Servings 2 servings
Calories 450
A fresh and flavorful salad combining grilled chicken, strawberries, and crunchy toppings, perfect for a light lunch or dinner.

Ingredients

Lettuce

  • 2 cups chopped romaine lettuce
  • 2 small boneless skinless chicken breasts
  • 1 cup fresh strawberries
  • 1 gala apple gala apple
  • 1/3 cup craisins (dried cranberries)
  • 1/2 cup shredded mozzarella cheese
  • 3 tablespoons crushed walnuts
  • to taste Olive oil, salt, and pepper (for seasoning and grilling)

Dressing

  • to taste creamy poppyseed or raspberry vinaigrette

Instructions 

  • Divide lettuce among two bowls and chill.
  • Season chicken with olive oil, salt, and pepper; grill until cooked through. Rest before slicing.
  • Slice strawberries and apple; add to bowls with lettuce.
  • Top with craisins, mozzarella, walnuts, and sliced chicken; drizzle with dressing.

Notes

Use your favorite dressing for added flavor.
Calories: 450kcal
Cost: $15
Course: Salad
Cuisine: American
Keyword: Chicken, Strawberries

Discover the Joy of Zesty Avocado Cucumber Salad!

Welcome to the vibrant world of culinary creativity! Today, we’re diving into a dish that’s not only a feast for the eyes but also a powerhouse of nutrition—Zesty Avocado Cucumber Salad. This quick and easy recipe showcases the delightful marriage of creamy avocado and crisp cucumber, all brought together with a zippy lime dressing. Perfect for any occasion, from summer barbecues to light lunches, this salad is your go-to for a refreshing bite. Let’s explore why you’ll love this salad and how to whip it up in no time!

Why You’ll Love This Recipe

  • Quick and Easy: This salad comes together in just 10 minutes, making it the perfect choice when you want something fresh and delicious without spending hours in the kitchen.
  • Nutritious and Wholesome: Packed with healthy fats from avocado and hydrating properties from cucumbers, this salad supports your well-being while satisfying your taste buds.
  • Vibrant Flavors: The combination of creamy avocado and crisp cucumber, paired with zesty lime juice, creates a burst of flavor that will brighten up any meal.
  • Versatile Dish: Whether you’re serving it as a side, topping it on greens, or enjoying it solo, this salad adapts beautifully to any dining experience.
  • Visually Stunning: The bright green hues of avocado and cucumber make this salad a colorful addition to your table, appealing to both the eyes and the palate!

Ingredients Breakdown

To make this delicious Zesty Avocado Cucumber Salad, you’ll need the following ingredients:

  • 2 English cucumbers: Sliced for that refreshing crunch.
  • 1 large avocado: Pitted, peeled, and sliced to add creaminess.
  • 1/3 cup green onion: Half of a bunch, chopped for a mild onion flavor.
  • 2 Tbsp lime juice: Freshly squeezed from 1 medium lime for zesty brightness.
  • 2 Tbsp extra virgin olive oil: Adds a rich, healthy fat component.
  • 1 tsp sea salt: To enhance flavors (or adjust to taste).
  • 1/8 tsp black pepper: For a subtle kick.

Ingredient Substitutions

Sliced cucumbers and avocado arranged beautifully in a bowl, garnished with green onions.

Don’t have all the ingredients on hand? No worries! Here are some substitutions that work beautifully:

  • Avocado: Substitute with silken tofu for a creamy vegan option.
  • Cucumbers: Use zucchini or yellow squash if cucumbers aren’t available.
  • Green onions: Chopped chives or shallots can add a similar flavor.
  • Lime juice: Lemon juice works as a great alternative to provide acidity.
  • Olive oil: Any light oil, such as avocado or grapeseed oil, can replace olive oil.

Step-by-Step Instructions

Ready to make this salad? Follow these simple steps:

  1. Wash and thinly slice the cucumbers.
  2. Cut the avocado in half, remove the pit, peel, and slice into bite-sized pieces.
  3. Chop the green onions and add them to a large mixing bowl with the cucumber and avocado.
  4. Drizzle the lime juice and olive oil over the salad ingredients.
  5. Sprinkle with sea salt and black pepper to taste.
  6. Gently toss the salad until all ingredients are well coated.
  7. Taste and adjust seasoning if necessary.
  8. Serve immediately while fresh and chilled for the best flavor!

Expert Tips for Success

  • Choose ripe avocados: Look for avocados that are slightly soft to the touch for that creamy texture.
  • Don’t overmix: Gently toss the salad to avoid mashing the avocado.
  • Fresh ingredients: Use fresh, high-quality ingredients to enhance the overall flavor profile.
  • Chill before serving: Let the salad sit in the fridge for a few minutes before serving to allow flavors to meld.
  • Adjust lime juice: Add more lime juice for an extra zesty kick if desired.
  • Layer flavors: Experiment by adding herbs like cilantro or mint for an aromatic twist.
  • Prevent browning: Serve immediately or store with lime juice to keep the avocado from browning.
  • Taste as you go: Always taste and adjust seasonings to your preference.

Common Mistakes and Troubleshooting

Even simple recipes can come with challenges. Here’s how to troubleshoot common issues:

  • Avocado browning: Always add lime juice to slow the browning process and serve promptly.
  • Salad too salty: If it’s overly salty, add more cucumber and avocado to balance it out.
  • Too acidic: If it’s too tangy for your taste, mix in a touch of honey or maple syrup to mellow the flavors.
  • Watery salad: If cucumbers release too much water, drain excess liquid before serving.

Flavor Variations

Want to switch things up? Here are some fun variations:

  • Cucumber Feta Avocado Salad: Add crumbled feta cheese for a salty, tangy twist.
  • Cucumber and Tomato Salad: Toss in halved cherry tomatoes for a pop of color and sweetness.
  • Spicy Avocado Cucumber Salad: Add diced jalapeños or a sprinkle of chili flakes for a spicy kick.
  • Herbed Avocado Cucumber Salad: Mix in fresh herbs like basil or dill for an aromatic infusion.

Storage and Make-Ahead Instructions

Need to prepare your salad in advance? Here’s how:

  • Refrigeration: Store the salad in an airtight container in the fridge for up to 2 days, but expect some browning on the avocado.
  • Make-ahead tip: Prepare all ingredients separately and combine just before serving to maintain freshness.
  • Freezing: It’s not recommended to freeze this salad due to the texture of the avocado.

Frequently Asked Questions

Got questions? We’ve got answers!

  • Can I make this salad without lime juice? Yes, you can use lemon juice as a substitute for a similar zesty flavor.
  • How can I make this salad vegan? This recipe is already vegan-friendly! Just avoid adding any dairy products.
  • What can I serve with this salad? Enjoy it as a side with grilled meats, or serve it over a bed of greens for a light main course.
  • Can I add protein to this salad? Absolutely! Grilled chicken, shrimp, or chickpeas are great additions for a protein boost.
  • How do I prevent cucumbers from getting soggy? Use English cucumbers, which have thinner skin and fewer seeds, to minimize water content.
  • Is this salad good for meal prep? Yes, but assemble it right before eating to keep the avocado fresh.
  • Can I use regular cucumbers instead of English ones? Yes, but be sure to peel and remove seeds to avoid bitterness.
  • How spicy is this salad? This salad is mild, but you can adjust the spice level by adding peppers or hot sauce.

Nutrition Tips and Dietary Adaptations

This salad not only tastes incredible, but it’s also packed with nutrition. Here’s why:

  • Healthy Fats: Avocado provides beneficial monounsaturated fats that support heart health.
  • Low-Calorie: This salad is low in calories but high in nutrients, making it a perfect diet-friendly choice.
  • Fiber-Rich: Both avocado and cucumber are good sources of dietary fiber, promoting digestive health.
  • Vegan and Gluten-Free: Suitable for various dietary lifestyles, making it inclusive for gatherings.

Recommended Equipment

To make your salad preparation smoother, here’s a list of handy kitchen tools:

  • Cutting Board: Essential for chopping vegetables safely.
  • Sharp Knife: A good knife makes slicing and dicing quick and easy.
  • Mixing Bowl: A large bowl is necessary for combining all ingredients effectively.
  • Measuring Spoons: To ensure you’re adding the right amounts of lime juice and oil.

Serving Suggestions

How you serve your salad can elevate the experience. Try these ideas:

  • On a Bed of Greens: Serve your salad over a bed of mixed greens for a hearty meal.
  • With Grilled Meats: Pair it with grilled chicken or fish for a complete, balanced meal.
  • In Lettuce Wraps: Use the salad as a filling for lettuce wraps for a fun, low-carb option.
  • As a Side Dish: It makes a refreshing side for any main dish, especially during warm weather.

In conclusion, Zesty Avocado Cucumber Salad is not just a dish; it’s a celebration of fresh, vibrant flavors that anyone can create. With its quick preparation and endless variations, this salad will surely become a staple in your healthy eating repertoire. Let’s make healthy eating fun and exciting—grab those avocados and cucumbers, and let’s get cooking!

Avocado Cucumber Salad Recipe

Prep Time 10 minutes
Total Time 10 minutes
Servings 2 servings
Calories 150
A fresh and vibrant salad combining crisp cucumbers and creamy avocado, perfect for a light, healthy meal or side dish.

Ingredients

Vegetables

  • 2 pieces English cucumbers (sliced)
  • 1 large avocado (pitted, peeled and sliced)
  • 0.33 cup green onion (chopped)
  • 2 Tbsp lime juice (from 1 medium lime)
  • 2 Tbsp extra virgin olive oil
  • 1 tsp sea salt (or to taste)
  • 1/8 tsp black pepper

Instructions 

  • Wash and thinly slice the cucumbers.
  • Cut the avocado in half, remove the pit, peel, and slice.
  • Chop the green onions and add all ingredients to a bowl.
  • Drizzle lime juice and olive oil over the mixture.
  • Sprinkle with salt and pepper, then toss gently.
  • Serve immediately while fresh and chilled.

Notes

Use ripe avocados for best flavor.
Calories: 150kcal
Cost: $8
Course: Salad
Cuisine: Healthy
Keyword: avocado

Welcome to the Vibrant World of Avocado Salads!

Are you ready to dive into a deliciously nutritious realm? Our Zesty Avocado Delight is not just a salad; it’s a celebration of flavors and textures. Bursting with fresh ingredients like cucumber, lime, and a hint of jalapeño, this salad is your ticket to a healthy, mouthwatering experience. Perfect for any occasion, whether it’s a casual lunch or a festive gathering, this dish proves that eating well can be an exciting adventure!

Why You’ll Love This Recipe

  • Quick and Easy: With minimal prep time, you can whip up this salad in under 15 minutes, making it perfect for busy days.
  • Nutritious Ingredients: Packed with healthy fats from avocados, vitamins from fresh veggies, and a burst of flavor from herbs and spices, this salad is as good for you as it tastes.
  • Customizable: Tailor this salad to your taste! Whether you prefer it spicy or mild, there are endless variations to explore.
  • Great for Meal Prep: Make a big batch and enjoy it throughout the week for a refreshing side or light meal.
  • Perfect for Any Occasion: Whether it’s a summer BBQ or a cozy family dinner, this avocado salad fits right in!

Ingredient Breakdown

Let’s take a closer look at what you’ll need to create this zesty masterpiece!

  • Avocados: About 2 medium or 2 cups cubed. They provide creaminess and healthy fats. Tip: Choose ripe avocados for the best flavor.
  • Cucumber: 2 cups cubed (about 1 large cucumber). Adds crunch and hydration. Substitution: Use zucchini for a different twist.
  • Lime Juice: 3 tablespoons, fresh from 1-2 limes. Provides that zing! Alternative: Lemon juice can work if you’re out of limes.
  • Olive Oil: 2 tablespoons of extra-virgin olive oil. A heart-healthy fat that ties the salad together.
  • Jalapeño: 1, seeds and membrane removed for a mild kick. Optional: Omit if you prefer no heat.
  • Garlic: 1 small clove, minced. Adds depth of flavor. Tip: Skip if you’re sensitive to raw garlic.
  • Sea Salt: ¼ teaspoon, or to taste. Enhances all the flavors.
  • Fresh Herbs: ½ cup chopped (cilantro, parsley, basil, dill). Adds freshness. Pro Tip: Mix and match your favorite herbs!
  • Hot Sauce: Optional, for those who love a spicy kick.

How to Make This Avocado Salad

Side view of a colorful avocado salad, featuring diced avocados and fresh ingredients.

Ready to create your flavor-packed salad? Follow these simple steps!

  1. In the bottom of a large bowl, whisk together the lime juice, olive oil, minced garlic, diced jalapeño, and salt until well combined. Stir in the fresh herbs.
  2. When you’re ready to serve, cut the avocados in half, remove the pits, and cut them into cubes. Add the cubed avocado and sliced cucumber to the salad bowl with the dressing. Gently toss them around the bowl until evenly coated in the dressing.
  3. Taste and adjust the seasoning as needed, adding additional salt or hot sauce to your liking.

Pro Tips for Perfection

  • Choose Ripe Avocados: Look for avocados that yield slightly to pressure; they should be firm but not hard.
  • Don’t Overmix: Gently toss the ingredients to avoid mashing the avocado.
  • Adjust to Your Taste: Feel free to tweak the lime juice and salt levels based on your preference.
  • Fresh is Best: Use fresh herbs for maximum flavor; dried herbs won’t provide the same punch.
  • Chill Before Serving: Let the salad sit in the fridge for 30 minutes to let the flavors meld together.
  • Add Crunch: Consider adding nuts or seeds for extra texture.
  • Pair Perfectly: This salad goes wonderfully with grilled chicken or fish.
  • Make Ahead: You can prepare the dressing in advance and add the avocado right before serving to maintain freshness.

Common Mistakes and Troubleshooting

Even the best chefs make mistakes! Here’s how to avoid some common pitfalls:

  • Overripe Avocados: If your avocado is too mushy, it can make the salad creamy instead of chunky. Aim for firm but ripe.
  • Too Much Lime: If your salad tastes too sour, balance it out with a pinch of sugar or extra olive oil.
  • Brown Avocado: If you have leftovers, sprinkle with lime juice to prevent browning.

Variations to Try

Feeling adventurous? Here are some fun twists on this avocado salad!

  • Avocado and Mango Salad: Add diced mango for a sweet contrast.
  • Spicy Chickpea Avocado Salad: Mix in canned chickpeas for added protein.
  • Caprese Style: Add mozzarella balls and fresh basil for an Italian flair.
  • Southwestern Twist: Toss in black beans, corn, and a touch of cumin for a zesty profile.

Storage and Make-Ahead Instructions

This salad is best enjoyed fresh, but if you have leftovers, here’s how to store them:

  • Refrigerate: Store in an airtight container for up to 2 days. The avocado may brown slightly.
  • Make Ahead: Prepare the dressing in advance and store separately; add the avocado and cucumber right before serving for optimal freshness.

Frequently Asked Questions

  • Can I use frozen avocados? Frozen avocados are best for smoothies but may not provide the desired texture for salads.
  • What can I pair this salad with? It pairs beautifully with grilled meats, fish, or as a side to tacos.
  • How can I make this salad vegan? It’s already vegan! Just be sure to use a plant-based hot sauce.
  • Can I add fruits? Absolutely! Try adding diced apples or berries for a sweet twist.
  • How do I prevent the avocado from browning? Sprinkle lime juice over the cut avocado to help maintain its color.
  • What are the health benefits of this salad? It’s rich in healthy fats, antioxidants, and vitamins, making it a nutritious choice.
  • Can I make this salad gluten-free? Yes, this recipe is naturally gluten-free!
  • How long does it last in the fridge? Best consumed within 2 days for optimal freshness.

Nutritional Tips and Dietary Adaptations

Feel free to adapt this salad to meet your dietary needs:

  • Low-Carb: Skip the cucumber and serve the salad in lettuce wraps.
  • High-Protein: Add grilled chicken, shrimp, or tofu for a protein boost.
  • Low-Fat: Use less olive oil and increase the fresh herbs for flavor.

Essential Equipment Recommendations

To make your cooking experience smoother, here are a few tools you might need:

  • Cutting Board: A sturdy board makes chopping easy and safe.
  • Chef’s Knife: A sharp knife is essential for precise cutting.
  • Mixing Bowl: A large bowl for tossing all your ingredients together.
  • Whisk: For mixing the dressing perfectly.

Serving Suggestions

When it comes to serving your Zesty Avocado Salad, think outside the bowl!

  • On a Bed of Greens: Serve it over a mix of leafy greens for a hearty meal.
  • With Grains: Pair it with quinoa or brown rice for added fiber.
  • As a Dip: Serve it with tortilla chips as a refreshing dip.

Conclusion

Your adventure into the world of healthy eating starts here! Our Zesty Avocado Delight is not just a recipe; it’s a way to bring joy and excitement into your meals. With its vibrant colors and delicious flavors, this salad is sure to become a staple in your kitchen. So grab your ingredients and let’s get cooking—because healthy food can be fun, fabulous, and oh-so-delicious!

The Best Avocado Salad

Prep Time 10 minutes
Total Time 10 minutes
Servings 4 servings
Calories 250
A fresh and vibrant avocado salad perfect for a quick, healthy meal or side dish.

Ingredients

Produce

  • 2 medium avocados (about 2 cups cubed)
  • 2 cups cucumber (about 1 large cucumber (300g))
  • 3 tablespoons fresh lime juice (from 1 to 2 limes)
  • 2 tablespoons extra-virgin olive oil
  • 1 small jalapeño (seeds and membrane removed)
  • 1 small garlic clove (omit if sensitive to raw garlic)
  • 0.25 teaspoon fine sea salt (or more to taste)
  • 0.5 cup chopped fresh herbs (cilantro, parsley, basil, dill, or a combination)

Optional

  • to taste hot sauce

Instructions 

  • Whisk lime juice, olive oil, minced garlic, jalapeño, and salt in a large bowl. Stir in herbs.
  • Cut avocados in half, remove pits, and cube. Add to bowl with cucumber.
  • Gently toss salad until evenly coated. Taste and adjust seasoning, add hot sauce if desired.

Notes

Use ripe avocados for best flavor and texture.
Calories: 250kcal
Cost: $12
Course: Salad
Cuisine: international
Keyword: avocado

Elevate Your Lunch Game with Our High Protein Egg Salad!

If you’re on the hunt for a delicious, nutritious, and quick meal to whip up, look no further! Our High Protein Egg Salad is not just any egg salad; it’s a vibrant, flavor-packed creation that’s perfect for busy days. With a blend of creamy textures and zingy flavors, this recipe will revolutionize the way you think about healthy eating. In this article, we’ll dive deep into the ingredients, techniques, and variations that make this salad a must-try. Let’s get started!

Why You’ll Love This Recipe

  • Packed with protein: Each serving is loaded with protein from eggs and Greek yogurt, keeping you full and energized throughout your day.
  • Vibrant flavors: The combination of fresh herbs, spices, and creamy ingredients creates a delightful taste explosion in every bite.
  • Quick and easy: With just a handful of ingredients, this recipe can be prepared in under 30 minutes—perfect for lunch or a snack!
  • Versatile serving options: Enjoy it on whole grain toast, in a wrap, or even stuffed inside an avocado for a fun twist.
  • Meal prep friendly: This egg salad can be made ahead of time, making it an ideal choice for meal prep enthusiasts.

Ingredient Breakdown

Here’s what you need to whip up this high protein delight:

  • 6 large eggs: The star of the show, packed with protein and healthy fats.
  • 3 tablespoons mayonnaise: A classic binding agent for creaminess.
  • 1 tablespoon Greek yogurt: Optional, but it adds extra creaminess and a protein boost.
  • 1 teaspoon Dijon mustard: For a tangy kick.
  • 1 teaspoon lemon juice: Brightens up the flavors.
  • 1/4 teaspoon salt: Essential for flavor enhancement.
  • 1/4 teaspoon black pepper: Adds a subtle heat.
  • 1/4 teaspoon smoked paprika: Optional, for a little kick.
  • 1 tablespoon chopped fresh chives or parsley: A fresh herb that elevates the flavor.
  • 1/4 cup diced celery: For that perfect crunch.
  • 1/4 cup diced red onion: Adds sweetness and bite.
  • 1/2 avocado (cubed): For a creamy twist that makes the salad luscious.

Substitutions

Side view of a creamy high protein egg salad with colorful ingredients.

If you’re missing an ingredient or want to customize your salad, here are some easy swaps:

  • Greek yogurt alternative: Use sour cream for a rich flavor or skip it altogether for a lighter option.
  • Herbs: Experiment with dill or cilantro for different flavor profiles.
  • Crunch factors: Substitute celery with diced bell peppers or cucumber for an extra refreshing crunch.
  • Avocado: Try using a ripe banana for a sweet, creamy twist (though it will change the flavor profile significantly).

Step-by-Step Instructions

1. Hard-Boil the Eggs

Place the eggs in a pot of water, cover, and bring to a boil. Once boiling, turn off the heat and let sit for 10-12 minutes. Transfer to an ice bath to cool.

2. Peel and Chop the Eggs

Once cooled, peel the eggs and chop them into bite-sized pieces.

3. Prepare the Dressing

In a bowl, mix the mayonnaise, Greek yogurt, Dijon mustard, lemon juice, salt, black pepper, and smoked paprika until smooth.

4. Combine the Salad

Gently fold the chopped eggs, celery, red onion, and herbs into the dressing mixture.

5. Chill and Serve

Let the salad chill in the refrigerator for at least 30 minutes for the flavors to meld. Serve chilled on toast, in a wrap, or on its own!

Pro Tips for Success

  • Perfect texture: For a creamier salad, mash some of the eggs before mixing them in.
  • Make-ahead magic: This salad tastes even better the next day, making it a great option for meal prep.
  • Customize your crunch: Add toasted nuts or seeds for an extra crunch and nutrient boost.
  • Experiment with spices: Don’t be afraid to try different spices like curry powder or chili flakes.
  • Fresh herbs are key: Always use fresh herbs when possible; they elevate the taste significantly.
  • Storage savvy: Store leftovers in an airtight container in the fridge for up to 3-4 days.
  • Perfect pairings: Serve with whole-grain crackers or alongside a fresh green salad for a balanced meal.
  • Mind the eggs: Ensure the eggs are not overcooked to avoid a rubbery texture.

Common Mistakes and Troubleshooting

Even the best chefs make mistakes! Here are some common pitfalls and how to avoid them:

  • Overcooking the eggs: This can lead to a greenish hue around the yolk and a rubbery texture. Follow the boiling method precisely!
  • Too much mayo: If the salad is too creamy, add more diced veggies to balance it out.
  • Skipping seasoning: Don’t forget to season adequately; taste as you go to get the perfect flavor.

Variations to Try

Feel free to mix it up with these fun variations:

  • Spicy jalapeño egg salad: Add diced jalapeños or a splash of hot sauce for a kick.
  • Curried egg salad: Mix in curry powder for an exotic twist.
  • Avocado and tomato egg salad: Fold in diced tomatoes and avocado for a refreshing summer salad.
  • Bacon and egg salad: Crumble crispy bacon into the mix for a smoky flavor.

Storage and Make-Ahead Instructions

This egg salad is perfect for meal prep! Here’s how to store it:

  • Refrigeration: Store in an airtight container in the fridge. It lasts for 3-4 days.
  • Freezing: We don’t recommend freezing egg salad, as the texture can change upon thawing.
  • Make-ahead: Prepare the salad a day in advance for the best flavor development.

Frequently Asked Questions (FAQs)

  • Is cottage cheese or yogurt better for protein? Both are excellent, but Greek yogurt is creamier, while cottage cheese has a chunkier texture.
  • What can I add to egg salad for more protein? Consider adding diced chicken, tuna, or extra Greek yogurt.
  • Can I make this salad without mayo? Yes! Use avocado or Greek yogurt for creaminess instead.
  • Is this salad good for meal prep? Absolutely! It keeps well in the fridge and tastes even better after a day.
  • How do I make egg salad less rich? Use less mayo or yogurt and add more vegetables like celery and cucumber.
  • Can I use other herbs? Yes! Dill, cilantro, and basil work wonderfully in this salad.
  • Is it safe to eat egg salad after a few days? If stored properly in the fridge, it should be safe for 3-4 days.
  • What is the best way to serve egg salad? On whole-grain bread, in lettuce wraps, or with fresh veggies for dipping!

Nutritional Tips and Dietary Adaptations

Here are some tips to keep your egg salad nutritious:

  • Use whole eggs: They provide essential nutrients and healthy fats.
  • Opt for low-fat mayo: If you’re watching your calorie intake, consider using a light mayo option.
  • Load up on veggies: Increase the vegetable content for added fiber and nutrients.

Essential Kitchen Equipment

To create this egg salad, you’ll need the following:

  • Pot: For boiling the eggs.
  • Mixing bowl: To combine all the ingredients.
  • Cutting board and knife: For chopping your veggies and eggs.
  • Measuring spoons: To ensure accurate ingredient measurements.

Delicious Serving Suggestions

Here are some fun ideas for serving your egg salad:

  • On toast: Spread on whole-grain toast for a hearty meal.
  • In a wrap: Roll it up in a tortilla with fresh greens for a satisfying lunch.
  • Stuffed avocado: Scoop it into halved avocados for a nutritious meal.
  • With crackers: Serve it as a dip with whole-grain crackers for a snack.

Enjoy every bite of this vibrant, high protein egg salad! With its bold flavors and nourishing ingredients, you’ll never look at egg salad the same way again—it’s time to get cooking and enjoy your delicious creation!

High Protein Egg Salad

Prep Time 10 minutes
Cook Time 10 minutes
Total Time 20 minutes
Servings 2 servings
Calories 250
A delicious and protein-packed egg salad perfect for a quick lunch or snack. Creamy, flavorful, and easy to prepare.

Ingredients

Eggs

  • 6 large large eggs

Mayonnaise

  • 3 tablespoons mayonnaise

Greek Yogurt

  • 1 tablespoon Greek yogurt (optional for extra creaminess)

Dijon Mustard

  • 1 teaspoon Dijon mustard

Lemon Juice

  • 1 teaspoon lemon juice

Salt

  • 1/4 teaspoon salt

Black Pepper

  • 1/4 teaspoon black pepper

Smoked Paprika

  • 1/4 teaspoon smoked paprika (optional, for a little kick)

Chives or Parsley

  • 1 tablespoon chopped fresh chives or parsley

Celery

  • 1/4 cup diced celery (for crunch)

Red Onion

  • 1/4 cup diced red onion

Avocado

  • 1/2 avocado cubed avocado (for a creamy twist)

Instructions 

  • Hard boil the eggs, then peel and chop them.
  • In a bowl, mix mayonnaise, Greek yogurt, Dijon mustard, lemon juice, salt, pepper, and smoked paprika.
  • Add chopped eggs, chopped chives or parsley, diced celery, red onion, and cubed avocado to the bowl. Mix gently.
  • Serve immediately or chill for 30 minutes for flavors to meld.

Notes

For extra flavor, sprinkle with additional herbs or paprika before serving.
Calories: 250kcal
Cost: $8
Course: Salad
Cuisine: American
Keyword: Egg, Protein

Get Ready to Fall in Love with These Crispy, Zesty Air Fryer Lemon Chicken Bites!

Are you ready to elevate your dinner game? These Crispy Zesty Air Fryer Lemon Chicken Bites are not just any chicken dish; they are a flavor-packed adventure that will make your taste buds dance! Bursting with fresh flavors, simple ingredients, and an easy cooking method, this recipe is perfect for anyone looking to enjoy a delicious, healthy meal without spending hours in the kitchen. Whether you’re a busy professional, a parent on the go, or someone who just loves good food, these chicken bites will become a staple on your dinner table.

Using an air fryer, you’ll achieve that satisfying crispiness without the need for excess oil, making this dish a guilt-free delight. Plus, with the vibrant zing of fresh lemon and aromatic herbs, every bite is a celebration of taste. Let’s dive into why you’ll love this recipe!

Why You’ll Love This Recipe

  • Quick Cooking Time: Ready in under 30 minutes, making it a perfect weeknight meal!
  • Healthy Cooking Method: Air frying uses significantly less oil than traditional frying, so you can indulge without the extra calories.
  • Flavor Explosion: The combination of lemon juice, zest, and garlic powder infuses each bite with a burst of flavor that will leave you craving more.
  • Versatile Serving Options: Enjoy these chicken bites on their own, in salads, or as a protein-packed addition to wraps and bowls.
  • Kid-Friendly: The crispy texture and zesty flavor make them irresistible for kids and adults alike!

Ingredients You’ll Need

Let’s gather our ingredients! This recipe is straightforward and uses items you probably already have in your kitchen.

  • 1 lb boneless, skinless chicken breasts: Cut into bite-sized pieces for quick cooking and maximum crispiness.
  • 2 tablespoons olive oil (or avocado oil): Helps the marinade stick for that perfect golden finish; feel free to substitute with avocado oil for a twist.
  • 1 tablespoon lemon juice: Freshly squeezed juice provides a tangy kick and tenderizes the chicken for that melt-in-your-mouth texture.
  • 1 teaspoon lemon zest: Adds an extra layer of lemony goodness that makes this dish truly special.
  • 1 teaspoon garlic powder: For a savory depth of flavor.
  • 1 teaspoon onion powder: Complements the garlic and enhances the overall taste.
  • ½ teaspoon paprika (smoked or regular): Adds color and a hint of warmth.
  • ½ teaspoon dried thyme (or Italian seasoning): Brings an aromatic herbaceous note to the chicken.
  • Salt and pepper to taste: Essential for balancing the flavors.
  • Fresh lemon wedges (for garnish, optional): Brightens the presentation and adds a refreshing touch.
  • Chopped parsley (for garnish, optional): A pop of color and freshness to finish the dish.

Step-by-Step Instructions for Air Fryer Lemon Chicken Bites

Side view of crispy air-fried lemon chicken bites with a shiny, zesty glaze and herbs.

Ready to cook? Follow these simple steps for a delightful dinner experience.

  1. Prepare the Marinade: In a large mixing bowl, combine the olive oil, lemon juice, lemon zest, garlic powder, onion powder, paprika, dried thyme, salt, and pepper.
  2. Marinate the Chicken: Add the bite-sized chicken pieces to the bowl and toss until they are well-coated in the marinade. Allow the chicken to marinate for at least 10 minutes to enhance the flavor.
  3. Preheat Your Air Fryer: While the chicken marinates, preheat your air fryer to 400°F (200°C) for about 5 minutes.
  4. Arrange Chicken in the Basket: Place the marinated chicken pieces in a single layer in the air fryer basket. Avoid overcrowding to allow for even cooking.
  5. Air Fry the Chicken: Air fry the chicken for about 12-15 minutes, shaking the basket halfway through to ensure even crispiness.
  6. Check for Doneness: The chicken should be golden brown and cooked through (internal temperature should reach 165°F or 75°C).
  7. Rest and Serve: Once cooked, remove the chicken bites from the air fryer and let them rest for a couple of minutes.
  8. Garnish and Enjoy: Serve warm, garnished with fresh lemon wedges and chopped parsley, if desired.

Pro Tips for Perfect Air Fryer Lemon Chicken Bites

  • Use Fresh Ingredients: Fresh lemon juice and zest make a noticeable difference in flavor, so skip the bottled stuff!
  • Don’t Skip Marinating: Allowing the chicken to marinate enhances flavor and tenderness.
  • Shake it Up!: Shaking the basket halfway through cooking ensures that all sides get crispy and golden.
  • Check for Overcrowding: For maximum crispiness, avoid overcrowding the air fryer basket.
  • Use a Meat Thermometer: To ensure your chicken is perfectly cooked, use a meat thermometer to check the internal temperature.
  • Experiment with Seasonings: Feel free to swap out herbs or spices based on your preferences—Italian seasoning or cumin can add a delightful twist!
  • Leftover Magic: These bites are great for meal prep. They taste fantastic cold in salads or wraps!
  • Garnish Wisely: Fresh herbs or a sprinkle of feta can take your presentation to the next level.

Common Mistakes and Troubleshooting

Even the best cooks make mistakes! Here are some common pitfalls and how to avoid them:

  • Chicken is Dry: This can happen if you overcook the chicken. Always check for doneness with a meat thermometer.
  • Flavor is Lacking: Ensure you don’t skimp on the marinade. Letting the chicken marinate for longer (up to an hour) can deepen the flavors.
  • Not Crispy Enough: Make sure your air fryer is preheated and don’t overcrowd the basket.

Variations to Try

Feeling adventurous? Here are some delicious variations to mix things up:

  • Spicy Kick: Add red pepper flakes to the marinade for a spicy version.
  • Herb-Infused: Use fresh herbs like rosemary or dill instead of dried thyme for a fragrant twist.
  • Honey Lemon Glaze: Drizzle honey over the chicken bites before serving for a sweet and tangy flavor.
  • Vegetable Addition: Toss in some bell peppers or zucchini with the chicken for a complete meal.

Storage and Make-Ahead Instructions

Want to prepare ahead of time? Here’s how to store and reheat your chicken bites:

  • In the Refrigerator: Store leftovers in an airtight container in the fridge for up to 3 days.
  • In the Freezer: Freeze cooked chicken bites in a single layer on a baking sheet, then transfer to a freezer-safe bag for up to 2 months.
  • Reheating: Reheat in the air fryer at 350°F (175°C) for about 5 minutes until heated through and crispy again.

Frequently Asked Questions (FAQs)

  • Can I use chicken thighs instead of breasts? Absolutely! Just ensure they are boneless and skinless for optimal cooking.
  • What can I serve these chicken bites with? They pair well with salads, rice, or in wraps. Get creative!
  • Can I bake these instead of air frying? Yes! Bake in a preheated oven at 400°F (200°C) for about 20-25 minutes.
  • How do I know when my chicken is cooked? Use a meat thermometer to check that it has reached 165°F (75°C).
  • Can I substitute lemon juice with something else? Lime juice or vinegar can be used, but the flavor will differ.
  • Is this recipe gluten-free? Yes! All ingredients listed are gluten-free.
  • Can I make this recipe vegan? Substitute chicken with tofu or chickpeas and adjust the cooking time accordingly.
  • How do I keep the chicken bites crispy? Ensure they don’t sit too long after cooking and store them uncovered to maintain crispiness.

Nutritional Tips and Dietary Adaptations

These air fryer lemon chicken bites are not only delicious but also nutritious! Here’s how to make them fit your dietary needs:

  • Low Carb: This recipe is already low in carbs, making it suitable for keto diets.
  • High Protein: Packed with protein, these bites are perfect for muscle recovery.
  • Dairy-Free: The recipe is naturally dairy-free, making it suitable for lactose-intolerant individuals.

Equipment Recommendations

For this recipe, you will need:

  • Air Fryer: A quality air fryer is essential for achieving that crispy texture. Brands like Ninja, Philips, or Cosori are great options.
  • Mixing Bowl: A large mixing bowl to prepare the marinade and toss the chicken.
  • Meat Thermometer: To ensure perfect doneness every time.

Serving Suggestions

Finally, let’s talk presentation! Here are a few ideas on how to serve your Crispy Zesty Air Fryer Lemon Chicken Bites:

  • On a Bed of Greens: Serve over a fresh salad with mixed greens, cherry tomatoes, and a light vinaigrette.
  • In a Wrap: Roll them up in a whole grain wrap with your favorite veggies and a drizzle of tzatziki.
  • With Dipping Sauces: Pair with a garlic aioli or spicy sriracha for an extra flavor boost.

Now, you’re all set to enjoy these mouthwatering chicken bites! Cooking healthy doesn’t have to be boring; it can be a fun and exciting journey in your kitchen. So grab your air fryer, and let’s get cooking!

Zesty Air Fryer Lemon Chicken Bites

Prep Time 10 minutes
Cook Time 15 minutes
Total Time 25 minutes
Servings 4 servings
Calories 250
Enjoy tender, flavorful chicken bites infused with lemon zest and herbs, cooked to perfection in the air fryer for a quick and healthy meal.

Ingredients

Chicken

  • 1 lb boneless, skinless chicken breasts, cut into bite-sized pieces
  • 2 tablespoons olive oil (or avocado oil)
  • 1 tablespoon lemon juice (freshly squeezed)
  • 1 teaspoon lemon zest
  • 1 teaspoon garlic powder
  • 1 teaspoon onion powder
  • ½ teaspoon paprika (smoked or regular)
  • ½ teaspoon dried thyme (or Italian seasoning)
  • to taste Salt and pepper
  • optional Fresh lemon wedges (for garnish)
  • optional Chopped parsley (for garnish)

Instructions 

  • Mix olive oil, lemon juice, lemon zest, garlic powder, onion powder, paprika, thyme, salt, and pepper in a bowl.
  • Add chicken pieces to the marinade and toss to coat. Marinate for at least 10 minutes.
  • Preheat air fryer to 400°F (200°C) for 5 minutes.
  • Arrange chicken in a single layer in the air fryer basket. Cook for 12-15 minutes, shaking halfway.
  • Let the chicken rest for a couple of minutes. Serve garnished with lemon wedges and parsley if desired.

Notes

For extra flavor, marinate longer or add a sprinkle of fresh herbs before serving.
Calories: 250kcal
Cost: $15
Course: Main Course
Cuisine: American
Keyword: air fryer, Chicken, Lemon

Unlock the Vibrant World of Zesty Thai Crunchy Slaw

Welcome to the colorful and exciting realm of Thai Crunchy Slaw! This vibrant veggie-packed salad is not just a side dish; it’s a celebration of flavors and textures that will elevate any meal. Tossed in a creamy peanut lime dressing, this crunchy slaw is the perfect blend of healthy and delicious, proving that nutritious eating can be fun and fulfilling. Whether you’re enjoying it as a refreshing side or a stand-alone meal, this Thai-inspired salad is sure to impress. Let’s dive into the delicious details!

Why You’ll Love This Recipe

  • Flavor Explosion: The combination of crunchy vegetables and a bold, tangy dressing creates a taste sensation that’s both refreshing and satisfying.
  • Nutritious and Wholesome: Packed with fresh veggies and healthy fats from peanuts, this slaw supports your wellness goals without skimping on taste.
  • Quick and Easy: With minimal prep time, this recipe is perfect for busy weekdays or last-minute gatherings.
  • Versatile Dish: Whether paired with grilled chicken, tofu, or enjoyed solo, it adapts to any meal occasion effortlessly.
  • Make-Ahead Friendly: Prepare it in advance for meal prep, and watch the flavors deepen as it sits!

Ingredient Breakdown

Let’s take a closer look at the ingredients that make this Thai Crunchy Slaw shine:

  • 3 cups shredded green cabbage: Provides a crunchy base and loads of nutrients.
  • 1 cup shredded purple cabbage (optional): Adds vibrant color and a slight sweetness.
  • 1½ cups shredded carrots: Offers a natural sweetness and extra crunch.
  • 3 scallions, thinly sliced: Enhances the flavor profile with a mild onion kick.
  • ¼ cup chopped fresh cilantro (or mint): Infuses freshness; swap herbs based on your preference!
  • ¼ cup chopped peanuts (for garnish): Adds delightful crunch and richness.
  • Optional: ½ red bell pepper, thinly sliced: Increases color and flavor complexity.

Flavorful Dressing Ingredients

Close-up of vibrant Thai Crunchy Slaw with bright vegetables and a creamy peanut dressing garnished with chopped peanuts.

The dressing is where the magic happens! Here’s what you’ll need:

  • 3 tbsp creamy peanut butter: The creamy base that brings the dressing together.
  • 2 tbsp fresh lime juice: Provides the essential tang.
  • 1 tbsp rice vinegar: Adds a slight acidity for balance.
  • 1 tbsp soy sauce (or tamari for gluten-free): Introduces umami flavor.
  • 1 tbsp maple syrup or honey: A touch of sweetness to round out the flavors.
  • 1 tsp toasted sesame oil: Imparts a rich, nutty depth.
  • ½ tsp fresh grated ginger: Adds warmth and spice.
  • 1 garlic clove, minced: Enhances the dressing with aromatic goodness.
  • 1–2 tbsp water to thin, as needed: Adjusts the dressing consistency.
  • Optional: pinch of red pepper flakes or sriracha for heat: Spice it up to your liking!

Pro Tips for Perfect Slaw

Here are some expert insights to elevate your slaw-making game:

  • Fresh Ingredients: Use the freshest veggies for the best crunch and flavor.
  • Dress Just Before Serving: To maintain crispness, toss the slaw with dressing right before serving.
  • Adjust Seasoning: Don’t be afraid to taste and tweak the dressing—add more lime for tang or maple for sweetness!
  • Chill Time: Letting the slaw sit for 15-30 minutes allows flavors to meld beautifully.
  • Make It a Meal: Add protein such as grilled shrimp, tofu, or rotisserie chicken for a complete meal.
  • Nut-Free Option: Substitute sunflower seeds for peanuts to keep it nut-free.
  • Herb Substitution: Swap cilantro for parsley or mint based on your taste preferences.
  • Storage Tips: Store leftovers in an airtight container in the fridge for up to 3 days.
  • Experiment with Veggies: Feel free to add other crunchy vegetables like radishes or jicama.
  • Presentation Matters: Serve in a colorful bowl for an eye-catching display!

Avoid Common Mistakes

Here are a few pitfalls to avoid when crafting your slaw:

  • Over-Dressing: Too much dressing can make the salad soggy; dress lightly at first.
  • Using Wilting Vegetables: Ensure all ingredients are fresh for the best texture.
  • Skipping the Chill: If time allows, chill the slaw to enhance the flavor experience.
  • Neglecting to Taste: Always taste your dressing and adjust before serving!
  • Ignoring the Garnish: Don’t skip the peanuts—they add crucial texture and flavor!

Flavor Variations

Mix things up with these exciting variations:

  • Spicy Thai Crunchy Slaw: Add extra sriracha or chopped jalapeños for a spicy kick.
  • Fruity Twist: Toss in diced apples or mango for a sweet contrast.
  • Asian-Inspired Slaw: Incorporate mandarin oranges and sesame seeds for a different flavor profile.
  • Southwest Style: Mix in black beans and corn, and swap the dressing for a chipotle vinaigrette.

Storage and Make-Ahead Instructions

This slaw is perfect for meal prep! Here’s how to store it:

  • Chilled Storage: Keep in an airtight container in the fridge for up to 3 days.
  • Make Ahead: Prepare the slaw ingredients and dressing separately, then combine prior to serving for maximum freshness.
  • Freezing Not Recommended: This dish is best enjoyed fresh; freezing may alter texture.

Frequently Asked Questions

Got questions? We’ve got answers!

  • Can I use different vegetables? Absolutely! Feel free to incorporate your favorites like bell peppers, radishes, or cucumbers.
  • Is this slaw vegan-friendly? Yes, simply use maple syrup instead of honey and tamari instead of soy sauce for a gluten-free option.
  • How can I make the dressing healthier? Consider using Greek yogurt instead of peanut butter for a lighter version.
  • Can I make this slaw spicy? Definitely! Add red pepper flakes or fresh chili for a spicy twist.
  • What can I serve with this Thai slaw? It pairs wonderfully with grilled meats, tacos, or as a topping for sandwiches!
  • How long does the slaw last in the fridge? Best consumed within 3 days; after that, the veggies may wilt.
  • Can I double the recipe? Yes! This slaw is perfect for large gatherings.
  • Is the slaw gluten-free? Use tamari instead of regular soy sauce to keep it gluten-free.

Nutritional Benefits and Dietary Adaptations

This Thai Crunchy Slaw is not just a fun dish; it’s also packed with nutrients:

  • High in Fiber: The vegetables provide essential fiber, promoting digestive health.
  • Rich in Antioxidants: Colorful veggies are loaded with antioxidants, supporting overall health.
  • Healthy Fats: The peanuts contribute healthy fats, which are important for brain health.
  • Low-Calorie Option: This slaw is a light choice, making it suitable for various dietary plans.

Essential Kitchen Equipment

Before you start, gather these kitchen tools:

  • Sharp Knife: For precise and easy vegetable slicing.
  • Cutting Board: A sturdy surface to chop your ingredients safely.
  • Mixing Bowl: A large bowl for combining the slaw and dressing.
  • Whisk or Jar: For mixing the dressing smoothly.
  • Measuring Cups and Spoons: Ensure accuracy in your ingredient quantities.

Serving Suggestions

Here’s how to enjoy your Thai Crunchy Slaw:

  • As a Side Dish: Serve alongside grilled chicken, fish, or tofu for a balanced meal.
  • In a Wrap: Use as a filling in lettuce wraps or burritos for a delicious twist.
  • On Tacos: Top your tacos for an extra crunch and flavor boost.
  • As a Snack: Enjoy it on its own for a refreshing, healthy snack.

Conclusion

In summary, our Zesty Thai Crunchy Slaw is a vibrant and exciting dish that proves healthy eating doesn’t have to be bland. With its colorful ingredients and bold flavors, it’s an essential addition to your recipe repertoire. Whether you serve it as a side or main dish, it’s sure to be a hit at your table. So grab your ingredients, unleash your inner chef, and let the crunch begin!

Thai Crunchy Slaw with Peanut Lime Dressing

Prep Time 15 minutes
Total Time 15 minutes
Servings 4 servings
Calories 250
A vibrant and crunchy slaw tossed in a tangy peanut lime dressing, perfect for a fresh and flavorful meal or side.

Ingredients

Vegetables

  • 3 cups shredded green cabbage
  • 1 cup shredded purple cabbage (optional, for color)
  • 1.5 cups shredded carrots
  • 3 scallions thinly sliced scallions
  • 0.25 cup chopped fresh cilantro (or mint)
  • 0.25 cup chopped peanuts (for garnish)
  • 0.5 red bell pepper thinly sliced red bell pepper (optional)
  • 3 tbsp creamy peanut butter
  • 2 tbsp fresh lime juice (1 lime)
  • 1 tbsp rice vinegar
  • 1 tbsp soy sauce (or tamari)
  • 1 tbsp maple syrup or honey
  • 1 tsp toasted sesame oil
  • 0.5 tsp fresh grated ginger
  • 1 clove garlic, minced
  • 1-2 tbsp water to thin, as needed

Optional

  • pinch red pepper flakes or sriracha for heat

Instructions 

  • Whisk together peanut butter, lime juice, vinegar, soy sauce, maple syrup, sesame oil, ginger, garlic, and water until smooth.
  • Combine cabbage, carrots, scallions, bell pepper (if using), and cilantro in a large bowl.
  • Pour dressing over the slaw and toss to coat. Top with chopped peanuts before serving.
  • Serve immediately or chill for 15–30 minutes. Store leftovers in the fridge for up to 3 days.

Notes

Adjust lime and chili to taste for more tang or heat.
Calories: 250kcal
Cost: $12
Course: Salad
Cuisine: Thai
Keyword: cabbage, Carrots, Peanuts