Author

Ryan

Browsing

Elevate Your Meals with a Crunchy Spring Greens Salad!

Welcome to the vibrant world of healthy eating! If you’re looking for a dish that embodies freshness and excitement, you’re in the right place. Our Crunchy Spring Greens Salad is a colorful medley of nutrient-dense ingredients that will not only nourish your body but also tantalize your taste buds. This salad is perfect for those sunny days when you crave something light, refreshing, and packed with flavor. Let’s dive into why this salad is a must-try!

Why You’ll Love This Recipe

This salad isn’t just another leafy green dish; it’s a celebration of spring flavors! Here are five compelling reasons to get excited about making this salad:

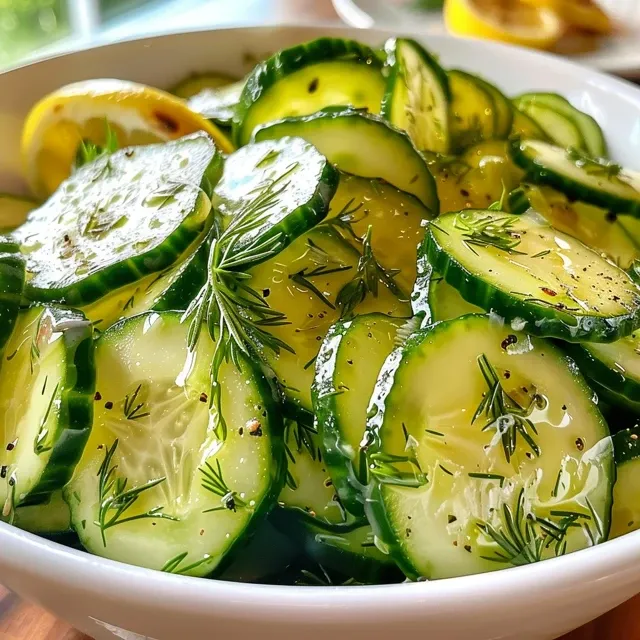
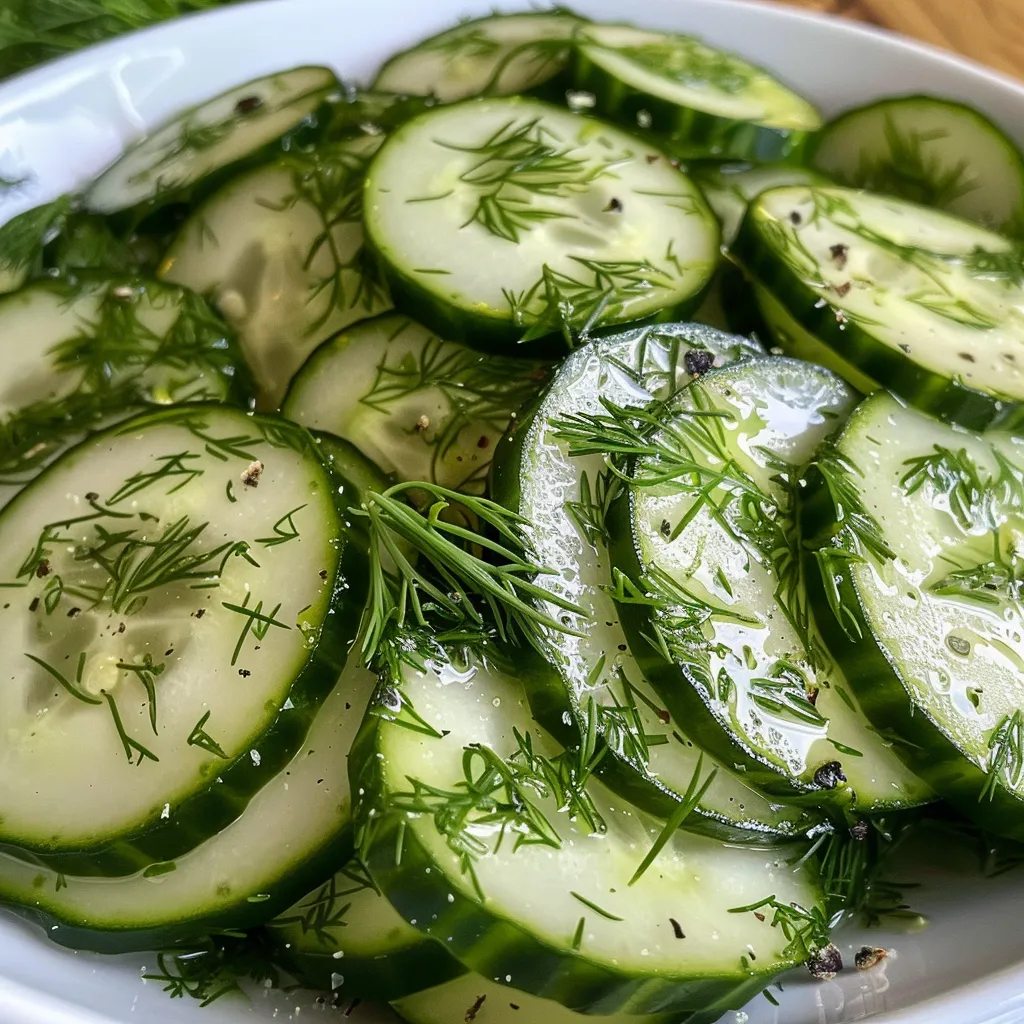
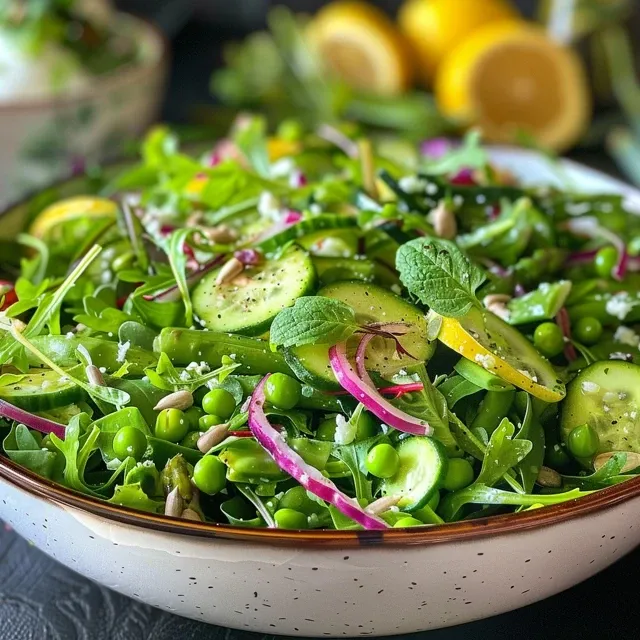
  • Vibrant Ingredients: Featuring a mix of crisp cucumbers, tender asparagus, and sweet peas, this salad is a feast for the eyes and palate.
  • Quick and Easy: With a preparation time of just 20 minutes, you can whip up this dish in no time, making it a great option for busy weekdays.
  • Customizable: Feel free to mix and match your favorite spring veggies and garnishes, allowing you to tailor it to your taste.
  • Meal Prep Friendly: This salad can last in the fridge for up to five days, making it an ideal choice for meal prep enthusiasts.
  • Nutrient-Packed: Loaded with vitamins, minerals, and healthy fats, this salad supports your overall health while keeping you energized.

Ingredients Breakdown

Here’s everything you need to create this delicious salad:

  • 3 tbsp extra-virgin olive oil (45 ml) – A heart-healthy fat that enhances flavor.
  • 1 tbsp fresh lemon juice (15 ml) – Adds brightness and zing.
  • 2 tsp fresh lemon zest – A fragrant touch that heightens the citrus flavor.
  • 2 tsp Dijon mustard (10 g) – For a little kick and creaminess in the vinaigrette.
  • 1 tbsp fresh mint leaves, chopped – A refreshing herb that complements the greens.
  • 1/2 tsp salt and pepper – Essential for seasoning.
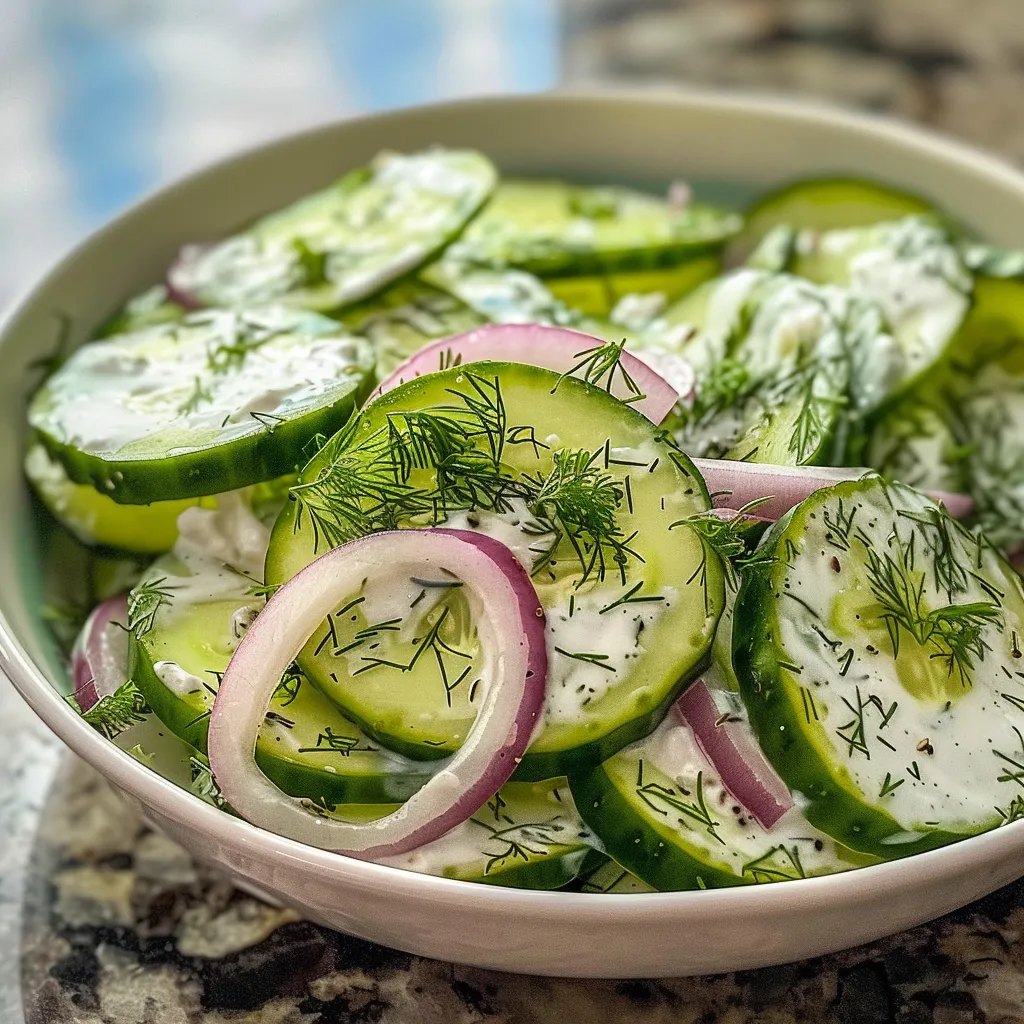
  • 1 medium or large cucumber – Adds crunch and hydration.
  • 1 small red onion (115 g) – Offers a sweet, sharp flavor.
  • 10 oz asparagus stalks (280 g) – Tender and nutrient-rich.
  • 6 ounces snap peas (170 g) – Sweet and crunchy for added texture.
  • 1 cup English peas (6 oz | 175g) – A pop of sweetness.
  • 4 cups arugula/rocket (about 120g) – The base of our salad, packed with nutrients.
  • 1/2 cup roasted sunflower seeds (70 g) – For added crunch and healthy fats.
  • 6 ounces fresh mozzarella cheese (170 g) – Creamy bites that take this salad to the next level.

**Substitutions:** If you need to tailor the ingredients, here are some suggestions:

  • Olive oil: Use avocado oil for a different flavor profile.
  • Cheese: Try feta or goat cheese for a tangy twist.
  • Veggies: Swap in your favorite seasonal vegetables like radishes or bell peppers.
  • Herbs: Basil or cilantro can add their unique flavors to the mix.

Pro Tips for a Perfect Salad

Side angle of a colorful salad featuring leafy greens, asparagus, and tomatoes in a bowl.

Here are some expert insights to ensure your salad shines:

  • Dry Your Greens: Make sure to wash and dry your greens thoroughly to prevent a soggy salad.
  • Season Your Cucumbers: Salting cucumbers before using helps draw out excess moisture, enhancing their crunchiness.
  • Ice Bath for Blanching: Always have an ice bath ready when blanching veggies to lock in that vibrant color and crisp texture.
  • Mix Vinaigrette Well: Whisk your dressing ingredients thoroughly to ensure an even flavor distribution.
  • Chill Ingredients: For the freshest taste, consider chilling your ingredients before assembly.
  • Taste as You Go: Adjust seasoning after combining to get that perfect flavor balance.
  • Layer for Visual Appeal: When assembling, layer ingredients for a beautiful presentation.
  • Store Separately: Keep dressing separate until serving for maximum freshness.

Common Mistakes and Troubleshooting

Even the best chefs can stumble! Here’s how to avoid common pitfalls:

  • Soggy Salad: Avoid adding dressing too early. Dress the salad just before serving.
  • Overcooked Veggies: Blanch vegetables just until tender; they should retain a slight crunch.
  • Unbalanced Flavors: If too salty, add a dash of lemon juice or a bit of sugar to balance.
  • Too Much Dressing: Start with a small amount of vinaigrette; you can always add more if needed.

Variations to Try

Feeling adventurous? Here are some fun variations to switch things up:

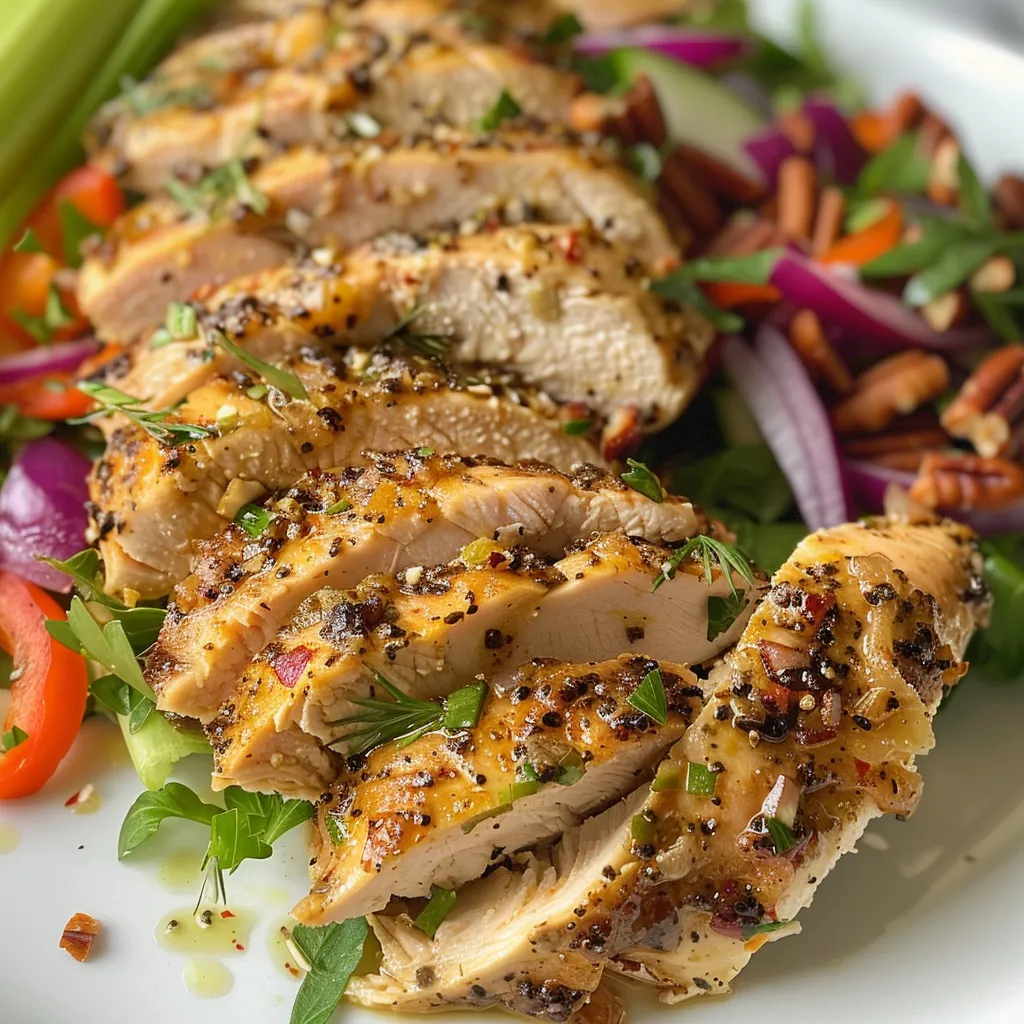
  • Grilled Chicken Salad: Add sliced grilled chicken for a protein boost.
  • Quinoa and Greens: Toss in cooked quinoa for a hearty, grain-filled option.
  • Fruit Addition: Add sliced strawberries or mandarin oranges for a sweet contrast.
  • Spicy Kick: Incorporate jalapeños or a spicy dressing for heat.

Storage and Make-Ahead Instructions

This salad is perfect for meal prep! Follow these tips to keep it fresh:

  • Refrigerate: Store in an airtight container in the refrigerator for up to 5 days.
  • Separate Ingredients: If making ahead, keep the dressing separate until ready to eat.
  • Revive Leftovers: Add a splash of lemon juice or olive oil to freshen up the flavors when consuming leftovers.

Frequently Asked Questions

Here are some common queries about our Crunchy Spring Greens Salad:

  • What are spring greens made of? Spring greens typically include tender leaves like arugula, baby spinach, and mesclun mixes.
  • Can I prep this salad ahead of time? Yes! Just keep the dressing separate to maintain freshness.
  • How do I store leftovers? Store in an airtight container in the fridge for up to 5 days.
  • Can I freeze this salad? We don’t recommend freezing due to the texture changes in fresh veggies.
  • What can I substitute for mozzarella? You can use feta cheese or goat cheese if you prefer a tangier flavor.
  • Is this salad gluten-free? Yes, all the ingredients are naturally gluten-free.
  • How do I make this vegan? Omit the mozzarella and use maple syrup in the vinaigrette for sweetness.
  • What’s the best way to serve this salad? Serve chilled as a refreshing side or main dish!

Nutrition Tips and Dietary Adaptations

This salad is not only delicious, but it also caters to various dietary needs:

  • Low-Calorie Option: Use less olive oil in the dressing.
  • Keto-Friendly: Skip the peas and opt for extra leafy greens and healthy fats.
  • High-Protein Additions: Add chickpeas or lentils for extra protein.
  • Dairy-Free Option: Replace mozzarella with avocado or leave it out entirely.

Equipment Recommendations

To make your salad preparation seamless, here’s what you’ll need:

  • Sharp Knife: For slicing veggies cleanly.
  • Cutting Board: A sturdy surface for food prep.
  • Mixing Bowl: To combine your salad ingredients easily.
  • Whisk: For mixing the vinaigrette thoroughly.
  • Fine-Mesh Strainer: Essential for rinsing cucumbers and onions.

Serving Suggestions

Make the most of your salad by pairing it with these options:

  • Grilled Fish: The light flavors complement seafood perfectly.
  • Roasted Chicken: A protein-packed dish that rounds out your meal.
  • Quinoa Bowl: Serve alongside a warm quinoa bowl for a hearty dinner.
  • Light White Wine: Pair with a crisp Sauvignon Blanc for a refreshing beverage option.

In conclusion, this Crunchy Spring Greens Salad is not just a meal; it’s an experience! With vibrant flavors, easy preparation, and endless customization, you can make it your own. Whether you enjoy it as a side or a main dish, you’ll find that healthy eating can be both fun and satisfying. So gather your ingredients and let’s celebrate the beauty of spring on your plate!

Crunchy Spring Greens Salad

Prep Time 15 minutes
Cook Time 10 minutes
Total Time 25 minutes
Servings 4 servings
Calories 350
A fresh and vibrant salad combining crisp vegetables, herbs, and seeds, perfect for a light, healthy meal or side dish.

Ingredients

Vegetables

  • 3 tbsp extra-virgin olive oil
  • 1 tbsp fresh lemon juice
  • 2 tsp fresh lemon zest
  • 2 tsp Dijon mustard (10 g)
  • 1 tbsp fresh mint leaves, chopped
  • 0.5 tsp salt (or sea salt)
  • 0.5 tsp pepper
  • 1 medium cucumber (seeded and diced)
  • 1 small red onion (thinly sliced (115 g))
  • 10 oz asparagus stalks (woody ends removed, cut into 1 inch pieces (280 g))
  • 6 oz snap peas (strings removed, cut into ½-inch slices (170 g))
  • 1 cup English peas in their pods ((6 oz | 175g))
  • 4 cups arugula/rocket ((about 120g))
  • 0.5 cup roasted sunflower seeds ((70 g))
  • 6 oz fresh mozzarella cheese (diced or torn (170 g))

Instructions 

  • Season cucumber slices with salt, set aside in a colander.
  • Soak sliced red onions in cold water, then drain and set aside.
  • Whisk together olive oil, lemon juice, zest, mustard, mint, salt, and pepper to make vinaigrette.
  • Blanch asparagus and peas in salted boiling water, then transfer to an ice bath.
  • Drain and dry all vegetables, then combine with arugula, sunflower seeds, mozzarella, and vinaigrette. Toss to combine and season to taste.

Notes

For extra crunch, toast sunflower seeds before adding.
Calories: 350kcal
Cost: $15
Course: Salad
Cuisine: American
Keyword: Vegetables

Discover the Magic of Juicy Air Fryer Chicken Thighs!

Welcome to a flavor-packed adventure that will transform your weeknight dinners into something extraordinary! If you’re looking for a quick, delicious, and healthy meal, you’ve landed in the right place. These air fryer chicken thighs are marinated to perfection, ensuring juicy, tender meat with a crispy skin that will have everyone at the table begging for seconds. Ready to dive in? Let’s cook!

Why You’ll Love This Recipe

Here are just a few reasons why this air fryer chicken thighs recipe will quickly become a staple in your kitchen:

  • Speedy Preparation: With just 5 minutes of hands-on time, you can have a delicious meal on the table in less than 30 minutes!
  • Flavorful Marinade: This simple marinade packs a punch, combining spices that enhance the natural flavors of the chicken.
  • Healthy Option: Air frying reduces the amount of oil used, making this a heart-healthy dinner choice without sacrificing taste.
  • Kid-Friendly: Crispy skin and juicy meat mean even picky eaters will be asking for more.
  • Versatile Dish: Perfect for meal prep, you can pair these thighs with a variety of sides for a balanced meal.

Gathering Your Ingredients

Let’s get into the nitty-gritty of what you’ll need to whip up these air fryer chicken thighs. Here’s your shopping list:

  • 1 tablespoon paprika: This gives a warm, smoky flavor.
  • 1/2 tablespoon smoked paprika: For an extra layer of smokiness.
  • 2 teaspoons kosher salt: Essential for enhancing flavor.
  • 1 teaspoon garlic powder: Add a savory kick.
  • 1/2 teaspoon ground black pepper: A must for that gentle heat.
  • 4 bone-in, skin-on chicken thighs (about 2 to 2 1/2 pounds): You can use boneless thighs if you prefer.)
  • 2 tablespoons extra virgin olive oil: For marinating and crisping up the skin.
  • Lemon wedges: For squeezing over the top for brightness.
  • Chopped fresh parsley or cilantro: Optional, for garnishing.

Step-by-Step Guide to Perfect Air Fryer Chicken Thighs

Side view of crispy chicken thighs cooked in an air fryer, served with lemon wedges.

Now that you have your ingredients, let’s get cooking! Follow these simple steps:

  1. In a large bowl, combine the paprika, smoked paprika, salt, garlic powder, and black pepper.
  2. Pat the chicken thighs very dry on both sides, then add them to the bowl. Drizzle with the olive oil and toss to coat them in the spice mixture.
  3. Preheat your air fryer to 400°F. Add the chicken thighs in a single layer, skin-side down. Do not let them touch; cook in batches if necessary.
  4. Air fry the chicken thighs for 16 to 22 minutes, flipping halfway through. Check the thickest part of a thigh with a thermometer; it should read 155°F (it will reach 165°F while resting).
  5. Set the chicken aside, cover it, and let it rest for 5 minutes. Serve hot with lemon wedges squeezed over the top and sprinkled with fresh herbs.

Pro Tips for Success

Want to elevate your chicken thigh game? Here are some expert insights:

  • Marinate Longer: For even more flavor, marinate the chicken thighs for at least 30 minutes, or up to overnight in the fridge.
  • Don’t Crowd the Basket: Ensure the chicken thighs have enough space in the air fryer for even cooking and crispy skin.
  • Check for Doneness: Always use a meat thermometer to ensure the chicken reaches the correct internal temperature.
  • Experiment with Spices: Feel free to mix up the marinade with your favorite herbs and spices for unique flavor profiles.
  • Rest Before Serving: Letting the chicken rest helps retain its juices for maximum tenderness.
  • Use Fresh Ingredients: Fresh herbs and quality spices make a huge difference in flavor.
  • Pair with Vegetables: Air fry some veggies alongside the chicken for a complete meal!
  • Consider Bone-In Thighs: They provide more flavor and moisture compared to boneless cuts.

Avoid These Common Mistakes

To ensure success, here are some pitfalls to avoid:

  • Using Wet Chicken: Make sure to pat the chicken dry before marinating; moisture can prevent crispiness.
  • Skipping the Preheat: Always preheat your air fryer for the best texture.
  • Not Flipping: Flip the chicken halfway through cooking to ensure even crisping.
  • Ignoring the Resting Time: Cutting into the chicken too soon can cause juices to run out.

Delicious Variations to Try

Feeling adventurous? Here are some fun variations to customize your chicken thighs:

  • Spicy Variation: Add cayenne pepper or chili powder to the marinade for a kick.
  • Herb Infusion: Use fresh herbs like rosemary or thyme in the marinade for an aromatic twist.
  • Balsamic Glaze: Drizzle with balsamic vinegar before serving for a tangy finish.
  • Asian-Inspired: Mix soy sauce, ginger, and sesame oil into the marinade for a different flavor profile.

Storage and Make-Ahead Instructions

Got leftovers? Here’s how to store them:

  • Refrigerate: Store cooked chicken thighs in an airtight container for up to 4 days.
  • Freeze: For longer storage, freeze cooked chicken thighs for up to 3 months. Thaw in the fridge before reheating.
  • Reheat: To retain crispiness, reheat in the air fryer or oven rather than the microwave.

Frequently Asked Questions

Got questions? We’ve got answers!

  • Can I use boneless chicken thighs? Yes! Boneless thighs will cook faster, so adjust the cooking time accordingly.
  • What dipping sauces pair well? BBQ sauce, ranch, or a spicy aioli are great options!
  • Can I marinate chicken overnight? Absolutely! Just ensure it’s sealed properly to avoid contamination.
  • What should I serve with the chicken? Roasted veggies, a fresh salad, or quinoa are fantastic accompaniments.
  • Is this recipe gluten-free? Yes, as long as you use gluten-free spices and oils.
  • How do I know when the chicken is done? Use a meat thermometer; the internal temperature should be 165°F.
  • Can I make this recipe in the oven? Yes! Bake at 425°F for about 35-40 minutes, flipping halfway through.
  • What air fryer do you recommend? A model with a basket and a good temperature range, like the Cosori or Ninja brands, is ideal.

Nutritional Tips and Dietary Adaptations

This recipe is not only delicious but also nutritious! Here are some tips to make it even healthier:

  • Low-Sodium Option: Reduce the salt in the marinade or use a low-sodium alternative.
  • Lean Protein: Chicken thighs are rich in protein, making them a great choice for muscle recovery.
  • Healthy Fats: The olive oil used in the recipe is a great source of heart-healthy fats.
  • Vegetable Sides: Pair with a variety of colorful vegetables to boost the nutrient content.

Equipment Recommendations

To achieve the best results, here’s what you’ll need:

  • Air Fryer: A reliable air fryer is essential for this recipe. Look for one with adjustable temperature settings.
  • Mixing Bowls: Use a large bowl for marinating the chicken.
  • Meat Thermometer: Ensures the chicken is cooked safely and perfectly.
  • Spatula: For flipping the chicken thighs during cooking.

Serving Suggestions

Now that your chicken is ready, here are some tasty ways to serve it:

  • With a Side Salad: A fresh garden salad adds crunch and color!
  • Over Rice or Quinoa: Serve the chicken over a bed of grains for a filling meal.
  • Alongside Roasted Vegetables: Complement the chicken with seasonal veggies like asparagus or Brussels sprouts.
  • As Part of a Wrap: Slice the chicken and use it in wraps with fresh veggies for a tasty lunch option.

In conclusion, these juicy air fryer chicken thighs are not only an amazing weeknight meal but also a delicious way to enjoy healthy cooking. So grab your air fryer, gather your ingredients, and let’s make something fabulous together! Your taste buds will thank you!

Air Fryer Chicken Thighs with Simple Marinade

Prep Time 10 minutes
Cook Time 20 minutes
Total Time 30 minutes
Servings 4 servings
Calories 350
Juicy, flavorful chicken thighs cooked to perfection in the air fryer with a simple spice marinade. Perfect for a quick and delicious meal.

Ingredients

Spice Mix

  • 1 tablespoon paprika
  • 0.5 tablespoon smoked paprika
  • 2 teaspoons kosher salt
  • 1 teaspoon garlic powder
  • 0.5 teaspoon ground black pepper

Chicken

  • 4 bone-in, skin-on chicken thighs (about 2 to 2 1/2 pounds) chicken thighs (Use boneless for variation)
  • 2 tablespoons extra virgin olive oil
  • As needed N/A lemon wedges (For squeezing over the top)
  • As needed N/A chopped fresh parsley or cilantro (For sprinkling)

Instructions 

  • Mix paprika, smoked paprika, salt, garlic powder, and black pepper in a large bowl.
  • Pat chicken dry, add to bowl, drizzle with oil, and toss to coat.
  • Preheat air fryer to 400°F. Arrange chicken skin-side down in a single layer.
  • Air fry for 16-22 minutes, flipping halfway. Check for 155°F internal temp.
  • Rest for 5 minutes, then serve with lemon wedges and herbs.

Notes

Ensure chicken reaches the proper internal temperature for safety and best flavor.
Calories: 350kcal
Cost: $15
Course: Main Course
Cuisine: American
Keyword: chicken thighs

Unleashing Flavor: The Joy of Cooking Lemony Garlic Butter Chicken

Welcome to the vibrant world of Lemony Garlic Butter Chicken, where tender chicken meets a zesty butter sauce that promises to dance on your taste buds! This recipe is not just about feeding your body; it’s about nourishing your spirit with joy, energy, and bold flavors. Perfect for busy weeknights or spontaneous gatherings, this dish transforms simple ingredients into a gourmet experience that everyone will love. Ready to discover how simple and enjoyable healthy cooking can be? Let’s dive in!

Why You’ll Love This Recipe

There are countless reasons to adore this Lemony Garlic Butter Chicken, and I’m here to share the top five!

  • Quick and Easy: Whip up this delicious meal in just 30 minutes, making it perfect for those hectic evenings when time is of the essence.
  • Flavor Explosion: The combination of garlic, lemon, and butter creates a mouthwatering sauce that elevates the chicken to a whole new level of deliciousness.
  • Versatile Ingredients: Using simple pantry staples, you can customize the recipe based on what you have on hand or your dietary preferences.
  • Healthy and Nourishing: Packed with protein and healthy fats, this dish supports your wellness goals without sacrificing flavor.
  • Impressive Presentation: The vibrant colors and aromatic scents make this dish a showstopper, perfect for impressing guests or simply treating yourself!

Ingredients Breakdown

Let’s get into the heart of our recipe: the ingredients! Each component plays a crucial role in creating that zesty, buttery flavor.

  • Chicken: 1 ½ pounds boneless, skinless chicken breasts, cut into bite-sized pieces. You can substitute with thighs for a juicier option.
  • Seasoning: Salt and freshly ground black pepper to taste. Seasoning is key to enhancing the dish’s flavors.
  • Olive Oil: 2 tablespoons for cooking. This adds healthy fats and helps achieve that golden-brown color.
  • Unsalted Butter: 6 tablespoons for a rich, buttery sauce. Use unsalted to control the saltiness of your dish.
  • Garlic: 4 cloves, minced. Fresh garlic adds that aromatic punch that pairs beautifully with lemon.
  • Dijon Mustard: 1 tablespoon for a tangy depth of flavor.
  • Lemon Juice and Zest: 1 tablespoon of fresh lemon juice and 1 teaspoon of lemon zest brighten the dish with acidity.
  • Red Pepper Flakes: 1 teaspoon for a hint of spice. Adjust to your heat preference!
  • Smoked Paprika: 1 teaspoon for a subtle smokiness that complements the other flavors.
  • Fresh Herbs: 1 tablespoon chopped parsley and 1 teaspoon chopped thyme. These add freshness and color to your plate.
  • Optional: ½ teaspoon cayenne pepper for those who like it hot!

Step-by-Step Instructions

Side view of tender chicken breasts cooked in a creamy lemon garlic butter sauce.

Ready to bring this dish to life? Follow these simple steps for a delicious result!

  1. Pat the chicken pieces dry with paper towels. This helps achieve that perfect sear!
  2. Heat a large skillet over medium-high heat and add the olive oil. Once hot, add the chicken in batches.
  3. Cook for about 3–4 minutes on each side until golden brown and cooked through. Transfer to a plate and set aside.
  4. Lower the heat to medium, add the butter to the same skillet, and melt it. Stir in the minced garlic for about 30 seconds until fragrant.
  5. Mix in the Dijon mustard, lemon juice, lemon zest, red pepper flakes, smoked paprika, parsley, and thyme. If you’re feeling adventurous, add cayenne pepper!
  6. Return the chicken to the skillet, tossing to coat in the sauce. Let it simmer for 1–2 minutes, allowing all those flavors to meld.
  7. Taste and adjust seasoning as needed. Garnish with extra parsley and serve hot with lemon wedges on the side.

Pro Tips for Making the Best Lemony Garlic Butter Chicken

Want to take your cooking game to the next level? Here are some expert insights!

  • Don’t Overcrowd the Pan: Cooking in batches ensures your chicken gets that beautiful golden crust. Overcrowding traps steam, preventing browning.
  • Use Fresh Ingredients: Fresh garlic and herbs make a significant difference in flavor. Opt for fresh whenever possible.
  • Adjust for Acidity: If you find the dish too tangy, balance it with a pinch of sugar or a bit more butter.
  • Experiment with Herbs: Feel free to substitute thyme with rosemary or oregano for a different flavor profile.
  • Let it Rest: Allow the chicken to rest before serving. This helps retain juices and enhances tenderness.
  • Serve with Sides: Pair your chicken with sautéed veggies, rice, or a fresh salad for a complete meal.
  • Make it Ahead: Prepare the sauce in advance; just add the chicken before serving to keep it fresh!
  • Store Properly: Store leftovers in an airtight container for up to 3 days in the fridge.

Common Mistakes & Troubleshooting

Even the best cooks can hit a snag. Here are some common mistakes and how to avoid them:

  • Chicken Sticking: Ensure your skillet is hot enough and use enough oil to prevent sticking.
  • Overcooking Garlic: If the garlic burns, it becomes bitter. Keep an eye on it and stir frequently.
  • Dry Chicken: Overcooking is the main culprit. Use a meat thermometer; chicken should reach an internal temperature of 165°F.
  • Too Much Acid: If the dish is too sour, add a pinch of sugar or more butter to balance it out.

Delicious Variations

Mix things up with these fun twists on the classic recipe!

  • Garlic Butter Shrimp: Substitute chicken with shrimp for a seafood delight!
  • Veggie Medley: Add bell peppers, zucchini, or asparagus to the skillet for extra nutrients and color.
  • Lemony Garlic Butter Tofu: For a plant-based option, replace chicken with tofu, ensuring it’s well-pressed and cubed.
  • Spicy Garlic Butter Chicken: Increase the red pepper flakes or add sriracha for a fiery kick!

Storage and Make-Ahead Instructions

Planning to make this dish in advance? Here’s how to store and reheat it perfectly:

  • Refrigeration: Store leftovers in an airtight container for up to 3 days. Reheat on the stove over low heat, adding a splash of water to keep it moist.
  • Freezing: This dish can be frozen for up to a month. Thaw overnight in the refrigerator before reheating.
  • Make-Ahead Sauce: Prepare the garlic butter sauce in advance. Just add the chicken right before serving for the freshest taste.

Frequently Asked Questions

Got questions? I’ve got answers! Here are some FAQs about Lemony Garlic Butter Chicken.

  • Can I use frozen chicken? Yes! Just ensure it’s fully thawed before cooking for even results.
  • What can I serve with this chicken? This dish pairs beautifully with rice, pasta, or a crunchy salad.
  • Can I make this dish dairy-free? Absolutely! Substitute the butter with a dairy-free alternative like vegan butter or olive oil.
  • Is this recipe gluten-free? Yes! Just be sure to use gluten-free Dijon mustard.
  • How can I make it spicier? Add cayenne pepper or increase the red pepper flakes to your liking!
  • What herbs can I use instead of thyme? Rosemary or basil are great substitutes!
  • Can I double this recipe? Yes! Just ensure your skillet is large enough or cook in batches.
  • How can I store leftovers? Keep in an airtight container in the fridge for up to 3 days.

Nutritional Tips and Dietary Adaptations

This Lemony Garlic Butter Chicken not only tastes amazing but can also fit into various dietary plans:

  • High-Protein: This recipe is rich in protein, making it ideal for muscle repair and growth.
  • Low-Carb Option: Serve it with cauliflower rice or zucchini noodles for a low-carb meal.
  • Balanced Meal: Pair with green vegetables for a well-rounded, nutrient-packed dinner.

Essential Equipment for the Recipe

Here’s what you need to make this dish shine:

  • Skillet: A large skillet is essential for cooking the chicken evenly and creating that delicious sauce.
  • Spatula: Use a sturdy spatula to flip the chicken without breaking it apart.
  • Meat Thermometer: To ensure perfectly cooked chicken every time!
  • Cutting Board and Knife: For prepping your ingredients efficiently.

Serving Suggestions

To make this meal even more delightful, consider these serving suggestions:

  • Fresh Salad: Serve with a crisp green salad topped with a citrus vinaigrette to complement the chicken.
  • Grain Side: Fluffy quinoa or brown rice pairs perfectly with the buttery sauce.
  • Vegetable Medley: Roasted or steamed vegetables can add color and nutrients to your plate.

Conclusion: Your Kitchen Adventure Awaits!

Now that you’re armed with this comprehensive guide to Lemony Garlic Butter Chicken, it’s time to get cooking! Embrace the joy of healthy eating while creating a dish that dazzles both your tastebuds and your dinner guests. Remember, cooking is an adventure—so have fun, experiment, and enjoy every moment in the kitchen. Bon appétit!

Lemony Garlic Butter Chicken

Prep Time 10 minutes
Cook Time 15 minutes
Total Time 25 minutes
Servings 4 servings
Calories 450
A flavorful and juicy chicken dish infused with lemon, garlic, and herbs, perfect for a quick and satisfying meal.

Ingredients

Protein

  • 1.5 pounds boneless, skinless chicken breasts, cut into bite-sized pieces
  • 2 tablespoons olive oil

Dairy & Fats

  • 6 tablespoons unsalted butter

Aromatics & Condiments

  • 4 cloves garlic, minced
  • 1 tablespoon Dijon mustard
  • 1 tablespoon fresh lemon juice
  • 1 teaspoon lemon zest
  • 1 teaspoon red pepper flakes
  • 1 teaspoon smoked paprika

Herbs

  • 1 tablespoon fresh parsley, chopped (plus extra for garnish)
  • 1 teaspoon fresh thyme, chopped

Optional

  • 0.5 teaspoon cayenne pepper (optional)

For serving

  • Lemon wedges (for serving)

Instructions 

  • Pat chicken dry. Heat oil in a skillet over medium-high heat.
  • Cook chicken in batches 3–4 minutes per side until golden. Set aside.
  • Melt butter in skillet, add garlic, and cook 30 seconds.
  • Add mustard, lemon juice, zest, spices, and herbs. Return chicken, toss, and simmer 1–2 minutes.
  • Garnish with parsley, serve with lemon wedges.

Notes

Use fresh herbs for best flavor. Adjust seasoning to taste.
Calories: 450kcal
Cost: $15
Course: Main Course
Cuisine: American
Keyword: Chicken

Discover the Zesty Lemon Dill Cucumber Salad: Your Summer Essential!

Welcome to your next favorite summer dish! The Zesty Lemon Dill Cucumber Salad is not just a salad; it’s a vibrant celebration of flavor that transforms ordinary cucumbers into a delightful culinary experience. Bursting with zesty lemon and aromatic dill, this salad is perfect for warm days and casual gatherings. In just minutes, you can whip up a fresh, healthy side that complements any meal. Let’s dive into why this salad deserves a spot on your table!

Why You’ll Love This Recipe

This salad isn’t just a pretty face! Here are five reasons why the Zesty Lemon Dill Cucumber Salad is a must-try:

  • Quick & Easy: Ready in under 10 minutes! Perfect for busy weeknights or last-minute gatherings.
  • Refreshing Crunch: The crisp cucumbers combined with a zesty dressing create a refreshing bite that’s simply irresistible.
  • Healthy & Nutritious: Low in calories but high in flavor, this salad is packed with vitamins and minerals.
  • Versatile Side Dish: Pairs beautifully with grilled meats, sandwiches, or as a light meal on its own.
  • Customizable: Easily adapt the recipe with your favorite ingredients or dietary needs!

Ingredient Breakdown

Let’s explore the star ingredients in our salad and some tasty substitutions if you want to switch things up!

Main Ingredients

  • 2 cups Cucumbers: Use Hot House or English cucumbers for the best crunch. Regular cucumbers work too but may have a different texture.
  • 1 clove Fresh Minced Garlic: Fresh garlic brings depth; garlic powder can substitute in a pinch.
  • 3 tablespoons Lemon Juice: Freshly squeezed lemon juice is ideal for the best flavor.
  • 2 tablespoons Extra Virgin Olive Oil: This adds richness; feel free to use light vegetable oil if preferred.
  • 1 tablespoon Dried Dill Weed: Fresh dill can be used at a 1:1 ratio for an even bolder flavor.
  • 1 teaspoon Salt: Kosher or sea salt enhances the flavors.
  • 1/2 teaspoon Ground Black Pepper: Adjust to taste for a little kick!

Substitutions

  • Vegan Option: All ingredients are vegan-friendly!
  • Low Sodium: Reduce salt or use a salt substitute.
  • Oil-Free: Swap olive oil with water or vegetable broth for a lighter version.
  • Herb Variations: Try fresh parsley, cilantro, or basil for a different flavor twist!

Pro Tips for Perfect Salad

Freshly prepared Zesty Lemon Dill Cucumber Salad served in a bowl.

To ensure your salad is the best it can be, check out these expert tips!

  • Chill the Cucumbers: Refrigerate cucumbers before slicing for an extra refreshing crunch.
  • Layer Ingredients: For maximum flavor, layer the cucumbers and dressing separately until serving.
  • Let it Marinate: Allow the salad to sit for at least 15 minutes before serving to let the flavors meld.
  • Keep it Crisp: Store dressing separately to avoid sogginess if making ahead.
  • Garnish Wisely: Top with additional fresh herbs or lemon slices for a pop of color and flavor.
  • Adjust Seasoning: Taste and tweak the seasoning right before serving for the best results.
  • Use a Mandoline: For perfectly sliced cucumbers, use a mandoline for consistency!
  • Freshness Matters: Always use fresh herbs and high-quality ingredients for the best flavor.

Avoiding Common Mistakes

Let’s tackle some common pitfalls to ensure your salad shines:

  • Soggy Salad: Avoid this by keeping cucumbers dry and mixing dressing just before serving.
  • Too Salty: Start with less salt and adjust to taste as you mix in the dressing.
  • Overdressed: Less is more! Start with a little dressing and add more as needed.

Variations to Spice Things Up

Feeling creative? Here are four exciting variations to try:

  • Avocado Twist: Add diced avocado for creaminess.
  • Spicy Kick: Incorporate chopped jalapeños or red pepper flakes for heat.
  • Feta Cheese: Crumbled feta adds a tangy richness.
  • Nutty Crunch: Toss in some toasted nuts or seeds for added texture.

Storage & Make-Ahead Tips

This salad is perfect for meal prep! Here’s how to store it:

  • Refrigerator: Store in an airtight container for up to 3 days.
  • Make Ahead: Prepare the salad a day in advance; just keep the dressing separate until serving.

Frequently Asked Questions

Got questions? We’ve got answers!

  • Can I use different vegetables? Yes! Feel free to add bell peppers, radishes, or even carrots!
  • Is this salad gluten-free? Absolutely, all ingredients are gluten-free!
  • How many servings does this recipe make? This recipe serves 4 as a side dish.
  • Can I freeze this salad? It’s best enjoyed fresh; freezing can affect the texture of cucumbers.
  • What’s the best way to serve it? Serve chilled as a side dish or light lunch.
  • Can I add protein? Yes! Grilled chicken or chickpeas would pair wonderfully.
  • How do I make it spicier? Add fresh herbs like cilantro or a dash of hot sauce.
  • What if I don’t have dill? Any fresh herb can be used as a substitute; parsley is a great option!

Nutritional Benefits & Dietary Adaptations

This salad not only tastes great but is also packed with nutritional benefits:

  • Low-Calorie Delight: Each serving is low in calories, making it a great option for weight management.
  • Hydrating Ingredients: Cucumbers are over 95% water, keeping you hydrated in the summer heat.
  • Rich in Vitamins: Loaded with vitamins A and C, it supports your immune system and skin health.
  • Heart-Healthy Fats: Olive oil provides healthy fats that promote heart health.

Recommended Equipment

Here’s what you’ll need to whip up this salad:

  • Cutting Board & Knife: Essential for chopping your cucumbers and garlic.
  • Bowl: A large mixing bowl for combining your ingredients.
  • Whisk: For mixing the dressing until smooth.
  • Measuring Cups & Spoons: To ensure accurate ingredient proportions.

Serving Suggestions

Ready to serve? Here are a few ideas:

  • Grilled Meats: Pairs perfectly with grilled chicken, steak, or fish.
  • Sandwiches: A refreshing side to elevate any sandwich.
  • Picnics: Ideal for outdoor gatherings or picnics!
  • Light Lunch: Enjoy it alone for a quick and nutritious lunch.

Now that you’re armed with everything you need to make the most amazing Zesty Lemon Dill Cucumber Salad, it’s time to get cooking! Remember, cooking should be fun, so don’t hesitate to get creative and make it your own. Enjoy the fresh flavors and the joy of cooking!

Zesty Lemon Dill Cucumber Salad for a Refreshing Summer Crunch

Prep Time 10 minutes
Total Time 10 minutes
Servings 4 servings
Calories 80
This vibrant cucumber salad combines fresh lemon, dill, and garlic for a crisp, refreshing summer side.

Ingredients

Cucumbers

  • 2 cups Cucumbers (Hot House or English, chopped)

Garlic

  • 1 clove Fresh Minced Garlic (or garlic powder in smaller amounts)

Lemon Juice

  • 3 tablespoons Lemon Juice (fresh is best)

Olive Oil

  • 2 tablespoons Extra Virgin Olive Oil (or light vegetable oil)

Dill

  • 1 tablespoon Dried Dill Weed (or fresh dill at a 1:1 ratio)

Salt

  • 1 teaspoon Salt (or kosher/sea salt)

Black Pepper

  • 1/2 teaspoon Ground Black Pepper (or white pepper)

Lemon Dill Marinade

  • Lemon Dill Marinade (A blend of the above ingredients)

Instructions 

  • Chop the cucumbers and place in a bowl.
  • Mix lemon juice, olive oil, minced garlic, dill, salt, and pepper to make the marinade.
  • Pour the marinade over the cucumbers and toss to combine.
  • Let sit for 10 minutes to allow flavors to meld.
  • Serve chilled as a refreshing summer side.

Notes

For extra flavor, add fresh dill just before serving.
Calories: 80kcal
Cost: $8
Course: Side Dish
Cuisine: American
Keyword: cucumber, Dill, Lemon

Unlock the Flavor: Air Fryer Lemon Chicken Bites

Are you ready to tantalize your taste buds and bring a burst of flavor to your dinner table? Look no further than these Air Fryer Lemon Chicken Bites! This vibrant recipe combines juicy chicken with the zesty goodness of lemon, making it a healthy and exciting option for any meal. Whether you’re a busy professional, a parent on the go, or just someone who loves delicious food, this dish promises to deliver satisfaction in every bite.

In this comprehensive guide, we’ll explore everything you need to know about making the best air fryer lemon chicken bites, from the ingredient breakdown to serving suggestions and expert tips. Let’s dive in!

Why You’ll Love This Recipe

  • Quick and Easy: This recipe is perfect for those busy nights when you need a delicious meal on the table in under 30 minutes.
  • Healthy and Nutritious: Packed with lean protein and fresh ingredients, these chicken bites are a guilt-free indulgence.
  • Versatile: Enjoy them as an appetizer, main dish, or even in salads and wraps. The possibilities are endless!
  • Flavor Explosion: The combination of lemon juice, zest, and spices creates a mouthwatering flavor profile that will leave you craving more.
  • Kid-Friendly: These chicken bites are not only healthy but also fun for kids to eat, making them a hit for family dinners.

Ingredient Breakdown

Let’s take a closer look at the ingredients that make these air fryer lemon chicken bites so irresistible:

  • 1 pound Boneless, skinless chicken breasts: Cut into bite-sized pieces for even cooking. You can substitute with chicken thighs for a richer flavor.
  • 2 tablespoons Olive oil: This adds moisture and helps the spices stick. Feel free to swap with avocado oil for a different taste.
  • 2 tablespoons Lemon juice: Freshly squeezed is key for that bright flavor. Bottled juice won’t provide the same zing.
  • 1 tablespoon Lemon zest: Adds a punch of citrus flavor. Zest your lemons right before using for the best aroma.
  • 1 teaspoon Garlic powder: A must for that savory depth. Fresh garlic can be used as a substitute if preferred.
  • 1 teaspoon Onion powder: Enhances the overall flavor profile.
  • 1 teaspoon Salt: Adjust to taste, especially if using salted ingredients elsewhere.
  • 1 teaspoon Black pepper: Freshly cracked pepper adds a nice bite.
  • 2 tablespoons Chopped fresh parsley: For garnishing and a pop of color.
  • 2 pieces Lemon wedges: For serving and extra zing!

Step-by-Step Instructions

Juicy lemon chicken bites arranged on a plate with lemon wedges and parsley.

Ready to get cooking? Follow these steps for perfectly air-fried lemon chicken bites:

  1. Marinate the Chicken: In a bowl, combine olive oil, lemon juice, lemon zest, garlic powder, onion powder, salt, and black pepper. Add the chicken pieces, ensuring they are well coated. Let them marinate for at least 15 minutes (or up to 2 hours for maximum flavor).
  2. Preheat the Air Fryer: Set your air fryer to 400°F (200°C) and let it preheat for about 5 minutes. This ensures even cooking.
  3. Air Fry the Chicken Bites: Place the marinated chicken in a single layer in the air fryer basket. Cook for 10-12 minutes, shaking the basket halfway through to ensure even cooking.
  4. Check for Doneness: The chicken should be golden brown and cooked through (internal temperature should reach 165°F). If needed, cook for an additional 2-3 minutes.
  5. Garnish and Serve: Once cooked, remove the chicken from the air fryer and sprinkle with fresh parsley. Serve hot with lemon wedges on the side.

Expert Tips for Perfect Chicken Bites

  • Don’t Overcrowd: Ensure the chicken bites are in a single layer for even cooking; overcrowding can lead to uneven results.
  • Adjust the Cooking Time: Depending on the size of your chicken pieces, you may need to adjust the cooking time. Cut larger pieces smaller for quicker cooking.
  • Use Fresh Ingredients: Fresh herbs and citrus will elevate the dish. Dried herbs can be used in a pinch, but fresh is always best.
  • Experiment with Spices: Feel free to add your favorite spices, like paprika or cayenne, to customize the flavor to your liking.
  • Check for Crispiness: For extra crunch, you can spray the chicken lightly with cooking spray before air frying.
  • Let Them Rest: Allow the chicken to rest for a few minutes after cooking; this helps retain moisture.
  • Batch Cooking: If making a larger batch, cook the chicken in multiple batches to ensure perfect cooking.
  • Pairing: These bites pair wonderfully with dipping sauces like tzatziki, honey mustard, or a spicy aioli.

Common Mistakes and Troubleshooting

Here are some common issues you might encounter and how to fix them:

  • Chicken is Dry: Overcooking is usually the culprit. Use a meat thermometer to ensure optimal doneness.
  • Not Enough Flavor: Ensure you marinate the chicken long enough to absorb all the flavors from the spices and lemon.
  • Sticking to the Basket: If the chicken sticks, consider lightly spraying the basket with oil before cooking.

Variations to Try

Feeling adventurous? Here are some fun variations to elevate your lemon chicken bites:

  • Honey Garlic Lemon Chicken: Add a tablespoon of honey to the marinade for a sweet touch.
  • Spicy Lemon Chicken: Incorporate red pepper flakes or cayenne pepper for a kick!
  • Herb-Infused: Mix in fresh herbs like thyme, oregano, or basil for a fragrant twist.
  • Asian-Inspired: Substitute lemon juice with soy sauce and add sesame oil for a unique flavor.

Storage and Make-Ahead Instructions

Want to prepare these bites in advance? Here’s how:

  • Make-Ahead: Marinate the chicken up to 24 hours in advance. Store in the fridge until ready to cook.
  • Storage: Leftover chicken can be stored in an airtight container in the fridge for up to 3 days.
  • Reheating: Reheat in the air fryer at 350°F (175°C) for about 5 minutes to maintain crispiness.

Frequently Asked Questions (FAQ)

  • Can I use frozen chicken? Yes, but thaw it completely before marinating for the best flavor.
  • Can I double the recipe? Absolutely! Just cook in batches to maintain quality.
  • What can I serve with these chicken bites? They’re great with salads, rice, or as a snack with dipping sauces!
  • Can I use a different type of chicken? Yes, chicken thighs or even shrimp would work well in this recipe.
  • Is this recipe gluten-free? Yes, all the ingredients used are gluten-free, making it a great option for those with dietary restrictions.
  • How can I make this dish lower in calories? Use less oil and opt for skinless chicken to reduce fat content.
  • What’s the best way to serve these chicken bites? Serve hot with fresh lemon wedges and a sprinkle of parsley for garnishing.
  • Can I use lemon juice from a bottle? While it’s possible, fresh lemon juice yields the best flavor and aroma.

Nutritional Tips and Dietary Adaptations

This dish is not only delicious but also packed with nutrients. Here’s how to adapt it:

  • Low-Carb Option: Pair with a side of roasted vegetables instead of rice for a low-carb meal.
  • Keto-Friendly: Use almond flour for a crispy coating instead of breadcrumbs.
  • High-Protein Boost: Add chickpeas or quinoa as a side for extra protein and fiber.

Essential Equipment Recommendations

To achieve the best results, having the right tools is essential:

  • Air Fryer: A reliable air fryer is key for perfectly cooked chicken bites.
  • Mixing Bowls: Use these for marinating and mixing ingredients.
  • Meat Thermometer: To ensure your chicken is cooked to perfection.
  • Spatula: A silicone spatula is great for tossing the chicken without damaging the air fryer basket.

Serving Suggestions

Here are a few delicious ways to serve your air fryer lemon chicken bites:

  • In a Salad: Toss the chicken bites with greens, cherry tomatoes, and a light vinaigrette for a refreshing meal.
  • As Wraps: Use whole wheat or lettuce wraps for a healthy handheld option.
  • With Dipping Sauces: Offer a variety of sauces, such as ranch, barbecue, or a spicy aioli.

Now that you have the ultimate guide to making Air Fryer Lemon Chicken Bites, it’s time to roll up your sleeves and get cooking! This recipe is not just a meal; it’s an experience bursting with flavor and joy. Remember, cooking is all about having fun and enjoying the process. So, gather your ingredients, unleash your creativity, and treat yourself and your loved ones to a dish that’s sure to impress. Happy cooking!

Air Fryer Lemon Chicken Bites: Zesty, Juicy Goodness Await!

Prep Time 10 minutes
Cook Time 15 minutes
Total Time 25 minutes
Servings 4 servings
Calories 250
Enjoy tender, flavorful chicken bites infused with fresh lemon, cooked to perfection in the air fryer for a quick and healthy meal.

Ingredients

Chicken

  • 1 pound Boneless, skinless chicken breasts (Cut into bite-sized pieces)
  • 2 tablespoons Olive oil (For marinade)
  • 2 tablespoons Lemon juice (Freshly squeezed)
  • 1 tablespoon Lemon zest
  • 1 teaspoon Garlic powder
  • 1 teaspoon Onion powder
  • 1 teaspoon Salt
  • 1 teaspoon Black pepper
  • 2 tablespoons Chopped fresh parsley (For garnishing)
  • 2 pieces Lemon wedges (For serving)

Instructions 

  • Marinate chicken pieces with olive oil, lemon juice, lemon zest, garlic powder, onion powder, salt, and pepper. Let sit for 10 minutes.
  • Preheat the air fryer to 400°F (200°C).
  • Place marinated chicken in the air fryer basket in a single layer.
  • Cook for 12-15 minutes, shaking halfway through, until chicken is cooked through and slightly crispy.
  • Garnish with chopped parsley and serve with lemon wedges.

Notes

For extra flavor, add a pinch of red pepper flakes to the marinade.
Calories: 250kcal
Cost: $15
Course: Main Course
Cuisine: American
Keyword: Chicken, Lemon

Welcome to a Flavor Explosion: Creamy Cucumber Salad with Dill!

Are you ready to elevate your side dish game with a refreshing, creamy cucumber salad that will have everyone at the table asking for seconds? This Creamy Cucumber Salad with Dill and Sour Cream is not just another recipe; it’s a celebration of flavors and textures that brings a burst of freshness to any meal. With just a handful of ingredients and a few simple steps, you’ll discover how easy it is to whip up this delightful dish that’s perfect for gatherings, potlucks, or a casual weeknight dinner. Let’s dive into this culinary adventure!

Why You’ll Love This Recipe

This creamy cucumber salad is more than just a side dish; it’s a versatile addition to your meals that offers numerous benefits:

  • Quick and Easy: With minimal prep time, this salad can be thrown together in just 15 minutes, making it perfect for busy schedules.
  • Health Benefits: Packed with fresh cucumbers, this salad is not only low in calories but also a great source of hydration and essential nutrients.
  • Endless Customization: Whether you prefer it classic or with a twist, there are endless variations to suit your taste buds.
  • Perfect for Meal Prep: This salad stays fresh in the fridge, making it an ideal make-ahead option for busy weeks.
  • Crowd-Pleaser: Its creamy texture and zesty flavor profile make it a hit among family and friends!

Ingredients Breakdown: What You’ll Need

Let’s take a closer look at the ingredients that make this salad shine—and don’t forget, there are plenty of substitutions if you’re missing something!

  • Fresh English Cucumbers: Use 2 large, thinly sliced cucumbers for that crisp texture. If unavailable, Persian cucumbers work well too!
  • Sour Cream: Half a cup adds the creamy base. Greek yogurt is a fantastic low-fat substitute if you want a lighter option.
  • Fresh Dill: Two teaspoons of chopped dill bring a bright, herby flavor. Dried dill can be used in a pinch, but fresh is always best!
  • White Vinegar: One tablespoon adds a tangy kick that balances the creaminess perfectly.
  • Minced Garlic: One teaspoon for a subtle depth of flavor. Adjust based on your garlic preference!
  • Salt and Pepper: Essential for seasoning; feel free to adjust to taste!
  • Sugar: Just half a teaspoon to enhance the flavors without making it sweet.

How to Make Creamy Cucumber Salad

Side view of a cucumber salad featuring sliced cucumbers, dill, and a creamy dressing.

Ready to get your hands dirty? Here’s how to make this creamy delight in just a few simple steps:

  1. Thinly slice two large cucumbers as thin as possible for the best texture.
  2. Place the cucumber slices into a large mixing bowl and set aside.
  3. In a smaller bowl, combine the sour cream, fresh dill, white vinegar, minced garlic, salt, sugar, and pepper.
  4. Pour the creamy dressing over the cucumber slices and toss to coat evenly.
  5. Serve immediately for the freshest taste, or refrigerate for at least 30 minutes to let the flavors meld!

Pro Tips for Perfection

Want to take your creamy cucumber salad to the next level? Check out these expert insights!

  • Chill Before Serving: Letting the salad sit in the fridge for a while enhances the flavors and improves the texture.
  • Prep Ahead: This salad keeps well, so feel free to make it a day in advance and enjoy the convenience!
  • Experiment with Add-Ins: Consider adding sliced radishes, cherry tomatoes, or even diced bell peppers for extra color and crunch.
  • Adjust the Creaminess: If you prefer a lighter salad, you can replace some of the sour cream with more vinegar or yogurt.
  • Season to Taste: Always taste your salad before serving; you might want to add a bit more salt or vinegar!

Common Mistakes & Troubleshooting

Even the best chefs make mistakes! Here are some common pitfalls to avoid:

  • Over-salting: Start with a little salt; you can always add more but it’s hard to take it out!
  • Using Thick Cucumbers: If your cucumbers are thick-skinned or seedy, peel and seed them for a better texture.
  • Not Letting It Chill: Skipping the chilling step can result in a less flavorful salad. Patience is key!

Variations to Spice Things Up

Feeling adventurous? Here are some fun twists on the classic creamy cucumber salad:

  • Greek Twist: Add crumbled feta cheese and kalamata olives for a Mediterranean flavor.
  • Spicy Kick: Incorporate diced jalapeños or a dash of hot sauce for some heat!
  • Nutty Flavor: Toss in some toasted walnuts or sunflower seeds for a crunchy texture.
  • Asian Flair: Swap out sour cream for a sesame dressing and add sliced carrots and scallions.

Storage & Make Ahead Instructions

This creamy cucumber salad can be stored in the refrigerator for up to 3 days. Just make sure to:

  • Store in an airtight container to keep it fresh.
  • Give it a good stir before serving if it has been sitting in the fridge.

Frequently Asked Questions

Here are some common questions about our creamy cucumber salad:

  • Can I use other types of cucumbers? Yes! English, Persian, or even Kirby cucumbers work, but English cucumbers have the best flavor and texture.
  • Is this salad gluten-free? Absolutely! All the ingredients are naturally gluten-free.
  • Can I make this salad vegan? Yes! Substitute sour cream with a vegan alternative like cashew cream or coconut yogurt.
  • How long can I store this salad? It lasts up to 3 days in the fridge, but it’s best enjoyed fresh!
  • What can I serve with this salad? It pairs wonderfully with grilled meats, sandwiches, or as part of a potluck spread.
  • Can I add protein to this salad? Definitely! Grilled chicken or chickpeas can make it a heartier meal.
  • Does it need to be refrigerated? Yes, to keep it fresh and safe to eat, it should be stored in the fridge.
  • Why is my salad watery? Cucumbers release water when salted; to reduce this, consider salting them beforehand and draining.

Nutritional Tips and Dietary Adaptations

This creamy cucumber salad is not only delicious but also adaptable to fit various dietary needs:

  • Low-Carb: Perfect for ketogenic diets, this salad is low in carbs while being high in flavor.
  • Low-Calorie Option: Use Greek yogurt instead of sour cream for a lighter version.
  • High-Protein Version: Add chickpeas or grilled chicken to boost protein content.

Equipment Recommendations

You don’t need fancy tools to whip up this salad, but some handy items can make your life easier:

  • Sharp Knife: A good knife is essential for slicing cucumbers thinly.
  • Cutting Board: Keep your workspace organized by using a spacious cutting board.
  • Mixing Bowls: Having a large bowl for mixing helps you toss everything together effortlessly.

Serving Suggestions

This creamy cucumber salad is incredibly versatile and pairs well with a variety of dishes:

  • Serve alongside grilled meats like chicken or steak for a refreshing contrast.
  • Pair with sandwiches or wraps for a crunchy side.
  • Include it in a picnic spread for a bright, fresh option.

Conclusion: Your New Favorite Salad Awaits!

Now that you have all the tools and tips you need, it’s time to make this Creamy Cucumber Salad with Dill your go-to side dish. With its irresistible flavors and simple preparation, you’ll find yourself whipping it up time and time again. Enjoy the delightful crunch of cucumbers and the creamy dressing that ties it all together. Happy cooking, and here’s to making every meal a celebration of flavor!

Cucumber Salad with Dill and Sour Cream

Prep Time 10 minutes
Total Time 10 minutes
Servings 4 servings
Calories 120
A refreshing and easy cucumber salad perfect for a light side dish or snack, featuring fresh dill and creamy sour cream.

Ingredients

Cucumbers

  • 0.5 cup sour cream
  • 2 teaspoons chopped fresh dill
  • 1 tablespoon white vinegar
  • 1 teaspoon minced garlic
  • 0.5 teaspoon salt
  • 0.5 teaspoon sugar
  • 0.25 teaspoon pepper

Cucumbers

  • 2 large English cucumbers (sliced thin)

Instructions 

  • Thinly slice the cucumbers and place in a bowl.
  • Mix sour cream, dill, vinegar, garlic, salt, sugar, and pepper in a small bowl.
  • Pour dressing over cucumbers and toss to coat.
  • Serve immediately or chill in the fridge before serving.

Notes

For extra flavor, add a squeeze of lemon before serving.
Calories: 120kcal
Cost: $8
Course: Side Dish
Cuisine: international
Keyword: cucumber

Unlock the Secrets to a Zesty Air Fryer Chicken Salad

Welcome to a culinary adventure where healthy meets delicious! If you’re looking for a vibrant and nutritious meal that can easily become a staple in your kitchen, you’ve landed in the right place. This Air Fryer Chicken Salad is packed with flavor, colorful veggies, and a creamy dressing that will make your taste buds dance. Whether you’re meal prepping for the week or looking for a quick lunch, this recipe is your go-to for a wholesome boost.

In this guide, we’ll dive deep into why you’ll love this recipe, the essential ingredients, expert tips, and variations to keep your meals exciting. Let’s get cooking!

Why You’ll Love This Recipe

  • Quick Cooking Time: The air fryer cooks your chicken to perfection in just 15 minutes, making it a time-saver for busy weeknights.
  • Flavor Explosion: With a zesty blend of spices and a creamy dressing, this chicken salad is a flavor powerhouse that’s anything but boring.
  • Meal Prep Friendly: Make a large batch on Sunday, and you’ll have delicious lunches ready to go for the week.
  • Customizable: Easily swap out ingredients to suit your taste or dietary needs—this recipe is versatile!
  • Nutrient-Dense: Packed with lean protein, healthy fats, and fresh veggies, this salad fuels your body with energy and nutrition.

Ingredients

Here’s what you’ll need to whip up this scrumptious air fryer chicken salad:

  • 1.5 lbs (680g) boneless, skinless chicken breasts
  • 2 tablespoons olive oil
  • 1 teaspoon garlic powder
  • 1 teaspoon onion powder
  • 1 teaspoon paprika
  • ½ teaspoon salt
  • ½ teaspoon black pepper
  • ¾ cup mayonnaise
  • 2 tablespoons Dijon mustard
  • 1 tablespoon lemon juice
  • 2 celery stalks, finely diced (about 1 cup)
  • ½ red onion, finely diced (about ½ cup)
  • ½ cup dried cranberries
  • ½ cup chopped pecans, toasted
  • 2 tablespoons fresh dill, chopped (or 1 teaspoon dried)
  • Salt and pepper to taste

**Ingredient Substitutions**: If you’re missing some ingredients, don’t worry! Here are some easy swaps:

  • Chicken: Use chicken thighs for a richer flavor.
  • Mayonnaise: Swap with Greek yogurt for a lighter dressing.
  • Dried Cranberries: Try raisins or chopped apples for a different sweetness.
  • Pecans: Almonds or walnuts work great as substitutes.

Step-by-Step Instructions: How to Make Air Fryer Chicken Salad

A vibrant plate of Air Fryer Chicken Salad with visible ingredients like cranberries, celery, and pecans.

Ready to get cooking? Follow these simple steps:

  1. Start by patting your chicken breasts dry with paper towels. If the breasts are thicker than 1 inch, pound them to an even thickness of about ¾ inch to ensure even cooking.
  2. In a small bowl, combine the garlic powder, onion powder, paprika, salt, and black pepper. Drizzle olive oil over the chicken and rub it in. Generously sprinkle the seasoning mixture over both sides of the chicken.
  3. Preheat your air fryer to 375°F (190°C) for about 3 minutes. Lightly spray the air fryer basket with cooking spray to prevent sticking.
  4. Place the seasoned chicken breasts in the basket in a single layer. Cook for 15 minutes, flipping halfway through at the 8-minute mark.
  5. Use a meat thermometer to check the internal temperature; it should reach 165°F (74°C). Let the chicken rest for 5 minutes before cutting it into ½-inch cubes.
  6. In a medium bowl, whisk together the mayonnaise, Dijon mustard, and lemon juice until smooth. Season to taste.
  7. Toast the pecans in a dry skillet over medium heat for 3-4 minutes until fragrant. Set aside to cool.
  8. In a large mixing bowl, combine the diced chicken, celery, red onion, dried cranberries, toasted pecans, and dill. Pour the dressing over the top and fold gently to combine.
  9. Season with additional salt and pepper if needed. Cover and refrigerate for at least 30 minutes before serving to allow the flavors to meld.

Pro Tips for the Best Air Fryer Chicken Salad

Elevate your dish with these expert insights:

  • Even Cooking: Pounding the chicken ensures it cooks evenly, avoiding dry spots.
  • Resting Time: Allowing the chicken to rest keeps it juicy and tender.
  • Chill Time: Refrigerating the salad helps the flavors develop beautifully.
  • Toast Pecan: Toasting nuts enhances their flavor and adds crunch.
  • Season Generously: Don’t skimp on seasoning; it elevates the taste dramatically.
  • Adjust to Taste: Feel free to tweak the dressing ingredients to match your flavor preferences!
  • Try Fresh Herbs: Fresh basil or cilantro can add an exciting twist to your salad.
  • Meal Prep: This salad lasts up to 4 days in the fridge, making it perfect for meal prep!

Common Mistakes and Troubleshooting

Avoid these common pitfalls for a perfect chicken salad:

  • Overcooking Chicken: Monitor cooking time closely; dry chicken ruins the dish.
  • Skipping the Rest: Don’t skip the resting period after cooking; it’s key for juiciness.
  • Using Warm Chicken: Allowing the chicken to cool completely prevents wilting the veggies.
  • Too Much Dressing: Start with a small amount of dressing; you can always add more!

Variations to Try

Keep your meals fresh with these fun twists:

  • Spicy Kick: Add a teaspoon of cayenne pepper to the seasoning for heat.
  • Southwestern Flair: Incorporate black beans, corn, and avocado for a fiesta-inspired salad.
  • Asian-Inspired: Swap mayo for sesame dressing and add shredded carrots and edamame.
  • Fruit Fusion: Mix in diced apple or pear for a sweet crunch contrast.

Storage and Make-Ahead Instructions

This air fryer chicken salad is perfect for meal prep!

  • Refrigerate: Store in an airtight container in the fridge for up to 4 days.
  • Freezing: Not recommended, as the texture may change once thawed.
  • Make-Ahead: Prepare the chicken and dressing a day in advance; mix everything together just before serving.

Frequently Asked Questions

Here are some common queries about this recipe:

  • Can I use frozen chicken? Yes, but thaw completely and pat dry before seasoning.
  • What can I substitute for mayonnaise? Greek yogurt or avocado can be great alternatives.
  • Is this salad gluten-free? Absolutely! All ingredients used are gluten-free.
  • Can I use a different protein? Yes! Try turkey breast or even chickpeas for a plant-based option.
  • How can I make it dairy-free? Use dairy-free mayo or a combination of tahini and lemon juice.
  • What’s the best way to serve it? Serve chilled on a bed of greens or in a wrap for a wholesome meal.
  • How do I spice it up? Add hot sauce or jalapeños for a spicy kick!
  • Can I add more vegetables? Definitely, feel free to include bell peppers, cucumbers, or any favorite veggies!

Nutrition Tips and Dietary Adaptations

This air fryer chicken salad is not only delicious but also nutritious:

  • Protein-Packed: Chicken is an excellent source of lean protein, essential for muscle repair and growth.
  • Healthy Fats: The olive oil and pecans provide heart-healthy fats that keep you satisfied.
  • Vitamins and Minerals: Fresh veggies add fiber, vitamins, and minerals to support overall health.

Equipment Recommendations

To make this dish, you’ll need:

  • Air Fryer: A reliable air fryer like the Cosori Pro II for even cooking.
  • Meat Thermometer: Ensures chicken is cooked to perfection every time.
  • Mixing Bowls: A good set of mixing bowls for easy prep and combining.
  • Knife Set: A sharp knife for precise cutting of chicken and vegetables.

Serving Suggestions

Make your meal even more delightful with these ideas:

  • On a Bed of Greens: Serve over mixed greens for a refreshing salad.
  • In a Wrap: Roll it up in a whole grain tortilla for a hearty lunch.
  • With Crackers: Pair with whole grain crackers for a crunchy snack.
  • As a Sandwich: Pile it on whole grain bread for a nutritious sandwich option.

Conclusion

And there you have it! A comprehensive guide to creating the ultimate zesty air fryer chicken salad that’s not just healthy but also bursting with flavor. Whether you’re meal prepping or seeking a quick lunch, this recipe is your ticket to a nutritious and delicious meal. So grab those ingredients and get ready to whip up a dish that will leave everyone asking for seconds. Happy cooking!

Air Fryer Chicken Salad Recipe

Prep Time 15 minutes
Cook Time 15 minutes
Total Time 30 minutes
Servings 4 servings
Calories 450
A flavorful and healthy chicken salad made effortlessly in the air fryer, perfect for a quick lunch or dinner.

Ingredients

Chicken

  • 1.5 lbs boneless, skinless chicken breasts
  • 2 tablespoons olive oil
  • 1 teaspoon garlic powder
  • 1 teaspoon onion powder
  • 1 teaspoon paprika
  • ½ teaspoon salt
  • ½ teaspoon black pepper
  • ¾ cup mayonnaise
  • 2 tablespoons Dijon mustard
  • 1 tablespoon lemon juice
  • 2 stalks celery (finely diced (about 1 cup))
  • ½ red onion red onion (finely diced (about ½ cup))
  • ½ cup dried cranberries
  • ½ cup chopped pecans (toasted)
  • 2 tablespoons fresh dill (chopped (or 1 teaspoon dried))

Salt and pepper

Instructions 

  • Pound chicken to ¾-1 inch thickness, season with spices, and air fry at 375°F for 15 minutes, flipping at 8 minutes.
  • Check for internal temperature of 165°F, then let chicken rest for 5 minutes before dicing into ½-inch cubes.
  • Mix mayonnaise, Dijon mustard, and lemon juice to make dressing. Toast pecans until fragrant, then cool.
  • Combine diced chicken, celery, onion, cranberries, pecans, and dill in a bowl. Add dressing and fold gently.
  • Season with additional salt and pepper if needed. Chill for 30 minutes before serving.

Notes

For best flavor, refrigerate the salad for at least 30 minutes before serving.
Calories: 450kcal
Cost: $15
Course: Main Course, Salad
Cuisine: American
Keyword: Chicken, Healthy, Quick

Elevate Your Summer with This Creamy Cucumber Dill Delight!

Summer is here, and that means it’s time for vibrant, light dishes that keep us cool and satisfied. If you’ve ever wanted a salad that bursts with flavor and freshness while taking just minutes to prepare, you’re in for a treat! This creamy cucumber dill salad is not only easy to whip up but also a delightful addition to any gathering, from picnics to barbecues. Let’s dive into why this salad is a must-try!

Why You’ll Love This Recipe

  • Quick and Easy: In less than 15 minutes, you can have this refreshing salad ready to serve, making it perfect for busy weekdays or spontaneous gatherings.
  • Flavor Explosion: The combination of creamy sour cream, bright dill, and crisp cucumbers creates a flavor profile that’s both tangy and refreshing.
  • Nutritious Ingredients: Packed with fresh veggies and wholesome ingredients, this salad is a guilt-free choice that adds a burst of nutrition to your meal.
  • Customizable Goodness: Whether you want to spice it up or keep it classic, this salad easily adapts to your taste and dietary needs.
  • Perfect for Any Occasion: Serve it as a side dish, a light main course, or even a refreshing snack—it pairs wonderfully with grilled meats or sandwiches!

Ingredients Breakdown

Here’s what you’ll need to make this creamy cucumber dill salad:

  • ½ cup sour cream: This is the base of your dressing, offering creaminess and tang. You can substitute it with Greek yogurt for a healthier option!
  • 1 ½ Tablespoons white vinegar: Adds a zesty kick; feel free to swap it for apple cider vinegar for a sweeter taste.
  • 3 Tablespoons chopped fresh dill: Fresh herbs provide the best flavor. If you don’t have dill, fresh parsley or chives can work in a pinch.
  • 1 teaspoon granulated sugar: Balances the tanginess. You can adjust the amount based on your preference.
  • ½ teaspoon salt: Enhances all the flavors in your salad.
  • ¼ teaspoon black pepper: Adds a hint of spice.
  • ¼ teaspoon garlic powder: For that extra depth of flavor; fresh minced garlic can also be used!
  • 2 English cucumbers: These are preferred for their thin skin and mild flavor. If using regular cucumbers, consider peeling them.
  • ½ small red onion: Adds a touch of sweetness and color. Soak it in cold water for 10 minutes to mellow the flavor if desired.

How to Make This Creamy Cucumber Dill Salad

Side view of a bowl filled with creamy cucumber dill salad featuring sliced cucumbers and herbs.
  1. In a large bowl, stir to combine the sour cream, vinegar, dill, sugar, salt, pepper, and garlic powder.
  2. Add the sliced cucumbers and red onion to the bowl and toss to coat evenly.
  3. Transfer the salad to a serving bowl and serve immediately for the freshest taste!

Pro Tips for the Perfect Salad

  • Choose the Right Cucumbers: Opt for English cucumbers for their crispness. If using regular cucumbers, peel them to avoid bitterness.
  • Let It Chill: For the best flavor, let the salad sit in the fridge for at least 30 minutes before serving to allow the flavors to meld.
  • Adjust the Creaminess: Feel free to mix in a splash of buttermilk or additional sour cream if you prefer a creamier texture.
  • Herb Variations: Experiment with different herbs! Fresh mint or basil can give a unique twist to your salad.
  • Spice It Up: Add a pinch of red pepper flakes or a dash of hot sauce for a kick!
  • Make It Dairy-Free: Substitute the sour cream with a dairy-free alternative like cashew cream or coconut yogurt.
  • Pairing Suggestions: This salad is fantastic with grilled chicken or fish, making it a versatile side dish!
  • Storing Leftovers: Keep any leftovers in an airtight container in the fridge for up to 3 days. The flavors will continue to develop!

Common Mistakes and Troubleshooting

Even the best cooks make mistakes! Here are some common pitfalls and how to avoid them:

  • Watery Salad: To prevent excess moisture, salt the cucumbers and let them sit for about 10 minutes before adding them to the mixture. This draws out excess water.
  • Too Tangy: If your salad is too tangy, balance it out with a tad more sugar or a drizzle of honey.
  • Flavorless Dressing: Make sure to taste as you go! Adjust seasoning gradually to find the perfect balance.
  • Overmixing: Gently toss the salad to avoid bruising the cucumbers. You want them to remain crisp!

Delicious Variations

Want to switch things up? Here are four exciting variations of this creamy cucumber dill salad:

  • Greek Twist: Add crumbled feta cheese and kalamata olives for a Mediterranean flair!
  • Avocado Delight: Mix in diced avocado for a creamy, healthy addition that pairs wonderfully with the cucumbers.
  • Spicy Sriracha: Incorporate a spoonful of Sriracha into the dressing for a spicy kick that will awaken your taste buds!
  • Asian Fusion: Swap out the dill for cilantro, and add sesame oil and soy sauce for an Asian-inspired version!

Storage and Make-Ahead Instructions

This creamy cucumber dill salad is best enjoyed fresh, but you can prepare it ahead of time for convenience:

  • Make Ahead: You can prepare the dressing the day before and store it in the fridge. Just mix it with the cucumbers and onions right before serving!
  • Storage: Keep any leftover salad in an airtight container in the refrigerator for up to 3 days. The flavors will continue to meld, making it even tastier the next day!

Frequently Asked Questions

Got questions? We’ve got answers! Here are some commonly asked queries about this creamy cucumber dill salad:

  • Can I use Greek yogurt instead of sour cream? Absolutely! Greek yogurt is a healthy alternative that still offers creaminess.
  • How do I keep the cucumbers from getting soggy? Salting the cucumbers and letting them sit before mixing will help draw out excess water.
  • Can I make this salad in advance? Yes! You can prepare the dressing and store it separately until you’re ready to add the cucumbers.
  • What can I serve with this salad? This salad pairs beautifully with grilled meats, fish, or as a refreshing side to sandwiches.
  • How long does this salad last in the fridge? Store it in an airtight container for up to 3 days.
  • Can I add other vegetables? Of course! Try adding bell peppers, carrots, or radishes for extra crunch.
  • Is this salad gluten-free? Yes! All the ingredients are gluten-free, making it a great option for those with dietary restrictions.
  • What’s the best way to serve this salad? Serve it chilled for the freshest taste, garnished with extra dill if desired!

Nutritional Tips and Dietary Adaptations

This creamy cucumber dill salad is not just delicious; it’s also packed with nutrients!

  • Low-Calorie Delight: With cucumbers being low in calories and high in water content, this salad is a great choice for light meals.
  • Protein Boost: Add chickpeas or grilled chicken to increase the protein content for a more filling dish.
  • Vegan Option: Use a dairy-free sour cream or yogurt alternative to make this salad vegan-friendly.
  • Fresh and Seasonal: Customize your salad with seasonal vegetables for maximum flavor and nutrition!

Essential Equipment

Before you get started, make sure you have the right tools:

  • Cutting Board: A sturdy surface for prepping your cucumbers and onions.
  • Sharp Knife: To slice your vegetables thinly for the best texture.
  • Mixing Bowl: A large bowl for combining all your ingredients seamlessly.
  • Measuring Cups and Spoons: For precise ingredient measurement to ensure perfect flavor.

Serving Suggestions

This creamy cucumber dill salad is versatile and pairs well with a variety of dishes:

  • Grilled Meats: Serve alongside grilled chicken, steak, or fish for a refreshing contrast.
  • Sandwiches: It makes an excellent side to any sandwich, adding crunch and flavor.
  • Picnic Favorite: Ideal for summer picnics, it’s a great dish to share with friends and family.
  • Light Lunch: Enjoy it as a light lunch option on its own or with whole-grain crackers.

Conclusion

And there you have it! A creamy cucumber dill salad that’s not only easy to make but also bursting with flavor and nutrition. With its crisp texture and vibrant taste, it’s the perfect companion for your summer meals. Whether you’re hosting a barbecue or simply need a quick and satisfying side dish, this salad will surely become a family favorite. Get in the kitchen and let your creativity shine—happy cooking!

Creamy Cucumber Dill Salad

Prep Time 10 minutes
Total Time 10 minutes
Servings 4 servings
Calories 150
A refreshing and creamy cucumber salad flavored with fresh dill, perfect for a light side dish or summer meal.

Ingredients

Dressing

  • 0.5 cup sour cream
  • 1.5 tablespoons white vinegar
  • 3 tablespoons chopped fresh dill
  • 1 teaspoon granulated sugar ((or to taste))
  • 0.5 teaspoon salt
  • 0.25 teaspoon black pepper
  • 0.25 teaspoon garlic powder
  • 2 English cucumbers English cucumbers, thinly sliced
  • 0.5 small red onion, halved and thinly sliced

Instructions 

  • Mix sour cream, vinegar, dill, sugar, salt, pepper, and garlic powder in a large bowl.
  • Add sliced cucumbers and red onion; toss to coat.
  • Transfer to a serving bowl and serve immediately.

Notes

Chill the salad for 10 minutes before serving for best flavor.
Calories: 150kcal
Cost: $8
Course: Side Dish
Cuisine: American
Keyword: cucumber, Dill, Salad

Unlock the Joy of Healthy Eating with Zesty Air Fryer Lemon Pepper Chicken Bites!

Are you ready to elevate your weeknight dinners? These Zesty Air Fryer Lemon Pepper Chicken Bites are not just a meal; they’re a celebration of flavor and health! In just 20 minutes, you’ll whip up a dish that’s perfectly seasoned, packed with nutrients, and incredibly satisfying. Whether you’re a busy professional or a culinary novice, this recipe makes healthy eating feel exciting and effortless. Let’s dive into the deliciousness!

Why You’ll Love This Recipe

This recipe is a game-changer! Here are five reasons why you’ll adore these lemon pepper chicken bites:

  • Quick and Easy: Ready in just 20 minutes, ideal for those hectic weeknights when you need a tasty meal fast.
  • Flavor-Packed: The combination of zesty lemon and bold pepper elevates simple chicken into a mouthwatering delight.
  • Healthier Alternative: Air frying reduces fat content compared to traditional frying, giving you a guilt-free indulgence.
  • Versatile Serving Options: Enjoy them as a snack, in salads, or as a main dish with your favorite sides.
  • Meal Prep Friendly: These chicken bites are perfect for meal prepping, so you can enjoy them throughout the week!

Ingredients You’ll Need

Gather these ingredients for your zesty chicken bites:

  • 1 lb chicken breast: Cut into bite-sized pieces for quick cooking.
  • 2 tbsp olive oil: Helps the seasoning stick and keeps the chicken juicy.
  • 1 tbsp lemon pepper seasoning: The star of the dish! You can use store-bought or homemade.
  • 1 tsp garlic powder: Adds depth of flavor.
  • 1 tsp paprika: Gives a slight smokiness and vibrant color.
  • 1/2 tsp salt: Enhances all the flavors.

Ingredient Substitutions

  • Chicken thighs: For extra juiciness, substitute with boneless, skinless chicken thighs.
  • Avocado oil: Use this instead of olive oil for a different flavor profile.
  • Homemade lemon pepper seasoning: Mix lemon zest, black pepper, and salt for a fresh alternative.
  • Other spices: Feel free to experiment with your favorite spices like cayenne for heat or Italian herbs for a twist!

Step-by-Step Instructions

Close-up view of seasoned chicken bites with a crispy texture, garnished with herbs.

Follow these simple steps to cook your Air Fryer Lemon Pepper Chicken Bites:

  1. Preheat your air fryer to 375°F (190°C).
  2. Mix the chicken pieces in a bowl with olive oil, lemon pepper seasoning, garlic powder, paprika, and salt.
  3. Place the chicken in the air fryer basket in a single layer to ensure even cooking.
  4. Cook for 10 minutes, shaking the basket halfway through to promote a golden crunch.
  5. Check for doneness: Ensure the internal temperature reaches 165°F (74°C).
  6. Serve hot and enjoy your flavorful creation!

Pro Tips for Perfect Chicken Bites

To ensure your lemon pepper chicken bites turn out fantastic every time, keep these pro tips in mind:

  • Don’t overcrowd the basket: This allows for optimal air circulation, ensuring each bite gets crispy.
  • Marinate for longer: For even more flavor, let the chicken marinate in the seasoning for at least 30 minutes before cooking.
  • Use a meat thermometer: This ensures perfectly cooked chicken every time, eliminating guesswork.
  • Spray with oil: A light spray of oil on the chicken before cooking can enhance crispiness.
  • Experiment with spices: Don’t hesitate to mix in your favorite spices or herbs to personalize your dish.
  • Garnish with fresh herbs: Fresh parsley or chives can elevate the presentation and flavor.
  • Adjust cooking time: Depending on your air fryer model, you may need to tweak the cooking time slightly.
  • Let them rest: Allow the chicken to rest for a few minutes after cooking to lock in flavors.

Avoid Common Mistakes

Here are some pitfalls to avoid for the best results:

  • Skipping the preheat: Not preheating your air fryer can lead to uneven cooking. Always preheat!
  • Using too much oil: A little goes a long way. Too much oil can result in greasy bites.
  • Ignoring internal temperature: Always check the chicken’s doneness to avoid undercooked or dry meat.
  • Not shaking the basket: This step is crucial for achieving an even crisp on all sides.

Delicious Variations to Try

Shake things up with these fun variations:

  • Spicy Buffalo Chicken Bites: Swap lemon pepper seasoning for buffalo sauce for a fiery kick.
  • Sweet and Tangy BBQ Bites: Use a BBQ rub instead of lemon pepper for a different flavor experience.
  • Herb-Crusted Chicken Bites: Add Italian herbs like oregano and thyme for a Mediterranean twist.
  • Curry-Lemon Chicken Bites: Mix curry powder with lemon pepper for an exotic flavor profile.

Storage and Make-Ahead Instructions

These chicken bites are perfect for meal prep! Here’s how to store and reheat them:

  • Refrigerator: Store leftovers in an airtight container for up to 3 days.
  • Freezer: Freeze cooked chicken bites in a single layer, then transfer to a freezer bag for up to 3 months.
  • Reheating: For best results, reheat in the air fryer at 375°F (190°C) for 5-7 minutes until warmed through.

Frequently Asked Questions

Got questions? We’ve got answers!

  • Can I use frozen chicken? Yes, but increase the cooking time by a few minutes.
  • What if I don’t have an air fryer? You can bake these in the oven at 400°F (200°C) for about 20 minutes.
  • Can I use other meats? Absolutely! This recipe works well with turkey or pork.
  • Is lemon pepper seasoning spicy? No, it’s usually mild, but you can adjust the pepper quantity to your liking.
  • Can I make this recipe gluten-free? Yes, all the ingredients are naturally gluten-free!
  • How do I know when the chicken is done? Use a meat thermometer to ensure it reaches 165°F (74°C).
  • Can I double the recipe? Yes! Just ensure you cook in batches to avoid overcrowding the basket.
  • What are some serving suggestions? Serve over rice, in wraps, or alongside fresh veggies for a balanced meal.

Nutritional Tips and Dietary Adaptations

Eating healthy doesn’t have to be boring! Here are some nutritional tips:

  • Protein Power: These chicken bites are high in protein, promoting muscle growth and repair.
  • Low Carb Option: Pair with a salad or cauliflower rice for a low-carb meal.
  • Vegan Alternative: Substitute chicken with tofu or chickpeas, adjusting seasoning as needed.
  • Heart-Healthy Fats: Olive oil is rich in monounsaturated fats, beneficial for heart health.

Equipment Recommendations

To achieve the best results with your air fryer chicken bites, consider these tools:

  • Air Fryer: A reliable air fryer is essential for achieving that crispy texture without excess oil.
  • Meat Thermometer: Ensure your chicken is cooked to perfection every time.
  • Mixing Bowls: Use these for marinating and mixing the seasoning.
  • Spatula or Tongs: Helpful for flipping and serving your delicious bites.

Serving Suggestions

Enjoy your zesty chicken bites in a variety of ways:

  • In a Salad: Toss them with greens, cherry tomatoes, and a light vinaigrette for a refreshing meal.
  • With Dipping Sauces: Serve with ranch, blue cheese, or a spicy aioli for a flavor boost.
  • In a Wrap: Add to a whole grain wrap with veggies for a satisfying lunch.
  • On a Platter: Arrange with fresh veggies and hummus for a fun appetizer spread.

In conclusion, these Zesty Air Fryer Lemon Pepper Chicken Bites are your new go-to for quick, healthy meals that don’t compromise on flavor. With just a few ingredients and minimal prep, you’ll be serving up a dish that’s sure to impress. So, roll up your sleeves, grab your air fryer, and let’s make healthy eating a delicious adventure!

20-Minute Air Fryer Lemon Pepper Chicken Bites

Prep Time 5 minutes
Cook Time 10 minutes
Total Time 15 minutes
Servings 4 servings
Calories 250
Quick and flavorful chicken bites seasoned with lemon pepper, perfect for a fast and tasty meal.

Ingredients

Chicken

  • 1 lb chicken breast, cut into bite-sized pieces
  • 2 tbsp olive oil
  • 1 tbsp lemon pepper seasoning
  • 1 tsp garlic powder
  • 1 tsp paprika
  • 1/2 tsp salt

Instructions 

  • Preheat air fryer to 375°F (190°C).
  • Mix chicken with olive oil, lemon pepper, garlic powder, paprika, and salt.
  • Place chicken in air fryer basket in a single layer.
  • Cook for 10 minutes, shaking halfway.
  • Check for doneness; internal temperature should reach 165°F (74°C).
  • Serve hot.

Notes

Ensure chicken is cooked thoroughly for safety.
Calories: 250kcal
Cost: $15
Course: Main Course
Cuisine: American
Keyword: air fryer, Chicken, lemon pepper

Welcome to Your Ultimate Guide to a Vibrant Spring Salad!

Spring is here, and with it comes the perfect opportunity to embrace fresh, colorful ingredients in your meals. This Spring Salad with Asparagus, Peas, and Goat Cheese is a celebration of everything delicious about the season. In this article, we’ll dive deep into why this salad is not just a feast for the eyes but also a powerhouse of nutrition and flavor. Let’s make healthy cooking fun and exciting!

Why You’ll Love This Recipe

What makes this spring salad a must-try? Here are five reasons:

  • Fresh Ingredients: Packed with seasonal produce like asparagus and peas, this salad bursts with flavor and nutrients.
  • Quick to Prepare: Whip it up in under 30 minutes, making it a perfect go-to for busy days.
  • Customizable: Easily adapt the ingredients to suit your taste or dietary needs.
  • Impressive Presentation: The vibrant colors and textures make this salad a showstopper for gatherings.
  • Rich in Nutrients: With protein from goat cheese and fiber from greens, this salad supports a healthy lifestyle.

Ingredients Breakdown

Let’s take a closer look at the ingredients that make this salad shine:

  • Asparagus: Look for thin, tender stalks. If you can’t find fresh, frozen asparagus will work too!
  • Peas: Fresh peas are ideal, but thawed frozen peas are a convenient alternative.
  • Fava Beans: A delicious addition for protein. Substitute with chickpeas if desired.
  • Radishes: Their crunch and peppery flavor add a delightful zing.
  • Zucchini: Ribboned zucchini adds a light texture; you can also use cucumbers for a similar effect.
  • Greens: A mix of red leaf lettuce and arugula provides a nutritious base; feel free to experiment with your favorite greens.
  • Goat Cheese: Creamy and tangy; choose a plain or honey-infused variety for a sweeter taste.
  • Hazelnuts: Toasted and slightly cracked, they add crunch. Walnuts or pecans work as substitutes.
  • Lemon: Juicy and zesty, essential for that bright dressing!
  • Olive Oil: A high-quality extra virgin olive oil elevates the dressing’s flavor.

Step-by-Step Instructions

Side view of a colorful salad topped with goat cheese, radishes, and nuts.
  1. Preheat your oven to 375°F (190°C). Roast the asparagus on a sheet pan drizzled with olive oil for about 5-10 minutes, until tender but still crisp. Allow them to cool and slice them lengthwise.
  2. Prepare the lemon dressing by mixing 2 parts fresh lemon juice with 4 parts olive oil.
  3. In a bowl, mash the goat cheese and loosen it up with 2 tablespoons of the lemon dressing.
  4. Combine the sliced asparagus with the goat cheese mixture. Season with salt and pepper to taste.
  5. On a large platter, layer the greens, peas, fava beans, radishes, and zucchini ribbons.
  6. Top with the goat cheese-coated asparagus and sprinkle the toasted hazelnuts over everything.
  7. Drizzle additional lemon dressing as desired, and finish with shavings of Parmigiano Reggiano and lemon slices for garnish.

Pro Tips for the Perfect Salad

  • Asparagus Cooking: For the best texture, don’t overcook the asparagus; it should have a slight crunch.
  • Dressing Balance: Adjust the lemon and olive oil ratio based on your taste preference; more lemon for tang, more oil for richness.
  • Cheese Choice: Experiment with different cheeses like feta or blue cheese for a unique flavor twist.
  • Nut Alternatives: If you’re nut-free, try sunflower seeds or pumpkin seeds for a similar crunch.
  • Chill the Salad: For enhanced flavor, let the salad chill in the fridge for 15-30 minutes before serving.
  • Mixing Greens: Combine different greens for varied textures and flavors—try kale or spinach!
  • Herb Infusion: Fresh herbs like basil or mint can elevate the flavor profile even more.
  • Make-ahead Option: Prepare the salad components ahead of time and assemble just before serving to keep everything fresh.

Common Mistakes to Avoid

Here are some common pitfalls to steer clear of when making your spring salad:

  • Overcooking Asparagus: Keep an eye on timing to prevent mushy asparagus.
  • Skipping the Dressing: Don’t forget to dress the salad! A good dressing ties all the flavors together.
  • Too Many Ingredients: Less is often more; focus on balancing flavors rather than adding everything in the fridge.
  • Ignoring Seasonality: Use what’s in season for the freshest taste and best nutrient profile.

Variations to Try

Feel free to shake things up! Here are some creative variations for your salad:

  • Protein-Packed: Add grilled chicken or shrimp for a heartier dish.
  • Grain Boost: Toss in cooked quinoa or farro for added texture and fiber.
  • Fruit Addition: Add sliced strawberries or mandarin oranges for a sweet twist.
  • Spicy Kick: Incorporate sliced jalapeños or a sprinkle of chili flakes for some heat.

Storage and Make-Ahead Instructions

This salad is best enjoyed fresh, but here are some tips for storage:

  • Fridge Storage: Store leftovers in an airtight container for up to 2 days. Keep the dressing separate to avoid sogginess.
  • Make-Ahead Prep: Prep the ingredients a day in advance, but mix just before serving.

Frequently Asked Questions

Here are some common questions to help you out:

  • Can I use frozen vegetables? Yes! Frozen peas work well; just thaw them before adding.
  • Is this salad vegan-friendly? Substitute goat cheese with tofu or a nut-based cheese.
  • How can I make it gluten-free? The ingredients listed are naturally gluten-free; just ensure your dressing is gluten-free.
  • What’s the best way to add flavor? Fresh herbs and quality olive oil can make a big difference!
  • How can I make this a meal? Add protein sources like beans, chicken, or fish to transform it into a filling meal.
  • Can I make it spicy? Yes! Add some sliced jalapeños or a spicy dressing for a kick.
  • What should I serve it with? It pairs beautifully with grilled meats, sandwiches, or even as a light lunch on its own.
  • How do I know if my ingredients are fresh? Look for bright colors and firm textures, especially in produce.

Nutritional Insights

This salad isn’t just a pretty dish; it’s packed with health benefits:

  • Vitamins and Minerals: Asparagus and peas are rich in vitamins A, C, and K, supporting immune function and skin health.
  • Fiber-Rich: The combination of greens, beans, and nuts helps support digestive health.
  • Healthy Fats: Olive oil and hazelnuts provide heart-healthy fats essential for nutrient absorption.

Equipment Recommendations

To whip up this delicious salad, you’ll need:

  • Sheet Pan: For roasting your asparagus—make sure it’s sturdy!
  • Mixing Bowls: A variety of sizes for prep and serving.
  • Vegetable Peeler: For creating those beautiful zucchini ribbons.
  • Measuring Cups and Spoons: To ensure you get those ingredient ratios just right.

Serving Suggestions

This vibrant spring salad can shine as:

  • Light Lunch: Perfect on its own or paired with a protein.
  • Side Dish: A delightful accompaniment to grilled meats or fish.
  • Picnic Favorite: Great for outdoor gatherings—just keep the dressing separate until serving!

Conclusion

There you have it, a comprehensive guide to creating a vibrant spring salad that’s not only delicious but also quick and easy to prepare. With the right ingredients and a sprinkle of creativity, you can whip up a dish that delights the senses and nourishes the body. So roll up your sleeves, gather those fresh ingredients, and let’s make healthy eating exciting!

Spring Salad with Asparagus, Goat Cheese, lemon and Hazelnuts

Prep Time 15 minutes
Cook Time 10 minutes
Total Time 25 minutes
Servings 4 servings
Calories 350
A fresh and vibrant spring salad combining tender asparagus, peas, radishes, zucchini, and greens, topped with creamy goat cheese, toasted hazelnuts, and a lemony dressing.

Ingredients

Vegetables

  • 1 bunch asparagus (thin but thick enough to cut in half lengthwise)
  • 1 cup fresh peas (or frozen and defrosted)
  • 0.5 cup cooked fava beans (or defrosted lima beans)
  • 5 radishes radishes (thinly sliced)
  • 2 medium raw zucchini (made into ribbons with a vegetable peeler, no seeds)
  • 0.5 bunch red leaf lettuce (chopped bite size)
  • a handful arugula (mixed with lettuce)
  • 4 oz chevre goat cheese (with honey)
  • 1 lemon lemon (zest and slices for garnish)
  • 0.5 cup toasted hazelnuts (slightly cracked open)
  • shavings Parmigiano Reggiano (for topping)
  • extra lemons lemons (for dressing)
  • as needed olive oil (for roasting and dressing)

Instructions 

  • Roast asparagus on a sheet pan with olive oil at 375°F for 5-10 minutes until tender but still crisp. Cool and slice lengthwise.
  • Make a lemon and olive oil dressing using 2 parts lemon juice to 4 parts olive oil.
  • Mix goat cheese with 2 tablespoons of lemon dressing until smooth, then toss with sliced asparagus.
  • Assemble greens, peas, fava beans, radishes, zucchini ribbons on a platter. Top with goat cheese-coated asparagus.
  • Sprinkle toasted hazelnuts and shaved Parmigiano Reggiano over the salad. Drizzle with lemon dressing and garnish with lemon slices.

Notes

Use fresh ingredients for the best flavor and texture.
Calories: 350kcal
Cost: $15
Course: Salad
Cuisine: American
Keyword: asparagus