Author

Ryan

Browsing

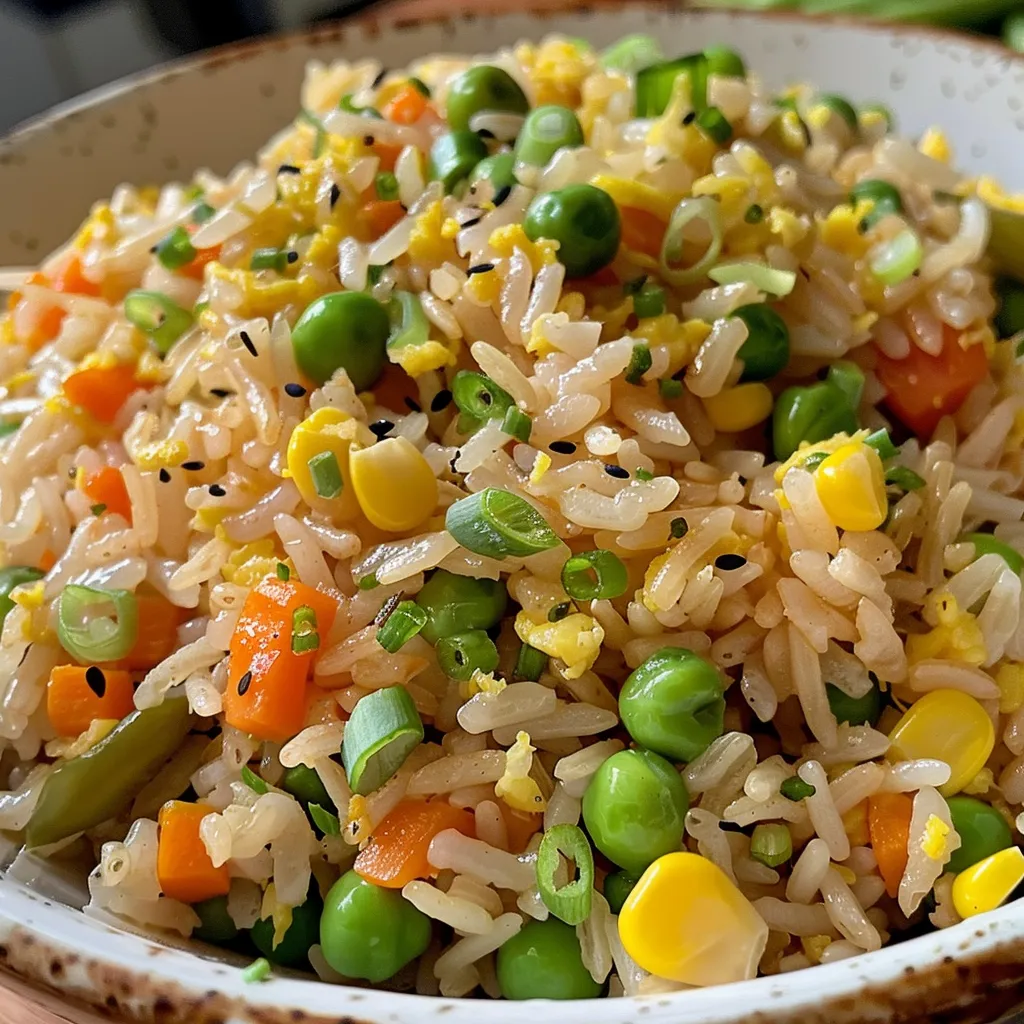
Are you ready to dive into a culinary adventure that’s both quick and delicious? Look no further! In just 15 minutes, you can whip up a vibrant, flavor-packed plate of veggie egg fried rice that’s perfect for busy food lovers. This dish is not just a meal; it’s a celebration of fresh ingredients and bold flavors that will make your taste buds dance with joy. Whether you’re a seasoned chef or a kitchen newbie, this recipe is your ticket to creating a homemade meal that’s both nutritious and satisfying. Let’s explore why this is the ultimate egg fried rice recipe!

Why You’ll Love This Recipe

  • Quick and Easy: Perfect for weeknight dinners when time is tight, this dish comes together in just 15 minutes!
  • Flavor Explosion: The combination of soy sauce, sesame oil, and fresh vegetables creates a mouthwatering medley of tastes.
  • Nutritious Ingredients: Packed with colorful veggies, this recipe is not only tasty but also a great way to sneak in essential nutrients.
  • Versatile: Customize with your favorite protein like tofu or chicken, or keep it plant-based for a lighter option.
  • Perfect for Meal Prep: Make a big batch and enjoy leftovers for lunch or dinner throughout the week.

Ingredient Breakdown

Here’s what you’ll need to create your delicious 15-minute veggie egg fried rice:

  • 2 cups cooked rice: Use day-old rice for the best texture and to prevent it from becoming mushy.
  • 2 large eggs: Lightly beaten for fluffy egg additions that enhance the dish.
  • 1 cup carrots: Finely diced for sweetness and crunch.
  • 1 cup green peas: Fresh or frozen, they add a pop of color and nutrition.
  • 1 cup bell peppers: Use a mix for vibrant colors and flavors.
  • 2 stalks green onions: Thinly sliced for a fresh, mild onion flavor.
  • 2 cloves garlic: Minced to bring out aromatic flavors.
  • 2 tablespoons soy sauce: Adjust to taste for the perfect umami kick.
  • 1 tablespoon sesame oil: Used for cooking and adds a nutty flavor.
  • Salt and pepper to taste: For seasoning.
  • 1/2 cup frozen corn (optional): For added sweetness and texture.
  • 1 teaspoon chili flakes (optional): For a spicy kick.
  • 1 cup tofu or cooked chicken (optional): For protein boost, making it more filling.

Cooking Instructions

Now, let’s get cooking! Follow these simple steps for a delightful dish:

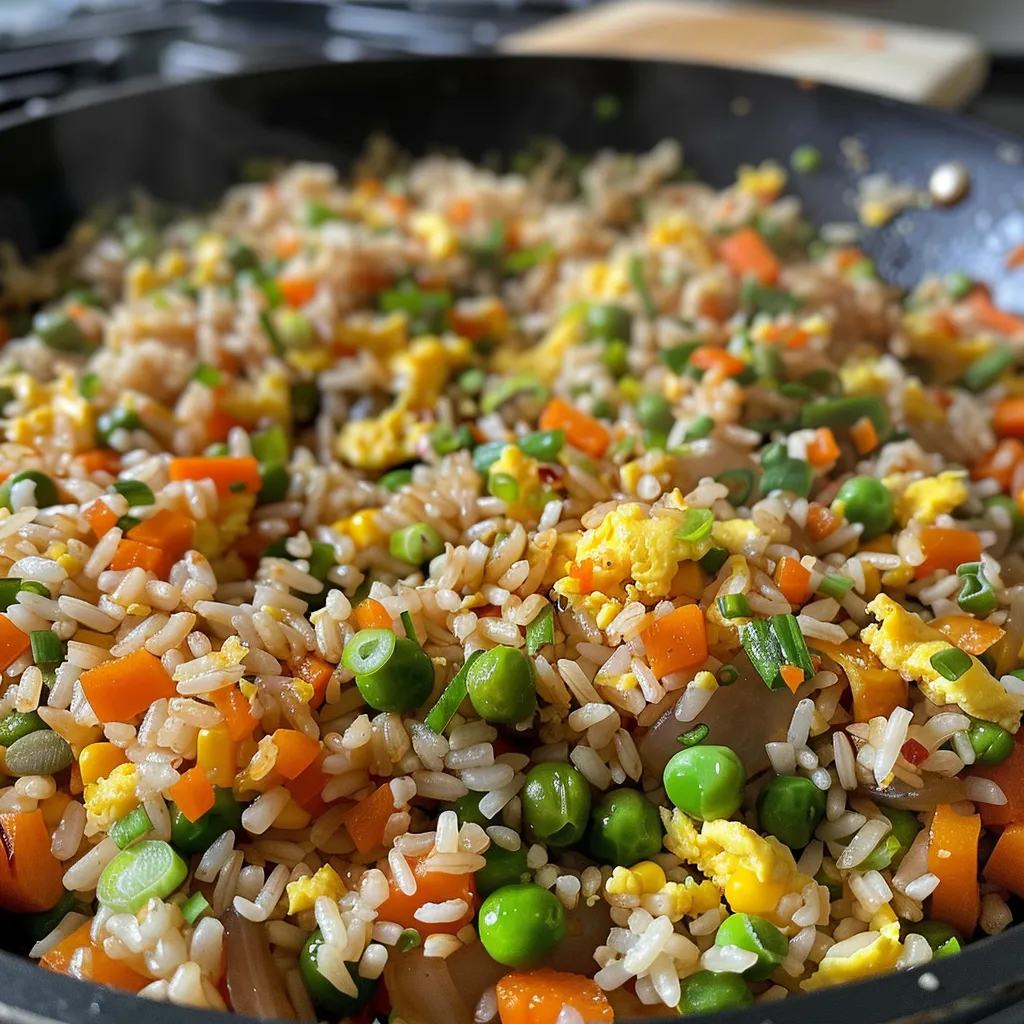
  1. In a large wok or skillet, heat the sesame oil over medium-high heat.
  2. Add the minced garlic and sauté for about 30 seconds until fragrant.
  3. Stir in the carrots and cook for 2-3 minutes until they start to soften.
  4. Add the bell peppers, green peas, and corn; stir fry for another 2-3 minutes.
  5. Push the vegetables to one side, pour in the beaten eggs on the other side, and scramble until just set.
  6. Mix the eggs with the veggies, then add the cooked rice to the pan.
  7. Drizzle the soy sauce over the rice, season with salt and pepper, and toss everything together until well combined and heated through.
  8. Finally, stir in the green onions and chili flakes if using, and serve hot!

Pro Tips for Perfect Veggie Egg Fried Rice

Side view of a delicious bowl of veggie egg fried rice garnished with green onions and sesame seeds.
  • Use Day-Old Rice: This prevents clumping and ensures a fluffy texture. Fresh rice may become mushy.
  • Don’t Overcook the Eggs: Scramble just until set; they should remain fluffy and soft.
  • Customize Your Veggies: Feel free to use any vegetables you have on hand—zucchini, broccoli, or snap peas work great!
  • Adjust Flavor to Your Liking: Taste and tweak the soy sauce and seasoning as per your preference.
  • Use High Heat: Stir frying on high heat helps to achieve that signature fried rice taste.
  • Garnish for Extra Flavor: Add sesame seeds or a drizzle of sesame oil before serving for an extra flavor boost.
  • Make It Spicy: Increase chili flakes or add sriracha for a fiery kick.
  • Keep It Vegan: Skip the eggs and add more tofu or chickpeas for protein.

Common Mistakes and Troubleshooting

  • Rice Too Sticky: Ensure you use day-old rice, and don’t overcrowd the pan while cooking.
  • Eggs Overcooked: Cook scrambled eggs quickly before mixing them in to keep them tender.
  • Flavor Lacking: Don’t hesitate to adjust soy sauce, salt, and pepper to enhance the flavor.
  • Too Dry: If your fried rice is too dry, add a splash more soy sauce or a little water while cooking.

Delicious Variations

Spice things up with these tasty variations:

  • Thai Basil Fried Rice: Add fresh Thai basil for a fragrant twist.
  • Sweet and Sour Fried Rice: Incorporate pineapple chunks for a sweet and tangy flavor.
  • Spicy Kimchi Fried Rice: Mix in chopped kimchi for an umami-packed, spicy version.
  • Seafood Fried Rice: Toss in shrimp or scallops for a delightful seafood twist.

Storage and Make-Ahead Instructions

This veggie egg fried rice is perfect for meal prep! Here’s how to store and reheat:

  • Refrigerate: Store in an airtight container in the fridge for up to 3 days.
  • Freeze: For longer storage, freeze in portions for up to 2 months. Thaw overnight in the fridge before reheating.
  • Reheat: Use a skillet over medium heat, adding a splash of water or soy sauce to keep it moist.

Frequently Asked Questions

  • Can I use fresh rice instead of day-old rice?
    Yes, but it may become mushy. Be sure to cool it quickly on a baking sheet to reduce moisture.
  • How can I make this dish vegetarian?
    Simply omit any meat and use tofu or additional vegetables for protein.
  • What can I use instead of soy sauce?
    Try tamari for a gluten-free option or coconut aminos for a sweeter alternative.
  • Can I add more vegetables?
    Absolutely! Feel free to add any vegetables you love or have on hand.
  • Is this recipe kid-friendly?
    Yes! Adjust the spice level to suit your kids’ taste, and they’ll enjoy this colorful dish.
  • How can I make it spicier?
    Increase the amount of chili flakes or add sriracha to your serving.
  • What proteins can I add?
    Chicken, shrimp, or even chickpeas work great in this fried rice.
  • Can this be served cold?
    Yes! It can be enjoyed cold as a salad or a snack.

Nutritional Tips and Dietary Adaptations

This recipe is not only delicious but can also cater to various dietary needs:

  • Gluten-Free: Use gluten-free soy sauce or tamari to suit your dietary needs.
  • Low-Carb: Substitute rice with cauliflower rice for a low-carb option.
  • High-Protein: Add more tofu or chicken to boost protein content.
  • Vegan: Skip the eggs and use plant-based proteins to keep it vegan.

Essential Equipment Recommendations

To make your cooking experience smooth and enjoyable, here’s what you’ll need:

  • Wok or Large Skillet: Ideal for stir-frying and achieving that perfect texture.
  • Spatula: For easy mixing and flipping of ingredients.
  • Measuring Cups and Spoons: To ensure precision in your ingredients.
  • Knife and Cutting Board: For quick prep of your fresh veggies.

Serving Suggestions

This veggie egg fried rice is versatile and can be served in various ways:

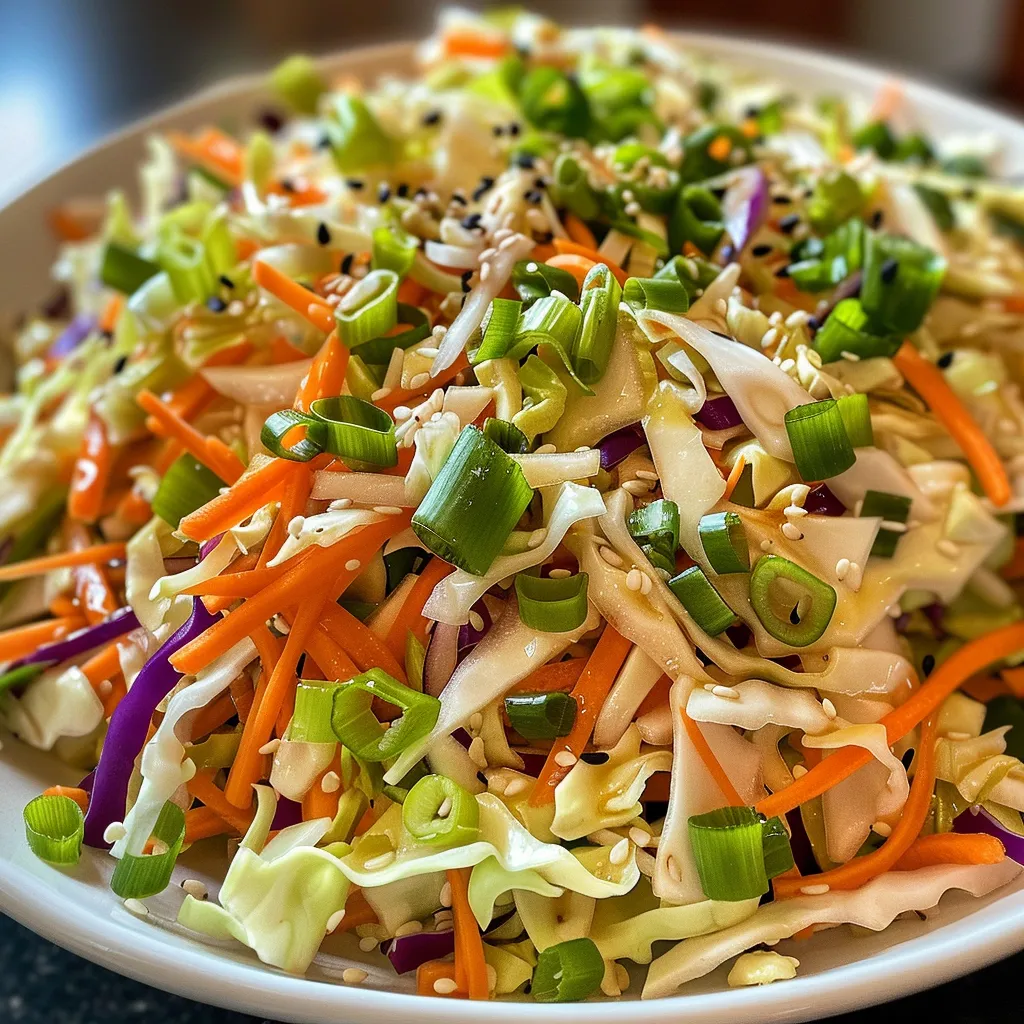
  • Pair it with a side salad for a refreshing contrast.
  • Serve alongside your favorite protein for a complete meal.
  • Top with additional green onions or sesame seeds for added crunch and flavor.
  • Enjoy it as a standalone dish for a light lunch or dinner option.

In conclusion, creating this zesty 15-minute veggie egg fried rice is not just about cooking; it’s about enjoying the vibrant flavors and the joy of making healthy meals fun and exciting. So grab your ingredients, unleash your inner chef, and let the flavor explosion begin!

Easy 15-Minute Veggie Egg Fried Rice Recipe for Busy Food Lovers

Prep Time 5 minutes
Cook Time 10 minutes
Total Time 15 minutes
Servings 4 servings
Calories 350
A quick and delicious fried rice recipe packed with colorful vegetables and protein, perfect for busy days.

Ingredients

Rice and grains

  • 2 cups cooked rice (Use day-old rice for best texture)

Eggs

  • 2 large large eggs (Lightly beaten)

Vegetables

  • 1 cup carrots (Finely diced)
  • 1 cup green peas (Fresh or frozen)
  • 1 cup bell peppers (Colorful varieties)
  • 2 stalks green onions (Thinly sliced)

Aromatics and sauces

  • 2 cloves garlic (Minced)
  • 2 tablespoons soy sauce (Adjust to taste)
  • 1 tablespoon sesame oil (For cooking)
  • to taste salt
  • to taste pepper

Optional ingredients

  • 1/2 cup frozen corn ((Optional))
  • 1 teaspoon chili flakes (Optional, for heat)
  • 1 cup tofu or cooked chicken (Optional, for protein)

Instructions 

  • Heat sesame oil in a wok or large skillet over medium-high heat.
  • Add garlic and cook for 30 seconds until fragrant.
  • Push ingredients to the side, scramble eggs in the pan, then mix with vegetables and rice.
  • Stir in soy sauce, salt, pepper, and optional chili flakes or corn. Add protein if using.
  • Cook for another 2-3 minutes, then serve hot garnished with sliced green onions.

Notes

Use day-old rice for best texture and flavor. Feel free to customize with your favorite proteins and vegetables.
Calories: 350kcal
Cost: $10
Course: Main Course
Cuisine: Asian
Keyword: Fried Rice

Unleash Your Culinary Creativity with Chickpea Flour Flatbreads!

Welcome to the vibrant world of healthy cooking, where flavor and nutrition unite in delightful harmony! If you’re looking for a quick, easy, and utterly delicious way to elevate your meals, you’ve come to the right place. In this definitive guide, we’ll dive into the magical realm of chickpea flour flatbreads. These versatile, gluten-free creations not only serve as a fantastic base for wraps and dips but also add a protein-packed punch to any meal. Let’s get started!

Why You’ll Love This Recipe

This isn’t just any flatbread recipe; it’s your ticket to culinary adventure! Here are five compelling reasons why you’ll adore making these chickpea flour flatbreads:

  • Quick and Easy: With just a few simple ingredients, you can whip up these flatbreads in under 30 minutes!
  • Gluten-Free Goodness: Made with chickpea flour, these flatbreads are perfect for anyone with gluten sensitivities.
  • Nutritious and Filling: Chickpea flour is loaded with protein and fiber, keeping you satisfied and energized.
  • Versatile Base: Use these flatbreads for wraps, pizzas, or as a side for soups and stews.
  • Customizable Flavors: Add herbs, spices, or toppings to personalize your flatbreads to your liking!

Ingredients You’ll Need

Gather these pantry staples to get started on your chickpea flour flatbread journey:

  • 2/3 cup flour (80g): You can use regular all-purpose flour or gluten-free flour here for a different texture.
  • 1/3 cup chickpea flour (35g): Also known as gram or besan flour, this is the star of the show!
  • 1 tsp olive oil: Adds richness and helps with browning.
  • Scant 1/4 cup warm water: Helps to bind your dough together.
  • Pinch of salt: Enhances the flavors.
  • 1 Tbs Nigella (Kalonji) seeds (Optional): For a unique flavor twist!

Step-by-Step Instructions

Juicy vegan chickpea flour flatbreads displayed enticingly, showing texture and color.

Follow these easy steps to create your delicious chickpea flour flatbreads:

  1. In a mixing bowl, combine the flours and salt.
  2. Make a well in the center, then gradually add the warm water while mixing until a soft dough forms.
  3. Knead the dough lightly, adding half the olive oil, and adjust with more water or flour as needed until pliable.
  4. Let the dough rest for 10-15 minutes to allow the flavors to meld.
  5. Heat a non-stick frying pan over medium heat.
  6. Divide the dough into golf ball-sized portions, then flatten into discs using a rolling pin or your hands.
  7. If using, push the Nigella seeds into the surface of the dough.
  8. Add a tiny bit of olive oil to the pan, then cook each disc until bubbles form, about 2-3 minutes per side.
  9. Keep warm on a plate while you cook the remaining discs.

Pro Tips for Perfect Chickpea Flour Flatbreads

Want to take your flatbread game to the next level? Here are some expert insights:

  • Resting the Dough: Allowing the dough to rest helps it become more pliable and easier to roll.
  • Adjusting Consistency: If your dough feels too sticky, add a bit more flour; if it’s too dry, a splash of water will do the trick!
  • Non-Stick Pan: Using a non-stick pan or a well-seasoned skillet ensures your flatbreads cook evenly without sticking.
  • Experiment with Flavors: Mix in spices like cumin or garlic powder for added depth.
  • Cook on Medium Heat: Cooking on too high heat can burn the flatbreads before they cook through, so keep it moderate!
  • Store Properly: Keep cooked flatbreads in an airtight container to maintain softness.
  • Make Ahead: Prepare the dough in advance and refrigerate it for quick meals later.

Common Mistakes and Troubleshooting

Even the best chefs make mistakes! Here are some common pitfalls and how to avoid them:

  • Dough Too Sticky: If your dough is overly sticky, gradually add more flour during the kneading stage.
  • Flatbreads Too Thick: Roll the dough thinly for a light and airy texture; thick flatbreads can turn out heavy.
  • Not Resting the Dough: Skipping the resting period can lead to tough flatbreads; give them time to relax!
  • Cooking Temperature: If your flatbreads are burning, lower the heat and give them more time to cook through.

Variations to Try

These flatbreads are incredibly versatile! Here are a few variations to mix things up:

  • Herbed Flatbreads: Add dried herbs like oregano or rosemary to the dough for an aromatic twist.
  • Spicy Chickpea Flatbreads: Incorporate red pepper flakes or cayenne for a spicy kick.
  • Cheesy Flatbreads: Mix in nutritional yeast for a cheesy flavor without dairy.
  • Stuffed Flatbreads: Fill the dough with sautéed veggies or cheese before cooking for a delightful surprise!

Storage and Make-Ahead Instructions

Want to enjoy these flatbreads later? Here’s how to store and prepare them in advance:

  • Refrigerate: Store cooked flatbreads in an airtight container in the fridge for up to 3 days.
  • Freeze: Freeze flatbreads between layers of parchment paper for up to a month. Reheat on a skillet before serving.
  • Dough in Advance: Prepare the dough and refrigerate it for up to 2 days. Bring to room temperature before rolling out.

Frequently Asked Questions (FAQs)

Got questions? We’ve got answers! Here are the most commonly asked questions about chickpea flour flatbreads:

  • Can I use other types of flour? Yes! Experiment with all-purpose or gluten-free blends for different textures.
  • Are these flatbreads suitable for meal prep? Absolutely! They store well and can be made ahead of time.
  • What can I serve with these flatbreads? They pair wonderfully with hummus, dips, or as a side for soups.
  • Can I make these flatbreads nut-free? Yes, just ensure any additional ingredients are nut-free.
  • How do I reheat leftover flatbreads? Simply warm them in a skillet or microwave for a few seconds.
  • Can I add toppings before cooking? Yes, feel free to top with seeds or herbs before cooking for extra flavor!
  • Is chickpea flour nutritious? Yes! It’s high in protein, fiber, and essential vitamins.
  • How do I know when my flatbreads are done? They should be lightly browned with bubbles forming on the surface.

Nutrition Tips and Dietary Adaptations

Want to maximize the health benefits of your flatbreads? Consider these tips:

  • Protein Boost: Pair with a protein-rich dip like hummus to create a well-rounded meal.
  • Add Veggies: Serve with a side of roasted or fresh vegetables for extra nutrients.
  • Healthy Fats: Drizzle with olive oil or avocado for healthy fat sources.

Equipment Recommendations

Here’s what you’ll need to whip up your chickpea flour flatbreads:

  • Mixing Bowl: A large bowl for combining your ingredients.
  • Non-Stick Skillet: Essential for evenly cooking the flatbreads without sticking.
  • Rolling Pin: For rolling out your dough to the perfect thickness.
  • Measuring Cups: Accurate measurements ensure consistent results.

Serving Suggestions

Ready to serve your delicious chickpea flour flatbreads? Try these serving ideas:

  • Wraps: Use as a base for wraps filled with your favorite veggies and proteins.
  • Dips: Serve with hummus, tzatziki, or guacamole for a delightful snack.
  • Mini Pizzas: Top with sauce and cheese for quick mini pizzas!
  • As a Side: Pair with soups, salads, or stews for a hearty meal.

And there you have it! A comprehensive guide to making delightful chickpea flour flatbreads that are not just healthy but also a joy to prepare. With this recipe, you’re well on your way to becoming a kitchen superstar! So roll up your sleeves, get creative, and enjoy the process of cooking. Happy baking!

Easy Vegan Chickpea Flour Flatbreads

Prep Time 10 minutes
Cook Time 15 minutes
Total Time 25 minutes
Servings 4 pieces
Calories 180
Delicious and simple vegan flatbreads made with chickpea and regular flour, perfect for a quick snack or meal.

Ingredients

Flours & Salt

  • 2/3 cup flour (or gluten-free flour)
  • 1/3 cup chickpea flour (gram or besan)
  • 1 tsp olive oil
  • scant 1/4 cup warm water
  • pinch salt
  • 1 Tbs tablespoon Nigella (Kalonji) seeds (Optional)

Instructions 

  • Mix the flours and salt together.
  • Make a well, then slowly add water and mix until a soft dough forms.
  • Knead the dough, add half the oil, then knead more, adjusting with water or flour as needed.
  • Let the dough rest for 10-15 minutes.
  • Divide into balls, flatten into discs, push seeds into dough, then cook on a heated pan until bubbling and golden.
  • Flip and cook until golden, then keep warm and repeat with remaining dough.

Notes

You can use gluten-free flour for a vegan, allergen-friendly option.
Calories: 180kcal
Cost: $4
Course: Main, Snack
Cuisine: Vegan
Keyword: chickpea, Flatbread

Welcome to the World of Chickpea Flour Naan!

Are you ready to dive into a delicious culinary adventure? Chickpea Flour Naan is not just your average flatbread; it’s a vibrant, gluten-free option that’s perfect for any occasion. In just 10 minutes, you can whip up this delightful vegan flatbread that not only satisfies your cravings but also packs a nutritional punch. Let’s explore the wonders of chickpea flour naan and why it deserves a spot in your kitchen!

Why You’ll Adore Chickpea Flour Naan

This isn’t just about making naan; it’s about embracing a healthier lifestyle without sacrificing taste. Here are some compelling reasons why you’ll fall in love with this recipe:

  • Quick and Easy: With just 10 minutes of prep time, you can have fresh, warm naan on your table. Perfect for busy weeknights!
  • Gluten-Free Goodness: Made with chickpea flour, this naan is naturally gluten-free, catering to those with dietary restrictions.
  • Nutritious and Wholesome: Chickpea flour is rich in protein and fiber, making this naan a nutritious choice that fuels your body.
  • Versatile Flavor: The addition of garlic powder and lemon juice gives this naan a unique twist, perfect for pairing with a variety of dishes.
  • Effortless Storage: Store leftovers in an airtight container for up to three days, allowing you to enjoy this delightful flatbread later!

Chickpea Flour Naan Ingredients

Let’s break down the key ingredients that make this naan so special. Each component plays a vital role in creating the perfect texture and flavor!

  • 1 cup Chickpea Flour: The star of the show, providing a nutty flavor and essential structure. It’s gluten-free and packed with protein.
  • ¾ cup Nondairy Milk: Almond or cashew milk are great alternatives to add moisture and softness to the naan.
  • 1 tbsp Lemon Juice: Acts as a curdling agent for the milk, creating a tangy flavor that enhances the naan.
  • 2 tbsp Whole Psyllium Husks: Helps bind the dough and retain moisture, ensuring your naan is soft and delightful.
  • 1 tbsp Baking Powder: Ensures lightness in texture without using yeast, making it quick and easy to prepare.
  • ½ tsp Baking Soda: Works alongside baking powder for a fluffy naan that rises beautifully.
  • ½ tsp Salt: Enhances the overall flavor beautifully, bringing all the ingredients together.
  • 1 tsp Garlic Powder: For a flavorful twist, adding depth to each bite.
  • 1 tbsp Vegetable Oil: Any neutral oil works well to keep the naan from sticking to the skillet.
  • 1 tbsp Nonstick Cooking Spray: To keep your skillet non-stick, ensuring perfect cooking every time!

Step-by-Step Instructions for Your Chickpea Flour Naan

Side angle of a fluffy Chickpea Flour Naan, showcasing its texture and color.

Now that we have our ingredients ready, let’s jump into the fun part—making the naan! Follow these simple steps for perfect results:

  1. In a mixing bowl, combine the chickpea flour, baking powder, baking soda, salt, and garlic powder. Stir well.
  2. Add the nondairy milk and lemon juice to the dry ingredients. Mix until a smooth dough forms.
  3. Incorporate the psyllium husks and vegetable oil into the dough, kneading briefly until well mixed.
  4. Divide the dough into equal portions and roll each piece into a ball.
  5. Heat a dry skillet over medium-high heat. Flatten each dough ball into a round shape.
  6. Cook the naan in the skillet for about 2-3 minutes on each side until golden brown and cooked through.
  7. Remove from heat and keep warm under a towel while you cook the remaining naan.
  8. Serve immediately, or store in an airtight container for later!

Storage Tips for Chickpea Flour Naan

Want to enjoy your naan later? Here’s how to keep it fresh:

  • Airtight Container: Store cooled naan in an airtight container at room temperature for up to 3 days.
  • Freezing: For longer storage, wrap naan in plastic wrap and freeze for up to 3 months. Thaw and reheat on a skillet or in the oven.

Chickpea Flour Naan Variations

Feeling adventurous? Here are some fun variations to try with your naan:

  • Herb-Infused Naan: Add chopped fresh herbs like cilantro or parsley for a burst of fresh flavor.
  • Spiced Naan: Incorporate spices like cumin or coriander into the dough for a unique twist.
  • Cheesy Naan: Mix in nutritional yeast or vegan cheese for a cheesy flavor that tantalizes the taste buds.
  • Sweet Naan: Add a touch of maple syrup or cinnamon for a sweet version perfect for breakfast!

Expert Tips for Perfect Chickpea Flour Naan

To help you achieve the best results, here are some expert tips to consider:

  • Check Your Flour: Make sure to use fresh chickpea flour for the best flavor and texture.
  • Adjust Consistency: If the dough is too dry, add a splash of water or more nondairy milk. If too wet, add a bit more chickpea flour.
  • Resting Time: Allowing the dough to rest for a few minutes helps enhance the texture of the naan.
  • Skillet Temperature: Ensure your skillet is hot enough before cooking. This helps achieve those lovely charred spots.
  • Cook One at a Time: To ensure each naan is cooked perfectly, focus on one at a time instead of overcrowding the skillet.
  • Keep Warm: Cover cooked naan with a towel to keep them warm and soft while you finish cooking.
  • Experiment with Oils: Try different oils like coconut or avocado for varied flavors.
  • Pair with Dips: Serve with hummus, salsa, or yogurt dip for a delightful snack or appetizer.

Common Mistakes and Troubleshooting

If things don’t go as planned, don’t worry! Here are some common mistakes to watch out for:

  • Dry Dough: If your dough is crumbly, you may need to add more liquid gradually until it comes together.
  • Sticky Dough: If the dough is too sticky, incorporate a bit more chickpea flour to help with handling.
  • Burnt Naan: If your naan is burning, reduce the heat slightly and cook a bit longer to ensure it’s cooked through.
  • Flat Naan: If your naan isn’t puffing up, ensure your baking powder is fresh and that the skillet is hot enough.

Comprehensive FAQs for Chickpea Flour Naan

Got questions? We’ve got answers! Here are some frequently asked questions about chickpea flour naan:

  • Can I use regular flour instead of chickpea flour? While this recipe is designed for chickpea flour, you can experiment with other flours, keeping in mind that it may alter the texture and flavor.
  • Is it possible to make naan without oil? Yes! You can omit the oil, but it helps with moisture and texture.
  • How do I know when the naan is cooked? Look for golden brown spots and a fluffy texture when you flip them over.
  • Can I make this recipe nut-free? Absolutely! Use oat milk or another nut-free milk alternative.
  • What should I serve with naan? Naan pairs perfectly with curries, soups, or as a base for wraps!
  • Can I make a larger batch? Yes! Just double or triple the ingredients as needed, ensuring even cooking time.
  • How do I reheat leftover naan? Reheat in a dry skillet over medium heat or warm it in the oven wrapped in foil.
  • Is it safe to eat raw chickpea flour? It’s best to cook chickpea flour to avoid any potential digestive issues.

Nutrition Tips and Dietary Adaptations

Here are some tips to make this recipe fit various dietary needs:

  • Protein Boost: Add a scoop of protein powder to the dough for a protein-packed version.
  • Low-Carb Option: Substitute with almond flour for a lower-carb alternative.
  • Fiber Upgrade: Incorporate ground flaxseed for added fiber and omega-3 fatty acids.
  • Allergy Considerations: Ensure all ingredients are free from allergens for those with sensitivities.

Equipment Recommendations

To make your chickpea flour naan experience seamless, here’s what you’ll need:

  • Mixing Bowl: A large bowl for combining ingredients effectively.
  • Skillet: A non-stick or cast-iron skillet works best for cooking naan.
  • Spatula: To flip the naan without damaging its shape.
  • Measuring Cups and Spoons: For precise ingredient measurements, ensuring consistent results.

Serving Suggestions

Your chickpea flour naan is versatile and can be enjoyed in various ways:

  • As a Wrap: Fill with roasted veggies, hummus, or salad for a delicious wrap.
  • With Dips: Serve alongside your favorite dips like baba ganoush or tzatziki.
  • As a Side: Pair with curries, soups, or stews for a hearty meal.
  • Breakfast Treat: Top with avocado and a sprinkle of salt for a nutritious breakfast option!

Conclusion: Your Chickpea Flour Naan Adventure Awaits!

Now that you’re equipped with the knowledge and skills to create delicious chickpea flour naan, it’s time to get cooking! Embrace the joy of healthy eating with this quick, easy, and flavorful recipe. Remember, the kitchen is your playground—experiment, have fun, and enjoy every bite of your flavorful creations. Happy cooking!

Chickpea Flour Naan – Easy Vegan Flatbread in 10 Minutes

Prep Time 5 minutes
Cook Time 5 minutes
Total Time 10 minutes
Servings 4 pieces
Calories 150
Enjoy quick and delicious vegan naan made with chickpea flour, perfect for a healthy snack or meal accompaniment.

Ingredients

Dry ingredients

  • 1 cup Chickpea Flour (The star of the show, providing a nutty flavor and essential structure.)
  • ¾ cup Nondairy Milk (Almond or cashew milk are great alternatives.)
  • 1 tbsp Lemon Juice (Acts as a curdling agent for the milk.)
  • 2 tbsp Whole Psyllium Husks (Helps bind the dough and retain moisture.)
  • 1 tsp Baking Powder (Ensures lightness in texture without yeast.)
  • ½ tsp Baking Soda (Works alongside baking powder for a fluffy naan.)
  • ½ tsp Salt (Enhances the overall flavor beautifully.)
  • 1 tsp Garlic Powder (For a flavorful twist.)
  • 1 tbsp Vegetable Oil (Any neutral oil works well.)
  • 1 tbsp Nonstick Cooking Spray (To keep your skillet non-stick.)

Instructions 

  • Mix chickpea flour, baking powder, baking soda, salt, and garlic powder in a bowl.
  • Add lemon juice to nondairy milk and let sit for a minute, then combine with dry ingredients along with oil and psyllium husks. Mix until a smooth dough forms.
  • Divide dough into 4 balls and flatten into round discs.
  • Heat a skillet with nonstick spray over medium heat. Cook each naan for 2-3 minutes per side until golden brown.
  • Serve warm with your favorite toppings or dips.

Notes

Ensure the dough is well mixed for the best texture, and cook on medium heat to prevent burning.
Calories: 150kcal
Cost: $8
Course: Flatbread
Cuisine: Vegan
Keyword: Chickpea Flour

Discover the Joy of Baking: Grain-Free Banana Zucchini Bread

Welcome to the world of baking where health meets flavor! Today, we’re diving into a recipe that showcases the best of both worlds: our Grain-Free Banana Zucchini Bread. This deliciously moist bread is not just a treat for your taste buds but also a powerhouse of nutrients, perfect for breakfast or a sweet snack. With ripe bananas, fresh zucchini, and a sprinkle of chocolate chips, this bread is a guilt-free indulgence that you won’t want to miss. Let’s get started!

Why You’ll Love This Recipe

This recipe isn’t just another banana bread. Here’s why you’ll absolutely adore it:

  • Nutritious Ingredients: Packed with vitamins and healthy fats, this bread keeps you energized throughout your day.
  • Grain-Free Goodness: Made with almond meal and powdered peanut butter, this recipe is perfect for those following a gluten-free or grain-free diet.
  • Moist & Flavorful: The combination of bananas and zucchini ensures a moist texture without any added sugar.
  • Easy to Make: With simple steps and minimal prep time, you’ll have a delicious loaf ready in no time.
  • Versatile Treat: Whether you enjoy it for breakfast, a snack, or dessert, this bread fits into any part of your day.

Ingredients Breakdown

Let’s take a closer look at what you’ll need to make this delightful banana zucchini bread:

  • 2 extra ripe bananas (~225g, heavily spotted peels): The riper the bananas, the sweeter the bread. Look for bananas that are covered in brown spots.
  • 1 cup shredded zucchini: Squeeze out excess moisture to prevent a soggy loaf. Fresh zucchini adds moisture and nutrients.
  • 1 large egg (room temperature): Acts as a binder and provides structure.
  • 1/4 cup honey or maple syrup: Natural sweetener that enhances flavor without overpowering the bread.
  • 2 tsp vanilla extract: Pure vanilla extract adds depth and sweetness.
  • 1 1/2 cups almond meal (also called almond flour): A grain-free flour that gives the bread a lovely texture and nutty flavor.
  • 1/2 cup powdered peanut butter (PB2 or similar): Adds protein and a subtle peanut flavor without the oil of traditional peanut butter.
  • 1 tsp baking soda: Essential for leavening the bread.
  • 1 tsp ground cinnamon: Spices up the flavor profile with warmth.
  • 1/2 tsp ground nutmeg: Freshly ground nutmeg adds a lovely aromatic touch.
  • 1/4 tsp salt: Balances the sweetness and enhances overall flavor.
  • 1/3 cup chocolate chips: Choose dairy-free if needed for a vegan option. Adds a delightful melty texture.
  • 3 tbsp crushed pecans (optional): For a crunchy topping that adds healthy fats and an extra layer of flavor.
  • 2 tbsp extra chocolate chips (optional): Because who doesn’t love more chocolate?

Step-by-Step Instructions

Sliced Grain-Free Banana Zucchini Bread displaying a soft texture and chocolatey bits, set against a simple background.

Ready to bake? Follow these easy steps for a perfect result:

  1. Prepare the pan: Preheat your oven to 350°F (175°C). Line an 8×4-inch loaf pan with parchment paper, leaving overhang on the sides for easy removal. Lightly spray with cooking spray.
  2. Squeeze the zucchini: After shredding, place the zucchini in a clean kitchen towel and squeeze hard to extract excess liquid. This crucial step prevents soggy bread.
  3. Blend wet ingredients: In a food processor or electric mixer, combine bananas, squeezed zucchini, egg, honey, and vanilla extract. Blend on high for 30-45 seconds until smooth and fluffy.
  4. Mix dry ingredients: In a large bowl, whisk together almond meal, powdered peanut butter, baking soda, cinnamon, nutmeg, and salt. Break up any clumps for even distribution.
  5. Combine wet and dry: Pour the wet mixture into the dry ingredients. Gently stir with a spatula until just combined—small lumps are okay!
  6. Fill the pan: Transfer your batter to the prepared loaf pan and smooth the top. Sprinkle crushed pecans and extra chocolate chips on top, gently pressing them in.
  7. Bake: Place in the oven and bake for 45-55 minutes, or until a toothpick inserted in the center comes out with a few moist crumbs. The top should be golden brown.
  8. Cool: Allow the bread to cool in the pan for 30 minutes before lifting it out using the parchment paper. Let it cool completely on a wire rack before slicing.

Pro Tips for Perfect Banana Zucchini Bread

Want to ensure your banana zucchini bread is a hit? Check out these expert tips:

  • Choose the right bananas: The more brown spots, the better! They provide natural sweetness and flavor.
  • Don’t skip squeezing the zucchini: This step is crucial for avoiding a soggy loaf.
  • Use room temperature egg: It helps the batter mix more evenly, creating a better texture.
  • Mix gently: Overmixing can lead to dense bread. Stir until just combined for the best results.
  • Check for doneness: Ovens vary, so start checking your bread at the 45-minute mark.
  • Let it cool: Patience is key! Let the bread cool completely before slicing for the best texture.
  • Try different add-ins: Experiment with nuts, seeds, or dried fruits to customize your bread.
  • Store properly: Keep the bread in an airtight container to maintain freshness.

Common Mistakes and Troubleshooting

Even the best bakers encounter hiccups. Here are some common mistakes and how to fix them:

  • Soggy bread: Most often caused by excess moisture in the zucchini. Always squeeze the liquid out!
  • Dense texture: Usually due to overmixing. Stir gently until just combined.
  • Not sweet enough: If your bananas aren’t ripe, consider adding a bit more honey or maple syrup.
  • Burnt edges: If your oven runs hot, consider using a lower temperature and covering the top with foil if it browns too quickly.

Delicious Variations to Try

Feeling adventurous? Here are some fun variations to switch things up:

  • Chocolate Chip Peanut Butter Swirl: Add dollops of peanut butter to the batter and swirl it in before baking.
  • Nut-Free Option: Substitute almond meal with oat flour or a nut-free flour blend.
  • Spiced Pumpkin Version: Replace zucchini with pumpkin puree for a fall-inspired twist.
  • Berry Blast: Fold in fresh or frozen berries for a fruity burst of flavor.

Storage and Make-Ahead Instructions

Want to keep your banana zucchini bread fresh? Here’s how:

  • Room Temperature: Store in an airtight container for up to 3 days.
  • Refrigerator: For longer storage, keep in the fridge for up to a week.
  • Freezing: Wrap slices in plastic wrap and freeze for up to 3 months. Thaw overnight in the fridge or at room temperature.

Nutritional Tips and Dietary Adaptations

This banana zucchini bread is not just delicious but also nutritious! Here are some dietary tips:

  • Protein Boost: Add protein powder to the batter for an extra protein punch.
  • Dairy-Free Option: Use dairy-free chocolate chips and nut milk for a completely dairy-free treat.
  • Low-Sugar Alternative: Replace honey with a sugar substitute like erythritol for a lower-calorie version.

Equipment Recommendations

To make your baking experience smooth and enjoyable, here’s what you’ll need:

  • Food Processor or Mixer: For blending the wet ingredients smoothly.
  • Loaf Pan: An 8×4-inch pan is perfect for this recipe.
  • Spatula: For folding and mixing without overworking the batter.
  • Wire Rack: Essential for cooling your bread evenly.

Serving Suggestions

Enjoy your banana zucchini bread in fun ways:

  • Spreadable Goodness: Top slices with almond butter or cream cheese for a delicious treat.
  • Breakfast Toast: Serve it warm with a sprinkle of cinnamon and a drizzle of honey for a delightful breakfast.
  • Snack Time Delight: Pair with a cup of tea or coffee for the perfect afternoon snack.

Frequently Asked Questions

Got questions? We’ve got answers! Here are some commonly asked questions about this recipe:

  • Can I use frozen zucchini?: Yes! Just make sure to thaw and squeeze out excess moisture.
  • What can I substitute for almond meal?: You can use coconut flour or oat flour, but adjustments to liquid may be needed.
  • Can I make this vegan?: Absolutely! Replace the egg with a flax egg (1 tbsp ground flaxseed mixed with 2.5 tbsp water).
  • How do I know when it’s done baking?: A toothpick inserted in the center should come out with a few moist crumbs, not wet batter.
  • What if I don’t have powdered peanut butter?: You can use regular peanut butter, but it will alter the texture slightly.
  • Can I add nuts?: Yes! Chopped walnuts or pecans make a fantastic addition.
  • Is this bread gluten-free?: Yes! As long as all your ingredients are certified gluten-free, it is safe for those with gluten sensitivities.
  • How should I store leftovers?: Keep in an airtight container at room temperature or refrigerate for up to a week.

Final Thoughts

There you have it! This Grain-Free Banana Zucchini Bread is not just a recipe; it’s a celebration of health, flavor, and creativity in the kitchen. With its moist texture and delicious taste, it’s sure to become a staple in your home. So gather your ingredients, preheat that oven, and get ready to enjoy a delightful baking experience that’s as fun as it is flavorful. Happy baking!

Grain-Free Banana Zucchini Bread

Prep Time 15 minutes
Cook Time 50 minutes
Total Time 1 hour 5 minutes
Servings 8 slices
Calories 250
A moist, flavorful banana zucchini bread that's grain-free and perfect for a healthy snack or breakfast.

Ingredients

Wet ingredients

  • 2 pieces extra ripe bananas (~225g, heavily spotted peels)
  • 1 cup shredded zucchini (squeeze out excess moisture)
  • 1 large egg (room temperature)
  • 1/4 cup honey (can substitute maple syrup)
  • 2 tsp vanilla extract (pure extract recommended)

Dry ingredients

  • 1 1/2 cups almond meal (also called almond flour)
  • 1/2 cup powdered peanut butter (PB2 or similar brand)
  • 1 tsp baking soda
  • 1 tsp ground cinnamon
  • 1/2 tsp ground nutmeg (freshly ground if possible)
  • 1/4 tsp salt
  • 1/3 cup chocolate chips (use dairy-free if needed)
  • 3 tbsp crushed pecans (optional, for topping)
  • 2 tbsp extra chocolate chips (optional, for topping)

Instructions 

  • Preheat oven to 350°F (175°C). Line a loaf pan with parchment and spray lightly.
  • Squeeze excess moisture from shredded zucchini.
  • Blend bananas, zucchini, egg, honey, and vanilla until smooth.
  • Mix dry ingredients, then fold wet mixture into dry. Stir in chocolate chips.
  • Pour batter into pan, top with pecans and extra chips, then bake 45-55 mins.
  • Cool in pan 30 mins, then cool completely before slicing.

Notes

Ensure zucchini is well squeezed to prevent sogginess.
Calories: 250kcal
Cost: $15
Course: Breakfast, Snack
Cuisine: American
Keyword: Banana, Grain-Free, Zucchini

Unleashing the Zest: Why Flourless Lemon Yogurt Cake is Your New Favorite Dessert

Welcome to the vibrant world of **Flourless Lemon Yogurt Cake**, where every bite bursts with sunny citrus goodness! If you’ve ever thought that healthy desserts lack flavor or excitement, then hold on tight—this cake is about to change your mind. Imagine a moist, zesty cake that not only satisfies your sweet tooth but also nourishes your body. Made with wholesome ingredients like **Greek yogurt** and **almond flour**, this recipe is perfect for those seeking a gluten-free indulgence without sacrificing taste.

In this article, we’re diving deep into everything you need to know about crafting the ultimate flourless lemon yogurt cake. From ingredient breakdowns and pro tips to common mistakes and serving suggestions, we’ve got you covered. Let’s get started!

Why You’ll Love This Recipe

This cake isn’t just a treat; it’s a celebration of flavor and health. Here are five compelling reasons to fall in love with this **lemon yogurt cake**:

  • Gluten-Free Delight: Made with **almond flour**, this cake is naturally gluten-free, making it a great choice for those with dietary restrictions.
  • Moisture Galore: The use of **Greek yogurt** not only adds protein but also ensures the cake remains incredibly moist and tender.
  • Natural Sweetness: With **granulated sugar** and **honey**, this recipe strikes the perfect balance of sweetness without being overwhelming.
  • Quick and Easy: This cake comes together in just about an hour, perfect for last-minute gatherings or a weekend treat.
  • Versatile and Adaptable: Feel free to experiment with flavors and add-ins like berries or nuts to create your own signature version!

Ingredient Breakdown: What You Need

Before you embark on this baking adventure, let’s look at the essential ingredients that make this cake shine:

  • 2 cups Greek yogurt (plain, full-fat): The star ingredient for creaminess and tang.
  • 4 large eggs: For binding and moisture.
  • 3/4 cup granulated sugar: Adds sweetness while balancing the tartness of the lemons.
  • 1/4 cup honey: Infuses natural sweetness and enhances the cake’s flavor.
  • 1/3 cup cornstarch: Acts as a gluten-free thickener, giving the cake structure.
  • Zest of 2 large lemons: For that punchy lemon flavor that brightens every bite!
  • 1/4 cup fresh lemon juice: Adds acidity and moisture, creating a delightful flavor profile.
  • 1 teaspoon vanilla extract: Enhances the overall flavor.
  • 1 teaspoon baking powder: Gives the cake a little lift.
  • 1/4 teaspoon salt: Balances flavors and enhances sweetness.

Ingredient Substitutions

  • Yogurt Alternatives: You can use **dairy-free yogurt** for a vegan option, but ensure it’s thick to maintain texture.
  • Sweetener Swaps: Replace granulated sugar with coconut sugar for a lower glycemic index option.
  • Flour Alternatives: If you prefer a different flavor, substitute **almond flour** with **coconut flour** (note that you’ll need to adjust the quantity).
  • Egg-Free Option: Use a flaxseed meal (1 tablespoon mixed with 2.5 tablespoons of water = 1 egg) for a vegan version.

Pro Tips for the Perfect Flourless Lemon Yogurt Cake

Side view of a delicious flourless lemon yogurt cake with a glossy finish and lemon zest on top.

Here are some expert tips to elevate your baking game:

  • Room Temperature Ingredients: Ensure your eggs and yogurt are at room temperature for a smooth batter.
  • Don’t Overmix: Gently fold in the ingredients to avoid a dense cake.
  • Test for Doneness: A toothpick inserted into the center should come out clean; if it’s wet, give it a few more minutes.
  • Let It Cool: Allow the cake to cool completely in the pan for easy removal without breaking.
  • Add Zest at the End: To retain the bright flavor, add lemon zest just before pouring the batter into the pan.
  • Experiment with Toppings: Dust with powdered sugar or serve with fresh berries for an elegant touch.
  • Double the Recipe: This cake freezes beautifully, making it a perfect option for meal prep!
  • Use a Springform Pan: For easy removal and a beautiful presentation, opt for a springform cake pan.

Common Mistakes and Troubleshooting

Even the best bakers encounter hiccups. Here are some common mistakes and how to avoid them:

  • Dense Texture: This often happens from overmixing. Remember, less is more!
  • Not Zesty Enough: Use fresh lemons for both zest and juice to maximize flavor.
  • Overbaking: Keep an eye on your cake; it can go from perfect to dry in minutes!
  • Sticking to the Pan: Always line your pan with parchment paper and grease it well.

Delicious Variations to Try

Why not switch things up? Here are some fun variations to give your cake a twist:

  • Berry Burst: Fold in fresh blueberries or raspberries for a fruity explosion.
  • Coconut Delight: Add shredded coconut to the batter for a tropical feel.
  • Chocolate Chip Extravaganza: Stir in dark chocolate chips for a decadent touch.
  • Spiced Up: Add cinnamon or nutmeg for a warm, cozy flavor profile.

Storage and Make-Ahead Instructions

This cake is not only delicious but also easy to store:

  • Room Temperature: Keep it covered at room temperature for 2 days.
  • Refrigeration: For longer freshness, store in an airtight container in the fridge for up to a week.
  • Freezing: Wrap slices tightly with plastic wrap and freeze for up to 3 months. Thaw in the fridge overnight before enjoying.

Frequently Asked Questions (FAQs)

Got questions? Let’s clear up some common queries about this cake:

  • Can I replace the maple syrup with sugar? Absolutely! You can use granulated sugar instead of maple syrup.
  • Can I use regular yogurt instead of Greek yogurt? While you can use regular yogurt, it may result in a softer crumb.
  • Can I substitute almond flour with another flour? Yes, but note that the texture and flavor will change. Coconut flour can be used but requires adjustment in quantity.
  • Can I make this cake dairy-free? Yes! Substitute Greek yogurt with a dairy-free alternative.
  • Can I double the recipe? Certainly! Just ensure your baking pan is large enough to accommodate the extra batter.
  • How can I make this cake more lemony? Add more lemon zest and juice to intensify the flavor.
  • Is this cake suitable for vegans? With egg substitutes and dairy-free yogurt, it can be made vegan!
  • What is the nutritional information per slice? Each slice contains approximately 180 calories, depending on the specific ingredients used.

Serving Suggestions: Pairing Perfectly

To elevate your serving experience, consider these delightful pairings:

  • With Fresh Berries: Serve slices with a side of mixed berries for added freshness.
  • Whipped Cream: A dollop of whipped cream or cool whip adds a luscious touch.
  • Tea or Coffee: Pair with a cup of herbal tea or coffee for a delightful afternoon treat.
  • Ice Cream: A scoop of lemon sorbet or vanilla ice cream makes for a refreshing contrast.

Final Thoughts: Your New Go-To Dessert

Now that you’re armed with all the knowledge to create the most delicious **Flourless Lemon Yogurt Cake**, it’s time to get baking! This cake isn’t just a recipe; it’s an experience filled with flavors that inspire joy and connection. Remember, cooking is about creativity and fun, so don’t hesitate to experiment with flavors and toppings. Enjoy every slice, and share your delicious creations with friends and family. Happy baking!

Flourless Lemon Yogurt Cake Recipe

Prep Time 15 minutes
Cook Time 45 minutes
Total Time 1 hour
Servings 8 slices
Calories 250
A light and tangy flourless cake combining Greek yogurt and fresh lemon for a delightful treat.

Ingredients

Dairy and Eggs

  • 2 cups Greek yogurt (plain, full-fat)
  • 4 large eggs eggs
  • 3/4 cup granulated sugar
  • 1/4 cup honey
  • 1/3 cup cornstarch
  • Zest of 2 large lemons lemon zest
  • 1/4 cup fresh lemon juice
  • 1 teaspoon teaspoon vanilla extract
  • 1 teaspoon teaspoon baking powder
  • 1/4 teaspoon teaspoon salt

Instructions 

  • Preheat oven to 350°F (175°C). Grease and line a cake pan with parchment.
  • Whisk eggs, sugar, and honey until smooth. Mix in yogurt, lemon zest, lemon juice, and vanilla.
  • Stir in cornstarch, baking powder, and salt until well combined. Pour batter into prepared pan.
  • Bake for 40-45 minutes until golden and a toothpick comes out clean. Cool before serving.

Notes

This cake is best enjoyed fresh and can be dusted with powdered sugar for extra flair.
Calories: 250kcal
Cost: $15
Course: Dessert
Cuisine: fusion
Keyword: gluten-free, Lemon, yogurt

Unleash Flavor with Zesty Cherry Tomato Pasta!

Welcome to a vibrant culinary adventure! If you’re looking for a dish that’s as delightful as it is nutritious, you’ve landed in the right place. Cherry Tomato Pasta is the perfect weeknight dinner that combines the freshness of ripe cherry tomatoes, the aromatic punch of garlic, and the delightful fragrance of fresh basil. This recipe not only promises to tantalize your taste buds but also makes the most out of simple ingredients. Let’s dive into the delicious world of Cherry Tomato Pasta, where cooking becomes an exciting playground!

Why You’ll Love This Recipe

  • Quick and Easy: Ready in just 30 minutes, making it ideal for busy weeknights.
  • Fresh Ingredients: Utilizes seasonal cherry tomatoes and aromatic garlic for maximum flavor.
  • Customizable: Easily adaptable with different pasta types or additional veggies.
  • Nutritious: Packed with vitamins from tomatoes and fresh basil, this dish is guilt-free!
  • Perfect for Meal Prep: Great for batch cooking and tastes even better the next day!

Essential Ingredients Breakdown

Let’s take a closer look at the ingredients that make this Cherry Tomato Pasta shine. Each component plays a crucial role in building layers of flavor.

  • 1 lb cherry tomatoes: The star of the dish! Use a mix of colors for a beautiful presentation.
  • 8 oz spaghetti: Feel free to switch it up with whole wheat, gluten-free, or your favorite pasta shape.
  • 4 cloves garlic, minced: Adds a robust flavor that elevates the entire dish.
  • 3 tbsp extra virgin olive oil: A splash of this liquid gold enhances richness and helps sauté the garlic.
  • 1 cup fresh basil leaves, torn: Offers a fragrant aroma and a burst of fresh flavor.
  • ½ cup grated Parmesan cheese: Optional, but it adds creaminess and depth.
  • Salt and pepper to taste: Essential for bringing all the flavors together.

How to Make Cherry Tomato Pasta

Side view of spaghetti mixed with juicy cherry tomatoes and grated Parmesan.

Get ready to whip up a Cherry Tomato Pasta that will impress everyone around your dinner table!

  1. Prepare the cherry tomatoes by washing and halving them.
  2. In a large skillet, heat olive oil over medium heat. Sauté minced garlic until fragrant, about 30 seconds.
  3. Add halved cherry tomatoes to the skillet, season with salt and pepper, and let simmer until softened and juicy.
  4. Meanwhile, cook pasta in salted boiling water according to package instructions until al dente. Reserve 1 cup of pasta water before draining.
  5. Combine cooked pasta with the tomato mixture in the skillet, adding reserved pasta water as needed to create a sauce that coats the pasta.
  6. Fold in torn basil leaves and top with grated Parmesan cheese before serving.

Pro Tips for Perfect Cherry Tomato Pasta

Want to elevate your cooking game? Here are some pro tips to ensure your Cherry Tomato Pasta turns out perfectly every time:

  • Quality over quantity: Use the freshest cherry tomatoes you can find; they make all the difference in taste.
  • Don’t rush the garlic: Sauté it until just fragrant—burnt garlic can ruin the dish.
  • Save pasta water: This starchy water is a secret weapon for creating a silky sauce.
  • Adjust seasoning: Taste your sauce before serving and adjust salt and pepper as necessary.
  • Garnish generously: A little extra basil and Parmesan on top can elevate your dish’s appearance.
  • Make it a meal: Add protein like grilled chicken or shrimp for a heartier dish.
  • Mix it up: Experiment with different herbs like parsley or thyme for a twist.
  • Don’t skip the simmer: Allow the tomatoes to break down and create a rich sauce.

Common Mistakes and Troubleshooting

Even the best chefs make mistakes! Here are some common pitfalls and how to avoid them:

  • Overcooking pasta: Always cook your pasta to al dente for the best texture.
  • Not enough salt: Failing to season your pasta water can lead to bland noodles.
  • Skipping the simmer: If you rush the cooking time for the tomatoes, you miss out on rich flavors.
  • Using dried herbs: Fresh herbs elevate this dish, so opt for fresh whenever possible.

Delicious Variations

Feeling adventurous? Here are some fun variations to try with your Cherry Tomato Pasta:

  • Spicy Kick: Add red pepper flakes while sautéing the garlic for a spicy twist.
  • Vegetable Medley: Toss in zucchini, bell peppers, or spinach for added nutrients and colors.
  • Protein Boost: Incorporate grilled chicken, shrimp, or chickpeas for a heartier meal.
  • Vegan Delight: Skip the cheese and add nutritional yeast for a cheesy flavor without dairy.

Storage and Make-Ahead Instructions

This Cherry Tomato Pasta is perfect for meal prep! Here’s how to store and reheat:

  • Refrigeration: Store any leftovers in an airtight container in the fridge for up to 3 days.
  • Freezing: While fresh pasta is best enjoyed immediately, you can freeze the sauce for up to 2 months.
  • Reheating: Warm on the stovetop over low heat, adding a splash of olive oil or reserved pasta water to loosen the sauce.

Comprehensive FAQ

Got questions? We’ve got answers! Here are some common queries about Cherry Tomato Pasta:

  • Can I use other types of tomatoes? Absolutely! Any ripe tomato will work, but cherry tomatoes provide the sweetest flavor.
  • Is this recipe vegan? You can easily make it vegan by omitting the cheese or using a plant-based alternative.
  • Can I add meat? Yes! Grilled chicken, sausage, or bacon can enhance the dish.
  • How do I make it gluten-free? Substitute spaghetti with gluten-free pasta alternatives.
  • What wine pairs well with this dish? A crisp white wine like Sauvignon Blanc complements the flavors beautifully.
  • Can I add more veggies? Definitely! Feel free to get creative with seasonal vegetables.
  • How can I make this dish spicier? Add red pepper flakes or diced jalapeños for a spicy kick!
  • What sides go well with Cherry Tomato Pasta? A simple green salad or garlic bread make excellent accompaniments.

Nutrition Tips and Dietary Adaptations

Eating healthily doesn’t mean sacrificing flavor. Here are some nutrition tips:

  • Whole grain pasta: Opt for whole grain spaghetti for added fiber and nutrients.
  • Lower fat cheese: Use reduced-fat Parmesan for a lighter option.
  • Fresh herbs: Load up on fresh basil and other herbs for added vitamins.
  • Balanced Meal: Pair with a protein source to create a balanced meal.

Equipment Recommendations

To make your cooking experience seamless, here are some kitchen essentials:

  • Large skillet: Perfect for sautéing and combining your ingredients.
  • Colander: For draining pasta efficiently.
  • Chef’s knife: A good quality knife makes prepping vegetables a breeze.
  • Pasta pot: A large pot for boiling pasta is essential for even cooking.

Serving Suggestions

Now that you’ve mastered the art of Cherry Tomato Pasta, here’s how to serve it:

  • Garnish: Top with extra torn basil and a sprinkle of Parmesan for visual appeal.
  • Pair with a salad: A side of arugula and cherry tomato salad complements the pasta perfectly.
  • Perfect for gatherings: Serve family-style in a large bowl for gatherings or potlucks.

Conclusion

Your journey into the world of Cherry Tomato Pasta is just beginning! With its vibrant flavors and simple preparation, this dish is destined to become a staple in your kitchen. Whether you’re whipping it up for a quick dinner or impressing guests at a gathering, this recipe proves that healthy food can be delicious and exciting. So grab those cherry tomatoes, unleash your creativity, and enjoy every bite of your culinary masterpiece. Happy cooking!

Cherry Tomato Pasta

Prep Time 10 minutes
Cook Time 15 minutes
Total Time 25 minutes
Servings 4 servings
Calories 450
A quick and flavorful pasta dish featuring fresh cherry tomatoes and basil, perfect for a light meal.

Ingredients

Cherry Tomatoes

  • 1 lb cherry tomatoes (washed and halved)
  • 8 oz spaghetti (or pasta of choice)
  • 4 cloves garlic (minced)
  • 3 tbsp extra virgin olive oil
  • 1 cup fresh basil leaves (torn)
  • ½ cup grated Parmesan cheese
  • to taste Salt and pepper

Instructions 

  • Wash and halve the cherry tomatoes.
  • Heat olive oil in a skillet, sauté garlic until fragrant.
  • Add tomatoes, season with salt and pepper, simmer until soft.
  • Cook pasta until al dente, reserve 1 cup pasta water.
  • Combine pasta with tomato sauce, add reserved water as needed.
  • Mix in basil, top with Parmesan, serve.

Notes

Use fresh basil for the best flavor and adjust salt and pepper to taste.
Calories: 450kcal
Cost: $12
Course: Main Course
Cuisine: Italian
Keyword: pasta

Unleash the Flavor: Why This Dish is a Must-Try!

Are you ready to dive into a world of vibrant flavors and wholesome goodness? If you’re looking for a dish that’s not just quick but also bursting with fresh basil and juicy cherry tomatoes, then you’ve found the right recipe! This Simple Basil and Cherry Tomato Pasta combines the essence of summer with every vibrant bite. Imagine the aroma of sautéed garlic mingling with the sweet scent of blistered tomatoes and the fresh, fragrant notes of basil. Whether you’re a busy professional, a parent juggling multiple tasks, or simply someone who loves good food without the fuss, this dish is designed for you!

In less than 30 minutes, you can create a meal that feels like a celebration of summer on your plate. It’s perfect for those impromptu gatherings or a cozy night in. Let’s embark on this culinary adventure and discover why this dish will become a staple in your kitchen!

Why You’ll Love This Recipe

  • Quick and Easy: Ready in just 15 minutes, this pasta dish is a lifesaver for busy evenings when cooking feels impossible.
  • Fresh Ingredients: The combination of fresh basil and cherry tomatoes creates a sauce that is naturally sweet and packed with flavor.
  • Healthy and Nutritious: This dish is not only delicious but also loaded with essential vitamins and minerals, making it a guilt-free indulgence.
  • Versatile: You can easily customize this recipe with your favorite vegetables, proteins, or grains for a personal touch.
  • Perfect for Meal Prep: This pasta keeps well, making it an ideal choice for leftovers or meal prep for the week ahead.

Gather Your Ingredients

Before we jump into the cooking process, let’s take a closer look at the ingredients you’ll need. Feel free to get creative with substitutions to suit your taste!

  • 200 g spaghetti or pasta of choice: Any pasta works, so choose your favorite or what you have on hand!
  • 3 cloves garlic (minced): Fresh garlic adds an aromatic depth that elevates the dish.
  • 250 g cherry tomatoes (halved): Sweet and juicy, these tomatoes are the star of the show.
  • 3 tablespoons olive oil: Use high-quality extra virgin olive oil for the best flavor.
  • A handful of fresh basil leaves (roughly chopped): The fresher, the better! Basil adds brightness and a hint of sweetness.
  • Salt and freshly ground black pepper (to taste): Essential for enhancing all the flavors!

Cooking Steps: Let’s Make It Happen!

A side view of basil and cherry tomato spaghetti, highlighting fresh ingredients and glossy pasta.

Now that we have all our ingredients ready, it’s time to bring this dish to life! Follow these simple steps for a pasta experience that feels like a warm hug.

  1. Bring a large pot of salted water to a boil and cook the pasta until al dente, following package instructions. Drain and set aside.
  2. In a skillet over medium heat, heat the olive oil and listen for a gentle shimmer, then add the minced garlic and sauté until fragrant, about 1 minute.
  3. Add the halved cherry tomatoes to the skillet and cook for 3-4 minutes, stirring occasionally, until they soften and release their delicious juices.
  4. Pour the cooked pasta directly into the skillet with the tomato mixture, tossing gently to ensure the noodles are coated evenly with the fragrant sauce.
  5. Sprinkle the chopped basil over the pasta, seasoning with salt and pepper to taste. Stir to combine, allowing the basil to infuse its fresh aroma into the dish.
  6. Serve immediately, letting the vibrant colors and fresh flavors shine on your plate!

Pro Tips for Cooking Success

To ensure you nail this dish every time, here are some expert insights that will take your pasta game to the next level:

  • Salt Your Pasta Water: Your pasta water should taste like the ocean! This is crucial for flavor enhancement.
  • Don’t Overcook the Pasta: Aim for al dente texture! It will continue cooking slightly when mixed with the sauce.
  • Use High-Quality Olive Oil: It makes a significant difference in flavor, so invest in a good bottle.
  • Variations Are Key: Feel free to add sautéed vegetables like zucchini, bell peppers, or spinach for extra nutrition.
  • Cheese Lovers Unite: Add freshly grated Parmesan or Pecorino Romano for a rich, savory finish!
  • Fresh Herbs Matter: Experiment with herbs like parsley or thyme for a different flavor profile.
  • Make it Spicy: Add a pinch of red pepper flakes for a kick of heat!
  • Meal Prep Friendly: This dish stores well in the fridge for up to 3 days—simply reheat and enjoy!

Avoiding Common Mistakes

Even the best chefs make mistakes! Here are some common pitfalls to watch out for:

  • Not Salting the Water: Your pasta will be bland without enough seasoning in the water!
  • Using Old Ingredients: Freshness is key—stale spices or old tomatoes can ruin the dish.
  • Rushing the Cooking: Let the garlic and tomatoes develop flavor! Don’t skip this step.

Delicious Variations to Try

Feeling adventurous? Here are some fun twists on the classic recipe:

  • Caprese Pasta: Add fresh mozzarella balls and balsamic glaze for a Caprese-inspired twist.
  • Pasta Primavera: Toss in seasonal vegetables like asparagus, peas, or broccoli.
  • Protein Boost: Incorporate grilled chicken, shrimp, or chickpeas for added protein.
  • Vegan Delight: Swap out cheese for nutritional yeast and use a plant-based pasta for a vegan option.

Storage and Make-Ahead Instructions

This pasta dish is perfect for meal prep! Here’s how to keep it fresh:

  • Refrigeration: Store leftovers in an airtight container in the fridge for up to 3 days.
  • Freezing: This dish can be frozen for up to a month. Just ensure it is cooled before placing it in a freezer-safe container.
  • Reheating: Reheat on the stovetop with a splash of water or broth to keep it moist.

Frequently Asked Questions

Here are some common questions about this dish:

  • Can I use dried basil instead of fresh? Fresh basil offers the best flavor, but if you must, use a smaller amount of dried basil.
  • What type of pasta works best? Any pasta is fine, but spaghetti or linguine are great choices for this recipe.
  • Is this dish gluten-free? Absolutely! Use gluten-free pasta to make this dish suitable for a gluten-free diet.
  • Can I add meat to this recipe? Yes! Grilled chicken or shrimp can be a delicious addition.
  • How do I keep the pasta from sticking? Toss it with a bit of olive oil after draining to prevent sticking.
  • Can I make this ahead of time? Yes! Just remember to store the pasta and sauce separately.
  • What can I substitute for cherry tomatoes? Grape tomatoes or diced regular tomatoes work well too.
  • How spicy can I make it? Adjust the heat level by varying the amount of red pepper flakes.

Nutrition Tips and Dietary Adaptations

This dish is naturally healthy but here are ways to enhance its nutritional value:

  • Boost Fiber: Use whole wheat or legume-based pasta for added fiber and nutrients.
  • Add Veggies: Incorporate more vegetables for a colorful and nutrient-rich meal.
  • Healthy Fats: Olive oil is great, but consider adding avocado for creaminess and healthy fats!

Equipment Recommendations

Here’s what you’ll need to whip up this delightful pasta:

  • Large Pot: For boiling pasta.
  • Skillet: A good non-stick skillet is essential for cooking the sauce.
  • Wooden Spoon: For stirring and mixing ingredients.
  • Measuring Cups and Spoons: Precision is key!

Serving Suggestions

To create a delightful meal, consider pairing your pasta with:

  • Garlic Bread: A classic side that complements the pasta beautifully.
  • Side Salad: A fresh green salad with vinaigrette will balance the richness of the dish.
  • Wine Pairing: A chilled white wine or light red can enhance your dining experience.

Conclusion: Dive Into Flavor!

There you have it! A comprehensive guide to making Simple Basil and Cherry Tomato Pasta that not only tastes incredible but is also quick and easy. Embrace the joy of cooking and let this dish bring brightness to your mealtime. Remember, healthy eating should be fun, colorful, and a bit adventurous. So gather your ingredients, summon your inner chef, and whip up this delightful dish that’s guaranteed to impress!

Simple Basil and Cherry Tomato Pasta

Prep Time 10 minutes
Cook Time 15 minutes
Total Time 25 minutes
Servings 2 servings
Calories 550
A quick and fresh pasta dish featuring cherry tomatoes, garlic, and basil for a vibrant, flavorful meal.

Ingredients

Pasta

  • 200 g spaghetti or pasta of choice
  • 3 cloves garlic (minced)
  • 250 g cherry tomatoes (halved)
  • 3 tablespoons olive oil
  • a handful fresh basil leaves (roughly chopped)
  • to taste salt and freshly ground black pepper

Instructions 

  • Cook pasta in salted boiling water until al dente, then drain.
  • Heat olive oil in a skillet over medium heat; add minced garlic and cook until fragrant.
  • Add cherry tomatoes and cook for 3-4 minutes until softened and juices are released.
  • Combine cooked pasta with the tomato mixture, tossing to coat.
  • Stir in chopped basil, season with salt and pepper, then serve immediately.

Notes

Use fresh basil for the best flavor and adjust seasoning to taste.
Calories: 550kcal
Cost: $10
Course: Main Course
Cuisine: Italian
Keyword: Basil, Cherry Tomatoes, pasta

Elevate Your Plate with Crunchy Asian Cabbage Slaw

Welcome to a world of vibrant flavors and crunchy textures! If you’re looking for a dish that adds a splash of excitement to your meals, this Crunchy Asian Cabbage Slaw with an addictive sesame dressing is your secret weapon. Bursting with freshness and nutrition, this slaw is not only easy to whip up but also versatile enough to accompany a variety of dishes. Ready to dive into your new favorite recipe? Let’s get started!

Why You’ll Love This Recipe

  • Quick and Easy: Perfect for busy weeknights, this slaw can be prepped in just 15 minutes!
  • Nutritious and Wholesome: Packed with vitamins and fiber, it’s a great addition to any meal.
  • Flavor Explosion: The combination of toasted sesame oil, soy sauce, and fresh veggies creates a delightful taste that dances on your palate.
  • Versatile Side Dish: Pair it with grilled chicken, fish, or tofu, or enjoy it on its own as a light meal.
  • Meal Prep Friendly: Make ahead and store for a quick lunch or dinner option throughout the week.

Ingredients Breakdown

Before we jump into the preparation, let’s take a closer look at the ingredients that make this slaw a standout!

  • Napa Cabbage: This forms the crisp base of your slaw, offering a delightful crunch.
  • Carrots: Shredded for sweetness and color, they brighten up the dish!
  • Green Onions: Adds a mild zing; feel free to swap in red onions for a bolder flavor.
  • Toasted Sesame Oil: This aromatic oil gives your slaw its addictive flavor profile.
  • Soy Sauce: Opt for low sodium to keep it healthy while enhancing the umami flavor.
  • Rice Vinegar: Adds a tangy kick that balances the sweetness of the honey.
  • Honey or Maple Syrup: A touch of sweetness; use agave nectar for a vegan option.
  • Garlic and Ginger: Freshly grated, these aromatics elevate the flavor immensely.
  • Chili Flakes or Sriracha: Optional, but they bring a delightful heat if you’re feeling adventurous!

How to Prepare This Delicious Slaw

Side view of crunchy Napa cabbage slaw drizzled with sesame dressing, showcasing fresh ingredients.

Now that we have our ingredients ready, let’s dive into the preparation!

  • Step 1: Start by thinly slicing the Napa cabbage and placing it in a large mixing bowl.
  • Step 2: Add the shredded carrots and chopped green onions to the bowl.
  • Step 3: In a separate small bowl, whisk together the toasted sesame oil, soy sauce, rice vinegar, honey (or maple syrup), grated garlic, and ginger until well combined.
  • Step 4: Pour the dressing over the cabbage mixture and toss until everything is evenly coated.
  • Step 5: If desired, sprinkle in chili flakes or Sriracha for an extra kick!
  • Step 6: Allow the slaw to sit for about 10 minutes before serving. This lets the flavors meld beautifully.

Pro Tips for the Perfect Slaw

Want to take your slaw to the next level? Here are some expert insights:

  • Keep it Crunchy: Dress the slaw just before serving to maintain that perfect crunch.
  • Make Ahead: You can prep the veggies in advance and store them separately from the dressing for quick assembly.
  • Customize Your Flavor: Experiment with different vinegars (like apple cider) or add a splash of citrus for a fresh twist!
  • Texture Matters: Shred the veggies finely; this enhances the slaw’s texture and flavor absorption.
  • Fresh Herbs: Add fresh cilantro or mint for a burst of freshness.
  • Balance it Out: If you like it sweeter, adjust the honey or maple syrup to taste.
  • Chill Out: Serve it cold for a refreshing crunch on a hot day!
  • Serving Size: This recipe is easily doubled or halved based on your needs.

Common Mistakes and Troubleshooting

Let’s ensure your slaw turns out perfectly every time. Here are common pitfalls and how to avoid them:

  • Overdressing: Too much dressing can make your slaw soggy. Start with less and add more to taste.
  • Unbalanced Flavors: If it’s too salty, add a touch more vinegar or sweetness to balance it out.
  • Veggie Size: Large chunks can lead to an uneven texture—ensure everything is finely shredded.
  • Not Enough Time: Letting the slaw sit for at least 10 minutes enhances flavor; don’t skip this step!

Delicious Variations to Try

Feeling adventurous? Here are some delicious variations of this slaw:

  • Asian Chicken Slaw: Add shredded rotisserie chicken for a protein-packed twist!
  • Spicy Mango Slaw: Include diced mango and jalapeños for a sweet and spicy combination.
  • Crunchy Quinoa Slaw: Mix in cooked quinoa for added texture and protein.
  • Peanut Butter Dressing: Swap the sesame dressing for a creamy peanut butter dressing for a nutty flavor.

Storage and Make-Ahead Instructions

This slaw is perfect for meal prep! Here’s how to store it:

  • Refrigerate: Store in an airtight container in the fridge for up to 3 days.
  • Make Ahead: Prep the slaw components and dressing separately; combine right before serving to keep it fresh.

Frequently Asked Questions

  • Can I make this slaw vegan? Yes! Simply use maple syrup or agave nectar instead of honey.
  • How spicy is this slaw? The spice level is adjustable—add chili flakes or Sriracha to taste.
  • What can I serve with this slaw? It pairs beautifully with grilled meats, tacos, or as a topping on sandwiches.
  • Can I use regular cabbage instead of Napa cabbage? Absolutely! Green or red cabbage will also work well.
  • How long can I store leftovers? Enjoy leftovers within 3 days for optimal freshness and crunch.
  • Can I freeze this slaw? Freezing isn’t recommended as it may affect the texture of the cabbage.
  • What other dressings work well? Try a sesame ginger or a light vinaigrette for different flavor profiles.
  • Is this slaw gluten-free? Use gluten-free soy sauce to keep it gluten-free!

Nutritional Tips and Dietary Adaptations

This slaw is naturally healthy, but here are some tips to adapt it:

  • Low-Calorie Option: Use less oil and sweetener while increasing the amount of veggies.
  • Protein Boost: Add edamame or chickpeas for added protein and texture.
  • Fiber Focus: Incorporate additional veggies like bell peppers or cucumbers for even more fiber.

Equipment Recommendations

To make your slaw-making process even smoother, here’s what you’ll need:

  • Sharp Knife: For easy and precise slicing of vegetables.
  • Cutting Board: A stable surface is essential for chopping.
  • Mixing Bowls: Large bowls for mixing the slaw and dressing.
  • Whisk: To combine dressing ingredients thoroughly.

Serving Suggestions

Now that your slaw is ready, here are some fun serving ideas:

  • As a Side Dish: Serve alongside grilled salmon or chicken for a colorful plate.
  • In Tacos: Use as a crunchy topping for fish or veggie tacos.
  • On Sandwiches: Layer it in wraps or sandwiches for a refreshing crunch.
  • As a Salad: Enjoy it topped with avocado and nuts for a filling meal.

Conclusion

There you have it—your guide to making the most delicious Crunchy Asian Cabbage Slaw with an addictive sesame dressing! This dish is not only visually appealing but also a powerhouse of flavor and nutrition. Whether you’re serving it at a family dinner or enjoying it as a quick lunch, this slaw will elevate your meals and make healthy eating a joy. So roll up your sleeves and get ready to enjoy the crunch!

Crunchy Asian Cabbage Slaw with Addictive Sesame Dressing Upgrade

Prep Time 15 minutes
Total Time 15 minutes
Servings 4 servings
Calories 150
A vibrant and crunchy cabbage slaw tossed in a flavorful sesame dressing, perfect for a quick and healthy meal or side dish.

Ingredients

Vegetables

  • 1 head Napa Cabbage (thinly sliced)
  • 2 medium Carrots (shredded)
  • 3 stalks Green Onions (chopped)

Dressing

  • 3 tablespoons Toasted Sesame Oil
  • 2 tablespoons Soy Sauce (low sodium preferred)
  • 2 tablespoons Rice Vinegar
  • 1 tablespoon Honey or Maple Syrup (for vegan option use agave nectar)
  • 1 clove Garlic (freshly grated)
  • 1 teaspoon Ginger (freshly grated)
  • Chili Flakes or Sriracha optional Chili Flakes or Sriracha (to taste)

Instructions 

  • In a large bowl, combine sliced Napa cabbage, shredded carrots, and chopped green onions.
  • In a small bowl, whisk together sesame oil, soy sauce, rice vinegar, honey (or maple syrup), grated garlic, and ginger.
  • Pour the dressing over the vegetables and toss to combine.
  • Optional: add chili flakes or Sriracha for heat, and toss again.
  • Serve immediately or chill for 10 minutes for more flavor.

Notes

For extra crunch, sprinkle with toasted sesame seeds before serving.
Calories: 150kcal
Cost: $12
Course: Side Dish
Cuisine: Asian
Keyword: cabbage

Welcome to the delightful world of cooking where flavor meets fun! Today, we’re diving into the vibrant experience of making 10-Minute Egg Fried Rice. This dish is not just a quick meal; it’s a flavorful explosion that brings together the magic of leftover rice, colorful veggies, and protein-rich eggs. Whether you’re whipping this up for a busy family weeknight dinner or a quick solo meal, this recipe proves that healthy food can be exciting and satisfying!

Why You’ll Love This Recipe

Before we get into the nitty-gritty of cooking, let’s discuss why this dish should be on your menu:

  • Quick and Easy: Ready in just 10 minutes, this recipe is perfect for those hectic weeknights when you need to get dinner on the table fast.
  • Customizable: Use any mixed vegetables on hand, making it a versatile choice to accommodate what’s in your fridge.
  • Flavor-Packed: The combination of soy sauce and sautéed vegetables creates a mouthwatering taste that’s anything but boring.
  • Budget-Friendly: Utilize day-old rice and leftover veggies to minimize waste and save money.
  • Nutritious: Packed with protein from eggs and fiber from veggies, this dish supports a balanced diet without sacrificing flavor.

Ingredient Breakdown

Let’s gather our ingredients! Here’s what you’ll need:

  • 2 cups cooked rice (preferably day-old): This ensures the rice is dry enough for frying without getting mushy.
  • 2 large eggs: Whisked and scrambled to create a fluffy texture.
  • 1 cup mixed vegetables: A colorful blend of peas, carrots, and corn for added nutrition and visual appeal.
  • 2 tablespoons soy sauce: Adds depth of flavor; feel free to use low-sodium if desired.
  • 2 tablespoons vegetable oil: Necessary for frying; can substitute with sesame oil for a nutty flavor.
  • 1 tablespoon green onions, chopped: For garnish and an extra pop of flavor.
  • Salt and pepper to taste: Essential seasonings to enhance the dish.

**Substitutions**: If you’re missing an ingredient, here are some easy swaps:

  • Rice: Any variety works, but long-grain rice is preferred for texture.
  • Vegetables: Use whatever you have—bell peppers, broccoli, or snap peas are great options!
  • Eggs: Can be substituted with tofu for a vegan version.

Step-by-Step Instructions

Ready to cook? Let’s get started!

  1. Gather Ingredients: Ensure your cooked rice is ready to use. If using leftover rice, break up any clumps for even frying.
  2. Scramble the Eggs: In a large skillet or wok, heat 1 tablespoon of vegetable oil over medium-high heat. Whisk the eggs in a bowl, then pour them into the hot skillet. Scramble until fully cooked, then transfer to a plate.
  3. Cook the Vegetables: In the same skillet, add the remaining tablespoon of oil. Add the mixed vegetables and sauté for 2-3 minutes until tender.
  4. Fry the Rice: Add the cooked rice, breaking up any clumps, and stir-fry for another 2-3 minutes until heated through.
  5. Combine: Return the scrambled eggs to the skillet, add soy sauce, and mix everything thoroughly. Season with salt and pepper to taste.
  6. Serve: Serve hot, garnished with chopped green onions for a fresh finish.

Pro Tips for Perfect Egg Fried Rice

Side view of a plate of egg fried rice with vibrant vegetables and fresh green onions sprinkled on top.

To elevate your fried rice game, consider these expert insights:

  • Use day-old rice: Freshly cooked rice tends to be too moist. Day-old rice, which has dried out in the fridge, is ideal.
  • High heat is key: Cooking over high heat helps to achieve that signature fried rice texture without steaming the ingredients.
  • Don’t overcrowd the pan: Give your ingredients space to fry properly; if necessary, cook in batches.
  • Use a wok: If you have one, a wok is perfect for stir-frying as it distributes heat evenly.
  • Customize flavors: Add a dash of sesame oil or chili sauce to elevate the flavor profile.
  • Prep ingredients ahead: This ensures a smooth cooking process, especially when you’re in a rush.
  • Experiment with proteins: Add cooked chicken, shrimp, or tofu for an extra protein boost.
  • Make it a meal prep hero: This dish stores well, making it perfect for meal prep.

Common Mistakes & Troubleshooting

Here are some pitfalls to avoid:

  • Using too much oil: This can make your rice greasy. Aim for just enough to coat the pan.
  • Not breaking up the rice: Leaving clumps can result in uneven cooking. Always break up clumps before frying.
  • Overcooking the eggs: Remove them from the skillet once they’re just set to maintain a soft texture.
  • Forget to season: Always taste and adjust seasoning at the end for the best flavor.

Variations to Try

Feeling adventurous? Here are some fun variations:

  • Chicken Fried Rice: Add cooked, shredded chicken for extra protein.
  • Vegetable Fried Rice: Load up on additional veggies like broccoli, bell peppers, and snap peas.
  • Spicy Fried Rice: Incorporate sriracha or chili paste for a spicy kick.
  • Thai Pineapple Fried Rice: Add chunks of fresh pineapple and cashews for a tropical twist.

Storage and Make-Ahead Instructions

This dish is perfect for leftovers!

  • Refrigerate: Store in an airtight container for up to 3 days.
  • Freezing: You can freeze fried rice for up to a month. Thaw in the fridge overnight before reheating.
  • Reheating: Heat in a skillet over medium heat, adding a splash of water to help steam it back to life.

Frequently Asked Questions

Here are some common questions about this recipe:

  • Can I use brown rice? Absolutely! Just ensure it’s cooked and cooled.
  • What if I don’t have soy sauce? Try tamari or coconut aminos as a gluten-free alternative.
  • Can I make this vegan? Yes! Replace eggs with scrambled tofu and use vegetable broth instead of soy sauce.
  • Is this dish gluten-free? It can be if you use gluten-free soy sauce or tamari.
  • How can I make it spicier? Add crushed red pepper flakes or sriracha to the cooking process.
  • What’s the best way to store leftovers? In an airtight container in the fridge, consume within 3 days.
  • Can I add nuts or seeds? Absolutely! Cashews or sesame seeds make delicious toppings.
  • What’s the best way to reheat fried rice? Reheat in a skillet with a splash of water over medium heat for best results.

Nutrition Tips and Dietary Adaptations

This dish is not only delicious but can also be tailored to meet various dietary needs:

  • Low-Carb Option: Substitute rice with cauliflower rice for a low-carb version.
  • High-Protein: Add cooked chicken or shrimp to increase protein content.
  • Vegan-Friendly: Swap eggs for tofu and use nutritional yeast for a cheesy flavor.

Equipment Recommendations

Here are the kitchen essentials you’ll need:

  • Skillet or Wok: A large, non-stick skillet or wok is ideal for frying.
  • Spatula: For flipping and mixing your ingredients efficiently.
  • Measuring Cups and Spoons: For precise ingredient measurements.

Serving Suggestions

Make your meal even more enticing with these serving ideas:

  • Serve with: A side of spring rolls or dumplings for a complete Asian-inspired feast.
  • Fresh Salad: Pair with a refreshing cucumber salad to balance the flavors.
  • Garnish: Top with additional green onions or sesame seeds for an extra crunch.

In conclusion, 10-Minute Egg Fried Rice is not just a meal; it’s a canvas for creativity in the kitchen! With its quick prep time and endless customization options, you can enjoy a flavorful and nutritious dish that fits your lifestyle. So grab your ingredients, channel your inner chef, and let’s get cooking!

Quick & Easy 10-Minute Egg Fried Rice

Prep Time 2 minutes
Cook Time 8 minutes
Total Time 10 minutes
Servings 2 servings
Calories 350
A quick and delicious fried rice recipe perfect for a fast meal using simple ingredients.

Ingredients

Rice and Vegetables

  • 2 cups cooked rice (preferably day-old) (Break up clumps if using leftover rice)
  • 2 large eggs
  • 1 cup mixed vegetables (peas, carrots, corn)
  • 2 tablespoons soy sauce
  • 2 tablespoons vegetable oil
  • 1 tablespoon green onions, chopped
  • to taste Salt and pepper

Instructions 

  • Ensure rice is ready and break up clumps if using leftover rice.
  • Heat 1 tablespoon of oil, scramble eggs until cooked, then set aside.
  • Add remaining oil, sauté vegetables for 2-3 minutes, then stir in rice and cook for another 2-3 minutes.
  • Return eggs to skillet, add soy sauce, season with salt and pepper, and mix well. Serve garnished with green onions.

Notes

Use day-old rice for best results and quick cooking.
Calories: 350kcal
Cost: $10
Course: Main Course
Cuisine: Asian
Keyword: Fried Rice

Unlock the Vibrant World of Veggie Rice Paper Rolls

Welcome to a culinary adventure that’s as playful as it is nutritious! These Fresh and Fun Veggie Rice Paper Rolls are your ticket to a world bursting with flavors and colors, making healthy eating an exciting experience. Packed with fresh veggies, creamy avocado, and a zesty peanut dipping sauce, you’ll soon discover that these delightful rolls are not just food; they’re a celebration of taste and creativity. Whether you’re in need of a quick snack, a light meal, or a party appetizer, these rolls check all the boxes. Let’s dive into why you’ll fall in love with this recipe!

Why You’ll Love This Recipe

Get ready to be inspired! Here are five compelling reasons to whip up these veggie rice paper rolls:

  • Quick and Easy Preparation: With just a handful of ingredients and simple steps, you can prepare these rolls in under 30 minutes, making them perfect for busy weeknights or last-minute gatherings.
  • Customizable to Your Taste: The beauty of these rolls lies in their versatility. Feel free to swap in your favorite vegetables, proteins, or dipping sauces based on what you have on hand!
  • Nutritious and Healthy: These rolls are not only vibrant but also packed with vitamins and minerals. The combination of fresh vegetables and healthy fats from avocado keeps your body energized.
  • Fun for All Ages: Making these rolls is a hands-on activity that kids and adults alike will enjoy. Gather your family or friends for a fun rolling party!
  • Perfect for Meal Prep: These rice paper rolls can be made ahead of time and stored in the fridge, making them an ideal choice for healthy meals on-the-go.

Ingredient Breakdown

Let’s take a closer look at the star players in this recipe. Each ingredient plays a vital role in flavor and texture!

  • Rice Paper Wrappers (20-25 sheets): These delicate sheets transform when dipped in warm water, creating a soft and pliable wrap for your fillings. Look for a high-quality brand, typically found in the Asian section of your grocery store.
  • Rice Vermicelli Noodles (200g / 7oz): These thin noodles add a satisfying texture and help absorb all the delicious flavors from the veggies.
  • Firm or Extra-Firm Tofu (1 block, approx. 400g / 14oz, optional): For those craving protein, tofu can be pressed, pan-fried, or baked until golden. Pre-marinated tofu works wonders too!
  • Large Carrots (2, medium): Julienned carrots add crunch and a vibrant orange hue to your rolls.
  • Cucumber (1, large): Seeded and julienned, cucumber introduces a refreshing crunch that balances the richness of avocado.
  • Red Bell Pepper (1, large): Its sweet, tangy flavor and bright color enhance both taste and presentation.
  • Lettuce Leaves (1 small head): These act as a gentle cradle for your fillings, helping to keep the rice paper intact.
  • Fresh Herbs (Mint, Cilantro, Thai Basil): Adding aromatic herbs elevates the flavor profile and freshness of the rolls.
  • Avocado (1-2, ripe): Creamy and packed with healthy fats, avocado is a must for a satisfying bite.
  • Creamy Peanut Butter (1/2 cup): The base of the dipping sauce, it adds richness and depth of flavor.
  • Soy Sauce or Tamari (3 tablespoons): A splash of soy sauce brings umami to the sauce; use tamari for a gluten-free option.
  • Rice Vinegar (2 tablespoons): This adds a tangy note that balances the peanut butter.
  • Maple Syrup or Agave Nectar (2 tablespoons): Sweetens the dipping sauce; feel free to adjust based on your taste!
  • Lime Juice (1 tablespoon): Freshly squeezed lime juice adds a zesty kick to the sauce.
  • Sesame Oil (1 teaspoon): A drizzle of sesame oil offers a nutty aroma and flavor.
  • Garlic (1 clove, minced): For a savory note that complements the sweetness of the peanut sauce.
  • Ginger (1 teaspoon, freshly grated): Adds warmth and a spicy zing to the sauce.
  • Warm Water (3-4 tablespoons): This is used to thin the peanut sauce to your desired consistency.
  • Red Pepper Flakes (1/4 teaspoon, optional): Add a hint of heat to your dipping sauce!

Pro Tips for Perfect Rolls

Side view of fresh veggie rice paper rolls filled with greens and herbs.

Elevate your rolling technique with these expert insights:

  • Soften the Rice Paper Properly: Dip each rice paper wrapper in warm water for about 10-15 seconds until it’s pliable but not too soft—this prevents tearing!
  • Don’t Overstuff: Less is more! Fill each roll with just enough ingredients to allow for easy rolling without bursting.
  • Layer Strategically: Place the lettuce first, followed by the heavier ingredients like tofu and vermicelli, topped with veggies and herbs.
  • Practice Your Rolling Technique: Start by folding in the sides before rolling from the bottom up. Tightly roll to keep all the fillings secure.
  • Keep it Moist: Have a damp paper towel handy to cover your rolls to prevent them from drying out while you work.
  • Experiment with Dips: While the peanut dipping sauce is a classic, feel free to try sweet chili sauce or a soy sauce-based dip for variety.
  • Chill Before Serving: If you have time, let the rolls chill in the fridge for 15-30 minutes before serving for a refreshing bite.
  • Make Ahead: Prepare the filling and rice paper wrappers separately, rolling them just before serving to maintain freshness.

Common Mistakes and Troubleshooting

Even the best chefs make mistakes! Here are some common pitfalls and how to avoid them:

  • Wrapper Tearing: If the rice paper tears, it may be too soft. Try dipping it in warm water for a shorter time.
  • Filling Falls Out: Ensure your rolls are tightly sealed, and avoid overfilling them.
  • Too Much Sauce: If the peanut sauce is too thick, thin it with a little warm water until it reaches your desired consistency.

Variations to Try

Mix things up with these exciting variations:

  • Shrimp Rice Paper Rolls: Add cooked shrimp for a protein-packed twist. Just make sure they’re peeled and deveined!
  • Spicy Tofu Rolls: Marinate tofu in sriracha for a spicy kick before cooking.
  • Quinoa Veggie Rolls: Swap rice vermicelli with cooked quinoa for an extra protein boost!
  • Fruit and Nut Rolls: Experiment with fruits like mango or strawberries alongside nuts for a sweet version.

Storage and Make-Ahead Instructions

Want to prep ahead? Here’s how to store your rolls for maximum freshness:

  • Refrigeration: Store rolled rice paper in an airtight container with damp paper towels to keep them moist. They’ll last about 2-3 days.
  • Freezing: While not recommended for raw rolls, you can freeze cooked fillings separately for future use. Just allow to thaw before rolling.
  • Make-Ahead: Prep your ingredients and dipping sauce the day before and assemble just before serving!

Comprehensive FAQ

Got questions? Here are some common inquiries about veggie rice paper rolls:

  • Can I use different proteins instead of tofu? Yes! Cooked chicken, shrimp, or even chickpeas work great.
  • Are rice paper rolls gluten-free? Yes! Just ensure your soy sauce is gluten-free, like tamari.
  • How do I keep my rolls from sticking together? Place parchment paper between rolls to prevent them from sticking.
  • Can I make these rolls ahead of time? Absolutely! They can be made a few hours in advance and stored in the fridge.
  • What dipping sauces pair well? Besides peanut sauce, try sweet chili sauce or a soy sauce dip!
  • How long do these rolls last? They’re best consumed within 2-3 days if stored properly in the fridge.
  • Can I use frozen veggies? Yes, just ensure they are thawed and drained to avoid excess moisture.
  • What is the best way to serve these rolls? Serve them chilled with your favorite dipping sauce for a refreshing treat!

Nutritional Tips and Dietary Adaptations

Here are some health-conscious tips to enhance your veggie rice paper rolls:

  • Boost Fiber: Include more veggies like bell peppers, spinach, or shredded cabbage for added fiber.
  • Lower Calorie Option: Skip the peanut butter for a lighter soy sauce dip.
  • Vegan-Friendly: This recipe is already vegan, but always check your brands for any additives.

Equipment Recommendations

To create the best veggie rice paper rolls, consider these essential tools:

  • Cutting Board: A sturdy board for prepping your veggies and tofu.
  • Sharp Knife: Ensure your knife is sharp for clean cuts.
  • Mixing Bowls: For combining your dipping sauce ingredients.
  • Measuring Cups and Spoons: Precision in your ingredients leads to tastier results!
  • Serving Platter: Present your rolls beautifully on a platter for an inviting display!

Serving Suggestions

Make your meal complete by pairing these rolls with:

  • Fresh Salad: Serve with a side of mixed greens or a refreshing cucumber salad.
  • Soup: Pair with a light broth-based soup for a comforting meal.
  • Fruit Platter: Finish off with a colorful assortment of seasonal fruits for dessert!

In conclusion, these Fresh and Fun Veggie Rice Paper Rolls are more than just a recipe—they’re a delightful journey into the world of healthy eating. With endless customization options and a fun assembly process, you’ll find joy in every bite! So roll up your sleeves, gather your ingredients, and get ready to create a dish that’s as vibrant as your spirit. Happy rolling!

Veggie Rice Paper Rolls

Prep Time 30 minutes
Cook Time 10 minutes
Total Time 40 minutes
Servings 4 servings
Calories 250
Fresh and vibrant, these Veggie Rice Paper Rolls are packed with crisp vegetables, herbs, and a creamy peanut sauce, perfect for a light, healthy meal or appetizer.

Ingredients

Rice Paper Wrappers

  • 20-25 sheets Rice Paper Wrappers (Thin, brittle, circular sheets made from rice flour and tapioca starch.)

Rice Vermicelli Noodles

  • 200 g Rice Vermicelli Noodles (Thin rice noodles that cook quickly.)

Tofu

  • 1 block Firm or Extra-Firm Tofu (Pressed and pan-fried or baked until golden.)

Carrots

  • 2 medium Large Carrots (Julienned or finely shredded.)

Cucumber

  • 1 large Cucumber (Seeded and julienned.)

Red Bell Pepper

  • 1 large Red Bell Pepper (Thinly sliced.)

Lettuce Leaves

  • 1 small head Lettuce Leaves (Washed and separated into individual leaves.)

Fresh Mint Leaves

  • 1 cup Fresh Mint Leaves (Loosely packed, picked from stems.)

Fresh Cilantro

  • 1 cup Fresh Cilantro Leaves (Loosely packed, picked from stems.)

Fresh Thai Basil Leaves

  • 0.5 cup Fresh Thai Basil Leaves (Optional, adds anise-licorice flavor.)

Avocado

  • 1-2 ripe Avocado (Sliced thinly, adds creaminess.)

Creamy Peanut Butter

  • 0.5 cup Creamy Peanut Butter (Natural, unsweetened preferred.)

Soy Sauce or Tamari

  • 3 tablespoons Soy Sauce or Tamari (Adds saltiness and umami.)

Rice Vinegar

  • 2 tablespoons Rice Vinegar (Adds tangy acidity.)

Maple Syrup or Agave Nectar

  • 2 tablespoons Maple Syrup or Agave Nectar (Adjust sweetness as desired.)

Lime Juice

  • 1 tablespoon Lime Juice (Freshly squeezed.)

Sesame Oil

  • 1 teaspoon Sesame Oil (Adds nutty aroma.)

Garlic

  • 1 clove Garlic (Minced.)

Ginger

  • 1 teaspoon Freshly grated Ginger (Adds warmth and spice.)

Warm Water

  • 3-4 tablespoons Warm Water (To thin the sauce.)

Red Pepper Flakes

  • 0.25 teaspoon Red Pepper Flakes (Optional, for heat.)

Instructions 

  • Dip rice paper sheets in warm water until soft, then lay flat.
  • Arrange vegetables, herbs, and tofu on the lower third of the wrapper.
  • Fold the sides inward, then roll tightly from the bottom to enclose the filling.
  • Repeat with remaining ingredients.
  • Mix peanut butter, soy sauce, rice vinegar, maple syrup, lime juice, sesame oil, garlic, ginger, warm water, and red pepper flakes to make the dipping sauce.
  • Serve the rolls with the peanut sauce on the side.

Notes

Use fresh herbs and ripe avocado for best flavor. Adjust the sauce ingredients to taste.
Calories: 250kcal
Cost: $15
Course: Appetizer, Main
Cuisine: Asian
Keyword: Vegan, Vegetables