Author

Ryan

Browsing

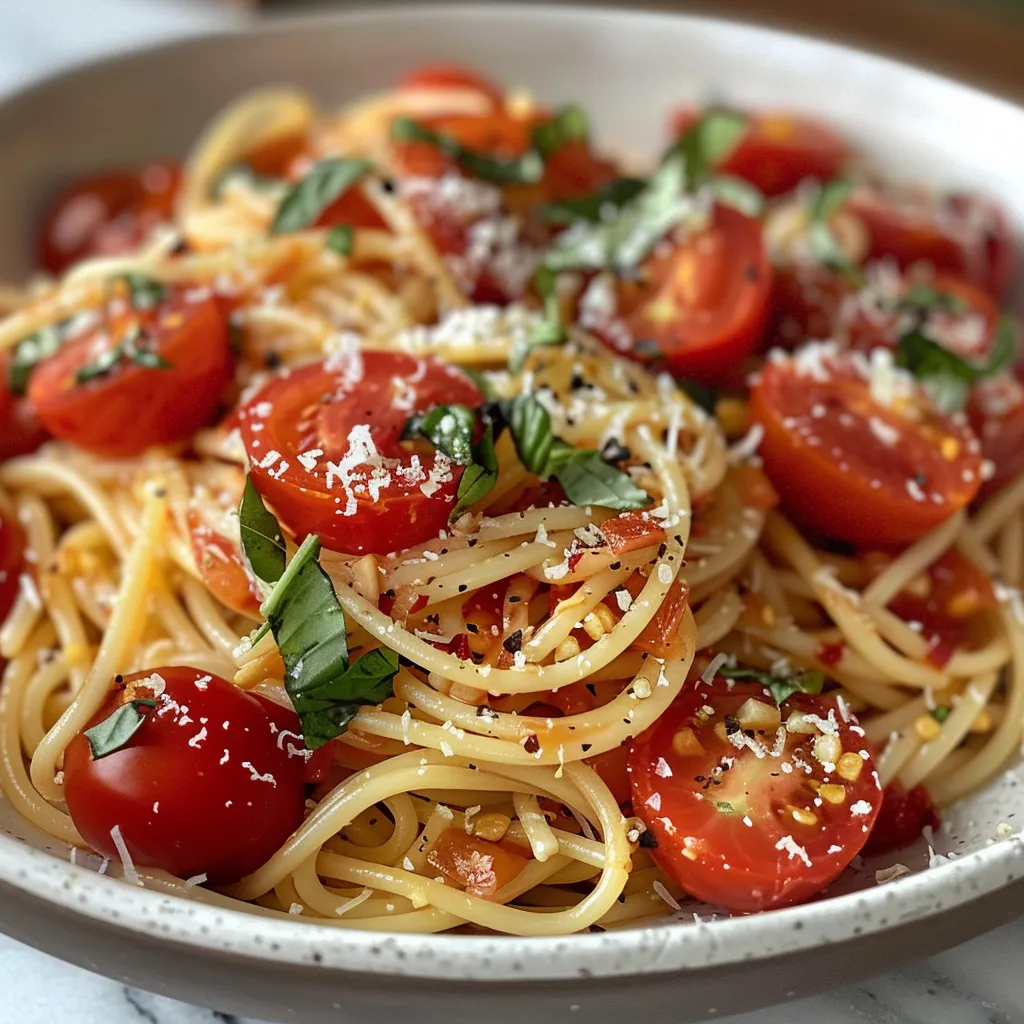
Discover the Joy of Cherry Tomato Pasta

Welcome to the vibrant world of Cherry Tomato Pasta, a dish that bursts with flavor and color! This delightful recipe is perfect for busy weeknights or as a standout option for a cozy dinner party. Imagine al dente penne pasta coated in a luscious sauce made from fresh cherry tomatoes, aromatic garlic, and a sprinkle of cheese. In this comprehensive guide, we’ll explore everything you need to know about making this dish, from ingredients to tips for perfecting your culinary adventure. Let’s dive in!

Why You’ll Love This Recipe

This Cherry Tomato Pasta is more than just another weeknight meal; it’s a celebration of flavor and health! Here are five compelling reasons to whip up this dish:

  • Quick and Easy: With minimal prep and cook time, you can have a delicious meal on the table in under 30 minutes.
  • Fresh and Flavorful: The combination of cherry tomatoes and fresh herbs creates a vibrant sauce that’s bursting with flavor.
  • Nutrition Packed: Cherry tomatoes are rich in vitamins C and K, making this dish not only tasty but also nourishing.
  • Customizable: Add your favorite proteins or vegetables to make it your own!
  • Perfect for Meal Prep: This pasta dish holds up beautifully in the fridge, making it a great option for leftovers or meal prep.

Ingredient Breakdown

Let’s take a closer look at the ingredients that make this Cherry Tomato Pasta a standout dish.

  • 12 oz penne pasta: This shape holds sauce well, but you can substitute with gluten-free pasta or spaghetti if you prefer.
  • 2 cups cherry tomatoes: Halved for maximum flavor release; grape tomatoes can also be used for a sweeter taste.
  • 4 cloves garlic: Minced to infuse the dish with aromatic depth.
  • 1/4 cup olive oil: Adds richness and helps to create a silky sauce; feel free to use avocado oil for a subtler flavor.
  • 1/2 tsp red pepper flakes: For a hint of heat; adjust according to your spice preference.
  • 1/2 tsp salt: Enhances the flavors of the ingredients.
  • 1/4 tsp black pepper: Adds a touch of warmth.
  • 1/2 cup grated Parmesan cheese: Provides creaminess and umami; can be substituted with nutritional yeast for a vegan option.
  • 1/4 cup fresh basil leaves: Torn for freshness; you can also use parsley or arugula for a different flavor.
  • 1/4 cup fresh parsley: Chopped to brighten the dish.

Pro Tips for Perfecting Your Pasta

Side view of a plate of pasta featuring halved cherry tomatoes and Parmesan.

Want to elevate your Cherry Tomato Pasta to the next level? Here are some expert insights:

  • Use high-quality ingredients: Fresh, ripe cherry tomatoes and good olive oil make a noticeable difference in flavor.
  • Don’t overcook the pasta: Aim for al dente to ensure the pasta retains its texture when mixed with the sauce.
  • Reserve pasta water: Save a cup of the starchy cooking water before draining; it helps to emulsify the sauce.
  • Experiment with herbs: Try adding a pinch of oregano or thyme for an extra layer of flavor.
  • Layer flavors: Sauté garlic gently to avoid burning, which can create bitterness.
  • Finish with fresh herbs: Adding basil and parsley at the end preserves their vibrant color and flavor.
  • Serve immediately: This dish is best enjoyed fresh, so don’t let it sit for too long!
  • For protein lovers: Consider adding grilled chicken, shrimp, or chickpeas for added substance.

Common Mistakes and Troubleshooting

Even the best chefs make mistakes! Here are some common pitfalls to avoid:

  • Overcooking the garlic: Sauté it just until fragrant to ensure it doesn’t turn bitter.
  • Skimping on seasoning: Salt and pepper are crucial for flavor; taste as you go!
  • Not mixing thoroughly: Make sure the pasta is well-coated in the sauce for every bite to be delicious.
  • Skipping the cheese: Parmesan adds a creamy depth; omit at your own risk!

Variations on Cherry Tomato Pasta

Get creative with these tasty variations:

  • Vegan Delight: Swap Parmesan for nutritional yeast and add sautéed mushrooms for a hearty twist.
  • Seafood Option: Toss in sautéed shrimp or scallops for a luxurious seafood pasta.
  • Veggie Packed: Add spinach, zucchini, or bell peppers for extra nutrients and color.
  • Spicy Kick: Increase red pepper flakes or add chopped fresh chili for a fiery version.

Storage and Make-Ahead Instructions

Planning ahead? Here’s how to store and reheat your Cherry Tomato Pasta:

  • Storage: Keep leftovers in an airtight container in the fridge for up to 3 days.
  • Reheating: Gently reheat on the stove with a splash of reserved pasta water to bring back the sauce’s creaminess.
  • Make-Ahead: You can prep the ingredients ahead of time; cook the pasta and sauce just before serving for the best flavor.

Frequently Asked Questions

Here are answers to some common questions about Cherry Tomato Pasta:

  • Can I use other types of tomatoes? Absolutely! Any fresh tomato variety works, but cherry tomatoes offer the sweetest flavor.
  • Is this recipe gluten-free? Yes, just substitute the penne with gluten-free pasta!
  • Can I make it vegan? Yes, use nutritional yeast instead of cheese and omit any meat.
  • How can I add more protein? Consider grilled chicken, chickpeas, or shrimp to amp up the protein content.
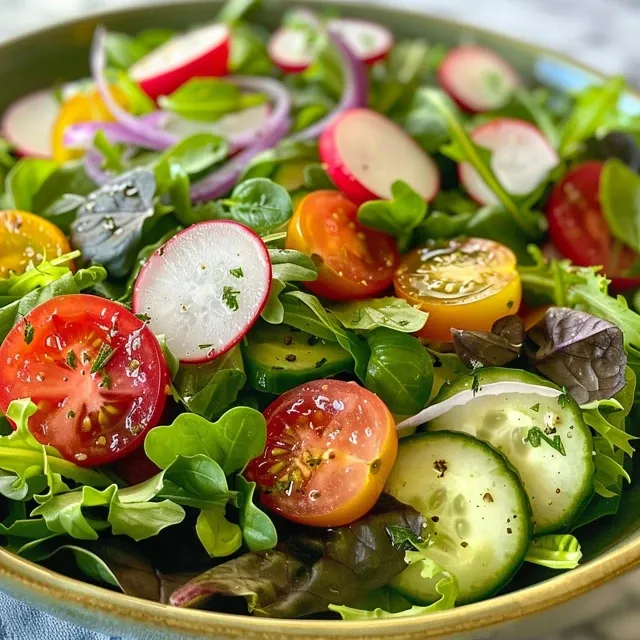
  • What can I serve with this pasta? A fresh salad or garlic bread pairs beautifully with this dish.
  • Can I freeze this pasta? We recommend against freezing; the texture may change upon thawing.
  • How can I make it spicier? Add more red pepper flakes or toss in some crushed fresh chili peppers.
  • What’s the best way to store leftovers? Keep in an airtight container in the fridge and consume within 3 days for the best taste.

Nutrition Tips and Dietary Adaptations

This Cherry Tomato Pasta not only delights the palate but also nourishes the body! Here’s how you can adapt it for different dietary needs:

  • Low-carb option: Substitute pasta with spiralized zucchini or spaghetti squash.
  • Dairy-free: Use a dairy-free cheese alternative or skip the cheese entirely.
  • Rich in antioxidants: The cherry tomatoes provide lycopene, known for its heart health benefits.

Essential Equipment

To make this delicious Cherry Tomato Pasta, you’ll need:

  • Large pot: For boiling the pasta; a heavy-bottomed pot is ideal.
  • Skillet: A large skillet for sautéing the garlic and tomatoes together.
  • Colander: For draining the pasta easily.
  • Measuring cups and spoons: Essential for accuracy in your ingredient amounts.

Serving Suggestions

Plate your Cherry Tomato Pasta with style! Here are some serving ideas to consider:

  • Garnish: Top with additional fresh basil, parsley, or a sprinkle of cheese for visual appeal.
  • Pair with wine: A crisp white wine, such as Sauvignon Blanc, complements the dish perfectly.
  • Accompany with a salad: A light arugula salad with lemon vinaigrette adds a refreshing contrast.
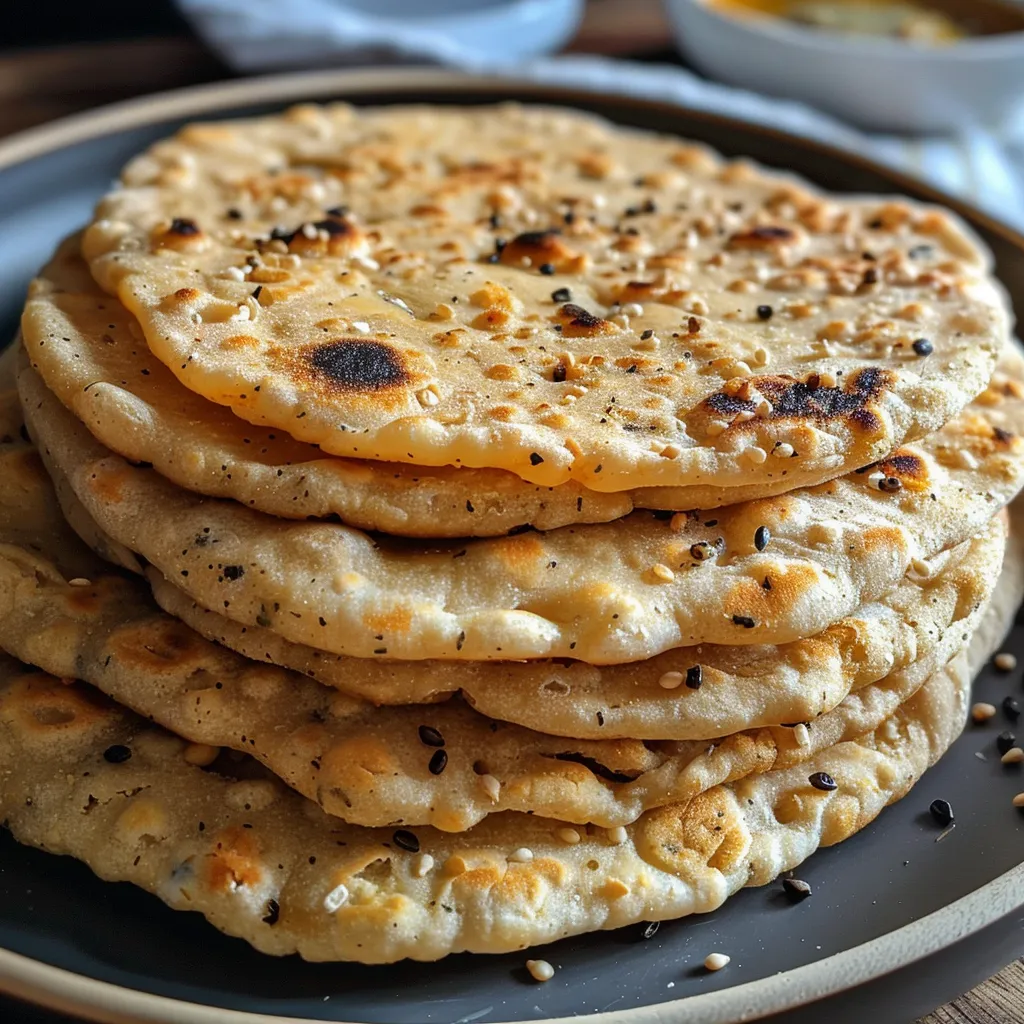
  • Include garlic bread: Serve with warm, crusty garlic bread for a comforting touch.

Conclusion

Making Cherry Tomato Pasta is not just a culinary task; it’s an opportunity to create a meal that’s both nutritious and bursting with flavor! With its vibrant colors, delightful textures, and endless customization possibilities, this dish is sure to become a favorite in your home. So roll up your sleeves, gather those fresh ingredients, and let the kitchen be your playground as you whip up this cherry tomato magic. Enjoy every delicious bite!

Cherry Tomato Pasta

Prep Time 10 minutes
Cook Time 15 minutes
Total Time 25 minutes
Servings 4 servings
Calories 450
A quick and flavorful pasta dish featuring fresh cherry tomatoes, garlic, and herbs, perfect for a vibrant meal.

Ingredients

Pasta

  • 12 oz penne pasta, uncooked

Vegetables

  • 2 cups cherry tomatoes, halved

Aromatics

  • 4 cloves garlic, minced

Oils & Fats

  • 1/4 cup olive oil

Spices & Seasonings

  • 1/2 tsp red pepper flakes
  • 1/2 tsp salt
  • 1/4 tsp black pepper

Cheese & Herbs

  • 1/2 cup grated Parmesan cheese
  • 1/4 cup fresh basil leaves, torn
  • 1/4 cup fresh parsley, chopped

Instructions 

  • Cook 12 oz of penne pasta in salted boiling water until al dente, then drain.
  • Heat olive oil in a skillet, sauté garlic for 1-2 minutes.
  • Add cherry tomatoes, cook 5-7 minutes until soft.
  • Stir in red pepper flakes, salt, black pepper; simmer 2-3 minutes.
  • Add cooked pasta, toss to coat with sauce.
  • Remove from heat, stir in Parmesan, basil, and parsley. Serve immediately.

Notes

For extra flavor, garnish with additional herbs or cheese before serving.
Calories: 450kcal
Cost: $12
Course: Main Course
Cuisine: Italian
Keyword: pasta

Brighten Your Day with This Flourless Ricotta Lemon and Almond Cake

Welcome to the world of baking where flavor meets health! If you’re looking for a dessert that’s not just delicious but also nutritionally balanced, then you’ve stumbled upon the perfect recipe. This Flourless Ricotta Lemon and Almond Cake is a vibrant, moist cake that combines the zesty brightness of lemon with the creamy richness of ricotta and the nutty goodness of almond flour. Trust me, once you try this cake, it’s going to become a staple in your kitchen, whether for brunch, a special occasion, or just because you deserve a treat!

In this article, we’ll cover everything you need to know to make this delightful cake, including the ingredients, step-by-step instructions, and expert tips to ensure your baking adventure is a success. Let’s dive in!

Why You’ll Love This Flourless Ricotta Lemon and Almond Cake

Here are just a few reasons why this cake will steal your heart:

  • Gluten-Free Goodness: Made entirely with almond flour, this cake is naturally gluten-free, making it perfect for those with dietary restrictions.
  • Moist and Creamy: Thanks to the ricotta cheese, this cake is incredibly moist and rich. You won’t believe it’s gluten-free!
  • Zesty Flavor Explosion: The combination of fresh lemon juice and zest gives the cake a refreshing zing that’ll wake up your taste buds.
  • Simple Ingredients: With just a handful of wholesome ingredients, you can whip up this cake without any fuss.
  • Perfect for Any Occasion: Whether it’s a casual gathering, a birthday celebration, or a cozy Sunday brunch, this cake fits right in.

Ingredients for Flourless Ricotta Lemon and Almond Cake

Here’s what you’ll need:

  • Zest of 2 lemons: This will add a punch of flavor.
  • 1/4 cup fresh lemon juice: For that zesty kick!
  • 1/2 cup honey or maple syrup: A natural sweetener that pairs beautifully with the lemon.
  • 4 large eggs (separated): This helps create a fluffy texture.
  • 1 cup whole-milk ricotta cheese: The star ingredient that keeps the cake moist.
  • 2 1/2 cups almond flour: The base of the cake, providing a nutty flavor.
  • 1 1/2 tsp baking powder (gluten-free if needed): To help the cake rise.
  • Pinch of salt: Enhances all the flavors.

How to Make Flourless Ricotta Lemon and Almond Cake

Side view of a moist Flourless Ricotta Lemon Almond Cake showing its fluffy texture and rich yellow hue.

Ready to get baking? Follow these simple steps:

  1. Preheat your oven: Set it to 350°F (175°C) and grease a 9-inch round cake pan to prevent sticking.
  2. Mix the lemon base: In a large bowl, combine the lemon zest and juice with honey or maple syrup. Mix until well combined.
  3. Add the creamy elements: Incorporate the egg yolks and ricotta cheese. Beat until the mixture is smooth and creamy.
  4. Combine dry ingredients: In another bowl, whisk together the almond flour, baking powder, and salt.
  5. Blend wet and dry ingredients: Gradually fold the dry mixture into the wet mixture until just combined.
  6. Whip the egg whites: In a separate bowl, beat the egg whites until stiff peaks form. Gently fold them into the batter until no white streaks remain.
  7. Pour and bake: Transfer the batter to the prepared cake pan and smooth the top. Bake for 30–35 minutes, or until the cake is set and a toothpick inserted in the center comes out clean.
  8. Cool down: Allow the cake to cool in the pan for about 10 minutes before transferring it to a wire rack to cool completely.

Pro Tips for Making the Perfect Cake

Here are some expert insights to elevate your baking experience:

  • Use full-fat ricotta: For the best texture, opt for full-fat ricotta. It makes a world of difference in creaminess!
  • Don’t skip the lemon zest: It’s crucial for enhancing the flavor profile of the cake.
  • Egg whites matter: Be sure to beat the egg whites until they form stiff peaks for a fluffy cake.
  • Let it cool: Patience is key! Allowing the cake to cool properly helps it set and improves the texture.
  • Experiment with sweeteners: Feel free to swap honey for agave syrup or maple syrup if you prefer.
  • Check for doneness: Ovens can vary, so start checking the cake a few minutes before the recommended bake time.
  • Use quality almond flour: The finer the grind, the better the texture of your cake!
  • Store properly: Keep the cake in an airtight container to maintain its moisture.

Common Mistakes to Avoid

To ensure your cake turns out perfectly, watch out for these pitfalls:

  • Overmixing the batter: This can lead to a dense cake. Mix until just combined!
  • Using low-fat ricotta: It won’t yield the same moistness and creaminess.
  • Skipping the cooling step: Cutting into a warm cake can lead to crumbling.
  • Not measuring ingredients accurately: Baking is a science! Use a kitchen scale for best results.

Variations and Additions

Want to mix it up? Here are some delicious variations you can try:

  • Berry Delight: Fold in fresh or frozen berries like blueberries or raspberries for a fruity twist.
  • Chocolate Chip Surprise: Add dark chocolate chips for a decadent touch.
  • Nuts About Almonds: Toss in some chopped almonds for extra crunch and flavor.
  • Citrus Medley: Experiment with different citrus juices like orange or grapefruit for a unique flavor.

Storage and Make-Ahead Instructions

Want to prepare in advance? Here’s how to store your cake:

  • Room Temperature: Store at room temperature in an airtight container for up to 3 days.
  • Refrigeration: For longer freshness, refrigerate for up to a week.
  • Freezing: You can freeze slices wrapped tightly in plastic wrap and foil for up to 3 months. Just thaw before serving.

Nutritional Information and Dietary Adaptations

This Flourless Ricotta Lemon and Almond Cake is packed with nutritional benefits. Here’s a quick breakdown:

  • Low in Carbs: Thanks to almond flour, it’s lower in carbohydrates compared to traditional cakes.
  • Protein Boost: Ricotta cheese adds a good amount of protein to keep you satisfied.
  • Rich in Healthy Fats: Almond flour provides healthy fats that are beneficial for your heart.
  • Natural Sweeteners: Using honey or maple syrup reduces the need for refined sugars.

Equipment Recommendations

To make your baking easier, here’s a list of must-have tools:

  • 9-inch round cake pan: A non-stick pan works best for easy release.
  • Mixing bowls: Have both large and medium bowls on hand for mixing ingredients.
  • Whisk and spatula: Essential for mixing and folding ingredients.
  • Electric mixer: Useful for beating egg whites to stiff peaks.

Serving Suggestions

Now that your cake is ready, here are some serving ideas:

  • Top with Fresh Berries: A handful of fresh berries adds color and flavor.
  • Drizzle with Honey: A light drizzle of honey can enhance sweetness.
  • Pair with Yogurt: Serve alongside Greek yogurt for a creamy contrast.
  • Garnish with Mint: Fresh mint leaves add a pop of color and freshness.

FAQs About Flourless Ricotta Lemon and Almond Cake

Here are some common questions about this cake:

  • Can I use a different sweetener? Yes! You can substitute honey with agave nectar or maple syrup.
  • Is this cake suitable for vegans? You can try using flax eggs instead of real eggs, but the texture may vary.
  • How do I know when the cake is done? A toothpick inserted in the center should come out clean.
  • Can I make this cake ahead of time? Absolutely! It stores well in the fridge for up to a week.
  • What’s the best way to serve it? Serve it chilled or at room temperature with a dollop of yogurt.
  • Can I freeze this cake? Yes, it freezes well! Just wrap it tightly in plastic wrap and foil.
  • What can I do if the cake is too dense? Ensure you’ve whipped the egg whites properly; they should form stiff peaks before folding.
  • Can I substitute almond flour? You can, but it won’t be gluten-free. Coconut flour is a possible alternative, but adjustments will be needed.

With this comprehensive guide, you’re ready to conquer the kitchen and create a dessert that’s not only delicious but also healthy. Enjoy the process, and most importantly, have fun while baking!

Let’s make healthy eating exciting, one slice at a time!

Irresistible Flourless Ricotta Lemon and Almond Cake in 6 Steps

Prep Time 15 minutes
Cook Time 35 minutes
Total Time 50 minutes
Servings 8 pieces
Calories 250
A light and flavorful cake combining ricotta, lemon, and almond flour for a delightful treat.

Ingredients

Fruits and liquids

  • 2 pieces lemon zest
  • 0.25 cup fresh lemon juice
  • 0.5 cup honey or maple syrup
  • 4 large eggs (separated)
  • 1 cup whole-milk ricotta cheese
  • 2.5 cups almond flour
  • 1.5 tsp baking powder (gluten-free if needed)
  • pinch salt

Instructions 

  • Preheat oven to 350°F (175°C) and grease a 9-inch round pan.
  • Mix lemon zest, lemon juice, and honey in a bowl.
  • Add egg yolks and ricotta; beat until smooth.
  • Combine almond flour, baking powder, and salt; fold into wet mixture.
  • Beat egg whites until stiff; fold into batter gently.
  • Pour batter into pan, bake 30–35 mins, cool before serving.

Notes

Ensure to fold egg whites gently to keep the cake airy.
Calories: 250kcal
Cost: $15
Course: Dessert
Cuisine: fusion
Keyword: almond, Lemon, ricotta

Get Ready to Ignite Your Taste Buds with This Easy Veggie Egg Fried Rice!

Welcome to the culinary playground where flavor meets convenience! If you’re searching for a vibrant, quick, and satisfying meal, look no further than this Easy Quick Veggie Egg Fried Rice. In just 20 minutes, you can whip up a bowl bursting with protein, colorful veggies, and explosive flavors. Whether you’re cooking for a busy weeknight dinner or a fun weekend brunch, this dish is your ticket to culinary delight!

Why You’ll Love This Recipe

  • Quick and Easy: Ready in 20 minutes, making it perfect for busy nights or last-minute meals.
  • Flavor-Packed: The combination of soy sauce, sesame oil, and spices creates a depth of flavor that will have your taste buds dancing.
  • Customizable: Perfectly adaptable to whatever veggies or proteins you have on hand—use leftovers creatively!
  • Healthy and Nutritious: Packed with protein from eggs and vibrant veggies for a colorful, nutrient-rich meal.
  • One-Pan Wonder: Minimal cleanup required since everything is cooked in one pan, giving you more time to enjoy your meal.

Ingredient Breakdown with Substitutions

Let’s dive into what you’ll need for this delightful dish:

  • 2 cups cooked rice: Use day-old rice for the best texture. Freshly cooked rice can be too sticky!
  • 2 large eggs: These provide fluffy richness and essential protein. You can substitute with tofu for a vegan option.
  • 1 cup mixed vegetables: A colorful combo of carrots, peas, and bell peppers is ideal, but feel free to use any seasonal veggies.
  • 2 stalks green onions: Sliced for freshness—red onions or shallots can also work well.
  • 1 clove garlic: Minced to add aromatic depth. Garlic powder is a quick alternative if you don’t have fresh garlic.
  • 3 tablespoons soy sauce: For depth and umami, tamari can be used for a gluten-free version.
  • 1 tablespoon sesame oil: Adds a nutty aroma. Olive oil can be a substitute, though the flavor will differ.
  • Salt and pepper: To taste, enhancing the overall flavor profile.
  • 1 inch ginger: Grated for a zesty kick—omit if you prefer a milder taste.
  • 1 teaspoon chili flakes: For added heat; adjust according to your spice tolerance.
  • 1 cup cooked chicken or shrimp: Optional for extra protein—can also use tempeh for a plant-based option.

Pro Tips for Perfect Fried Rice

Juicy Veggie Egg Fried Rice in a bowl, showcasing mixed veggies and garnished with green onions.
  • Use Day-Old Rice: Helps achieve the perfect texture and avoids sogginess.
  • High Heat Cooking: Cooking on high heat ensures the rice fries rather than steams, enhancing flavor.
  • Prep Ahead: Chop all veggies and proteins in advance to make the cooking process smoother.
  • Don’t Overcrowd the Pan: If making a large batch, cook in batches to maintain that coveted fried rice texture.
  • Season Gradually: Taste as you go, adjusting soy sauce and seasoning for the perfect balance.
  • Add Fresh Herbs: Toss in fresh cilantro or basil at the end for a refreshing finish.
  • Experiment with Sauces: A splash of sriracha or teriyaki sauce can elevate the dish further.
  • Let It Rest: Allow the cooked fried rice to sit for a minute after cooking to enhance flavors.

Common Mistakes and Troubleshooting

  • Too Much Liquid: Avoid adding too much soy sauce; it can make the rice soggy. Start with less and add more as needed.
  • Overcooked Eggs: Scramble the eggs separately before adding to the rice to keep them fluffy and avoid rubbery texture.
  • Using Fresh Rice: Freshly cooked rice can clump together and become mushy. Always use cold, day-old rice.
  • Neglecting Flavor Balance: Ensure you taste your dish as you go, adjusting seasonings to your preference.

Variations to Try

This dish is a canvas for your culinary creativity! Here are some exciting variations:

  • Spicy Veggie Egg Fried Rice: Add diced jalapeños or sriracha for a fiery twist.
  • Protein-Packed Fried Rice: Incorporate cooked chicken, shrimp, or tofu for a heartier meal.
  • Herb-Infused Fried Rice: Mix in fresh herbs like cilantro or basil for a fragrant flavor boost.
  • Cheesy Fried Rice: Stir in some grated cheese like cheddar or mozzarella for a creamy finish.

Storage and Make-Ahead Instructions

To keep your dish fresh and delicious:

  • Refrigerate: Store leftovers in an airtight container in the fridge for up to 3 days.
  • Freeze: For longer storage, freeze in portions for up to 2 months. Thaw in the fridge before reheating.
  • Reheat: Reheat in a pan over medium heat, adding a splash of water or soy sauce to revive moisture.

Frequently Asked Questions

  • Can I use frozen vegetables? Absolutely! Frozen veggies are a great time-saver and work perfectly in this dish.
  • How do I make this dish vegan? Substitute eggs with scrambled tofu and use tamari for gluten-free soy sauce.
  • What type of rice is best? Long-grain rice like jasmine or basmati is ideal, but any type of rice will work.
  • Can I use other proteins? Yes! Feel free to add cooked chicken, shrimp, or even diced ham.
  • How spicy is this recipe? It’s mild, but you can easily adjust the spice level by adding chili flakes or fresh peppers.
  • Can I make it ahead of time? Yes! You can prepare the ingredients and store them in the fridge until you’re ready to cook.
  • What can I serve with fried rice? Pair it with spring rolls, a side salad, or grilled chicken for a complete meal.
  • Why is my fried rice mushy? Using fresh rice or too much liquid can cause mushiness. Always use cold, day-old rice for the best texture.

Nutritional Tips and Dietary Adaptations

This dish can be easily tailored to fit various dietary needs:

  • Low-Carb Option: Substitute rice with cauliflower rice for a lower-carb alternative.
  • Gluten-Free: Use tamari instead of soy sauce and ensure all sauces are gluten-free.
  • Protein-Rich: Add additional protein sources like edamame or chickpeas to boost nutritional value.

Essential Equipment Recommendations

To make your cooking experience seamless, here are some must-have kitchen tools:

  • Wok or Large Skillet: Ideal for even cooking at high heat.
  • Spatula: A sturdy spatula will help you stir and toss ingredients easily.
  • Cutting Board: Essential for prepping your veggies and proteins.
  • Measuring Cups and Spoons: For precise ingredient measurements to achieve the best flavor.

Serving Suggestions

Make your meal complete by pairing it with:

  • Spring Rolls: Light and crispy, they complement the fried rice beautifully.
  • Asian-Inspired Salads: A refreshing cucumber or sesame salad adds a nice crunch.
  • Grilled Chicken or Tofu: For a heartier meal, serve with grilled proteins on the side.

So there you have it! This Easy Quick Veggie Egg Fried Rice recipe is not just a meal; it’s an experience waiting to happen in your kitchen. With its vibrant colors, delightful flavors, and endless customization options, it’s sure to become a staple in your culinary repertoire. Get cooking, and let the flavor fiesta begin!

Easy Quick Veggie Egg Fried Rice – Flavor Burst in 20 Minutes

Prep Time 5 minutes
Cook Time 15 minutes
Total Time 20 minutes
Servings 4 servings
Calories 350
This vibrant and flavorful fried rice is a quick, satisfying meal packed with vegetables, eggs, and a savory soy sauce kick, ready in just 20 minutes.

Ingredients

Main

  • 2 cups cooked rice (Use day-old rice for best texture)
  • 2 large eggs (Provide fluffy richness and protein)
  • 1 cup mixed vegetables (Carrots, peas, bell peppers)
  • 2 stalks green onions (Sliced)
  • 1 clove garlic (Minced)
  • 3 tablespoons soy sauce (For depth and umami)
  • 1 tablespoon sesame oil (Add a nutty aroma)
  • to taste salt
  • to taste pepper
  • 1 inch ginger (Grated, for a zesty kick)
  • 1 teaspoon chili flakes (For added heat)
  • 1 cup cooked chicken or shrimp (For extra protein)

Instructions 

  • Heat sesame oil in a wok or large skillet over medium-high heat.
  • Add minced garlic and grated ginger; sauté until fragrant.
  • Push garlic and ginger to the side, scramble eggs in the pan until fluffy.
  • Add mixed vegetables, cooked chicken or shrimp, soy sauce, chili flakes, salt, and pepper; stir-fry for 3-4 minutes.
  • Stir in cooked rice and sliced green onions; cook for another 2-3 minutes until heated through.

Notes

Use day-old rice for best texture and flavor.
Calories: 350kcal
Cost: $10
Course: Main Course
Cuisine: Asian
Keyword: Fried Rice

Unleash Your Inner Chef with Fresh Rice Paper Veggie Rolls

Welcome to the vibrant world of Rice Paper Veggie Rolls! These delightful snacks are not just visually appealing but also packed with nutrients and flavor. Perfect for a light meal, appetizer, or quick lunch, they present an exciting way to incorporate fresh veggies and herbs into your diet. Get ready to embark on a crunchy adventure that elevates your culinary game while keeping it healthy and fun!

Why You’ll Love This Recipe

Rice Paper Veggie Rolls are a fantastic addition to your meal repertoire for several reasons:

  • Colorful and Fun: The vibrant colors of fresh vegetables make these rolls a feast for the eyes, turning everyday meals into exciting culinary art.
  • Quick and Easy: With minimal prep time, these rolls can be whipped up in just 20 minutes, making them perfect for busy days.
  • Health-Packed: Loaded with fresh vegetables and herbs, these rolls are low in calories yet high in essential nutrients.
  • Versatile: Customize ingredients based on your preferences! Swap veggies, add proteins, or create unique dipping sauces.
  • Gluten-Free Option: Rice paper wrappers are gluten-free, making these rolls suitable for various dietary needs and preferences.

Ingredient Breakdown

Here’s a detailed look at the ingredients you need for these delicious Rice Paper Veggie Rolls:

  • Rice Paper Wrappers: Essential for rolling, these wrappers are easy to find and can be stored for long periods.
  • Vegetables: Use a mix of shredded carrots, julienned cucumber, sliced bell peppers, and avocado for a crunchy texture.
  • Fresh Herbs: Cilantro and mint add a refreshing flavor that complements the veggies perfectly.
  • Dipping Sauce: A simple soy sauce enhances the flavor profile, but feel free to experiment with peanut or hoisin sauce!

Step-by-Step Instructions

Side view of vibrant rice paper rolls showcasing shredded carrots and avocados.

Ready to roll? Here’s how to make your Rice Paper Veggie Rolls:

  1. Prepare your ingredients: Dice the carrots, julienne the cucumber, slice the bell pepper, and cut the avocado into thin slices.
  2. Soften the rice paper wrappers: Fill a large bowl with warm water and submerge one rice paper wrapper at a time for about 10-15 seconds until pliable.
  3. Assemble the rolls: Lay the softened rice paper on a cutting board. Place a small handful of each veggie in the center, along with a few cilantro and mint leaves.
  4. Roll it up: Fold the bottom edge over the filling, then fold in the sides, and roll it tightly away from you until closed.
  5. Repeat: Continue with the remaining wrappers and fillings until all ingredients are used up.
  6. Serve: Arrange the veggie rolls on a plate and drizzle with sesame oil or serve with soy sauce for dipping.

Pro Tips for Perfect Rice Paper Rolls

Want to elevate your rolling game? Here are some expert tips:

  • Keep It Moist: If the rice paper starts to dry out, dip it back in water quickly to soften it again.
  • Don’t Overfill: Less is more! Overstuffing can lead to messy rolls that fall apart.
  • Chill Before Serving: Refrigerate your rolls for 30 minutes before serving to enhance the flavors and make them crispier.
  • Experiment with Dipping Sauces: Try a spicy peanut sauce for a delicious twist!
  • Make Ahead: Prepare the rolls in advance and store them in an airtight container with parchment paper between layers.

Common Mistakes and Troubleshooting

Here are some pitfalls to avoid when making Rice Paper Veggie Rolls:

  • Rice Paper Breakage: If your wrappers tear, it may be due to over-soaking. Ensure you only soak until pliable.
  • Filling Spillage: Avoid overfilling, which can lead to bursting. Aim for a small, manageable amount of filling.
  • Too Much Sauce: Excess sauce can make the rolls soggy. Use just enough to add flavor without overwhelming them.

Delicious Variations

Add a twist to your Rice Paper Veggie Rolls with these fun variations:

  • Protein-Packed: Add grilled chicken, shrimp, or tofu for a protein boost.
  • Spicy Kick: Incorporate sliced jalapeños or a drizzle of sriracha for heat.
  • Asian-Inspired: Add sesame seeds and scallions for a more traditional flavor.
  • Sweet and Savory: Include mango slices or drizzle with honey for a unique taste experience.

Storage and Make-Ahead Instructions

To store your Rice Paper Veggie Rolls:

  • Refrigerate in an airtight container for up to 2 days.
  • Place parchment paper between layers to prevent sticking.
  • Do not freeze, as the texture will change upon thawing.

Frequently Asked Questions

Got questions? Here are some common queries about Rice Paper Veggie Rolls:

  • Can I use other vegetables? Absolutely! Feel free to use any veggies you love or have on hand.
  • Are these rolls gluten-free? Yes, rice paper is naturally gluten-free, making these rolls suitable for gluten-sensitive diets.
  • What can I serve with these rolls? Pair with dipping sauces, salads, or a light soup for a complete meal.
  • How do I make the rolls more colorful? Use a variety of veggies—think purple cabbage or yellow bell peppers!
  • Can I make these rolls vegan? Yes! All the ingredients are plant-based, making them perfect for vegan diets.
  • What’s the best way to store leftovers? Keep them in the refrigerator in an airtight container, with parchment paper between layers.
  • Can I use homemade sauce? Definitely! Homemade peanut or tahini sauce can elevate the flavor even more.
  • How long do they last? Fresh rolls are best consumed within 2-3 days for optimal taste and texture.

Nutritional Insights and Dietary Adaptations

Each Rice Paper Veggie Roll is a nutritional powerhouse. Here’s a quick look:

  • Low Calorie: Each roll contains approximately 90 calories, making them a guilt-free snack.
  • High Fiber: The vegetables contribute a good amount of dietary fiber, aiding digestion.
  • Customizable: Easily adapt for low-carb or high-protein diets by adjusting ingredients.

Equipment Recommendations

Here’s what you’ll need to create these delicious rolls:

  • Large Bowl: For soaking rice paper wrappers.
  • Cutting Board: A clean surface for assembling your rolls.
  • Sharp Knife: To slice vegetables thinly for easy rolling.
  • Airtight Container: For storing leftovers or prepped rolls.

Serving Suggestions

Serve your Rice Paper Veggie Rolls with a variety of dipping sauces:

  • Classic Soy Sauce: A simple yet effective choice.
  • Spicy Peanut Sauce: For those who crave heat!
  • Sweet Chili Sauce: Adds a sweet and spicy kick.
  • Hoisin Sauce: A sweet, rich option that pairs perfectly with veggies.

Conclusion: Roll Into a World of Flavor!

Rice Paper Veggie Rolls are not just a meal; they’re a canvas for your culinary creativity! With their fresh ingredients, vibrant colors, and endless possibilities, these rolls can transform healthy eating from mundane to magnificent. So grab those rice paper wrappers and get rolling—your taste buds will thank you!

Rice Paper Veggie Rolls

Prep Time 20 minutes
Total Time 20 minutes
Servings 4 rolls
Calories 150
Fresh and healthy rice paper veggie rolls are perfect for a light lunch or appetizer, packed with crisp vegetables and herbs.

Ingredients

Rice Paper Wrappers

  • 1 cup shredded carrots
  • 1 cup cucumber, julienned
  • 1 cup bell pepper, sliced
  • 1 cup avocado, sliced
  • 0.5 cup fresh cilantro
  • 0.5 cup fresh mint leaves
  • 0.25 cup soy sauce (for dipping)
  • 1 tablespoon sesame oil

Instructions 

  • Prepare vegetables: dice carrots, julienne cucumber, slice bell pepper, and cut avocado into thin slices.
  • Submerge rice paper in warm water for 10-15 seconds until pliable.
  • Lay rice paper on a surface, add veggies, cilantro, and mint in the center.
  • Fold bottom over filling, then sides, and roll tightly to close.
  • Repeat with remaining wrappers and fillings, then serve with sesame oil or soy sauce.

Notes

Keep the rolls moist by covering with a damp cloth until serving.
Calories: 150kcal
Cost: $10
Course: Appetizer
Cuisine: Vietnamese
Keyword: Vegetables

Discover the Joy of Fresh Rice Paper Veg Rolls!

Welcome to the delightful world of rice paper veg rolls! If you’re searching for a snack that’s not only delicious but also visually stunning, you’ve landed in the right place. These rolls are bursting with fresh veggies and aromatic herbs, making them a perfect quick snack or light meal that everyone will love. Whether you’re a busy professional, a health enthusiast, or a food lover, this guide will inspire you to create your own vibrant rolls at home!

In this article, we’ll explore everything you need to know about making rice paper rolls, from a detailed ingredient breakdown to expert tips and common mistakes to avoid. So grab your rice paper wrappers and let’s roll!

Why You’ll Love This Recipe

  • Quick and Easy: Prep and roll these delightful snacks in under 30 minutes, perfect for spontaneous meals or unexpected guests!
  • Customizable: Mix and match your favorite vegetables and proteins to create endless flavor combinations that suit your taste and dietary needs.
  • Healthy and Nutritious: Packed with fresh veggies, these rolls are low in calories and high in vitamins, making them a guilt-free snack.
  • Perfect for Meal Prep: Make a batch in advance and store them in the fridge for quick grab-and-go snacks throughout the week.
  • Fun to Make: Rolling these beauties is a fun kitchen activity that you can enjoy with family and friends!

Ingredients for Rice Paper Veg Rolls

Let’s gather our ingredients! You’ll need:

  • 6 sheets of rice paper: Soak briefly in warm water to soften without tearing.
  • 1 cup julienned carrots: Adds vibrant crunch and natural sweetness.
  • 1 cup cucumber strips: Provides a refreshing texture.
  • 1/2 cup fresh mint leaves: Offers a fragrant lift.
  • 1/2 cup fresh cilantro: Adds a zesty note.
  • 1 cup butter lettuce or leafy greens: Provides a tender base.
  • 1 cup cooked shrimp or sliced tofu: For extra nutrients and protein.
  • 1 cup rice vermicelli noodles: The traditional filler for added texture.
  • 1/4 cup peanut sauce or hoisin-based dip: For a savory, sweet contrast.
  • 2 tablespoons soy sauce or tamari: To add a salty splash.

Expert Tips for Perfect Rice Paper Veg Rolls

Side view of freshly made rice paper rolls with greens and shrimp.
  • Soaking Technique: Soak the rice paper sheets in warm water for just 10-15 seconds until they are pliable. Don’t over-soak to prevent tearing.
  • Rolling Station: Set up a clean surface with all your ingredients prepped and within reach. This makes assembly a breeze!
  • Layering: Start with a base of greens, then add your veggies and protein. Don’t overfill to ensure easy rolling!
  • Rolling Method: Fold the sides in, then roll tightly from the bottom up to secure the filling.
  • Prevent Sticking: Place finished rolls on a plate lined with lettuce to keep them from sticking together.
  • Serve with Dipping Sauce: A delightful dipping sauce enhances the flavor and gives a beautiful presentation.
  • Storage Tips: Keep rolled veg rolls in an airtight container in the fridge for up to 3 days.
  • Flavor Boost: Add a squeeze of lime or a sprinkle of sesame seeds for extra zing!

Common Mistakes and Troubleshooting

Even the best of us can make mistakes in the kitchen. Here’s how to troubleshoot:

  • Rolls tearing: Make sure you don’t over-soak the rice paper. A quick dip is all you need!
  • Filling spilling out: Avoid overfilling your rolls. Less is more when it comes to rolling.
  • Sticking together: Use lettuce or parchment paper between rolls to keep them from sticking.
  • Flavor not popping: Ensure you season your fillings well and don’t skip the dipping sauce!

Delicious Variations to Try

Get creative with your rice paper rolls by trying these variations:

  • Spicy Shrimp Rolls: Add sliced jalapeños and spicy mayo for a kick!
  • Vegan Delight: Substitute shrimp with marinated tempeh and add avocado for creaminess.
  • Rainbow Rolls: Use a variety of colorful veggies like bell peppers, purple cabbage, and radishes for vibrant presentations.
  • Breakfast Rolls: Fill with scrambled eggs, spinach, and cheese for a morning boost!

Make-Ahead and Storage Instructions

Want to prep in advance? Here’s how:

  • Make Ahead: Assemble your rolls and keep them in an airtight container in the fridge for up to 3 days. Place parchment paper between layers to prevent sticking.
  • Freezing: Although it’s best to enjoy them fresh, you can freeze unfilled rice paper sheets. Just soak and fill them as needed!
  • Storage: Store leftover dipping sauce in a separate container in the fridge for up to a week.

Nutrition Tips and Dietary Adaptations

This dish is naturally healthy, but here are some ways to adapt it:

  • Low-Carb Option: Skip the vermicelli noodles and double up on the veggies!
  • Gluten-Free: Use tamari instead of soy sauce for a gluten-free dipping experience.
  • Protein Boost: Incorporate edamame or chickpeas for a plant-based protein punch.
  • Low-Fat Version: Use less peanut sauce or opt for a yogurt-based dip for a lighter alternative.

Essential Equipment for Perfect Rolls

Here’s what you’ll need to create your rice paper veg rolls:

  • Large Shallow Dish: For soaking the rice paper wrappers.
  • Cutting Board: A steady surface for slicing veggies and assembling your rolls.
  • Sharp Knife: To julienne your ingredients with precision.
  • Serving Plate: To showcase your beautiful rolls!

Serving Suggestions

Pair your rice paper rolls with these delicious accompaniments:

  • Dipping Sauces: Peanut sauce, hoisin sauce, or a spicy sriracha mix!
  • Side Salads: A light cucumber salad or a tangy coleslaw complements the rolls perfectly.
  • Fresh Fruit: Serve with slices of watermelon or mango for a refreshing contrast.
  • Herbal Tea: A nice jasmine or mint tea will enhance your meal’s fresh flavors.

Frequently Asked Questions (FAQs)

  • Can I use any kind of rice paper? Yes! Look for round rice paper sheets at your local grocery store or Asian market.
  • How do I prevent the rice paper from sticking together? Keep the rolls separated with lettuce leaves or parchment paper.
  • Can I make these rolls ahead of time? Absolutely! They can be made a day in advance and stored in the fridge.
  • What should I serve with rice paper rolls? Consider dipping sauces, salads, or fresh fruit for a complete meal.
  • Are rice paper rolls gluten-free? Yes, as long as you use gluten-free sauces like tamari.
  • How do I store leftover rolls? Keep them in an airtight container in the fridge for up to 3 days.
  • Can I freeze rice paper rolls? It’s best to eat them fresh, but unfilled rice paper can be frozen.
  • What other fillings can I use? Get creative! Try different proteins, veggies, or even fruits!

Final Thoughts

There you have it, your ultimate guide to making fresh and fun rice paper veg rolls! With these tips and tricks, you’re sure to impress your friends and family with your culinary skills. Remember that the kitchen is your playground, so have fun experimenting with flavors and ingredients. Enjoy your delicious creations and the joy of healthy eating!

Easy Rice Paper Veg Rolls: Fresh, Crunchy Bites You’ll Crave

Prep Time 20 minutes
Cook Time 10 minutes
Total Time 30 minutes
Servings 4 servings
Calories 150
These vibrant rice paper veggie rolls are quick to assemble and packed with fresh flavors and crunchy textures, perfect for a light snack or appetizer.

Ingredients

Rice paper

  • 6 sheets Rice paper (soak briefly in warm water to soften without tearing)

Julienned carrots

  • 1 cup Julienned carrots (adds vibrant crunch and natural sweetness)

Cucumber strips

  • 1 cup Cucumber strips (for refreshing texture)

Fresh mint leaves

  • 1/2 cup Fresh mint leaves (for fragrant lift)

Fresh cilantro

  • 1/2 cup Fresh cilantro (adds zesty note)

Butter lettuce or leafy greens

  • 1 cup Butter lettuce or leafy greens (provides a tender base)

Cooked shrimp or sliced tofu

  • 1 cup Cooked shrimp or sliced tofu (for extra nutrients)

Rice vermicelli noodles

  • 1 cup Rice vermicelli noodles (traditional filler)

Peanut sauce or hoisin-based dip

  • 1/4 cup Peanut sauce or hoisin-based dip (for savory, sweet contrast)

Soy sauce or tamari

  • 2 tablespoons Soy sauce or tamari (for a salty splash)

Instructions 

  • Soak rice paper sheets briefly in warm water until soft.
  • Lay softened rice paper on a flat surface and layer with greens, vegetables, herbs, and protein.
  • Fold the sides and roll tightly to enclose the filling.
  • Repeat with remaining ingredients.
  • Serve with peanut or hoisin sauce and soy sauce for dipping.

Notes

Keep the rice paper moist to prevent tearing during rolling.
Calories: 150kcal
Cost: $15
Course: Appetizer
Cuisine: Asian
Keyword: Vegetables

Unleash the Flavor: A Quick Dive into Egg Fried Rice

Welcome to a culinary adventure that’s as quick as it is delightful! If you’ve ever found yourself staring into the fridge wondering what to whip up for dinner, this 10-minute Egg Fried Rice recipe is your golden ticket. Packed with vibrant veggies, fluffy scrambled eggs, and a tantalizing soy sauce kick, this meal is not just nutritious but also a burst of flavor in every bite. Whether you’re a busy professional, a student, or just someone seeking a fun cooking project, this dish is sure to impress!

Why You’ll Love This Recipe

  • Quick and Easy: Ready in just 10 minutes, making it perfect for busy weeknights when you need something satisfying fast!
  • Versatile Ingredients: Customize with whatever veggies you have on hand—peas, carrots, or even leftover proteins!
  • Nutritious and Filling: A balanced meal that packs proteins, carbs, and essential vitamins, keeping you energized.
  • One-Pan Wonder: Minimal cleanup required as everything cooks in one skillet or wok—less mess, more fun!
  • Kid-Friendly: A surefire hit with the little ones; they’ll love the colorful veggies and the fun flavors!

Ingredient Breakdown

Let’s gather our ingredients! This recipe is simple, but let’s explore each component for maximum flavor and nutrition. Here’s what you’ll need:

  • 2 cups cooked rice: Preferably day-old; this helps achieve the perfect texture!
  • 2 eggs, beaten: Adds protein and fluffiness to the dish.
  • 1 cup mixed vegetables: Think peas, carrots, and corn for a colorful mix; feel free to swap these based on your fridge’s contents!
  • 2 tablespoons soy sauce: The essential flavor booster—choose low-sodium if you’re watching salt intake.
  • 1 tablespoon sesame oil: Adds a nutty flavor that elevates the dish; don’t skip this!
  • 2 green onions, chopped: For a fresh crunch and flavor burst.
  • Salt and pepper to taste: Essential for seasoning and bringing all the flavors together.

Step-by-Step Instructions

Side view of a serving of egg fried rice showcasing grains and veggies.

Ready to cook? Let’s get started! Follow these simple steps to whip up your Egg Fried Rice:

  • Prep the Skillet: In a large skillet or wok, heat a little oil over medium heat. Add the beaten eggs and scramble until fully cooked. Remove the eggs from the skillet and set aside.
  • Sauté the Vegetables: In the same skillet, add a bit more oil if needed and toss in the mixed vegetables. Sauté for about 2-3 minutes until they’re tender.
  • Add the Rice: Incorporate the cooked rice into the skillet along with the soy sauce. Stir everything together until the rice is heated through, breaking apart any clumps.
  • Combine Ingredients: Add the scrambled eggs back into the skillet. Mix everything well, incorporating the green onions and sesame oil, and season with salt and pepper to taste.

Pro Tips for Perfect Egg Fried Rice

Want to elevate your Egg Fried Rice to the next level? Check out these expert tips:

  • Use Day-Old Rice: Freshly cooked rice can be too sticky; day-old rice has the right texture for frying.
  • High Heat is Key: Cooking on medium-high heat helps to achieve that perfect fried texture without steaming the rice.
  • Don’t Overcrowd the Pan: If you’re making a large batch, consider cooking in batches to maintain the quality of each serving.
  • Add Protein: Boost the nutritional value by tossing in cooked chicken, shrimp, or tofu for extra protein.
  • Experiment with Sauces: Try adding oyster sauce or chili sauce for a different flavor profile.
  • Fresh Herbs Enhance Flavor: Garnish with cilantro or basil for an aromatic touch.
  • Eggs Last: Add the eggs at the end to prevent overcooking and keep them fluffy.
  • Don’t Rush the Sauté: Allow vegetables to sauté until tender for optimal flavor.

Common Mistakes and Troubleshooting

Even the best chefs make mistakes! Here are some common pitfalls and how to avoid them:

  • Too Sticky Rice: If your rice is sticky, it’s likely too fresh. Always use day-old rice for the best texture.
  • Overcooked Eggs: Scramble the eggs just until they’re set; they’ll continue to cook when added back into the dish.
  • Insufficient Flavor: Always taste before serving! Adjust soy sauce, salt, or add a splash more sesame oil if needed.
  • Vegetables Too Crunchy: Make sure to sauté them until tender, but not mushy, to retain a bit of crunch.

Flavorful Variations to Try

This recipe is wonderfully adaptable! Here are some tasty variations to keep things exciting:

  • Spicy Egg Fried Rice: Add a teaspoon of chili oil or red pepper flakes for a spicy kick!
  • Vegetable Delight: Load up on extra veggies like bell peppers, broccoli, or zucchini for a health boost.
  • Protein-Packed: Stir in shredded rotisserie chicken or cooked shrimp for a hearty meal.
  • Vegan Version: Replace eggs with tofu scrambled or chickpea flour for a plant-based twist.

Storage and Make-Ahead Instructions

Want to prep ahead? Here’s how to store and reheat your Egg Fried Rice:

  • Storing Leftovers: Store any leftovers in an airtight container in the fridge for up to 3 days.
  • Reheating: Reheat in a skillet over medium heat with a splash of water to prevent drying out.
  • Make-Ahead: You can prepare the rice and chopped veggies a day in advance and store them separately until ready to cook.

FAQ: Your Egg Fried Rice Questions Answered

Got questions? Let’s tackle some common queries!

  • Can I use frozen vegetables? Absolutely! They’re a great time-saver—just make sure to thaw and drain excess moisture.
  • What type of rice is best? Long-grain white rice or jasmine rice works best for fried rice due to their fluffy texture.
  • Can I make this gluten-free? Yes! Use gluten-free soy sauce or tamari.
  • How do I make it less salty? Use low-sodium soy sauce and taste as you go to control the saltiness.
  • Is fried rice healthy? When made with fresh vegetables and lean proteins, it can be a healthy meal option!
  • Can I add sauces? Definitely! Feel free to drizzle on some teriyaki or sweet chili sauce for extra flavor.
  • What’s the best oil for frying? Neutral oils like canola or avocado oil work best as they won’t overpower the taste.
  • How can I make it vegetarian? Skip the eggs and add extra veggies or tofu for a delicious vegetarian option.

Nutrition Tips and Dietary Adaptations

Looking to enhance the nutritional profile? Here are some adaptations:

  • Whole Grain Rice: Substitute white rice with brown rice or quinoa for added fiber.
  • Extra Veggies: The more veggies, the better! Aim for a rainbow of colors for a variety of nutrients.
  • Healthy Fats: Use olive oil instead of sesame oil for a heart-healthy option.

Equipment Recommendations

Here’s what you’ll need to whip up this delicious dish:

  • Skillet or Wok: A non-stick skillet or wok is essential for easy cooking and cleanup.
  • Spatula: A sturdy spatula helps in stirring and flipping ingredients efficiently.
  • Measuring Cups and Spoons: For accurate ingredient measurements, especially with sauces.

Serving Suggestions

How to serve your Egg Fried Rice? Here are some fun ideas:

  • Garnish: Top with sesame seeds and additional green onions for a pop of color.
  • Side Dishes: Pair with a fresh salad or spring rolls for a complete meal.
  • Sauce on the Side: Serve with soy sauce or sweet chili sauce for dipping.

Final Thoughts

And there you have it! A colorful, nutritious, and downright delicious Egg Fried Rice that’s ready in a flash. Perfect for any meal, this dish proves that eating healthy can be fun, vibrant, and utterly satisfying. So grab your skillet, unleash your inner chef, and make this quick meal that’s sure to become a staple in your kitchen. Happy cooking!

Quick 10 Minute Egg Fried Rice

Prep Time 3 minutes
Cook Time 7 minutes
Total Time 10 minutes
Servings 2 servings
Calories 350
A quick and easy fried rice recipe perfect for a satisfying meal in just 10 minutes.

Ingredients

Rice

  • 2 cups cooked rice (preferably day-old)

Eggs

  • 2 pieces beaten eggs

Vegetables

  • 1 cup mixed vegetables (peas, carrots, corn)

Soy Sauce

  • 2 tablespoons soy sauce

Sesame Oil

  • 1 tablespoon sesame oil

Green Onions

  • 2 green onions chopped green onions

Salt and Pepper

  • to taste salt and pepper

Instructions 

  • Heat oil in a skillet, scramble eggs until cooked, then set aside.
  • Cook vegetables in the same skillet for 2-3 minutes until tender.
  • Add rice and soy sauce, stir until heated and clumps break apart.
  • Return eggs to skillet, add sesame oil and green onions, season with salt and pepper, then mix well.

Notes

Use day-old rice for best texture and flavor.
Calories: 350kcal
Cost: $8
Course: Main Course
Cuisine: Asian
Keyword: Fried Rice

Why You’ll Love This Chickpea Flour Cottage Cheese Flatbread!

If you’re looking for a quick, nutritious, and utterly delicious way to enjoy your meals, then you’ve hit the jackpot with this Chickpea Flour Cottage Cheese Flatbread! This recipe is a game changer for anyone who craves a healthy yet satisfying option without sacrificing flavor. Here are five reasons why this flatbread will become your new best friend in the kitchen:

  • High in Protein: With cottage cheese as a primary ingredient, this flatbread packs a protein punch, perfect for fueling your day or post-workout recovery.
  • Quick and Easy: Ready in just a few simple steps, this flatbread is perfect for busy weeknights or spontaneous gatherings with friends.
  • Versatile Base: Whether you’re using it for wraps, pizza, or as a side to your favorite soups and salads, this flatbread adapts to whatever flavor profile you desire.
  • Gluten-Free Option: Made primarily with chickpea flour, this recipe caters to gluten-sensitive eaters without skimping on taste or texture.
  • Exciting Flavor: The nutty taste of chickpea flour combined with the creaminess of cottage cheese creates a flavor explosion that feels indulgent yet healthy.

Ingredients You’ll Need

Creating your Chickpea Flour Cottage Cheese Flatbread is a breeze! Here’s what you need:

  • 1 cup cottage cheese: Choose full-fat for richness, or low-fat if you prefer something lighter.
  • 2 large eggs: These help bind the ingredients and provide moisture.
  • 1/2 cup chickpea flour: The star of the show! This flour gives the flatbread its unique flavor and texture.

Feel free to get creative with substitutions:

  • Flour Alternatives: If you’re looking for a low-carb option, almond flour works well. For a different flavor, try using oat flour.
  • Spice It Up: Add herbs like oregano or spices like cumin to the batter for an extra flavor kick!

How to Make Chickpea Flour Cottage Cheese Flatbread

Follow these straightforward steps to whip up your new favorite flatbread:

  1. Add cottage cheese and eggs to a blender.
  2. Blend until smooth and creamy.
  3. Incorporate chickpea flour and blend again until well combined.
  4. Pour the batter onto a parchment-lined baking sheet or heated skillet.
  5. Spread into a thin, even rectangle or circle.
  6. Bake or cook until set and golden around the edges, approximately 10-12 minutes.
  7. Let cool slightly before slicing for wraps or serving as pizza bases.

Pro Tips for Perfect Flatbread

Side view of a flaky flatbread made from chickpea flour and cottage cheese, showcasing its texture.

To ensure your flatbread turns out perfectly every time, check out these expert tips:

  • Don’t Overmix: Blend just until combined to keep the texture light and airy.
  • Prep Your Pan: Ensure your skillet is well-heated or your baking sheet is lined with parchment for easy release.
  • Control the Thickness: Aim for about 1/4 inch thickness for an ideal balance of crispness and chewiness.
  • Flavor Boost: Add a pinch of salt or your favorite spices to enhance the overall taste.
  • Check for Doneness: The edges should be golden brown, but the center should remain soft.
  • Let It Cool: Allowing the flatbread to sit for a few minutes helps it firm up and makes it easier to handle.

Common Mistakes & Troubleshooting

Don’t let minor hiccups ruin your flatbread experience! Here are some common mistakes and how to fix them:

  • Cracking Flatbread: This can happen if the batter is too thick or if it’s cooked too long. Make sure to spread evenly and keep an eye on the cooking time.
  • Flatbread Is Too Dense: If the flatbread is dense, ensure you’re blending enough air into the batter. The eggs should be fully incorporated into the cottage cheese.
  • Sticking to the Pan: Use parchment paper or a non-stick spray to prevent sticking. If using a skillet, make sure it’s well-greased or heated.

Delicious Variations to Try

Want to switch things up? Here are four fun variations you can try with this flatbread recipe:

  • Herbed Flatbread: Add finely chopped rosemary or thyme to the batter for an aromatic twist.
  • Spicy Flatbread: Mix in a teaspoon of chili powder or cayenne for a kick.
  • Sweet Flatbread: Substitute a tablespoon of honey and a dash of cinnamon for a sweet treat, perfect for breakfast.
  • Cheesy Flatbread: Incorporate shredded cheese into the batter, like mozzarella or cheddar, for a gooey, cheesy delight.

How to Store and Make Ahead

Make your meal prep even easier with these storage tips:

  • Storing Leftovers: Keep your flatbread in an airtight container in the fridge for up to 3 days.
  • Freezing: Slice and freeze flatbread between layers of parchment paper for up to a month. Thaw in the fridge overnight before use.
  • Make Ahead: Prepare the batter in advance and store it in the fridge for up to 24 hours. Just stir before cooking!

Nutritional Benefits & Dietary Adaptations

This Chickpea Flour Cottage Cheese Flatbread isn’t just tasty; it’s also packed with nutritional benefits:

  • Rich in Protein: Perfect for muscle repair and growth, thanks to the cottage cheese.
  • High Fiber: Chickpea flour adds fiber, aiding in digestion and promoting fullness.
  • Low Carb Option: Great for those on a low-carb diet when using chickpea or almond flour.

For dietary adaptations, consider:

  • Vegan Option: Substitute eggs with flaxseed meal mixed with water.
  • Dairy-Free: Use dairy-free cottage cheese or a nut-based alternative.

Essential Equipment Recommendations

To create your flatbread masterpiece, here’s what you’ll need:

  • Blender or Food Processor: For smooth mixing of ingredients.
  • Baking Sheet or Skillet: Choose your cooking method based on preference.
  • Parchment Paper: To prevent sticking and make cleanup a breeze.

Serving Suggestions

Ready to enjoy your Chickpea Flour Cottage Cheese Flatbread? Here are some serving ideas:

  • Wraps: Fill with fresh veggies, hummus, or grilled chicken for a hearty meal.
  • Pizza Base: Top with sauce, cheese, and your favorite toppings for a guilt-free pizza night.
  • Sides: Serve alongside soups or salads for a filling addition to your meal.

Frequently Asked Questions

Got questions? We’ve got answers! Here are some common FAQs:

  • Can I make the batter ahead of time? Yes! Store it in the fridge for up to 24 hours.
  • Why are my flatbreads cracking? This may happen if the batter is too thick or cooked too long. Ensure even spreading and appropriate cooking time.
  • Do I need to strain the cottage cheese? No need! Just use it straight from the container.
  • What can I use instead of chickpea flour? Almond flour or oat flour are great alternatives.
  • How do I know when my flatbread is done? Look for golden edges and a firm center.
  • Can I freeze the flatbread? Yes! Wrap it well and store in the freezer for up to a month.
  • Can I make this recipe vegan? Absolutely! Use flaxseed meal instead of eggs.
  • Is this flatbread gluten-free? Yes, especially when using chickpea flour!

Conclusion: Your New Favorite Flatbread Awaits!

Now that you’ve got the scoop on this Chickpea Flour Cottage Cheese Flatbread, it’s time to roll up your sleeves and get cooking! With its wholesome ingredients and endless possibilities, you’ll find yourself reaching for this recipe time and time again. So go ahead, unleash your inner chef, and enjoy the delicious journey ahead!

Chickpea Flour Cottage Cheese Flatbread

Prep Time 10 minutes
Cook Time 15 minutes
Total Time 25 minutes
Servings 4 pieces
Calories 250
A quick and protein-packed flatbread made with chickpea flour and cottage cheese, perfect for wraps or pizza.

Ingredients

Dairy

  • 1 cup cottage cheese
  • 2 large eggs

Dry Ingredients

  • 1/2 cup chickpea flour

Instructions 

  • Add cottage cheese and eggs to a blender.
  • Blend until smooth, then add chickpea flour and blend again.
  • Pour batter onto a parchment-lined baking sheet or skillet and spread evenly.
  • Bake or cook until set and golden around edges.
  • Let cool slightly before slicing and serving.

Notes

This flatbread is versatile and can be used as a wrap or pizza base.
Calories: 250kcal
Cost: $8
Course: Main Course
Cuisine: international
Keyword: chickpea, cottage cheese, Flatbread

Welcome to Your Culinary Playground: The Ultimate Spring Green Salad

As spring unfolds, there’s nothing quite like a vibrant salad to celebrate the season’s fresh bounty. This Spring Green Salad with Basil Lemon Vinaigrette is not just a feast for the eyes; it’s a delicious and nutritious way to revitalize your plate. Bursting with crisp greens, juicy cherry tomatoes, and a zesty vinaigrette, this salad is your go-to recipe for a refreshing meal that’s simple to prepare and packed with flavor. Let’s dive into why you’ll absolutely love this recipe, and how it can transform your dining experience!

Why You’ll Love This Recipe

  • Quick and Easy: Ready in just 15 minutes, this salad requires no cooking, making it perfect for busy days.
  • Flavor Explosion: The combination of fresh basil and tangy lemon creates a delightful vinaigrette that elevates the salad.
  • Nutrient-Dense: Packed with vitamins and minerals, the mixed spring greens are a powerhouse of nutrition, providing antioxidants and fiber.
  • Customizable: Easily adapt this salad by adding your favorite vegetables or proteins to suit your taste.
  • Seasonal Freshness: This recipe celebrates spring ingredients, ensuring you enjoy the freshest flavors the season has to offer.

Ingredient Breakdown: What You’ll Need

Here’s what you’ll need to create this vibrant salad, along with some substitution ideas to spark your creativity:

  • 4 cups mixed spring greens: Use a blend of arugula, spinach, and baby kale for a variety of textures.
  • 1 cup cherry tomatoes, halved: Substitute with grape tomatoes or diced bell peppers for a different flavor.
  • 1 cucumber, sliced: Any crisp variety works, but feel free to use zucchini for a twist.
  • ½ cup radishes, thinly sliced: If you prefer a milder taste, consider using jicama or sweet bell peppers.
  • ¼ cup red onion, thinly sliced: Swap with scallions for a milder onion flavor.
  • ½ cup fresh basil leaves: Experiment with mint or cilantro for a unique flavor profile.
  • ¼ cup extra-virgin olive oil: You can use avocado oil for a different taste and health benefits.
  • 2 tablespoons fresh lemon juice: Lime juice works well too if you’re looking for a zesty kick.
  • 1 teaspoon lemon zest: This adds a bright flavor; don’t skip it!
  • Salt and pepper, to taste: Adjust based on your preference.

Step-by-Step Instructions: Crafting Your Salad

Juicy spring greens salad featuring sliced cucumbers and red onion, drizzled with vinaigrette.

Creating the Spring Green Salad with Basil Lemon Vinaigrette is a breeze! Follow these easy steps:

  • Rinse and Dry: Start by rinsing the mixed spring greens thoroughly in cold water. Pat them dry with a clean kitchen towel or use a salad spinner to remove any excess moisture.
  • Chop the Vegetables: Slice the cherry tomatoes in half, the cucumber into rounds, and the radishes into thin slices. Also, thinly slice the red onion.
  • Combine Salad Ingredients: In a large salad bowl, toss together the mixed greens, cherry tomatoes, cucumber, radishes, red onion, and fresh basil leaves.
  • Make the Vinaigrette: In a small bowl, whisk together the extra-virgin olive oil, fresh lemon juice, lemon zest, salt, and pepper until well combined and emulsified.
  • Dress the Salad: Drizzle the vinaigrette over the salad ingredients in the bowl. Toss gently to ensure the greens and vegetables are evenly coated with the dressing.
  • Taste and Adjust: Sample the salad and adjust the seasoning with more salt, pepper, or lemon juice as desired.
  • Serve Immediately: Transfer the dressed salad to plates or serve it family-style from the bowl. Enjoy your fresh, flavorful creation!

Pro Tips for the Perfect Salad

Here are some expert insights to elevate your salad-making game:

  • Quality Greens: Always use the freshest, tender greens for optimal flavor and texture.
  • Drying is Key: Ensure your greens are thoroughly dried; excess moisture can dilute the vinaigrette.
  • Chill Your Ingredients: For an extra-refreshing salad, chill your salad bowl and ingredients in the refrigerator before assembling.
  • Brighten Up: Adding a pinch of sugar to the vinaigrette can balance the acidity and enhance the flavors.
  • Mix and Match: Feel free to add nuts, seeds, or your favorite protein, like grilled chicken or chickpeas, for a more filling meal.
  • Dress Just Before Serving: To keep your salad crisp, dress it just before serving.
  • Experiment with Flavors: Add a splash of balsamic vinegar or a teaspoon of Dijon mustard to the vinaigrette for an extra kick.
  • Store Properly: If you have leftovers, store the salad and dressing separately.

Common Mistakes and Troubleshooting

Even the best of us make mistakes in the kitchen! Here are a few common pitfalls and how to avoid them:

  • Overdressing the Salad: Too much dressing can make your salad soggy. Start with a little, then add more as needed.
  • Using Wilted Greens: Always check your greens for freshness; wilted or slimy greens can ruin the dish.
  • Ignoring Seasoning: Don’t forget to season your salad! A little salt and pepper can elevate the flavors immensely.
  • Chopping Ingredients Too Small: Aim for uniform sizes in your vegetables to ensure an even bite and presentation.

Delicious Variations to Try

Feeling adventurous? Here are some exciting variations to put a twist on your Spring Green Salad:

  • Fruit-Infused: Add sliced strawberries or mandarin oranges for a sweet touch.
  • Grain Bowl: Mix in cooked quinoa or farro for a hearty, nutritious twist.
  • Cheesy Delight: Top with crumbled feta or goat cheese for a creamy contrast.
  • Protein-Packed: Include grilled shrimp, chicken, or chickpeas for a satisfying, complete meal.

Storage and Make-Ahead Instructions

Want to prep ahead? Here’s how to store your salad:

  • Make-Ahead: Prepare the salad ingredients in advance (except the dressing) and keep them in an airtight container in the fridge for up to 2 days.
  • Store Dressing Separately: Keep the vinaigrette in a sealed jar in the fridge for up to a week. Shake well before using.
  • Freshness Matters: If storing leftovers, keep the salad and dressing separate to maintain crispness and prevent sogginess.

Frequently Asked Questions About Spring Greens

Got questions? We’ve got answers! Here are some common inquiries about spring greens and this salad:

  • What are spring greens made of? Spring greens typically include tender leaves like arugula, spinach, and baby kale.
  • Can I prep spring greens salad ahead of time? Yes! Just store the salad and dressing separately to keep it fresh.
  • How long will this salad last in the fridge? If stored properly, it should be good for 1-2 days, but it’s best enjoyed fresh.
  • Can I use frozen vegetables? While fresh is best, you can use thawed frozen veggies in a pinch.
  • What’s the best way to slice radishes? Thinly slicing them enhances their flavor and makes them easier to eat.
  • What other greens can I use? Feel free to mix in kale, romaine, or even shredded cabbage for variety.
  • Can I add nuts or seeds? Absolutely! Toasted walnuts, pecans, or sunflower seeds add great texture and flavor.
  • Is this salad vegan? Yes, this salad is entirely plant-based and vegan-friendly!

Nutritional Tips and Dietary Adaptations

Looking to tweak the recipe for dietary needs? Here are some suggestions:

  • Gluten-Free: This recipe is naturally gluten-free; enjoy without any adaptations.
  • Low-Carb: Skip or reduce the amount of radishes and cucumbers if you’re watching your carb intake.
  • Rich in Protein: Add grilled chicken or a scoop of hummus for a protein boost, perfect for post-workout meals.
  • Heart-Healthy: Using extra-virgin olive oil is a great choice for heart health, packed with healthy fats.

Equipment Recommendations

Make your salad-making experience even smoother with these essential tools:

  • Salad Spinner: A must-have for drying greens quickly and effectively.
  • Sharp Knife and Cutting Board: For easy chopping of vegetables and herbs.
  • Whisk: Essential for emulsifying the vinaigrette to achieve that perfect creamy texture.
  • Large Mixing Bowl: A spacious bowl is key for tossing all the ingredients together without spilling.

Serving Suggestions: How to Enjoy Your Salad

Ready to serve? Here are some ideas on how to enjoy your Spring Green Salad:

  • As a Side: Pair it with grilled fish or chicken for a light and healthy dinner.
  • For Lunch: Serve it with a slice of whole grain bread or wrap for a satisfying meal.
  • Picnic Perfect: Pack it up in a container for a refreshing picnic treat!
  • Garnish: Top with edible flowers for a stunning presentation at gatherings.

Conclusion: Celebrate Spring with Every Bite!

This Spring Green Salad with Basil Lemon Vinaigrette is more than just a dish; it’s a celebration of the season’s best produce, designed to invigorate your meals and bring joy to your table. Embrace the fresh flavors, enjoy the vibrant colors, and let every bite remind you that healthy eating can be both exciting and delicious. Gather your ingredients, unleash your culinary creativity, and let’s make this spring unforgettable!

Spring Green Salad with Basil Lemon Vinaigrette: An Incredible Ultimate Recipe

Prep Time 15 minutes
Total Time 15 minutes
Servings 4 servings
Calories 150
A fresh and vibrant salad featuring spring greens and a zesty basil lemon vinaigrette, perfect for a light and healthy meal.

Ingredients

Main

  • 4 cups mixed spring greens (such as arugula, spinach, and baby kale)
  • 1 cup cherry tomatoes, halved
  • 1 cucumber cucumber, sliced
  • 0.5 cup radishes, thinly sliced
  • 0.25 cup red onion, thinly sliced
  • 0.5 cup fresh basil leaves
  • 0.25 cup extra-virgin olive oil
  • 2 tablespoons fresh lemon juice
  • 1 teaspoon lemon zest
  • to taste Salt and pepper

Instructions 

  • Rinse and dry the greens. Slice vegetables and basil.
  • Combine greens, vegetables, and basil in a large bowl.
  • Whisk olive oil, lemon juice, lemon zest, salt, and pepper to make the vinaigrette.
  • Drizzle dressing over the salad and toss gently.
  • Taste and adjust seasoning if needed. Serve immediately.

Notes

Use fresh basil for the best flavor.
Calories: 150kcal
Cost: $15
Course: Salad
Cuisine: American
Keyword: Spring Greens

Are you ready to dive into a culinary adventure that’s both quick and delicious? Look no further! In just 15 minutes, you can whip up a vibrant, flavor-packed plate of veggie egg fried rice that’s perfect for busy food lovers. This dish is not just a meal; it’s a celebration of fresh ingredients and bold flavors that will make your taste buds dance with joy. Whether you’re a seasoned chef or a kitchen newbie, this recipe is your ticket to creating a homemade meal that’s both nutritious and satisfying. Let’s explore why this is the ultimate egg fried rice recipe!

Why You’ll Love This Recipe

  • Quick and Easy: Perfect for weeknight dinners when time is tight, this dish comes together in just 15 minutes!
  • Flavor Explosion: The combination of soy sauce, sesame oil, and fresh vegetables creates a mouthwatering medley of tastes.
  • Nutritious Ingredients: Packed with colorful veggies, this recipe is not only tasty but also a great way to sneak in essential nutrients.
  • Versatile: Customize with your favorite protein like tofu or chicken, or keep it plant-based for a lighter option.
  • Perfect for Meal Prep: Make a big batch and enjoy leftovers for lunch or dinner throughout the week.

Ingredient Breakdown

Here’s what you’ll need to create your delicious 15-minute veggie egg fried rice:

  • 2 cups cooked rice: Use day-old rice for the best texture and to prevent it from becoming mushy.
  • 2 large eggs: Lightly beaten for fluffy egg additions that enhance the dish.
  • 1 cup carrots: Finely diced for sweetness and crunch.
  • 1 cup green peas: Fresh or frozen, they add a pop of color and nutrition.
  • 1 cup bell peppers: Use a mix for vibrant colors and flavors.
  • 2 stalks green onions: Thinly sliced for a fresh, mild onion flavor.
  • 2 cloves garlic: Minced to bring out aromatic flavors.
  • 2 tablespoons soy sauce: Adjust to taste for the perfect umami kick.
  • 1 tablespoon sesame oil: Used for cooking and adds a nutty flavor.
  • Salt and pepper to taste: For seasoning.
  • 1/2 cup frozen corn (optional): For added sweetness and texture.
  • 1 teaspoon chili flakes (optional): For a spicy kick.
  • 1 cup tofu or cooked chicken (optional): For protein boost, making it more filling.

Cooking Instructions

Now, let’s get cooking! Follow these simple steps for a delightful dish:

  1. In a large wok or skillet, heat the sesame oil over medium-high heat.
  2. Add the minced garlic and sauté for about 30 seconds until fragrant.
  3. Stir in the carrots and cook for 2-3 minutes until they start to soften.
  4. Add the bell peppers, green peas, and corn; stir fry for another 2-3 minutes.
  5. Push the vegetables to one side, pour in the beaten eggs on the other side, and scramble until just set.
  6. Mix the eggs with the veggies, then add the cooked rice to the pan.
  7. Drizzle the soy sauce over the rice, season with salt and pepper, and toss everything together until well combined and heated through.
  8. Finally, stir in the green onions and chili flakes if using, and serve hot!

Pro Tips for Perfect Veggie Egg Fried Rice

Side view of a delicious bowl of veggie egg fried rice garnished with green onions and sesame seeds.
  • Use Day-Old Rice: This prevents clumping and ensures a fluffy texture. Fresh rice may become mushy.
  • Don’t Overcook the Eggs: Scramble just until set; they should remain fluffy and soft.
  • Customize Your Veggies: Feel free to use any vegetables you have on hand—zucchini, broccoli, or snap peas work great!
  • Adjust Flavor to Your Liking: Taste and tweak the soy sauce and seasoning as per your preference.
  • Use High Heat: Stir frying on high heat helps to achieve that signature fried rice taste.
  • Garnish for Extra Flavor: Add sesame seeds or a drizzle of sesame oil before serving for an extra flavor boost.
  • Make It Spicy: Increase chili flakes or add sriracha for a fiery kick.
  • Keep It Vegan: Skip the eggs and add more tofu or chickpeas for protein.

Common Mistakes and Troubleshooting

  • Rice Too Sticky: Ensure you use day-old rice, and don’t overcrowd the pan while cooking.
  • Eggs Overcooked: Cook scrambled eggs quickly before mixing them in to keep them tender.
  • Flavor Lacking: Don’t hesitate to adjust soy sauce, salt, and pepper to enhance the flavor.
  • Too Dry: If your fried rice is too dry, add a splash more soy sauce or a little water while cooking.

Delicious Variations

Spice things up with these tasty variations:

  • Thai Basil Fried Rice: Add fresh Thai basil for a fragrant twist.
  • Sweet and Sour Fried Rice: Incorporate pineapple chunks for a sweet and tangy flavor.
  • Spicy Kimchi Fried Rice: Mix in chopped kimchi for an umami-packed, spicy version.
  • Seafood Fried Rice: Toss in shrimp or scallops for a delightful seafood twist.

Storage and Make-Ahead Instructions

This veggie egg fried rice is perfect for meal prep! Here’s how to store and reheat:

  • Refrigerate: Store in an airtight container in the fridge for up to 3 days.
  • Freeze: For longer storage, freeze in portions for up to 2 months. Thaw overnight in the fridge before reheating.
  • Reheat: Use a skillet over medium heat, adding a splash of water or soy sauce to keep it moist.

Frequently Asked Questions

  • Can I use fresh rice instead of day-old rice?
    Yes, but it may become mushy. Be sure to cool it quickly on a baking sheet to reduce moisture.
  • How can I make this dish vegetarian?
    Simply omit any meat and use tofu or additional vegetables for protein.
  • What can I use instead of soy sauce?
    Try tamari for a gluten-free option or coconut aminos for a sweeter alternative.
  • Can I add more vegetables?
    Absolutely! Feel free to add any vegetables you love or have on hand.
  • Is this recipe kid-friendly?
    Yes! Adjust the spice level to suit your kids’ taste, and they’ll enjoy this colorful dish.
  • How can I make it spicier?
    Increase the amount of chili flakes or add sriracha to your serving.
  • What proteins can I add?
    Chicken, shrimp, or even chickpeas work great in this fried rice.
  • Can this be served cold?
    Yes! It can be enjoyed cold as a salad or a snack.

Nutritional Tips and Dietary Adaptations

This recipe is not only delicious but can also cater to various dietary needs:

  • Gluten-Free: Use gluten-free soy sauce or tamari to suit your dietary needs.
  • Low-Carb: Substitute rice with cauliflower rice for a low-carb option.
  • High-Protein: Add more tofu or chicken to boost protein content.
  • Vegan: Skip the eggs and use plant-based proteins to keep it vegan.

Essential Equipment Recommendations

To make your cooking experience smooth and enjoyable, here’s what you’ll need:

  • Wok or Large Skillet: Ideal for stir-frying and achieving that perfect texture.
  • Spatula: For easy mixing and flipping of ingredients.
  • Measuring Cups and Spoons: To ensure precision in your ingredients.
  • Knife and Cutting Board: For quick prep of your fresh veggies.

Serving Suggestions

This veggie egg fried rice is versatile and can be served in various ways:

  • Pair it with a side salad for a refreshing contrast.
  • Serve alongside your favorite protein for a complete meal.
  • Top with additional green onions or sesame seeds for added crunch and flavor.
  • Enjoy it as a standalone dish for a light lunch or dinner option.

In conclusion, creating this zesty 15-minute veggie egg fried rice is not just about cooking; it’s about enjoying the vibrant flavors and the joy of making healthy meals fun and exciting. So grab your ingredients, unleash your inner chef, and let the flavor explosion begin!

Easy 15-Minute Veggie Egg Fried Rice Recipe for Busy Food Lovers

Prep Time 5 minutes
Cook Time 10 minutes
Total Time 15 minutes
Servings 4 servings
Calories 350
A quick and delicious fried rice recipe packed with colorful vegetables and protein, perfect for busy days.

Ingredients

Rice and grains

  • 2 cups cooked rice (Use day-old rice for best texture)

Eggs

  • 2 large large eggs (Lightly beaten)

Vegetables

  • 1 cup carrots (Finely diced)
  • 1 cup green peas (Fresh or frozen)
  • 1 cup bell peppers (Colorful varieties)
  • 2 stalks green onions (Thinly sliced)

Aromatics and sauces

  • 2 cloves garlic (Minced)
  • 2 tablespoons soy sauce (Adjust to taste)
  • 1 tablespoon sesame oil (For cooking)
  • to taste salt
  • to taste pepper

Optional ingredients

  • 1/2 cup frozen corn ((Optional))
  • 1 teaspoon chili flakes (Optional, for heat)
  • 1 cup tofu or cooked chicken (Optional, for protein)

Instructions 

  • Heat sesame oil in a wok or large skillet over medium-high heat.
  • Add garlic and cook for 30 seconds until fragrant.
  • Push ingredients to the side, scramble eggs in the pan, then mix with vegetables and rice.
  • Stir in soy sauce, salt, pepper, and optional chili flakes or corn. Add protein if using.
  • Cook for another 2-3 minutes, then serve hot garnished with sliced green onions.

Notes

Use day-old rice for best texture and flavor. Feel free to customize with your favorite proteins and vegetables.
Calories: 350kcal
Cost: $10
Course: Main Course
Cuisine: Asian
Keyword: Fried Rice

Unleash Your Culinary Creativity with Chickpea Flour Flatbreads!

Welcome to the vibrant world of healthy cooking, where flavor and nutrition unite in delightful harmony! If you’re looking for a quick, easy, and utterly delicious way to elevate your meals, you’ve come to the right place. In this definitive guide, we’ll dive into the magical realm of chickpea flour flatbreads. These versatile, gluten-free creations not only serve as a fantastic base for wraps and dips but also add a protein-packed punch to any meal. Let’s get started!

Why You’ll Love This Recipe

This isn’t just any flatbread recipe; it’s your ticket to culinary adventure! Here are five compelling reasons why you’ll adore making these chickpea flour flatbreads:

  • Quick and Easy: With just a few simple ingredients, you can whip up these flatbreads in under 30 minutes!
  • Gluten-Free Goodness: Made with chickpea flour, these flatbreads are perfect for anyone with gluten sensitivities.
  • Nutritious and Filling: Chickpea flour is loaded with protein and fiber, keeping you satisfied and energized.
  • Versatile Base: Use these flatbreads for wraps, pizzas, or as a side for soups and stews.
  • Customizable Flavors: Add herbs, spices, or toppings to personalize your flatbreads to your liking!

Ingredients You’ll Need

Gather these pantry staples to get started on your chickpea flour flatbread journey:

  • 2/3 cup flour (80g): You can use regular all-purpose flour or gluten-free flour here for a different texture.
  • 1/3 cup chickpea flour (35g): Also known as gram or besan flour, this is the star of the show!
  • 1 tsp olive oil: Adds richness and helps with browning.
  • Scant 1/4 cup warm water: Helps to bind your dough together.
  • Pinch of salt: Enhances the flavors.
  • 1 Tbs Nigella (Kalonji) seeds (Optional): For a unique flavor twist!

Step-by-Step Instructions

Juicy vegan chickpea flour flatbreads displayed enticingly, showing texture and color.

Follow these easy steps to create your delicious chickpea flour flatbreads:

  1. In a mixing bowl, combine the flours and salt.
  2. Make a well in the center, then gradually add the warm water while mixing until a soft dough forms.
  3. Knead the dough lightly, adding half the olive oil, and adjust with more water or flour as needed until pliable.
  4. Let the dough rest for 10-15 minutes to allow the flavors to meld.
  5. Heat a non-stick frying pan over medium heat.
  6. Divide the dough into golf ball-sized portions, then flatten into discs using a rolling pin or your hands.
  7. If using, push the Nigella seeds into the surface of the dough.
  8. Add a tiny bit of olive oil to the pan, then cook each disc until bubbles form, about 2-3 minutes per side.
  9. Keep warm on a plate while you cook the remaining discs.

Pro Tips for Perfect Chickpea Flour Flatbreads

Want to take your flatbread game to the next level? Here are some expert insights:

  • Resting the Dough: Allowing the dough to rest helps it become more pliable and easier to roll.
  • Adjusting Consistency: If your dough feels too sticky, add a bit more flour; if it’s too dry, a splash of water will do the trick!
  • Non-Stick Pan: Using a non-stick pan or a well-seasoned skillet ensures your flatbreads cook evenly without sticking.
  • Experiment with Flavors: Mix in spices like cumin or garlic powder for added depth.
  • Cook on Medium Heat: Cooking on too high heat can burn the flatbreads before they cook through, so keep it moderate!
  • Store Properly: Keep cooked flatbreads in an airtight container to maintain softness.
  • Make Ahead: Prepare the dough in advance and refrigerate it for quick meals later.

Common Mistakes and Troubleshooting

Even the best chefs make mistakes! Here are some common pitfalls and how to avoid them:

  • Dough Too Sticky: If your dough is overly sticky, gradually add more flour during the kneading stage.
  • Flatbreads Too Thick: Roll the dough thinly for a light and airy texture; thick flatbreads can turn out heavy.
  • Not Resting the Dough: Skipping the resting period can lead to tough flatbreads; give them time to relax!
  • Cooking Temperature: If your flatbreads are burning, lower the heat and give them more time to cook through.

Variations to Try

These flatbreads are incredibly versatile! Here are a few variations to mix things up:

  • Herbed Flatbreads: Add dried herbs like oregano or rosemary to the dough for an aromatic twist.
  • Spicy Chickpea Flatbreads: Incorporate red pepper flakes or cayenne for a spicy kick.
  • Cheesy Flatbreads: Mix in nutritional yeast for a cheesy flavor without dairy.
  • Stuffed Flatbreads: Fill the dough with sautéed veggies or cheese before cooking for a delightful surprise!

Storage and Make-Ahead Instructions

Want to enjoy these flatbreads later? Here’s how to store and prepare them in advance:

  • Refrigerate: Store cooked flatbreads in an airtight container in the fridge for up to 3 days.
  • Freeze: Freeze flatbreads between layers of parchment paper for up to a month. Reheat on a skillet before serving.
  • Dough in Advance: Prepare the dough and refrigerate it for up to 2 days. Bring to room temperature before rolling out.

Frequently Asked Questions (FAQs)

Got questions? We’ve got answers! Here are the most commonly asked questions about chickpea flour flatbreads:

  • Can I use other types of flour? Yes! Experiment with all-purpose or gluten-free blends for different textures.
  • Are these flatbreads suitable for meal prep? Absolutely! They store well and can be made ahead of time.
  • What can I serve with these flatbreads? They pair wonderfully with hummus, dips, or as a side for soups.
  • Can I make these flatbreads nut-free? Yes, just ensure any additional ingredients are nut-free.
  • How do I reheat leftover flatbreads? Simply warm them in a skillet or microwave for a few seconds.
  • Can I add toppings before cooking? Yes, feel free to top with seeds or herbs before cooking for extra flavor!
  • Is chickpea flour nutritious? Yes! It’s high in protein, fiber, and essential vitamins.
  • How do I know when my flatbreads are done? They should be lightly browned with bubbles forming on the surface.

Nutrition Tips and Dietary Adaptations

Want to maximize the health benefits of your flatbreads? Consider these tips:

  • Protein Boost: Pair with a protein-rich dip like hummus to create a well-rounded meal.
  • Add Veggies: Serve with a side of roasted or fresh vegetables for extra nutrients.
  • Healthy Fats: Drizzle with olive oil or avocado for healthy fat sources.

Equipment Recommendations

Here’s what you’ll need to whip up your chickpea flour flatbreads:

  • Mixing Bowl: A large bowl for combining your ingredients.
  • Non-Stick Skillet: Essential for evenly cooking the flatbreads without sticking.
  • Rolling Pin: For rolling out your dough to the perfect thickness.
  • Measuring Cups: Accurate measurements ensure consistent results.

Serving Suggestions

Ready to serve your delicious chickpea flour flatbreads? Try these serving ideas:

  • Wraps: Use as a base for wraps filled with your favorite veggies and proteins.
  • Dips: Serve with hummus, tzatziki, or guacamole for a delightful snack.
  • Mini Pizzas: Top with sauce and cheese for quick mini pizzas!
  • As a Side: Pair with soups, salads, or stews for a hearty meal.

And there you have it! A comprehensive guide to making delightful chickpea flour flatbreads that are not just healthy but also a joy to prepare. With this recipe, you’re well on your way to becoming a kitchen superstar! So roll up your sleeves, get creative, and enjoy the process of cooking. Happy baking!

Easy Vegan Chickpea Flour Flatbreads

Prep Time 10 minutes
Cook Time 15 minutes
Total Time 25 minutes
Servings 4 pieces
Calories 180
Delicious and simple vegan flatbreads made with chickpea and regular flour, perfect for a quick snack or meal.

Ingredients

Flours & Salt

  • 2/3 cup flour (or gluten-free flour)
  • 1/3 cup chickpea flour (gram or besan)
  • 1 tsp olive oil
  • scant 1/4 cup warm water
  • pinch salt
  • 1 Tbs tablespoon Nigella (Kalonji) seeds (Optional)

Instructions 

  • Mix the flours and salt together.
  • Make a well, then slowly add water and mix until a soft dough forms.
  • Knead the dough, add half the oil, then knead more, adjusting with water or flour as needed.
  • Let the dough rest for 10-15 minutes.
  • Divide into balls, flatten into discs, push seeds into dough, then cook on a heated pan until bubbling and golden.
  • Flip and cook until golden, then keep warm and repeat with remaining dough.

Notes

You can use gluten-free flour for a vegan, allergen-friendly option.
Calories: 180kcal
Cost: $4
Course: Main, Snack
Cuisine: Vegan
Keyword: chickpea, Flatbread