Author

Ryan

Browsing

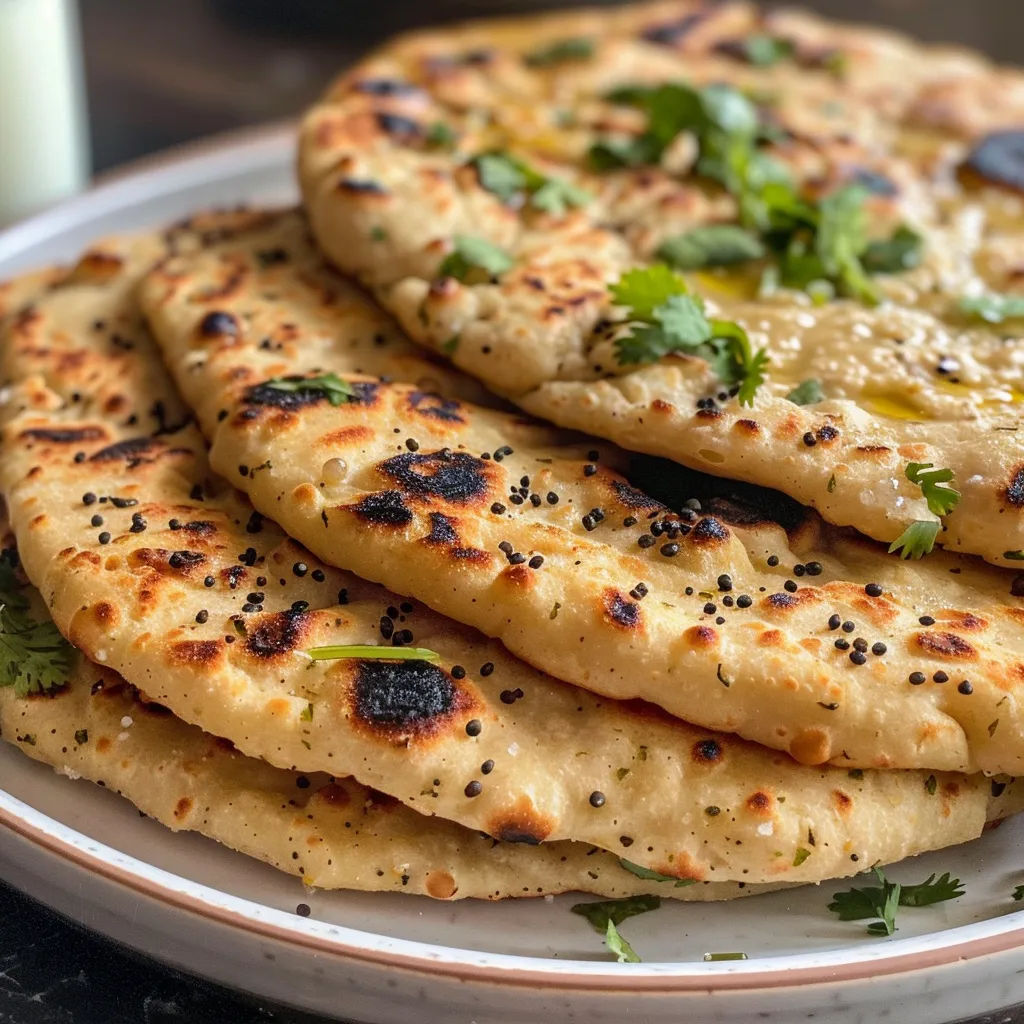
Welcome to the vibrant world of chickpea flour naan, where healthy meets hearty in a deliciously satisfying way! If you’re looking to elevate your meals with a gluten-free, grain-free flatbread that’s bursting with flavor and nutrition, you’ve landed in the right spot. This recipe is not just easy to make; it’s also a delightful way to introduce chickpea flour into your cooking routine. Let’s dive into why you’ll love this simple yet flavorful naan!

Why You’ll Love This Recipe

  • Quick and Easy: This chickpea flour naan comes together in just about 10 minutes, making it perfect for busy weeknights or sudden cravings.
  • Gluten-Free Goodness: Made entirely from chickpea flour, this naan is gluten-free, so it’s friendly for those with dietary restrictions.
  • Protein-Packed: Chickpea flour is rich in protein, making this naan not just a side dish, but a great source of energy!
  • Vegan-Friendly: This recipe uses nondairy ingredients, ensuring it’s suitable for vegans and those avoiding animal products.
  • Versatile Pairing: Whether you serve it with curries, soups, or use it as a wrap, chickpea flour naan enhances every meal!

Ingredient Breakdown

To make this delicious chickpea flour naan, you’ll need the following ingredients:

  • 1/2 cup nondairy milk: Soy, almond, or cashew milk works great here. This adds moisture and a subtle creaminess.
  • 1.5 teaspoons lemon juice: A natural curdling agent; you can substitute with light-colored vinegar if you’re in a pinch.
  • 1 cup chickpea flour: The foundation of this naan, providing a nutty flavor and essential structure.
  • 3 tablespoons whole psyllium husks: These are crucial for binding the dough. If you can’t find whole husks, psyllium powder works too.
  • 1.5 teaspoons baking powder: Ensure it’s certified gluten-free if needed.
  • 1/4 teaspoon salt: Enhances the flavor of your naan.
  • 1/8 teaspoon baking soda: Adds a fluffy texture to the naan.
  • Optional: 1.5 teaspoons garlic powder: For those who love garlic, this addition elevates the flavor profile.
  • 2 teaspoons vegetable oil: Any variety will do, but olive or coconut oil adds a nice touch.
  • Nonstick cooking spray or additional oil: For brushing the naan before cooking.

Step-by-Step Instructions

Ready to roll? Let’s make your chickpea flour naan come to life!

  1. Curdle the Milk: In a small bowl, combine the nondairy milk and lemon juice. Let it stand for about 5 minutes to curdle.
  2. Mix the Dry Ingredients: In a medium mixing bowl, whisk together the chickpea flour, whole psyllium husks, baking powder, salt, and baking soda. If you’re making garlic naan, stir in the garlic powder.
  3. Combine Wet and Dry: Add the curdled milk mixture and vegetable oil to the dry ingredients. Mix well until a cohesive dough forms. Allow the dough to sit for 1-2 minutes; this helps the psyllium absorb the liquid, making it easier to handle.
  4. Shape the Dough: Divide the dough into three equal portions. Roll each portion into a ball and place it on a well-floured surface (use chickpea flour for dusting).
  5. Roll It Out: Take one dough ball, sprinkle it with chickpea flour, and press it into an oval shape. Then, use a rolling pin to flatten it into a wide oval, about 7-8 inches long and 4-5 inches wide. Spritz or brush lightly with nonstick spray or oil.
  6. Cook the Naan: Preheat a cast-iron skillet over medium-high heat. Once hot, place the rolled-out naan into the skillet, oiled side down. Cook for about 1 minute, or until the top starts to bubble and the bottom has golden-brown spots. Flip and cook the other side for another minute.
  7. Keep Warm: Transfer the naan to a plate and loosely cover it with a clean dishcloth to keep it warm. Repeat with the remaining dough.
  8. Garnish and Serve: Optionally, sprinkle with herbs like parsley or cilantro and serve warm!

Pro Tips for Perfect Naan

Deliciously fluffy Chickpea Flour Naan garnished and ready to serve.
  • Rest the Dough: Letting the dough sit for a few minutes helps the psyllium husks do their magic, making the dough easier to handle.
  • Don’t Rush the Cooking: Ensure your skillet is adequately heated before cooking the naan. This creates those lovely golden-brown spots.
  • Experiment with Flavors: Feel free to mix in herbs or spices into the dough for a unique twist on the traditional naan.
  • Use Parchment Paper: If you’re worried about sticking, roll the naan between two sheets of parchment paper.
  • Store Properly: Keep any leftover naan in an airtight container to maintain freshness.
  • Reheat Gently: To revive leftover naan, reheat it in a skillet over low heat for a few minutes.
  • Make It Ahead: You can prepare the dough and refrigerate it for up to 24 hours before cooking!
  • Be Mindful of the Oil: If you want a lighter naan, reduce the amount of oil used in the recipe.

Common Mistakes and Troubleshooting

Even the best chefs can run into hiccups. Here are some common mistakes and how to avoid them:

  • Too Sticky?: If your dough feels overly sticky, add a little more chickpea flour until it’s manageable.
  • Dry Naan?: If your naan turns out dry, it may be due to overcooking or not enough liquid. Ensure you’re measuring accurately!
  • Uneven Cooking?: If your naan isn’t cooking evenly, check the skillet temperature. Adjust as necessary to create consistent heat.
  • Flavor Not Strong Enough?: If you find the flavor lacking, consider adding more garlic powder or fresh herbs into the dough for a bolder taste.

Delicious Variations

Ready to get creative? Here are some exciting variations to try:

  • Garlic Naan: Add 1.5 teaspoons of garlic powder to the dry ingredients for a garlicky twist.
  • Herbed Naan: Mix in fresh herbs like cilantro or parsley for a fragrant and flavorful naan.
  • Spicy Naan: For heat, add a pinch of cayenne pepper or red chili flakes to the dough.
  • Cheesy Naan: Fold in nutritional yeast or your favorite plant-based cheese for a cheesy flavor profile.

Storage and Make-Ahead Instructions

Here’s how to store and prepare your naan for later:

  • Refrigeration: Store leftover naan in an airtight container in the fridge for up to 3 days.
  • Freezing: Freeze naan by wrapping it tightly in plastic wrap followed by aluminum foil. It can last for up to 2 months. Just thaw before reheating!
  • Make-Ahead: Prepare the dough ahead of time and store it in the fridge for up to 24 hours. Shape and cook when you’re ready!

Comprehensive FAQ

  • Can I use regular flour instead of chickpea flour? No, this recipe specifically relies on chickpea flour for texture and flavor.
  • Is this recipe suitable for meal prep? Absolutely! It’s a great option for meal prepping since it can be made ahead and stored.
  • Can I make this naan without psyllium husks? Psyllium husks are crucial for binding in this recipe. Try to use them for the best results.
  • What can I serve with chickpea flour naan? Pair it with curries, stews, or even use it as a wrap for various fillings.
  • How do I know when the naan is cooked? Look for golden-brown spots on both sides and slight bubbling on the top.
  • Can I add other spices to the dough? Yes! Feel free to experiment with spices like cumin or coriander for extra flavor.
  • What if I can’t find nondairy milk? You can use regular milk, but this will no longer be a vegan recipe.
  • Can I make this recipe nut-free? Yes, just choose a nondairy milk that is nut-free, like soy or oat milk.

Nutrition Tips and Dietary Adaptations

This chickpea flour naan is not only delicious but also nutritious! Here’s how to adapt it:

  • High Protein: Chickpea flour is a fantastic source of plant-based protein, making this naan great for vegans and vegetarians.
  • Low Carb: It’s naturally lower in carbohydrates compared to traditional naan, making it suitable for those watching their carb intake.
  • High Fiber: Chickpea flour is rich in fiber, promoting digestive health and keeping you full longer.

Equipment Recommendations

To make your cooking experience smooth and enjoyable, here’s what you’ll need:

  • Mixing Bowls: A set of mixing bowls for combining ingredients.
  • Rolling Pin: Essential for rolling out the naan to the right thickness.
  • Heavy Skillet: A cast-iron skillet works best for even cooking.
  • Spatula: For flipping the naan without tearing it.

Serving Suggestions

Now that you’ve mastered the art of chickpea flour naan, here are some delicious ways to enjoy it:

  • With Curry: Serve alongside your favorite curry for a hearty meal.
  • As a Wrap: Fill it with veggies, hummus, or your go-to protein for a satisfying wrap.
  • With Dips: Pair it with dips like tzatziki, baba ghanoush, or a spicy salsa.
  • Flatbread Style: Use it as a base for a flatbread pizza topped with your favorite ingredients.

In conclusion, making your own chickpea flour naan is not just an easy endeavor, it’s a gateway to endless culinary possibilities! With this comprehensive guide, you’re well on your way to creating delicious, flavorful naan that will impress family and friends alike. So roll up your sleeves, get your ingredients ready, and let the cooking fun begin. Happy cooking!

Chickpea Flour Naan {vegan, grain-free, easy}

Prep Time 10 minutes
Cook Time 10 minutes
Total Time 20 minutes
Servings 3 pieces
Calories 150
This vegan, grain-free chickpea flour naan is quick to make and perfect for a flavorful, healthy bread option.

Ingredients

Dairy Substitutes

  • 0.5 cup nondairy milk (e.g., soy, cashew, almond milk)
  • 1.5 teaspoons lemon juice (or light vinegar)

Main Ingredients

  • 1 cup chickpea flour
  • 3 tablespoons whole psyllium husks (see note for psyllium powder)
  • 1.5 teaspoons baking powder (certified GF if needed)
  • 1/4 teaspoon salt
  • 1/8 teaspoon baking soda
  • 1.5 teaspoons garlic powder (optional)
  • 2 teaspoons vegetable oil (any variety)

For Cooking

  • Nonstick cooking spray or oil

Instructions 

  • Combine milk and lemon juice; let stand 5 minutes.
  • Mix chickpea flour, psyllium, baking powder, salt, and optional garlic powder.
  • Add milk mixture and oil; stir into a cohesive dough. Let rest 1-2 minutes.
  • Divide dough into 3 balls, roll into ovals about 7-8 inches long and 4-5 inches wide.
  • Cook each naan in a hot skillet 1 minute per side until golden and bubbly.
  • Serve warm, optionally garnished with herbs or salt.

Notes

This naan is best enjoyed fresh and warm. You can customize with herbs or spices for added flavor.
Calories: 150kcal
Cost: $10
Course: Bread
Cuisine: Vegan
Keyword: chickpea

Unleash the Zest: Your Ultimate Guide to Flourless Lemon Cake

Welcome to a culinary adventure where flavor meets simplicity! In this article, we’re diving into the world of Flourless Lemon Cake, a delightful gluten-free dessert that’s sure to impress at any gathering. Imagine biting into a cake that’s light, fluffy, and bursting with vibrant lemon flavor. Whether you’re a baking novice or a seasoned pro, this recipe is designed to make your kitchen experience joyful and rewarding. Let’s get started on this zesty journey!

Why You’ll Love This Recipe

This cake isn’t just another dessert; it’s a celebration of flavors and healthy ingredients. Here’s why you’ll absolutely adore this flourless lemon creation:

  • Gluten-Free Goodness: Perfect for those with gluten sensitivities, this cake is entirely gluten-free without sacrificing taste or texture!
  • Simple Ingredients: With just a handful of pantry staples, baking this cake is a breeze—no fancy equipment needed!
  • Light and Fluffy: The combination of eggs and almond flour creates a texture that’s both airy and satisfying.
  • Vibrant Flavor: Infused with fresh lemon zest and juice, this cake delivers a refreshing zing that dances on your taste buds.
  • Perfectly Versatile: Great for any occasion, from casual get-togethers to elegant celebrations, this cake fits right in!

Ingredients Breakdown

Let’s take a closer look at the ingredients that make this cake shine, along with some tasty substitutions:

  • ¾ cup white granulated sugar: Sweeten your cake to perfection. For a healthier option, try coconut sugar!
  • 115 g unsalted butter: Provides richness and moisture. You can substitute with coconut oil for a dairy-free version.
  • 4 large eggs: Essential for structure and fluffiness. Use flax eggs for a vegan alternative.
  • 1 teaspoon vanilla extract: Adds depth of flavor. Consider using almond extract for a unique twist!
  • 2 tablespoons lemon zest: The star of the show! Fresh zest is key to achieving that vibrant lemon flavor.
  • 1 tablespoon lemon juice: Brightens the cake. Freshly squeezed is always best!
  • 2 ½ cups almond meal (almond flour): Provides a nutty flavor and keeps the cake gluten-free.
  • 1 teaspoon baking powder: Helps the cake rise beautifully.
  • ¼ teaspoon salt: Enhances all the flavors.
  • 1 ¼ cups icing sugar: For a lovely icing that adds sweetness and visual appeal.
  • 6-8 teaspoons lemon juice: Use for adjusting icing consistency.
  • Extra lemon zest: For garnish and an extra burst of flavor!

Pro Tips for Success

Side view of a delicious flourless lemon cake, highlighting its rich texture and vibrant lemon zest.

Before you dive into baking, here are some expert tips to ensure your flourless lemon cake is a showstopper:

  • Room Temperature Ingredients: Ensure your butter and eggs are at room temperature for the best mixing and texture.
  • Don’t Overmix: Mix until just combined to keep the cake light and fluffy.
  • Use Fresh Ingredients: For the best flavor and results, always use fresh lemons and quality almond flour.
  • Check for Doneness: Insert a toothpick into the center; it should come out clean when the cake is ready.
  • Let It Cool: Allow the cake to cool in the pan for a few minutes before inverting it onto a wire rack.
  • Experiment with Flavors: Add poppy seeds for a delightful texture or blueberries for a fruity twist!
  • Decorate with Style: Dust with additional icing sugar or top with fresh berries for a stunning presentation.
  • Make It Ahead: This cake stores well, making it a great option for prepping in advance!

Avoiding Common Mistakes

Even the best bakers can run into hiccups! Here are some common mistakes and how to troubleshoot them:

  • Flat Cake: This can happen if you don’t beat the egg whites enough. Whip them until stiff peaks form!
  • Dry Texture: Avoid overbaking! Keep an eye on your cake and do the toothpick test.
  • Too Sweet or Tart: Adjust the sugar or lemon juice to your taste preferences before baking.
  • Cracked Top: This is normal for flourless cakes. Just embrace the rustic look!

Delicious Variations

Feeling adventurous? Here are some fun variations to try with your flourless lemon cake:

  • Lemon Blueberry Cake: Fold fresh blueberries into the batter for a fruity explosion!
  • Chocolate Lemon Cake: Add cocoa powder to the batter for a rich, chocolatey twist.
  • Matcha Lemon Cake: Incorporate matcha powder for a vibrant green color and earthy flavor.
  • Coconut Lemon Cake: Mix in shredded coconut for a tropical flair!

Storage and Make-Ahead Instructions

Want to enjoy this cake later? Here’s how to store it:

  • Refrigerate: Store in an airtight container for up to 5 days.
  • Freeze: Wrap slices in plastic wrap and foil, then freeze for up to 3 months.
  • Serve Cold or Room Temperature: This cake is delicious either way!

Frequently Asked Questions (FAQs)

Got questions? We’ve got answers! Here are some common queries about flourless lemon cake:

  • Can I use a different flour? Yes! However, this recipe is specifically designed for almond flour.
  • Is this cake suitable for vegans? You can make it vegan by using flax eggs and coconut oil!
  • How do I know when the cake is done? A toothpick inserted into the center should come out clean.
  • Can I add other flavors? Absolutely! Feel free to experiment with different extracts and spices.
  • What’s the best way to serve it? Dust with icing sugar and serve with fresh berries or whipped cream.
  • How long does it take to make? This cake takes about 15 minutes to prep and 30-35 minutes to bake.
  • Can I make it in advance? Yes! It’s perfect for prepping ahead of time.
  • What’s the nutritional info? Check the section below for detailed nutritional information!

Nutritional Tips and Dietary Adaptations

This flourless lemon cake is not only a treat for your taste buds but can also fit into various dietary needs:

  • Low-Carb Option: Substitute sugar with a low-carb sweetener for a keto-friendly dessert.
  • Dairy-Free: Use a dairy-free butter substitute to make the cake suitable for lactose-intolerant diets.
  • Protein-Packed: Almond flour adds a protein boost, making this cake a healthier dessert choice.

Essential Equipment Recommendations

Before you start baking, make sure you have the right tools:

  • Mixing Bowls: A set of various sizes for mixing wet and dry ingredients.
  • Hand Mixer: For whipping egg whites to perfection.
  • Spatula: For folding ingredients gently to maintain fluffiness.
  • Baking Pan: A round 9-inch cake pan works great for this recipe.
  • Cooling Rack: Essential for cooling your cake evenly after baking.

Serving Suggestions

When it comes to serving your flourless lemon cake, the possibilities are endless! Here are a few ideas:

  • With Fresh Berries: Serve with a mix of strawberries, blueberries, or raspberries for a pop of color and flavor.
  • Whipped Cream: A dollop of whipped cream enhances the cake’s moistness and adds decadence.
  • Citrus Glaze: Drizzle a citrus glaze made from lemon juice and icing sugar for an extra layer of sweetness.
  • Ice Cream: Pair with a scoop of vanilla or lemon sorbet for a refreshing dessert combo!

Conclusion

And there you have it! Your ultimate guide to baking a spectacular Flourless Lemon Cake that’s not only gluten-free but also bursting with flavor. With its light texture and zesty taste, this cake is sure to become a favorite in your home. Don’t be afraid to get creative with variations and toppings. So grab your ingredients, unleash your inner chef, and enjoy the delightful experience of baking this beautiful cake. Happy baking!

Flourless Lemon Cake (Gluten Free)

Prep Time 15 minutes
Cook Time 30 minutes
Total Time 45 minutes
Servings 8 pieces
Calories 250
A light and tangy gluten-free cake made with almond meal and fresh lemon zest, perfect for a citrusy treat.

Ingredients

Dried ingredients

  • 0.75 cup white granulated sugar (150g / 5.3oz)
  • 115 g unsalted butter, softened (½ cup / 1 stick)
  • 4 large eggs, separated
  • 1 teaspoon vanilla extract
  • 2 tablespoons lemon zest (not packed)
  • 1 tablespoon lemon juice
  • 250 g almond meal (almond flour) (2½ cups)
  • 1 teaspoon baking powder
  • 0.25 teaspoon salt
  • 163 g icing (powdered) sugar (1¼ cups)
  • 6-8 teaspoons lemon juice

Extra lemon zest

Instructions 

  • Preheat oven to 350°F (175°C). Grease and line a cake pan.
  • Beat egg yolks with sugar, lemon zest, lemon juice, and vanilla until combined.
  • Fold in almond meal, baking powder, and salt. Whisk egg whites until stiff peaks form and gently fold into batter.
  • Pour batter into prepared pan and bake for 30 minutes or until golden and set.
  • Let cool, then dust with powdered sugar and lemon zest before serving.

Notes

Use fresh lemon zest for the best flavor. Store in an airtight container for up to 3 days.
Calories: 250kcal
Cost: $15
Course: Dessert
Cuisine: fusion
Keyword: cake, gluten-free, Lemon

Welcome to the vibrant world of Crunchy Asian Slaw! This delightful, colorful salad is not just a feast for the eyes but also a celebration of flavors and textures that will make your taste buds sing. Bursting with fresh vegetables, aromatic herbs, and a zesty dressing, this salad is perfect for any occasion—be it a quick lunch, a picnic, or a party favorite! In this article, we’ll dive deep into everything you need to know to create this delicious dish, including tips, variations, and even common mistakes to avoid. Let’s get started!

Why You’ll Love This Recipe

  • Nutritious and Wholesome: Packed with vitamins and minerals from fresh vegetables, this salad supports a healthy lifestyle while satisfying your cravings.
  • Flavor Explosion: The combination of crunchy cabbage, sweet carrots, and aromatic herbs all come together in a tangy dressing that tantalizes your palate.
  • Versatility: This salad can be served as a side dish or transformed into a main course with the addition of protein like chicken or tofu.
  • Quick and Easy: With minimal prep time, this dish is perfect for busy weeknights or last-minute gatherings.
  • Make-Ahead Friendly: The flavors deepen when allowed to sit, making it an ideal dish to prepare in advance for meal prep or parties.

Ingredient Breakdown

Here’s what you’ll need to create this crunchy oriental cabbage salad:

  • 3 cups green cabbage: Shredded for a crunchy base. You can substitute with Napa cabbage for a milder flavor.
  • 3 cups red cabbage: Adds color and a slightly sweet taste. If unavailable, use more green cabbage.
  • 2 large carrots: Julienned for that sweet crunch. Baby carrots can be used in a pinch.
  • 3 cups bean sprouts: For an extra crunch; feel free to swap with sliced radishes if you prefer.
  • 3 green onions: Sliced for a mild onion flavor; shallots can be used as an alternative.
  • 1/2 cup coriander leaves: Fresh and fragrant; you can substitute with parsley if desired.
  • 1/2 cup mint leaves: Offers a refreshing note; basil is a great alternative.
  • 3 tbsp rice vinegar: The tangy star of the dressing! White vinegar or apple cider vinegar can work as substitutes.
  • 3 tbsp soy sauce: Adds umami flavor; tamari can be used for a gluten-free option.
  • 2 tbsp lime juice: Freshly squeezed for brightness; lemon juice can be a good substitute.
  • 3 tbsp peanut oil: For richness; sesame oil can add a different flavor profile.
  • 1 1/2 tbsp sugar: Balances the acidity; honey or maple syrup can be used for a natural sweetener.
  • 2 garlic cloves: Minced for depth of flavor; garlic powder can be an alternative.
  • 3 cups shredded cooked chicken (optional): For added protein; tofu is a great vegetarian option.

How to Make Crunchy Asian Slaw

Let’s get cooking! Follow these simple steps to create your delicious salad.

  1. Prepare the dressing: In a jar, combine rice vinegar, soy sauce, lime juice, peanut oil, sugar, and minced garlic. Shake well until blended.
  2. Assemble the salad ingredients: In a large mixing bowl, combine green cabbage, red cabbage, julienned carrots, bean sprouts, sliced green onions, coriander, and mint leaves.
  3. Combine everything together: Pour the dressing over the salad mixture and toss gently until well coated.
  4. Garnish and serve: For an extra touch, garnish with fried shallots before serving. Enjoy immediately or let it sit for a bit to meld the flavors!

Pro Tips for Perfection

Mouthwatering Asian slaw with fresh vegetables, including cabbage, carrots, and herbs, in a bowl.
  • Chill the salad: Refrigerate for at least 30 minutes before serving to enhance the flavors.
  • Fresh ingredients: Use the freshest vegetables for maximum crunch and flavor.
  • Adjust the dressing: Taste the dressing and adjust the sweetness or acidity to your preference.
  • Don’t overdress: Start with less dressing and add more as needed to avoid sogginess.
  • Use a sharp knife: For clean cuts on your vegetables; this helps maintain their crunch.
  • Experiment with textures: Adding nuts or seeds can introduce a wonderful crunch!
  • Make it colorful: Incorporate other colorful veggies like bell peppers or radishes for visual appeal.
  • Leftovers are great: This salad keeps well in the fridge for up to 3 days, making it perfect for meal prep.

Common Mistakes and Troubleshooting

Here are some common pitfalls and how to avoid them:

  • Overcooked chicken: Ensure your chicken is cooked just right to keep it juicy and tender.
  • Too soggy: Use less dressing if you plan to serve later; the salad can absorb the dressing over time.
  • Flavorless salad: Always taste as you go—seasoning adjustments can make a big difference!
  • Wrong vegetable cuts: Keep your cuts uniform for a more appealing presentation and even texture.

Variations to Try

Get creative with these fun variations of your crunchy slaw:

  • Spicy Asian Slaw: Add thinly sliced jalapeños or a pinch of red pepper flakes to the dressing for a kick!
  • Mango Slaw: Toss in some diced mango for a tropical twist that adds sweetness.
  • Crunchy Peanut Slaw: Stir in chopped peanuts or cashews for an added crunch and nutty flavor.
  • Quinoa Slaw: Mix in cooked quinoa for extra protein and a heartier texture.

Storage and Make-Ahead Instructions

This salad is perfect for making ahead of time!

  • In the fridge: Store in an airtight container for up to 3 days. The flavors will meld beautifully!
  • Dress separately: Keep the dressing in a separate container until ready to serve to maintain crunchiness.
  • Freezing: Not recommended, as the fresh vegetables will lose their texture when thawed.

Common FAQs

  • Can I make this salad vegan? Absolutely! Omit the chicken and use maple syrup instead of sugar in the dressing.
  • What can I substitute if I don’t have rice vinegar? Apple cider vinegar works well and adds a nice tang!
  • Is this salad good for meal prep? Yes! It keeps well in the fridge, making it great for lunches throughout the week.
  • Can I add other vegetables? Definitely! Feel free to add bell peppers, snap peas, or any other crunchy veggies you love.
  • How can I make the dressing spicier? Add sriracha or chili garlic sauce for that extra heat!
  • What protein pairs well with this slaw? Grilled chicken, shrimp, or tofu all make great additions!
  • Can I use a different type of cabbage? Yes! Savoy cabbage or Napa cabbage can be great alternatives.
  • How do I make this gluten-free? Use tamari instead of soy sauce in the dressing.

Nutritional Tips and Dietary Adaptations

This Crunchy Asian Slaw is not only delicious but also highly nutritious:

  • High in fiber: The veggies provide plenty of fiber, aiding digestion and keeping you full.
  • Low in calories: This salad is a great option for those watching their calorie intake without sacrificing flavor.
  • Rich in vitamins: Packed with vitamins A, C, and K from the fresh vegetables, it supports overall health.

Equipment Recommendations

Here are some tools that will make your salad-making experience a breeze:

  • Sharp chef’s knife: Essential for precise vegetable cuts.
  • Cutting board: A sturdy board helps protect your countertops and keep your workspace organized.
  • Mixing bowl: A large bowl allows for easy tossing and mixing of ingredients.
  • Jar with lid: Perfect for shaking up your dressing ingredients!

Serving Suggestions

Wondering how to serve your Crunchy Asian Slaw? Here are some ideas:

  • As a side dish: Pair it with grilled meats, fish, or tofu for a balanced meal.
  • In wraps: Use it as a filling in lettuce wraps or rice paper for a fresh, handheld meal.
  • On tacos: Top your fish or chicken tacos with this slaw for added crunch and flavor.
  • As a meal prep component: Combine it with grains and protein for a complete meal throughout the week.

Conclusion

And there you have it! Crunchy Asian Slaw is not just a salad; it’s a vibrant, delicious experience that’s easy to prepare and adaptable to your preferences. With fresh ingredients, a zesty dressing, and plenty of crunchy textures, it’s a dish that everyone will love. So grab your ingredients, unleash your inner chef, and enjoy the colorful, healthful joy of making this fabulous salad. Happy cooking, friends!

Asian Slaw - crunchy Oriental Cabbage Salad with Asian Dressing

Prep Time 15 minutes
Total Time 15 minutes
Servings 4 servings
Calories 250
A vibrant and crunchy salad combining shredded cabbages, fresh herbs, and a tangy Asian dressing, perfect as a side or light meal.

Ingredients

Vegetables

  • 3 cups green cabbage, shredded
  • 3 cups red cabbage, shredded
  • 2 large carrots, julienned
  • 3 cups bean sprouts
  • 3 green green onions, sliced
  • 1/2 cup coriander leaves
  • 1/2 cup mint leaves
  • 3 tbsp rice vinegar
  • 3 tbsp soy sauce
  • 2 tbsp lime juice
  • 3 tbsp peanut oil
  • 1 1/2 tbsp sugar
  • 2 cloves garlic, minced
  • 3 cups shredded cooked chicken (optional)

Instructions 

  • Combine rice vinegar, soy sauce, lime juice, peanut oil, sugar, and garlic in a jar. Shake well.
  • Mix shredded cabbages, carrots, bean sprouts, green onions, coriander, and mint in a large bowl.
  • Pour dressing over the salad and toss gently to coat.
  • Garnish with fried shallots if desired and serve immediately.

Notes

For extra flavor, add toasted sesame seeds or chopped peanuts.
Calories: 250kcal
Cost: $15
Course: Salad
Cuisine: Asian
Keyword: cabbage

Wake Up to Deliciousness: Your Guide to Almond Flour Pancakes

Welcome to your new favorite breakfast adventure! These almond flour pancakes are not just gluten-free; they’re fluffy, flavorful, and completely guilt-free. Perfect for a busy morning or a relaxed brunch, this recipe is your ticket to a nutritious start. With just a handful of ingredients, you’ll discover that cooking healthy can be quick, fun, and absolutely delicious. Let’s dive into the world of almond flour pancakes and transform your breakfast routine!

Why You’ll Love This Recipe

This almond flour pancake recipe is packed with benefits that will make your mornings brighter:

  • Gluten-Free Goodness: Made with finely blanched almond flour, these pancakes are perfect for gluten-intolerant individuals or anyone looking to reduce gluten in their diet.
  • Protein-Packed: With eggs and almond flour, these pancakes provide a great source of protein, helping you feel energized and satisfied throughout the morning.
  • Quick and Easy: Whip these up in under 15 minutes, making them ideal for busy mornings or last-minute brunch plans.
  • Customizable: Add your favorite toppings or mix-ins to create a uniquely delicious pancake experience every time.
  • Kid-Friendly: These pancakes are a hit with kids! They’re perfect for introducing healthy eating habits without sacrificing flavor.

Ingredients Breakdown

Let’s get into the nitty-gritty of what you need to create these delightful pancakes:

  • 2 cups almond flour (finely blanched): This is the star ingredient! It gives the pancakes a nutty flavor and fluffy texture.
  • 2 large eggs: They bind the ingredients together and contribute to the fluffiness.
  • 1/4 cup unsweetened almond milk: Adds moisture without overpowering the flavor.
  • 2 tablespoons maple syrup or monk fruit sweetener: For a touch of sweetness. Adjust based on your preference!
  • 1 teaspoon vanilla bean paste: Enhances the flavor profile with a rich, sweet aroma.
  • 1 teaspoon baking powder: Essential for fluffiness; don’t skip this!
  • 1/4 teaspoon salt: Balances the sweetness.
  • 1 tablespoon melted butter or coconut oil: Adds richness and helps achieve a golden-brown exterior.
  • Optional toppings: Fresh berries, Greek yogurt, and maple syrup for serving.

Pro Tips for Perfect Pancakes

Side view of delicious almond flour pancakes with berry toppings.

Want pancakes that are consistently fluffy and delicious? Check out these expert tips:

  • Let the batter rest: Allowing the batter to sit for 2-3 minutes thickens it, resulting in fluffier pancakes.
  • Use a non-stick skillet: This helps prevent sticking and makes flipping easier!
  • Control the heat: Cook on medium-low heat to ensure the pancakes cook through without burning.
  • Experiment with textures: If you like your pancakes a bit thicker, add a little more almond flour to the batter.
  • Don’t overcrowd the skillet: Leave space between pancakes for even cooking.
  • Use fresh ingredients: The better your ingredients, the tastier your pancakes will be!
  • Flip at the right time: Wait for bubbles to form on the surface before flipping for the best results.
  • Try different oils: Experiment with different fats like avocado oil or ghee for varied flavors.

Common Mistakes and Troubleshooting

Even the best chefs make mistakes! Here’s how to avoid some common pitfalls:

  • Too dry? Add a splash more almond milk to loosen the batter.
  • Too crumbly? Make sure your eggs are fresh and well-beaten to ensure proper binding.
  • Not flipping well? Allow the pancakes to cook long enough before flipping; patience is key!
  • Burnt edges? Lower the heat if your skillet is too hot.

Flavor Variations to Explore

Feel free to get creative with your pancakes! Here are some delicious variations:

  • Chocolate Chip Pancakes: Fold in sugar-free chocolate chips before cooking for a sweet treat.
  • Banana Nut Pancakes: Add mashed bananas and chopped walnuts for a satisfying twist.
  • Cinnamon Spice Pancakes: Mix in a teaspoon of cinnamon for warmth and flavor.
  • Berry Bliss Pancakes: Top with mixed berries or fold in fresh blueberries for a burst of freshness.

Storage and Make-Ahead Instructions

Want to enjoy these pancakes throughout the week? Here’s how to store and reheat them:

  • Make-ahead: Prepare the batter the night before and store it in the fridge. Just give it a good stir before cooking.
  • Storing leftovers: Keep any uneaten pancakes in an airtight container in the fridge for up to 3 days.
  • Freezing: Freeze individual pancakes between layers of parchment paper in a freezer-safe bag for up to 3 months.
  • Reheating: Warm them in a toaster, microwave, or skillet until heated through.

Frequently Asked Questions

Here are some common questions about almond flour pancakes:

  • Can I substitute almond flour with another flour? While almond flour offers unique flavor and texture, you can try coconut flour, but you’ll need to adjust the liquid.
  • Are these pancakes suitable for meal prep? Absolutely! They store well and reheat beautifully.
  • Can I make them dairy-free? Yes! Just use a dairy-free milk alternative and coconut oil.
  • What can I use instead of eggs? Try flax eggs (1 tablespoon ground flaxseed mixed with 3 tablespoons water) for a vegan option.
  • Can I make the batter ahead of time? Yes! Just store it in the refrigerator for up to 24 hours.
  • What toppings work best? Fresh fruit, yogurt, nut butter, or a drizzle of honey are all fantastic options.
  • How do I know when the pancakes are done? Look for bubbles forming on the surface before flipping; they should be golden-brown when finished.
  • Can I add protein powder to the batter? Yes! Add a scoop for an extra protein boost, but adjust the liquid accordingly.

Nutrition Tips and Dietary Adaptations

These pancakes are already a nutritious choice, but here are some tips to enhance their health benefits:

  • Boost fiber: Add ground flaxseed or chia seeds to the batter for extra fiber and omega-3s.
  • Lower sugar: Use less maple syrup or opt for a sugar substitute to reduce sweetness.
  • Add veggies: Sneak in finely grated zucchini or carrots for added nutrients.
  • Top with protein: Serve with Greek yogurt or cottage cheese for a protein-rich breakfast.

Essential Equipment for Success

Here’s what you’ll need to make these almond flour pancakes:

  • Mixing bowls: A medium bowl for mixing wet ingredients and a larger one for dry.
  • Whisk or electric mixer: For smooth batter consistency.
  • Non-stick skillet or griddle: Essential for even cooking.
  • Measuring cups and spoons: Accurate measurements lead to the best results.
  • Spatula: A flexible spatula makes flipping pancakes a breeze.

Serving Suggestions

Now that you’ve mastered the pancake-making process, here are some serving ideas:

  • Top with fresh fruit: Berries, sliced bananas, or peaches add a pop of color and flavor.
  • Drizzle with maple syrup: A classic choice that never disappoints!
  • Add a dollop of yogurt: Greek yogurt adds creaminess and protein.
  • Sprinkle with nuts or seeds: Chopped almonds, walnuts, or chia seeds provide extra crunch and nutrition.

With this definitive guide, you’re all set to create the fluffiest, most delicious almond flour pancakes imaginable. Remember, the kitchen is your playground! Embrace the process, get creative with toppings, and enjoy delicious meals that nourish your body and soul. Happy cooking, and don’t forget to share your pancake creations with friends and family!

Almond Flour Pancakes

Prep Time 5 minutes
Cook Time 10 minutes
Total Time 15 minutes
Servings 4 pancakes
Calories 250
Delicious and fluffy almond flour pancakes perfect for a gluten-free breakfast.

Ingredients

Dried ingredients

  • 2 cups almond flour (finely blanched)
  • 2 large eggs eggs
  • 1/4 cup unsweetened almond milk
  • 2 tablespoons maple syrup or monk fruit sweetener
  • 1 teaspoon vanilla bean paste
  • 1 teaspoon baking powder
  • 1/4 teaspoon salt
  • 1 tablespoon melted butter or coconut oil

Optional toppings

  • fresh berries (Greek yogurt, maple syrup)

Instructions 

  • Whisk eggs, almond milk, maple syrup, vanilla, and melted butter until smooth.
  • Mix in almond flour, baking powder, and salt; let rest for 2–3 minutes.
  • Preheat skillet over medium-low heat and grease lightly.
  • Scoop 1/4 cup batter per pancake; cook 2–3 minutes until bubbles form, then flip and cook 1–2 minutes until golden.
  • Serve hot with your favorite toppings.

Notes

For extra flavor, add a dash of cinnamon or top with nuts.
Calories: 250kcal
Cost: $12
Course: Breakfast
Cuisine: American
Keyword: almond flour

Transform Your Cooking with This 20-Minute Veggie Fried Rice Recipe!

Are you ready to elevate your weeknight dinners with a dish that’s bursting with flavor and nutrition? This 20-minute veggie fried rice not only beats takeout—it’s a vibrant celebration of fresh ingredients and bold tastes. Whether you’re a busy professional, a student, or anyone who loves quick, delicious meals, this recipe is your ticket to culinary success. Let’s dive into why this recipe is a must-try!

Why You’ll Love This Recipe

  • Speedy Preparation: In just 20 minutes, you can whip up a satisfying meal that’s ready faster than a takeout delivery!
  • Versatile Ingredients: Use whatever veggies you have on hand. This recipe is perfect for cleaning out the fridge!
  • Nutritious and Balanced: Packed with colorful veggies, this dish is not only tasty but also provides essential vitamins and minerals.
  • Customizable: Want to add protein? Toss in some leftover chicken or tofu for an extra boost!
  • Kid-Friendly: Even picky eaters love this dish! The colorful veggies and fun texture make it appealing for kids.

Ingredients for Your Veggie Fried Rice

Let’s gather the essentials! Here’s what you’ll need:

  • 2 cups cooked rice (preferably cold)
  • 1 cup mixed vegetables (carrots, peas, bell peppers)
  • 2 tbsp vegetable oil
  • 2 cloves garlic, minced
  • 1 tbsp soy sauce
  • 1 tsp sesame oil
  • 2 eggs, beaten (optional)
  • Salt and pepper to taste

How to Make Your Easy Veggie Fried Rice

Delicious plate of Easy Veggie Fried Rice showcasing vibrant carrots, peas, and bell peppers.

Ready to get cooking? Follow these simple steps:

Step 1: Sauté the Aromatics

Heat the vegetable oil in a large pan over medium heat. Add the minced garlic and sauté for about 30 seconds until fragrant.

Step 2: Cook the Vegetables

Add your mixed vegetables to the pan, stirring frequently for 3-4 minutes until they’re tender yet crisp.

Step 3: Scramble the Eggs (Optional)

If you’re using eggs, push the veggies to one side of the pan and pour the beaten eggs into the other side. Scramble until fully cooked.

Step 4: Combine Everything

Add the cold cooked rice, soy sauce, and sesame oil. Stir everything together, ensuring the rice is well coated with the sauce.

Step 5: Finish Cooking

Cook for another 3-4 minutes, stirring occasionally to prevent sticking and ensure even heating.

Step 6: Season and Serve

Season with salt and pepper to taste. Serve hot and enjoy!

Pro Tips for Perfect Veggie Fried Rice

  • Use Cold Rice: Day-old rice or cold rice works best for achieving the perfect fried rice texture. Freshly cooked rice can be too sticky.
  • Experiment with Veggies: Feel free to mix and match your favorite vegetables. Broccoli, zucchini, or spinach can add great color and nutrition.
  • Adjust Your Sauce: If you love a bolder flavor, feel free to add more soy sauce or a splash of oyster sauce.
  • Don’t Overcrowd the Pan: If you’re making a large batch, consider cooking in batches to ensure everything cooks evenly.
  • Garnish for Flavor: Add green onions or sesame seeds as a garnish for an extra pop of flavor and texture.
  • Meal Prep Friendly: This dish keeps well in the fridge and can be reheated quickly, making it perfect for meal prep!
  • Spice It Up: For a kick, add some red pepper flakes or a drizzle of sriracha when serving.
  • Perfect for Leftovers: This recipe is fantastic for using up leftover rice and veggies, making it a great zero-waste meal!

Common Mistakes to Avoid

To ensure your veggie fried rice turns out perfectly, watch out for these common pitfalls:

  • Using fresh rice: Freshly cooked rice can clump together. Always use cold or day-old rice for the best texture.
  • Overcooking the vegetables: Keep your veggies slightly crisp for that perfect stir-fry texture. They should be tender but not mushy.
  • Not seasoning well: Don’t skip the seasoning! A little extra soy sauce or a sprinkle of salt can elevate the flavors significantly.
  • Skipping the oil: Oil is essential for frying! It helps prevent sticking and adds flavor.

Delicious Variations

Feeling adventurous? Here are some fun variations to try with your veggie fried rice:

  • Protein-Packed Fried Rice: Add cooked chicken, shrimp, or tofu for a hearty meal.
  • Spicy Veggie Fried Rice: Toss in some diced jalapeños or a splash of chili sauce for heat.
  • Curry Fried Rice: Stir in a teaspoon of curry powder for a unique flavor twist.
  • Herbed Fried Rice: Mix in fresh herbs like cilantro or basil for a fresh, aromatic touch.

Storage & Reheating Instructions

To keep your veggie fried rice fresh and delicious, follow these guidelines:

  • Refrigeration: Store any leftovers in an airtight container in the fridge for up to 4 days.
  • Freezing: If you want to freeze your fried rice, place it in a freezer-safe container for up to 3 months.
  • Reheating: Reheat in the microwave or on the stovetop. If using the stovetop, add a splash of water to help steam the rice back to fluffy perfection.

FAQs About Veggie Fried Rice

  • Can I use any type of rice? Yes! While jasmine or long-grain rice works best, you can use whatever you have on hand.
  • Is this dish gluten-free? To make it gluten-free, use tamari instead of soy sauce.
  • What other vegetables can I add? Feel free to add any vegetables you enjoy, such as corn, broccoli, or snap peas.
  • Can I make this vegan? Absolutely! Simply omit the eggs or use a vegan egg substitute.
  • How do I enhance the flavor? Adding fresh herbs, lime juice, or a splash of vinegar can enhance the flavor beautifully.
  • Can I prepare this in advance? Yes! This dish is great for meal prep and can be easily reheated.
  • What can I serve with veggie fried rice? This dish pairs well with a variety of proteins or can be enjoyed as a standalone meal.
  • How do I prevent sticking? Ensure you use enough oil and use cold rice to prevent sticking during cooking.

Nutritional Tips and Dietary Adaptations

This veggie fried rice is not only a delicious choice but also a smart one! Here are some tips for making it even healthier:

  • Add More Veggies: Load up on seasonal vegetables to boost vitamins and minerals.
  • Choose Whole Grain Rice: Opt for brown rice or quinoa for added fiber and nutrients.
  • Reduce Sodium: Use low-sodium soy sauce to keep the dish healthier without sacrificing flavor.

Essential Equipment

To make your cooking experience smooth and enjoyable, here are some kitchen tools you might need:

  • Wok or Large Skillet: Ideal for stir-frying due to its high sides and heat retention.
  • Spatula: A sturdy spatula helps in tossing and mixing the ingredients efficiently.
  • Measuring Cups and Spoons: For accurate ingredient measurements, especially for sauces.

Serving Suggestions

This veggie fried rice can stand alone, but here are some tasty pairings:

  • Grilled Chicken or Tofu: These proteins add a delicious contrast to the fried rice.
  • Fresh Salad: A light salad with a citrus dressing complements the dish perfectly.
  • Spring Rolls: Serve with some crispy spring rolls for an extra crunch!

In conclusion, this 20-minute veggie fried rice is a game-changer in the kitchen. It’s quick, easy, and bursting with flavor. Whether you’re looking to impress guests or just want a delightful weeknight meal, this recipe has your back. So grab your ingredients, unleash your creativity, and make cooking a fun adventure!

20-Minute Easy Veggie Fried Rice That Beats Takeout Every Time

Prep Time 5 minutes
Cook Time 10 minutes
Total Time 15 minutes
Servings 4 servings
Calories 350
This quick and delicious veggie fried rice is a perfect weeknight dinner that rivals takeout in flavor and speed.

Ingredients

Cooked Rice

  • 2 cups cooked rice (preferably cold)

Mixed Vegetables

  • 1 cup mixed vegetables (carrots, peas, bell peppers)

Cooking Oil

  • 2 tbsp vegetable oil

Garlic

  • 2 cloves garlic, minced

Soy Sauce

  • 1 tbsp soy sauce

Sesame Oil

  • 1 tsp sesame oil

Eggs

  • 2 eggs beaten eggs (optional)

Salt and Pepper

  • Salt and pepper to taste

Instructions 

  • Heat oil in a large pan over medium heat.
  • Sauté garlic for 30 seconds, then add vegetables and stir-fry for 3-4 minutes.
  • Push vegetables aside, scramble beaten eggs until cooked.
  • Add rice, soy sauce, and sesame oil; stir well and cook for 3-4 minutes.
  • Season with salt and pepper, then serve hot.

Notes

Use cold leftover rice for best results and quicker cooking.
Calories: 350kcal
Cost: $10
Course: Main Course
Cuisine: Asian
Keyword: Vegetables

Irresistibly Crispy Air Fryer Chicken Thighs: A Flavor Explosion!

Are you ready to elevate your dinner game with an easy and exciting recipe? This air fryer chicken thighs recipe is not just another weeknight meal; it’s a culinary adventure that brings crispy perfection to your plate! With just a few simple ingredients, you’ll whip up a delicious dinner that’s quick, easy, and bursting with flavor. Perfect for busy nights when you want something that feels gourmet without the fuss!

Why You’ll Love This Recipe

Let’s dive into the delicious reasons to love these amazing air fryer chicken thighs:

  • Quick Cooking Time: Forget slaving over a hot stove! The air fryer gets these babies done in about 18 minutes, giving you more time to enjoy your evening.
  • Minimal Ingredients, Maximum Flavor: With just a handful of pantry staples like paprika and garlic powder, you’ll create a dish that’s bursting with taste without breaking the bank.
  • Perfect for Busy Weeknights: This recipe is a lifesaver for those hectic evenings—easy to prep and even easier to cook!
  • Healthier Option: Air frying reduces the oil needed for cooking, making these chicken thighs a guilt-free indulgence while still achieving that crispy texture we all crave.
  • Versatile Dish: Pair these thighs with a variety of sides—from fresh salads to hearty grains—to make a complete and balanced meal that suits any palate.

Ingredients for Air Fryer Chicken Thighs

Let’s gather our ingredients! Here’s what you need for this recipe:

  • 4 chicken thighs, bone-in (skin-on for extra crispiness)
  • 2 tbsp paprika (smoked paprika adds a nice twist!)
  • 1 tsp Italian seasoning (or your favorite herbs)
  • 1 tsp garlic powder (for flavor that packs a punch)
  • Spray oil (to help spices stick and enhance crispiness)

**Substitutions:** If you’re missing an ingredient or want to switch things up, here are a few suggestions:

  • Chicken Breasts: Substitute with skin-on chicken breasts for a leaner option.
  • Spices: Experiment with different spice blends like Cajun or BBQ seasoning for a unique flavor twist.
  • Oil Alternatives: Use olive oil or avocado oil if you prefer a different flavor profile.

How to Make Air Fryer Chicken Thighs: Step-by-Step Instructions

Juicy bone-in chicken thighs seasoned and cooked in an air fryer.

Let’s get cooking! Follow these simple steps for perfectly crispy chicken thighs:

  1. Trim chicken thighs as needed. Wash and pat dry to ensure they crisp up nicely.
  2. In a small bowl, mix together the paprika, Italian seasoning, and garlic powder until well combined.
  3. Spray the chicken thighs lightly with oil (optional) to help the spices adhere better. Pat the spice mixture onto both sides of the chicken thighs, ensuring they are evenly coated.
  4. Place the chicken thighs in the air fryer basket. To help with cleanup, line the basket with parchment paper or aluminum foil first.
  5. Cook the chicken thighs for about 18 minutes at 400°F (200°C). Flip the chicken after 9 minutes to ensure even cooking and crispiness.

Pro Tips for Perfect Air Fryer Chicken Thighs

Want to take your chicken thighs to the next level? Here are some expert insights:

  • Patience is Key: Let the chicken rest for a few minutes after cooking to allow juices to redistribute, ensuring a moist bite.
  • Check for Doneness: Use a meat thermometer to ensure the internal temperature reaches 165°F (75°C) for safe eating.
  • Don’t Overcrowd the Basket: For the crispiest results, cook in batches if necessary—air needs to circulate around the chicken.
  • Experiment with Marinades: Marinate the chicken thighs for a few hours before cooking for an extra flavor boost.
  • Save the Leftovers: Leftover chicken thighs make a great addition to salads, wraps, or grain bowls!

Common Mistakes and Troubleshooting

Even the best chefs make mistakes! Here are some common pitfalls and how to avoid them:

  • Underseasoning: Don’t be shy with spices! Chicken can handle bold flavors, so season generously.
  • Overcooking: Cooking times may vary based on your air fryer model—keep an eye on your chicken to prevent it from drying out.
  • Not Preheating: If your air fryer requires preheating, don’t skip this step—it helps achieve that crispy texture.

Variations on Air Fryer Chicken Thighs

Feeling adventurous? Here are some delicious variations to try:

  • Honey Garlic Chicken: Add honey and minced garlic to the spice mixture for a sweet and savory twist.
  • Buffalo Style: Toss cooked chicken thighs in buffalo sauce for a spicy kick!
  • Lemon Herb: Use lemon zest and fresh herbs like rosemary and thyme for a refreshing flavor.
  • Asian-Inspired: Marinate in soy sauce and sesame oil for a unique twist that pairs beautifully with stir-fried veggies.

Storage and Make-Ahead Instructions

Want to prep ahead of time? Here’s how to store and reheat your chicken thighs:

  • Refrigeration: Store cooked chicken thighs in an airtight container in the fridge for up to 4 days.
  • Freezing: You can freeze cooked thighs for up to 3 months. Just ensure they are well-wrapped.
  • Reheating: Reheat leftovers in the air fryer for about 5-7 minutes at 350°F (175°C) for a crispy finish.

Comprehensive FAQ

Got questions? We’ve got answers! Here are some frequently asked questions about air fryer chicken thighs:

  • Can I use boneless chicken thighs? Absolutely! Adjust cooking time slightly as boneless thighs may cook faster.
  • Is it necessary to spray oil? While optional, spraying oil helps achieve a crispy skin and enhances flavor.
  • What side dishes pair well with air fryer chicken thighs? Try roasted veggies, quinoa salad, or creamy mashed potatoes for a delicious combo!
  • Can I use frozen chicken thighs? Yes, but you will need to increase the cooking time. Ensure they reach the right internal temperature.
  • How do I know when my chicken is done? Use a meat thermometer; the internal temperature should be at least 165°F (75°C).
  • Can I double the recipe? Yes, but cook in batches to ensure even crisping and cooking.
  • Do I need to flip the chicken thighs? Yes, flipping helps achieve an even cook and crispy texture on both sides.
  • What if I don’t have an air fryer? You can bake these thighs in a conventional oven at 425°F (220°C) for about 30-35 minutes.

Nutrition Tips and Dietary Adaptations

This dish is not only delicious but can also fit into various dietary preferences! Here’s how:

  • Gluten-Free: This recipe is naturally gluten-free—just check your spices!
  • Paleo-Friendly: Use only natural spices and oils to keep it paleo-compliant.
  • Low-Carb: Perfect for keto diets—just pair with low-carb veggies!

Equipment Recommendations

To get the best results, here are some handy tools to have:

  • High-Quality Air Fryer: Invest in a reliable air fryer that fits your cooking needs—brands like Philips and Ninja are great options.
  • Meat Thermometer: A digital meat thermometer is essential for ensuring perfectly cooked chicken every time.
  • Non-Stick Spray: A good non-stick spray helps reduce sticking and cleanup time.

Serving Suggestions

Ready to plate up? Here are some delightful serving ideas:

  • Fresh Salad: Serve with a vibrant salad topped with avocados and a zesty vinaigrette.
  • Grains: Pair with quinoa, brown rice, or couscous for a complete meal.
  • Roasted Veggies: Complement with seasonal roasted vegetables for a colorful plate.

So, there you have it! This air fryer chicken thighs recipe is your ticket to a quick, healthy, and flavorful dinner that’s bound to impress. Whether you’re cooking for yourself or entertaining friends, these crispy delights will steal the show. Get ready to savor every bite and enjoy the fun of cooking healthy meals that are anything but boring!

Foolproof Air Fryer Chicken Thighs Recipe Tonight

Prep Time 5 minutes
Cook Time 18 minutes
Total Time 23 minutes
Servings 4 pieces
Calories 250
Juicy and flavorful chicken thighs cooked to perfection in the air fryer with simple spices.

Ingredients

Meat

  • 4 pieces chicken thighs bone-in

Spices

  • 2 tbsp paprika
  • 1 tsp Italian seasoning
  • 1 tsp garlic powder

Other

  • Spray oil Spray oil (optional)

Instructions 

  • Trim and wash chicken thighs, then pat dry.
  • Mix paprika, Italian seasoning, and garlic powder. Pat onto chicken.
  • Spray chicken with oil (optional). Place in air fryer basket lined with parchment or foil.
  • Cook at 400°F/200°C for 18 minutes, flipping after 9 minutes.

Notes

Ensure chicken thighs are evenly coated for best flavor.
Calories: 250kcal
Cost: $10
Course: Main Course
Cuisine: American
Keyword: chicken thighs

Unlock the Zesty Magic of Flourless Lemon Almond Cake!

Welcome to the bright and delicious world of Flourless Lemon Almond Cake! This delightful dessert is not just another cake; it’s a celebration of flavors that will leave your taste buds dancing. With its sunny lemon notes and nutty almond undertones, this cake is a perfect blend of moist goodness and zesty flair. Whether you’re gluten-free, health-conscious, or simply looking for a guilt-free treat, this cake is your new go-to. Let’s dive into why you’ll love this recipe!

Why You’ll Love This Recipe

This isn’t just any cake; it’s a delightful experience. Here’s why:

  • Gluten-Free Goodness: Made entirely with almond flour, this cake is a wonderful option for those avoiding gluten without sacrificing flavor.
  • Simple Ingredients: With just a handful of pantry staples, you can whip up this cake in no time. No complicated steps, just pure joy!
  • Bright and Flavorful: The combination of fresh lemon juice and zest brings a refreshing zing that brightens any day.
  • Healthier Indulgence: Sweetened with maple syrup or honey, this cake is a wholesome alternative to traditional desserts, making it perfect for satisfying your sweet tooth.
  • Versatile and Adaptable: Dress it up or down! Serve it plain, with a dollop of Greek yogurt, or topped with fresh fruits for a stunning presentation.

Ingredients You’ll Need

Here’s what you’ll need to create this zesty masterpiece. Each ingredient plays a key role in the cake’s flavor and texture:

  • 2 cups almond flour: The star of the show, providing a moist and nutty base.
  • 4 large eggs: Essential for structure; make sure they are at room temperature for best results.
  • 1 tsp baking powder: This helps the cake rise, giving it that perfect fluffy texture.
  • 1/4 tsp salt: Balances the sweetness and enhances the overall flavor.
  • 1 tsp vanilla extract: Adds depth and richness to the cake.
  • 1/3 cup fresh lemon juice: The heart of the flavor—fresh is best!
  • 1 tbsp lemon zest: For an extra punch of lemony goodness.
  • 1/2 cup maple syrup or honey: Your choice for natural sweetness.
  • 1/2 cup plain Greek yogurt (optional): Adds moisture and a subtle tang, making the cake even more delicious.

Let’s Get Cooking! Step-by-Step Guide

Side view of a textured lemon almond cake topped with lemon zest and fresh lemon slices.

Ready to roll up your sleeves and bake? Follow these simple steps to create your Delightfully Zesty Flourless Lemon Almond Cake!

  1. Preheat your oven to 350°F (175°C) and grease a springform pan or line it with parchment paper.
  2. In a large bowl, whisk together the wet ingredients: eggs, maple syrup (or honey), vanilla extract, lemon juice, and Greek yogurt if using.
  3. In a separate bowl, mix the dry ingredients: almond flour, baking powder, and salt until well combined.
  4. Gradually fold the dry mixture into the wet mixture, being careful not to overmix. You want a smooth batter!
  5. Pour the batter into your prepared pan and smooth the top.
  6. Bake for 25-30 minutes, or until a toothpick inserted comes out clean.
  7. Let the cake cool in the pan for about 10 minutes before transferring it to a wire rack to cool completely.

Pro Tips for Perfection

Want to ensure that your cake comes out perfectly? Here are some expert tips:

  • Room Temperature Ingredients: Always use eggs and yogurt at room temperature for a fluffier cake.
  • Don’t Overmix: Gently fold the batter to keep it light and airy.
  • Flavor Boost: For an extra kick, add a pinch of cinnamon or nutmeg to the dry ingredients.
  • Egg Whites: Whip the egg whites separately and fold them in gently for an ultra-light texture.
  • Cool Completely: Let the cake cool completely to prevent it from crumbling when slicing.
  • Use Fresh Ingredients: Fresh lemons and high-quality almond flour make a noticeable difference in flavor.
  • Craving a Twist?: Add in some poppy seeds or chopped nuts for added texture.
  • Check for Doneness: If the cake is browning too quickly, cover it loosely with foil.

Common Mistakes and Troubleshooting

Even the best bakers encounter hiccups. Here’s how to troubleshoot:

  • Dense Cake: If your cake turns out dense, it’s likely due to overmixing. Gently fold ingredients together.
  • Underbaking: Always check for doneness with a toothpick. If it comes out with wet batter, bake a little longer.
  • Too Sweet: If it’s too sweet for your taste, reduce the amount of maple syrup or honey in future batches.
  • Crumbling: Ensure the cake is cooled completely before slicing to avoid crumbling.

Variations to Try

Feel like getting creative? Here are some fun variations to switch things up:

  • Citrus Medley: Swap lemon for orange or lime juice and zest for a different flavor profile.
  • Berry Burst: Add fresh or frozen berries to the batter for bursts of sweetness in every bite.
  • Nutty Delight: Incorporate chopped nuts or seeds into the batter for a crunchy texture.
  • Chocolate Drizzle: Drizzle melted dark chocolate on top for a decadent finish.

Storage and Make-Ahead Instructions

This cake is great for meal prep! Here’s how to store it:

  • Room Temperature: Keep the cake covered at room temperature for up to 3 days.
  • Refrigerate: For longer storage, refrigerate the cake for up to a week.
  • Freeze: Wrap slices individually in plastic wrap and freeze for up to 3 months. Thaw in the fridge when ready to enjoy.

Frequently Asked Questions

Got questions? We’ve got answers! Here are some common queries about the Flourless Lemon Almond Cake:

  • Can I make this cake ahead of time? Absolutely! It stays fresh for several days and is perfect for making ahead.
  • Is this cake suitable for a vegan diet? You can try replacing eggs with flax eggs or applesauce, but results may vary.
  • What should I serve with this cake? Pair it with fresh fruit, yogurt, or a light dusting of powdered sugar for an elegant touch.
  • Can I use other flours? Almond flour is key for this recipe, but feel free to experiment with a blend of gluten-free flours.
  • Why is my cake dense? This may be due to overmixing or not enough leavening. Be gentle and precise!
  • How can I make this cake more citrusy? Add more lemon zest or juice to amp up the flavor!
  • What’s the best way to store leftovers? Keep it covered at room temperature or refrigerate for a longer shelf life.
  • Can I replace the sweetener? Yes, you can use coconut sugar or another natural sweetener of your choice!

Nutritional Tips and Dietary Adaptations

This cake is not only delicious but also adaptable to various dietary needs:

  • High Protein: Add protein powder to the batter for an extra boost!
  • Dairy-Free: Substitute Greek yogurt with a dairy-free alternative like coconut yogurt.
  • Low Carb: Use a low-carb sweetener to reduce sugar content.
  • Nut-Free: Try sunflower seed flour as a nut-free alternative; just be mindful of flavor changes.

Equipment Recommendations

To make your baking experience seamless, here are a few essentials:

  • Springform Pan: Ideal for easy removal and presentation of your cake.
  • Mixing Bowls: A set of varying sizes will be helpful for separating wet and dry ingredients.
  • Whisk: Essential for combining ingredients smoothly, especially for egg whites.
  • Spatula: A rubber spatula is perfect for folding and scraping down the bowl.

Serving Suggestions

This cake can shine on its own, but here are some delightful serving ideas:

  • With Fresh Berries: Top with raspberries or blueberries for a fruity explosion.
  • Light Cream: A dollop of whipped cream or coconut cream adds a rich touch.
  • Dusting of Powdered Sugar: For a classic presentation, sprinkle with powdered sugar just before serving.
  • Pair with Tea: This cake goes wonderfully with a cup of herbal or green tea for a delightful afternoon treat.

Conclusion: Your New Favorite Dessert Awaits!

Now that you have all the tools and tips to create your very own Delightfully Zesty Flourless Lemon Almond Cake, it’s time to get baking! This cake is more than just a dessert; it’s a journey into the world of flavor, health, and pure joy. So gather your ingredients and let your kitchen become the playground of delicious possibilities. Happy baking!

Delightfully Zesty Flourless Lemon Almond Cake Recipe

Prep Time 10 minutes
Cook Time 30 minutes
Total Time 40 minutes
Servings 8 pieces
Calories 250
A light and tangy gluten-free cake bursting with lemon flavor, perfect for a healthy treat or dessert.

Ingredients

Dry ingredients

  • 2 cups almond flour
  • 1 tsp baking powder
  • 1/4 tsp salt

Wet ingredients

  • 4 large eggs eggs
  • 1/3 cup fresh lemon juice
  • 1 tbsp lemon zest
  • 1/2 cup maple syrup or honey
  • 1/2 cup plain Greek yogurt (optional) (optional)

Instructions 

  • Preheat oven and prepare the pan.
  • Mix wet ingredients in a bowl.
  • Add dry ingredients gradually and combine.
  • Bake until a toothpick comes out clean.
  • Cool before serving.

Notes

Use fresh lemon for the best flavor.
Calories: 250kcal
Cost: $15
Course: Dessert
Cuisine: fusion
Keyword: gluten-free, Lemon

Unleash Your Inner Baker: The Ultimate Guide to Gluten-Free Banana Bread

Welcome to your new favorite baking adventure! Today, we’re diving into the scrumptious world of gluten-free banana bread. This delightful recipe is not just easy to make; it’s also a celebration of flavors and textures that will have you whipping up this healthy treat in no time. Whether you’re a seasoned baker or a kitchen newbie, you’ll find this guide packed with tips, tricks, and everything you need to create a mouthwatering loaf that’s perfect for breakfast, a snack, or dessert. Let’s get those bananas ripe and ready!

Why You’ll Love This Recipe

This gluten-free banana bread is more than just a recipe; it’s a ticket to deliciousness! Here’s why this recipe will become a staple in your kitchen:

  • Moist and Flavorful: This banana bread is incredibly moist, thanks to ripe bananas and a touch of oil, delivering a flavor explosion in every bite.
  • Quick and Easy: With just a few simple steps, you’ll have a delightful loaf baked and cooling in your kitchen.
  • Nutritious Ingredients: Packed with wholesome ingredients, this recipe allows you to indulge without the guilt.
  • Customizable: Feel free to add your favorite nuts, chocolate chips, or spices to make it uniquely yours!
  • Perfect for Meal Prep: Make a loaf ahead of time, and enjoy it throughout the week for a quick breakfast or snack.

Ingredients Breakdown

Let’s gather our ingredients! Here’s what you’ll need to whip up this delicious gluten-free banana bread:

  • 1 cup 1:1 gluten-free flour: I recommend using King Arthur Flour Measure for Measure for the best results.
  • 1 teaspoon baking powder: This helps your bread rise perfectly.
  • 1/2 teaspoon baking soda: A vital ingredient that works with the acidity of the bananas.
  • 1 teaspoon salt: Enhances all the flavors in your bread.
  • 1 teaspoon cinnamon: Adds a warm, comforting spice.
  • 1 cup mashed banana: About 2-3 medium ripe bananas—ripe bananas make the best banana bread!
  • 1/3 cup vegetable or avocado oil: Keeps the bread moist and adds healthy fats.
  • 1/2 cup granulated sugar: Sweetens your bread perfectly.
  • 1/4 cup light brown sugar: Adds depth of flavor and moisture.
  • 2 large eggs: Binds the ingredients together and provides structure.
  • 2 teaspoons vanilla extract: For a hint of sweetness that elevates the flavor.

Common Substitutions

A detailed view of gluten-free banana bread showcasing its texture and rich banana chunks.

Got dietary restrictions? No problem! Here are some substitutions to make this recipe work for you:

  • Egg-free option: Use 1/4 cup unsweetened applesauce or a flax egg (1 tablespoon flaxseed meal + 2.5 tablespoons water).
  • Oil alternatives: Substitute with melted coconut oil or unsweetened applesauce for a lighter option.
  • Sweeteners: Feel free to use coconut sugar or maple syrup for a different flavor profile.
  • Flour alternatives: Try almond flour or a homemade gluten-free blend if you don’t have 1:1 gluten-free flour.

Step-by-Step Instructions

Ready to bake? Here’s how to create your gluten-free banana bread masterpiece:

  • Step 1: Preheat your oven to 350°F (175°C). This ensures that your banana bread will bake evenly.
  • Step 2: Grease your loaf pan with a little oil or line it with parchment paper for easy removal after baking.
  • Step 3: In a medium mixing bowl, combine the gluten-free flour, baking powder, baking soda, salt, and cinnamon. Whisk them together until well mixed.
  • Step 4: In a large mixing bowl, mash the bananas using a fork or potato masher until smooth. Add the vegetable or avocado oil, granulated sugar, brown sugar, eggs, and vanilla extract. Whisk until everything is well combined and smooth.
  • Step 5: Gradually add the dry ingredients to the wet mixture. Using a rubber spatula, gently fold them together until just combined. Remember, a few lumps are perfectly fine!
  • Step 6: Pour the batter into the prepared loaf pan, spreading it evenly.
  • Step 7: Bake in the preheated oven for about 55-60 minutes. Check for doneness by inserting a toothpick into the center; it should come out clean.
  • Step 8: Once baked, let your banana bread cool in the pan for about 10 minutes. Then, transfer it to a wire rack to cool completely before slicing.

Pro Tips for Perfect Banana Bread

Want to ensure your banana bread turns out amazing every time? Here are some expert insights:

  • Use overripe bananas: The riper your bananas, the sweeter and more flavorful your bread will be.
  • Don’t overmix: Mixing too much can lead to dense bread. Mix until just combined!
  • Check your oven: Every oven is different—use an oven thermometer to ensure your temperature is accurate.
  • Cool completely: Letting your bread cool completely before slicing helps retain moisture and flavor.
  • Experiment with add-ins: Throw in nuts, chocolate chips, or dried fruit for extra flavor and texture.
  • Double the recipe: If you love it, make two loaves and freeze one for later!
  • Store properly: Keep your banana bread in an airtight container to maintain freshness.
  • Freeze leftovers: Wrap slices in plastic wrap and freeze for a quick snack later on.

Common Mistakes and Troubleshooting

Even the best bakers make mistakes! Here are some common issues and how to avoid them:

  • Dense texture: This usually happens from overmixing. Mix just until combined.
  • Not rising: Ensure your baking powder and soda are fresh. Expired leavening agents can lead to flat bread.
  • Too dry: Overbaking can dry out your banana bread. Keep an eye on it in the last few minutes of baking.
  • Too sweet: If you prefer a less sweet loaf, reduce the sugar by a couple of tablespoons.

Delicious Variations

Get creative with your banana bread! Here are some fun variations to try:

  • Chocolate Chip Banana Bread: Add 1 cup of chocolate chips to the batter for a decadent treat.
  • Nuts Galore: Stir in 1/2 cup of chopped walnuts or pecans for a crunchy texture.
  • Spiced Banana Bread: Add 1/4 teaspoon nutmeg or ginger for an extra layer of flavor.
  • Banana Bread Muffins: Use the same batter to fill a muffin tin and bake for about 20-25 minutes.

Storage and Make-Ahead Instructions

Planning ahead? Here’s how to store your banana bread:

  • Room Temperature: Store in an airtight container at room temperature for up to 3 days.
  • Refrigeration: If you prefer, you can store it in the fridge for up to a week, although it may dry out slightly.
  • Freezing: Wrap slices tightly in plastic wrap and place them in a freezer bag. They can be frozen for up to 3 months. Just thaw at room temperature when you’re ready to enjoy!

Frequently Asked Questions

Got questions? We’ve got answers! Here are some FAQs about gluten-free banana bread:

  • Can I use regular flour instead of gluten-free? Yes, but this recipe is specifically designed for gluten-free flour for a reason!
  • How can I tell when my banana bread is done? Insert a toothpick into the center; it should come out clean or with a few crumbs.
  • Can I add yogurt or sour cream? Absolutely! This will make your banana bread even more moist.
  • Is banana bread healthy? It can be! This recipe uses healthier fats and sugars. Just enjoy in moderation.
  • What can I substitute for eggs? Use applesauce, mashed banana, or a flax egg as alternatives.
  • Can I use frozen bananas? Yes! Just thaw them before mixing them into the batter.
  • What’s the best way to store banana bread? Keep it in an airtight container at room temperature or freeze for long-term storage.
  • Can I make mini loaves? Yes! Just adjust the baking time to about 30-35 minutes.

Nutritional Benefits and Dietary Adaptations

This gluten-free banana bread is not only delicious but also packs in some nutritional benefits:

  • Rich in Potassium: Bananas are a great source of potassium, which is essential for heart health.
  • Healthy Fats: Using avocado oil provides heart-healthy monounsaturated fats.
  • Customizable Nutrients: Add nuts or seeds to boost protein and healthy fats.

Equipment Recommendations

To make your baking experience smooth, here’s a list of essential equipment:

  • Loaf Pan: A 9×5 inch loaf pan is ideal for this recipe.
  • Mixing Bowls: Have a medium and large mixing bowl for your dry and wet ingredients.
  • Whisk: A good whisk is crucial for mixing ingredients evenly.
  • Rubber Spatula: Perfect for folding ingredients without overmixing.
  • Cooling Rack: Helps your banana bread cool evenly and prevents sogginess.

Serving Suggestions

Ready to dig in? Here are some ideas for serving your gluten-free banana bread:

  • With Nut Butter: Spread almond or peanut butter on warm slices for a protein-packed snack.
  • With Greek Yogurt: Serve with a dollop of Greek yogurt and a drizzle of honey for breakfast.
  • On Its Own: Enjoy a slice plain, fresh out of the oven, for a comforting treat.
  • Toasted: Lightly toast a slice and add a smear of cream cheese for a decadent breakfast.

So there you have it—the ultimate guide to creating the most delicious gluten-free banana bread! With this comprehensive recipe and all the tips and tricks, you’re well on your way to becoming a banana bread baking master. Get ready to impress your friends and family, and most importantly, enjoy every bite of your homemade creation!

Gluten-Free Banana Bread

Prep Time 10 minutes
Cook Time 1 hour
Total Time 1 hour 10 minutes
Servings 8 slices
Calories 250
A moist and flavorful gluten-free banana bread perfect for breakfast or a snack. Easy to make with simple ingredients and no gluten required.

Ingredients

Dry ingredients

  • 1 cup 1:1 gluten-free flour (recommended: King Arthur Flour Measure for Measure)
  • 1 teaspoon baking powder
  • 0.5 teaspoon baking soda
  • 1 teaspoon salt
  • 1 teaspoon cinnamon

Wet ingredients

  • 1 cup mashed banana (about 2-3 medium ripe bananas)
  • 0.33 cup vegetable or avocado oil
  • 0.5 cup granulated sugar
  • 0.25 cup light brown sugar (lightly packed)
  • 2 large eggs
  • 2 teaspoons vanilla extract

Instructions 

  • Preheat oven to 350°F (175°C). Grease or line a loaf pan.
  • Mix dry ingredients in a bowl. Mash bananas and combine with wet ingredients.
  • Fold dry ingredients into wet mixture until just combined.
  • Pour batter into prepared pan and bake for 55-60 minutes until a toothpick comes out clean.
  • Cool in pan for 10 minutes, then transfer to a wire rack to cool completely.

Notes

Use ripe bananas for best flavor and sweetness.
Calories: 250kcal
Cost: $15
Course: Breakfast, Snack
Cuisine: American
Keyword: Banana, gluten-free

Irresistible Garlic Parmesan Chicken Bake: A Wholesome Delight

Welcome to your next culinary adventure! If you’re looking to elevate your dinner game with a dish that’s not just easy to make but also bursting with flavor, you’ve landed in the right place. This Garlic Parmesan Chicken Bake combines tender chicken breasts, zesty spices, and rich parmesan for a mouthwatering meal perfect for busy weeknights or cozy family dinners. Let’s dive into why you’ll love this recipe and how to make it shine in your kitchen!

Why You’ll Love This Recipe

This Garlic Parmesan Chicken Bake is more than just a dish; it’s a celebration of flavor, convenience, and nutrition. Here are five reasons why this recipe will become your new go-to:

  • Quick and Easy to Make: With just a handful of ingredients and straightforward steps, your dinner will be ready in no time—ideal for busy nights!
  • Flavor-Packed: The combination of garlic and parmesan creates a savory, buttery sauce that enhances each bite of chicken.
  • Versatile Pairings: This chicken bake pairs perfectly with sides like cauliflower rice, roasted veggies, or a fresh salad, making it adaptable to your meal preferences.
  • Healthy Eating Made Simple: With lean chicken breasts and wholesome ingredients, this recipe supports your healthy eating goals without compromising on taste.
  • Meal Prep Friendly: Make a double batch and enjoy leftovers throughout the week, simplifying your meal planning.

Ingredients Breakdown

Let’s gather everything you need to whip up this delectable dish! Here’s the complete list of ingredients, along with some handy substitutions:

  • 2 or 3 chicken breasts, cut in half horizontally: Opt for skinless, boneless breasts for ease.
  • 3 teaspoons paprika, divided: This adds a warm color and depth of flavor.
  • 1 teaspoon garlic powder: Enhance the garlic flavor; fresh minced garlic works too!
  • 1 teaspoon onion powder: Adds a subtle sweetness; you can omit this if preferred.
  • 1 teaspoon instant chicken bouillon (optional): For extra umami flavor; can be skipped for a lower sodium option.
  • 1 or 2 tablespoons lemon juice: Freshly squeezed for a touch of acidity.
  • 4 tablespoons melted unsalted butter: Can substitute with olive oil for a lighter option.
  • 2 tablespoons olive oil: Provides healthy fats; avocado oil is a good alternative.
  • 3/4 cup freshly grated parmesan: For that cheesy goodness; try nutritional yeast for a dairy-free version.
  • 1/2 teaspoon fresh cracked black pepper: Freshly cracked enhances the flavor!
  • 1 tablespoon minced garlic (or garlic powder): More garlic means more flavor!
  • 1 teaspoon Italian seasoning: A classic blend of herbs; feel free to use your favorite herbs!
  • 1 tablespoon fresh chopped parsley, plus more for garnish: Fresh herbs brighten the dish.
  • 1 teaspoon red chili pepper flakes (optional): For a kick of heat.

How to Make Garlic Parmesan Chicken Bake

Close-up of a golden-brown garlic parmesan chicken bake, garnished with parsley.

Now that we have our ingredients ready, it’s time to bring this dish to life with these simple steps:

  1. Position a rack in the center of your oven and preheat to 400ºF (200°C).
  2. Season chicken cutlets generously with salt, pepper, garlic powder, onion powder, lemon juice, instant chicken bouillon (if using), and one teaspoon of paprika, then arrange them in a baking dish.
  3. In a bowl, combine melted butter, olive oil, parmesan, pepper, minced garlic, two teaspoons of paprika, parsley, red chili pepper flakes, and Italian seasoning. Pour the mixture over the chicken cutlets in the baking dish, keeping some for serving later, if you like.
  4. Bake the garlic parmesan chicken for 15-20 minutes, depending on your oven. Chicken is done when cooked to an internal temperature of 165˚F (75°C).
  5. Serve the baked chicken parmesan immediately with a side of cauliflower rice, baked veggies, and the remaining sauce to dip.

Pro Tips for Perfect Garlic Parmesan Chicken Bake

To ensure your chicken bake turns out flawlessly every time, check out these expert tips:

  • Room Temperature Chicken: Let chicken come to room temperature for 10-15 minutes before cooking for even baking.
  • Don’t Overcook: Monitor the internal temperature closely to avoid dry chicken; use a meat thermometer.
  • Rest Before Serving: Let the chicken rest for a few minutes after baking to allow juices to redistribute.
  • Customize Your Seasoning: Feel free to add more herbs or spices to suit your taste preferences.
  • Make It Ahead: Prepare the chicken and sauce in advance, and bake just before serving.
  • Leftover Magic: Use leftover chicken in salads, wraps, or pasta dishes for quick lunches.
  • Experiment with Cheese: Try using different cheeses like mozzarella or feta for a twist!
  • Garnish for Appeal: Fresh parsley not only adds flavor but also makes your dish visually appealing.

Common Mistakes and Troubleshooting

Even seasoned cooks can run into hiccups. Here are some common mistakes and how to avoid them:

  • Underseasoning: Don’t skimp on salt and spices; they elevate the dish significantly.
  • Using Cold Chicken: Starting with cold chicken can lead to uneven cooking—always let it sit out first.
  • Skipping the Sauce: The garlic parmesan sauce is what makes this dish special, so don’t skip it!
  • Inaccurate Cooking Time: Ovens can vary, so always check the chicken’s doneness with a thermometer.

Variations to Spice Up Your Chicken Bake

Feeling creative? Here are four delicious variations to keep your meals exciting:

  • Italian Herb Chicken: Add dried oregano, thyme, or basil to the garlic parmesan sauce for an Italian twist.
  • Buffalo Chicken Bake: Mix in buffalo sauce to the garlic sauce for a spicy kick; serve with blue cheese dressing.
  • Creamy Spinach Chicken Bake: Add fresh spinach to the chicken before pouring the sauce for added nutrition.
  • Mediterranean Chicken Bake: Toss in sun-dried tomatoes and olives for a Mediterranean flair!

Storage and Make-Ahead Instructions

Want to prepare ahead of time? Here’s how to store and reheat your Garlic Parmesan Chicken Bake:

  • Refrigerate: Store leftovers in an airtight container in the refrigerator for up to 4 days.
  • Freeze: You can freeze the chicken bake for up to 3 months; just ensure it’s well wrapped!
  • Reheat: Warm in the oven at 350°F (175°C) until heated through, or use the microwave for a quicker option.

Frequently Asked Questions

Here are some common queries about this dish:

  • Can I use frozen chicken breasts? Yes, just ensure they are fully thawed before cooking for even results.
  • What can I serve with Garlic Parmesan Chicken? Try it with rice, quinoa, roasted vegetables, or a simple salad!
  • Can I make this dish dairy-free? Absolutely! Substitute parmesan with nutritional yeast and use olive oil instead of butter.
  • How do I know when the chicken is done? Use a meat thermometer! Chicken should reach an internal temperature of 165°F (75°C).
  • Can I use chicken thighs instead of breasts? Yes! Just adjust the cooking time as thighs may take a bit longer.
  • What if I don’t have paprika? You can use chili powder or cayenne for a different flavor profile.
  • Can I add vegetables to the bake? Yes! Broccoli, bell peppers, or zucchini are great additions.
  • Is this recipe suitable for meal prep? Yes! It’s perfect for batch cooking and reheating throughout the week.

Nutrition Tips and Dietary Adaptations

This Garlic Parmesan Chicken Bake can fit various dietary needs:

  • Low Carb: Perfect for keto diets; serve with low-carb sides like cauliflower rice.
  • Gluten-Free: Naturally gluten-free as it uses minimal processed ingredients.
  • High-Protein: A great source of protein from chicken, ideal for muscle recovery.
  • Low Cholesterol: Lean chicken breasts keep cholesterol levels in check; use olive oil to reduce saturated fat.

Equipment Recommendations

To make your cooking experience seamless, here are a few kitchen essentials:

  • Baking Dish: A sturdy, oven-safe baking dish is crucial for even cooking.
  • Meat Thermometer: An invaluable tool to ensure your chicken is perfectly cooked.
  • Mixing Bowls: For preparing sauces and seasonings, having a few sizes is handy.
  • Cutting Board and Knife: A sharp knife and a good cutting board will make prepping ingredients a breeze.

Serving Suggestions

To truly make your Garlic Parmesan Chicken Bake shine, consider these serving ideas:

  • Fresh Salad: Pair with a light green salad topped with a tangy vinaigrette for balance.
  • Grains: Serve over quinoa, rice, or barley to soak up the delicious sauce!
  • Garnish: Fresh parsley or basil sprinkled on top adds a burst of color and flavor.
  • Dip Option: Serve with a side of creamy ranch or a yogurt sauce for extra flavor.

Conclusion

And there you have it—a complete guide to making the ultimate Garlic Parmesan Chicken Bake! This dish is not just a meal; it’s an experience that brings flavor, health, and joy to your table. Whether you’re cooking for yourself, your family, or entertaining friends, this recipe is sure to impress. So roll up your sleeves, embrace the kitchen as your playground, and enjoy every bite of this wholesome feast!

Garlic Parmesan Chicken Bake

Prep Time 10 minutes
Cook Time 20 minutes
Total Time 30 minutes
Servings 4 servings
Calories 450
A flavorful baked chicken dish with garlic, parmesan, and Italian seasonings, perfect for a quick and satisfying meal.

Ingredients

Chicken

  • 2 pieces chicken breasts, cut in half horizontally
  • 3 teaspoons paprika, divided
  • 1 teaspoon garlic powder
  • 1 teaspoon onion powder
  • 1 teaspoon instant chicken bouillon (optional)
  • 1 or 2 tablespoons lemon juice
  • 4 tablespoons melted unsalted butter
  • 2 tablespoons olive oil
  • 3/4 cup freshly grated parmesan
  • 1/2 teaspoon fresh cracked black pepper
  • 1 tablespoon minced garlic (or garlic powder)
  • 1 teaspoon Italian seasoning
  • 1 tablespoon fresh chopped parsley, plus for garnish
  • 1 teaspoon red chili pepper flakes, optional

Instructions 

  • Preheat oven to 400ºF (200°C) and season chicken with salt, pepper, garlic powder, onion powder, lemon juice, bouillon, and 1 teaspoon paprika.
  • Mix melted butter, olive oil, parmesan, pepper, garlic, remaining paprika, parsley, chili flakes, and Italian seasoning. Pour over chicken.
  • Bake for 15-20 minutes until internal temperature reaches 165ºF (75°C). Serve immediately.

Notes

For extra flavor, garnish with additional parsley before serving.
Calories: 450kcal
Cost: $15
Course: Main Course
Cuisine: American
Keyword: Chicken, garlic, parmesan

Unlock the Secret to Crispy and Juicy Air Fryer Chicken Thighs!

If you’re on the hunt for a meal that’s not only mouthwateringly delicious but also a breeze to whip up, look no further! Today, we’re diving into the world of air fryer chicken thighs—the dish that will change your dinner game forever. This recipe promises juicy, tender meat paired with extra crispy skin, proving that healthy eating doesn’t have to be boring. Get ready to impress your taste buds and those of your loved ones with a flavor explosion in every bite!

Why You’ll Love This Recipe

This isn’t just any chicken dish—it’s a culinary experience that brings joy and excitement to your dinner table. Here’s why you’ll absolutely adore these extra crispy chicken thighs:

  • Flavor Packed: Each bite bursts with a savory blend of spices that will leave you craving more.
  • Quick Cooking Time: Ready in under 30 minutes, this dish is perfect for busy weeknights.
  • Less Oil, More Crisp: The air fryer allows you to achieve that deep-fried taste without all the grease!
  • Versatile Ingredients: Use simple ingredients you likely already have in your pantry.
  • Healthy Comfort Food: Enjoy a satisfying meal that fits into your healthy lifestyle without sacrificing flavor.

Ingredients for Crispy and Juicy Air Fryer Chicken Thighs

Let’s gather the essentials for our mouthwatering dish. Here’s what you’ll need:

  • 3 bone-in, skin-on chicken thighs (approximately 1 ¼ lbs): The star of the show!
  • 1 tbsp olive oil: Helps the skin crisp up beautifully.
  • 1 tsp paprika: Adds a lovely smoky flavor.
  • ½ tsp garlic powder: For that irresistible aroma.
  • ½ tsp black pepper: Just the right kick.
  • ½ tsp cumin: A warm, earthy flavor that rounds out the dish.
  • ½ tsp salt: Essential for bringing out all the flavors.
  • ½ tbsp baking powder: The secret to achieving that coveted crispy skin.

Expert Tips for Perfectly Crispy Chicken Thighs

Juicy, seasoned chicken thighs with crispy skin, displayed on a wooden surface.

Want to elevate your air fryer chicken thighs to the next level? Check out these pro tips:

  • Pat Dry: Make sure to pat the chicken thighs dry with paper towels before seasoning. This step is crucial for achieving crispy skin.
  • Use Baking Powder: This ingredient helps to draw moisture from the skin, resulting in a crunchier texture.
  • Don’t Overcrowd: Give your chicken room to breathe in the air fryer basket to ensure even cooking.
  • Flip with Care: Use tongs to flip the thighs gently to avoid tearing the skin.
  • Check for Doneness: The safe minimum internal temperature for chicken is 165°F, but for maximum tenderness, aim for 185-195°F.
  • Rest Before Serving: Let your chicken rest for 5-10 minutes after cooking to allow the juices to redistribute.
  • Experiment with Spices: Don’t hesitate to add your favorite spices or herbs to customize the flavor.
  • Pair with Sides: Serve with a fresh salad or roasted vegetables for a complete meal.

Common Mistakes and Troubleshooting

Even the best chefs can stumble! Here are some common pitfalls and how to avoid them:

  • Skin Not Crispy: If the skin isn’t crispy enough, check that you dried the chicken thoroughly and used enough baking powder.
  • Chicken Overcooked: Ensure you’re monitoring the cooking time and checking the internal temperature regularly.
  • Seasoning Insufficient: Don’t shy away from seasoning generously; chicken can handle it!

Flavor Variations to Try

Feeling adventurous? Here are some fun variations to switch things up:

  • Spicy Kick: Add cayenne pepper or chili powder to the seasoning mix for a heat boost.
  • Herb Infusion: Incorporate dried herbs like thyme, oregano, or rosemary for an aromatic twist.
  • Asian Flair: Use soy sauce, ginger, and sesame oil for a deliciously different flavor profile.
  • BBQ Bliss: Brush the thighs with your favorite BBQ sauce during the last few minutes of cooking for a sweet and smoky finish.

Storage and Make-Ahead Instructions

Want to prep ahead? Here’s how to store and reheat your chicken thighs:

  • Refrigerate: Store any leftovers in an airtight container for up to 3 days.
  • Freeze: These chicken thighs can be frozen for up to 3 months. Let them cool completely before freezing.
  • Reheat: For best results, reheat in the air fryer at 350°F for 5-7 minutes until warmed through.

Frequently Asked Questions (FAQ)

Curious about air frying? Let’s tackle some common questions:

  • Can I use boneless chicken thighs? Absolutely! Just adjust the cooking time as they may cook faster.
  • What if I don’t have baking powder? You can use baking soda, but the results may vary; baking powder is recommended for best crispiness.
  • How do I know when chicken thighs are done? Use a meat thermometer to check that the internal temperature has reached at least 165°F.
  • Can I use frozen chicken thighs? Yes, but ensure to fully thaw them before cooking for even results.
  • What are good sides to serve with air fryer chicken thighs? Try roasted veggies, a quinoa salad, or mashed sweet potatoes for a balanced meal.
  • Is an air fryer worth it? Absolutely! It’s a versatile kitchen appliance that can help you create healthier meals with less oil.
  • Can I marinate the chicken thighs? Yes, marinating can add more flavor; just be sure to pat the thighs dry before cooking.
  • How do I clean my air fryer? Clean the basket and tray with warm soapy water, and wipe the interior with a damp cloth.

Nutritional Benefits and Dietary Adaptations

This recipe isn’t just delicious; it’s also packed with nutrients:

  • High Protein: Chicken thighs are a fantastic source of protein, essential for muscle repair and growth.
  • Healthy Fats: The skin contains healthy fats that can support heart health when consumed in moderation.
  • Customizable: Adjust seasonings and side dishes to meet dietary needs, whether you’re low-carb, gluten-free, or looking for a vegetarian option.

Essential Equipment Recommendations

To make this recipe as successful as possible, here are some must-have kitchen tools:

  • Air Fryer: A reliable air fryer is essential for achieving that crispy texture.
  • Meat Thermometer: Ensures your chicken is cooked perfectly every time.
  • Mixing Bowls: Handy for combining spices and prepping ingredients.
  • Cooking Tongs: Perfect for flipping the chicken without damaging the skin.

Serving Suggestions

Now that you’ve crafted the perfect chicken thighs, let’s think about how to serve them:

  • On a Bed of Greens: Serve atop a fresh green salad for a light and healthy meal.
  • With Quinoa: Pair with quinoa and grilled veggies for a nutritious bowl.
  • With Dipping Sauce: Create a tangy dipping sauce using yogurt and herbs for added flavor.

Conclusion

And there you have it! Your guide to making the most delicious, crispy, and juicy air fryer chicken thighs. With just a few simple ingredients and some expert tips, you can transform your dinner routine and impress everyone at your table. So, get your air fryer ready, unleash your inner chef, and enjoy the delightful flavors awaiting you!

Air Fryer Chicken Thighs (Extra Crispy + Juicy)

Prep Time 10 minutes
Cook Time 16 minutes
Total Time 26 minutes
Servings 2 servings
Calories 350
Enjoy perfectly crispy and juicy chicken thighs cooked effortlessly in the air fryer with a flavorful seasoning mix.

Ingredients

Meat

  • 3 pieces bone-in, skin-on chicken thighs (about 1 ¼ lbs)
  • 1 tbsp olive oil
  • 1 tsp paprika
  • ½ tsp garlic powder
  • ½ tsp black pepper
  • ½ tsp cumin
  • ½ tsp salt
  • ½ tbsp baking powder

Instructions 

  • Preheat air fryer to 400°F (200°C) for 5–6 minutes.
  • Mix paprika, garlic powder, black pepper, cumin, salt, and baking powder in a small bowl.
  • Pat chicken dry, rub with olive oil, then season with the spice mix.
  • Place chicken skin-side down in the air fryer basket, cook at 400°F for 10 minutes.
  • Flip chicken and cook for an additional 6–10 minutes until crispy and internal temp reaches 165°F.

Notes

Let the chicken rest for 5–10 minutes before serving for best juiciness.
Calories: 350kcal
Cost: $15
Course: Main Course
Keyword: chicken thighs