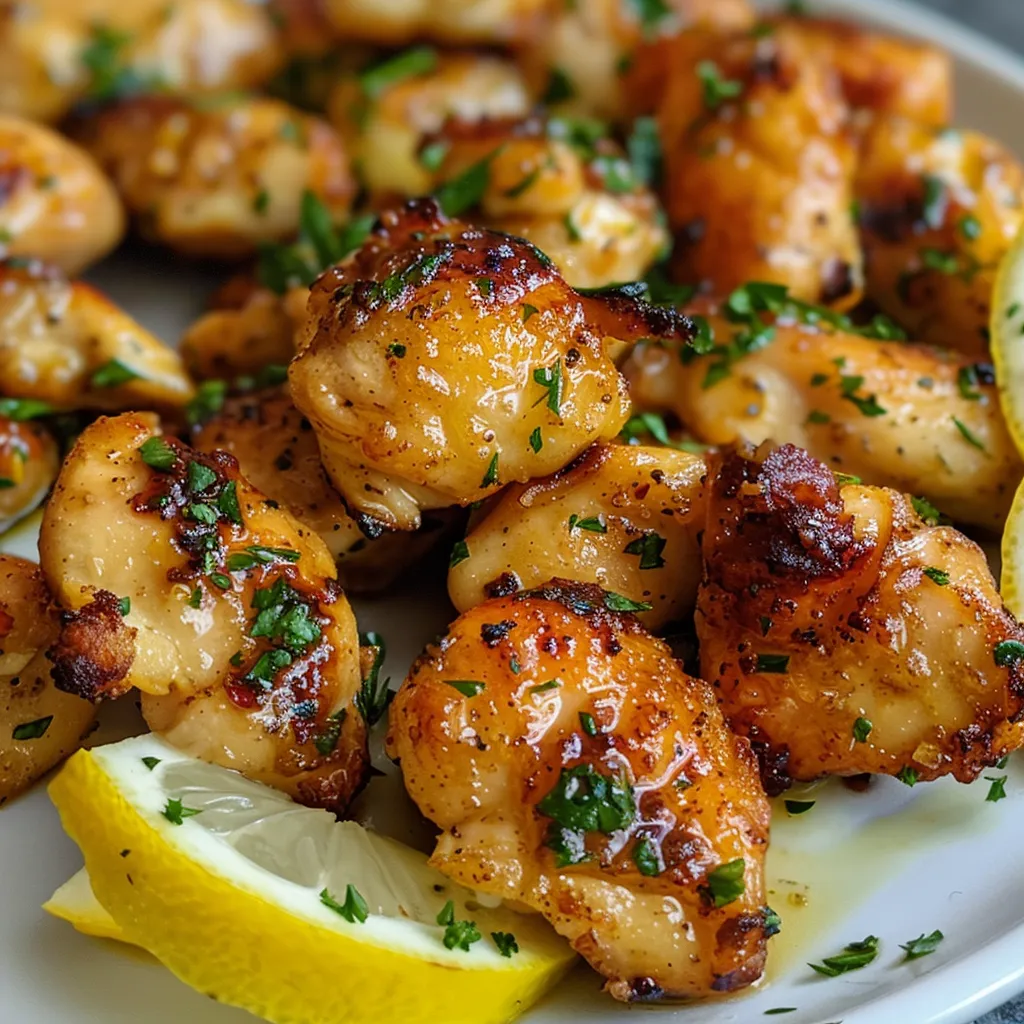
Unleash the Flavor: Zesty Air Fryer Chicken Bites That Dance on Your Taste Buds!
Welcome to a world where healthy cooking meets vibrant flavors! If you’re looking for a quick, nutritious meal that doesn’t skimp on taste, you’ve landed in the right place. These Zesty Air Fryer Lemon Herb Chicken Bites are not just another recipe; they’re a culinary adventure waiting to happen. Bursting with zesty lemon and aromatic herbs, these bites are perfect for busy weeknights or casual gatherings. Let’s get cooking and discover how easy it is to make delicious, healthy meals that will impress!
Why You’ll Love This Recipe
Before we dive into the recipe, let’s explore the fantastic benefits of these air fryer chicken bites:
- Quick and Easy: Ready in just 20 minutes, these chicken bites are perfect for weeknight dinners!
- Healthier Option: Air frying reduces the need for excess oil, making this a lighter alternative to traditional frying.
- Flavor Packed: Fresh lemon juice, garlic, and herbs create a mouthwatering flavor explosion with every bite.
- Versatile Serving: Serve them as an appetizer, salad topping, or a main course; they fit any meal!
- Meal Prep Friendly: Perfect for meal prepping; they store well and reheat beautifully!
Ingredient Breakdown
Let’s gather the ingredients to make these delightful chicken bites. Here’s what you’ll need:
- 1.5 lbs Boneless Skinless Chicken Breasts: Cut into uniform 1-inch pieces for even cooking.
- 2 tbsp Extra Virgin Olive Oil: Helps the herbs stick and provides a rich flavor.
- 1 large Lemon: Both the zest and juice will add that essential zing!
- 3 cloves Garlic, minced: Fresh garlic elevates the flavor—don’t skimp on this!
- 1 tsp Dried Oregano: Adds a savory note that pairs perfectly with lemon.
- 1/2 tsp Dried Thyme: This herb brings an earthy flavor to the mix.
- 1/2 tsp Onion Powder: For an extra layer of flavor.
- Salt and Black Pepper: Season to taste—about 1/2 tsp each is a good start.
- Optional: Fresh parsley for garnish and a pinch of red pepper flakes for heat.
How to Make Air Fryer Lemon Chicken Bites
Now that we have our ingredients ready, let’s get into the cooking process. Follow these simple steps for mouthwatering results!
- Step 1: Prepare the Chicken: Pat your chicken breasts dry with a paper towel. This helps them brown nicely! Cut into uniform 1-inch cubes.
- Step 2: Make the Marinade: In a large mixing bowl, whisk together the olive oil, lemon juice, lemon zest, minced garlic, oregano, thyme, onion powder, salt, and pepper.
- Step 3: Marinate the Chicken: Toss the chicken bites into the bowl and stir until every piece is coated. Let it sit for 10 minutes if you can, but they’re delicious even if cooked immediately!
- Step 4: Preheat the Air Fryer: Set your air fryer to 400°F (200°C). Preheating helps the chicken sear beautifully.
- Step 5: Arrange Chicken in Air Fryer Basket: Place the chicken in a single layer in the basket. Avoid overcrowding—if needed, cook in two batches!
- Step 6: Air Fry the Chicken: Cook for 8–10 minutes, shaking the basket halfway through. The chicken is done when it reaches an internal temperature of 165°F (74°C) and has a beautiful golden color.
- Step 7: Let it Rest: Allow the chicken to rest for 2–3 minutes before serving. This helps retain juiciness!
Pro Tips for Perfect Chicken Bites
To elevate your cooking game, here are some expert tips:
- Use Fresh Ingredients: Fresh herbs and lemon juice make a world of difference in flavor!
- Don’t Skip the Marinade: Even a short marination time enhances the flavor drastically.
- Check for Doneness: Use a meat thermometer to ensure your chicken is properly cooked.
- Experiment with Spices: Feel free to mix in your favorite spices or herbs for a personal touch!
- Keep it Layered: Single-layer cooking ensures even crisping; avoid overcrowding the basket.
- Make it a Meal: Pair with a fresh salad or whole grains for a complete dinner!
- Garnish for Flair: Fresh parsley or red pepper flakes add color and flavor—don’t forget!
- Reheat Wisely: When reheating, use the air fryer for a crispy finish.
Common Mistakes to Avoid
Here are some pitfalls to steer clear of when making your chicken bites:
- Overcrowding the Basket: This leads to uneven cooking and soggy chicken. Always cook in batches if necessary.
- Skipping the Drying Step: Moisture on the chicken can prevent it from browning properly.
- Under-seasoning: Don’t be shy with the salt and spices; seasoning is key for flavor.
- Ignoring Temperature: Always check the internal temperature to avoid undercooked chicken.
- Rushing the Resting Time: Letting the chicken rest is crucial for juiciness. Don’t skip this step!
Variations on Air Fryer Lemon Chicken Bites
Feeling adventurous? Try these fun twists on the classic recipe:
- Spicy Kick: Add cayenne pepper or chili flakes to the marinade for a spicy twist!
- Herb Medley: Mix different herbs like basil or rosemary for a unique flavor profile.
- Honey Lemon Glaze: Drizzle honey over the chicken before cooking for a sweet and tangy finish.
- Asian-Inspired: Use soy sauce and ginger for a different flavor direction!
Storage and Make-Ahead Instructions
Want to prep in advance? Here’s how to store your chicken bites:
- Refrigerate: Store leftover chicken bites in an airtight container for up to 3 days.
- Freeze: For longer storage, freeze cooked chicken bites in a single layer, then transfer to a freezer bag for up to 3 months.
- Reheat: Use the air fryer to reheat at 350°F (175°C) for about 5 minutes until hot and crispy.
Frequently Asked Questions
Got questions? Let’s answer some common ones about Air Fryer Lemon Chicken Bites:
- Can I use chicken thighs instead of breasts? Absolutely! Just adjust the cooking time as thighs may take a bit longer.
- What side dishes go well with these chicken bites? Consider serving with a fresh salad, quinoa, or roasted vegetables for a balanced meal.
- Can I make these ahead of time? Yes! Prepare and marinate the chicken in advance, then cook when ready to serve.
- Is this recipe gluten-free? Yes, all ingredients are naturally gluten-free!
- Can I use frozen chicken? It’s best to thaw it first for even cooking.
- What’s the best way to keep leftover chicken bites? Store them in an airtight container in the fridge for optimal freshness.
- How do I know when the chicken is done? The internal temperature should reach 165°F (74°C) for safe consumption.
- Can I make these without an air fryer? Yes! You can bake them in the oven at 400°F (200°C) for about 20 minutes.
Nutritional Tips and Dietary Adaptations
Looking to make this recipe even healthier? Here are some tips:
- Low-Calorie Option: Use skinless chicken breasts and minimize oil for a lighter dish.
- Protein Boost: Pair with legumes or a scoop of Greek yogurt for added protein.
- Low-Carb Variation: Serve on a bed of leafy greens for a keto-friendly meal.
- Vegetarian Alternative: Substitute chicken with tofu or tempeh for a plant-based version!
Equipment Recommendations
To achieve the best results, make sure to have the right tools:
- Air Fryer: A quality air fryer is essential for crispy chicken bites.
- Mixing Bowl: A large bowl for marinating and tossing the chicken.
- Meat Thermometer: For ensuring perfectly cooked chicken every time.
- Cutting Board and Knife: For easy chicken preparation.
Serving Suggestions
Ready to serve up these delicious chicken bites? Here are some ideas:
- As an Appetizer: Serve with a zesty dipping sauce, like garlic aioli or tzatziki.
- On a Salad: Toss them onto a fresh salad for a protein-packed meal.
- In a Wrap: Use in wraps with fresh veggies and your favorite sauce for a satisfying lunch.
- With Dips: Pair with hummus or guacamole for a delightful snack!
In conclusion, these Zesty Air Fryer Lemon Herb Chicken Bites are more than just a recipe—they’re a celebration of flavor, health, and convenience. Whether you’re cooking for yourself or entertaining guests, these bites are sure to impress. So grab your air fryer, gather your ingredients, and let’s make healthy cooking a fun adventure!
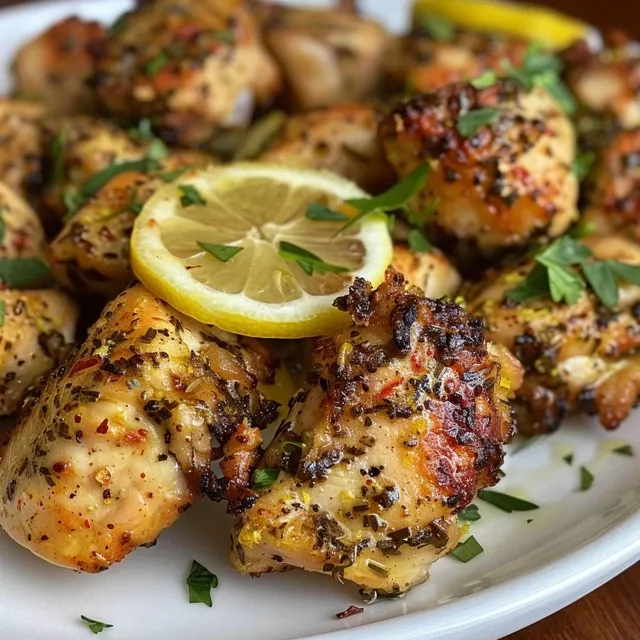
Air Fryer Lemon Herb Chicken Bites
Ingredients
Chicken
- 1.5 lbs Boneless Skinless Chicken Breasts, cut into uniform 1-inch pieces
- 2 tbsp Extra Virgin Olive Oil
- 1 large Lemon, freshly grated zest and juice
- 3 cloves Garlic, minced finely (or 1 tsp garlic powder)
- 1 tsp Dried Oregano
- 0.5 tsp Dried Thyme
- 0.5 tsp Onion Powder
- 0.5 tsp Salt and Black Pepper, to taste (about 1/2 tsp each)
- Optional Fresh parsley for garnish and a pinch of red pepper flakes for heat
Instructions
- Pat chicken dry and cut into 1-inch cubes.
- Mix olive oil, lemon juice, zest, garlic, herbs, salt, and pepper. Coat chicken and let sit for 10 minutes.
- Preheat air fryer to 400°F (200°C). Arrange chicken in a single layer.
- Cook for 8–10 minutes, shaking halfway, until golden and internal temp reaches 165°F (74°C).
- Rest for 2–3 minutes, then garnish with parsley and red pepper flakes if desired.