Author

Ryan

Browsing

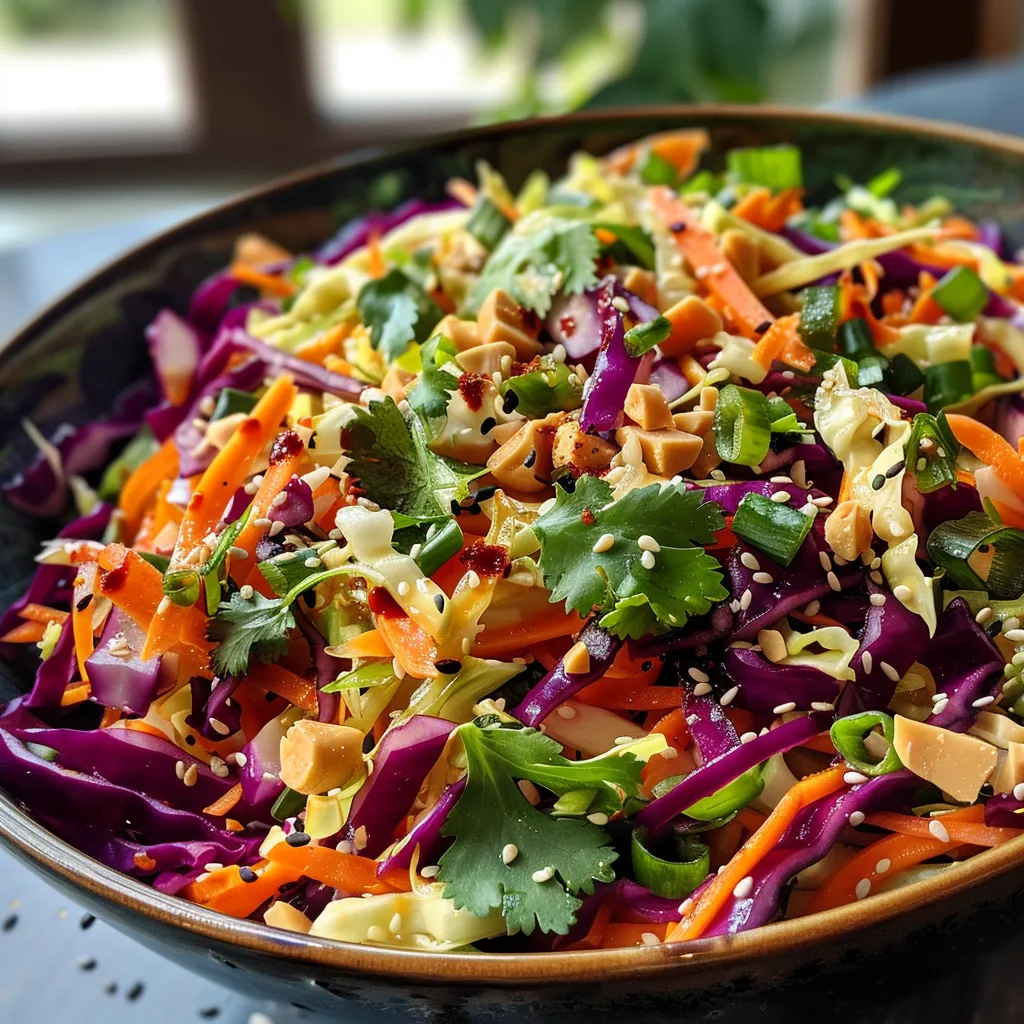
Welcome to the Flavor Explosion: Your Guide to Asian Peanut Slaw!

Are you ready to dive into a vibrant world of flavors? Our Asian Peanut Slaw is not just a side dish; it’s an experience! Packed with crunchy veggies, a creamy peanut dressing, and a hint of zesty lime, this recipe is designed to tantalize your taste buds while nourishing your body. So let’s explore why this Asian Peanut Slaw is a must-try for everyone, from seasoned chefs to kitchen newbies!

Why You’ll Love This Recipe

  • Flavor-Packed Goodness: The combination of fresh veggies and a creamy peanut dressing creates a taste sensation that dances on your palate.
  • Quick and Easy: Perfect for busy weeknights, this slaw takes just 15 minutes to whip up, making it a go-to for any meal.
  • Versatile Dish: Serve it as a side, a topping for tacos, or even as a light lunch on its own. The possibilities are endless!
  • Nutritious Ingredients: Loaded with vitamins and minerals, this slaw helps you stay energized and healthy without sacrificing flavor.
  • Make-Ahead Friendly: Prepare it in advance for an easy grab-and-go meal that stays fresh and crunchy.

Ingredient Breakdown

Let’s get into the nitty-gritty of what makes this Asian Peanut Slaw so special. Here’s what you’ll need:

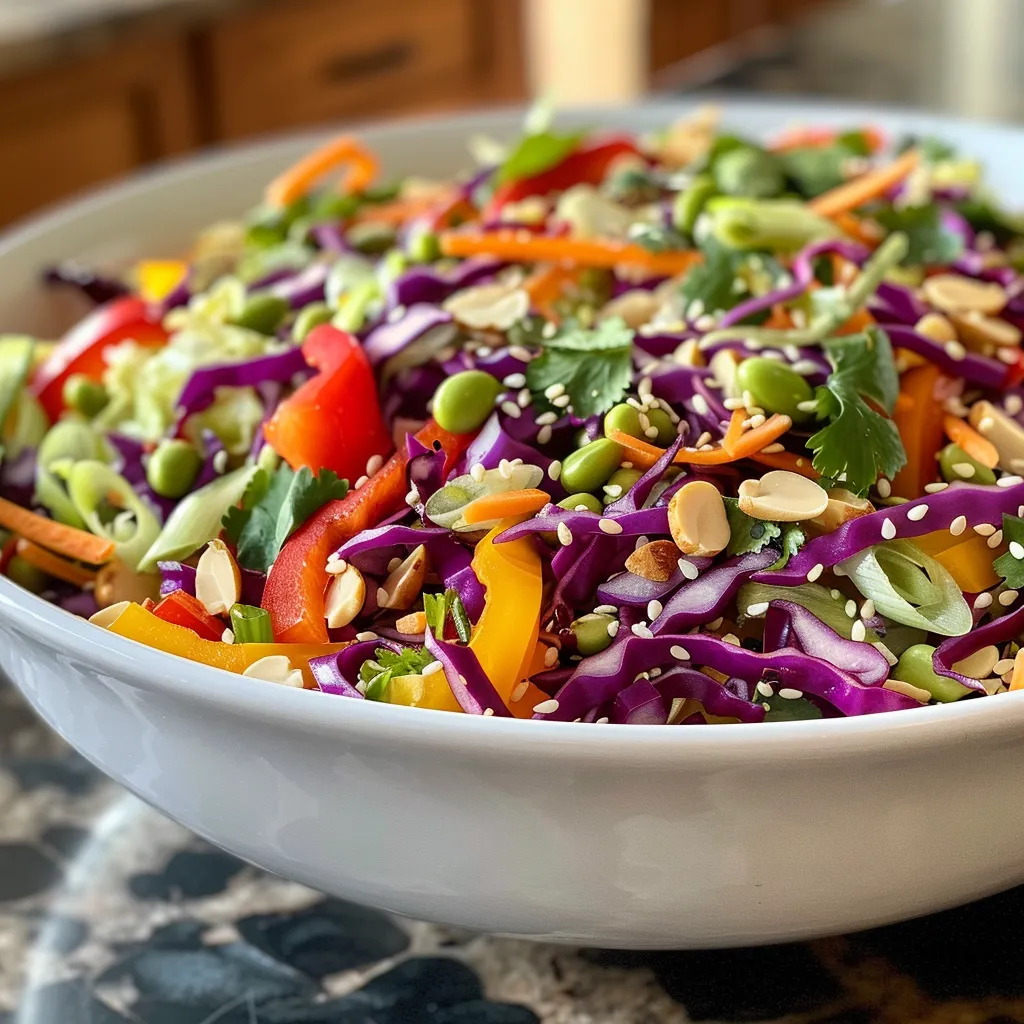
  • 2.5 cups red cabbage (shredded): Adds a beautiful color and crunch.
  • 2.5 cups green cabbage (shredded): Offers a classic slaw texture and flavor.
  • 1-2 carrots (shredded): For a touch of sweetness and extra color.
  • 3 scallions (chopped): Brings a mild onion flavor that complements the slaw.
  • 1/2 cup fresh cilantro leaves (OPTIONAL): For that fresh herbaceous note.
  • 1/4 cup creamy peanut butter: The star of the dressing, giving it that rich flavor.
  • 1.5 tbsp soy sauce: Adds depth and umami.
  • 2 tbsp coconut milk (or any plant milk): For a creamy consistency without dairy.
  • 2 limes (juiced): Brightens up the dish with zesty acidity.
  • 1.5 tbsp maple syrup: Balances the flavors with a hint of sweetness.
  • 1 tbsp fresh ginger root (grated): For a spicy kick that elevates the dressing.
  • 1.5 tbsp sesame seeds: For a delightful crunch and nuttiness.
  • 1 pinch red pepper flakes (to taste): For those who like it hot!
  • Hot sauce to taste (optional): Personalize the heat level!

Pro Tips for the Best Slaw Ever

Side view of a bowl of Asian Peanut Slaw featuring vibrant red and green cabbage.
  • Use a Mandolin: For perfectly shredded cabbage and carrots, a mandolin slicer is a game-changer.
  • Chill Before Serving: Let the slaw sit in the fridge for at least 30 minutes before serving to enhance the flavors.
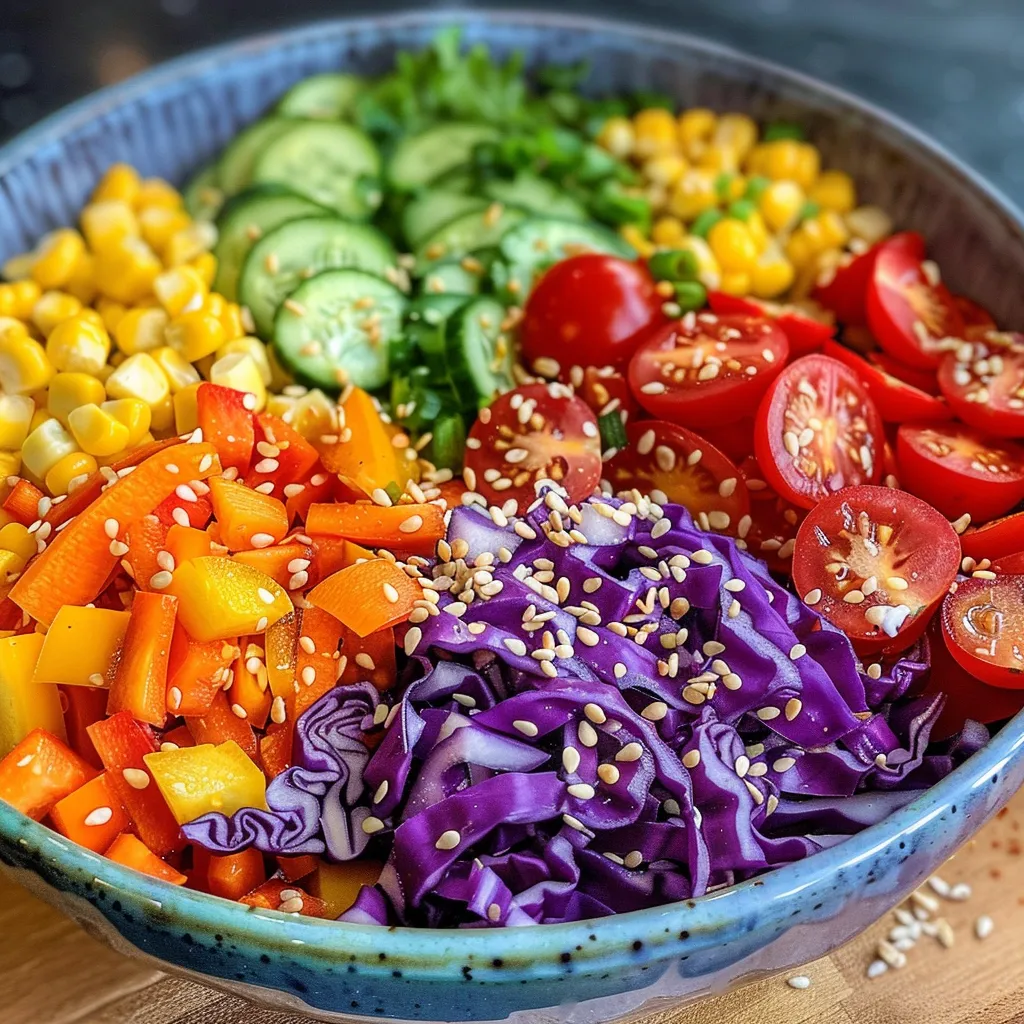
  • Make it Colorful: Feel free to add other colorful veggies like bell peppers or radishes for added crunch and nutrition.
  • Adjust the Dressing: Taste as you go! Feel free to adjust the sweetness or acidity based on your preference.
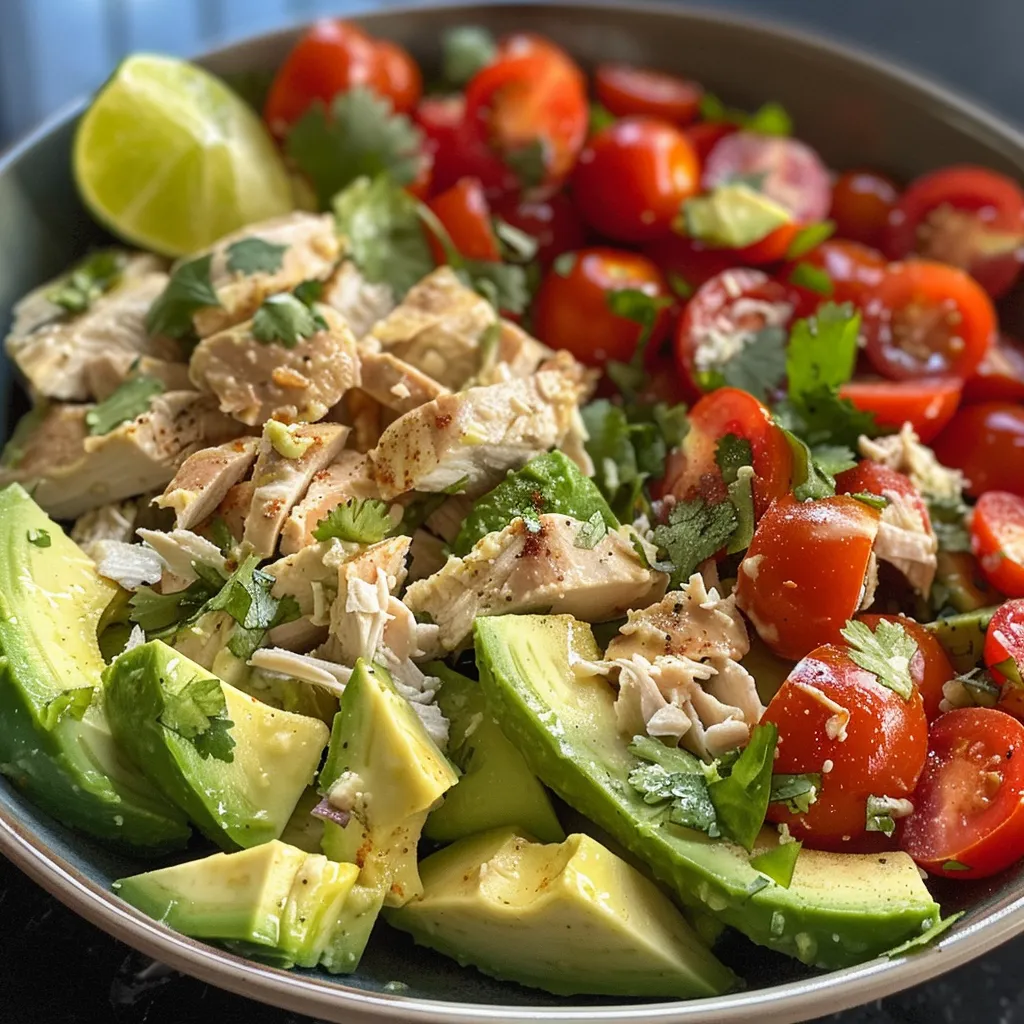
  • Experiment with Proteins: Top this slaw with grilled chicken, tofu, or shrimp for a complete meal.
  • Store Properly: Keep the slaw and dressing separate until ready to serve to maintain crunch.
  • Use Fresh Ingredients: Fresh veggies not only taste better but also retain more nutrients.
  • Get Creative with Nuts: Add chopped peanuts or cashews for an extra crunch and flavor.

Common Mistakes and Troubleshooting

Even the best chefs encounter hiccups! Here are some common mistakes and how to avoid them:

  • Overdressing: Too much dressing can make the slaw soggy. Start with less and add more as needed.
  • Using Old Veggies: Fresh ingredients are key! Ensure your cabbage and carrots are crisp for the best texture.
  • Skipping the Chill: Don’t skip letting the flavors meld in the fridge; it truly makes a difference!
  • Ignoring the Balance: Make sure your dressing has a balance of sweet, salty, and tangy for a well-rounded flavor.

Variations to Try

This slaw is a blank canvas! Here are some exciting twists:

  • Spicy Thai Peanut Slaw: Add Sriracha or chili paste to the dressing for an extra kick!
  • Mango Madness: Toss in diced fresh mango for a sweet and tropical twist.
  • Crunchy Asian Noodle Slaw: Mix in cooked, cooled rice noodles for heartiness.
  • Sesame Soy Slaw: Replace peanut butter with tahini for a nut-free option.

Storage and Make-Ahead Instructions

This Asian Peanut Slaw is perfect for meal prep! Here’s how to store it:

  • Refrigerator: Store in an airtight container for up to 3 days, but keep the dressing separate until serving.
  • Freezer: Not recommended for freezing as the texture of the veggies will change.
  • Make-Ahead: You can prepare the slaw a day in advance. Just add the dressing right before serving.

Frequently Asked Questions

Got questions? We’ve got answers!

  • Can I use pre-shredded cabbage?: Absolutely! It saves time and is just as delicious.
  • Is this slaw gluten-free?: Yes, just ensure you use gluten-free soy sauce or tamari.
  • Can I make it vegan?: Yes! The ingredients listed are vegan-friendly, just check your peanut butter.
  • What can I serve with this slaw?: It pairs wonderfully with grilled meats, tacos, or as a topping on sandwiches.
  • How do I make it less spicy?: Reduce or omit the red pepper flakes and hot sauce.
  • Can I add other vegetables?: Definitely! Bell peppers, snap peas, or cucumbers would all be great additions.
  • What’s the best way to chop ginger?: Use a microplane for finely grated ginger or a knife for chunkier pieces.
  • Can I add protein to this slaw?: Yes! Grilled chicken, shrimp, or tofu make great additions for a complete meal.

Nutrition Tips and Dietary Adaptations

Let’s talk nutrition! This Asian Peanut Slaw is not only packed with flavor, but it’s also nutritious. Here’s how to adapt it for your dietary needs:

  • Low-Carb Version: Skip the carrots or use spiralized zucchini for a low-carb alternative.
  • Keto-Friendly: Use sugar-free maple syrup or a keto sweetener in the dressing.
  • For Added Protein: Toss in edamame or chickpeas for a protein boost.
  • Low-FODMAP: Avoid scallions if you’re sensitive to FODMAPs, and use chives instead.

Equipment Recommendations

Here are a few tools to make your slaw-making experience smooth:

  • Mandolin Slicer: For perfectly shredded veggies.
  • Mixing Bowls: Have a few different sizes for mixing and storing.
  • Whisk: Essential for blending your dressing ingredients smoothly.
  • Airtight Containers: Perfect for meal prep and storing leftovers.

Serving Suggestions

Now that you’ve created this delicious slaw, how can you serve it? Here are some ideas:

  • As a Side Dish: Perfect alongside grilled meats or fish.
  • As a Topping: Use it to top tacos, burgers, or sandwiches for an added crunch.
  • In a Bowl: Serve it as a light lunch with added proteins for a complete meal.
  • For Meal Prep: Pack it in lunch containers for easy grab-and-go meals during the week.

Get ready to crunch into flavor with this Asian Peanut Slaw adventure! Whether you’re enjoying it as a side or making it the star of your plate, you’ll find that healthy eating can be delicious, exciting, and oh-so-simple. So grab those ingredients and let’s get cooking!

Asian Peanut Slaw

Prep Time 15 minutes
Total Time 15 minutes
Servings 4 servings
Calories 250
A vibrant and crunchy Asian-inspired slaw tossed in a creamy peanut dressing, perfect for a quick and healthy meal.

Ingredients

Vegetables

  • 2.5 cups red cabbage (shredded)
  • 2.5 cups green cabbage (shredded)
  • 1-2 carrots carrots (shredded)
  • 3 scallions scallions (chopped)
  • 1/2 cup fresh cilantro leaves (OPTIONAL)
  • 1/4 cup creamy peanut butter
  • 1.5 tbsp soy sauce
  • 2 tbsp coconut milk (or any plant milk)
  • 2 limes juiced
  • 1.5 tbsp maple syrup
  • 1 tbsp fresh ginger root (grated)
  • 1.5 tbsp sesame seeds
  • 1 pinch red pepper flakes red pepper flakes (to taste)
  • to taste hot sauce hot sauce (optional)

Instructions 

  • Combine shredded cabbages, carrots, scallions, and cilantro in a large bowl.
  • In a separate bowl, whisk together peanut butter, soy sauce, coconut milk, lime juice, maple syrup, and grated ginger until smooth.
  • Pour the dressing over the vegetables and toss to combine.
  • Sprinkle sesame seeds and red pepper flakes on top, and add hot sauce if desired.

Notes

For extra crunch, add chopped peanuts or cashews.
Calories: 250kcal
Cost: $12
Course: Salad
Cuisine: Asian
Keyword: cabbage, peanut

Discover the Magic of Sun Dried Tomato Pasta Salad!

Are you ready to elevate your pasta game? This Vibrant Sun Dried Tomato Pasta Salad is a delightful explosion of flavor packed with fresh ingredients that will not only tantalize your taste buds but also provide a healthy boost to your meal repertoire. Whether you’re planning a family gathering, a picnic, or just a simple dinner at home, this recipe is your go-to choice! In this article, we’ll explore everything you need to know about making this sensational salad, from the ingredients to expert tips!

Why You’ll Love This Recipe

This sun dried tomato pasta salad is not just another dish—it’s a celebration of flavors and textures! Here are five reasons why you’ll be head over heels in love with this recipe:

  • Quick to Make: With just a few steps and minimal cooking, you can whip up a delicious dish in under 30 minutes!
  • Healthy Ingredients: Packed with fresh veggies, healthy fats, and protein, this salad is a nutritious option for any meal.
  • Versatile: Perfect as a main dish, side, or even a meal prep option for busy weekdays!
  • Flavor Explosion: The combination of sun dried tomatoes, fresh basil, and a zesty dressing creates a mouthwatering experience.
  • Make-Ahead Friendly: Prepare it in advance and let the flavors meld in the fridge for an even tastier dish!

Ingredient Breakdown

Now let’s dive into what makes this salad so special! Here’s a detailed look at the ingredients you’ll need to create this masterpiece, along with some fantastic substitutions:

  • 16 oz. short pasta (rigatoni, rotini, bow tie, etc.): Choose your favorite pasta shape, or even try whole wheat or gluten-free options for a healthier twist.
  • 3 oz. baby spinach: For a nutrient boost, substitute with kale or arugula.
  • 10 oz. cherry tomatoes (halved): Any fresh tomatoes will work, but cherry tomatoes add sweetness and color!
  • 1 jar of sun-dried tomatoes in oil (8.5 oz): Look for ones with Italian herbs for extra flavor.
  • ½ red onion (small diced): Red onion adds a nice crunch; shallots can be a milder alternative.
  • ½ cup shredded parmesan: Use any hard cheese like pecorino or nutritional yeast for a dairy-free option.
  • 8 oz. mozzarella pearls: Fresh mozzarella or feta crumbles work beautifully here as well.
  • ⅓ cup chopped basil: This herb brings freshness—feel free to mix in parsley or cilantro!
  • ⅓ cup extra virgin olive oil: A high-quality oil enhances flavors; avocado oil can be a great substitute.
  • 2 T balsamic vinegar: Regular or white balsamic adds a sweet tang! You can also use red wine vinegar.
  • 2 garlic cloves (minced): Fresh garlic is key; garlic powder can be used in a pinch.
  • 1 tsp Italian seasoning: A blend of herbs enhances the taste; feel free to adjust according to your preference.
  • Salt & Pepper: Season to taste for a perfect balance!

How to Make This Pasta Salad

Side view of a pasta salad featuring sun-dried tomatoes, spinach, and cherry tomatoes.

Ready to bring this salad to life? Follow these easy steps for a delicious result:

  1. Cook pasta al dente according to package instructions. When pasta is cooked, drain and toss with spinach to wilt. Rinse with cool water to help cool it off more quickly, or allow it to cool for 15-20 minutes.
  2. Toss pasta and spinach with chopped basil, onion, sun-dried tomatoes (julienned), cherry tomatoes, parmesan, and mozzarella (if pasta is still pretty hot, wait to add the mozzarella until cooled off).
  3. Whisk together the dressing ingredients and toss 3/4 of it with the pasta salad, reserving 1/4 of the dressing if waiting to serve. Chill for about 30 minutes and then toss remaining dressing before serving.

Pro Tips for Perfect Pasta Salad

To ensure your Sun Dried Tomato Pasta Salad turns out perfectly every time, check out these expert insights:

  • Cook Pasta Al Dente: This ensures the pasta holds its shape and texture when mixed with other ingredients.
  • Cool Pasta Before Mixing: Rinsing with cool water helps to stop the cooking process and keeps the salad fresh.
  • Use Quality Ingredients: Fresh herbs and quality olive oil make a significant difference in flavor.
  • Add Dressing Before Serving: To keep the salad from becoming soggy, add the dressing just before serving.
  • Let It Chill: Allowing the salad to sit in the fridge for at least 30 minutes lets the flavors meld beautifully.
  • Mix It Up: Don’t hesitate to add in other favorites like olives, artichokes, or roasted red peppers for a unique twist.
  • Adjust Seasoning: Taste and adjust salt and pepper as needed after chilling.
  • Keep It Colorful: A variety of colors not only makes the dish more appealing but also packs in more nutrients!

Common Mistakes and Troubleshooting

No one is perfect, and that includes cooking! Here are some common pitfalls to avoid:

  • Overcooking Pasta: This will make your salad mushy. Aim for al dente!
  • Forgetting to Cool: Mixing hot pasta with fresh ingredients can wilt them; always cool down your pasta first.
  • Not Enough Flavor: If the salad tastes bland, it may need more seasoning or dressing. Taste and adjust!
  • Using Dried Herbs Instead of Fresh: Fresh herbs provide a brighter flavor; use dried herbs sparingly.

Delicious Variations

Feeling adventurous? Here are some fun variations to try out:

  • Add Protein: Mix in grilled chicken, shrimp, or chickpeas for a heartier meal.
  • Switch Up the Pasta: Use whole grain, gluten-free, or spiralized zucchini as a base for a different texture.
  • Change the Cheese: Experiment with feta, goat cheese, or leave it out for a vegan option.
  • Spicy Kick: Add red pepper flakes or jalapeños for a bit of heat!

Storage and Make-Ahead Instructions

This salad is perfect for meal prepping! Here’s how to store it:

  • Refrigerate: Store in an airtight container in the fridge for up to 3-5 days.
  • Make Ahead: Prepare the salad a day in advance, but hold off on adding mozzarella and dressing until just before serving to maintain freshness.

Frequently Asked Questions

Got questions? Here are some answers to common queries about this pasta salad:

  • Can I use different pasta shapes? Absolutely! Any short pasta works well, and you can even try long pasta like fettuccine.
  • Is this salad gluten-free? Yes, just use gluten-free pasta for a delicious alternative!
  • How can I make this vegan? Omit cheese and use agave syrup or maple syrup instead of honey in the dressing.
  • Can I freeze this salad? It’s best enjoyed fresh, but you can freeze the pasta separately. Thaw and mix fresh ingredients before serving.
  • What can I serve with this salad? It pairs beautifully with grilled meats, fish, or as a standalone lunch option!
  • How spicy is this salad? It’s mild, but you can add spices to your liking for a kick!
  • What dressing alternatives can I use? Try lemon juice, yogurt-based dressings, or a simple vinaigrette for a different flavor profile.
  • Can I add nuts or seeds? Absolutely! Pine nuts, walnuts, or sunflower seeds add a nice crunch!

Nutritional Tips and Dietary Adaptations

For those mindful of their nutritional intake, here are some tips:

  • Protein Boost: Add grilled chicken or chickpeas for extra protein.
  • Fiber Rich: Incorporate more veggies like bell peppers or carrots for added fiber.
  • Low-Carb Option: Substitute pasta with zoodles (zucchini noodles) or spaghetti squash.
  • Healthy Fats: The olive oil and cheese provide healthy fats, but feel free to reduce the cheese for a lighter option.

Equipment Recommendations

Here’s what you’ll need to whip this salad up:

  • Large Pot: For boiling the pasta.
  • Colander: For draining the pasta.
  • Mixing Bowl: To combine all ingredients and dressings.
  • Whisk: For mixing the dressing smoothly.
  • Cutting Board and Knife: Essential for chopping veggies and herbs!

Serving Suggestions

Now that your salad is ready, here are some fun ways to serve it:

  • As a Main Dish: Enjoy it as a light lunch or dinner option.
  • At Gatherings: Perfect for potlucks or BBQs, served cold or at room temperature.
  • Meal Prep: Pack it in containers for easy grab-and-go lunches throughout the week.
  • With Grilled Proteins: Pair it with grilled chicken, steak, or fish for a complete meal.

Conclusion

There you have it! A comprehensive guide to making the most vibrant and delicious Sun Dried Tomato Pasta Salad you’ve ever tasted! Remember, cooking should be fun and creative—so feel free to experiment with flavors and ingredients. This recipe is your canvas, and you’re the artist. Now, grab your apron, and let’s get cooking! It’s time to enjoy the fresh, vibrant flavors that make healthy eating a joyous celebration!

Sun Dried Tomato Pasta Salad

Prep Time 15 minutes
Cook Time 10 minutes
Total Time 25 minutes
Servings 4 servings
Calories 450
A vibrant and flavorful pasta salad featuring sun-dried tomatoes, fresh vegetables, and a tangy balsamic dressing, perfect for a quick lunch or side dish.

Ingredients

Pasta and Vegetables

  • 16 oz short pasta (rigatoni, rotini, bow tie, etc.)
  • 3 oz baby spinach
  • 10 oz cherry tomatoes (halved)
  • 8.5 oz sun-dried tomatoes in oil with Italian herbs (oil drained)
  • 0.5 small red onion (small diced)
  • 0.5 cup shredded parmesan (shaved or grated)
  • 8 oz mozzarella pearls
  • 1/3 cup chopped basil (packed)
  • 1/3 cup extra virgin olive oil (or enough to make 2/3 cup with oil from tomatoes)
  • 1/3 cup oil drained from sun-dried tomatoes
  • 2 T balsamic vinegar (regular or white)
  • 2 cloves garlic (minced)
  • 1 tsp Italian seasoning
  • 0.5 tsp Pepper
  • 0.5 tsp Salt (more or less to taste)

Instructions 

  • Cook pasta al dente, drain, and toss with spinach to wilt. Cool slightly.
  • Mix pasta with basil, onion, sun-dried tomatoes, cherry tomatoes, parmesan, and mozzarella.
  • Whisk dressing ingredients and toss with pasta. Chill for 30 minutes, then toss again before serving.

Notes

Adjust salt and pepper to taste. For a creamier texture, add more mozzarella or a splash of cream.
Calories: 450kcal
Cost: $15
Course: Salad
Cuisine: Italian
Keyword: pasta

Why This Rainbow Salad Will Brighten Your Day

Are you ready to elevate your salad game? Our Vibrant Rainbow Salad with Creamy Tahini Dressing is not just a feast for the eyes but also a powerhouse of nutrition and flavor. Packed with an array of colorful vegetables and a rich, creamy dressing, this salad is your go-to for a quick and delicious meal. Whether you’re prepping for a busy week or looking to impress at your next gathering, this recipe is here to inspire your culinary creativity!

It’s time to dive into the deliciousness of this salad! In this article, we’ll explore everything from the health benefits of the ingredients to essential tips for perfecting your tahini dressing. Let’s get started and make healthy eating fun and exciting!

Why You’ll Love This Recipe

  • Quick and Easy: This rainbow salad comes together in less than 30 minutes, making it perfect for busy weekdays or last-minute gatherings.
  • Nutrient-Packed: Loaded with vitamins and minerals from fresh vegetables, this salad is a powerhouse of nutrition, supporting your overall health.
  • Flavor Explosion: The creamy tahini dressing adds a rich, nutty flavor that elevates the salad to a whole new level of deliciousness.
  • Customizable: Feel free to mix and match your favorite veggies and toppings to make this salad your own. The possibilities are endless!
  • Meal Prep Friendly: This salad stays fresh and flavorful, making it an excellent option for meal prep. Enjoy it for lunch or dinner throughout the week!

Ingredients Breakdown

Here’s what you’ll need to whip up this fantastic rainbow salad:

  • 1 cup red bell pepper: Thinly sliced for a sweet crunch.
  • 1 cup yellow bell pepper: Adds vibrant color and a slightly tangy flavor.
  • 1 cup carrot: Julienned for a satisfying crunch and natural sweetness.
  • 1 cup purple cabbage: Shredded for a pop of color and added fiber.
  • 1 cup cucumber: Sliced for refreshing juiciness.
  • 1 cup cherry tomatoes: Halved for a burst of sweetness.
  • ½ cup sweet corn: Drained for a hint of sweetness and texture.
  • ¼ cup red onion: Thinly sliced for a sharp flavor contrast.
  • 2 cups mixed salad greens: A mix of arugula, spinach, and romaine for variety.

And for the creamy tahini dressing:

  • ¼ cup tahini: The star ingredient that makes the dressing creamy and rich.
  • 2 tablespoons freshly squeezed lemon juice: Brightens the dressing and enhances flavors.
  • 1 tablespoon maple syrup or honey: Adds a touch of sweetness to balance the tahini.
  • 1 tablespoon olive oil: For a smooth texture and healthy fats.
  • 1 clove garlic: Minced for a kick of flavor.
  • 2-3 tablespoons water: To thin the dressing to your desired consistency.
  • ½ teaspoon salt: Enhances all the flavors.
  • ¼ teaspoon ground black pepper: For a touch of heat.
  • 2 tablespoons toasted sunflower seeds: Optional, for a crunchy topping.
  • 2 tablespoons chopped fresh herbs: Optional, such as parsley, cilantro, or mint for added freshness.

Pro Tips for the Perfect Rainbow Salad

Close-up view of a fresh salad featuring red and yellow bell peppers, carrots, cabbage, and tahini dressing.
  • Prep Ahead: Chop your veggies ahead of time and store them in the fridge. This makes assembling the salad a breeze.
  • Fresh is Best: Choose the freshest vegetables from your local farmers market to enhance flavor and nutrition.
  • Dress Wisely: To prevent a soggy salad, dress it just before serving or keep the dressing on the side for meal prep.
  • Experiment with Textures: Add different nuts or seeds for crunch, like toasted sunflower seeds or walnuts.
  • Adjust the Dressing: If the tahini dressing is too thick, gradually whisk in water until you reach your desired consistency.
  • Flavor Boost: Allow the salad to chill for 10-15 minutes before serving to let the flavors meld together.
  • Make it a Meal: Add protein like grilled chicken, chickpeas, or quinoa to turn this salad into a filling meal.
  • Go Seasonal: Use seasonal vegetables for the freshest taste and best nutrition.

Common Mistakes and Troubleshooting

Even the best chefs make mistakes! Here are some common pitfalls to avoid:

  • Soggy Salad: Avoid over-dressing your salad until just before serving. Keep the dressing on the side for meal prep.
  • Too Much Tahini: If the tahini flavor is overwhelming, add more lemon juice or a pinch of salt to balance it out.
  • Uneven Distribution: Make sure to toss the salad well to coat all the veggies with the dressing evenly.
  • Overly Thick Dressing: Gradually add water to the tahini dressing until it’s the perfect pourable consistency.

Delicious Variations

Want to change things up? Here are some fun variations to try:

  • Fruit-Infused: Add diced apples or juicy oranges for a sweet twist.
  • Spicy Kick: Toss in some sliced jalapeños or a pinch of red pepper flakes for some heat.
  • Grain Bowl: Serve over a bed of quinoa or brown rice for added fiber and protein.
  • Asian Twist: Use sesame oil instead of olive oil and add edamame for a unique flavor profile.

Storage and Make-Ahead Instructions

This salad is perfect for meal prepping! Here’s how to store it:

  • Refrigeration: Store the salad and dressing separately in airtight containers for up to 3 days. This keeps everything fresh!
  • Make Ahead: You can prep the veggies ahead of time and store them in the fridge. Just dress them when you’re ready to eat!

Comprehensive FAQ

  • Can I make this salad vegan? Absolutely! This recipe is already vegan-friendly!
  • What can I substitute for tahini? You can use sunflower seed butter or almond butter for a different flavor.
  • How can I add more protein? Consider adding chickpeas, grilled chicken, or roasted tofu.
  • Can I use frozen vegetables? Fresh is best, but if frozen is all you have, thaw and drain them before adding to the salad.
  • How do I keep the salad crisp? Store the dressing separately and only dress the salad right before serving.
  • What’s the best way to cut vegetables? Use a sharp knife and a cutting board for even slices. A julienne peeler can help with carrots.
  • Can I use different greens? Yes! Feel free to use any greens you enjoy such as kale or mixed baby greens.
  • How long does the dressing last? The tahini dressing can be stored in the fridge for up to a week in an airtight container.

Nutrition Tips and Dietary Adaptations

This rainbow salad is not only visually stunning but also nutritionally balanced. Here are some tips:

  • Gluten-Free: All ingredients used are gluten-free, making this salad suitable for those with gluten sensitivities.
  • Low-Carb: Skip the sweet corn if you’re looking to reduce carbs.
  • Nut-Free: If you have nut allergies, omit the tahini or substitute it with sunflower seed butter.
  • High-Protein: Add roasted chickpeas or a scoop of your favorite protein powder to the dressing for an extra protein boost.

Recommended Equipment

Make your salad-making process smoother with these handy tools:

  • Sharp Chef’s Knife: For easy and precise chopping of vegetables.
  • Cutting Board: A good cutting board is essential for prepping your ingredients.
  • Mixing Bowl: A large bowl helps you mix everything without making a mess.
  • Whisk: Perfect for combining your tahini dressing smoothly.
  • Storage Containers: Airtight containers for storing salad and dressing separately.

Serving Suggestions

Ready to serve? Here’s how to present your delicious salad:

  • Plate Beautifully: Layer your salad in a clear bowl or on a plate, showcasing the vibrant colors.
  • Garnish: Sprinkle additional fresh herbs or seeds on top for an extra pop of flavor.
  • Pair with Protein: Serve alongside grilled chicken, shrimp, or chickpeas for a complete meal.
  • Enjoy Cold: This salad is best served cold, so keep it chilled until you’re ready to enjoy!

Conclusion

Your journey to a healthier lifestyle starts with delicious meals like this Vibrant Rainbow Salad with Creamy Tahini Dressing. With its colorful ingredients, rich flavors, and nutritional benefits, this salad proves that healthy eating can be both fun and satisfying. So grab your chopping board, unleash your inner chef, and let the vibrant colors of this salad inspire you to create something amazing!

Colorful Rainbow Salad with Tahini Dressing

Prep Time 15 minutes
Total Time 15 minutes
Servings 4 servings
Calories 250
A vibrant and healthy salad packed with fresh vegetables and a creamy tahini dressing, perfect for a quick and nutritious meal.

Ingredients

Vegetables

  • 1 cup red bell pepper, thinly sliced
  • 1 cup yellow bell pepper, thinly sliced
  • 1 cup carrot, julienned
  • 1 cup purple cabbage, shredded
  • 1 cup cucumber, sliced
  • 1 cup cherry tomatoes, halved
  • 0.5 cup sweet corn kernels, drained
  • 0.25 cup red onion, thinly sliced
  • 2 cups mixed salad greens (arugula, spinach, romaine)
  • 0.25 cup tahini
  • 2 tablespoons freshly squeezed lemon juice
  • 1 tablespoon maple syrup or honey
  • 1 tablespoon olive oil
  • 1 clove garlic, minced
  • 2–3 tablespoons water to thin dressing (add gradually)
  • 0.5 teaspoon salt
  • 0.25 teaspoon ground black pepper
  • 2 tablespoons toasted sunflower seeds (optional)
  • 2 tablespoons chopped fresh herbs (parsley, cilantro, or mint) (optional)

Instructions 

  • Slice, julienne, shred, and halve all vegetables; transfer to a large bowl.
  • Whisk tahini, lemon juice, maple syrup or honey, olive oil, garlic, salt, and pepper; add water gradually until dressing is pourable.
  • Pour dressing over vegetables and toss gently to coat.
  • Sprinkle sunflower seeds and herbs on top, if desired. Serve immediately or chill for 10-15 minutes.

Notes

For extra crunch, add more sunflower seeds or herbs.
Calories: 250kcal
Cost: $15
Course: Salad
Cuisine: international
Keyword: Vegetables

Revitalize Your Plate with a Crunchy Asian Rainbow Salad!

Ready to dive into a bowl of vibrant vitality? This Crunchy Asian Rainbow Salad is the perfect fusion of color, flavor, and nutrition, all wrapped up in a zesty ginger dressing! Not only is it immune-boosting, but it’s also vegan and incredibly quick to whip up, making it ideal for busy weeknights or meal prep. In just a few minutes, you can enjoy a satisfying dish that’s a treat for your taste buds!

Why You’ll Love This Recipe

This salad is more than just a pretty plate; it’s a powerhouse of flavor and health benefits. Here are five reasons you’ll want to make this dish a staple:

  • Colorful Creation: Packed with a rainbow of vegetables, this salad is as visually appealing as it is nutritious. Each ingredient brings its unique vitamins and minerals to the table!
  • Quick and Easy: With minimal prep time, this salad can be on your table in just 20 minutes. Perfect for those busy evenings!
  • Nutrient Dense: Featuring ingredients like edamame and cabbage, this salad is loaded with protein, fiber, and antioxidants to support your immune system.
  • Versatile Dish: Whether you’re serving it as a side dish or adding protein for a full meal, this salad can easily adapt to your dietary preferences.
  • Meal Prep Friendly: Make a big batch and store it in the fridge for quick, healthy lunches throughout the week!

Ingredients Breakdown

Here’s what you’ll need to create this vibrant salad:

For the Salad:

  • 2 cups red cabbage: Finely shredded for a crunchy texture and rich in anthocyanins.
  • 2 cups Napa or green cabbage: Adds a gentle crunch and mild flavor, making it a perfect base.
  • 1 large carrot: Julienned or grated, this nutrient powerhouse adds sweetness and color.
  • 1 red bell pepper: Thinly sliced for a sweet, crunchy bite.
  • 1 yellow bell pepper: Provides a burst of color and flavor, complementing the other veggies.
  • 1 cup shelled edamame: Steamed and cooled, these legumes offer protein and fiber.
  • 1 cup sugar snap peas: Thinly sliced for an extra crunch and refreshing taste.
  • 3 green onions: Thinly sliced for a mild onion flavor.
  • ½ cup fresh cilantro leaves: Chopped for a fresh, herbaceous kick.
  • ¼ cup sliced almonds: Toasted for a nutty crunch.
  • 2 tbsp sesame seeds: Toasted to enhance the flavor and texture.

For the Ginger Dressing:

  • 3 tbsp rice vinegar: Adds a tangy flavor that balances the sweetness of the salad.
  • 2 tbsp low-sodium tamari or soy sauce: Provides a salty depth without overwhelming the dish.
  • 1 tbsp maple syrup or honey: Adds a touch of sweetness to the dressing.
  • 1 tbsp toasted sesame oil: Infuses a rich, nutty flavor that’s characteristic of Asian cuisine.
  • 1 tbsp fresh ginger: Grated for a zingy kick that elevates the dressing.
  • 1 clove garlic: Minced for added depth and flavor.
  • 1 tsp fresh lime juice: Brightens up the dressing with a zesty finish.
  • ¼ tsp red pepper flakes (optional): For those who like a little heat!

Step-by-Step Instructions

Side view of a fresh and crunchy Asian salad filled with red cabbage, carrots, and bell peppers.

Follow these simple steps for a deliciously vibrant salad:

  1. Make the Dressing: In a small bowl, whisk together all the dressing ingredients until well combined. Set aside.
  2. Toast the Nuts and Seeds: In a dry skillet over medium-low heat, toast the almonds and sesame seeds until fragrant (about 3-5 minutes). Allow to cool.
  3. Chop the Vegetables: Prepare all vegetables as listed above, placing them in a large mixing bowl.
  4. Combine Ingredients: Add the edamame, cilantro, and half of the toasted nuts and seeds to the bowl. Pour the dressing over everything and toss gently to coat.
  5. Serve: Transfer the salad to plates or a serving bowl. Top with the remaining nuts and seeds for a beautiful finish!

Common Mistakes to Avoid

Here are some tips to ensure your salad turns out perfectly:

  • Overdressing: Start with less dressing; you can always add more if needed. Too much can make your salad soggy!
  • Using stale nuts: Always toast fresh nuts to enhance their flavor. Stale nuts can ruin the dish.
  • Not chopping uniformly: Aim for even-sized vegetable pieces for consistent texture and taste.
  • Skipping the cooling step: Make sure edamame is cooled before adding to avoid wilting the greens.

Variations to Try

Feel free to mix and match ingredients to suit your taste or dietary needs:

  • Add Protein: Toss in grilled chicken, shrimp, or tofu for a heartier meal.
  • Grains Galore: Incorporate cooked quinoa or brown rice for added fiber and texture.
  • Fruity Twist: Add diced mango or pineapple for a sweet, tropical flair.
  • Spice it Up: Experiment with different spices in the dressing, such as sriracha or sesame chili oil.

Storage and Make-Ahead Instructions

This salad is fantastic for meal prep! Here’s how to store it:

  • Refrigerate: Store in an airtight container for up to 3 days. Keep the dressing separate until ready to serve to maintain freshness.
  • Make-Ahead: Prep the veggies and dressing in advance, but combine them only when ready to eat for the best texture.

Frequently Asked Questions

Got questions? We’ve got answers!

  • Can I use frozen edamame? Absolutely! Just make sure to thaw and cool it before adding.
  • What can I substitute for rice vinegar? Apple cider vinegar or white vinegar works well in a pinch.
  • Is this salad gluten-free? Yes, just ensure your soy sauce is gluten-free or use tamari.
  • Can I add other vegetables? Definitely! Feel free to incorporate whatever fresh veggies you have on hand.
  • How do I make this salad spicier? Add more red pepper flakes or a splash of hot sauce to the dressing.
  • What’s the best way to chop cabbage? Use a sharp knife to slice it thinly or use a food processor for speed.
  • Can I make this salad vegan? This recipe is already vegan-friendly as is, but always check your dressing ingredients!
  • How long does this salad last? For best quality, consume within 3 days when stored properly in the fridge.

Nutritional Tips and Dietary Adaptations

Want to make this salad even healthier? Here are some tips:

  • Boost the Fiber: Add beans or legumes like chickpeas for extra fiber and protein.
  • Healthy Fats: Include avocado slices for creamy texture and heart-healthy fats.
  • Low-Carb Option: Skip the edamame and use spiralized vegetables like zucchini instead.
  • Fresh Herbs: Experiment with mint or basil alongside cilantro for a different flavor profile.

Equipment Recommendations

Here’s what you’ll need to make this salad:

  • Sharp Chef’s Knife: Essential for slicing and dicing vegetables with precision.
  • Cutting Board: A sturdy surface is crucial for safe and efficient chopping.
  • Mixing Bowl: A large bowl is necessary for combining all ingredients.
  • Whisk: For effortlessly mixing the dressing ingredients together.
  • Skillet: A non-stick skillet works best for toasting nuts and seeds.

Serving Suggestions

Pair this salad with:

  • Grilled Proteins: Chicken, shrimp, or tofu make excellent companions.
  • Rice Dishes: Serve alongside a bowl of brown rice or quinoa for a complete meal.
  • Wraps: Use this salad as a filling for lettuce wraps or whole-grain tortillas.
  • Soups: A light soup can complement this salad perfectly for a balanced meal.

Conclusion

There you have it! A Crunchy Asian Rainbow Salad that’s not only a feast for the eyes but also a celebration for your taste buds. With its vibrant colors, zesty dressing, and endless variations, this salad is your new go-to for healthy eating. Embrace the joy of cooking and make this delightful dish today—your body will thank you!

Crunchy Asian Rainbow Chopped Salad with Ginger Dressing – Immune-Boosting & Vegan

Prep Time 15 minutes
Cook Time 10 minutes
Total Time 25 minutes
Servings 4 servings
Calories 250
A vibrant, colorful salad packed with fresh vegetables and a zesty ginger dressing, perfect for a healthy, immune-boosting meal.

Ingredients

For the Salad:

  • 2 cups red cabbage, finely shredded
  • 2 cups Napa or green cabbage, finely shredded
  • 1 large carrot, julienned or grated
  • 1 red bell pepper, thinly sliced
  • 1 yellow bell pepper, thinly sliced
  • 1 cup shelled edamame, steamed & cooled
  • 1 cup sugar snap peas, thinly sliced
  • 3 green green onions, thinly sliced
  • ½ cup fresh cilantro leaves, chopped
  • ¼ cup sliced almonds, toasted
  • 2 tbsp sesame seeds, toasted

For the Ginger Dressing:

  • 3 tbsp rice vinegar
  • 2 tbsp low-sodium tamari or soy sauce
  • 1 tbsp maple syrup or honey
  • 1 tbsp toasted sesame oil
  • 1 tbsp fresh ginger, grated
  • 1 clove garlic, minced
  • 1 tsp fresh lime juice
  • ¼ tsp red pepper flakes (optional)

Instructions 

  • Whisk all dressing ingredients in a small bowl and set aside.
  • Toast almonds and sesame seeds in a dry skillet until fragrant (3-5 mins). Cool.
  • Prepare vegetables as listed and place in a large bowl.
  • Add edamame, cilantro, and half the nuts/seeds. Pour dressing over and toss gently.
  • Transfer to plates or a bowl, top with remaining nuts and seeds, and serve.

Notes

For extra crunch, add chopped peanuts or cashews.
Calories: 250kcal
Cost: $15
Course: Salad
Cuisine: Asian
Keyword: Healthy, Vegan, Vegetables

Revitalize Your Lunch Routine with a Zesty Avocado Chicken Salad!

Are you ready to elevate your lunch game? This Avocado Chicken Salad is not just a meal; it’s a celebration of flavors and textures that will make your taste buds dance! Packed with protein, fresh veggies, and a burst of zesty goodness, this dish is perfect for anyone looking to eat healthy without sacrificing taste. Let’s dive into why you’ll love this recipe, how to make it, and the many ways you can enjoy this delightful dish!

Why You’ll Love This Recipe

This Avocado Chicken Salad is more than just a healthy option. Here are five fantastic reasons to whip this up for your next meal:

  • Protein-Packed Goodness: With 2 cups of cooked chicken breast, you’re fueling your body with high-quality protein, essential for muscle repair and growth.
  • Healthy Fats: The creamy avocados not only add a rich texture but also provide heart-healthy monounsaturated fats that can help lower bad cholesterol.
  • Fresh and Colorful: Featuring vibrant cherry tomatoes and crisp cucumber, this salad is as visually appealing as it is delicious, making healthy eating feel exciting!
  • Quick and Easy: Ready in under 30 minutes, this recipe is perfect for busy weeknights or quick lunch prep.
  • Versatile and Customizable: Easily adjust the ingredients to suit your taste or dietary needs, making it a go-to recipe for everyone!

What You’ll Need

To create this scrumptious dish, gather the following ingredients:

  • 2 cups cooked chicken breast, diced
  • 2 ripe avocados, diced
  • 1 cup cherry tomatoes, halved
  • 1 cucumber, diced
  • 1/4 cup fresh cilantro, chopped
  • 1 tsp garlic powder
  • 1/2 tsp salt
  • 1/2 tsp black pepper
  • 2 tbsp olive oil
  • 1 lime, juiced
  • 1/2 tsp cumin

Ingredient Breakdown and Substitutions

Here’s a closer look at each ingredient and some substitutions you can make:

  • Chicken breast: You can use rotisserie chicken for added convenience or swap it out for canned chicken if you’re in a pinch.
  • Avocados: Make sure they’re ripe for the best creamy texture. If you’re out of avocados, try using Greek yogurt for a tangy twist.
  • Cherry tomatoes: Grape tomatoes or even diced regular tomatoes work well here. You can also skip them if you prefer your salad without.
  • Cilantro: If you’re not a fan, consider using parsley or basil for a different flavor profile.
  • Olive oil: Avocado oil or a light vinaigrette can also be delicious alternatives.

Step-by-Step Guide to Making Your Avocado Chicken Salad

Side profile of a fresh Avocado Chicken Salad with diced ingredients.

Are you ready to whip up your salad? Follow these simple steps:

  1. Gather your ingredients: Make sure you have everything prepped before you start.
  2. Dice the chicken: Chop your cooked chicken breast into bite-sized pieces.
  3. Prep the veggies: Dice the avocados and cucumber, and halve the cherry tomatoes for that colorful crunch.
  4. Chop the cilantro: A rough chop will do; it adds a fresh burst to your salad.
  5. Mix the salad: In a large bowl, combine all your diced ingredients along with the garlic powder, salt, and black pepper. Toss gently.
  6. Make the dressing: In a small bowl, whisk together olive oil, lime juice, and cumin.
  7. Dress the salad: Drizzle the dressing over your salad mix and toss gently to coat.
  8. Serve it up: Grab your favorite bowls, scoop in the salad, and enjoy!

Pro Tips for the Perfect Avocado Chicken Salad

Here are some expert insights to ensure your salad turns out amazing every time:

  • Choose ripe avocados: For the best flavor and texture, select avocados that yield slightly to gentle pressure.
  • Mix ingredients gently: Be careful when mixing to keep the avocado from mashing too much.
  • Adjust seasoning to taste: Always taste and tweak the salt, pepper, and lime juice to fit your palate.
  • Chill before serving: Letting your salad sit in the fridge for about 30 minutes enhances the flavors.
  • Make it ahead: Prepare the salad in advance and store it in an airtight container for up to two days.

Common Mistakes and Troubleshooting

Even simple recipes like this one can have their hiccups. Here’s how to avoid them:

  • Overripe avocados: If your avocados are too soft, they can turn mushy. Aim for a ripe avocado that’s not overly soft.
  • Too much dressing: Start with less dressing and add more to taste. You want the salad to be coated, not drowning.
  • Chicken too dry: Ensure your chicken is cooked properly but not overcooked. Juicy chicken makes all the difference!
  • Chopping too small: Keep your veggies and chicken in bite-sized pieces, but not too small, so they maintain texture.

Variations to Try

Feeling adventurous? Here are some fun variations to keep things fresh:

  • Spicy Kick: Add diced jalapeños or a dash of hot sauce for a spicy twist.
  • Fruity Flair: Mix in diced apples or grapes for a sweet crunch that complements the savory chicken.
  • Mediterranean Style: Toss in feta cheese, olives, and a sprinkle of oregano for a Mediterranean flair.
  • Asian-Inspired: Use sesame oil instead of olive oil, and add chopped peanuts and shredded carrots.

Storage and Make-Ahead Instructions

This salad is perfect for meal prep! Here’s how to store it:

  • Refrigerate: Store in an airtight container in the fridge for up to 2 days. The avocado will brown, but the flavor will still be delicious!
  • Make-ahead tips: Prep the chicken and chop the veggies ahead of time, but mix the salad just before serving to keep it fresh.

Frequently Asked Questions

Here are answers to some common questions about this Avocado Chicken Salad:

  • Can I use canned chicken? Yes! Canned chicken is a great shortcut for busy days.
  • Can I double the recipe? Absolutely! This salad is perfect for meal prep or feeding a crowd.
  • Can I freeze this salad? It’s not recommended due to the avocados; they won’t thaw well. However, you can freeze the chicken separately!
  • What can I serve with this salad? It pairs beautifully with whole-grain crackers, pita bread, or a fresh green salad.
  • How can I make this salad low-carb? Skip the cucumbers and focus on the chicken and avocados for a lower-carb option.
  • Is this salad gluten-free? Yes! All the ingredients are naturally gluten-free.
  • What if I don’t like cilantro? Substitute parsley or omit it entirely!
  • Can I add other veggies? Definitely! Bell peppers, corn, or shredded carrots add great crunch and flavor.

Nutritional Tips and Dietary Adaptations

This Avocado Chicken Salad is not only delicious but also nutritious. Here are some dietary adaptations:

  • Low-Calorie Option: Use skinless chicken and reduce the amount of olive oil.
  • Paleo-Friendly: All ingredients fit a paleo diet; just ensure your chicken is free of additives.
  • Vegan Variation: Substitute chicken with chickpeas or tofu and use a plant-based yogurt instead of dressing.
  • Low-FODMAP Version: Skip the garlic and use a garlic-infused oil for flavor without the FODMAPs.

Essential Kitchen Equipment

To make this recipe, you’ll need:

  • Cutting board: A sturdy surface for chopping your ingredients.
  • Sharp knife: For easy dicing of chicken and veggies.
  • Mixing bowl: A large bowl is essential for tossing everything together.
  • Whisk: To mix the dressing smoothly.

Serving Suggestions

Enjoy your Avocado Chicken Salad in various fun ways:

  • As a wrap: Serve it in a whole wheat or lettuce wrap for a portable meal.
  • On greens: Top a bed of mixed greens for a hearty salad.
  • With chips: Serve with whole-grain tortilla chips for a crunchy side.
  • Stuffed in avocados: Serve the salad inside halved avocados for an extra avocado kick!

Final Thoughts

This Zesty Avocado Chicken Salad is your ticket to a flavorful and nutritious meal that’s quick to prepare and endlessly customizable. Whether you’re meal prepping for the week or whipping up a quick lunch, this salad promises to be a hit. So, what are you waiting for? Gather those ingredients and let the deliciousness unfold!

Avocado Chicken Salad

Prep Time 15 minutes
Cook Time 10 minutes
Total Time 25 minutes
Servings 4 servings
Calories 450
A fresh and flavorful salad combining tender chicken, creamy avocados, and vibrant vegetables, perfect for a quick and healthy meal.

Ingredients

Protein

  • 2 cups cooked chicken breast, diced

Fruits & Vegetables

  • 2 ripe avocados avocados, diced
  • 1 cup cherry tomatoes, halved
  • 1 cucumber cucumber, diced

Herbs & Spices

  • 1/4 cup fresh cilantro, chopped
  • 1 tsp garlic powder
  • 1/2 tsp salt
  • 1/2 tsp black pepper
  • 2 tbsp olive oil
  • 1 lime lime, juiced
  • 1/2 tsp cumin

Instructions 

  • Dice the cooked chicken, avocados, cucumber, and halve the cherry tomatoes.
  • Combine chicken, avocados, tomatoes, cucumber, and cilantro in a large bowl.
  • Mix in garlic powder, salt, and black pepper, then toss gently.
  • Whisk together olive oil, lime juice, and cumin to make the dressing.
  • Drizzle dressing over the salad and toss to coat. Serve immediately.

Notes

For extra flavor, add a pinch of chili flakes or a splash of hot sauce.
Calories: 450kcal
Cost: $15
Course: Salad
Cuisine: American
Keyword: avocado, Chicken

Why You’ll Crave This Zesty Herbed Lemon Orzo Salad!

Welcome to the world of flavors, freshness, and fun! If you’re on the hunt for a dish that’s not only nutritious but also bursting with zesty goodness, look no further. Our Zesty Herbed Lemon Orzo Salad is here to tantalize your taste buds and make healthy eating a delightful experience. This salad is not just a side dish; it’s a vibrant centerpiece perfect for any occasion—from casual lunches to festive gatherings. Ready to dive in? Let’s explore why this salad is a must-have in your recipe repertoire!

5 Reasons You’ll Adore This Salad

  • Fresh and Flavorful: The combination of zesty lemon, crisp veggies, and fragrant herbs creates a symphony of flavors that dance on your palate.
  • Super Easy to Make: With just a handful of ingredients and simple steps, you can whip up this salad in no time—perfect for busy weeknights!
  • Perfect for All Occasions: Whether it’s a summer BBQ, a picnic in the park, or a cozy dinner at home, this salad fits right in.
  • Nutritious and Wholesome: Packed with fresh vegetables and herbs, this dish is a powerhouse of vitamins, making it a healthy choice you can feel good about.
  • Make-Ahead Friendly: This salad tastes even better after it has a chance to chill, making it a great option for meal prep or potlucks.

Ingredient Breakdown: What You’ll Need

Let’s get into the nitty-gritty of what makes this salad so special! Here’s what you’ll need to create your own flavor fiesta:

  • 1 lb orzo pasta: A delightful base that adds texture. Substitute with quinoa or gluten-free pasta if desired.
  • 1 cup thinly sliced green onions: Adds a mild onion flavor and a lovely crunch.
  • 1/3 cup chopped fresh dill: The star herb that brings a refreshing taste. Don’t have dill? Use parsley or basil as exciting alternatives.
  • 1 cup chopped fresh parsley: For an extra pop of color and flavor.
  • 1 large cucumber, diced: Refreshing and hydrating—perfect for summer!
  • 1 small red onion, diced: Adds a slightly sweet and tangy crunch.
  • Kosher salt and pepper: Essential for seasoning and enhancing flavors.
  • 2 large lemons, zested and juiced: The zesty base for our dressing—fresh is best!
  • 1/3 cup olive oil: A healthy fat that brings all the flavors together.
  • 1 tablespoon honey: A touch of sweetness to balance the acidity of the lemons.
  • 1 teaspoon kosher salt: For flavor enhancement.
  • 1/2 teaspoon ground black pepper: Adds a subtle kick.

How to Make This Refreshing Salad

Side view of a vibrant Herbed Lemon Orzo Salad featuring orzo pasta and diced vegetables.

Now that you have your ingredients ready, let’s dive into the steps to create this delightful dish:

  1. Start by boiling water and cooking the orzo according to package directions. Drain and set aside.
  2. While the orzo is cooking, chop up the veggies and herbs into small, uniform pieces to ensure every bite is packed with flavor.
  3. In a separate bowl, mix up the lemon dressing by whisking together the lemon juice, zest, olive oil, honey, salt, and pepper. You can also shake everything up in a mason jar for a quick and easy option!
  4. Toss the cooked orzo with the diced veggies, herbs, and lemon dressing. Season to taste with additional salt and pepper.
  5. Serve this salad at room temperature or chilled. If it’s been in the fridge, let it sit at room temperature for 5-10 minutes before serving for the best flavor.

Expert Tips for a Flawless Salad

Want to take your orzo salad to the next level? Here are some pro tips to ensure success:

  • Cook the orzo al dente: This ensures it maintains a nice bite rather than becoming mushy.
  • Chill before serving: Allowing the salad to chill in the fridge enhances the flavors.
  • Adjust the acidity: If you prefer a tangier flavor, add more lemon juice. For sweetness, increase the honey.
  • Customizable add-ins: Toss in grilled chicken, chickpeas, or feta cheese for added protein and flavor.
  • Storage tips: Store in an airtight container in the fridge for up to 3 days.
  • Mix well: Ensure all ingredients are evenly coated with dressing for maximum flavor.
  • Experiment with herbs: Don’t hesitate to mix and match herbs based on your preferences.
  • Use high-quality olive oil: A good olive oil can significantly elevate the taste of your dressing.

Common Mistakes to Avoid

Even the best chefs can make mistakes. Here’s how to steer clear of common pitfalls:

  • Overcooking the orzo: Keep an eye on the cooking time to avoid mushiness.
  • Not seasoning enough: Taste and adjust the seasoning as you go for the best flavor.
  • Using stale ingredients: Fresh herbs and vegetables make a world of difference in taste.
  • Skipping the dressing: The dressing is what ties everything together—don’t skip it!

Delicious Variations to Try

Looking to mix things up? Here are some fun variations you can try:

  • Mediterranean Twist: Add kalamata olives and cherry tomatoes for a delicious Mediterranean flair.
  • Protein-Packed: Incorporate grilled chicken or shrimp for a heartier meal.
  • Spicy Kick: Toss in some diced jalapeños or red pepper flakes for heat!
  • Vegan Delight: Omit honey and add avocado for creaminess.

Storage and Make-Ahead Instructions

This salad is perfect for meal prep! Here’s how to store it:

  • Fridge: Store in an airtight container for up to 3 days.
  • Make-Ahead: Prepare the salad and dressing separately and combine just before serving to keep everything fresh.

Frequently Asked Questions

Got questions? I’ve got answers! Here are some common queries about the Herbed Lemon Orzo Salad:

  • Can I use a different type of pasta? Absolutely! Feel free to substitute with your favorite short pasta.
  • How long does this salad last in the fridge? It stays fresh for up to 3 days when stored properly.
  • Can I freeze this salad? It’s best enjoyed fresh, but you can freeze the dressing separately.
  • What can I serve this salad with? It pairs beautifully with grilled chicken, fish, or as a stand-alone dish.
  • Is this salad gluten-free? Yes, just use gluten-free pasta as a substitute!
  • Can I add cheese? Definitely! Feta or goat cheese adds a delightful creaminess.
  • What’s the best way to reheat this salad? It’s best served cold or at room temperature, so no reheating is necessary!
  • Can I make this salad vegan? Yes, simply omit the honey and use maple syrup or agave instead.

Nutritional Benefits of Your Orzo Salad

This salad isn’t just delicious; it’s also packed with nutrition:

  • High in Vitamins: Fresh veggies like cucumbers and parsley provide essential vitamins and minerals.
  • Whole Grains: Orzo is made from whole grains, providing fiber and energy.
  • Healthy Fats: Olive oil adds heart-healthy fats that support overall health.

Essential Equipment for Success

Before you get started, here’s a quick list of kitchen essentials that will make your cooking experience smoother:

  • Large pot: For boiling the orzo.
  • Cutting board and sharp knife: For chopping veggies and herbs.
  • Mixing bowl: For combining salad ingredients and dressing.
  • Whisk or mason jar: For mixing the dressing thoroughly.

Serving Suggestions: Elevate Your Meal!

Now that you’ve mastered the salad, let’s talk about how to serve it:

  • As a Side Dish: Pair it with grilled meats or roasted vegetables for a balanced meal.
  • On a Buffet: This salad is a hit at parties—set it out as a colorful side!
  • As a Main Course: Add protein like chicken, chickpeas, or tofu for a filling meal.

That’s a wrap on our Herbed Lemon Orzo Salad! This dish is not just about nourishment; it’s about celebrating flavors, colors, and creativity in the kitchen. So grab your ingredients, unleash your culinary spirit, and enjoy every vibrant bite. Happy cooking!

Herbed Lemon Orzo Salad

Prep Time 10 minutes
Cook Time 10 minutes
Total Time 20 minutes
Servings 4 servings
Calories 350
A fresh and vibrant salad combining tender orzo with herbs, vegetables, and a zesty lemon dressing, perfect for a light meal or side dish.

Ingredients

pasta

  • 1 lb orzo pasta
  • 1 cup thinly sliced green onions
  • 1/3 cup chopped fresh dill
  • 1 cup chopped fresh parsley
  • 1 large cucumber, diced
  • 1 small red onion, diced
  • to taste Kosher salt and pepper
  • 2 large lemons, zested and juiced
  • 1/3 cup olive oil
  • 1 tablespoon honey
  • 1 teaspoon kosher salt
  • 1/2 teaspoon ground black pepper

Instructions 

  • Cook the orzo in boiling water until tender, then drain and cool.
  • Chop vegetables and herbs into small, uniform pieces.
  • Whisk lemon juice, zest, olive oil, honey, salt, and pepper to make the dressing.
  • Combine cooked orzo, vegetables, herbs, and dressing; toss well.
  • Serve at room temperature or chilled, letting it sit for 5-10 minutes if refrigerated.

Notes

This salad is best enjoyed fresh but can be stored in the fridge for up to 2 days.
Calories: 350kcal
Cost: $15
Course: Salad
Cuisine: Mediterranean
Keyword: Herbs

Welcome to the Zesty World of Creamy Avocado Chicken Salad!

Are you ready to elevate your lunch game with a dish that’s not only delicious but also bursting with nutrition? Our Creamy Avocado Chicken Salad is your new go-to recipe! This mayo-free delight combines tender chicken and creamy avocados, all drizzled with zesty lime juice for a refreshing twist. Whether you’re meal prepping for the week or whipping up a quick lunch, this salad is here to make healthy eating exciting and easy.

In this comprehensive guide, we’ll dive deep into everything you need to know about making this avocado chicken salad. From ingredient breakdowns to expert tips, we’ve got you covered to ensure your dish is a showstopper!

Why You’ll Love This Recipe

This isn’t just another salad recipe; it’s a flavor-packed adventure! Here are a few reasons why you’ll fall head over heels for this creamy avocado chicken salad:

  • Mayo-free goodness: Enjoy a lighter option without sacrificing creaminess, thanks to ripe avocados and Greek yogurt.
  • Packed with protein: With grilled chicken breast as the star, this salad delivers a protein punch to fuel your day.
  • Versatile ingredients: Customize to your heart’s content! Swap in your favorite veggies or proteins for a unique twist.
  • Quick and easy: This dish comes together in under 30 minutes, perfect for busy weekdays or last-minute gatherings.
  • Meal prep-friendly: Make a big batch and store it for quick lunches all week long!

Ingredient Breakdown

Let’s take a closer look at what makes this salad shine!

  • Cooked Chicken Breast: Use grilled, poached, or baked chicken. For convenience, rotisserie chicken works beautifully too!
  • Ripe Avocados: The star ingredient! Look for avocados that yield slightly to pressure for perfect creaminess.
  • Greek Yogurt: A healthy alternative to mayo, adding creaminess and tang. For a dairy-free option, swap with a plant-based yogurt.
  • Lime Juice: Freshly squeezed for the best flavor! This adds a zesty kick that brightens the dish.
  • Garlic: Freshly minced garlic gives a robust flavor that pairs perfectly with the other ingredients.
  • Salt and Pepper: Essential seasonings to enhance the overall taste.
  • Celery: Adds a delightful crunch and freshness.
  • Red Onion: For a mild onion flavor and a pop of color!
  • Fresh Herbs: Cilantro or parsley can elevate the flavor profile and add freshness.

Pro Tips for the Perfect Avocado Chicken Salad

Juicy avocado chicken salad displayed in a bowl, highlighting fresh ingredients and a creamy texture.

Want to ensure your salad is next-level? Check out these expert tips:

  • Choose ripe avocados: Opt for avocados that are slightly soft to the touch but not mushy for the best texture.
  • Shred your chicken: For a more cohesive mix, shred the chicken instead of chopping it. It integrates better with the salad.
  • Prep add-ins ahead: If you’re adding extras like nuts or fruits, prep them in advance for a quick assembly.
  • Chill before serving: Let the salad sit in the fridge for 30 minutes to allow flavors to meld beautifully.
  • Garnish creatively: Top with sliced avocado or a sprinkle of sesame seeds for an extra touch of flair.
  • Balance flavors: Don’t hesitate to adjust the lime juice and salt to suit your taste preferences.
  • Experiment with spices: A dash of cumin or smoked paprika can add a unique twist to the flavor profile.
  • Use a food processor: For a super creamy texture, pulse the avocado and Greek yogurt in a food processor before mixing.

Avoiding Common Mistakes

Even the best chefs make mistakes! Here are some common pitfalls to avoid:

  • Overripe avocados: Avoid using avocados that are too mushy as they can make the salad watery.
  • Not seasoning enough: Don’t skip on salt and pepper; they enhance and bring out the flavors.
  • Forgetting the acidity: Lime juice isn’t just for flavor; it prevents the avocado from browning too quickly.
  • Making too much: If you’re unsure about quantities, start small; it’s easier to scale up than down!

Creative Variations

Feeling adventurous? Here are some fun variations to keep things exciting:

  • Mexican Twist: Add chopped jalapeños, corn, and black beans for a fiesta in a bowl!
  • Classic Chicken Salad: Mix in diced apples and walnuts for a sweet and crunchy contrast.
  • Asian-Inspired: Incorporate sesame oil, soy sauce, and chopped green onion for an Asian flair.
  • Fruit Fusion: Toss in diced mango or pineapple for a sweet, tropical vibe!

Storage and Make-Ahead Instructions

Want to prepare this dish in advance? Here’s how to store it:

  • Refrigerate: Store in an airtight container for up to 3 days. The flavors will continue to develop!
  • Freezing: Not recommended, as the texture of avocados can change once thawed.
  • Make-ahead tip: Chop all ingredients and mix the dressing separately. Combine right before serving for the best texture.

Frequently Asked Questions

Got questions? We’ve got answers!

  • Can I use canned chicken? Absolutely! Canned chicken works in a pinch; just drain and mix.
  • How do I double the recipe? Simply double each ingredient for a larger batch; adjustments aren’t necessary.
  • Can I freeze the salad? It’s not recommended due to the texture change; it’s best enjoyed fresh.
  • What can I serve with this salad? Serve alongside whole-grain bread, on a bed of greens, or in a wrap!
  • How do I make it dairy-free? Substitute Greek yogurt with a dairy-free yogurt or avocado cream.
  • Can I add nuts? Yes! Chopped nuts like almonds or walnuts add crunch and flavor.
  • What if I don’t have lime juice? Lemon juice is a great alternative that will still give you that zesty kick!
  • How spicy can I make it? Adjust spice levels with diced jalapeños or hot sauce to your liking.

Nutrition Tips and Dietary Adaptations

Looking to tailor this recipe to your nutritional needs? Here are some insights:

  • Low-carb option: Skip the yogurt and substitute with avocado for a keto-friendly version.
  • High-protein need: Add chickpeas or extra chicken for a protein boost!
  • Vegan adaptation: Replace chicken with chickpeas or tofu and use a plant-based yogurt.
  • Gluten-free: Naturally gluten-free; enjoy it without worry!

Equipment Recommendations

Here’s what you’ll need to whip up this salad:

  • Cutting board and knife: For chopping ingredients quickly and efficiently.
  • Mixing bowl: A large bowl to combine all ingredients effortlessly.
  • Serving spoon: To dish out your delicious creation!
  • Food processor (optional): For a smoother avocado mixture if desired.

Serving Suggestions

Ready to impress? Here’s how to serve this salad:

  • On greens: Serve over a bed of mixed greens or spinach for added nutrients.
  • In a wrap: Use a whole grain or lettuce wrap for a handheld treat.
  • With crackers: Pair with whole-grain crackers for a crunchy side.
  • As a dip: Serve with veggie sticks for a healthy snack option!

Conclusion

There you have it—your complete guide to making a Creamy Avocado Chicken Salad that’s not only easy but also packed with flavor and nutrition! With its endless variations and quick prep time, this recipe will quickly become a staple in your kitchen. Whether you’re enjoying it for lunch, dinner, or a snack, remember that eating healthy can be fun, exciting, and oh-so-delicious. Now get cooking, and let those avocados shine!

Avocado Chicken Salad That's Creamy, Healthy, and Mayo-Free

Prep Time 10 minutes
Cook Time 15 minutes
Total Time 25 minutes
Servings 4 servings
Calories 350
This delicious and healthy chicken salad combines creamy avocados with fresh herbs and crunchy vegetables, all without mayonnaise.

Ingredients

Cooked Chicken

  • 2 cups Cooked Chicken Breast (grilled, poached, or baked)

Avocado

  • 2 medium Ripe Avocado

Dairy-Free Option

  • Greek Yogurt (skip for dairy-free)

Lime Juice

  • 2 tablespoons Lime Juice

Garlic

  • 2 cloves Garlic (minced)

Salt

  • 1 teaspoon Salt

Pepper

  • 0.5 teaspoon Pepper

Celery

  • 1 stalk Celery (finely chopped)

Red Onion

  • 0.25 cup Red Onion (finely chopped)

Fresh Herbs

  • 0.25 cup Fresh Herbs (like cilantro or parsley)

Instructions 

  • Chop the cooked chicken, avocado, celery, red onion, and herbs.
  • In a bowl, mash the avocados and mix with lime juice, garlic, salt, and pepper.
  • Add the chopped chicken and vegetables to the avocado mixture and stir until combined.
  • Adjust seasoning as needed and serve immediately.

Notes

For a dairy-free version, skip the Greek yogurt.
Calories: 350kcal
Cost: $15
Course: Salad
Cuisine: American
Keyword: avocado, Chicken, Healthy

Get Ready to Dive into a Flavorful Adventure!

Welcome to the world of vibrant flavors and exciting textures! This Thai Noodle Salad is not just a dish; it’s a celebration of fresh ingredients and bold tastes. Bursting with colorful veggies, protein-packed edamame, and a zesty peanut sauce, this salad is a quick, nutritious meal that will tantalize your taste buds. Whether you’re preparing lunch for a busy day or looking for a delightful dinner option, this recipe is here to elevate your culinary experience. Let’s jump in and discover why this salad is a must-try!

Why You’ll Love This Thai Noodle Salad

This noodle salad isn’t just eye-catching; it’s also packed with benefits that make it an ideal choice for everyone. Here are five reasons to get excited:

  • Colorful presentation: The mix of red and yellow bell peppers, purple cabbage, and green scallions makes this dish a feast for the eyes.
  • Nutritious ingredients: With fresh vegetables, edamame for protein, and a homemade peanut sauce, this salad covers all bases in terms of nutrition.
  • Quick and easy: Ready in under 30 minutes, it’s perfect for those busy weeknights when you want something delicious without the fuss.
  • Meal prep friendly: This salad holds up beautifully in the fridge, making it an excellent option for meal prep or potlucks.
  • Customizable: Feel free to mix and match your favorite veggies or proteins to make this salad your own!

Ingredients Breakdown and Substitutions

Let’s take a closer look at the ingredients that make this Thai Noodle Salad shine:

  • 12 ounces dry noodles: You can use rice, soba, or even whole wheat spaghetti for a gluten-free twist.
  • 1 red bell pepper: Adds sweetness and crunch—feel free to substitute with orange or yellow bell peppers for a different flavor.
  • 1 yellow bell pepper: For a pop of color and fresh flavor.
  • 2 cups shredded purple cabbage: This adds a satisfying crunch and vibrant color. Green cabbage works too!
  • 2 cups shredded/grated carrots: A natural sweetener that balances the flavors beautifully.
  • 4 scallions (sliced): Fresh and zesty, they elevate the dish’s flavor profile.
  • 1 cup edamame (defrosted): For a protein punch—perfect if you’re looking for a vegetarian option!
  • 1 batch peanut sauce: You can use store-bought or make your own with simple ingredients.
  • ~1/2 cup chopped cilantro for garnish: Adds freshness and an aromatic touch.
  • Optional: 1/2 cup crushed peanuts (chopped): For added crunch and flavor!

How to Make This Thai Noodle Salad

Close-up view of a Thai noodle salad with red and yellow peppers, purple cabbage, and green scallions.

Creating this delicious salad is as easy as 1-2-3! Here’s how:

  1. Bring a large pot of salted water to a boil. Cook the noodles according to package instructions, then drain.
  2. While the noodles are cooking, wash and slice your veggies into long, thin strips. Use a mandoline for the cabbage to save time, and a food processor for the carrots if you like!
  3. Rinse the cooked noodles under cold water to stop the cooking process and place them in a large serving bowl.
  4. Add the sliced veggies and edamame to the bowl, then pour half of the peanut sauce over the top. Mix until everything is well combined, adding more sauce to reach your desired level of sauciness.
  5. Top with fresh cilantro, scallions, and chopped peanuts for an extra layer of flavor and crunch.

Pro Tips for the Perfect Salad

To ensure your Thai Noodle Salad is the best it can be, keep these expert tips in mind:

  • Don’t overcook the noodles: Aim for al dente to maintain a pleasant texture.
  • Chill your salad: Let it sit in the fridge for 15-30 minutes before serving for the flavors to meld beautifully.
  • Make the peanut sauce your own: Experiment with adding sriracha for a spicy kick or lime juice for a tangy twist!
  • Use seasonal vegetables: Opt for whatever’s fresh and local to enhance flavor and nutrition.
  • Dress it lightly: Start with half the sauce; you can always add more if you like it saucier.
  • Store properly: Keep any leftovers in an airtight container for up to three days.
  • Garnish generously: Fresh herbs and nuts add not only flavor but also an appealing look!
  • Pair with protein: Add grilled chicken, shrimp, or tofu for a heartier meal.

Common Mistakes and Troubleshooting

Even the best chefs can run into hiccups. Here are some common mistakes and how to avoid them:

  • Overcooked noodles: If they become mushy, be sure to cook them to al dente next time.
  • Too much sauce: Remember, you can always add more, but it’s hard to take away. Start with less!
  • Flavor imbalance: If your salad tastes bland, add a dash of salt, lime juice, or more peanut sauce to brighten it up.
  • Not enough crunch: Always include a variety of textures—add nuts or seeds for that satisfying crunch!

Variations to Try

Want to switch things up? Here are some fun variations you can try:

  • Thai Peanut Chicken Noodle Salad: Add grilled chicken for extra protein.
  • Vegan Option: Replace edamame with chickpeas for a hearty, plant-based protein.
  • Spicy Thai Noodle Salad: Incorporate sliced jalapeños or a splash of chili oil into the dressing.
  • Asian Fusion: Use zucchini noodles instead of traditional noodles for a low-carb twist!

Storage and Make-Ahead Instructions

This salad is perfect for meal prep! Here’s how to store it:

  • Refrigerate: Keep in an airtight container for up to three days. The flavors will only deepen!
  • Make ahead: Prepare the salad without dressing and store in the fridge. Dress it just before serving to keep it fresh.

FAQs About Thai Noodle Salad

Got questions? We’ve got answers! Here are some frequently asked questions:

  • Can I use different noodles? Absolutely! Rice noodles, soba, or even whole wheat pasta work well.
  • Is this salad gluten-free? Yes, if you use gluten-free noodles and soy sauce!
  • How long will it last in the fridge? It keeps for about three days in an airtight container.
  • Can I add protein? Definitely! Grilled chicken, tofu, or shrimp are all fantastic additions.
  • What if I don’t like peanuts? You can substitute almond butter or sunflower seed butter for a different flavor.
  • Is it suitable for meal prep? Yes! Just keep the dressing separate until you’re ready to eat.
  • Can I make it vegan? Yes! Just use a plant-based peanut sauce and skip any animal products.
  • What’s the best way to serve it? Serve chilled or at room temperature as a side or main dish.

Nutritional Tips and Dietary Adaptations

Eating healthy doesn’t mean giving up flavor! Here are some tips to adapt this recipe to fit your dietary needs:

  • Protein boost: Add grilled tofu or chickpeas for a vegetarian-friendly protein source.
  • Low-carb option: Substitute traditional noodles with spiralized vegetables like zucchini.
  • Low-calorie dressing: Use a lighter peanut sauce made with less oil and more citrus.
  • Fiber-rich: Include more vegetables like broccoli or snap peas to enhance fiber content.

Essential Equipment Recommendations

To whip up this vibrant salad, here are some kitchen essentials:

  • Large pot: For cooking your noodles perfectly.
  • Mandoline slicer: For quick and uniform slicing of veggies.
  • Mixing bowls: To easily combine ingredients.
  • Measuring cups and spoons: Accurate measurements mean consistent results!

Serving Suggestions for Thai Noodle Salad

Ready to serve? Here are some delicious suggestions:

  • Pair with grilled shrimp: The smoky flavor complements the fresh salad beautifully.
  • Serve chilled: Perfect for hot summer days or as a picnic dish!
  • Accompany with spring rolls: A delightful way to add more flavor and texture to your meal.

Wrap-Up: Your Invitation to Culinary Creativity!

With this Vibrant Thai Noodle Salad, you’re not just making a meal; you’re creating a culinary experience that’s fun, healthy, and absolutely delicious! So gather your ingredients, unleash your creativity in the kitchen, and savor every bite of this colorful dish. Remember, cooking is about joy and exploration—enjoy the process, and don’t hesitate to make this recipe your own. Happy cooking!

Thai Noodle Salad

Prep Time 15 minutes
Cook Time 10 minutes
Total Time 25 minutes
Servings 4 servings
Calories 350
A vibrant and fresh Thai noodle salad packed with colorful vegetables and a flavorful peanut sauce.

Ingredients

Dry Noodles

  • 12 ounces dry noodles (rice, soba, etc.)

Vegetables

  • 1 red bell pepper red bell pepper
  • 1 yellow bell pepper yellow bell pepper
  • 2 cups shredded purple cabbage
  • 2 cups shredded/grated carrot
  • 4 scallions scallions (sliced)
  • 1 cup edamame (defrosted)

Peanut Sauce

  • 1 batch peanut sauce
  • 1/2 cup chopped cilantro for garnish
  • 1/2 cup crushed peanuts (optional)

Instructions 

  • Cook noodles in salted boiling water, then rinse with cold water and place in a large bowl.
  • Slice vegetables into thin strips and add to the noodles.
  • Pour half the peanut sauce over the mixture and toss to combine, adding more sauce as desired.
  • Garnish with cilantro, scallions, peanuts, and sesame seeds if using.

Notes

Adjust the amount of sauce to your preferred sauciness.
Calories: 350kcal
Cost: $15
Course: Salad
Cuisine: Thai
Keyword: Noodles

Discover the Ultimate Flavor Explosion with This 10-Minute Sesame Cucumber Salad!

If you’re searching for a refreshing, vibrant, and oh-so-easy side dish that will brighten your meal, look no further! This Sesame Cucumber Salad is not only a feast for the eyes but also a dance party for your taste buds. In just 10 minutes, you’ll whip up a salad that’s both nutritious and bursting with flavor. Let’s dive into why this dish is a must-try!

Why You’ll Love This Recipe

  • Quick and Easy: In just 10 minutes, you can have this salad ready, making it perfect for busy weeknights or last-minute gatherings.
  • Refreshingly Crisp: The cucumbers provide a delightful crunch, making this salad a fantastic palate cleanser that’s light and energizing.
  • Flavorful Dressing: With a blend of rice vinegar, sesame oil, and a touch of sweetness, this dressing elevates the cucumbers to a whole new level.
  • Versatile Side Dish: Pair it with grilled chicken, dumplings, or even serve it as a topping for rice bowls. This salad is adaptable to various meals!
  • Nutrient-Packed: Cucumbers are low in calories and high in water content, making this salad a guilt-free addition to your diet.

Ingredient Breakdown and Substitutions

Here’s what you’ll need to make this zesty salad, along with some handy substitutions:

  • 2 large cucumbers: Opt for Persian or English cucumbers for extra crunch and fewer seeds. If unavailable, any cucumber variety works!
  • 1/2 tsp kosher salt: Helps draw out moisture for crunchier cucumbers. You can skip this if watching sodium intake.
  • 2 tbsp rice vinegar: This gives the salad its tangy flavor. Substitute with apple cider vinegar for a different twist.
  • 1 1/2 tbsp soy sauce: For a gluten-free option, use tamari or coconut aminos.
  • 1 tbsp toasted sesame oil: It adds depth and richness. If you’re sensitive to sesame, consider using olive oil.
  • 1 to 2 tsp sugar or honey: Sweetness balances the tanginess. Feel free to replace with maple syrup for a vegan option.
  • 1 small garlic clove: Optional, but it adds a punch! You can use garlic powder if you prefer.
  • 1/2 to 1 tsp chili crisp or red pepper flakes: Spice it up! Adjust according to your heat preference.
  • 2 tbsp toasted sesame seeds: For a nutty crunch—it’s also delicious to sprinkle more on top before serving.
  • 2 scallions: Adds freshness and color; you can swap with chives if you like.
  • 1 tsp grated fresh ginger: Optional but highly recommended for an aromatic zing!

Step-by-Step Instructions

A side view of a fresh Sesame Cucumber Salad, showcasing thinly sliced cucumbers and garnishes.

Follow these easy steps to create your salad:

  1. Slice the cucumbers into coins or half-moons. For extra texture, lightly smash them with the side of a knife first, then tear into bite-size pieces.
  2. Toss cucumbers with 1/2 tsp salt in a colander. Let sit for 3 minutes, then gently squeeze or pat dry with a towel for maximum crunch.
  3. In a medium bowl, whisk together rice vinegar, soy sauce, sesame oil, sugar or honey, garlic, and chili crisp if using. The dressing should taste tangy-salty with a hint of sweetness.
  4. Add cucumbers to the bowl and toss until glossy and evenly coated. Stir in sesame seeds and scallions if using.
  5. Eat right away for peak crunch, or chill for 10 to 20 minutes for a more marinated, pickly vibe.

Pro Tips for the Perfect Salad

  • Choose the right cucumbers: Persian and English cucumbers are less watery and have fewer seeds, ensuring a crunchier salad.
  • Let it marinate: Chilling the salad for about 20 minutes before serving allows the flavors to meld beautifully.
  • Adjust the sweetness: If you prefer a sweeter taste, feel free to add more sugar or honey to the dressing.
  • Experiment with textures: Try adding nuts or seeds for an extra crunch—think sunflower seeds or chopped peanuts!
  • Add herbs: Fresh herbs like cilantro or mint can give the salad a lively twist.
  • Make it a meal: Toss in some protein like grilled chicken, tofu, or chickpeas to turn this side dish into a main course.
  • Use a large bowl: This allows for easier mixing without spilling the dressing everywhere.
  • Don’t skip the salt: Salting the cucumbers draws out moisture, enhancing their flavor and crunch.

Common Mistakes and Troubleshooting

Here are some pitfalls to avoid while making your salad:

  • Over-salting: Be cautious about the amount of salt you use when salting cucumbers. Too much can make the salad too salty!
  • Using watery cucumbers: Avoid cucumbers with lots of seeds or that are overly soft. They won’t hold up well in the salad.
  • Not drying the cucumbers: Ensure you dry the cucumbers well after salting them for the best crunch.
  • Skipping the dressing: The dressing is what gives this salad its flavor. Don’t skip or skimp on it!

Variations to Try

Feeling adventurous? Here are some fun twists on the classic sesame cucumber salad:

  • Asian Style: Add shredded carrots and edamame for a colorful, nutrient-rich salad.
  • Spicy Kick: Incorporate sliced jalapeños or a drizzle of sriracha for a fiery version!
  • Herbed Delight: Mix in fresh herbs like basil or cilantro for a refreshing herbal note.
  • Nutty Addition: Toss in chopped almonds or peanuts for added protein and crunch.

Storage and Make-Ahead Instructions

This salad can be made ahead of time, making it a great option for meal prep:

  • Fridge Storage: Store in an airtight container in the refrigerator for up to 2 days. The cucumbers will soften over time, so enjoy it fresh!
  • Make-Ahead: You can prepare the dressing and chop the cucumbers the night before. Just mix them together shortly before serving for optimal crunch.

Nutrition Tips and Dietary Adaptations

This sesame cucumber salad is not only refreshing but also packed with nutrients:

  • Low-Calorie: Perfect for those looking to maintain or lose weight while enjoying a flavorful side.
  • Hydration Boost: Cucumbers are over 90% water, making this salad a great way to stay hydrated.
  • Vegan-Friendly: Easily adaptable by substituting honey with maple syrup.
  • Gluten-Free: Use tamari instead of soy sauce to keep it gluten-free without sacrificing flavor.

Equipment Recommendations

For the best results, gather these essential tools:

  • Sharp Knife: A good knife makes slicing cucumbers a breeze.
  • Cutting Board: A sturdy cutting board provides a safe and stable surface.
  • Mixing Bowl: A medium-sized bowl is perfect for mixing the salad and dressing together.
  • Colander: For draining excess water from the cucumbers after salting.

Serving Suggestions

This salad is incredibly versatile!

  • With Grilled Chicken: Serve alongside grilled chicken for a balanced meal.
  • On Rice Bowls: Top your rice or quinoa bowls with this salad to add freshness and texture.
  • As an Appetizer: Place it on the table as a refreshing starter before the main course.
  • With Dumplings: Pair it with dumplings for a fantastic combination of flavors and textures.

Frequently Asked Questions

  • Can I use other vegetables?: Absolutely! Feel free to add bell peppers or carrots for additional color and crunch.
  • How can I make it spicier?: Add more chili crisp or even a splash of hot sauce to the dressing.
  • Is it okay to make it ahead of time?: Yes, just keep in mind the cucumbers will soften slightly after a day in the fridge.
  • What’s the best way to serve it?: Serve immediately for the best crunch, or chill for a more marinated flavor.
  • Can I double the recipe?: Definitely! This salad is great for gatherings and can easily be scaled up.
  • What if I don’t like sesame oil?: You can substitute it with olive oil for a different flavor profile.
  • How do I store leftovers?: Keep in an airtight container in the fridge and consume within 2 days.
  • Can I use bottled dressing?: While you can, homemade dressing is fresher and more flavorful!

In conclusion, this 10-Minute Sesame Cucumber Salad is not just a side dish; it’s a celebration of flavors that can elevate any meal. With its simple ingredients, quick preparation, and vibrant taste, you’ll find yourself making this salad again and again. So grab your cucumbers and let’s get cooking! Enjoy the crunch and the burst of flavor that makes healthy eating exciting!

10-Minute Sesame Cucumber Salad

Prep Time 5 minutes
Total Time 5 minutes
Servings 4 servings
Calories 80
A quick and refreshing cucumber salad with sesame and a tangy dressing, perfect for a light snack or side dish.

Ingredients

Vegetables

  • 2 large cucumbers (about 1 lb / 450 g, thinly sliced or lightly smashed)
  • 1/2 tsp kosher salt (optional, for quick draining)
  • 2 tbsp rice vinegar (30 ml)
  • 1.5 tbsp soy sauce (22 ml)
  • 1 tbsp toasted sesame oil (15 ml)
  • 1 to 2 tsp sugar or honey (to taste, 5 to 10 g)
  • 1 small garlic clove (finely grated, optional)
  • 1/2 to 1 tsp chili crisp or red pepper flakes (optional)
  • 2 tbsp toasted sesame seeds (about 18 g, plus more to finish)
  • 2 scallions thinly sliced (optional)
  • 1 tsp grated fresh ginger (optional)

Instructions 

  • Slice cucumbers into coins or half-moons; lightly smash and tear into bite-sized pieces.
  • Toss cucumbers with salt; let sit 3 minutes, then squeeze dry.
  • Whisk together vinegar, soy, sesame oil, sugar, garlic, and chili if using.
  • Add cucumbers to dressing, toss, then stir in sesame seeds and scallions.
  • Serve immediately or chill for 10-20 minutes for more flavor.

Notes

For extra crunch, lightly smash cucumbers before slicing.
Calories: 80kcal
Cost: $8
Course: Side Dish
Cuisine: Asian
Keyword: cucumber

Transform Your Lunch Game with This Fresh Broccoli Crunch Salad!

If you’re looking to spice up your lunch routine, you’ve landed in the right spot! This Fresh Broccoli Crunch Salad is not just another boring dish; it’s a vibrant explosion of flavors and textures that will make your taste buds dance. Packed with nutrient-rich ingredients and a zesty dressing, this salad is here to prove that healthy eating can be both exciting and satisfying. Whether you’re meal prepping for the week or need a quick side for a gathering, this salad is your go-to solution.

Let’s dive into why you’ll love this salad and how you can make it your own!

Why You’ll Love This Recipe

  • Flavor-packed: The combination of crunchy broccoli, sweet apples, and zesty dressing creates a delightful mix that’s irresistible.
  • Versatile: Perfect as a side dish or a hearty lunch on its own, this salad adapts to your needs!
  • Quick and easy: With just a handful of ingredients and simple steps, you can whip this up in no time.
  • Healthy and nutritious: Loaded with vitamins, fiber, and antioxidants, this salad keeps you energized throughout the day.
  • Customizable: Add your favorite nuts, seeds, or proteins to make it uniquely yours!

Ingredient Breakdown

Let’s look closer at the ingredients that make this salad a winner:

  • 4 cups broccoli florets: Fresh, vibrant florets are essential for the crunch! You can also use pre-chopped broccoli to save time.
  • 1 large red apple: Adds a sweet crunch. Feel free to swap with a green apple for a tangy twist!
  • 1/4 cup red onion: Finely chopped for a mild yet zesty flavor. If you prefer a sweeter taste, try using green onions instead.
  • 1/2 cup dried cranberries: Sweet and chewy, they balance the salad beautifully. Raisins or chopped dates work as great alternatives.
  • 1/3 cup sunflower seeds: For that nutty crunch! If there are nut allergies, you can use pumpkin seeds instead.
  • 1/2 cup mayonnaise: The base of the creamy dressing. Swap with Greek yogurt for a healthier option or a vegan mayo for a plant-based alternative.
  • 1/4 cup plain Greek yogurt: Adds creaminess and protein. If you want a dairy-free option, go for a coconut yogurt.
  • 1 tablespoon apple cider vinegar: Provides a tangy kick. Lemon juice is a fantastic substitute!
  • 1 tablespoon honey: Naturally sweetens the dressing. Maple syrup can be used for a vegan version.
  • Salt and pepper: Essential for seasoning. Adjust to taste!

Step-by-Step Instructions for Making Fresh Broccoli Crunch Salad

Side view of a colorful broccoli salad featuring apples, cranberries, and sunflower seeds.
  1. Toss chopped broccoli, diced apple, red onion, cranberries, and sunflower seeds in a large bowl.
  2. In a separate small bowl, whisk together mayonnaise, Greek yogurt, apple cider vinegar, honey, salt, and pepper until smooth.
  3. Pour the dressing over the salad mixture and toss until everything is well coated.
  4. Chill the salad in the refrigerator for at least 30 minutes before serving to let the flavors meld.
  5. Stir before serving and adjust seasoning if needed.

Expert Pro Tips for Perfect Results

  • Chill for flavor: Letting the salad sit in the fridge allows the flavors to mingle, enhancing the overall taste.
  • Fresh is best: Use fresh, firm broccoli for the best crunch. Avoid limp or overcooked broccoli!
  • Customize your crunch: Mix in different nuts or seeds for added texture. Try almonds, walnuts, or pecans!
  • Make it ahead: This salad keeps well in the fridge for a couple of days, making it perfect for meal prep.
  • Don’t skip the dressing: The dressing is key! Make sure to coat all ingredients for maximum flavor.
  • Mind the apple: To prevent browning, toss diced apples in a little lemon juice if preparing in advance.
  • Get creative: Feel free to add in shredded carrots or bell peppers for extra color and nutrients!
  • Keep it crunchy: Add nuts or seeds just before serving to maintain their crispness!

Common Mistakes and Troubleshooting

  • Overmixing: Avoid over-mixing the salad after adding the dressing to keep the broccoli crunchy.
  • Wrong apple choice: Opt for firm apples to prevent mushy textures; soft apples can turn the salad soggy.
  • Too much dressing: Start with a smaller amount of dressing; you can always add more if needed!

Variations to Try

Want to switch things up? Here are some fun variations:

  • Protein-packed: Add grilled chicken or chickpeas for a hearty meal.
  • Fruit-forward: Incorporate sliced grapes or pears for a different sweet touch.
  • Spicy kick: Toss in some diced jalapeños or a dash of chili powder to spice things up!
  • Asian twist: Replace the dressing with a sesame vinaigrette and include edamame for a unique flavor profile.

Storage and Make-Ahead Instructions

This salad can be prepped ahead of time and stored in the fridge:

  • In the fridge: Store in an airtight container for up to 3 days. Just keep the nuts on the side until serving to maintain crunchiness!
  • Make-ahead: Assemble the salad without dressing up to a day in advance. Add the dressing just before serving to keep it fresh.

Frequently Asked Questions

  • Can I make this salad ahead of time? Yes! This salad tastes even better after sitting for a bit. Just add the nuts right before serving!
  • How do I store leftovers? Keep leftovers in an airtight container in the fridge for up to 3 days.
  • Can I use something other than mayonnaise for the dressing? Absolutely! Greek yogurt or a dairy-free alternative works great.
  • What other mix-ins can I add? Feel free to add shredded carrots, bell peppers, or nuts of your choice!
  • Is this salad gluten-free? Yes, as long as you use gluten-free products for the dressing!
  • How do I prevent the apples from browning? Toss them in lemon juice right after cutting!
  • Can I use frozen broccoli? Fresh broccoli is recommended for the best texture, but if using frozen, ensure it’s thawed and drained well.
  • What can I serve with this salad? It pairs wonderfully with grilled chicken, fish, or as a side for any main dish!

Nutritional Benefits and Dietary Adaptations

This salad is not just delicious; it’s also packed with nutrients:

  • Rich in vitamins: Broccoli provides vitamin C, K, and fiber, while apples add antioxidants.
  • Heart-healthy: Sunflower seeds are rich in healthy fats and vitamin E, promoting heart health.
  • Protein boost: Greek yogurt adds protein, making this salad more filling.

Equipment Recommendations

For a smooth cooking experience, here’s what you’ll need:

  • Cutting board and knife: Essential for chopping vegetables and fruits.
  • Mixing bowls: One for the salad and another for the dressing.
  • Whisk or fork: For blending the dressing ingredients smoothly.
  • Airtight containers: Perfect for storing leftovers and prepped salad.

Serving Suggestions

This salad is incredibly versatile! Here are some serving ideas:

  • Serve as a refreshing side for grilled meats or fish.
  • Pair it with a protein-packed main for a filling lunch.
  • Top with crumbled feta or goat cheese for a gourmet touch!

With its vibrant colors and crunch, this Fresh Broccoli Crunch Salad is sure to impress at any table. Remember, healthy eating is all about joy and creativity in the kitchen! Enjoy making this salad, and let it transform your meals into something truly special!

Fresh Broccoli Crunch Salad

Prep Time 15 minutes
Total Time 15 minutes
Servings 4 servings
Calories 250
A vibrant and crunchy salad combining fresh broccoli, sweet apples, and a creamy dressing for a refreshing dish.

Ingredients

Main

  • 4 cups broccoli florets, chopped
  • 1 large red apple, diced
  • 0.25 cup red onion, finely chopped
  • 0.5 cup dried cranberries
  • 0.33 cup sunflower seeds
  • 0.5 cup mayonnaise
  • 0.25 cup plain Greek yogurt
  • 1 tablespoon apple cider vinegar
  • 1 tablespoon honey
  • to taste Salt and pepper (to taste)

Instructions 

  • Toss broccoli, apple, onion, cranberries, and sunflower seeds in a bowl.
  • Whisk mayonnaise, Greek yogurt, vinegar, honey, salt, and pepper until smooth.
  • Pour dressing over salad and toss to coat.
  • Chill for 30 minutes before serving.
  • Stir and adjust seasoning if needed before serving.

Notes

For extra crunch, add toasted nuts or seeds.
Calories: 250kcal
Cost: $12
Course: Salad
Keyword: broccoli