Author

Ryan

Browsing

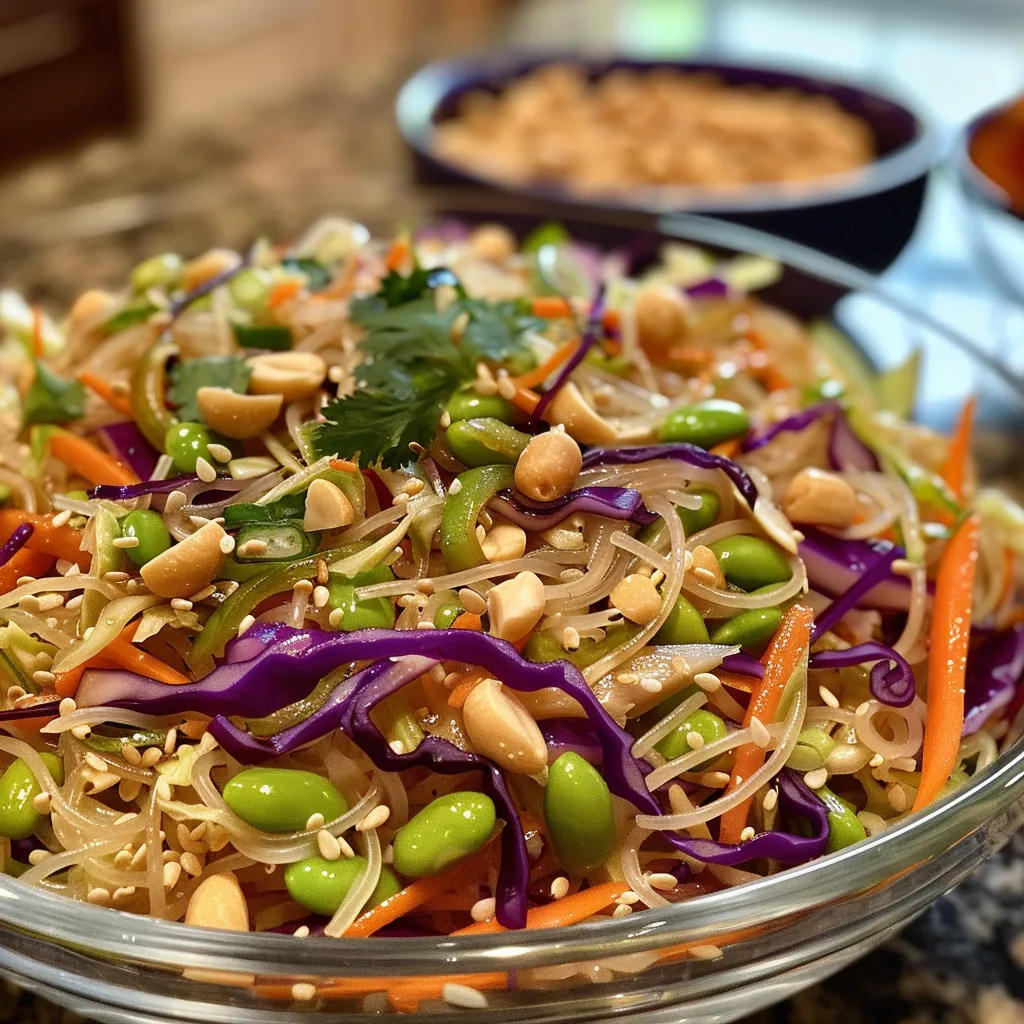
Discover the Zesty Delight of Asian Cucumber and Chickpea Slaw

Welcome to a refreshing culinary adventure! This Asian Cucumber and Chickpea Slaw is more than just a salad; it’s a colorful, vibrant explosion of flavors that will invigorate your plate and your palate. Packed with crunchy cucumbers, protein-rich chickpeas, and a zesty sesame dressing, this dish is perfect for busy days, gatherings, or just elevating your lunch game. In this article, we’ll explore everything you need to know about making this delicious slaw, from ingredient breakdowns and expert tips to serving suggestions and nutritional insights. Let’s get started!

Why You’ll Love This Asian Cucumber and Chickpea Slaw

  • Quick and Easy: Ready in under 30 minutes, this slaw is perfect for those on a tight schedule!
  • Flavor-Packed: The combination of sweet, savory, and tangy flavors will make your taste buds dance.
  • Nutritious Powerhouse: Rich in vitamins, minerals, and plant-based protein, it’s a health-conscious choice.
  • Versatile Side Dish: Pairs beautifully with grilled meats, seafood, or as a standalone lunch option.
  • Make-Ahead Friendly: Prepping in advance enhances the flavors and makes for a quick meal option!

Ingredients Breakdown

To create this delightful slaw, you’ll need the following ingredients:

  • 2 cups shredded cucumber
  • 1 cup shredded carrots
  • 1 can (15 oz) chickpeas, drained and rinsed
  • 1/4 cup thinly sliced red onion
  • 1/4 cup chopped cilantro
  • 2 tablespoons sesame oil
  • 1 tablespoon rice vinegar
  • 1 tablespoon soy sauce
  • 1 teaspoon honey (or maple syrup for vegan option)
  • 1 teaspoon grated ginger
  • 1 clove garlic, minced
  • 1 tablespoon sesame seeds

Feel free to customize the ingredients based on what you have on hand or your dietary preferences. Here are some substitutions:

  • Cucumber: Use zucchini or jicama for a different crunch.
  • Carrots: Swap with bell peppers or radishes for added color.
  • Chickpeas: Substitute with black beans or edamame for a twist.
  • Soy Sauce: Opt for tamari or coconut aminos for a gluten-free version.

Essential Equipment List

Side view of a colorful slaw featuring cucumbers, chickpeas, and sesame seeds, garnished with herbs.

Before we dive into the recipe, ensure you have the following kitchen tools:

  • Grater or mandoline for shredding vegetables
  • Large mixing bowl
  • Small bowl for dressing
  • Whisk or fork for mixing
  • Serving spoon for tossing the slaw

Step-by-Step Instructions

Let’s get cooking! Follow these simple steps to whip up your Asian Cucumber and Chickpea Slaw:

  • Step 1: Shred the cucumber and carrots using a grater or mandoline. Place them in a large bowl.
  • Step 2: Add the chickpeas, red onion, and cilantro to the bowl with the shredded vegetables.
  • Step 3: In a small bowl, whisk together the sesame oil, rice vinegar, soy sauce, honey, ginger, and garlic until well combined.
  • Step 4: Pour the dressing over the slaw mixture and toss gently to coat all ingredients evenly.
  • Step 5: Sprinkle sesame seeds on top for garnish.
  • Step 6: Let the slaw sit for at least 10 minutes before serving to allow the flavors to meld.
  • Step 7: Serve chilled and enjoy the fresh, zesty flavors!

Expert Tips for Success

To ensure your slaw is a hit, keep these expert tips in mind:

  • Choose Quality Cucumbers: Use fresh Persian or English cucumbers for the best crunch; avoid ones that feel soft or have blemishes.
  • Don’t Skip Salting: Salting the cucumbers draws out moisture, ensuring they stay crisp. Let them sit for at least 10-15 minutes before mixing.
  • Taste and Adjust: Always taste the dressing and adjust sweetness or spice levels according to your preference; a little extra chili oil can go a long way!
  • Chill to Enhance Flavor: Letting the slaw chill for a while before serving allows the flavors to meld beautifully.
  • Meal Prep Magic: Prepare the slaw and dressing separately for optimal freshness, combining them just before serving.
  • Make It a Meal: Add grilled chicken or tofu for a complete meal option!
  • Experiment with Herbs: Basil or mint can add an exciting twist to the traditional flavors.
  • Garnish Creatively: Add crushed peanuts or sunflower seeds for an extra crunch!

Common Mistakes and Troubleshooting

Even the best chefs make mistakes now and then! Here are some common pitfalls to avoid:

  • Overcooking Chickpeas: Ensure your chickpeas are just rinsed and drained; overcooking can make them mushy.
  • Skipping the Resting Time: Don’t rush to serve; letting the slaw sit enhances the flavor!
  • Too Much Dressing: Start with less dressing; you can always add more if needed.
  • Using Old Ingredients: Fresh veggies make all the difference, so use the freshest ingredients you can find!

Variations to Try

Get creative with your slaw! Here are some delicious variations:

  • Spicy Slaw: Add sliced jalapeños or a dash of Sriracha for heat.
  • Thai-Inspired: Use lime juice instead of rice vinegar and add crushed peanuts.
  • Fruit Fusion: Toss in diced mango or pineapple for a sweet twist.
  • Asian Noodle Slaw: Mix in cooked rice noodles for added texture and heartiness.

Storage and Make-Ahead Instructions

This slaw is perfect for meal prep! Here’s how to store it:

  • Refrigerate: Store in an airtight container in the refrigerator for up to 3 days.
  • Make Ahead: Prepare the slaw a day in advance, but keep the dressing separate until you’re ready to serve.
  • Freezing: It’s best enjoyed fresh, but you can freeze the chickpeas and veggies separately for up to a month.

Comprehensive FAQ

Got questions? We’ve got answers! Here are some frequently asked questions about this slaw:

  • Can I use frozen chickpeas? Yes, just ensure they are thawed and drained properly before using.
  • Is this slaw vegan? Yes, it’s entirely plant-based if you use maple syrup instead of honey.
  • Can I add more vegetables? Absolutely! Feel free to include any of your favorites.
  • What can I serve this slaw with? It pairs well with grilled chicken, fish, or as a topping for tacos.
  • How long does the slaw last? It can be stored in the fridge for up to 3 days, but it’s best enjoyed fresh.
  • Can I use another dressing? Yes, feel free to experiment with different dressings to suit your taste.
  • Is this slaw gluten-free? Yes, if you use gluten-free soy sauce or tamari.
  • Can I make this slaw spicy? Absolutely! Just add some chili flakes or a spicy sauce to the dressing.

Nutrition Tips and Dietary Adaptations

This Asian Cucumber and Chickpea Slaw is not only delicious but also packed with nutrition!

  • Low-Calorie Option: Reduce the amount of sesame oil for a lighter slaw.
  • Protein Boost: Add grilled chicken, tofu, or edamame for extra protein.
  • Fiber-Rich: Chickpeas provide a great source of fiber, benefiting your digestion.
  • Vegan Friendly: Easily made vegan by substituting honey with agave or maple syrup.

Serving Suggestions

This slaw is incredibly versatile! Here are some ideas for serving:

  • As a refreshing side for grilled meats or seafood.
  • On top of tacos or burritos for added crunch.
  • As a filling lunch option paired with whole grain pita.
  • Mixed into grain bowls for a nutritious boost.

In conclusion, this Asian Cucumber and Chickpea Slaw is a must-try for anyone looking to enjoy healthy, flavorful meals without the fuss. With its endless variations and vibrant taste, it’s sure to become a staple in your kitchen. Dive into this zesty adventure today!

Asian Cucumber and Chickpea Slaw with Sesame Dressing

Prep Time 15 minutes
Total Time 15 minutes
Servings 4 servings
Calories 180
A fresh and crunchy slaw combining cucumbers, carrots, and chickpeas, tossed in a flavorful sesame dressing for a quick and healthy meal.

Ingredients

Vegetables

  • 2 cups shredded cucumber
  • 1 cup shredded carrots
  • 1 can (15 oz) chickpeas, drained and rinsed
  • 1/4 cup thinly sliced red onion
  • 1/4 cup chopped cilantro
  • 2 tablespoons sesame oil
  • 1 tablespoon rice vinegar
  • 1 tablespoon soy sauce
  • 1 teaspoon honey
  • 1 teaspoon grated ginger
  • 1 clove garlic, minced
  • 1 tablespoon sesame seeds

Instructions 

  • Shred cucumber and carrots, then combine in a large bowl.
  • Add chickpeas, red onion, and cilantro to the bowl.
  • Whisk together sesame oil, rice vinegar, soy sauce, honey, ginger, and garlic to make the dressing.
  • Pour dressing over the vegetables and toss gently.
  • Sprinkle sesame seeds on top and let sit for 10 minutes before serving.

Notes

This slaw is best served chilled and can be prepared ahead of time for a quick, healthy meal.
Calories: 180kcal
Cost: $12
Course: Salad
Cuisine: Asian
Keyword: vegetarian

Why This Green Goddess Salad Will Become Your Go-To Recipe

If you’re looking for a vibrant, refreshing dish that packs a punch of flavor and nutrients, look no further! This Green Goddess Salad is not just a salad; it’s an experience! Packed with crunchy cabbage, creamy avocado, and a zesty dressing, this salad is your new lunchtime hero. Perfectly simple yet utterly satisfying, grab your tortilla chips and dive into the excitement of fresh, nutritious eats!

Why You’ll Love This Recipe

This Green Goddess Salad is a delightful twist on traditional salads, offering a multitude of benefits that make it irresistible:

  • Fresh and Flavorful: The combination of crisp cabbage and creamy avocado creates a refreshing bite that will elevate your lunch.
  • Vibrant Colors: The bright greens and colorful ingredients make this salad visually appealing, ensuring it’s as delightful to look at as it is to eat.
  • Quick to Prepare: With minimal prep time, you can whip up this salad in just 15 minutes, making it perfect for busy weekdays.
  • Customizable: Adjust the ingredients to fit your taste or dietary needs, allowing you to create a salad that’s uniquely yours.
  • Nutritious and Satisfying: Packed with vitamins, minerals, and healthy fats, this salad supports your health goals without sacrificing taste.

Ingredients Breakdown

To create this delicious Green Goddess Salad, you’ll need the following ingredients:

  • 1 small head of green cabbage: Finely chopped into confetti-sized pieces (about 8 cups chopped). Cabbage is a low-calorie vegetable rich in fiber and nutrients.
  • 1/2 English cucumber: Alternatively, use 3 small garden cucumbers for a refreshing crunch. Cucumbers are hydrating and add a nice texture.
  • 1 avocado: Diced for creaminess. Avocado not only adds healthy fats but also enriches the flavor profile of the salad.
  • 1 bunch of green onions: Finely chopped to add a mild onion flavor. Green onions are a great way to infuse extra freshness.
  • 1 recipe Green Goddess Dressing: Use store-bought or homemade for maximum flavor. The dressing ties all the ingredients together beautifully.
  • Tortilla chips: Optional, but highly recommended for a satisfying crunch. They add a fun twist to the salad!

How to Make Green Goddess Salad

A colorful Green Goddess Salad featuring chopped cabbage, cucumber, avocado, and green onions.

Follow these simple steps to create your Green Goddess Salad:

  1. Chop: Start by slicing the cabbage in half through the core and removing the tough core. Lay the halves flat, slice into thin shreds, and cross-cut the shreds into small confetti-sized pieces. Dice up the cucumbers and avocado, and finely chop the green onions. Aim for uniform sizes for even distribution.
  2. Mix: In a large mixing bowl, combine the chopped cabbage, cucumbers, avocado (if using), and green onions. Toss gently to distribute the ingredients.
  3. Make the dressing: In a blender or food processor, blend the ingredients for the Green Goddess Dressing until it’s creamy and bright green in color. This dressing is the star of the show!
  4. Add: Pour the dressing over the veggie mixture. Start with a little and add to taste, tossing everything to combine evenly. I recommend using most of it for the best flavor!
  5. Serve: Enjoy the salad as it is, or serve it with crispy tortilla chips for an extra crunch. This adds a fun, scoopable element to the experience!

Pro Tips for the Perfect Green Goddess Salad

Here are some expert insights to take your salad to the next level:

  • Chop with Care: Ensure the cabbage and cucumbers are chopped finely for a better texture and easier eating.
  • Dress to Impress: Dress the salad just before serving to keep the cabbage crisp and fresh.
  • Add Protein: Consider adding grilled chicken, chickpeas, or tofu for a heartier meal.
  • Experiment with Herbs: Fresh herbs like dill, parsley, or cilantro can add an aromatic touch to the dressing.
  • Make Ahead: Prepare the dressing in advance and store it separately to maintain the salad’s freshness.
  • Season Well: Don’t forget to season with salt and pepper to enhance the flavors of the salad.
  • Use a Food Processor: A food processor can save time and effort when chopping your veggies.
  • Store Leftovers Properly: If you have leftovers, store them in an airtight container in the fridge to keep them fresh for a day or two.

Common Mistakes and Troubleshooting

Avoid these common pitfalls for a successful Green Goddess Salad experience:

  • Over-Dressing: Adding too much dressing can make the salad soggy. Start with a little and adjust as needed.
  • Using Old Ingredients: Freshness matters! Ensure your veggies are fresh to enhance flavor and nutrition.
  • Not Chopping Evenly: Unevenly chopped ingredients can lead to an inconsistent texture. Aim for uniformity!
  • Skipping Seasoning: A little salt and pepper can go a long way in bringing out the flavors. Don’t skip this step!

Variations to Try

Want to switch it up? Here are some variations to inspire your culinary creativity:

  • Italian Twist: Replace the Green Goddess Dressing with a balsamic vinaigrette and toss in cherry tomatoes and mozzarella balls.
  • Protein-Packed: Add grilled chicken or shrimp for a heartier meal.
  • Vegan Delight: Substitute the avocado with tahini for a creamy vegan option.
  • Fruit Fusion: Toss in diced apples or pears for a sweet crunch that complements the savory elements.

Storage and Make-Ahead Instructions

This salad is best enjoyed fresh, but if you need to make it ahead of time, here are some tips:

  • Store Separately: Keep the dressing separate from the salad until you’re ready to serve to maintain freshness.
  • Refrigerate: Store the salad in an airtight container in the refrigerator for up to 2 days.
  • Freshen Up: If the salad wilts, add a splash of lemon juice or extra dressing before serving to revive it.

Frequently Asked Questions

Here are some common questions and answers related to the Green Goddess Salad:

  • Can I use other vegetables? Absolutely! Feel free to add or substitute with your favorite veggies like bell peppers, carrots, or radishes.
  • How can I make the dressing dairy-free? Use a plant-based yogurt or avocado as a base for a creamy dressing without dairy.
  • Is this salad gluten-free? Yes! All the ingredients are gluten-free, making it a great option for those with dietary restrictions.
  • How long does the dressing last? The dressing can be stored in the fridge for up to a week, so you can enjoy it with other salads too!
  • Can I freeze the salad? It’s best to avoid freezing the salad as it may wilt and lose its texture upon thawing.
  • What can I serve with this salad? This salad pairs wonderfully with grilled meats, as a side dish, or with tortilla chips for scooping!
  • Can I make this salad vegan? Yes! Simply omit the avocado if you prefer a lighter version or use a substitute like tahini.
  • What’s the best way to add flavor? Fresh herbs, citrus juice, and quality olive oil will enhance the flavors of your salad beautifully.

Nutrition Tips and Dietary Adaptations

This Green Goddess Salad is not only delicious but also packed with nutrients:

  • High in Fiber: The cabbage and cucumbers provide a good source of dietary fiber, promoting digestive health.
  • Healthy Fats: Avocado is rich in monounsaturated fats, which are beneficial for heart health.
  • Low Calorie: This salad is low in calories, making it a great option for those watching their calorie intake.
  • Rich in Vitamins: Packed with vitamins A and C, this salad supports immune function and overall health.

Equipment Recommendations

To make this Green Goddess Salad, you may find the following kitchen tools helpful:

  • Sharp Knife: For easy chopping of vegetables.
  • Cutting Board: Essential for safe and efficient food prep.
  • Mixing Bowl: A large bowl to combine all the ingredients.
  • Blender or Food Processor: For making the creamy Green Goddess Dressing.

Serving Suggestions

This Green Goddess Salad can be served in various delightful ways:

  • As a Main Dish: Enjoy it on its own or topped with your favorite protein.
  • As a Side Dish: Pair it with grilled meats or fish for a nutritious meal.
  • With Tortilla Chips: Serve it as a dip alongside crunchy tortilla chips for a fun appetizer.
  • In a Wrap: Use the salad as a filling in a whole grain wrap for an on-the-go meal.

Conclusion

This Green Goddess Salad is more than just food; it’s a celebration of vibrant flavors and healthy eating! With its colorful ingredients, creamy dressing, and endless customization options, you’ll find yourself reaching for this recipe again and again. Whether you’re enjoying it for lunch, dinner, or as a snack, this salad proves that healthy eating can be exciting and delicious. So grab your ingredients, channel your inner chef, and get ready to savor every bite of this fantastic dish!

Green Goddess Salad

Prep Time 15 minutes
Total Time 15 minutes
Servings 4 servings
Calories 150
A fresh and vibrant salad featuring chopped green cabbage, cucumbers, and a creamy green goddess dressing, perfect for a light meal or side dish.

Ingredients

Vegetables

  • 1 small head green cabbage (finely chopped (confetti-sized, 8 cups))
  • 1/2 English cucumber or 3 small garden cucumbers (diced)
  • 1 avocado (diced for creaminess)
  • 1 bunch green onions (finely chopped)
  • 1 recipe Green Goddess Dressing (or added to taste)
  • Tortilla chips optional for serving

Instructions 

  • Chop the cabbage, cucumbers, avocado, and green onions into small, confetti-sized pieces.
  • In a large bowl, combine all chopped vegetables.
  • Blend the Green Goddess Dressing until creamy and bright green.
  • Pour dressing over the vegetables and toss to coat, adding dressing to taste.
  • Serve as a salad or with tortilla chips for a crunchy side.

Notes

For extra flavor, chill the salad before serving.
Calories: 150kcal
Cost: $10
Course: Salad
Cuisine: American
Keyword: Green, Vegetables

Discover the Vibrant World of Thai Peanut Noodle Salad

Welcome to the colorful, flavorful universe of Thai Peanut Noodle Salad! This dish is not just a meal; it’s an adventure for your taste buds, brimming with crunchy veggies, a creamy peanut dressing, and a kick of spice. Whether you’re prepping for a quick lunch or planning a meal for friends, this recipe is your ticket to culinary delight. Let’s dive into the nuances of this Thai classic where healthy eating meets exuberant flavor!

Why You’ll Love This Recipe

This Thai Peanut Noodle Salad isn’t just another salad; it’s a celebration of textures and flavors. Here are five compelling reasons to whip it up:

  • Quick and Easy: Ready in just 30 minutes, making it perfect for busy weeknights.
  • Customizable: Tailor it to your taste with different proteins like chicken, tofu, or shrimp.
  • Meal Prep Friendly: Ideal for make-ahead lunches, it stays fresh in the fridge for days.
  • Flavor Explosion: A delightful combination of sweet, savory, and spicy notes that dance on your palate.
  • Nutrient-Packed: Loaded with veggies, it’s a great way to boost your intake of vitamins and minerals.

Ingredient Breakdown

Let’s talk about the star players in this recipe. Each ingredient contributes to the overall harmony of flavors and textures!

  • Rice Noodles: About 8-9 oz of rice noodles create a chewy base. Feel free to substitute with spaghetti or whole grain noodles for a different twist.
  • Shredded Carrots: One cup adds a sweet crunch. You can also use shredded beets for a vibrant color!
  • Cucumber: One cup of thinly sliced cucumber provides a refreshing, crisp bite. Try using Persian cucumbers for less seeds.
  • Red Bell Pepper: Adds a splash of color and sweetness; feel free to swap for yellow or orange bell peppers.
  • Green Onions: About 3-4 sliced green onions lend a mild onion flavor that brightens the dish.
  • Cilantro: 1/4 cup chopped cilantro is essential for that fresh herbal note. Not a fan? Basil works too!
  • Peanut Butter: The heart of our dressing! Use creamy or crunchy, depending on your preference.
  • Soy Sauce: 2-3 tablespoons add that umami depth. Opt for low-sodium if watching salt intake.
  • Rice Vinegar or Lime Juice: 1-2 tablespoons for acidity. Lime juice gives a bright zing!
  • Honey or Maple Syrup: Sweet balance in the dressing; adjust based on your taste!
  • Garlic and Ginger: Fresh flavors that elevate the dressing; use minced garlic and grated ginger for best results.
  • Optional Heat: Spice things up with sriracha or chili flakes if you like a kick!

How to Make Thai Peanut Noodle Salad

Side angle of a Thai Peanut Noodle Salad, showcasing rice noodles and fresh veggies in a bowl.

Ready to create this culinary masterpiece? Let’s get cooking!

  1. Cook the noodles according to package instructions until al dente, then drain and rinse under cold water.
  2. In a medium bowl, whisk together peanut butter, soy sauce, rice vinegar or lime juice, honey or maple syrup, minced garlic, and grated ginger until smooth.
  3. Add water gradually to the dressing to achieve a pourable consistency, then stir in sriracha or chili flakes if desired.
  4. In a large bowl, combine the cooked noodles with shredded carrots, cucumber, red bell pepper, green onions, and cilantro.
  5. Pour the peanut dressing over the salad and toss until everything is evenly coated.
  6. Serve topped with crushed peanuts and lime wedges. Enjoy your vibrant creation!

Expert Tips for Perfection

To ensure your Thai Peanut Noodle Salad is a hit every time, check out these expert tips:

  • Don’t Overcook the Noodles: Aim for al dente to prevent sogginess.
  • Chill Before Serving: Letting the salad sit in the fridge for 30 minutes enhances the flavors.
  • Prep Ingredients Ahead: Chop veggies and make the dressing a day in advance for a quick assembly.
  • Balance the Flavors: Taste and adjust the dressing; add more soy for saltiness, honey for sweetness, or lime for acidity.
  • Mix It Up: Incorporate protein like grilled chicken or tofu for a heartier meal.
  • Garnish Creatively: Fresh herbs or sesame seeds add a nice finishing touch.
  • Store Properly: Keep in an airtight container for up to 4 days for maximum freshness.
  • Keep It Crunchy: Add crunchy toppings like crushed peanuts just before serving to maintain texture.

Common Mistakes and Troubleshooting

Even the best chefs make mistakes! Here’s how to avoid common pitfalls:

  • Too Saucy: If your salad is too wet, add more noodles or veggies to absorb the dressing.
  • Flavorless Dressing: Don’t be shy with seasoning; taste as you go and adjust to your liking.
  • Stale Ingredients: Use fresh veggies for the best crunch and flavor. Old produce can make the salad dull.
  • Overpowering Peanut Flavor: If the peanut flavor is too strong, balance it with more lime juice or vinegar.

Variations to Explore

Feeling adventurous? Here are four fun variations to switch things up:

  • Thai Chicken Noodle Salad: Add grilled chicken strips for a protein-packed version.
  • Spicy Sriracha Peanut Noodles: Add more sriracha to the dressing for a spicy twist.
  • Veggie-Loaded Salad: Mix in bell peppers, snap peas, or zucchini for extra crunch.
  • Quinoa Peanut Salad: Substitute rice noodles with cooked quinoa for a gluten-free option.

Storage and Make-Ahead Instructions

This salad is perfect for meal prep! Here’s how to store it:

  • In the Fridge: Store in an airtight container for up to 4 days.
  • Make-Ahead Dressing: Prepare the dressing in advance and keep it in the fridge for up to a week.
  • Keep Ingredients Separate: If prepping ahead, store the dressing and salad components separately to maintain freshness.

Comprehensive FAQ

Got questions? We’ve got answers!

  • Can I use other noodles? Yes! Substitute rice noodles with soba, udon, or whole wheat spaghetti.
  • Is this salad vegan? Yes, just use maple syrup instead of honey for a vegan option.
  • Can I make this salad gluten-free? Absolutely! Use gluten-free soy sauce or tamari.
  • How do I adjust the spiciness? Modify the amount of sriracha or chili flakes based on your heat preference.
  • Can I freeze the salad? It’s best fresh, but you can freeze the dressing separately for later use.
  • What can I serve with this salad? Pair it with grilled meats, spring rolls, or as a side dish for Asian-inspired meals.
  • How long does the salad last? It stays fresh for about 4 days in the fridge.
  • Can I add fruit? Yes! Mango or pineapple can add a sweet contrast to the savory flavors.

Nutrition Tips and Dietary Adaptations

This Thai Peanut Noodle Salad is not only delicious but also healthy! Here’s how you can adapt it:

  • Low-Carb: Replace noodles with spiralized zucchini or cauliflower rice.
  • High-Protein: Add grilled chicken, shrimp, or edamame for extra protein boost.
  • Nut-Free: Use sunflower seed butter instead of peanut butter if you have allergies.
  • Low-Sodium: Use low-sodium soy sauce and skip the added salt to keep it heart-healthy.

Essential Equipment Recommendations

To make this recipe, here’s what you’ll need:

  • Large Pot: For boiling the noodles.
  • Whisk: To combine the dressing ingredients smoothly.
  • Large Bowl: For mixing the salad ingredients.
  • Cutting Board and Knife: For chopping veggies and herbs.
  • Measuring Cups and Spoons: For accuracy in ingredient amounts.

Serving Suggestions

This salad shines on its own, but here are some delightful pairings:

  • Grilled Protein: Serve with grilled chicken, shrimp, or tofu for a balanced meal.
  • Spring Rolls: Fresh or fried spring rolls make a perfect side.
  • Soup: Pair with a light miso or vegetable soup for a full-course meal.
  • Chilled Beverages: A refreshing iced tea or coconut water complements the flavors beautifully.

Conclusion

Your journey to a delicious, nutrient-packed meal ends here! Thai Peanut Noodle Salad is not only easy to make but also versatile enough to suit any dietary preference. I hope this recipe inspires you to embrace healthy cooking with joy and creativity. So grab your ingredients, unleash your inner chef, and enjoy every colorful bite of this vibrant salad. Happy cooking!

Thai Peanut Noodle Salad

Prep Time 10 minutes
Cook Time 10 minutes
Total Time 20 minutes
Servings 4 servings
Calories 450
A vibrant and flavorful cold noodle salad with fresh vegetables and a creamy peanut dressing, perfect for a quick lunch or light dinner.

Ingredients

Noodles

  • 8-9 oz rice noodles or spaghetti
  • 1 cup shredded carrots
  • 1 cup thinly sliced cucumber
  • 1 red bell pepper thinly sliced red bell pepper
  • 3-4 green onions sliced green onions
  • 1/4 cup chopped cilantro
  • Optional crushed peanuts and lime wedges for serving
  • 1/4 cup creamy peanut butter
  • 2-3 tbsp soy sauce
  • 1-2 tbsp rice vinegar or lime juice
  • 1-2 tbsp honey or maple syrup
  • 1-2 garlic cloves minced garlic
  • 1 tsp grated fresh ginger (optional)
  • Water to thin dressing as needed Water to thin dressing
  • Optional sriracha or chili flakes

Instructions 

  • Cook noodles until al dente, drain, and rinse with cold water.
  • Whisk peanut butter, soy sauce, lime juice, honey, garlic, and ginger until smooth.
  • Add water gradually to reach desired consistency; stir in chili flakes if using.
  • Combine noodles with vegetables and cilantro in a large bowl.
  • Pour dressing over and toss to coat; serve topped with peanuts and lime wedges.

Notes

Feel free to add more chili for heat or extra lime for tang.
Calories: 450kcal
Cost: $15
Course: Salad
Cuisine: Thai
Keyword: Noodles

Welcome to a culinary journey where healthy meets delicious! Our Spicy Thai Peanut Noodle Salad is not just a meal; it’s an explosion of flavor that transforms your lunch routine into something truly extraordinary. This recipe is perfect for busy days when you crave something satisfying yet quick, allowing you to indulge in a vibrant array of tastes and textures. Ready to tantalize your taste buds? Let’s dive in!

Why You’ll Love This Recipe

  • Quick and Easy: Whip this up in under 30 minutes, making it a perfect option for those busy weeknights or quick lunches.
  • Flavor-Packed: The combination of creamy peanut butter, zesty sriracha, and fresh veggies creates a mouthwatering experience with every bite.
  • Customizable: Make it your own! Add your favorite vegetables or proteins to suit your taste and dietary preferences.
  • Healthy and Nutritious: Packed with vitamins from fresh veggies and healthy fats from peanut butter, this salad supports a balanced diet.
  • Meal Prep Friendly: Great for making ahead of time! Store in the fridge for a delicious grab-and-go meal.

Gather Your Ingredients for Spicy Thai Peanut Noodle Salad

Before we jump into the cooking, let’s gather our ingredients. This recipe is all about fresh, vibrant components that bring the salad to life!

  • 8 ounces dried noodles: Use spaghetti, linguine, or rice noodles for a gluten-free option.
  • 1/2 cup creamy peanut butter: The star of the show! Opt for natural peanut butter without added sugars.
  • 1/4 cup soy sauce: For a gluten-free alternative, tamari or coconut aminos work beautifully.
  • 2 tablespoons rice vinegar: Adds a delightful tang to the peanut sauce.
  • 1 tablespoon honey: Sweetens the deal—maple syrup is a great vegan substitute!
  • 1 tablespoon sriracha: Adjust according to your spice preference.
  • 1 clove garlic, minced: Fresh garlic elevates the flavor profile.
  • 1/4 cup hot water: Helps to achieve the perfect sauce consistency.
  • 1 cup shredded carrots: Adds crunch and nutrition.
  • 1 cup shredded red cabbage: For color and added crunch.
  • 1/2 cup chopped green onions: Fresh and vibrant, they add a wonderful bite.
  • 1/4 cup chopped cilantro: Fresh herbs are a must for that authentic Thai flavor.
  • 1/4 cup chopped peanuts: For garnishing and an extra layer of texture.

How to Make This Delicious Spicy Thai Peanut Noodle Salad

Ready to create your masterpiece? Here’s a step-by-step guide to assembling this mouthwatering salad!

  • Cook the noodles: Prepare the noodles according to package directions. Once cooked, drain and rinse with cold water to stop the cooking process.
  • Whisk together the peanut sauce: In a bowl, combine peanut butter, soy sauce, rice vinegar, honey, sriracha, and minced garlic. Whisk until smooth and creamy.
  • Adjust the sauce: Gradually whisk in hot water until you reach your desired sauce consistency. It should be creamy but pourable!
  • Combine the salad: In a large bowl, mix the cooked noodles, shredded carrots, red cabbage, green onions, and cilantro. Toss well to combine.
  • Add the sauce: Pour the peanut sauce over the noodle mixture and toss until everything is evenly coated.
  • Garnish and serve: Top with chopped peanuts for an irresistible crunch before digging in!

Pro Tips for the Best Salad Ever

Side view of a vibrant Spicy Thai Peanut Noodle Salad featuring noodles, shredded carrots, and peanuts.
  • Perfect Texture: Ensure your noodles are al dente for the best bite. Overcooked noodles can become mushy.
  • Fresh Ingredients: Use the freshest vegetables possible for maximum crunch and flavor.
  • Customize Your Crunch: For added texture, toss in some chopped bell peppers or snap peas.
  • Make It Creamier: If you prefer a creamier salad, double the peanut sauce or add a splash more peanut butter.
  • Spice Level: Adjust sriracha to match your heat tolerance—don’t be afraid to experiment!
  • Chill Before Serving: Let the salad chill in the fridge for 30 minutes before serving to let the flavors meld beautifully.
  • Leftovers: Store leftovers in an airtight container in the fridge for up to 3 days.
  • Garnish Variety: Consider garnishing with sesame seeds or fresh lime wedges for an extra burst of flavor.

Common Mistakes and Troubleshooting

Even the best chefs make mistakes! Here are some common pitfalls and how to avoid them:

  • Overcooking noodles: Keep an eye on the cooking time. Rinse immediately to stop cooking.
  • Too much sauce: Start with less sauce and add until you reach your preferred flavor level.
  • Not enough veggies: The more, the merrier! Load up on fresh vegetables for nutritional benefits.

Variations to Spice Things Up!

Looking to switch things up? Here are a few creative variations you can try:

  • Protein Boost: Add grilled chicken, tofu, or shrimp for a protein-packed meal.
  • Crunchy Add-ins: Toss in some crushed peanuts, sunflower seeds, or crispy wonton strips for extra crunch.
  • Herb Overload: Experiment with different herbs like mint or basil for a fresh twist.
  • Different Noodles: Swap out traditional noodles for zucchini noodles or soba noodles for a gluten-free alternative.

Storage and Make-Ahead Instructions

This salad is perfect for meal prep! Here’s how to store it:

  • In the Fridge: Store in an airtight container for up to 3 days. The flavors deepen as it sits, making it even more delicious!
  • Make-Ahead: Prepare the salad and sauce separately. Combine before serving to keep the noodles from getting soggy.

Frequently Asked Questions

Got questions? We’ve got answers! Here are some common queries about the Spicy Thai Peanut Noodle Salad:

  • Can I make this vegan? Absolutely! Use maple syrup instead of honey and ensure your peanut butter is vegan-friendly.
  • Is it gluten-free? Yes, simply use gluten-free noodles and tamari instead of soy sauce.
  • How can I adjust the spice level? Start with less sriracha and gradually add more to taste.
  • Can I use other nut butters? Yes! Almond butter or cashew butter can be great alternatives.
  • What’s the best way to serve this salad? Serve chilled or at room temperature for the best flavor.
  • Can I add fruits? Definitely! Mango or pineapple can add a sweet touch to the salad.
  • What to pair with this salad? It pairs beautifully with grilled meats, spring rolls, or a refreshing cucumber salad.
  • How can I increase the nutritional value? Add more colorful veggies or sprinkle in some chia seeds for an omega-3 boost!

Nutrition Tips and Dietary Adaptations

This Spicy Thai Peanut Noodle Salad is not just a feast for the taste buds; it’s also packed with nutrients! Here are some tips to enhance its nutritional value:

  • Incorporate more greens: Add spinach or kale for a vitamin boost.
  • Healthy fats: Peanut butter provides healthy fats; consider avocado for an additional creamy texture.
  • Whole grains: Use whole grain noodles for added fiber and nutrients.

Equipment Recommendations

To create this culinary delight, you’ll need:

  • Large pot: For boiling the noodles.
  • Mixing bowls: To combine ingredients and sauces.
  • Whisk: For blending the sauce smoothly.
  • Cutting board and knife: To prep your fresh veggies.

Serving Suggestions

Ready to serve? Here are some ideas to elevate your dining experience:

  • With Lime Wedges: A squeeze of fresh lime juice brightens up the flavors.
  • On a Bed of Greens: Serve over a bed of mixed greens for a refreshing twist.
  • As a Side Dish: Pair with grilled chicken or fish for a complete meal.

And there you have it! Your ultimate guide to crafting the perfect Spicy Thai Peanut Noodle Salad. With its vibrant flavors and customizable options, this dish makes healthy eating a delicious adventure. So grab your ingredients, unleash your creativity, and enjoy every bite of this culinary delight!

Spicy Thai Peanut Noodle Salad: 1 Awesome Meal

Prep Time 10 minutes
Cook Time 10 minutes
Total Time 20 minutes
Servings 4 servings
Calories 450
A vibrant and flavorful noodle salad with a spicy peanut sauce, perfect for a quick and satisfying meal.

Ingredients

Noodles

  • 8 ounces dried noodles (like spaghetti or linguine)
  • 0.5 cup creamy peanut butter
  • 0.25 cup soy sauce
  • 2 tablespoons rice vinegar
  • 1 tablespoon honey
  • 1 tablespoon sriracha (or more, to taste)
  • 1 clove garlic, minced
  • 0.25 cup hot water
  • 1 cup shredded carrots
  • 1 cup shredded red cabbage
  • 0.5 cup chopped green onions
  • 0.25 cup chopped cilantro
  • 0.25 cup chopped peanuts (for garnish)

Instructions 

  • Cook noodles according to package directions. Drain and rinse with cold water.
  • Whisk together peanut butter, soy sauce, rice vinegar, honey, sriracha, and garlic until smooth. Gradually add hot water to reach desired consistency.
  • Combine cooked noodles, carrots, cabbage, green onions, and cilantro in a large bowl. Toss with peanut sauce.
  • Garnish with chopped peanuts before serving.

Notes

Adjust sriracha for desired spice level.
Calories: 450kcal
Cost: $15
Course: Main Course
Cuisine: Thai
Keyword: Noodles, peanut

Welcome to the World of Vibrant Vegan Elote Salad!

Are you ready to dive into a bowl of sunshine? This Vegan Elote Salad is a colorful explosion of flavors that will make your taste buds dance! Packed with roasted corn, creamy avocado, zesty lime, and a kick of jalapeño, this salad is not just a dish; it’s a celebration of all that is fresh and delightful about healthy eating. Perfect for picnics, potlucks, or a quick weeknight dinner, this salad is a simple yet bold way to enjoy the essence of Mexican street food right in your kitchen!

In this comprehensive guide, I’ll take you through everything you need to know to create the ultimate vegan elote salad. From ingredient breakdowns to expert tips, variations, and more, let’s make healthy cooking an exciting adventure!

Why You’ll Love This Recipe

This vegan elote salad is more than just a delicious dish; it’s brimming with benefits that make it a must-try. Here’s why you’ll absolutely love it:

  • Flavor Explosion: Combining smoky, sweet, and spicy elements, this salad tantalizes your palate with every bite.
  • Nutritious & Wholesome: Made with fresh ingredients like corn, avocado, and cilantro, this salad is a powerhouse of vitamins and minerals.
  • Versatile Dish: Serve it as a side, a main, or as a topping for tacos; this salad adapts to your meal plans seamlessly.
  • Quick & Easy: With minimal prep time, you can whip this salad up in under 20 minutes, making it perfect for busy lifestyles.
  • Vegan & Dairy-Free: Enjoy a delicious corn salad that fits perfectly into a plant-based diet without sacrificing flavor.

Ingredients You’ll Need

Gather these vibrant ingredients to create your own vegan elote salad:

  • 3 cups roasted corn (16 ounces frozen or cut from about 4 ears)
  • ¾ cup chopped red onion
  • ½ cup sliced green onion
  • ½ cup avocado (cubed)
  • ½ -1 cup vegan cotija or feta cheese (depending on creaminess preference, homemade or store-bought)
  • ¼ cup chopped cilantro
  • 1 jalapeño (chopped)
  • 2-4 tablespoons fresh lime juice (to taste)
  • ½ teaspoon sea salt
  • ½ teaspoon chili powder or smoked paprika
  • Optional: Black beans, red pepper for added texture and flavor

How To Make This Vegan Elote Salad

A vibrant Vegan Elote Salad featuring red onion, green onion, and avocado, seen from the side.

Ready to bring all these ingredients together? Let’s make this salad sing!

  1. Put all the ingredients into a large bowl and mix well to combine.
  2. Serve immediately and enjoy the vibrant flavors!

Pro Tips for the Best Flavor

Here are some expert insights to elevate your vegan elote salad game:

  • Fresh Corn is Key: For the best flavor, use fresh roasted corn. If using frozen, make sure to thaw and drain thoroughly.
  • Customize Spice Levels: Adjust the amount of jalapeño and chili powder to suit your spice preference. A little extra heat can elevate the dish!
  • Let It Chill: Allowing the salad to sit for about 10-15 minutes enhances the flavors as they meld together beautifully.
  • Creamy Avocado: For the best texture, add the avocado just before serving to keep it fresh and intact.
  • Experiment with Herbs: Try adding fresh mint or basil for a unique twist on this classic salad!
  • Serving Temperature: This salad is delicious cold, but serving it at room temperature allows the flavors to shine even more.

Common Mistakes and Troubleshooting

Even the best chefs have mishaps, but fear not! Here are some tips to avoid common pitfalls:

  • Too Watery? If your salad seems soggy, drain excess liquid from the corn or other ingredients.
  • Overly Spicy? Balance out too much heat with a dollop of vegan sour cream or more avocado.
  • Not Enough Flavor? Adjust lime juice, salt, and spices to enhance the taste. Taste as you go!

Creative Variations to Try

Want to switch things up? Here are some fun variations to consider:

  • Mexican Street Corn Style: Add mayonnaise or vegan mayo for an extra creamy twist reminiscent of traditional elote.
  • Tex-Mex Fusion: Incorporate black beans or diced bell peppers for added protein and crunch.
  • Spicy Avocado Twist: Blend avocado with a bit of lime juice and hot sauce for a creamy dressing!
  • Fruit Additions: Toss in diced mango or pineapple for a sweet contrast to the savory elements.

Storage and Make-Ahead Instructions

This salad is perfect for meal prep! Here’s how to store it:

  • In the Fridge: Store in an airtight container for up to 3 days. The flavors will continue to develop!
  • Make Ahead: Prepare the ingredients and store separately. Combine just before serving to keep everything fresh.

Frequently Asked Questions

Got questions? I’ve got answers! Here are some common queries:

  • Can I use canned corn? Yes! Just be sure to rinse and drain it well.
  • Is this salad gluten-free? Absolutely! All ingredients are naturally gluten-free.
  • Can I make this salad oil-free? Yes! Just skip any oil and opt for fresh lime juice for flavor.
  • What can I substitute for vegan cotija? Crumbled tofu works well, or you can use any dairy-free cheese.
  • How can I add protein? Add black beans, chickpeas, or grilled tofu to amp up the protein content.
  • Can I freeze this salad? It’s best fresh, but you can freeze the corn mixture. Just add the avocado and fresh ingredients when ready to serve.
  • What can I serve this salad with? It pairs wonderfully with grilled veggies, tacos, or as a topping for burrito bowls.
  • How do I make it spicier? Add more jalapeño or sprinkle some red pepper flakes for an extra kick!

Nutritional Benefits and Dietary Adaptations

This vegan elote salad isn’t just tasty; it’s loaded with health benefits:

  • High in Fiber: The corn and beans provide plenty of fiber, promoting digestive health.
  • Rich in Healthy Fats: Avocado brings in heart-healthy monounsaturated fats.
  • Low in Calories: A great option for those looking to enjoy a tasty dish without overindulging.

Equipment Recommendations

To make your cooking experience smooth, here’s what you’ll need:

  • Mixing Bowl: A large bowl for combining all your ingredients easily.
  • Knife: A sharp knife for chopping veggies and slicing avocado.
  • Measuring Cups and Spoons: Ensures precise ingredient amounts for perfect results.

Serving Suggestions

This salad shines on its own, but here are some fun ways to enjoy it:

  • As a Side Dish: Serve alongside grilled veggies or your favorite protein.
  • Taco Topping: Use it as a zesty topping for tacos or burritos.
  • In a Wrap: Wrap it up in a tortilla for a fresh and vibrant lunch option.

Final Thoughts

Now that you’re equipped with all the tips, tricks, and knowledge to create the perfect vegan elote salad, it’s time to get cooking! Embrace the flavors, enjoy the process, and remember that healthy eating can be both delightful and fun. Whether you’re sharing it at a gathering or enjoying it solo, this salad is sure to bring a smile to your face. Happy cooking, and savor every bite!

Vegan Elote Salad Recipe

Prep Time 10 minutes
Cook Time 10 minutes
Total Time 20 minutes
Servings 4 servings
Calories 250
A vibrant and creamy vegan elote-inspired salad perfect for summer gatherings or a quick, flavorful meal.

Ingredients

Main ingredients

  • 3 cups roasted corn (16 ounces frozen or cut from about 4 ears)
  • ¾ cup chopped red onion
  • ½ cup sliced green onion
  • ½ cup cubed avocado
  • ½ -1 cup vegan cotija or feta cheese (depending on creaminess preference)
  • ¼ cup chopped cilantro
  • 1 jalapeno chopped jalapeno
  • 2-4 tablespoons fresh lime juice (adjust to taste)
  • ½ teaspoon sea salt
  • ½ teaspoon chili powder or smoked paprika

Black beans

  • ½ cup Black beans

Red pepper

Instructions 

  • Combine all ingredients in a bowl and mix well.
  • Serve immediately.

Notes

You can adjust lime and spice levels to taste.
Calories: 250kcal
Cost: $15
Course: Salad
Cuisine: Vegan
Keyword: corn

Discover the Crunchy Delight of Asian Cucumber Salad

If you’re on a quest for a refreshing, zesty, and nutritious side dish, look no further! This Asian Cucumber Salad is a vibrant blend of fresh flavors and textures, perfect for any meal. Bursting with freshness and a spicy kick, this easy recipe comes together in just 10 minutes, proving that healthy eating doesn’t have to be boring. Whether you’re serving it alongside grilled meats, or enjoying it as a light lunch, this salad is your new go-to!

Why You’ll Love This Recipe

Let’s dive into what makes this Easy Asian Cucumber Salad a must-try:

  • Quick Preparation: Perfect for busy weeknights, you can whip this up in under 10 minutes.
  • Nutritious Ingredients: Packed with vitamins, cucumbers are hydrating and low in calories!
  • Versatile Dish: Serve it as a side, mix it into grain bowls, or enjoy it as a light snack.
  • Customizable Flavors: Adjust the dressing ingredients to make it your own—spicy, sweet, or savory!
  • Great for Meal Prep: Make it ahead of time and enjoy throughout the week!

Essential Ingredients for Your Asian Cucumber Salad

This recipe requires just a handful of fresh ingredients that you might already have in your kitchen. Here’s what you’ll need:

  • 1.5 pounds Turkish, Persian, or English cucumbers: About 5 cups sliced; these varieties offer the best crunch and flavor.
  • 0.5 teaspoon salt: Essential for drawing out moisture and enhancing flavor.
  • 4-5 pieces scallions: Finely sliced for a mild onion flavor.
  • 1 teaspoon ginger: Grated for that perfect zing.
  • 1 clove garlic: Finely minced; it’s the flavor booster!
  • 0.25 cup rice vinegar: Adds a tangy kick.
  • 1 tablespoon soy sauce: For a savory depth (substitute with Bragg’s Liquid Aminos or Coconut aminos for gluten-free).
  • 1 tablespoon toasted sesame oil: Introduces a rich, nutty aroma.
  • 1 tablespoon maple syrup: Balances the acidity (or honey/sugar as alternatives).
  • 1 teaspoon chili garlic sauce: More to taste for those who like it spicy!
  • 1-2 tablespoons toasted sesame seeds: For that delightful crunch!

How to Make Your Easy Asian Cucumber Salad

Side view of a colorful Asian Cucumber Salad featuring sliced cucumbers and aromatic ingredients.

Ready to get cooking? Let’s break down the simple steps to create your salad:

Step 1: Prep and Slice the Cucumbers

Start by washing the cucumbers thoroughly. Slice them thinly for the best texture—around 1/4 inch thick is ideal.

Step 2: Salt and Chill the Cucumbers

Sprinkle the sliced cucumbers with salt. Let them sit for about 10-15 minutes. This draws out excess moisture, keeping your salad crisp!

Step 3: Rinse and Drain

After the cucumbers have released their water, rinse them under cold water and drain thoroughly.

Step 4: Toss with Flavor-Packed Dressing

In a large bowl, combine the remaining ingredients—ginger, garlic, rice vinegar, soy sauce, sesame oil, maple syrup, and chili garlic sauce. Add in your drained cucumbers and toss everything together until well coated.

Step 5: Serve and Enjoy!

Garnish with toasted sesame seeds and scallions. Chill in the refrigerator for about 10 minutes before serving for the best flavor!

Pro Tips for the Perfect Salad

Want to elevate your salad game? Here are some expert insights:

  • Choose Quality Cucumbers: Look for firm, unblemished cucumbers for the best crunch.
  • Don’t Skip the Salt: Salting is crucial for texture; it prevents sogginess.
  • Customize Your Dressing: Adjust sweetness and spiciness according to your taste; add more chili oil if you crave heat!
  • Fresh Herbs: Add cilantro or mint for a fresh twist!
  • Creative Additions: Toss in some diced avocado or bell peppers for extra flavor and nutrition.
  • Make it a Meal: Add cooked chicken, shrimp, or chickpeas to transform this side into a main!
  • Let It Marinate: For deeper flavors, let your salad sit in the fridge for a couple of hours.
  • Be Mindful of Storage: The salad is best eaten fresh but can be stored in an airtight container for up to 2 days.

Common Mistakes and Troubleshooting

Here are some common pitfalls to avoid when making your Asian Cucumber Salad:

  • Over-Salting: Use just enough salt to draw out moisture without making it too salty.
  • Slicing Too Thick: Thin slices allow for better absorption of flavors and a more pleasant texture.
  • Skipping the Chill: Chilling the salad enhances the flavors and improves texture—don’t rush this step!

Variations on Your Asian Cucumber Salad

Feel free to get creative! Here are some delicious variations you can try:

  • Spicy Sriracha Cucumber Salad: Add more chili garlic sauce or Sriracha for a kick.
  • Peanut Dressing Cucumber Salad: Swap soy sauce for a creamy peanut dressing for a nutty twist.
  • Fruit-Infused Salad: Add diced mango or pineapple for a sweet contrast.
  • Asian Noodle Salad: Mix in some cooked soba noodles for a heartier dish.

Make-Ahead and Storage Instructions

Planning to prepare your salad in advance? Here’s how to store it:

  • Make Ahead: You can prepare the salad a few hours in advance. Just keep the dressing separate if you want to maintain crispness.
  • Storage: Store any leftovers in an airtight container in the fridge for up to 2 days. The flavors will continue to meld together, making it even tastier!

Frequently Asked Questions (FAQs)

Got questions? We’ve got answers! Here are some common queries about Asian Cucumber Salad:

  • Can I use regular cucumbers? Yes, but Persian or English cucumbers are preferred for their texture.
  • How long does it last in the fridge? It’s best consumed within 2 days for optimal freshness.
  • Can I make this vegan? Absolutely! Use maple syrup and check your soy sauce for gluten-free options.
  • What can I serve with this salad? It pairs well with grilled meats, rice dishes, or even as a topping for tacos!
  • Can I add protein to this salad? Yes! Consider adding grilled chicken, shrimp, or tofu for a more substantial meal.
  • How do I adjust the sweetness? Taste the dressing and add more maple syrup or honey as needed.
  • Is this salad gluten-free? If you use gluten-free soy sauce or Bragg’s Liquid Aminos, it is!
  • What’s the best way to serve it? Serve chilled and garnished with scallions and sesame seeds for a beautiful presentation.

Nutritional Tips and Dietary Adaptations

This Asian Cucumber Salad is naturally low in calories and packed with nutrients. Here are some tips for making it even healthier:

  • Low Sodium: Use low-sodium soy sauce to cut down on sodium intake.
  • More Veggies: Add in shredded carrots or bell peppers for added vitamins and color!
  • Protein Boost: Incorporate chickpeas or edamame for a plant-based protein option.

Recommended Equipment

Here’s what you’ll need to make your salad:

  • Sharp Knife: For precise slicing of cucumbers.
  • Cutting Board: A stable surface for chopping.
  • Mixing Bowl: A large bowl to toss everything together.
  • Measuring Cups and Spoons: For accurate ingredient measurements.

Serving Suggestions

This salad not only shines on its own but enhances many dishes. Here are some ideas:

  • Grilled Meats: Serve alongside chicken or pork for a refreshing contrast.
  • Rice Bowls: Mix into brown rice or quinoa bowls for added crunch.
  • Tacos: Use it as a topping for fish or shrimp tacos for extra flavor.

In conclusion, the Crunchy, Zesty Asian Cucumber Salad is not just a dish; it’s a burst of flavors that elevates any meal. With its vibrant colors, refreshing taste, and health benefits, this salad is a celebration of simple ingredients coming together beautifully. So grab your cucumbers and get ready to impress yourself and your loved ones with this delightful recipe!

Asian Cucumber Salad

Prep Time 10 minutes
Total Time 10 minutes
Servings 4 servings
Calories 80
A refreshing and tangy cucumber salad with Asian-inspired flavors, perfect as a side dish or light meal.

Ingredients

Vegetables

  • 1.5 pounds Turkish, Persian or English cucumbers (about 5 cups sliced)
  • 0.5 teaspoon salt
  • 4-5 pieces scallions (finely sliced)
  • 1 teaspoon ginger (grated)
  • 1 clove garlic (finely minced)
  • 0.25 cup rice vinegar
  • 1 tablespoon soy sauce (for gluten-free use Bragg's Liquid Aminos or Coconut aminos)
  • 1 tablespoon toasted sesame oil
  • 1 tablespoon maple syrup (or honey, or sugar, more to taste)
  • 1 teaspoon chili garlic sauce (sambal olek or sriracha, more to taste)
  • 1-2 tablespoons toasted sesame seeds

Instructions 

  • Slice cucumbers and place in a bowl.
  • Mix salt, ginger, garlic, rice vinegar, soy sauce, sesame oil, maple syrup, and chili garlic sauce in a small bowl.
  • Pour dressing over cucumbers and toss to combine.
  • Sprinkle with toasted sesame seeds and sliced scallions.

Notes

Adjust the chili garlic sauce and sweetener to taste for desired spice and sweetness.
Calories: 80kcal
Cost: $8
Course: Side Dish
Cuisine: Asian
Keyword: cucumber

Unleash Flavor and Nutrition with Our Vibrant Avocado & Chickpea Salad!

Welcome to a culinary adventure that will awaken your taste buds and nourish your body! Our Vibrant Avocado & Chickpea Salad is not just a meal; it’s a colorful celebration of wholesome ingredients that come together in a zesty, satisfying dish. Whether you’re a busy professional, a health-conscious parent, or simply someone looking to spice up their lunch routine, this salad is your new go-to. Packed with plant-based protein, healthy fats, and vibrant veggies, you can whip it up in minutes and enjoy all the benefits of a nutritious meal without sacrificing flavor.

In this article, we’ll dive into everything you need to know about making this delicious salad, from ingredient breakdowns to pro tips, variations, and more. Get ready to transform your kitchen into a vibrant playground of flavors!

Why You’ll Love This Recipe

  • Quick and Easy: Perfect for busy days, this salad takes just minutes to prepare, allowing you to enjoy a healthy meal without the hassle.
  • Nutritious Powerhouse: Chickpeas and avocados are packed with protein, fiber, and healthy fats, making this salad a balanced option that keeps you full and energized.
  • Customizable: With various possible add-ins and toppings, you can make this salad your own, ensuring it fits your taste preferences perfectly.
  • Meal Prep Friendly: This salad is ideal for meal prep, staying fresh in the fridge for several days—perfect for planned lunches and dinners!
  • Vibrant Flavors: The combination of zesty lemon juice, creamy avocado, and crunchy veggies creates a burst of flavor in every bite!

Ingredients You’ll Need for the Avocado Chickpea Salad

Gathering the right ingredients is the first step to creating a scrumptious salad. Here’s what you need:

  • 4 tablespoons lemon juice: Freshly squeezed for the best flavor and to prevent browning of avocados.
  • 2 tablespoons extra-virgin olive oil: Adds richness and smoothness to the dressing.
  • 1/4 teaspoon salt: Enhances the flavors of all the ingredients.
  • 1/4 teaspoon pepper: Adds a hint of spice.
  • 1 can chickpeas (15 oz): Rinsed and drained, providing a hearty base.
  • 3 cups grape tomatoes: Halved for sweetness and color.
  • 1/2 medium red onion: Finely sliced to add crunch and a slight zing.
  • 2 large avocados: Diced or mashed for creaminess and healthy fats.

How to Make a Zesty Chickpea and Avocado Salad

Side shot of a fresh salad featuring avocados, chickpeas, and colorful vegetables.

Now that you have your ingredients prepped, let’s get cooking! Follow these simple steps to create your salad:

  • Prepare the Dressing: In a large bowl, whisk together 4 tablespoons lemon juice, 2 tablespoons olive oil, 1/4 teaspoon salt, and 1/4 teaspoon pepper.
  • Combine the Ingredients: Add the rinsed chickpeas, halved grape tomatoes, sliced red onion, and diced avocado to the bowl.
  • Toss Gently: Use a spatula to gently toss everything together, ensuring the dressing coats all ingredients without mashing the avocado.

Pro Tips for the Best Chickpea Salad

Want to elevate your salad game? Check out these expert insights:

  • Fresh Ingredients: Use ripe avocados and fresh tomatoes for the best flavor and texture.
  • Adjust the Dressing: If you like it tangier, add more lemon juice. For a creamier salad, consider adding a dollop of Greek yogurt or tahini.
  • Mix in Greens: For added nutrients, mix in a handful of spinach or arugula for a leafy green boost.
  • Use Flavorful Add-Ins: Consider adding feta cheese or cucumbers for extra flavor and crunch!
  • Keep Avocados Fresh: To prevent browning, add lemon juice to the diced avocado immediately after cutting.
  • Chill Before Serving: Letting the salad sit in the fridge for about 30 minutes allows flavors to meld beautifully.

Common Mistakes to Avoid

Even the best chefs make mistakes! Here are some common pitfalls and how to avoid them:

  • Over-Seasoning: Be cautious with salt and pepper; you can always add more, but it’s hard to fix an overly salty salad.
  • Mashing the Avocado: When tossing, be gentle! You want to keep the avocado pieces intact for a beautiful presentation.
  • Skipping the Dressing: Don’t skip the dressing step; it brings all the flavors together and enhances the overall taste.

Variations to Try

Feeling adventurous? Here are some fun variations to switch things up:

  • Southwestern Style: Add black beans, corn, and diced jalapeños for a spicy twist!
  • Mediterranean Flair: Toss in olives, sun-dried tomatoes, and fresh herbs like parsley or basil.
  • Fruit Fusion: Mix in diced mango or pineapple for a tropical vibe that balances the savory flavors.
  • Protein Boost: Add grilled chicken or shrimp for an extra protein punch, turning it into a hearty meal!

Storage and Make-Ahead Instructions

This salad is perfect for meal prep! Here’s how to store and prepare ahead of time:

  • Refrigeration: Store in an airtight container in the fridge for up to 3 days. Keep the dressing separate until ready to serve to maintain freshness.
  • Make-Ahead: You can prep all ingredients and store them separately. Combine just before serving for optimal taste and texture.

Frequently Asked Questions

Got questions? We’ve got answers! Here are some FAQs about this delicious salad:

  • Can I use canned chickpeas? Yes! Canned chickpeas are perfect for this recipe—just rinse and drain them before use.
  • Is this salad vegan? Absolutely! It’s completely plant-based and packed with nutrients.
  • How can I add more protein? Try adding grilled chicken, tofu, or a sprinkle of hemp seeds for an extra protein boost.
  • What can I substitute for avocado? If you’re not a fan of avocado, consider using silken tofu for creaminess or a dollop of hummus.
  • Can I freeze this salad? It’s best enjoyed fresh, but you can freeze chickpeas separately if needed.
  • How do I make it gluten-free? This salad is naturally gluten-free, so you’re good to go!
  • What’s the best way to serve it? Serve chilled as a side dish, or enjoy it as a hearty main course with crusty bread!
  • How much does this recipe make? This salad serves about 4 as a side dish or 2 as a main course.

Nutrition Tips and Dietary Adaptations

Here are some nutritional insights and adaptations to consider:

  • High in Fiber: Chickpeas provide a rich source of dietary fiber, promoting digestive health.
  • Healthy Fats: Avocados are loaded with heart-healthy monounsaturated fats, beneficial for heart health.
  • Low-Calorie Option: This salad is low in calories while being rich in nutrients, making it a great choice for weight management.

Equipment Recommendations

To make your cooking experience smoother, here are some essential tools:

  • Mixing Bowl: A large bowl for combining ingredients.
  • Whisk: For blending your dressing ingredients thoroughly.
  • Cutting Board and Knife: Essential for chopping veggies and avocados.
  • Spatula: Useful for gently mixing the salad without mashing the avocado.

Serving Suggestions

Ready to dig in? Here’s how to serve this delightful salad:

  • With Whole Grain: Serve alongside quinoa, brown rice, or whole-grain bread for a complete meal.
  • As a Wrap: Use a large lettuce leaf or a whole-grain wrap to create a healthy lunch option.
  • On a Bed of Greens: Serve over a bed of mixed greens for added crunch and nutrients.

In conclusion, our Vibrant Avocado & Chickpea Salad is not only easy to make but also an explosion of flavor and nutrition in every bite! So grab your ingredients, unleash your inner chef, and enjoy a healthy meal that’s as delightful to make as it is to eat. Dive into this zesty adventure today—your taste buds will thank you!

5-Ingredient Avocado & Chickpea Salad

Prep Time 10 minutes
Total Time 10 minutes
Servings 4 servings
Calories 350
A quick and healthy salad combining creamy avocados, hearty chickpeas, and fresh grape tomatoes with a simple lemon dressing.

Ingredients

Dressing

  • 4 tablespoons lemon juice
  • 2 tablespoons extra-virgin olive oil
  • 1/4 teaspoon salt
  • 1/4 teaspoon pepper

Main ingredients

  • 1 can chickpeas (rinsed and drained)
  • 3 cups grape tomatoes (halved)
  • 1/2 medium red onion (sliced)
  • 2 large avocados (diced)

Instructions 

  • Whisk lemon juice, oil, salt, and pepper in a large bowl.
  • Add chickpeas, tomatoes, onion, and avocado; toss gently to coat.

Notes

Use ripe avocados for best flavor.
Calories: 350kcal
Cost: $10
Course: Salad
Cuisine: Healthy
Keyword: avocado

Why Honey Hot Chicken Salad Will Rock Your World

Welcome to a delightful culinary adventure with our Honey Hot Chicken Salad! If you’re tired of bland salads and looking for a flavor explosion, you’ve hit the jackpot. This dish is all about juicy, crispy chicken, a sweet and spicy dressing, and fresh, vibrant greens. In this comprehensive guide, we’ll transform your perception of salads—get ready to embrace a dish that’s not only nutritious but also bursting with excitement!

Let’s dive into why this recipe is a must-try:

  • Flavor Fusion: The combination of crispy chicken, sweet honey, and a kick of heat makes every bite an adventure.
  • Versatile Meal Prep: Perfect for quick lunches or dinners, this salad can be made ahead and enjoyed throughout the week.
  • Health Boost: Packed with protein and fresh ingredients, you’re fueling your body while satisfying your taste buds.
  • Quick and Easy: With simple steps, you can whip this up in about 30 minutes, making it ideal for busy weeknights.
  • Crowd-Pleaser: Whether for family dinner or a potluck, this salad is sure to impress everyone at the table!

Ingredient Breakdown

Understanding your ingredients is crucial for achieving the best flavor and texture in your Honey Hot Chicken Salad. Here’s what you’ll need:

  • 2 organic chicken breasts: Slice them in half lengthwise to ensure even cooking. Quality matters, so choose fresh, high-quality chicken.
  • 1/4 cup arrowroot starch powder: This will give your chicken a deliciously crispy coating.
  • 1/3 cup cassava flour: A gluten-free alternative that adds a unique flavor and texture.
  • Seasonings: Garlic powder, chili powder, sea salt, paprika, onion powder, and ground pepper enhance the chicken’s flavor.
  • 3 tbsp avocado oil: Perfect for frying due to its high smoke point and neutral flavor.
  • Hot sauce and honey: The star duo that creates that irresistible sweet and spicy dressing!
  • Fresh greens: 3 heads of chopped romaine hearts provide a crisp base for your salad.
  • Optional toppings: Croutons, avocado slices, fresh cilantro, lemon wedges, raw hempseeds, and grated parmesan for extra flavor and texture.

Pro Tips for Success

To elevate your Honey Hot Chicken Salad, consider these expert tips:

  • Prep Ahead: Cook the chicken and prepare the dressing in advance to streamline your mealtime.
  • Double the Sauce: If you love a good dressing, double the hot honey sauce for extra flavor.
  • Use a Meat Thermometer: Ensure your chicken is perfectly cooked at 165°F for the best texture.
  • Customize Your Greens: Experiment with a mix of greens like spinach or kale for added nutrients.
  • Experiment with Spices: Adjust the level of chili powder based on your heat preference.
  • Add Crunch: Toss in some nuts or seeds for extra texture and nutrition.
  • Fresh Herbs: Incorporate fresh herbs like basil or parsley for an aromatic boost.
  • Don’t Skimp on Dressing: Make sure every bite is coated with the delicious hot honey sauce!

Avoiding Common Mistakes

Side view of a colorful Honey Hot Chicken Salad served in a bowl with honey drizzle.

Even seasoned cooks can make a few missteps. Here’s how to avoid common pitfalls:

  • Overcrowding the Pan: Fry the chicken in batches to achieve that perfect crispy texture.
  • Not Preheating the Oil: Ensure your oil is hot before adding chicken to avoid sogginess.
  • Skipping the Dredging Process: This is key for the crispy coating—don’t skip it!
  • Using Low-Quality Ingredients: Fresh, high-quality ingredients make a world of difference in flavor.

Delicious Variations to Try

Feeling adventurous? Here are some variations on the classic Honey Hot Chicken Salad:

  • Buffalo Chicken Salad: Swap the honey hot sauce for buffalo sauce for a spicier kick.
  • Vegan Version: Use crispy tofu or chickpeas instead of chicken for a plant-based delight.
  • Southwestern Twist: Add black beans, corn, and avocado for a southwestern flair.
  • Asian-Inspired: Incorporate sesame oil and top with sesame seeds and green onions for an Asian twist.

Storage and Make-Ahead Instructions

Want to prepare your Honey Hot Chicken Salad in advance? Here’s how to store it:

  • Refrigerate: Store the chicken and dressing separately in airtight containers for up to 3 days.
  • Freeze: The chicken can be frozen for up to 2 months. Thaw and reheat before serving.
  • Assemble Fresh: Combine the salad ingredients just before serving to keep everything crisp.

FAQ: All Your Questions Answered

Got questions? We’ve got answers! Here are some common queries regarding the Honey Hot Chicken Salad:

  • Can I use leftover chicken? Absolutely! Shredded rotisserie chicken works perfectly.
  • Is there a gluten-free option? Yes! Using cassava flour and arrowroot starch keeps it gluten-free.
  • How spicy is this dish? The heat level can be adjusted based on your choice of hot sauce.
  • Can I make this vegan? Definitely! Substitute chicken with crispy tofu or chickpeas.
  • What can I serve with this salad? It pairs well with crusty bread, quinoa, or a light soup.
  • How long does it last in the fridge? Enjoy within 3 days for the best flavor and texture.
  • Can I use a different dressing? Feel free to experiment with your favorite dressings!
  • How do I make it more filling? Add grains like quinoa or farro for an extra boost!

Nutritional Tips and Dietary Adaptations

Here are some tips for making this salad suit your dietary needs:

  • Low-Carb Option: Skip the croutons and use leafy greens for a keto-friendly meal.
  • High-Protein: Add extra chicken or a scoop of Greek yogurt for protein boosts.
  • Calorie-Conscious: Control portions of dressing and toppings to keep calories in check.

Equipment You’ll Need

Before you dive into creating your Honey Hot Chicken Salad, gather these kitchen essentials:

  • Non-stick skillet: Ideal for frying the chicken to crispy perfection.
  • Meat thermometer: Ensures your chicken is cooked perfectly.
  • Mixing bowls: For combining ingredients and tossing the salad.
  • Whisk: To mix your hot honey dressing smoothly.

Serving Suggestions

Ready to serve your stunning Honey Hot Chicken Salad? Here are some ideas:

  • Garnish with Fresh Herbs: Sprinkle chopped cilantro or parsley for added freshness.
  • Serve with Lemon Wedges: A squeeze of lemon brightens up the flavors beautifully.
  • Pair with a Light Drink: Enjoy with iced tea or sparkling water for a refreshing meal.

So there you have it! This Honey Hot Chicken Salad is more than just a meal; it’s a celebration of flavors, textures, and health. Get ready to amaze your taste buds and redefine what a salad can be. Let’s dig in and enjoy this vibrant, bold dish together!

Honey Hot Chicken Salad

Prep Time 15 minutes
Cook Time 10 minutes
Total Time 25 minutes
Servings 4 servings
Calories 650
A flavorful and crispy chicken salad tossed in spicy honey hot sauce, served over fresh greens with vibrant toppings.

Ingredients

Protein

  • 2 pieces organic chicken breasts (sliced in half lengthwise, about 1/4-inch thick (Ensure they are fresh and high-quality))
  • 1/4 cup arrowroot starch powder (For dredging and crispiness)
  • 1/3 cup cassava flour (Provides a gluten-free alternative to flour)
  • 1/2 tsp garlic powder (For flavor)
  • 1 tsp chili powder (Adds a mild heat)
  • 1/2 tsp sea salt (For seasoning)
  • 1/2 tsp paprika (Adds color and smokiness)
  • 1/2 tsp onion powder (Enhances flavor depth)
  • 1/4 tsp ground pepper (For a hint of spice)
  • 3 tbsp avocado oil (A neutral oil for frying)
  • 1 egg egg (For dredging and binding the flour mixture)
  • 1/4 cup hot sauce (Any preferred brand, like Cholula or Frank's, for heat)
  • 2-3 tbsp honey (For sweetness to balance the heat)
  • 3 heads romaine hearts (chopped (For a crisp, fresh base))
  • 3 tbsp Caesar dressing (Use your favorite, such as Primal Kitchen or homemade)
  • 1/2 cup fresh cilantro leaves (roughly chopped (Optional, for a fresh herbal touch))
  • Croutons Croutons (Optional, homemade sourdough croutons are ideal)
  • to taste Grated parmesan (For added richness)
  • 1 avocado avocado (sliced (Adds creaminess and texture))
  • 2 to 3 lemon slices lemon slices (cut 1/4 inch thick (For a fresh citrus pop))
  • 2 tbsp raw hempseeds (Optional, for extra crunch and nutrition)
  • 2 tbsp raw or roasted pumpkin seeds (Optional, for crunch)
  • to taste Freshly ground black pepper (For seasoning)

Instructions 

  • Set up three shallow bowls: one with arrowroot starch, another with whisked egg, and the last with cassava flour and seasonings. Dredge chicken in each step, then fry in hot oil until cooked through.
  • Mix hot sauce and honey in a bowl. Toss fried chicken in the sauce until fully coated, then slice into 1/2-inch pieces.
  • Combine chopped romaine and Caesar dressing in a large bowl. Add cilantro if desired. Top with chicken slices, avocado, lemon, and optional toppings. Season with black pepper and serve.

Notes

For extra flavor, marinate chicken briefly in hot sauce before cooking.
Calories: 650kcal
Cost: $15
Course: Main Course
Cuisine: American
Keyword: Chicken, Honey, Salad

Elevate Your Dinner Game with This Vibrant Vegetarian Quinoa Bowl

Welcome to a world of flavor, nutrition, and creativity! This Vegetarian Quinoa Bowl is not just a meal; it’s a celebration of summer’s bounty! Packed with colorful veggies, creamy avocado, and zesty lemon, this dish is your new go-to for quick, satisfying dinners. In under 30 minutes, you’ll have a delicious and nutritious meal that makes healthy eating feel exciting and accessible. Let’s dive into the magic of this quinoa bowl!

Why You’ll Love This Recipe

  • Easy to Prepare: This vegetarian quinoa bowl is super simple, making it perfect for busy weeknights or lazy weekends.
  • Nutritious Ingredients: Each ingredient brings its own health benefits, ensuring a meal that nourishes your body and soul.
  • Vibrant Colors: The array of fresh vegetables not only tastes fantastic but also creates a feast for the eyes!
  • Customizable: You can easily swap in your favorite veggies or proteins, making it a versatile dish for all tastes.
  • Make-Ahead Friendly: Prepare this bowl in advance for a quick and healthy meal during the week.

Gathering Your Ingredients

Let’s get excited about what goes into this colorful bowl! Here’s what you’ll need:

  • 1 cup quinoa: A complete protein that serves as a fantastic base.
  • 2 cups vegetable broth or water: For cooking the quinoa, broth adds extra flavor.
  • 1 cup cherry tomatoes, halved: Sweet and juicy, they add a burst of freshness.
  • 1 cup cucumber, diced: Crisp and refreshing, perfect for a summer bowl.
  • 1 cup bell peppers (mixed colors), diced: Adds crunch and a pop of color!
  • 1 avocado, sliced: Creamy and rich, providing healthy fats.
  • 3 tablespoons olive oil: For dressing and cooking, it enhances flavor.
  • Juice of 1 lemon: Zesty and brightens up the dish!
  • Salt and pepper to taste: Essential seasonings to tie everything together.

How to Create Your Quinoa Masterpiece

Close-up view of a quinoa bowl featuring cherry tomatoes, cucumbers, and bell peppers.

This is where the fun begins! Follow these easy steps to make your vegetarian quinoa bowl.

  1. Rinse the quinoa under cold water to remove bitterness. In a medium saucepan, combine rinsed quinoa and vegetable broth or water. Bring to a boil, reduce heat, cover, and simmer for 15 minutes until liquid is absorbed.
  2. While the quinoa cooks, chop cherry tomatoes, cucumber, bell peppers, and avocado into bite-sized pieces.
  3. In a small bowl, whisk together olive oil, lemon juice, salt, and pepper until well combined.
  4. Once the quinoa has cooked and slightly cooled, fluff it with a fork. In a large bowl, mix in the chopped veggies and drizzle with dressing.
  5. Serve portions in bowls topped with avocado slices. Enjoy your vibrant meal!

Pro Tips for Quinoa Perfection

  • Rinse the Quinoa: Always rinse quinoa to remove its natural coating, saponin, which can taste bitter.
  • Flavor the Broth: Using vegetable broth instead of water can significantly enhance the flavor of your quinoa.
  • Let It Cool: Allowing the cooked quinoa to cool slightly before mixing with veggies helps maintain texture.
  • Experiment with Dressings: Feel free to swap out the olive oil and lemon for your favorite vinaigrette or yogurt-based dressing!
  • Stir Gently: When mixing ingredients, stir gently to keep the avocado slices and veggies intact.
  • Get Creative with Herbs: Fresh herbs like parsley or cilantro can elevate the dish even further!
  • Store Separately: If prepping ahead, store the quinoa and veggies separately to keep them fresh.
  • Make It a Meal: Add grilled chicken, chickpeas, or tofu for extra protein!

Common Mistakes and Troubleshooting

Even the best chefs have their off days! Here are some common pitfalls and how to avoid them:

  • Too Much Water: If your quinoa turns out mushy, you may have added too much liquid. Stick to the 2:1 ratio!
  • Bland Quinoa: Always season your cooking liquid to infuse flavor; don’t skip the broth!
  • Overcooked Veggies: Make sure to chop and add veggies that cook quickly to maintain their crunch.
  • Unbalanced Dressing: Taste your dressing before adding it to ensure it’s zesty enough!

Variations to Try

This quinoa bowl is incredibly versatile! Here are some fun variations:

  • Protein-Packed Bowl: Add grilled chicken or shrimp for a hearty meal.
  • Spicy Twist: Include diced jalapeños or a splash of hot sauce for heat.
  • Mediterranean Style: Swap in chopped olives, feta cheese, and a drizzle of balsamic vinegar.
  • Asian Fusion: Use sesame oil, add edamame, and top with sesame seeds for an Asian flair.

Storage and Make-Ahead Instructions

This dish is perfect for meal prep! Here’s how to store it:

  • Fridge: Store in an airtight container for up to 4 days. Keep the dressing separate until ready to serve.
  • Freezer: Quinoa can be frozen for up to 3 months. Thaw overnight in the fridge before use.
  • Make-Ahead: Prepare the quinoa and chop veggies ahead of time for quick assembly during the week.

Nutritional Insights and Dietary Adaptations

This vegetarian quinoa bowl is packed with nutrients:

  • High in Fiber: Quinoa and veggies provide a significant fiber boost for digestive health.
  • Rich in Antioxidants: Fresh vegetables like tomatoes and bell peppers are loaded with antioxidants.
  • Gluten-Free: Quinoa is naturally gluten-free, making this dish suitable for gluten-sensitive individuals.
  • Vegan-Friendly: Perfect for plant-based eaters, this recipe is completely vegan!

Essential Equipment

To whip up this bowl, here’s what you’ll need:

  • Medium Saucepan: For cooking quinoa.
  • Cutting Board and Knife: For chopping your fresh veggies.
  • Whisk: For mixing the dressing.
  • Large Mixing Bowl: To combine all your ingredients beautifully.

Serving Suggestions

Now that your bowl is ready, how should you serve it? Here are some ideas:

  • Garnish with Fresh Herbs: Sprinkle with parsley or cilantro for a fresh touch.
  • Pair with Whole Grain Bread: Serve alongside your favorite whole grain bread or pita.
  • Add a Side Salad: A light side salad complements this meal beautifully.
  • Enjoy as a Cold Salad: This bowl can also be served cold, making it a refreshing option!

Frequently Asked Questions

  • Can I make this vegetarian quinoa bowl ahead of time? Yes, prep the quinoa and veggies in advance for easy assembly later!
  • How do I store leftovers? Keep leftovers in an airtight container in the fridge for up to 4 days.
  • What can I substitute for quinoa? You can use farro, bulgur, or brown rice for different textures.
  • Is this dish suitable for meal prep? Absolutely! It’s perfect for meal prep and makes for easy lunches.
  • Can I add protein to this bowl? Yes! Grilled chicken, chickpeas, or tofu work great.
  • What if I don’t like certain vegetables? Feel free to swap in your favorites or whatever you have on hand!
  • Can this recipe be made gluten-free? Yes, quinoa is gluten-free, so it’s suitable for gluten-sensitive diets.
  • How long does it take to prepare? The total time is about 30 minutes, making it a quick and nutritious meal!

In conclusion, this Vibrant Vegetarian Quinoa Bowl is not just a meal; it’s a canvas for your culinary creativity! With its fresh ingredients, vibrant colors, and customizable nature, it’s bound to become a staple in your kitchen. Dive into this delicious bowl, and remember, healthy eating can be fun, exciting, and bursting with flavor! Happy cooking!

Vegetarian Quinoa Bowl Summer Dinner

Prep Time 10 minutes
Cook Time 15 minutes
Total Time 25 minutes
Servings 4 servings
Calories 350
A fresh and healthy vegetarian quinoa bowl perfect for summer evenings. Packed with colorful veggies and a zesty lemon dressing, it's quick to prepare and full of flavor.

Ingredients

Grains

  • 1 cup quinoa
  • 2 cups vegetable broth or water

Vegetables

  • 1 cup cherry tomatoes, halved
  • 1 cup cucumber, diced
  • 1 cup bell peppers (mixed colors), diced
  • 1 avocado sliced avocado

Dressing

  • 3 tablespoons olive oil
  • Juice of 1 lemon lemon juice
  • to taste salt and pepper

Instructions 

  • Rinse quinoa and cook with broth for 15 minutes, then fluff.
  • Chop cherry tomatoes, cucumber, bell peppers, and slice avocado.
  • Whisk olive oil, lemon juice, salt, and pepper to make dressing.
  • Mix cooked quinoa with chopped veggies and drizzle with dressing.
  • Serve in bowls topped with avocado slices.

Notes

Feel free to add herbs like cilantro or basil for extra flavor.
Calories: 350kcal
Cost: $15
Course: Main Course
Cuisine: Vegetarian
Keyword: Quinoa, Summer, Vegetables

Welcome to the vibrant world of flavor with our Viral Cucumber Salad with Chili & Sesame! If you’re looking for a dish that marries crunch with a delightful zing, you’ve hit the jackpot. This refreshing salad is not only visually appealing but also packed with nutrients and bold flavors that will make your taste buds dance. Perfect as a snack or a lively side dish, it’s time to explore why this salad is becoming a hit across TikTok and beyond!

Why You’ll Love This Recipe

This salad isn’t just another dish; it’s an experience! Here are some compelling reasons to make it:

  • Quick to Prepare: With just a handful of ingredients and minimal prep time, this salad can be on your table in under 15 minutes!
  • Flavor Explosion: The combination of sesame oil, soy sauce, and chili flakes creates a savory, spicy kick that tantalizes your taste buds.
  • Highly Customizable: Whether you prefer it mild or fiery, you can adjust the spice levels to match your palate perfectly.
  • Nutrient-Rich: Packed with fresh cucumbers and spring onions, this salad is low in calories but high in vitamins and minerals.
  • Perfect for Meal Prep: Store it in the fridge for a quick, healthy snack or side dish throughout the week—just be aware of the texture!

Ingredient Breakdown

Let’s dive into the ingredients that make this salad shine:

  • Snack Cucumbers (6 pieces): These smaller, firmer cucumbers are perfect for holding their shape and providing that satisfying crunch. Feel free to substitute with Persian or English cucumbers if necessary!
  • Spring Onions (3 pieces): Finely sliced, these add a mild onion flavor that complements the dish beautifully.
  • Soy Sauce (4 tbsp): The savory foundation of the dressing; opt for low-sodium soy sauce if you’re watching your salt intake.
  • Rice Vinegar (2 tbsp): Adds a tangy zest that balances the flavors in the salad.
  • Sesame Oil (1 tbsp): Infuses a nutty aroma and richness, enhancing the overall flavor profile.
  • Honey (1 tsp): A touch of sweetness to counteract the savory and spicy notes.
  • Chili Flakes (1 tsp): Adds that necessary heat! Adjust according to your spice tolerance.
  • Garlic (2 cloves): Minced for an aromatic boost.
  • Sesame Seeds (1 tsp): Lightly toasted, these add a beautiful finish and crunch.

How to Make the Salad

Ready to get started? Here’s how to whip up this delicious salad:

  1. In a large mixing bowl, combine the soy sauce, rice vinegar, sesame oil, honey, chili flakes, and minced garlic. Mix well to create your dressing.
  2. Slice the snack cucumbers into thin rounds and add them to the bowl along with the spring onions.
  3. Toss gently but thoroughly to ensure everything is well-coated in the dressing.
  4. Let the salad sit for about 5-10 minutes to allow the flavors to meld.
  5. Garnish with toasted sesame seeds before serving. Enjoy your crunchy, zesty salad!

Pro Tips for Perfection

Juicy cucumber salad with colorful toppings and dressing in a bowl.

To elevate your salad-making game, consider these expert insights:

  • Freshness is Key: Always use fresh cucumbers and herbs for the best flavor. Check for firm, unblemished cucumbers.
  • Adjust the Heat: If you prefer a milder salad, remove the seeds from the chili or reduce the amount of chili flakes.
  • Make-Ahead Magic: Prep the dressing and cucumbers separately. Combine them just before serving to maintain the crunch.
  • Experiment with Herbs: Add fresh cilantro or mint for an extra layer of flavor!
  • Storage Savvy: Store leftovers in an airtight container in the fridge for up to one day. The salad will soften but still taste great.
  • Pair with Protein: Serve this salad alongside grilled chicken or tofu for a complete meal.
  • Garnish for Style: Add extra sesame seeds or finely chopped herbs for a beautiful presentation.
  • Mix it Up: Feel free to add other crunchy vegetables like bell peppers or radishes for additional color and flavor!

Common Mistakes and Troubleshooting

Even the best chefs make mistakes! Here’s how to avoid common pitfalls:

  • Overdressing: If the salad becomes too soggy, use less dressing next time or serve the dressing on the side.
  • Wrong Cucumber Type: Using overly ripe or soft cucumbers can lead to a mushy salad. Always opt for firm varieties.
  • Too Spicy: If your salad turns out too spicy, balance it with extra honey or a splash of vinegar.
  • Garlic Overload: Mince garlic carefully; too much can overpower the dish. Start with less if you’re unsure.

Variations to Try

Looking to mix things up? Here are some delicious variations:

  • Spicy Mango Twist: Add diced mango for a sweet, tropical twist that pairs wonderfully with the heat.
  • Crispy Tofu Addition: Toss in crispy tofu cubes for added protein and texture.
  • Avocado Delight: Incorporate diced avocado for creaminess and healthy fats.
  • Asian Pasta Salad: Mix with cooked soba noodles for a heartier meal, perfect for lunch!

Storage and Make-Ahead Instructions

To keep your salad fresh and tasty:

  • Short-Term Storage: Place leftovers in an airtight container in the fridge for up to one day. The cucumbers will soften but still taste delicious.
  • Make-Ahead Tips: Prepare the dressing and slice the cucumbers a few hours in advance. Combine just before serving for maximum crunch.

Comprehensive FAQ

Got questions? We’ve got answers! Here are some frequently asked questions:

  • Can I make this ahead of time? Yes! Just keep the dressing separate until you’re ready to serve.
  • Is this salad spicy? It can be! Adjust the chili flakes to suit your taste.
  • Can I double the recipe? Absolutely! This salad is perfect for sharing at gatherings.
  • What type of cucumbers should I use? Snack cucumbers are best, but Persian or English cucumbers work well too.
  • Can I add other vegetables? Yes! Feel free to incorporate bell peppers, radishes, or any crunchy veggies you enjoy.
  • How long does it last in the refrigerator? It’s best enjoyed fresh but can be stored for up to one day in an airtight container.
  • Is this salad gluten-free? Yes, it is gluten-free if you use gluten-free soy sauce.
  • What can I serve with this salad? It pairs wonderfully with grilled meats, seafood, or as a refreshing side to any meal.

Nutritional Tips and Dietary Adaptations

This salad not only delights your palate but also offers numerous health benefits:

  • Low-Calorie Snack: Perfect for those watching their caloric intake while still enjoying flavorful food.
  • Rich in Vitamins: Cucumbers are hydrating and provide essential vitamins and minerals, making this salad a nutritious choice.
  • Customizable for Diets: Easily adaptable for vegan, vegetarian, and gluten-free diets by substituting ingredients as needed.

Equipment Recommendations

Here’s what you’ll need to create this delicious salad:

  • Sharp Knife: For precise slicing of cucumbers and onions.
  • Cutting Board: A clean surface for all your chopping needs.
  • Mixing Bowl: To combine all those vibrant ingredients.
  • Measuring Cups and Spoons: For accurate ingredient measurements.

Serving Suggestions

To elevate your dining experience:

  • Chilled Delight: Serve the salad chilled for a refreshing taste, especially during hot days!
  • Garnish with Fresh Herbs: A sprinkle of fresh cilantro or mint adds a pop of color and flavor.
  • Pair with Grilled Proteins: This salad complements grilled chicken, shrimp, or tofu perfectly, making it a versatile side.

In conclusion, the Viral Cucumber Salad with Chili & Sesame is a testament to the idea that healthy eating can be fun, exciting, and bursting with flavor. Whether you’re meal prepping for the week or hosting a gathering, this salad is sure to impress. So grab your ingredients and get ready to indulge in a bowl of crunchy joy!

Viral TikTok Cucumber Salad with Chili & Sesame

Prep Time 10 minutes
Total Time 10 minutes
Servings 2 people
Calories 120
A quick and refreshing cucumber salad with a spicy, tangy, and nutty dressing, perfect for a light snack or side dish.

Ingredients

Vegetables

  • 6 pieces Snack cucumbers (These smaller, firmer cucumbers are perfect for holding their shape.)
  • 3 pieces Spring onions (Finely sliced into rings.)

Sauces & Oils

  • 4 tbsp Soy sauce (The savory foundation.)
  • 2 tbsp Rice vinegar (For tangy zest.)
  • 1 tbsp Sesame oil (Infuses nutty aroma.)
  • 1 tsp Honey (Balances sour and spicy.)
  • 1 tsp Chili flakes (Adds heat.)

Aromatics

  • 2 cloves Garlic (Finely minced.)
  • 1 tsp Sesame seeds (Toasted lightly.)

Instructions 

  • Slice cucumbers and spring onions thinly.
  • Mix soy sauce, rice vinegar, sesame oil, honey, chili flakes, and minced garlic to make the dressing.
  • Toss cucumbers and onions with the dressing until evenly coated.
  • Sprinkle toasted sesame seeds on top before serving.

Notes

For extra crunch, add chopped peanuts or cashews.
Calories: 120kcal
Cost: $8
Course: Side Dish
Cuisine: Asian
Keyword: cucumber