Author

Ryan

Browsing

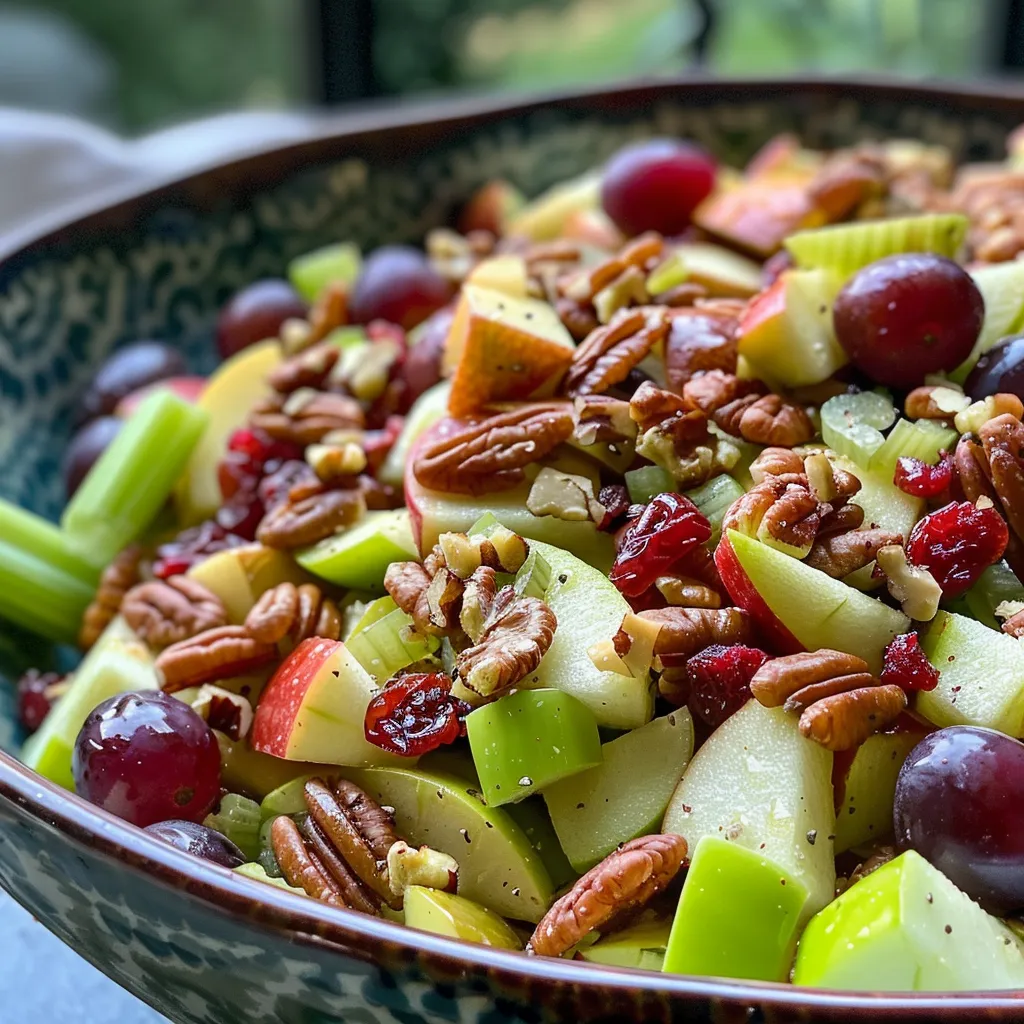
Discover the Flavor Explosion of Apple Salad with Grapes & Pecans!

Welcome to a vibrant culinary experience where crunch meets sweetness! Our Apple Salad with Grapes & Pecans is not just another salad; it’s a delightful medley that brings together the crispness of Honeycrisp apples, the juiciness of red grapes, and the rich crunch of pecans, all enveloped in a creamy, tangy dressing. Perfect for a refreshing snack, a colorful side for gatherings, or a make-ahead dish for your busy week, this recipe will redefine how you think about salads!

Let’s dive into the reasons this salad is an absolute must-try!

Why You’ll Love This Recipe

  • Quick and Easy: With just a handful of ingredients and a few simple steps, you can whip up this salad in no time, making it perfect for busy days or last-minute gatherings.
  • Flavorful Harmony: The mix of sweet, tart, and crunchy elements creates a balanced flavor profile that will leave your taste buds dancing.
  • Nutritious Goodness: Packed with vitamins from fresh fruits and healthy fats from pecans, this salad is a powerhouse of nutrition.
  • Customizable: Feel free to mix and match ingredients based on your preferences or what you have on hand, making it versatile and fun!
  • Make-Ahead Friendly: This salad tastes even better after chilling in the fridge, allowing the flavors to meld beautifully.

Essential Ingredients for Your Apple Salad

Here’s what you’ll need to create this delicious salad:

  • ½ cup chopped pecans: Adds crunch and a nutty flavor.
  • 4 large Honeycrisp apples: Their sweetness and crisp texture make them the ideal choice.
  • 2 ribs celery: Provides a refreshing crunch.
  • 1 lemon: Freshly squeezed lemon juice helps prevent browning and adds tang.
  • ½ cup dried cranberries: For a sweet, chewy contrast.
  • ⅓ cup mayonnaise: The base of our creamy dressing.
  • 1½ tablespoons brown sugar: Enhances the sweetness and depth of flavor.
  • 1 cup seedless red grapes: Halved for easy eating and juicy bursts in every bite.

Making Your Apple Salad: Step-by-Step

Juicy apple salad with chopped apples, grapes, and pecans in a bowl.

Creating this salad is as easy as pie! Follow these simple steps for a delicious result:

  1. In a large mixing bowl, coat the cubed apples with freshly squeezed lemon juice to prevent browning and preserve their crisp texture.

  2. In a separate bowl, thoroughly whisk together the mayonnaise and brown sugar until well combined.

  3. Add the prepared apples, celery slices, halved grapes, chopped pecans, and dried cranberries to the mayonnaise mixture.

  4. Gently fold the ingredients together until evenly coated and well distributed throughout the salad.

  5. Cover the bowl and refrigerate for a minimum of 30 minutes before serving to enhance the flavors and ensure a chilled presentation.

Pro Tips for the Perfect Apple Salad

  • Select Sweet and Tart Apples: Using a mix of sweet Honeycrisp and tart Granny Smith apples will elevate the flavor.
  • Toast the Pecans: Lightly toasting your pecans will enhance their flavor and crunch.
  • Mix in Greek Yogurt: For a healthier twist, substitute part of the mayonnaise with Greek yogurt for added creaminess and protein.
  • Chill Before Serving: Allowing the salad to chill not only improves the taste but also makes it refreshing.
  • Experiment with Add-Ins: Consider adding mini marshmallows or shredded coconut for a fun twist!
  • Use Fresh Ingredients: Fresh produce makes a significant difference in taste and texture.
  • Adjust Sweetness: Tailor the brown sugar to your taste; you can always add a little more if you prefer a sweeter salad.
  • Don’t Skip the Lemon Juice: It not only prevents browning but also brightens the flavors.

Common Mistakes and Troubleshooting

Even the best recipes can have hiccups! Here’s how to troubleshoot common issues:

  • Apples Browning: If you notice browning, ensure you coat them in lemon juice immediately after cutting.
  • Too Watery Salad: If your salad seems watery, try reducing the amount of mayonnaise or adding more crunchy ingredients like celery or nuts.
  • Flavor Flatness: If the flavor isn’t popping, a pinch of salt or a dash more lemon juice can enhance the overall taste.

Delicious Variations of the Apple Salad

Feel free to mix things up! Here are a few fun variations you can try:

  • Nut-Free Option: Omit the pecans and replace them with sunflower seeds for crunch.
  • Fruit Mix-Up: Add additional fruits like diced pears or mandarin oranges for a tropical twist.
  • Cranberry-Walnut Delight: Swap cranberries for raisins and pecans for walnuts for a different flavor profile.
  • Spiced Apple Salad: Sprinkle a dash of cinnamon or nutmeg for an extra layer of warmth.

Storing and Make-Ahead Instructions

This salad is perfect for meal prep! Here’s how to store it:

  • Refrigeration: Store your salad in an airtight container in the fridge for up to 3 days.
  • Make-Ahead: You can prepare the salad a day in advance; just add the dressing right before serving to keep it fresh.
  • Freezing: Not recommended, as the texture of the apples and grapes may change.

Frequently Asked Questions

Got questions? We’ve got answers!

  • Can I use different types of apples? Absolutely! A mix of sweet and tart apples will provide a great flavor balance.
  • What can I use instead of mayonnaise? Greek yogurt or a dairy-free mayo can work wonderfully!
  • How do I prevent the apples from browning? Coating them with lemon juice immediately after cutting is key!
  • Is there a vegan version of this salad? Yes! Substitute mayonnaise with a plant-based mayo and skip the honey.
  • Can I add protein? Definitely! Grilled chicken or chickpeas can make this a complete meal.
  • How long does this salad last? It stays fresh in the fridge for up to 3 days.
  • Can I add more fruits? Yes! Feel free to include your favorite fruits like berries or mango.
  • What should I serve this salad with? It pairs beautifully with grilled meats or as a light lunch on its own!

Nutrition Tips and Dietary Adaptations

This salad is not only delicious but can also be tailored to fit various dietary needs:

  • For a Low-Calorie Option: Reduce the amount of mayonnaise and sugar, or use a lighter dressing.
  • High-Protein Variation: Add grilled chicken or a scoop of cottage cheese.
  • Gluten-Free: All ingredients are gluten-free; just ensure any added items are certified gluten-free.

Equipment Recommendations

To make your salad preparation smooth, here are some handy tools:

  • Sharp Knife: For easy apple slicing.
  • Cutting Board: A sturdy surface is essential.
  • Mixing Bowl: Essential for mixing your ingredients thoroughly.
  • Measuring Cups: For accurate ingredient measurements.

Serving Suggestions for Your Apple Salad

Now that you’ve created this beautiful salad, here are some serving ideas:

  • As a Side Dish: Serve alongside grilled chicken, pork chops, or fish for a refreshing contrast.
  • As a Snack: Enjoy it on its own for a nutritious and filling snack.
  • For Celebrations: Present it at potlucks or family gatherings in a beautiful serving bowl to impress your guests!

Conclusion: Enjoy Every Crunch!

Your journey into the refreshing world of our Apple Salad with Grapes & Pecans doesn’t have to end here! This vibrant dish is a celebration of flavors and textures, perfect for any occasion. So grab your ingredients, unleash your creativity in the kitchen, and make this salad your own. Remember, healthy eating is all about fun, flavor, and flexibility. Happy cooking!

Apple Salad with Grapes & Pecans

Prep Time 15 minutes
Total Time 15 minutes
Servings 4 servings
Calories 350
A refreshing and crunchy apple salad combining sweet grapes, toasted pecans, and a creamy dressing, perfect for a light snack or side dish.

Ingredients

Main Ingredients

  • 0.5 cup chopped pecans
  • 4 large Honeycrisp apples (cubed) (see notes)
  • 2 ribs celery (thinly sliced)
  • 1 lemon lemon (juiced)
  • 0.5 cup dried cranberries
  • 0.33 cup mayonnaise
  • 1.5 tablespoons brown sugar
  • 1 cup seedless red grapes (halved)

Instructions 

  • Coat the cubed apples with lemon juice to prevent browning.
  • Whisk together mayonnaise and brown sugar until smooth.
  • Add apples, celery, grapes, pecans, and cranberries to the dressing and toss gently.
  • Mix until ingredients are evenly coated.
  • Refrigerate for at least 30 minutes before serving.

Notes

For extra crunch, toast the pecans before adding.
Calories: 350kcal
Cost: $12
Course: Salad
Cuisine: American
Keyword: apple, Grapes, Pecans

Are you ready to transform your weeknight dinners into a fiesta of flavor with a Ground Beef Burrito Bowl? This dish is more than just a meal; it’s a vibrant celebration of fresh ingredients, savory beef, and zesty toppings that will leave your taste buds dancing. In under 30 minutes, you can whip up a satisfying meal that’s not only delicious but also packed with nutrients.

This recipe combines juicy ground beef, fluffy cilantro-lime rice, and a rainbow of fresh veggies, making it an approachable and exciting dish for everyone, from busy families to meal-prepping enthusiasts. So grab your skillet, and let’s dive into the world of bold flavors and wholesome ingredients!

Why You’ll Love This Recipe

  • Quick and Easy: This ground beef burrito bowl can be prepared in less than 30 minutes, making it perfect for busy weeknights.
  • Customizable: Whether you’re a meat lover or prefer plant-based options, this bowl is fully adaptable to suit your dietary preferences.
  • Flavor Explosion: The combination of seasoned beef, tangy lime, and fresh veggies creates a delightful burst of flavor in every bite.
  • Nutrient-Rich: Packed with protein, fiber, and essential vitamins, this meal supports a balanced diet without sacrificing taste.
  • Fun to Assemble: Building your burrito bowl is a fun and interactive way to engage the whole family in meal prep!

Ingredients Breakdown

Here’s what you’ll need to make your own Ground Beef Burrito Bowl:

  • 1 pound lean ground beef (80/20 or leaner): Provides a hearty protein base. For a healthier alternative, try ground turkey or plant-based meat.
  • 1 tablespoon olive oil: For sautéing the onions and adding richness.
  • 1 small onion, finely diced: Adds sweetness and depth of flavor.
  • 3 cloves garlic, minced: Essential for aromatic flavor.
  • 1 packet taco seasoning: A quick way to infuse flavor; feel free to make your own for a personalized touch.
  • 1/2 cup tomato sauce or salsa: Brings moisture and tanginess.
  • 1/2 cup water: To adjust the consistency of the beef mixture.
  • Salt and pepper to taste: Essential for bringing out flavors.
  • Optional: a pinch of red pepper flakes: For an extra kick of heat.
  • 1 cup long-grain white or brown rice: Acts as the base of the bowl. Brown rice offers more fiber.
  • 2 cups water or chicken broth: Use broth for added flavor when cooking the rice.
  • Juice of 1 lime: Provides freshness and acidity.
  • 2 tablespoons fresh cilantro, chopped: Adds a burst of herbal flavor.
  • 1 tablespoon butter or olive oil: For enriching the rice.
  • 1 cup black beans, drained and rinsed: An excellent source of fiber and protein.
  • 1 cup corn (grilled or canned, drained): Adds sweetness and crunch.
  • 1 cup shredded lettuce (romaine or iceberg): For a refreshing crunch.
  • 1 avocado, diced or sliced: Creamy texture that balances the dish.
  • 1 cup cherry tomatoes, halved: Juicy and sweet additions.
  • 1/2 cup red onion, thinly sliced: Adds sharpness and color.
  • 1 cup shredded cheese (cheddar, Monterey Jack, or a blend): Melts beautifully and adds richness.
  • 1/2 cup sour cream: Creamy topping that enhances flavor.
  • Hot sauce, for drizzling: Spice it up as you like!
  • 1 jalapeño, sliced (optional): For those who love extra heat.
  • Fresh cilantro leaves, for garnish: A flavorful finishing touch.
  • Lime wedges for serving: Extra zing for your bowl!

Step-by-Step Instructions

Let’s get cooking! Follow these simple steps to create your Ground Beef Burrito Bowl:

  1. Rinse the rice in cold water to remove excess starch.
  2. In a medium saucepan, bring water (or broth) and a pinch of salt to a boil.
  3. Add the rice, stir once, and reduce heat to low. Cover and simmer for 15-20 minutes, or until the rice is fully cooked and the liquid is absorbed.
  4. Once done, fluff the rice with a fork. Stir in lime juice, cilantro, and butter or olive oil. Set aside and keep warm.
  5. In a large skillet, heat olive oil over medium heat.
  6. Add the diced onion and cook for about 3-4 minutes, until softened.
  7. Add the garlic and sauté for another 30 seconds, until fragrant.
  8. Add the ground beef to the skillet and cook until browned, breaking it apart with a wooden spoon as it cooks.
  9. Drain excess fat if needed.
  10. Stir in the taco seasoning, tomato sauce or salsa, and water.
  11. Bring to a simmer and cook for about 5-7 minutes, allowing the sauce to thicken and the flavors to meld.
  12. Taste and adjust the seasoning with salt, pepper, or red pepper flakes. Set aside.
  13. In individual bowls, start by placing a base layer of the cilantro-lime rice.
  14. Top with a generous scoop of the seasoned ground beef.
  15. Add toppings in sections: black beans, corn, shredded lettuce, avocado, tomatoes, red onion, and shredded cheese.
  16. Top with sour cream and hot sauce.
  17. Garnish with fresh cilantro and jalapeño slices.
  18. Serve with lime wedges on the side, and enjoy!

Pro Tips for Cooking Success

Juicy Ground Beef Burrito Bowl with layers of rice, beans, avocado, and fresh vegetables.
  • Use high-quality beef: Opt for lean ground beef to keep your burrito bowl flavorful without excess fat.
  • Customize your toppings: Feel free to add or substitute any of your favorite toppings like jalapeños, different cheeses, or even roasted veggies.
  • Make it spicy: Add diced chipotle peppers in adobo sauce for a smoky heat.
  • Batch cook: Make extra beef mixture and rice to enjoy throughout the week for easy lunches or dinners.
  • Fresh herbs matter: Fresh cilantro and lime juice elevate the dish, adding brightness and freshness.
  • Mind the rice: Ensure your rice is not overcooked; it should be fluffy and separate, not mushy.
  • Don’t skip the toppings: They add texture and flavor; mix and match to keep it interesting!
  • Layer well: Build your bowl in layers for a beautiful presentation and flavor distribution.

Common Mistakes and Troubleshooting

  • Overcooking the beef: Keep an eye on it to prevent dryness. Cook just until browned.
  • Under seasoning: Taste as you go to ensure the flavors are balanced; don’t be shy with salt and spices!
  • Sticking rice: Rinse your rice before cooking to avoid stickiness.
  • Too many toppings: While variety is great, don’t overload your bowl to the point it becomes unwieldy to eat.

Delicious Variations to Try

Feeling adventurous? Here are some fun variations of the classic Ground Beef Burrito Bowl:

  • Chicken Burrito Bowl: Substitute ground beef for shredded chicken for a lighter option.
  • Vegetarian Burrito Bowl: Replace meat with grilled veggies, black beans, and quinoa for a filling plant-based meal.
  • Mexican Street Corn Style: Add cotija cheese and a drizzle of crema to replicate street corn flavors.
  • Breakfast Burrito Bowl: Top with scrambled eggs, pico de gallo, and avocado for a hearty breakfast option.

Storage and Make-Ahead Instructions

This dish can be made ahead of time and stored in the fridge for up to 3 days. Here’s how to keep it fresh:

  • Storing leftovers: Keep the beef and rice in separate airtight containers to maintain freshness.
  • Reheating: Reheat in a skillet over medium heat, adding a splash of water or broth to keep it moist.
  • Freezing: You can freeze the beef mixture for up to 3 months; just thaw in the fridge overnight before reheating.

Frequently Asked Questions

  • Can I make this burrito bowl ahead of time? Absolutely! You can prepare the beef and rice in advance and assemble the bowls when ready to serve.
  • What kind of rice is best for a burrito bowl? Long-grain white or brown rice works best for a fluffy texture, but feel free to use cauliflower rice for a low-carb option.
  • Can I freeze the burrito bowl? Yes, the beef mixture can be frozen for later use. Just store it in an airtight container.
  • What toppings can I use? The sky’s the limit! Use your favorites like jalapeños, different cheeses, or even fresh fruit like mango.
  • How can I make this bowl spicier? Add more hot sauce, jalapeños, or diced chipotle peppers to kick it up a notch!
  • Is this recipe suitable for meal prep? Yes, it’s perfect for meal prep! Just keep components separate until you’re ready to eat.
  • What can I substitute for ground beef? Ground turkey, chicken, or even plant-based meat alternatives work great!
  • How do I make this bowl gluten-free? Ensure your taco seasoning is gluten-free, and use corn tortillas or lettuce wraps instead of flour tortillas.

Nutritional Tips and Dietary Adaptations

This Ground Beef Burrito Bowl is naturally nutrient-dense. Here are some tips to make it fit various dietary needs:

  • Low-Carb: Use cauliflower rice instead of traditional rice.
  • High-Protein: Add an extra serving of beans or top with a poached egg.
  • Dairy-Free: Substitute cheese and sour cream with dairy-free alternatives.
  • Vegan: Use plant-based beef alternatives and skip the cheese and sour cream.

Equipment Recommendations

To make your cooking experience smooth, here are a few tools I recommend:

  • Non-stick skillet: Ideal for browning ground beef without sticking.
  • Medium saucepan: Perfect for cooking rice and keeping it fluffy.
  • Measuring cups and spoons: For accurate ingredient measurements.
  • Wooden spoon: Great for breaking up the beef while cooking.

Serving Suggestions

To elevate your meal experience, consider these serving ideas:

  • Serve with tortilla chips: For extra crunch on the side.
  • Pair with a refreshing drink: A lime margarita or iced tea complements the flavors beautifully.
  • Add a side salad: A simple green salad can balance the richness of the burrito bowl.

Conclusion

Your Ground Beef Burrito Bowl is not just a meal; it’s an experience filled with flavors, colors, and textures that excite the palate and nourish the body. So gather your ingredients and get ready to enjoy a delicious, satisfying dinner that’s as fun to make as it is to eat. Remember, cooking is all about creativity, so don’t hesitate to make this recipe your own. Happy cooking!

Ground Beef Burrito Bowl

Prep Time 10 minutes
Cook Time 30 minutes
Total Time 40 minutes
Servings 4 servings
Calories 650
A flavorful and customizable burrito bowl featuring seasoned ground beef, rice, and fresh toppings, perfect for a quick and satisfying meal.

Ingredients

Meat and Rice

  • 1 pound lean ground beef (80/20 or leaner)
  • 1 tablespoon olive oil
  • 1 small onion, finely diced
  • 3 cloves garlic, minced
  • 1 packet taco seasoning
  • 0.5 cup tomato sauce or salsa
  • 0.5 cup water
  • to taste Salt and pepper (to taste)
  • 1 cup long-grain white or brown rice
  • 2 cups water or chicken broth
  • 1 unit lime (juice of 1 lime)
  • 2 tablespoons fresh cilantro, chopped
  • 1 tablespoon butter or olive oil
  • to taste Salt
  • 1 cup black beans, drained and rinsed
  • 1 cup corn (grilled or canned, drained)
  • 1 cup shredded lettuce (romaine or iceberg)
  • 1 avocado diced or sliced
  • 1 cup cherry tomatoes, halved
  • 0.5 cup red onion, thinly sliced
  • 1 cup shredded cheese (cheddar, Monterey Jack, or a blend)
  • 0.5 cup sour cream
  • to taste Hot sauce (for drizzling)
  • 1 jalapeño sliced (optional)

Garnish

  • to taste Fresh cilantro leaves
  • for serving Lime wedges

Instructions 

  • Cook rice in boiling water or broth until tender, then fluff and stir in lime juice, cilantro, and butter. Keep warm.
  • Sauté onion in olive oil until softened, add garlic, then cook ground beef until browned. Stir in taco seasoning, tomato sauce, and water; simmer until thickened.
  • Assemble bowls by layering rice, seasoned beef, and toppings: beans, corn, lettuce, avocado, tomatoes, onion, cheese, sour cream, hot sauce, cilantro, jalapeño, and lime wedges.

Notes

Feel free to customize toppings and spice level to your preference.
Calories: 650kcal
Cost: $15
Course: Main Course
Cuisine: Mexican
Keyword: Beef

Unleashing Flavor: Your Guide to Sizzling Chicken Dumplings

Welcome to the ultimate guide for creating crispy pan-fried chicken dumplings that will ignite your taste buds! These dumplings are not just a meal; they are a culinary adventure filled with juicy ground chicken, vibrant napa cabbage, and a delightful burst of ginger and garlic. Whether you’re looking to impress guests or just want a quick dinner option, these dumplings are your ticket to flavor town!

In this comprehensive article, we will dive deep into the world of chicken dumplings, explore their rich history, and equip you with all the tools you need to make the perfect batch. Let’s get cooking!

Why You’ll Love This Recipe

So, what makes these pan-fried chicken dumplings so special? Here are just a few reasons:

  • Flavor explosion: Each bite is bursting with a harmonious blend of savory chicken, crisp vegetables, and aromatic spices.
  • Quick and easy: Perfect for busy weeknights, you can whip these up in under an hour!
  • Customizable: Feel free to adapt the filling to suit your tastes or dietary needs.
  • Perfect for meal prep: Make a large batch and freeze them for later, ensuring you have a delicious meal on hand whenever you need it.
  • Great for sharing: These dumplings are a fun appetizer or party dish that everyone will love!

Ingredient Breakdown

Here’s what you’ll need to create your dumpling masterpiece:

  • 1 lb ground chicken: The star of the show! This will provide a juicy and flavorful base for your dumplings.
  • 1 lb circular dumpling wrappers: You can find these in the freezer section of your local grocery store, or make your own for an added touch!
  • 2 cups napa cabbage, chopped: This adds crunch and a hint of sweetness.
  • 1 tsp salt: Enhances the flavors of your filling.
  • 4 green onions, sliced: They bring a fresh, mild onion flavor that elevates your dumplings.
  • 6 garlic cloves, minced: For a fragrant kick that’s hard to resist.
  • 2-inch piece of ginger, minced: Adds warmth and a zesty zing!
  • 1 tbsp soy sauce: A must for umami flavor.
  • 1 tbsp oyster sauce: This adds depth and richness.
  • 1 tbsp sesame oil: For that nutty aroma.
  • 1 tbsp chicken bouillon: Lifts the overall flavor profile.
  • 1 tsp white pepper: A subtle spice that complements the filling.
  • 2 tbsp cooking oil (for frying): Essential for achieving that crispy texture.
  • ½ cup water (for steaming): Helps cook the dumplings through while keeping them moist.

Cooking Steps

Side view of juicy chicken dumplings, revealing a crispy exterior and fresh ingredients.

Ready to dive into the cooking process? Here’s how to make your crispy pan-fried chicken dumplings:

  1. Prepare the cabbage: In a bowl, toss chopped napa cabbage with salt and let it sit for 10 minutes. Rinse off the salt and squeeze out any excess moisture.
  2. Make the filling: In a large bowl, mix ground chicken, napa cabbage, green onions, garlic, ginger, soy sauce, oyster sauce, sesame oil, chicken bouillon, and white pepper until well combined. Taste-test a small piece of filling to adjust seasoning if needed.
  3. Assemble the dumplings: Wet the edges of a dumpling wrapper with water, place a spoonful of filling in the center, and fold in half. Create three pleats on each side towards the middle and pinch to seal. Keep wrapped dumplings covered with a damp towel.
  4. Fry the dumplings: Heat 1 tbsp oil in a non-stick pan over medium heat. Arrange the dumplings in a single layer and fry for 2 minutes until the bottoms turn golden brown.
  5. Steam the dumplings: Add ½ cup of water to the pan, cover, and steam for 5 minutes.
  6. Serve: Plate the dumplings and garnish with sesame seeds and green onions. Serve with your favorite dumpling dipping sauce!

Expert Tips for Perfect Dumplings

Want to elevate your dumpling game? Here are some pro tips to ensure your dumplings shine:

  • Don’t overfill: Less is more! Overfilling can lead to dumpling blowouts while cooking.
  • Seal tightly: Ensure your dumplings are sealed to prevent any filling from escaping during cooking.
  • Experiment with flavors: Try adding spices like five-spice powder or chili flakes to the filling for a flavor boost.
  • Use fresh ingredients: Fresh produce makes a world of difference in flavor and texture.
  • Keep the wrappers moist: Cover any unused wrappers with a damp cloth to prevent them from drying out.
  • Perfect your frying technique: Start with a hot pan to get that crispy base, but don’t forget to add water for steaming!
  • Serve hot: Dumplings are best enjoyed fresh and hot off the pan.
  • Practice makes perfect: Don’t worry if they don’t look perfect on your first try; keep practicing!

Common Mistakes and Troubleshooting

Let’s tackle some common hiccups you might encounter while making chicken dumplings:

  • Filling leaks: This often happens if the dumpling isn’t sealed tightly. Ensure edges are wet when sealing.
  • Wrappers tearing: If you find that your wrappers are tearing, they may be too dry. Keep them covered with a damp cloth.
  • Too greasy: If your dumplings are too greasy, try using less oil during frying.
  • Filling is bland: Always taste-test the filling before assembling to adjust seasoning as necessary.

Variations to Try

Feeling adventurous? Here are a few variations you can try:

  • Vegetable dumplings: Substitute ground chicken with a mix of mushrooms, tofu, and other veggies for a plant-based option.
  • Spicy dumplings: Add diced jalapeños or Sriracha to the filling for a spicy kick!
  • Herbed dumplings: Incorporate fresh herbs like cilantro or mint for a refreshing twist.
  • Cheesy dumplings: Add a bit of shredded cheese into the filling for a melty surprise!

Storage and Make-Ahead Instructions

Want to prepare ahead of time? Here’s how to store your dumplings:

  • Refrigeration: Store uncooked dumplings in an airtight container for up to 2 days.
  • Freezing: To freeze, arrange dumplings in a single layer on a baking sheet, freeze until solid, then transfer to a freezer bag. They can be stored for up to 3 months.
  • Cooking from frozen: When ready to cook, there’s no need to thaw! Just add an extra 2-3 minutes of steaming time.

Frequently Asked Questions

Here are some common questions you might have:

  • Can I use other meats instead of chicken? Absolutely! Ground pork, turkey, or a mix of meats work wonderfully.
  • What if I don’t have dumpling wrappers? You can easily make your own using flour and water!
  • How can I make my filling less watery? Ensure you squeeze out excess moisture from the vegetables before mixing the filling.
  • What’s the best dipping sauce? A mix of soy sauce, rice vinegar, and chili oil is a classic choice!
  • Are these dumplings healthy? Yes! They are packed with protein and vegetables, making them a nutritious option.
  • Can I bake these dumplings instead of frying them? Yes, you can bake them at 400°F for about 20 minutes for a healthier alternative.
  • What can I serve with dumplings? They pair well with a fresh salad, steamed veggies, or a bowl of miso soup!
  • How do I know when my dumplings are done? The bottoms should be golden and crispy while the filling is cooked through!

Nutritional Tips and Dietary Adaptations

For those keeping an eye on nutrition, here are some tips:

  • Lower fat: Use lean ground chicken or turkey to reduce fat content.
  • Gluten-free option: Search for gluten-free dumpling wrappers or make your own.
  • Increase fiber: Add more vegetables to the filling for added nutrients!

Recommended Equipment

To make your dumpling-making process seamless, consider having these tools on hand:

  • Non-stick frying pan: Ensures even cooking and easy flipping.
  • Dumpling steamer: For perfectly steamed dumplings every time.
  • Mixing bowls: Essential for preparing your filling.
  • Measuring spoons: For accurate seasoning!

Serving Suggestions

Here are some ideas for serving your delicious dumplings:

  • With dipping sauces: Serve with soy sauce, chili oil, or sweet chili sauce for added flavor.
  • As a meal: Pair with steamed rice and sautéed vegetables for a complete meal.
  • As an appetizer: Serve on a platter with a selection of sauces for dipping during gatherings!

Conclusion

There you have it! A comprehensive guide to making crispy pan-fried chicken dumplings that are not only delicious but also simple to prepare. Embrace your inner chef, get creative with flavors, and have fun in the kitchen. Remember, cooking is all about joy and exploration—so gather your ingredients, invite some friends over, and let the dumpling party begin!

Crispy Pan-Fried Chicken Dumplings

Prep Time 20 minutes
Cook Time 10 minutes
Total Time 30 minutes
Servings 4 servings
Calories 250
Enjoy these delicious crispy pan-fried chicken dumplings, perfect for a flavorful appetizer or main dish.

Ingredients

Dumpling Wrappers

  • 1 lb ground chicken
  • 1 lb circular dumpling wrappers
  • 2 cups napa cabbage, chopped
  • 1 tsp salt
  • 4 green onions sliced green onions
  • 6 cloves garlic, minced
  • 2 inch ginger, minced
  • 1 tbsp soy sauce
  • 1 tbsp oyster sauce
  • 1 tbsp sesame oil
  • 1 tbsp chicken bouillon
  • 1 tsp white pepper
  • 2 tbsp cooking oil (for frying)
  • ½ cup water (for steaming)

Instructions 

  • Toss chopped napa cabbage with salt, sit for 10 minutes, then rinse and squeeze out excess moisture.
  • Mix ground chicken, cabbage, green onions, garlic, ginger, soy sauce, oyster sauce, sesame oil, chicken bouillon, and white pepper until combined. Pan-fry a small sample to taste and adjust seasoning.
  • Wet wrapper edges, add filling, fold, pleat, and pinch to seal. Keep covered with damp towel.
  • Heat oil in pan, fry dumplings for 2 minutes until golden, add water, cover, and steam for 5 minutes.
  • Serve garnished with sesame seeds and green onions with dipping sauce.

Notes

Keep dumplings covered to prevent drying out.
Calories: 250kcal
Cost: $15
Course: Appetizer
Cuisine: Chinese
Keyword: dumplings

Welcome to Your New Favorite Meal Prep Recipe!

Are you ready to transform your busy days with a delicious and nutritious 20-Minute Meal-Prep Chicken, Rice, and Broccoli? This vibrant dish combines the protein-packed goodness of chicken, the wholesome energy of rice, and the vibrant crunch of broccoli, all while being quick and easy to prepare. It’s perfect for those looking for healthy meal prep ideas that won’t leave you feeling deprived. Let’s dive into why this recipe is not just a meal but a flavorful adventure in your kitchen!

Why You’ll Love This Recipe

  • Quick and Easy: With just 20 minutes of prep time, you’ll have a satisfying meal ready in no time.
  • Nutrient-Rich: Packed with protein, fiber, and essential vitamins, this meal supports your health goals.
  • Versatile Ingredients: Customize with your favorite veggies or spices to suit your taste.
  • Great for Meal Prep: This dish stores well in the fridge and is perfect for weekday lunches.
  • Budget-Friendly: A cost-effective meal option that doesn’t skimp on flavor.

Ingredient Breakdown

Let’s take a closer look at the ingredients that make this dish a meal prep superstar:

  • 2 cups water: Essential for cooking the rice.
  • 1 cup jasmine rice: This variety offers a delicate floral aroma and fluffy texture.
  • 3/4 teaspoon salt: Enhances the flavors of the rice and chicken.
  • 4 chicken breasts or thighs (boneless, skinless): A lean protein choice that keeps you full.
  • 1 teaspoon brown or granulated sugar: Balances savory flavors with a hint of sweetness.
  • 1/2 teaspoon paprika: Adds a smoky depth to the chicken.
  • 1/2 teaspoon cumin: Infuses warmth and earthiness.
  • 1/2 teaspoon garlic powder: A must-have for that robust flavor.
  • Olive oil: A healthy fat to cook the chicken.
  • 2-3 cups broccoli florets: A fantastic source of fiber and vitamins.
  • Water for steaming: Essential for cooking the broccoli.

Pro Tips for Meal Prep Success

Side view of a healthy meal prep dish featuring chicken, jasmine rice, and steamed broccoli.
  • Prep Ahead: Chop your vegetables and marinate the chicken the night before to save time.
  • Cook in Batches: Make a double batch for extra meals throughout the week.
  • Use Leftover Rice: If you have leftover rice, this recipe comes together even faster!
  • Mix and Match: Feel free to swap out broccoli for your favorite green veggies like asparagus or snap peas.
  • Flavor Boost: Experiment with different seasonings to keep your meals exciting.
  • Use a Meat Thermometer: Ensure your chicken reaches an internal temperature of 165°F for safety.
  • Store Properly: Use airtight containers to keep your meal fresh longer.
  • Reheat Wisely: When reheating, add a splash of water to the rice to prevent it from drying out.

Common Mistakes and Troubleshooting

Even the best chefs can have off days! Here are some common mistakes to avoid:

  • Overcooking the Chicken: This can lead to dry, tough meat. Always check for doneness with a thermometer.
  • Burning the Rice: Make sure to simmer on low and keep the lid on to retain steam.
  • Under-seasoning: Don’t be afraid to taste and adjust seasonings during cooking.
  • Overcrowding the Pan: Cook in batches if necessary for even cooking.

Delicious Variations

Want to switch things up? Check out these variations:

  • Spicy Kick: Add a teaspoon of chili powder or red pepper flakes to the chicken rub.
  • Curry Flavor: Swap the spices for curry powder for an exotic twist.
  • Asian-Inspired: Use soy sauce and sesame oil in place of olive oil for a different flavor profile.
  • Vegetarian Delight: Substitute chicken with chickpeas or tofu for a plant-based option.

Storage and Make-Ahead Instructions

This meal prep dish can be stored in the fridge for up to 4 days. Here’s how:

  • Cool Before Storing: Allow the chicken and rice to cool before transferring to containers.
  • Airtight Containers: Use glass or BPA-free plastic containers to preserve freshness.
  • Reheat with Care: Microwave on high for 2 minutes or until heated through, adding a splash of water if needed.

Comprehensive FAQ

  • Can I freeze this meal? Yes, you can freeze the components separately for up to 2 months.
  • What can I serve this with? Pair with a side salad or some fresh fruit for a balanced meal.
  • How can I make this dish gluten-free? Ensure your chicken broth and seasonings are gluten-free.
  • Can I use brown rice instead? Absolutely! Just adjust the cooking time as brown rice takes longer.
  • How do I know when the chicken is done? The internal temperature should reach 165°F.
  • What if I don’t have broccoli? Substitute with cauliflower, green beans, or your preferred vegetable.
  • Is this dish low-carb? The rice adds carbs, but you can swap it for cauliflower rice for a lower-carb option.
  • Can I add sauces? Yes! Add your favorite sauce after reheating for extra flavor.

Nutrition Tips and Dietary Adaptations

This meal is designed to be balanced, but if you have specific dietary needs, consider the following:

  • Protein Boost: Add more chicken or include additional protein sources like beans or lentils.
  • Low-Calorie Option: Reduce the amount of rice or use cauliflower rice to lower calories.
  • Low-Sodium: Use low-sodium chicken broth or omit added salt.

Essential Equipment Recommendations

Here’s a list of tools that will make your meal prep effortless:

  • Medium Saucepan: For cooking the rice perfectly.
  • Heavy-Duty Skillet: Ideal for searing chicken to juicy perfection.
  • Meat Thermometer: Ensures your chicken is cooked safely.
  • Microwave-Safe Bowl: For quick steaming of broccoli.
  • Airtight Containers: Essential for storing your meal prep.

Serving Suggestions

Elevate your meal with these serving ideas:

  • Fresh Herbs: Sprinkle chopped parsley or cilantro for a fresh touch.
  • Citrus Zest: A squeeze of lemon or lime brightens up the flavors.
  • Hot Sauce: Spice it up with your favorite hot sauce for a flavor punch.

Now, you’re all set to conquer your busy week with this vibrant and energizing 20-Minute Meal-Prep Chicken, Rice, and Broccoli recipe! Remember, healthy eating can be fun and exciting. Enjoy your culinary adventure!

20 Minute Meal-Prep Chicken, Rice, and Broccoli

Prep Time 5 minutes
Cook Time 15 minutes
Total Time 20 minutes
Servings 4 servings
Calories 450
A quick and healthy meal featuring tender chicken, fluffy jasmine rice, and steamed broccoli, perfect for meal prep.

Ingredients

Broth and Rice

  • 2 cups water
  • 1 cup jasmine rice
  • 3/4 teaspoon salt

Chicken

  • 4 oz chicken breasts or thighs (boneless, skinless)
  • 1 teaspoon brown or granulated sugar
  • 1/2 teaspoon paprika
  • 1/2 teaspoon cumin
  • 1/2 teaspoon garlic powder
  • Salt and pepper to taste Salt and pepper
  • 1 tablespoon olive oil

Broccoli

  • 2-3 cups broccoli florets

Water for steaming

  • 3 tablespoons water (for microwave steaming)

Instructions 

  • Bring 2 cups water to a boil, add rice, cover, and simmer for 15 minutes until water is absorbed.
  • Rub chicken with sugar, paprika, cumin, garlic powder, salt, and pepper. Heat 1-2 tbsp oil in a skillet over medium-high heat.
  • Cook chicken 5-6 minutes per side until browned. Rest for 5 minutes before slicing.
  • Steam broccoli by boiling in water for 1 minute or microwave with 3 tbsp water for 3 minutes.
  • Slice chicken, measure 2/3 cup rice per serving, and assemble with broccoli. Refrigerate and reheat as needed.

Notes

This meal is perfect for quick prep and leftovers can be stored for up to 4 days.
Calories: 450kcal
Cost: $15
Course: Main Course
Cuisine: American
Keyword: broccoli, Chicken, Rice

Unlock the Secrets to the Ultimate Sunday Roast Beef

Welcome to the delicious world of Savory Sunday Roast Beef! If you’re looking for a meal that transforms your Sundays into a flavor-packed adventure, you’ve landed in the right spot. This recipe is not just about cooking; it’s about creating memories around the table with a hearty dish that bursts with flavor. As you gather your loved ones, let the mouthwatering aromas fill your kitchen and set the stage for a cozy gathering. Get ready to dive into a culinary experience where nutrition meets taste!

Whether you’re a seasoned chef or just starting your cooking journey, this recipe will empower you with the confidence to whip up a delicious roast that will impress everyone. Ready to elevate your Sunday? Let’s get started!

Why You’ll Love This Savory Sunday Roast Beef

This isn’t just any roast beef; it’s a celebration of flavor, comfort, and togetherness! Here are five irresistible reasons to fall in love with this recipe:

  • Flavor Explosion: The combination of tender beef, vibrant veggies, and savory broth creates a symphony of flavors that will tantalize your taste buds.
  • Effortless Cooking: With mostly hands-off cooking time, you can relax and enjoy your Sunday while the roast works its magic in the oven.
  • Healthy and Nutritious: Packed with vitamins from the veggies and lean protein from the beef, this dish offers a balanced meal that nourishes your body.
  • Family-Friendly: Perfect for gatherings, this roast is a hit with both kids and adults, making it a staple for any family dinner.
  • Versatile Meal: Serve it with your favorite sides or transform leftovers into delicious sandwiches or beef stews for the week ahead!

What Ingredients Are In Savory Sunday Roast Beef?

Gathering the right ingredients is key to ensuring your roast is flavorful and tender. Here’s what you’ll need:

  • 3-5 pound beef roast: Choose a cut like chuck or brisket for the best texture.
  • 2 tablespoons canola oil: This helps in browning the meat.
  • 2 tablespoons flour: Essential for making a rich gravy.
  • Salt to taste: Enhances the flavors of the beef and veggies.
  • 5 cups water: The base for your savory broth.
  • 1/2 package Knorr vegetable soup mix: Adds depth and flavor to the broth.
  • 2 OXO bouillon cubes: Further intensifies the savory notes.
  • 1 package baby carrots: A sweet, tender addition that cooks perfectly.
  • 4 potatoes: Cut into quarters for a hearty side.
  • 1 large onion: Adds sweetness and flavor depth.

If you need substitutions, here are some options:

  • Beef roast alternatives: Use pork or chicken for a different protein experience.
  • Vegetable soup mix swap: Homemade vegetable broth can be used instead.
  • Oil choices: Olive oil or avocado oil can be used in place of canola oil.

How to Make Savory Sunday Roast Beef

Now that you have your ingredients ready, let’s dive into the step-by-step process of creating this mouthwatering roast:

  1. Preheat your oven: Set it to 350°F to prepare for slow cooking.
  2. Heat the oil: In a large skillet over medium-high heat, warm the canola oil.
  3. Brown the meat: Carefully place the beef roast in the skillet and brown it for about 2-3 minutes per side until it develops a beautiful caramelized crust.
  4. Transfer to a roasting pan: Move the browned roast to your roasting pan, ready for the next step.
  5. Mix the broth: In a bowl, combine 5 cups of water, Knorr vegetable soup mix, and OXO bouillon cubes. Stir until dissolved and pour it over the roast.
  6. Cover and cook: Cover the roasting pan and cook for about 2 hours.
  7. Add veggies: After 2 hours, add baby carrots, quartered potatoes, and sliced onion around the roast.
  8. Continue cooking: Cook for another 45 minutes to 1 hour until veggies are tender and meat reaches desired doneness.
  9. Make the gravy: Take the reserved drippings, add flour, and stir over low heat to create a roux. Gradually whisk in the strained cooking liquid until thickened.
  10. Serve and enjoy: Slice the roast and serve on a platter with veggies, drizzled with gravy or served on the side.

Pro Tips for the Best Roast

To ensure your roast beef dinner is nothing short of spectacular, follow these expert insights:

  • Choose the right cut: For a melt-in-your-mouth experience, opt for a well-marbled cut like chuck or brisket.
  • Let it rest: After cooking, allow the roast to rest for at least 15 minutes to retain juices.
  • Use a meat thermometer: Aim for a temperature of 145°F for medium-rare, ensuring perfect doneness.
  • Season generously: Don’t skimp on salt and pepper; they enhance the natural flavors of the beef.
  • Experiment with herbs: Adding rosemary or thyme can elevate the flavor profile.
  • Use a Dutch oven: For even cooking, a Dutch oven works wonders for this roast.
  • Avoid overcooking: Keep an eye on cooking time to prevent tough meat.
  • Save the drippings: They’re liquid gold for making rich, flavorful gravy!

Common Mistakes and Troubleshooting

Don’t let mistakes ruin your roast! Here are common pitfalls to avoid:

  • Skipping browning: This step adds essential flavor; don’t skip it!
  • Overcrowding the pan: This can lead to steaming instead of browning; give your meat and veggies space.
  • Not checking doneness: Use a thermometer to avoid undercooking or overcooking.
  • Not resting the meat: Allowing it to rest ensures juicy slices.

Variations to Spice Things Up

Feeling adventurous? Here are some creative variations to try with your roast:

  • Herb-Crusted Roast: Mix fresh herbs like rosemary, thyme, and parsley with olive oil and rub on the roast before cooking.
  • Spicy Chipotle Roast: Add chipotle peppers in adobo sauce to the broth for a smoky kick.
  • Garlic Lover’s Roast: Incorporate whole cloves of garlic into the roasting pan for a rich, garlicky flavor.
  • Vegetarian Option: Substitute with a hearty portobello mushroom roast for a plant-based meal.

How to Store and Make Ahead

Planning ahead? Here’s how to store your roast and maximize its deliciousness:

  • Storage: Let the roast cool completely before storing leftovers in an airtight container. It will keep in the fridge for up to 3 days.
  • Freezing: For longer storage, wrap portions tightly in plastic wrap and freeze for up to 3 months.
  • Make-ahead tips: Prepare the broth and brown the meat a day in advance, then store in the refrigerator. Simply assemble and cook the next day!

Frequently Asked Questions

Got questions? We’ve got answers! Here are some common queries about roast beef:

  • Can I use a different cut of beef? Yes, just choose one that suits slow cooking, like brisket or round.
  • How do I know when the roast is done? Use a meat thermometer; it should read between 130-145°F for medium-rare.
  • What if my roast is tough? It may need more cooking time; ensure it’s tender before serving.
  • Can I make this in a slow cooker? Absolutely! Cook on low for 8 hours for a tender roast.
  • What sides pair well with roast beef? Classic sides include mashed potatoes, green beans, and a fresh salad.
  • Can I use fresh vegetables instead of frozen? Yes, fresh veggies will add a vibrant flavor!
  • How do I reheat leftovers? Gently reheat in the oven covered with foil to maintain moisture.
  • What’s the best way to slice the roast? Always slice against the grain for the most tender pieces.

Nutritional Tips and Dietary Adaptations

This roast can fit into various dietary needs:

  • Low-carb option: Skip the potatoes and add more non-starchy vegetables like zucchini or broccoli.
  • Gluten-free: Omit flour from the gravy and use cornstarch or arrowroot instead.
  • Paleo-friendly: Stick to the meat and veggies, avoiding processed ingredients.

Equipment Recommendations

Make sure you have the right tools to simplify your cooking:

  • Heavy-duty roasting pan: Essential for even cooking and browning.
  • Meat thermometer: An invaluable tool for achieving the perfect doneness.
  • Sharp carving knife: For easily slicing the roast into tender pieces.
  • Large skillet: Perfect for browning the meat before roasting.

Serving Suggestions

Make your roast beef dinner complete with these serving ideas:

  • Classic pairings: Serve with traditional sides like roasted vegetables, mashed potatoes, or a fresh garden salad.
  • Gourmet touch: Drizzle with homemade chimichurri or horseradish cream for an added flavor boost.
  • Leftover magic: Transform leftovers into sandwiches or beef stew for a delicious next-day meal.

Final Thoughts on Your Roast Beef Adventure

Congratulations! You’re now equipped with everything you need to create the perfect Savory Sunday Roast Beef. This recipe isn’t just about the food; it’s about bringing people together, sharing stories, and enjoying the simple pleasures of life. Embrace your time in the kitchen, let your creativity shine, and remember that every roast is a chance to make wonderful memories. Happy cooking!

Savory Sunday Roast Beef

Prep Time 20 minutes
Cook Time 2 hours 30 minutes
Total Time 2 hours 50 minutes
Servings 6 servings
Calories 650
A hearty and flavorful roast beef with tender vegetables and rich gravy, perfect for a Sunday family dinner.

Ingredients

Meat

  • 3-5 pounds beef roast
  • 2 tablespoons canola oil
  • 2 tablespoons flour
  • Salt to taste Salt
  • 5 cups water
  • 1/2 package Knorr vegetable soup mix
  • 2 OXO bouillon cubes bouillon cubes
  • 1 package baby carrots
  • 4 potatoes potatoes
  • 1 large onion (sliced)

Instructions 

  • Preheat oven to 350°F (175°C).
  • Heat oil and brown the beef on all sides, then transfer to a roasting pan.
  • Mix water with soup mix and bouillon, pour over the roast, cover, and cook for 2 hours.
  • Add vegetables around the roast and cook for another 45 minutes to 1 hour until tender.
  • Prepare gravy by stirring flour into drippings, strain cooking liquid, and whisk into roux until thickened.
  • Slice the roast, serve with vegetables, and drizzle with gravy.

Notes

Use a meat thermometer to ensure the beef reaches your desired doneness.
Calories: 650kcal
Cost: $20
Course: Main Course
Cuisine: American
Keyword: Roast Beef

Introducing Wholesome Warmth: Your New Favorite Gluten-Free Chicken Noodle Soup

Welcome to the cozy world of homemade soups! If you’re on the hunt for a dish that’s not only delicious but also packed with nutrients, this Gluten-Free Chicken Noodle Soup is calling your name. Imagine a bowl brimming with tender chicken, vibrant veggies, and perfectly cooked gluten-free noodles, all swimming in a warm, savory broth. It’s comfort food at its finest, and guess what? It’s super easy to whip up! In this article, we’ll dive deep into the reasons you’ll love this recipe, how to master it, plus all the tips and tricks to make it uniquely yours.

Why You’ll Love This Recipe

  • Comforting & Nourishing: This soup isn’t just a meal; it’s a hug in a bowl! Perfect for chilly days or when you’re feeling under the weather.
  • Quick & Easy: You can have this soup ready in about 30 minutes, making it ideal for busy weeknights.
  • Customizable: With various ingredient options and substitutions, you can tailor this soup to your taste preferences and dietary needs.
  • Gluten-Free Goodness: Made with gluten-free noodles and stock, it’s perfect for those with dietary restrictions.
  • Meal Prep Friendly: This soup keeps well in the fridge and can be made ahead, making it a smart choice for meal prepping.

Ingredients Breakdown

Let’s gather the essentials for your Gluten-Free Chicken Noodle Soup. Here’s what you need:

  • 1 tablespoon extra-virgin olive oil: A healthy fat for sautéing your veggies.
  • 1 tablespoon butter: Adds a rich flavor to the broth.
  • 1 large or 2 medium carrots, peeled and thinly sliced: For sweetness and color.
  • 1 rib celery, sliced: Adds crunch and aroma.
  • 1 shallot or 1/2 small onion, chopped: A flavor base that enhances the soup.
  • Salt and pepper: Essential for seasoning.
  • 2 cloves garlic, minced: For that delicious aromatic boost.
  • 64 oz chicken stock: The heart of the soup; feel free to add more if needed when reheating.
  • 1 chicken breast, cut into bite-sized pieces: For protein perfection.
  • 8 oz gluten-free spaghetti or any gluten-free short pasta, broken into small pieces: This is your noodle element to soak up the broth.

Step-by-Step Instructions for Making Gluten-Free Chicken Noodle Soup

Side view of a hearty bowl of gluten-free chicken noodle soup featuring noodles and fresh ingredients.

Now that we have the ingredients, let’s bring this soup to life with these simple steps:

  • Cook the vegetables: Heat the olive oil and butter in a large soup pot or Dutch oven over medium heat. Add the carrots, celery, and shallot. Season with salt and pepper, then sauté for about 10 minutes, until the vegetables begin to soften. Add the garlic and cook for 1 additional minute.
  • Add the broth: Pour in the chicken stock and bring it to a boil.
  • Add chicken and pasta: Season the chicken with salt and pepper. Add the chicken and pasta to the boiling broth. Reduce heat to medium and simmer, stirring occasionally, until the pasta is cooked and the chicken is tender.
  • Taste and serve: Taste the soup and adjust the seasoning with additional salt and pepper if needed. Serve warm. Add extra chicken stock when reheating, as gluten-free pasta absorbs liquid.

Pro Tips for the Perfect Soup

  • Quality Ingredients: Always use high-quality chicken stock for a richer flavor.
  • Fresh Herbs: Consider adding fresh herbs like parsley or thyme for an aromatic twist.
  • Don’t Overcook the Noodles: Gluten-free noodles can become mushy quickly, so monitor cooking times closely.
  • Adjust Seasoning: Don’t be shy about tasting and adjusting salt and pepper to your liking!
  • Make it Ahead: This soup tastes even better the next day as the flavors meld, making it great for meal prep!
  • Experiment with Veggies: Feel free to add in other vegetables like spinach or peas for added nutrition.
  • Cool Before Storing: Always let the soup cool before placing it in the fridge to maintain its freshness.
  • Freeze for Later: Portion out servings and freeze for quick meals on busy days!

Common Mistakes and Troubleshooting

Even the best chefs make mistakes, and that’s okay! Here are some common pitfalls and how to avoid them:

  • Overcooked Veggies: Sauté just until tender to keep them vibrant and flavorful.
  • Soggy Noodles: Undercook the noodles slightly if you plan to store or freeze the soup.
  • Flavorless Broth: Always taste and adjust seasoning; a little extra salt can go a long way!
  • Unbalanced Seasoning: If it’s too salty, add more veggies or a splash of vinegar to balance it out.

Delicious Variations to Try

Mix it up! Here are some fun variations to keep things exciting:

  • Herbed Chicken Noodle Soup: Add fresh herbs like thyme and dill for a fragrant twist.
  • Spicy Chicken Noodle Soup: Toss in some red pepper flakes for a kick of heat!
  • Mushroom & Chicken Noodle Soup: Add sliced mushrooms for an earthy flavor boost.
  • Vegetable-Loaded Soup: Go full veggie by swapping chicken for extra vegetables like zucchini or bell peppers.

Storage and Make-Ahead Instructions

This soup is perfect for meal prep! Here’s how to store it:

  • Refrigerate: Store leftovers in an airtight container in the fridge for up to 4 days.
  • Freeze: Freeze in individual portions for up to 3 months. Thaw in the fridge overnight before reheating.
  • Reheat: Add a splash of chicken stock when reheating to loosen the soup and restore its creamy texture.

Frequently Asked Questions (FAQs)

  • Can I use chicken thighs instead of breasts? Absolutely! Chicken thighs add more flavor and tenderness.
  • What gluten-free noodles should I use? You can use any gluten-free pasta like rice noodles, quinoa pasta, or gluten-free spaghetti.
  • How do I make this soup dairy-free? Simply omit the butter and use olive oil instead.
  • Can I make this soup in a slow cooker? Yes! Add all the ingredients to your slow cooker and cook on low for 6-8 hours.
  • How can I thicken the soup? You can add a cornstarch slurry or use a gluten-free thickener if you prefer a heartier consistency.
  • Is this soup kid-friendly? Definitely! It’s mild in flavor and packed with nutrients.
  • Can I add more vegetables? Yes! Feel free to add any veggies you love.
  • What’s the best way to store leftovers? Store in airtight containers in the fridge or freezer for later enjoyment.

Nutritional Tips and Dietary Adaptations

This soup is not only delicious but also nutritious! Here are some tips to maximize its health benefits:

  • Protein Boost: Add beans or lentils for an extra protein punch.
  • Low-Sodium Options: Use low-sodium chicken stock if you’re watching your salt intake.
  • Vegetarian Version: Swap chicken for tofu or chickpeas and use vegetable broth for a plant-based option.

Essential Equipment Recommendations

To make this soup, you’ll need:

  • Large Soup Pot or Dutch Oven: Perfect for simmering all the ingredients together.
  • Sharp Knife: For chopping your vegetables efficiently.
  • Cutting Board: A sturdy surface for all your cutting needs.
  • Measuring Cups & Spoons: For precise ingredient measurements.

Serving Suggestions

Ready to serve? Here are some fun ideas to elevate your soup experience:

  • Crusty Bread: Serve with a side of gluten-free bread or rolls for dipping.
  • Salad: Pair with a fresh garden salad for a complete meal.
  • Garnishes: Top with fresh herbs, a squeeze of lemon, or a sprinkle of Parmesan cheese (if not dairy-free).

Conclusion

And there you have it! A delightful, easy-to-make Gluten-Free Chicken Noodle Soup that’s sure to warm your heart and fill your belly. Whether you’re preparing for a stormy day or just want a simple, flavorful meal, this recipe is your go-to choice. So grab your apron, get in the kitchen, and enjoy the process of making something deliciously wholesome. Happy cooking!

Gluten-Free Homemade Chicken Noodle Soup

Prep Time 10 minutes
Cook Time 30 minutes
Total Time 40 minutes
Servings 4 servings
Calories 350
A comforting and hearty gluten-free chicken noodle soup made with fresh vegetables, tender chicken, and gluten-free pasta, perfect for a cozy meal.

Ingredients

Vegetables

  • 1 tablespoon extra-virgin olive oil
  • 1 tablespoon butter
  • 1 large or 2 medium carrots, peeled and thinly sliced
  • 1 rib celery, sliced
  • 1 shallot or 1/2 small onion shallot or small onion, chopped

Seasonings

  • to taste Salt and pepper
  • 2 cloves garlic, minced

Broth

  • 64 oz chicken stock (plus more if needed for reheating)

Protein

  • 1 chicken breast chicken breast, cut into bite-sized pieces

Pasta

  • 8 oz gluten-free spaghetti or short pasta, broken into small pieces

Instructions 

  • Heat olive oil and butter in a large pot. Sauté carrots, celery, and shallot for 10 minutes.
  • Add garlic and cook for 1 minute. Pour in chicken stock and bring to a boil.
  • Season chicken with salt and pepper, add to broth with pasta. Simmer until chicken is tender and pasta is cooked.
  • Taste and adjust seasoning. Serve warm, adding extra broth when reheating.

Notes

Use gluten-free pasta to keep the soup gluten-free and enjoy a hearty, healthy meal.
Calories: 350kcal
Cost: $15
Course: Soup
Cuisine: American
Keyword: Chicken, Comfort Food, gluten-free

Welcome to Flavor Town: Your Ultimate Chow Mein Adventure!

Get ready to embark on a culinary journey that transforms your kitchen into a vibrant hub of flavors! This Chow Mein recipe is not just a meal; it’s an experience brimming with bold tastes and colorful ingredients. With a quick prep time and the ability to customize ingredients to suit your cravings, you’ll be whipping up a delightful stir-fry noodle dish that not only satisfies but also fuels your day!

Whether you’re a seasoned cook or a kitchen novice, this recipe will prove that eating well doesn’t have to be boring. Say goodbye to bland takeout and hello to homemade goodness in less than 30 minutes!

Why You’ll Love This Recipe

  • Ready in 30 minutes: Perfect for busy weeknights! This chow mein dish comes together in a flash, allowing you to enjoy a hearty meal without the wait.
  • Customizable ingredients: Use whatever protein or veggies you have on hand! From chicken to tofu, the possibilities are endless.
  • Fresh flavors: The combination of garlic, ginger, and fresh vegetables creates a mouthwatering aroma that will make your kitchen feel like a bustling Chinese restaurant.
  • Health-conscious: Packed with colorful vegetables and lean proteins, this dish is not only delicious but also nutritious!
  • Fun cooking experience: Stir-frying is an energetic and engaging cooking method, perfect for involving the whole family in meal prep!

Ingredient Breakdown

Let’s dive into the vibrant world of chow mein ingredients. Each component plays a vital role in creating that signature flavor. Here’s what you’ll need:

  • 8 oz egg or chow mein noodles: Use lo mein noodles if you prefer; for a gluten-free option, substitute with rice noodles.
  • 2 tbsp vegetable oil: Canola or peanut oil works well for high-heat cooking.
  • 1 small yellow onion: Thinly sliced for that sweet, caramelized flavor.
  • 2 cloves garlic: Minced to infuse your dish with zest.
  • 1 tbsp fresh ginger: Grated or jarred, it adds a peppery warmth.
  • 1 cup shredded cabbage: Green or napa cabbage offers crunch and nutrition.
  • 1 medium carrot: Julienned or thinly sliced for a pop of color.
  • 1/2 cup bell pepper: Any color will do; thinly sliced for sweetness and texture.
  • 2 green onions: Sliced diagonally for garnish and flavor.
  • 3 tbsp low-sodium soy sauce: Kikkoman is a great choice for balanced flavor.
  • 1 tbsp oyster sauce: For depth; use vegetarian mushroom sauce for a plant-based option.
  • 1 tsp sesame oil: Toasted sesame oil is a must for that nutty aroma.
  • 1/4 tsp ground white pepper: Optional but adds authenticity.
  • Pinch sugar: Balances the saltiness of the sauces.
  • 6 oz protein of choice: Diced chicken breast, peeled shrimp, or cubed extra-firm tofu are all excellent choices.

Pro Tips for Perfect Chow Mein

Side view of a homemade Chow Mein dish featuring vibrant bell peppers and green onions.
  • Prep ingredients ahead: Chop your veggies and protein in advance to streamline the cooking process.
  • High heat is key: Stir-frying at a high temperature seals in flavors and keeps veggies crisp.
  • Don’t overcrowd the pan: Cook in batches if necessary to ensure even cooking and browning.
  • Adjust sauce to taste: If you prefer a saucier dish, add a splash more soy sauce or broth.
  • Garnish creatively: Top with toasted sesame seeds or fresh herbs to elevate presentation.
  • Use a wok for best results: A wok allows for better heat distribution and cooking technique.
  • Experiment with spices: A dash of chili oil or sriracha can add a delightful heat!
  • Check noodle doneness: Cook them just enough to retain a bit of bite—no one likes mushy noodles!
  • Incorporate a variety of colors: The more colorful the veggies, the more nutrients your dish contains!
  • Keep it moving: Stir constantly while cooking to ensure even cooking and prevent sticking.

Avoid Common Mistakes

  • Overcooking the noodles: Follow package directions closely to avoid mushiness.
  • Skipping the oil: Oil is essential for a proper stir-fry; it prevents sticking and promotes even cooking.
  • Using low-quality sauces: Invest in good soy and oyster sauces for the best flavor.
  • Ignoring the heat: Make sure your pan is hot enough before adding ingredients.
  • Not tasting as you go: Adjust seasonings throughout cooking to ensure a balanced flavor.

Delicious Variations of Chow Mein

  • Vegetable Chow Mein: Load up on your favorite veggies, like broccoli, snap peas, and bean sprouts for a hearty vegetarian option.
  • Spicy Chow Mein: Add chili paste or fresh diced chilies to kick up the heat and enhance the flavor.
  • Seafood Chow Mein: Substitute shrimp with scallops or squid for a delightful seafood twist!
  • Curry Chow Mein: Stir in a tablespoon of curry powder to give your dish an exotic flair.

Storage and Make-Ahead Instructions

This chow mein is best enjoyed fresh, but you can store leftovers in an airtight container in the fridge for up to 3 days. Reheat in a skillet over medium heat, adding a splash of soy sauce or broth to revive the flavors.

Frequently Asked Questions

  • Can I use other types of noodles? Absolutely! Feel free to experiment with rice noodles or even whole wheat noodles for a healthier twist.
  • Is this recipe gluten-free? Yes, simply substitute chow mein or egg noodles with rice noodles and ensure your sauces are gluten-free!
  • Can I add more protein? Yes! Feel free to double the protein amount or mix different types for a protein-packed meal.
  • What vegetables work best? Any quick-cooking vegetables will work, such as bell peppers, zucchini, and snap peas.
  • Can I freeze chow mein? While it’s best fresh, you can freeze leftovers; just expect some texture changes upon reheating.
  • What’s the difference between chow mein and lo mein? Chow mein noodles are thinner and fried crisp, while lo mein noodles are thicker and tossed with sauce.
  • How can I make this recipe vegan? Simply use tofu or tempeh for protein and ensure your sauce options are plant-based.
  • What can I serve with chow mein? Pair it with egg rolls, dumplings, or a light salad for a complete meal!

Nutritional Tips and Dietary Adaptations

Chow mein can be easily adapted to fit various dietary needs. Choose whole grain noodles for extra fiber, load up on colorful veggies for nutrients, and opt for lean proteins to keep it healthy. For a low-carb version, swap noodles for spiralized zucchini or cauliflower rice.

Essential Equipment

To achieve the best results for your chow mein, here’s what you’ll need:

  • Wok or large skillet: Essential for high-heat stir-frying.
  • Spatula or wooden spoon: For stirring and tossing ingredients efficiently.
  • Measuring cups and spoons: For accurate ingredient measurements.
  • Cutting board and knife: To chop vegetables and protein.

Serving Suggestions

Your chow mein is ready to shine! Serve it hot, garnished with extra green onions, sesame seeds, and a wedge of lime for a zesty finish. Pair it with a light soy sauce on the side for those who love a little extra seasoning.

Conclusion

Now that you have all the tools and tips to create your Chow Mein masterpiece, it’s time to get cooking! Enjoy the process, play with flavors, and most importantly, have fun in the kitchen. Remember, this dish is not just about feeding your body; it’s about nourishing your soul with vibrant, exciting food. Happy cooking!

Chow Mein Recipe: Quick, Flavorful Homemade Chinese Stir-Fry Noodles

Prep Time 10 minutes
Cook Time 15 minutes
Total Time 25 minutes
Servings 4 servings
Calories 450
This quick and flavorful chow mein recipe combines tender noodles with crisp vegetables and savory sauces for an authentic homemade Chinese stir-fry.

Ingredients

Noodles

  • 8 oz egg or chow mein noodles (or lo mein; substitute rice noodles for gluten-free)
  • 2 tbsp vegetable oil (canola or peanut oil)
  • 1 small yellow onion (thinly sliced)
  • 2 cloves garlic (minced; about 1 tsp)
  • 1 tbsp fresh ginger (grated or 1 tsp jarred ginger paste)
  • 1 cup shredded cabbage (green or napa)
  • 1 medium carrot (julienned or thinly sliced)
  • 1/2 cup bell pepper (thinly sliced, any color)
  • 2 green onions green onions (sliced on the diagonal)
  • 3 tbsp low-sodium soy sauce (Kikkoman recommended)
  • 1 tbsp oyster sauce (or vegetarian mushroom stir-fry sauce)
  • 1 tsp sesame oil (toasted for extra aroma)
  • 1/4 tsp ground white pepper (optional, but authentic)
  • Pinch sugar (balances the salty notes)
  • 6 oz protein of choice (diced chicken breast, peeled shrimp, or cubed extra-firm tofu)

Instructions 

  • Cook noodles until al dente, drain, toss with 1 tsp oil, and set aside.
  • Heat wok with oil; stir-fry onion for 1 min, then add garlic and ginger until fragrant.
  • Add protein; cook until done (3-4 min for chicken, 2 min per side for shrimp, or until tofu is golden).
  • Push ingredients aside, cook carrots and bell pepper for 1 min, then add cabbage and green onions; stir-fry briefly.
  • Mix soy sauce, oyster sauce, sesame oil, white pepper, and sugar; add broth if needed. Toss noodles to coat, then serve topped with green onions.

Notes

Adjust soy sauce and chili oil to taste for more saltiness or heat.
Calories: 450kcal
Cost: $15
Course: Main Course
Cuisine: Chinese
Keyword: Stir-Fry

Ignite Your Culinary Adventure with a Spicy Ground Beef Stir-Fry Bowl!

Are you ready to turn up the heat in your kitchen? Dive into a delicious and nutritious Spicy Ground Beef Stir-Fry Bowl, packed with vibrant veggies and a burst of bold flavors. This recipe is perfect for busy nights when you want something quick, healthy, and oh-so-satisfying. In just minutes, you can whip up a meal that combines protein, fiber, and a kick of spice, keeping your taste buds dancing and your energy levels high!

Why You’ll Love This Recipe

Here are five fantastic reasons why this Spicy Ground Beef Stir-Fry Bowl should be on your dinner table tonight:

  • Quick Preparation: This dish can be prepared in just 30 minutes, making it a prime choice for hectic weeknights.
  • Customizable Ingredients: Feel free to swap out veggies based on what you have at home; the possibilities are endless!
  • Healthy Balance: Packed with protein from the ground beef and fiber from the veggies, it’s a well-rounded meal.
  • Flavor Explosion: The combination of garlic, soy sauce, and chili flakes creates a tantalizing flavor profile that will keep you coming back for more.
  • Meal Prep Friendly: Make a big batch and store leftovers for easy lunches or dinners throughout the week.

Spicy Ground Beef Stir-Fry Bowl Ingredients

Let’s gather the stars of this show! Here’s what you need:

  • 1 lb Ground Beef: Substitute with ground turkey or chicken for a leaner option.
  • 0.25 cup Soy Sauce: Opt for low-sodium soy sauce for a healthier version.
  • 1 tsp Chili Flakes: Adjust according to your spice preference for that perfect kick!
  • 2 tbsp Brown Sugar: Honey or maple syrup can be used as alternatives for a touch of sweetness.
  • 2 tbsp Sesame Oil: Can substitute with vegetable oil if needed.
  • 4 cloves Garlic: Use fresh garlic for the best aromatic flavor.
  • 2 cups Broccoli Florets: You can substitute with bok choy or snap peas.
  • 1 medium Red Bell Pepper: Yellow or green bell peppers are suitable substitutes.
  • 1 medium Zucchini: You can replace with eggplant or yellow squash.
  • 1 cup Mushrooms: Any type of mushrooms works well in this dish.
  • 2 tbsp Olive Oil: Alternatively, use vegetable or canola oil.
  • 4 cups Steamed White Rice: Brown rice or quinoa can add extra fiber to your meal.

How to Make Your Spicy Ground Beef Stir-Fry Bowl

Side view of a delicious spicy stir-fry bowl featuring ground beef, broccoli, bell pepper, and rice.

Ready to stir things up? Follow these steps to create your flavorful bowl:

  1. In a large skillet or wok, heat the olive oil over medium-high heat.
  2. Add the ground beef and cook until browned, breaking it up with a spatula as it cooks.
  3. Stir in the garlic and chili flakes, sautéing for about 1 minute until fragrant.
  4. Add the soy sauce, brown sugar, and sesame oil; mix well to combine.
  5. Introduce the broccoli, bell pepper, zucchini, and mushrooms. Stir-fry for about 5-7 minutes until the veggies are tender-crisp.
  6. Serve hot over a bed of steamed white rice and enjoy your spicy creation!

Make-Ahead Options

This Spicy Ground Beef Stir-Fry Bowl is not only delicious but also perfect for meal prepping:

  • Prepare Ingredients Ahead: Chop your veggies and store them in airtight containers in the fridge for up to 3 days.
  • Cook and Store: Make the stir-fry in advance and store it in the refrigerator for up to 4 days.
  • Freezing: You can freeze portions in airtight containers for up to 3 months. Just reheat on the stove or in the microwave!

How to Store and Freeze Your Stir-Fry Bowl

Keep your leftovers fresh and delicious:

  • Refrigerate: Store in an airtight container in the fridge for up to 4 days.
  • Freeze: Allow to cool completely before transferring to freezer-safe containers. It can last for up to 3 months!
  • Reheating: For best results, reheat on the stovetop with a splash of water or broth to prevent drying out.

Expert Tips for a Perfect Stir-Fry

Want to elevate your stir-fry game? Here are some pro tips:

  • High Heat: Stir-frying requires high heat to achieve that perfect sear on your veggies and beef.
  • Don’t Overcrowd: Cook in batches if necessary to avoid steaming the ingredients instead of frying them.
  • Use Fresh Ingredients: Fresh veggies will provide the best flavor and nutrients—always opt for fresh over frozen when possible.
  • Cook in Order: Start with the proteins and denser vegetables, adding softer vegetables later for even cooking.
  • Experiment with Sauces: Try adding oyster sauce or hoisin for a different flavor profile!
  • Keep It Colorful: Use a variety of colorful vegetables to make your dish more visually appealing and nutritious.
  • Adjust Spice Levels: Feel free to adjust the amount of chili flakes based on your spice tolerance.
  • Incorporate Herbs: Garnish with fresh herbs like cilantro or green onions for an extra flavor boost!

Common Mistakes and Troubleshooting

Even the best chefs make mistakes! Here’s how to troubleshoot:

  • Too Salty?: If your stir-fry is too salty, add a splash of water or some extra veggies to dilute the flavor.
  • Overcooked Veggies?: If your veggies are mushy, reduce the cooking time next time and keep them crunchier.
  • Beef Too Greasy?: Use leaner ground beef or drain excess fat after browning.
  • Need More Flavor?: Add a splash of vinegar or citrus juice for brightness!

Variations to Try

Want to mix things up? Here are some fun variations:

  • Vegetarian Delight: Swap the ground beef for tofu or tempeh for a plant-based version.
  • Spicy Thai Twist: Include Thai basil and a touch of peanut sauce for a Thai-inspired dish.
  • Mexican Flair: Add black beans and corn, and use taco seasoning for a zesty twist!
  • Asian Fusion: Incorporate bok choy and shiitake mushrooms for an Asian-inspired flavor.

Frequently Asked Questions

Here are some common questions about making your Spicy Ground Beef Stir-Fry Bowl:

  • Can I use other proteins? Absolutely! Chicken, turkey, or even shrimp can work wonderfully in this recipe.
  • How can I make this gluten-free? Use tamari or coconut aminos instead of soy sauce.
  • What if I don’t like spicy food? Reduce the chili flakes or omit them entirely for a milder flavor.
  • Can I add more vegetables? Yes! Feel free to add any of your favorites like carrots, snow peas, or bell peppers.
  • How long does it take to cook? The entire dish takes about 30 minutes from start to finish!
  • Can I make this ahead of time? Yes, this dish stores well and can be made in advance for meal prep.
  • What’s the best way to reheat leftovers? Reheat in a skillet with a splash of water or broth to keep it moist.
  • How can I make it more filling? Serve it with brown rice or quinoa for added fiber and nutrients.

Nutrition Tips and Dietary Adaptations

This recipe offers a great balance of macronutrients:

  • Protein-Packed: The ground beef provides a hearty dose of protein, essential for muscle recovery.
  • Fiber-Rich: With plenty of veggies, this dish helps keep you full and supports digestive health.
  • Low-Carb Option: Serve over cauliflower rice instead of regular rice for a low-carb twist.
  • Vegan Option: Use plant-based ground meat alternatives for a fully vegan meal.

Equipment Recommendations

Make your cooking experience seamless with the right tools:

  • Wok or Skillet: A good quality wok or non-stick skillet is essential for perfect stir-frying.
  • Spatula: A sturdy spatula helps in breaking apart the beef and stirring the ingredients.
  • Knife and Cutting Board: For chopping your vegetables with ease.
  • Measuring Cups and Spoons: Ensure accurate measurements for consistent results.

Serving Suggestions

To enhance your dining experience:

  • Garnish: Top with sesame seeds or chopped green onions for added texture.
  • Side Dishes: Pair with a light cucumber salad or spring rolls for a complete meal.
  • Beverage Pairing: A refreshing iced tea or lemon water complements the flavors perfectly.

Now that you’ve equipped yourself with the ultimate guide to making a Spicy Ground Beef Stir-Fry Bowl, it’s time to unleash your culinary creativity! Enjoy the process, experiment with flavors, and most importantly, have fun in the kitchen. Happy cooking!

Spicy Ground Beef Stir-Fry Bowl with Garlic Veggies Delight

Prep Time 10 minutes
Cook Time 15 minutes
Total Time 25 minutes
Servings 4 servings
Calories 650
A flavorful and quick stir-fry featuring spicy ground beef and vibrant vegetables served over steamed rice.

Ingredients

Protein

  • 1 lb Ground Beef (Substitute with ground turkey or chicken for a leaner option.)
  • 0.25 cup Soy Sauce (Use low-sodium for a healthier version.)
  • 1 tsp Chili Flakes (Adjust according to spice preference.)
  • 2 tbsp Brown Sugar (Honey or maple syrup can be used as alternatives.)
  • 2 tbsp Sesame Oil (Can substitute with vegetable oil.)
  • 4 cloves Garlic (Use fresh for the best flavor.)
  • 2 cups Broccoli Florets (Substitute with bok choy or snap peas.)
  • 1 medium Red Bell Pepper (Yellow or green are suitable substitutes.)
  • 1 medium Zucchini (Can replace with eggplant or yellow squash.)
  • 1 cup Mushrooms (Any type works well.)
  • 2 tbsp Olive Oil (Can use vegetable or canola oil instead.)
  • 4 cups Steamed White Rice (Brown rice or quinoa can add fiber.)

Instructions 

  • Cook the rice and set aside.
  • Heat sesame oil in a large skillet over medium-high heat.
  • Add ground beef and cook until browned, then stir in garlic, chili flakes, soy sauce, and brown sugar.
  • Add vegetables and cook until tender-crisp.
  • Serve the beef and vegetable mixture over steamed rice.

Notes

For a lower sodium option, reduce soy sauce or use a low-sodium version.
Calories: 650kcal
Cost: $15
Course: Main Course
Cuisine: Asian-inspired
Keyword: Beef, Stir-Fry, Vegetables

Unleash Flavor: Your Ultimate Guide to Beef and Broccoli

Welcome to a vibrant culinary adventure where eating healthy meets excitement! This beef and broccoli recipe is your ticket to a quick, delicious meal that’s packed with flavor and nutrition. Whether you’re a busy professional or a home chef looking to spice up your weeknight dinners, this dish has got you covered. Ready in under 30 minutes, it combines tender flank steak, crisp broccoli, and a savory sauce that will have your taste buds dancing. Let’s dive into the details!

Why You’ll Love This Recipe

  • Speedy preparation: Ready in just 30 minutes, perfect for busy weeknights.
  • Flavor explosion: The savory sauce, infused with ginger and garlic, delivers a satisfying umami punch.
  • Health-conscious: Packed with nutrients from broccoli and lean protein from flank steak, it’s a balanced meal.
  • Customizable: Easily adjust spice levels and add your favorite vegetables to make it your own.
  • One-pan wonder: Minimal cleanup with everything cooked in one pan—who doesn’t love that?

Ingredients You’ll Need

Here’s what you’ll need to create this delightful dish:

  • 1 pound flank steak: Choose high-quality, grass-fed for extra flavor and nutrients.
  • 4 tablespoons olive oil: You can substitute with vegetable oil if preferred.
  • 12 ounces broccoli florets: Fresh is best, but frozen works too in a pinch!
  • Sesame seeds and green onions: Optional garnishes add a lovely crunch and freshness.
  • Rice or whole-grain spaghetti: Serve this dish over your choice of carb for a complete meal.
  • 2 teaspoons fresh ginger (grated): For that warm, spicy kick.
  • 4 cloves garlic (minced): Fresh garlic adds depth and flavor.
  • 1/2 cup chicken stock: Homemade or store-bought, for a rich sauce.
  • 6 tablespoons low sodium soy sauce: Essential for the savory base of the sauce.
  • 3 tablespoons brown sugar (or honey): Adds a hint of sweetness to balance the flavors.
  • 2 tablespoons sesame oil: Use toasted sesame oil for an extra depth of flavor.
  • 1-2 teaspoons sriracha: Optional, for those who love some heat!
  • 1/2 – 1 tablespoon cornstarch: Adjust based on your preferred sauce thickness.

How to Make Beef and Broccoli

Juicy Beef and Broccoli dish showcasing the glossy sauce and sesame seed garnish.

Now that you have your ingredients ready, let’s get cooking!

  1. **Prep the beef**: Place the flank steak in the freezer for about 1 hour (or at least 30 minutes). This makes it easier to slice thinly against the grain.
  2. **Slice thin**: Once chilled, slice the flank steak into strips as thinly as possible. Let them sit at room temperature while you prepare the sauce and broccoli.
  3. **Cook the broccoli**: In a large pan or wok, heat 2 tablespoons of olive oil over medium-high heat. Add the broccoli and sauté for about 3-4 minutes until bright green and tender-crisp. Remove from the pan and set aside.
  4. **Sear the beef**: In the same pan, add another 2 tablespoons of olive oil. Add the sliced beef and stir-fry for about 2-3 minutes until browned and cooked through.
  5. **Make the sauce**: In a bowl, whisk together the chicken stock, soy sauce, brown sugar, ginger, garlic, and sriracha. Pour this sauce over the beef in the pan.
  6. **Thicken the sauce**: Sprinkle in the cornstarch and stir quickly to combine. Let it bubble for 1-2 minutes until thickened.
  7. **Combine**: Add the broccoli back into the pan and toss everything together until well coated in the sauce.
  8. **Serve**: Garnish with sesame seeds and sliced green onions. Serve over rice or whole-grain spaghetti. Enjoy your meal!

Pro Tips for Perfect Beef and Broccoli

  • Slice against the grain: This technique ensures tender beef, making it easier to chew and more enjoyable to eat.
  • Don’t overcrowd the pan: Sauté in batches if necessary to achieve a nice sear on the beef.
  • Use high heat: Cooking on high heat helps achieve that authentic stir-fry flavor.
  • Prep your ingredients: Have everything chopped and ready to go before you start cooking—stir-frying is quick!
  • Adjust seasoning: Taste the sauce before adding cornstarch; feel free to adjust to your liking!
  • Experiment with veggies: Feel free to toss in bell peppers, snap peas, or carrots for added color and nutrition.
  • Make it a meal prep star: This dish stores well in the fridge for up to 3 days—perfect for meal prep!
  • Spice it up!: Add more sriracha or even a splash of chili oil for a fiery kick.

Common Mistakes to Avoid

Even the best chefs make mistakes! Here are some common pitfalls and how to avoid them:

  • Not slicing thin enough: This can lead to tough beef. Chill the steak for easy slicing!
  • Overcooking the broccoli: Aim for tender-crisp to retain nutrients and texture.
  • Not letting the beef rest: Letting it sit after slicing helps keep it juicy.
  • Ignoring the sauce: Make sure to whisk it well before adding to ensure an even distribution of flavors.

Variations of Beef and Broccoli

Feeling adventurous? Here are some tasty twists you can try:

  • Beef and Broccoli with Oyster Sauce: Swap out soy sauce for oyster sauce for an additional depth of flavor.
  • Vegetarian Option: Replace beef with tofu or tempeh for a plant-based version.
  • Extra Veggie Boost: Incorporate other stir-fry favorites like bell peppers, mushrooms, or bok choy.
  • Spicy Beef and Broccoli: Add more sriracha or fresh chili peppers for a fiery spin.

Storage and Make-Ahead Instructions

This beef and broccoli recipe is perfect for meal prep! Here’s how to store it:

  • Refrigerate: Store leftovers in an airtight container for up to 3 days.
  • Freeze: For longer storage, freeze in a freezer-safe container for up to 3 months. Thaw overnight in the fridge before reheating.
  • Reheat gently: Microwave or heat on the stovetop, adding a splash of water or stock to keep it moist.

Nutrition Tips and Dietary Adaptations

Staying healthy while enjoying this dish is easy! Here are some tips:

  • Low-carb option: Serve with cauliflower rice instead of traditional rice.
  • Gluten-free: Use tamari or coconut aminos instead of soy sauce.
  • Increase fiber: Add more vegetables or serve with brown rice for extra fiber.

Equipment Recommendations

To make your cooking experience even smoother, consider these essential tools:

  • Wok or large skillet: Ideal for stir-frying, allowing for high heat and quick cooking.
  • Sharp knife: A good chef’s knife makes slicing the beef a breeze.
  • Cutting board: A sturdy cutting board is a must for prepping your ingredients.

Serving Suggestions

Elevate your meal with these serving ideas:

  • Serve over rice: White or brown rice absorbs the flavors beautifully.
  • Pair with noodles: Whole-grain spaghetti or rice noodles add a delightful twist.
  • Garnish with fresh herbs: Fresh cilantro or basil adds a pop of color and freshness.
  • Side with a salad: A light cucumber or Asian slaw complements the meal perfectly.

Frequently Asked Questions

Got questions? We’ve got answers!

  • Can I use another cut of beef? Yes! Sirloin or ribeye also work well for stir-frying.
  • How can I make the sauce thicker? Add more cornstarch mixed with water to achieve your desired thickness.
  • Can I make this dish ahead of time? Absolutely! Just store it in the fridge and reheat when ready to serve.
  • What’s the best way to cut flank steak? Always slice against the grain for tender pieces.
  • Is this recipe gluten-free? You can make it gluten-free by using tamari instead of soy sauce.
  • Can I add more vegetables? Definitely! Feel free to include bell peppers, snap peas, or carrots.
  • How spicy is this dish? Adjust the sriracha to your preference for heat!
  • What can I serve with this? It pairs well with rice, noodles, or a fresh salad.

This beef and broccoli recipe is not just a meal; it’s a culinary journey that brings flavor, nutrition, and joy to your plate. So gather your ingredients, channel your inner chef, and let’s get cooking! Remember, the kitchen is your playground—make it fun!

Beef and Broccoli

Prep Time 10 minutes
Cook Time 10 minutes
Total Time 20 minutes
Servings 4 servings
Calories 450
A quick and flavorful stir-fry combining tender beef with crisp broccoli in a savory sauce.

Ingredients

Meat

  • 1 pound flank steak

Oil

  • 4 tablespoons olive oil (or vegetable oil)

Vegetables

  • 12 ounces broccoli florets

Garnish

  • optional sesame seeds and green onions for garnish

Carbohydrate

  • to serve rice or whole-grain spaghetti

Sauce ingredients

  • 2 teaspoons fresh ginger (grated)
  • 4 cloves garlic (minced or grated)
  • 1/2 cup chicken stock
  • 6 tablespoons low sodium soy sauce
  • 3 tablespoons brown sugar (or honey)
  • 2 tablespoons sesame oil (toasted is ideal)
  • 1-2 teaspoons sriracha or hot sauce (more if spicier)
  • 1/2 - 1 tablespoon cornstarch (depending on sauce thickness)

Instructions 

  • Place the flank steak in the freezer for 30-60 minutes to firm up.
  • Slice the steak against the grain into thin strips and set aside.

Notes

Use toasted sesame oil for a richer flavor and adjust hot sauce to taste.
Calories: 450kcal
Cost: $15
Course: Main Course
Cuisine: Asian
Keyword: Beef, broccoli, Stir-Fry

Unleash the Flavor: A Guide to Creamy Smothered Chicken and Rice

Welcome to a culinary adventure that transforms your dinner routine into an exciting, flavor-packed experience! This creamy smothered chicken and rice dish is not just a meal; it’s a celebration of bold flavors, comforting textures, and simple ingredients. Perfect for busy weeknights or special occasions, this recipe will become a staple in your kitchen. Let’s dive into why you’ll love this vibrant dish and how to make it shine!

Why You’ll Love This Recipe

  • Quick and Easy: With minimal prep and cook time, you can whip up this delicious meal in under an hour, perfect for those hectic weeknights.
  • One-Pan Wonder: Everything cooks in one pan, making clean-up a breeze while delivering maximum flavor without the fuss.
  • Comfort Food at Its Best: This dish combines tender chicken with a creamy sauce that envelops fluffy rice, creating a comforting experience every bite.
  • Customizable: Whether you want to add veggies or switch up the seasonings, this recipe is a blank canvas for your culinary creativity!
  • Impressive Presentation: Serve this dish garnished with fresh parsley, and it’s sure to impress family and friends, making it perfect for special occasions.

Ingredients for Creamy Smothered Chicken and Rice

Let’s break down the ingredients you’ll need to make this dish sing. Here’s what you’ll need:

  • 4 boneless, skinless chicken breasts: The star of the show, providing lean protein.
  • 1 teaspoon garlic powder: For a punch of flavor.
  • 1 teaspoon onion powder: Adds depth to the seasoning.
  • 1 teaspoon smoked paprika: A touch of smokiness that elevates the dish.
  • Salt and black pepper: To taste, ensuring the flavors pop!
  • 2 tablespoons olive oil: For searing the chicken to perfection.
  • 1 cup long-grain white rice: The perfect base for this creamy creation.
  • 2 cups chicken broth: The liquid gold that brings everything together.
  • ½ teaspoon salt: For the rice.
  • For the creamy sauce:
  • 2 tablespoons unsalted butter: Richness is key!
  • 2 tablespoons all-purpose flour: To create a beautiful roux.
  • 1 ½ cups whole milk: For creaminess.
  • ½ cup chicken broth: Enhances the flavor of the sauce.
  • ½ cup shredded cheddar cheese: Adds a cheesy richness.
  • ½ cup grated Parmesan cheese: For umami depth.
  • Fresh parsley (chopped, for garnish): Brightens up the dish!

Ingredient Substitutions

Juicy chicken breasts on a bed of fluffy rice, covered in a creamy sauce.

Don’t have everything on hand? No problem! Here are some substitutions you can make:

  • Chicken breasts: Substitute with chicken thighs for a juicier option.
  • Rice: Use brown rice for a healthier twist (adjust cooking time).
  • Milk: Swap with almond or oat milk for a dairy-free version.
  • Cheese: Nutritional yeast can replace cheese for a vegan option.
  • Butter: Use olive oil or vegan butter for dairy-free diets.

Step-by-Step Instructions

Now, let’s get cooking! Follow these steps for a flawless execution:

  1. Prepare the Chicken: Season the chicken breasts with garlic powder, onion powder, smoked paprika, salt, and black pepper.
  2. Heat Olive Oil: In a large skillet over medium-high heat, add the olive oil. Sear the chicken for 4-5 minutes on each side until golden brown. Remove the chicken from the skillet and set aside.
  3. Cook the Rice: In a medium saucepan, bring the chicken broth and salt to a boil. Add the rice, reduce heat to low, cover, and simmer for 15-18 minutes until tender and the liquid is absorbed. Fluff with a fork and set aside.
  4. Make the Sauce: In the same skillet, melt the butter over medium heat. Whisk in the flour and cook for 1-2 minutes until lightly golden.
  5. Add Liquid: Gradually whisk in the milk and chicken broth, creating a smooth sauce. Stir in garlic powder, thyme, cheddar cheese, and Parmesan cheese. Cook for 3-4 minutes until the sauce thickens and cheese melts.
  6. Combine Everything: Return the chicken breasts to the skillet, spooning the creamy sauce over the top. Cover and simmer on low heat for 10 minutes until the chicken is fully cooked and tender.
  7. Serve: Plate the cooked rice and top with the smothered chicken and sauce. Garnish with fresh parsley and enjoy!

Pro Tips for Success

  • Rest the Chicken: Allow the chicken to rest after cooking for juicier results.
  • Use Room Temperature Ingredients: They blend better into the sauce, ensuring a smooth consistency.
  • Don’t Rush the Sauce: Take your time to meld the flavors; it’s worth the wait!
  • Adjust Seasonings: Taste as you go! Everyone’s palate is different.
  • Garnish Generously: Fresh herbs elevate the dish’s presentation and flavor.
  • Double the Batch: This recipe freezes well, making it perfect for meal prep.
  • Serve with a Side: A fresh salad or steamed veggies complement this dish beautifully.
  • Experiment: Feel free to add your favorite spices or vegetables to personalize your creamy smothered chicken!

Common Mistakes and Troubleshooting

Here are some common pitfalls to watch out for:

  • Overcooking the Chicken: Keep an eye on the chicken to prevent it from drying out. It should reach an internal temperature of 165°F.
  • Clumpy Sauce: If your sauce gets lumpy, whisk vigorously to break up any clumps.
  • Rice Not Cooking Properly: Use a tight-fitting lid and avoid lifting it too often to maintain steam.

Variations on Creamy Smothered Chicken and Rice

Make this dish your own with these variations:

  • Vegetable Medley: Toss in your favorite vegetables like spinach, peas, or bell peppers for added nutrition.
  • Spicy Kick: Add crushed red pepper flakes or diced jalapeños to the seasoning for a spicy twist.
  • Herb Infusion: Experiment with fresh herbs like thyme or rosemary to deepen the flavor profile.
  • Cheesy Spinach: Mix in fresh spinach and extra cheese for a creamy, cheesy delight!

Storage and Make-Ahead Instructions

This recipe is perfect for meal prep and leftovers!

  • Storing: Store leftovers in an airtight container in the refrigerator for up to 3 days.
  • Freezing: This dish freezes well! Just make sure to cool it completely before transferring to a freezer-safe container. It can last up to 3 months.
  • Reheating: Reheat in a skillet over low heat, adding a splash of milk or broth to maintain creaminess.

Frequently Asked Questions

  • Can I use brown rice instead? Yes, but you’ll need to adjust the cooking time, as brown rice takes longer to cook.
  • Is this recipe gluten-free? You can make it gluten-free by using cornstarch instead of flour for the sauce.
  • What can I serve with this dish? A simple green salad or steamed vegetables pair wonderfully.
  • Can I use frozen chicken? Yes, but ensure it’s fully thawed before cooking for even results.
  • How can I make it dairy-free? Substitute dairy products with almond milk and omit the cheese.
  • What if my sauce is too thick? Add a little more chicken broth or milk to thin it out to your desired consistency.
  • How do I know when the chicken is done? Check with a meat thermometer; it should read 165°F in the thickest part.
  • Can I add cheese to the rice? Absolutely! Mixing in cheese right before serving adds extra creaminess.

Nutrition Tips and Dietary Adaptations

Packing nutritious ingredients into your meals is essential for a balanced diet. Here are some tips:

  • Lean Protein: Use chicken breasts or turkey for a leaner option.
  • Whole Grains: Choose brown rice or quinoa for added fiber and nutrients.
  • Vegetable Boost: Incorporate a variety of colorful vegetables to increase vitamins and minerals.

Equipment Recommendations

To make this dish, you’ll need:

  • Large Skillet: A deep skillet or sauté pan with a tight-fitting lid works best.
  • Medium Saucepan: For cooking the rice and broth.
  • Whisk: Essential for creating a smooth sauce.
  • Measuring Cups and Spoons: For accurate ingredient measurements.

Serving Suggestions

To really elevate your serving experience:

  • Garnish: Always finish with a sprinkle of fresh parsley for color and flavor.
  • Pairing: Serve with a glass of crisp white wine or a refreshing iced tea.
  • Presentation: Use colorful plates or bowls to make the dish pop on the table.

Final Thoughts

There you have it! A complete guide to making the ultimate creamy smothered chicken and rice. This dish not only satisfies your cravings but also inspires your cooking creativity. Remember, the kitchen is your playground—get in there and have fun with it! Enjoy your culinary masterpiece and share the love with family and friends. Happy cooking!

Creamy Smothered Chicken and Rice

Prep Time 10 minutes
Cook Time 30 minutes
Total Time 40 minutes
Servings 4 servings
Calories 650
A comforting dish featuring tender chicken smothered in a creamy cheese sauce served over flavorful rice.

Ingredients

Chicken

  • 4 pieces boneless (skinless chicken breasts)
  • 1 teaspoon garlic powder
  • 1 teaspoon onion powder
  • 1 teaspoon smoked paprika
  • Salt and black pepper (to taste) Salt and black pepper (to taste)
  • 2 tablespoons olive oil
  • 1 cup long-grain white rice
  • 2 cups chicken broth
  • ½ teaspoon salt

For the Creamy Sauce:

  • 2 tablespoons unsalted butter
  • 2 tablespoons all-purpose flour
  • 1 ½ cups whole milk
  • ½ cup chicken broth
  • ½ teaspoon garlic powder
  • ¼ teaspoon thyme
  • ½ cup shredded cheddar cheese
  • ½ cup grated Parmesan cheese
  • Fresh parsley (chopped (for garnish)) Fresh parsley (for garnish)

Instructions 

  • Season chicken with spices. Sear in oil until golden, then set aside.
  • Cook rice in chicken broth with salt until tender, then fluff and set aside.
  • Melt butter, whisk in flour, then gradually add milk and broth to make sauce. Stir in cheeses and seasonings until thickened.
  • Return chicken to skillet, spoon sauce over, cover, and simmer for 10 minutes.
  • Serve chicken and sauce over rice, garnish with parsley.

Notes

Ensure the chicken is fully cooked before serving.
Calories: 650kcal
Cost: $15
Course: Main Course
Cuisine: American
Keyword: Cheese, Chicken, Rice