Author

Ryan

Browsing

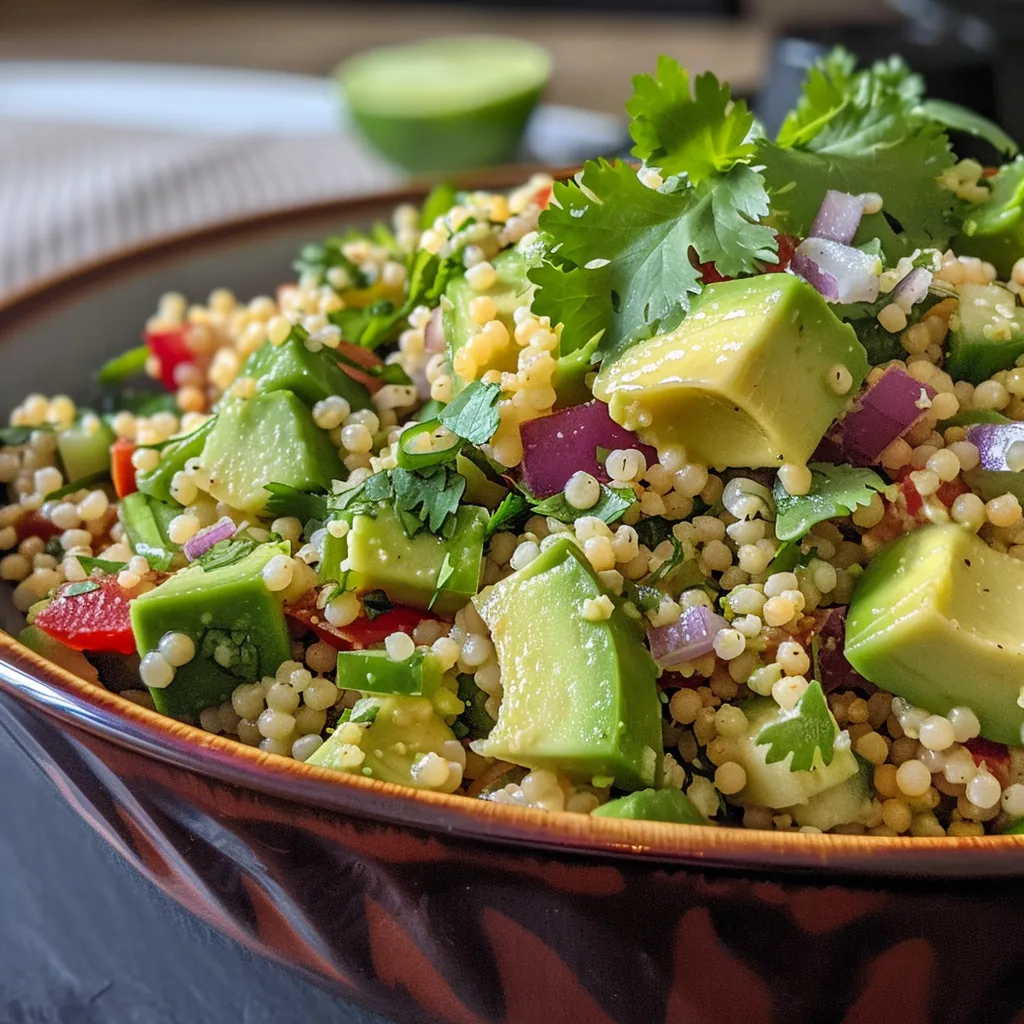
Discover the Magic of Zesty Lemon Herb Couscous Salad

Welcome to a vibrant culinary adventure! If you think healthy eating is dull, you’re in for a delightful surprise with our Zesty Lemon Herb Couscous Salad. This dish isn’t just another salad; it’s a flavor fiesta that combines the nutty goodness of pearl couscous, the freshness of herbs, and the zest of lemon. Perfect for busy weeknights, picnics, or as a side for your next gathering, this salad brings a burst of energy and joy to your table. Let’s dive into why this recipe is not just delicious but also an essential addition to your healthy cooking repertoire.

Why You’ll Love This Recipe

This salad is more than just a pretty plate; it’s designed to impress your taste buds and nourish your body! Here are five reasons you’ll adore it:

  • Quick and Easy: With minimal cooking time, you can have this salad ready in under 30 minutes, making it perfect for busy schedules.
  • Flavor Explosion: The combination of lemon, fresh herbs, and savory chickpeas delivers a refreshing and satisfying taste in every bite.
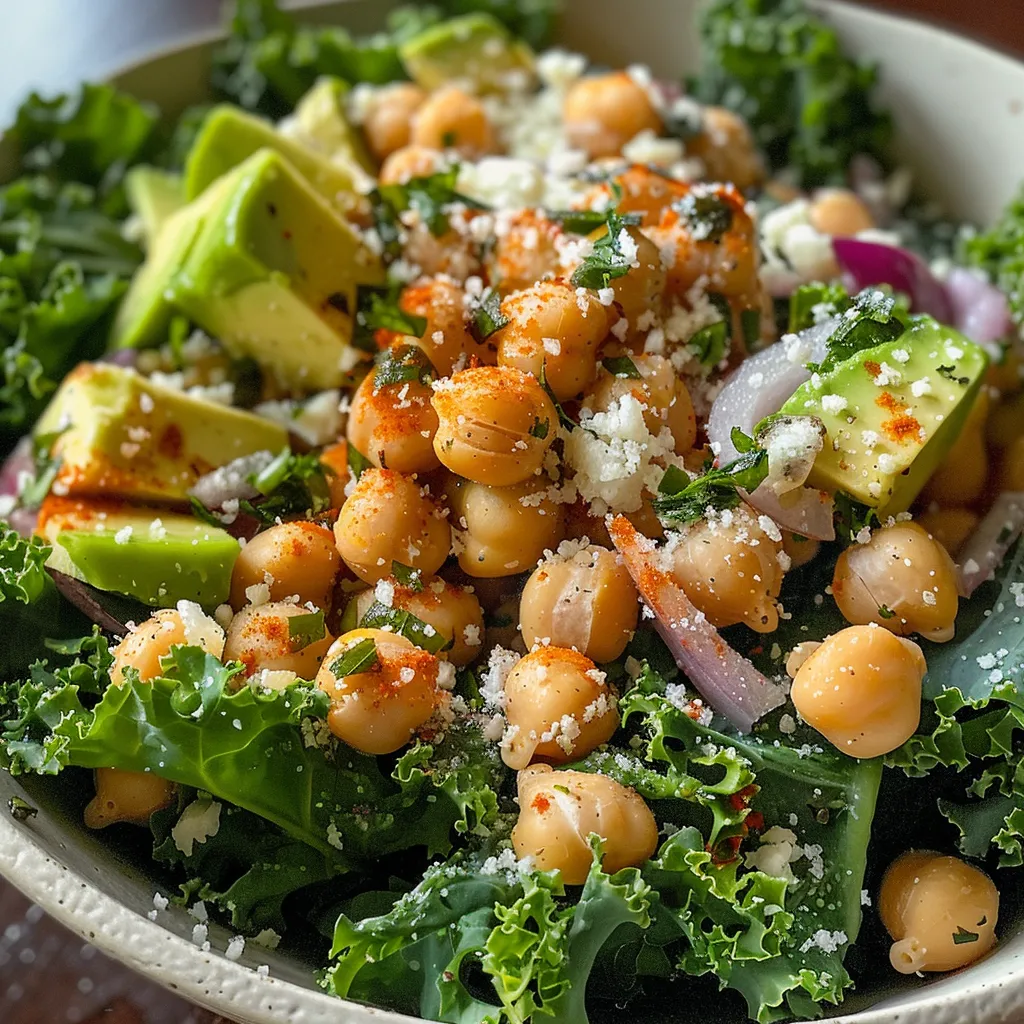
  • Nutrition Powerhouse: Packed with protein from chickpeas, fiber from couscous, and essential vitamins from herbs, this salad is a well-rounded meal.
  • Versatile Base: Whether as a main dish or a side, this couscous salad adapts beautifully to your meal plans.
  • Meal Prep Friendly: Make it ahead of time for a quick grab-and-go option during the week.

Ingredients Breakdown

Gathering the right ingredients is key to a fantastic salad. Here’s what you’ll need:

  • 2 tablespoons vegan butter: Adds richness and flavor; can substitute with olive oil for a lighter option.
  • 8 ounces pearl couscous: This larger pasta version of couscous provides a delightful chewiness; regular couscous can be used but will require less cooking time.
  • 1 cup cherry tomatoes: Sweet and juicy, they enhance the salad’s freshness; feel free to substitute with diced bell peppers for a different crunch.
  • 2 1/2 cups broth: Using vegan chicken broth adds depth; vegetable broth works just as well.
  • 1 small red onion (diced): Adds a sharpness that balances the salad; shallots can be a milder alternative.
  • 1 15-ounce can chickpeas: A fantastic source of protein; you can also use black beans or lentils for variety.
  • 1/4 cup grated vegan parmesan: Provides a cheesy element; nutritional yeast is an excellent dairy-free substitute.
  • 1-2 cloves garlic (finely minced): Infuses the salad with aromatic flavor; roasted garlic can add a sweeter touch.
  • 1/3 cup fresh herbs: A mix of parsley, basil, and mint brightens the dish; use whatever fresh herbs you have on hand.
  • 1/4 cup olive oil: Essential for dressing; avocado oil can also work here.
  • 1 lemon (juiced): The star of the dish, its acidity balances the flavors; lime juice can be used for a twist.
  • 1 tablespoon dijon mustard: Adds a tangy kick; feel free to omit if you prefer a simpler dressing.
  • Salt & pepper (to taste): Essential for seasoning; adjust according to your preference.

How to Make Your Zesty Lemon Herb Couscous Salad

A side view showing a bowl of Lemon Herb Couscous Salad, featuring bright colors and textures.

Ready to create this culinary masterpiece? Follow these steps:

  1. Melt the vegan butter in a skillet over medium heat. Add the pearl couscous and toast for 2-3 minutes, stirring frequently. This step enhances the nutty flavor of the couscous!
  2. Pour in the cherry tomatoes and broth, then bring to a boil. Cover, reduce heat, and simmer for 12-15 minutes, or until the liquid is absorbed and the couscous is tender.
  3. Transfer the couscous and tomatoes to a bowl and allow to cool for about 30 minutes.
  4. Once cooled, add the chickpeas, red onion, garlic, vegan parmesan, herbs, olive oil, lemon juice, and dijon mustard. Toss to combine everything beautifully.
  5. Season with salt and pepper to taste. Feel free to adjust the lemon juice for extra zing!
  6. Serve immediately or refrigerate to chill for a refreshing side dish. This salad can be enjoyed right away or after it’s had some time to marinate in the fridge—flavors deepen and meld over time!

Pro Tips for Perfecting Your Salad

Take your salad to the next level with these expert insights:

  • Chill Out: Allowing the salad to chill enhances the flavors and gives a refreshing taste that’s perfect for hot days.
  • Customize Your Herbs: Experiment with different combinations of fresh herbs to find your favorite mix.
  • Toasting Couscous: Always toast the couscous before adding liquid; it enhances the flavor and texture.
  • Don’t Skip the Dressing: The dressing is crucial; it ties all the ingredients together and elevates the dish.
  • Make It Your Own: Feel free to add veggies like cucumbers or radishes for an extra crunch!
  • Be Mindful of Salt: Since broth can be salty, adjust your seasoning gradually to avoid over-salting.
  • Batch Cooking: Make a larger batch and store it for up to 5 days in the fridge for easy meals!
  • Garnish with Extra Herbs: Fresh herbs sprinkled on top right before serving add a beautiful touch and enhance the aroma.

Common Mistakes and Troubleshooting

Even the best chefs make mistakes! Here’s how to avoid common pitfalls:

  • Overcooking Couscous: Keep an eye on cooking time; overcooked couscous can become mushy.
  • Too Much Dressing: Start with less dressing and add more as needed; it’s easier to add than to take away!
  • Skipping the Cooling Step: Allowing the couscous to cool prevents wilting of the herbs and keeps the textures intact.
  • Not Tasting: Always taste and adjust seasoning before serving; what might seem fine during prep can be different when served.

Delicious Variations to Try

Want to switch things up? Here are some fun variations:

  • Greek Twist: Add feta cheese, olives, and a splash of red wine vinegar for a Mediterranean flair.
  • Spicy Kick: Include diced jalapeños or a sprinkle of red pepper flakes for a heat boost.
  • Protein-Packed: Toss in grilled chicken or shrimp for a heartier meal.
  • Fruity Addition: Mix in diced mango or pomegranate seeds for a sweet contrast to the savory elements.

Storage and Make-Ahead Instructions

This salad stores beautifully! Here’s how to keep it fresh:

  • Refrigerate in an airtight container for up to 5 days.
  • For make-ahead meals, prepare the couscous and dressing separately, then combine just before serving.
  • To revive leftovers, add a splash of olive oil and lemon juice before enjoying.

FAQ: Your Questions Answered

Curious minds want to know! Here are answers to frequently asked questions:

  • Can I make this salad gluten-free? Absolutely! Use gluten-free couscous or quinoa as a substitute.
  • How can I add more protein? Chickpeas are great, but you can also add nuts, seeds, or cooked lentils.
  • What can I serve this salad with? It pairs well with grilled veggies, tofu, or as a side for a protein main dish.
  • Is it suitable for meal prep? Yes, it’s perfect for meal prep and can be stored for up to a week!
  • Can I use dried herbs instead of fresh? While fresh is ideal, you can use dried herbs; just use less since they are more potent.
  • Can I freeze this salad? Freezing is not recommended as the texture may change upon thawing.
  • How do I make it vegan? This recipe is already vegan! Just ensure all ingredients, like the broth and parmesan, are vegan-friendly.
  • What’s the best way to serve it? Serve chilled or at room temperature, garnished with extra herbs for a visually appealing touch.

Nutrition Tips and Dietary Adaptations

This salad is naturally nutritious, but here are a few tips to enhance its health benefits:

  • Increase Fiber: Add more veggies like spinach or kale for added fiber and nutrients.
  • Healthy Fats: Incorporate avocado slices for creaminess and healthy fats.
  • Lower Carb Option: Substitute couscous with cauliflower rice for a low-carb alternative.

Recommended Equipment

To make your cooking experience seamless, here’s a list of handy tools:

  • Skillet: A non-stick skillet is ideal for toasting couscous without sticking.
  • Mixing Bowl: A large bowl for combining all ingredients easily.
  • Measuring Cups and Spoons: Ensure accurate ingredient measurements for perfect results.
  • Sharp Knife: For dicing vegetables and herbs with ease.

Serving Suggestions

Now that your Zesty Lemon Herb Couscous Salad is ready, here’s how to serve it:

  • Garnish with additional fresh herbs and a lemon wedge for presentation.
  • Serve alongside grilled meats, roasted veggies, or as part of a picnic spread.
  • Enjoy it as a light lunch on its own or pair with a refreshing beverage like iced tea or lemonade.

Are you excited to bring this vibrant dish to your kitchen? With its bold flavors, nutritious ingredients, and versatile nature, the Zesty Lemon Herb Couscous Salad is sure to become a favorite. Get cooking, and let your taste buds celebrate!

Lemon Herb Couscous Salad

Prep Time 10 minutes
Cook Time 15 minutes
Total Time 25 minutes
Servings 4 servings
Calories 350
A fresh and vibrant vegan couscous salad packed with herbs, chickpeas, and a zesty lemon dressing.

Ingredients

Main

  • 8 oz pearl couscous (see notes)
  • 2 tablespoons vegan butter
  • 1 cup cherry tomatoes
  • 2 1/2 cups broth (vegan chicken broth)
  • 1 small red onion (diced)
  • 1 15-ounce can chickpeas (drained & rinsed)
  • 1/4 cup grated vegan parmesan (Follow Your Heart)
  • 1-2 cloves garlic (finely minced)
  • 1/3 cup fresh herbs (parsley, basil & mint)
  • 1/4 cup olive oil
  • 1 lemon lemon juice
  • 1 tablespoon dijon mustard
  • to taste salt & pepper

Instructions 

  • Melt vegan butter and toast couscous for 2-3 minutes.
  • Add tomatoes and broth, bring to a boil, then simmer for 12-15 minutes until liquid is absorbed.
  • Cool the couscous mixture for 30 minutes.
  • Mix in remaining ingredients, toss, and adjust seasoning as needed.
  • Serve immediately or chill in the fridge.

Notes

Use fresh herbs for the best flavor and adjust seasoning to taste.
Calories: 350kcal
Cost: $12
Course: Salad
Cuisine: Mediterranean
Keyword: Couscous, Herbs, Vegan

Welcome to Your New Favorite Salad!

Are you ready to transform your mealtime with a dish that’s both vibrant and nutritious? Look no further than this Chickpea & Tomato Fusion salad! Packed with protein from the chickpeas and bursting with the fresh flavors of cherry tomatoes, this salad is not just a meal; it’s an experience. Whether you need a quick lunch or a colorful side dish for dinner, this recipe is the perfect blend of health and flavor. In just a few simple steps, you’ll create a masterpiece that dazzles both the eyes and the taste buds!

Why You’ll Love This Recipe

  • Quick and Easy: With only a handful of ingredients and minimal prep time, you can whip this salad up in under 30 minutes!
  • Plant-Powered Goodness: Rich in protein and fiber, chickpeas are a fantastic addition to your diet, making this salad both filling and nourishing.
  • Flavor Explosion: The combination of spices and fresh vegetables creates a mouthwatering burst of flavors that will keep you coming back for more.
  • Customizable: Feel free to mix and match ingredients based on what you have on hand or your personal preferences!
  • Perfect for Meal Prep: This salad stores well, making it an excellent option for healthy lunches throughout the week.

Ingredient Breakdown: What You’ll Need

Gather the following ingredients for your Chickpea & Tomato Fusion salad:

  • 2 x 400g cans of chickpeas, drained and rinsed
  • 400g cherry tomatoes
  • 3 tbsp olive oil
  • 1 tsp smoked paprika
  • 1/2 tsp ground cumin
  • 1/4 tsp garlic powder
  • 1/4 tsp chili flakes (optional)
  • Salt and freshly ground black pepper, to taste
  • 200g unsweetened plant-based yoghurt (e.g., coconut or soy)
  • 1 tbsp lemon juice
  • 1 small red onion, thinly sliced
  • 2 tbsp fresh parsley, chopped
  • Extra virgin olive oil, for drizzling
  • Chili flakes, for sprinkling (optional)

Substitutions and Variations

Close-up of a colorful vegan salad with chickpeas, tomatoes, and fresh herbs.

If you’re missing an ingredient or want to switch it up, here are some tasty alternatives:

  • Chickpeas: You can substitute with black beans or kidney beans for a different flavor profile.
  • Cherry Tomatoes: Diced regular tomatoes or grape tomatoes work as well!
  • Olive Oil: Avocado oil or sesame oil can be used for a unique taste.
  • Yoghurt: Try a cashew-based yoghurt for a creamier texture, or skip it altogether for a lighter salad.

The Cooking Process: Step-by-Step Instructions

Let’s get cooking! Follow these simple steps to create your Chickpea & Tomato Fusion salad:

  1. Preheat your oven to 200°C (180°C fan/gas mark 6). Line a large baking tray with parchment paper.
  2. Place the chickpeas and cherry tomatoes on the tray. Drizzle with olive oil, then sprinkle with smoked paprika, ground cumin, garlic powder, chili flakes (if using), salt, and black pepper. Toss everything together until well coated. Spread the mixture out evenly on the tray.
  3. Roast in the oven for 15-20 minutes, shaking the tray halfway through, until the tomatoes are blistered and slightly caramelized, and the chickpeas are lightly crispy.
  4. While the chickpeas and tomatoes roast, prepare the yoghurt base. In a small bowl, whisk together the plant-based yoghurt, lemon juice, garlic powder, and a pinch of salt. Spread the yoghurt evenly across the base of a large serving bowl or platter.
  5. Once the chickpeas and tomatoes are ready, spoon them over the yoghurt base, arranging them to create a vibrant presentation.
  6. Garnish with thinly sliced red onion, a sprinkle of fresh parsley, and a generous grind of black pepper. Drizzle with extra virgin olive oil and add a pinch of chili flakes if desired.
  7. Serve immediately as a main or side dish, paired with warm pita bread or a fresh green salad.

Pro Tips for the Perfect Salad

  • Quality Ingredients: Use the freshest vegetables and high-quality olive oil for the best flavor.
  • Roasting Time: Keep an eye on the chickpeas and tomatoes to avoid burning; you want them crispy, not charred!
  • Make it Ahead: You can roast the chickpeas and tomatoes in advance to save time during meal prep.
  • Spice It Up: Experiment with different spices—cumin, coriander, or even a pinch of cinnamon for a unique twist!
  • Garnish Boldly: Don’t skip the garnish—fresh herbs and a drizzle of olive oil make a huge difference in presentation and flavor.

Avoiding Common Mistakes

Here are some common pitfalls to avoid while making your salad:

  • Too Much Oil: While olive oil adds flavor, too much can make your salad greasy. Aim for just enough to coat your ingredients.
  • Overcooking: Keep an eye on the oven; roasted chickpeas should be crunchy, not burned.
  • Skipping Seasoning: Season at every stage—before roasting, in the yoghurt, and as a final touch. Trust me, it makes a world of difference!
  • Storing Leftovers: Store roasted chickpeas and salad separately to maintain crunch; otherwise, they may become soggy.

Storage and Make-Ahead Instructions

This salad is perfect for meal prep! Here’s how to store it:

  • Refrigerator: Store any leftovers in an airtight container in the fridge for up to 3 days. Keep the chickpeas and tomatoes separate from the yoghurt to maintain texture.
  • Freezer: Not recommended for freezing as the texture may change. However, the roasted chickpeas can be made ahead and stored in the fridge.
  • Make-Ahead: You can prepare the roasted chickpeas and tomatoes a day in advance. Just reheat them in the oven for a few minutes before serving.

Frequently Asked Questions

  • Can I make this salad gluten-free? Yes! All the ingredients listed are gluten-free!
  • Is this salad vegan? Absolutely! It’s 100% plant-based.
  • How can I make this salad more filling? Add some quinoa or a handful of nuts for extra protein and texture.
  • Can I use canned chickpeas? Yes! Canned chickpeas are perfect for this recipe—just rinse and drain them before use.
  • What can I serve this salad with? It pairs beautifully with pita bread, grilled vegetables, or even as a topping for tacos!
  • How long does this salad keep? The salad will last about 3 days in the fridge if stored properly, but it’s best enjoyed fresh.
  • Can I use different herbs? Definitely! Feel free to substitute the parsley with cilantro or mint for a different flavor.
  • What if I don’t have smoked paprika? Regular paprika or cayenne pepper can work as substitutes, but the flavor will vary slightly.

Nutritional Benefits

This Chickpea & Tomato Fusion salad is not only delicious but also packed with nutritional benefits:

  • High in Protein: Chickpeas provide a hearty dose of protein, essential for muscle repair and growth.
  • Rich in Fiber: Aids digestion and keeps you feeling full longer.
  • Vitamins and Minerals: Cherry tomatoes are an excellent source of vitamins C and K, while red onions provide antioxidants.
  • Healthy Fats: Olive oil is rich in monounsaturated fats that support heart health.

Essential Equipment for This Recipe

  • Baking Tray: A large, sturdy baking tray is essential for roasting your ingredients evenly.
  • Parchment Paper: Prevents sticking and makes cleanup a breeze.
  • Mixing Bowls: Use a couple of mixing bowls for tossing ingredients and preparing the yoghurt.
  • Whisk: For combining the yoghurt and spices smoothly.

Serving Suggestions

To elevate your meal, consider pairing your Chickpea & Tomato Fusion salad with:

  • Warm Pita Bread: The perfect vehicle for scooping up your vibrant salad.
  • Grilled Veggies: Add a side of grilled zucchini or eggplant for a Mediterranean feast.
  • Fresh Green Salad: Complement with a light side salad for added crunch.
  • Protein Boost: Top with grilled chicken, fish, or tofu for extra protein.

Conclusion: Celebrate Healthy Eating!

This Chickpea & Tomato Fusion salad is more than just a dish; it’s a celebration of color, flavor, and health. By combining simple ingredients and spices, you’ve created a meal that’s not only delightful but also nourishing. Enjoy every bite knowing that you’re fueling your body with the best. So roll up your sleeves, get into the kitchen, and let’s make healthy eating fun!

Roasted Chickpea & Tomato Vegan Salad

Prep Time 10 minutes
Cook Time 20 minutes
Total Time 30 minutes
Servings 4 servings
Calories 350
A vibrant and nutritious vegan salad featuring roasted chickpeas and cherry tomatoes, served over a creamy plant-based yoghurt base.

Ingredients

Canned Goods

  • 800 g canned chickpeas, drained and rinsed
  • 400 g cherry tomatoes

Seasonings & Oils

  • 3 tbsp olive oil
  • 1 tsp smoked paprika
  • 0.5 tsp ground cumin
  • 0.25 tsp garlic powder
  • 0.25 tsp chilli flakes (optional)

Yoghurt Base

  • 200 g unsweetened plant-based yoghurt
  • 1 tbsp lemon juice
  • 0.25 tsp garlic powder
  • Pinch salt

Additional Toppings

  • 1 small red onion, thinly sliced
  • 2 tbsp fresh parsley, chopped
  • to taste black pepper, freshly ground
  • for drizzling extra virgin olive oil
  • for sprinkling chilli flakes (optional)

Instructions 

  • Preheat oven to 200°C. Line a baking tray with parchment.
  • Place chickpeas and cherry tomatoes on tray, toss with olive oil and spices, then roast for 15-20 minutes.
  • Whisk yoghurt, lemon juice, garlic powder, and salt; spread over serving platter.
  • Top with roasted chickpeas, tomatoes, sliced red onion, parsley, and black pepper. Drizzle with olive oil and sprinkle chilli flakes if desired.
  • Serve immediately as a main or side dish.

Notes

For extra flavor, add a squeeze of lemon or a dash of hot sauce.
Calories: 350kcal
Cost: $15
Course: Main
Cuisine: Vegan
Keyword: Chickpeas

Elevate Your Salad Game with the Ultimate Kale Caesar!

Ready to transform your salad experience? Our Crunchy Kale Caesar Salad is a vibrant explosion of flavors and textures that will revitalize your plate. With seasoned chickpeas, fresh greens, and a zesty homemade dressing, this dish is not only delicious but also a powerhouse of nutrition! Dive into a bowl of bright colors and bold tastes that invigorate your day, making healthy eating exciting and fun!

Why You’ll Love This Recipe

This Kale Caesar Salad isn’t just any ordinary salad; it’s a feast for the senses! Here are five reasons why you’ll want to whip this up:

  • Flavor Explosion: The combination of creamy dressing, crunchy chickpeas, and fresh greens creates a delightful harmony in every bite.
  • Nutritious Powerhouse: Packed with vitamins, fiber, and protein, this salad will fuel your body and keep you energized throughout the day.
  • Quick & Easy: Ready in just 30 minutes, this dish is perfect for a quick lunch or a stress-free dinner.
  • Versatile Base: Feel free to customize this salad with your favorite veggies or proteins—make it your own!
  • Great for Meal Prep: This salad stores well and is perfect for making ahead to enjoy throughout the week.

Ingredient Breakdown

Let’s dive into what makes this salad so special. Here’s a detailed look at the ingredients and some tasty substitutions:

  • Chickpeas: A 15-ounce can of chickpeas offers protein and fiber. If you don’t have chickpeas, try using black beans or cannellini beans.
  • Spices: Chili powder, garlic powder, and cumin make the chickpeas pop! Substitute with your favorite spices like smoked paprika for a different flavor profile.
  • Kale: Curly kale is ideal for this recipe, but you can also use lacinato kale or even spinach for a milder taste.
  • Romaine Lettuce: This adds a nice crunch. If you want to mix it up, try using arugula or mixed greens.
  • Avocado: Adds creaminess. Replace with diced cucumbers if you’re looking for a lighter option.
  • Red Onion: This adds a sharp flavor. You can use green onions or shallots for a milder taste.
  • Walnuts: They provide crunch and healthy fats. Feel free to swap them for pecans or sunflower seeds.
  • Parmesan Cheese: Optional, but it adds a lovely salty richness. For a dairy-free option, try nutritional yeast.

How to Make the Crunchy Kale Caesar Salad

An iPhone captured image of a fresh Crunchy Kale Caesar Salad with layers of greens and various toppings.

Follow these steps to create a salad that’s as fun to make as it is to eat:

  • Preheat the oven: Set it to 425°F (220°C) and prepare a baking sheet with non-stick cooking spray.
  • Season the chickpeas: In a small bowl, mix chili powder, garlic powder, cumin, kosher salt, and black pepper. Spread chickpeas on the baking sheet, drizzle with olive oil, and sprinkle the seasoning mix over them.
  • Roast: Pop the baking sheet in the oven and roast for 20 minutes. Once done, let the chickpeas cool for 5 minutes to achieve maximum crunch.
  • Prepare the greens: While the chickpeas roast, in a large bowl, toss the kale and romaine with a drizzle of olive oil. Massage the kale for about one minute to soften the leaves.
  • Add veggies: Combine diced avocado, red onion, and walnuts with the kale and romaine.
  • Make the dressing: Blend all dressing ingredients in a blender for 30-45 seconds until creamy.
  • Combine everything: Add the roasted chickpeas to the salad. Drizzle with dressing and toss gently to coat.
  • Serve and enjoy: Optionally top with Parmesan cheese. Serve chilled or at room temperature.

Pro Tips for Perfecting Your Kale Caesar

Want to make this salad even better? Here are some expert tips:

  • Massage the kale: This step is crucial! It makes the kale tender and easier to eat.
  • Customize your toppings: Feel free to add grilled chicken, shrimp, or crumbled feta for additional protein.
  • Make it a meal: Pair this salad with a hearty whole grain like quinoa or farro for a complete meal.
  • Use a high-quality olive oil: It enhances the dressing’s flavor and brings out the best in your ingredients.
  • Adjust seasoning to taste: Don’t be afraid to tweak the spices and dressing to match your preferences!
  • Chill the salad: Letting it sit in the fridge for 30 minutes before serving allows flavors to meld beautifully.
  • Experiment with dressings: Try adding tahini or a touch of lemon juice to the dressing for different flavor profiles.
  • Store leftovers properly: Keep any remaining salad in an airtight container to maintain freshness.

Common Mistakes and Troubleshooting

Even the best chefs make mistakes! Here’s how to avoid common pitfalls:

  • Overcooking the chickpeas: Keep an eye on them while roasting. You want them crispy, not burnt!
  • Skipping the massage: Don’t skip massaging the kale; it’s key to a delightful texture.
  • Underdressing the salad: Ensure you coat all ingredients well for the best flavor experience.
  • Using old greens: Freshness matters! Always use crisp, vibrant greens for optimal taste.
  • Making the dressing too thick: If it’s too thick, add a splash of water or more olive oil until you reach the desired consistency.

Variations to Spice Up Your Salad

Feeling adventurous? Here are some creative twists on the classic Kale Caesar Salad:

  • Spicy Chickpea Caesar: Add a pinch of cayenne pepper to the chickpeas for a spicy kick.
  • Asian-Inspired Kale Salad: Swap the dressing for a sesame-ginger vinaigrette and add mandarin oranges and edamame.
  • Southwestern Kale Caesar: Incorporate black beans, corn, and a chipotle ranch dressing.
  • Greek Twist: Use feta cheese, Kalamata olives, and a lemon-oregano dressing for a Mediterranean vibe.

Storage and Make-Ahead Instructions

Want to enjoy this salad throughout the week? Here’s how to store and prepare in advance:

  • Make-ahead tips: Pre-chop the veggies and store them in airtight containers in the fridge. Prepare the chickpeas and dressing in advance.
  • Storage: Store the salad components separately to prevent sogginess. The dressed salad can be stored for up to 2 days in the fridge.
  • Refrigerate: Keep the dressing in a separate container to maintain its creamy consistency.

Frequently Asked Questions

Got questions? We’ve got answers!

  • Can I use frozen chickpeas? Yes! Just thaw and rinse them before roasting.
  • How can I make this recipe vegan? Skip the Parmesan cheese or use a dairy-free alternative.
  • What’s a good substitute for kale? Spinach or Swiss chard work well if you prefer a milder taste.
  • Can I add fruits to this salad? Absolutely! Sliced apples or pears add a nice sweetness.
  • How long does the salad last? It’s best consumed within 2 days for optimal freshness.
  • Can I use store-bought dressing? Yes! But homemade dressing elevates the flavor to another level.
  • What’s the best way to serve this salad? It’s perfect as a side dish or a light lunch, served chilled or at room temperature.
  • Can I make this salad gluten-free? Yes! Ensure all ingredients, especially the dressing, are gluten-free.

Nutrition Tips and Dietary Adaptations

This salad is packed with nutrients! Here’s how to maximize its health benefits:

  • Fiber boost: With chickpeas and leafy greens, you’re getting a great source of dietary fiber.
  • Healthy fats: Avocado and walnuts provide essential fatty acids that are great for heart health.
  • Protein power: Chickpeas are a fantastic plant-based protein source, keeping you full and satisfied.
  • Vitamins and minerals: Kale is a superfood loaded with vitamins A, C, K, and calcium!

Equipment Recommendations

Here are some kitchen essentials to have on hand for this recipe:

  • Baking sheet: A sturdy baking sheet is essential for roasting the chickpeas.
  • Blender: For making a smooth and creamy dressing, a high-speed blender is ideal.
  • Mixing bowls: A variety of sizes helps in mixing the salad and dressing efficiently.
  • Salad tongs: Use these to toss your salad without bruising the greens.

Serving Suggestions

To make the most of this Kale Caesar Salad, consider these serving ideas:

  • Pair with protein: Add grilled chicken, baked tofu, or salmon for a heartier meal.
  • Serve with whole grains: Quinoa or farro on the side will complement the salad beautifully.
  • Garnish creatively: Top with extra avocado, seeds, or even edible flowers for a stunning presentation.
  • Perfect for gatherings: Serve it as a side dish at barbecues, picnics, or potlucks for a crowd-pleasing option.

Conclusion

In just a few simple steps, you’ve created a Kale Caesar Salad that brings together vibrant flavors, crunchy textures, and wholesome nutrition. This recipe is not just a meal; it’s a celebration of healthy eating that proves eating well can be delicious and fun! So grab your ingredients, unleash your inner chef, and enjoy the journey of making this delightful salad that’s bound to impress!

The Perfect Crunchy Kale Caesar Salad With Bold Homemade Dressing

Prep Time 15 minutes
Cook Time 20 minutes
Total Time 35 minutes
Servings 4 servings
Calories 350
A vibrant and crunchy kale Caesar salad featuring roasted chickpeas and a bold homemade dressing, perfect for a nutritious and flavorful meal.

Ingredients

Canned Goods

  • 1 can chickpeas (15 ounces, drained and rinsed)
  • 2 teaspoons chili powder
  • 2 teaspoons garlic powder
  • 1 teaspoon ground cumin
  • to taste Kosher salt and black pepper (for seasoning)

Fresh Produce

  • 4 cups curly kale (sliced)
  • 2 cups romaine lettuce (sliced)
  • ½ cup diced avocado (about 1–2 avocados)
  • ¼ cup red onion (finely diced)
  • ¼ cup chopped walnuts

Dressing

  • homemade Caesar dressing (blend all dressing ingredients)

Optional Toppings

  • shredded Parmesan cheese (for serving)

Instructions 

  • Preheat oven to 425°F (220°C). Roast chickpeas on a prepared baking sheet for 20 minutes, then cool.
  • Mix kale and romaine, drizzle with olive oil, and massage for one minute. Add diced avocado, red onion, and walnuts.
  • Blend dressing ingredients until creamy. Toss salad with dressing and roasted chickpeas.
  • Garnish with Parmesan cheese if desired. Serve chilled or at room temperature.

Notes

For extra crunch, ensure chickpeas are roasted until crispy. Adjust seasoning to taste.
Calories: 350kcal
Cost: $15
Course: Salad
Cuisine: American
Keyword: Caesar, Chickpeas, Kale

Transform Your Dinner Routine with Zesty Chili-Lime Shrimp Bowls!

Welcome to the vibrant world of delicious, healthy eating! If you’re looking to spice up your dinner with something flavorful yet nutritious, you’ve landed in the right spot. Today, we’re diving into the recipe for Chili-Lime Shrimp Bowls paired with a refreshing Avocado-Cucumber Salad. This dish is not only a feast for the taste buds but also a visual delight, packed with nutrients to fuel your body and keep your spirits high.

This recipe is perfect for those busy weeknights when you want to impress your family or friends without spending hours in the kitchen. With bold flavors and fresh ingredients, you’ll see how healthy eating doesn’t have to be boring. Let’s get cooking!

Why You’ll Love This Recipe

  • Quick and Easy: Ready in under 30 minutes, this dish is perfect for busy weeknights.
  • Flavor Explosion: Each bite bursts with zesty and smoky flavors from the chili-lime shrimp and fresh salad.
  • Customizable: Easily adjust spice levels or swap out ingredients to suit your taste.
  • Healthy and Nutritious: Packed with protein and fresh vegetables, this meal supports your health and wellness goals.
  • Impressive Presentation: The colorful combination of shrimp, avocado, and cucumber makes for an eye-catching dish!

Ingredients You’ll Need

Here’s what you’ll need to create your Chili-Lime Shrimp Bowls:

  • 1 large avocado, sliced
  • 1 large Persian cucumber, chopped
  • 3 green onions, sliced
  • 2 tbsp cilantro, chopped (leaves & stems)
  • 2 tbsp lime juice
  • 1 tbsp olive oil
  • ¼ tsp salt
  • Cracked black pepper, to taste
  • 2 tsp chili powder
  • 1 tsp cumin
  • 1 tsp salt
  • ½ tsp smoked paprika
  • ½ tsp garlic powder
  • ¼ tsp black pepper
  • ⅛ tsp cayenne
  • 1 lb raw shrimp, peeled & deveined
  • 2 tbsp olive oil, divided
  • Cooked white rice, for serving
  • Lime wedges, for serving
  • Tortilla chips, for serving (optional)

Ingredient Breakdown & Substitutions

Side angle of a vibrant bowl with shrimp seasoned in chili-lime, garnished with fresh vegetables.

Let’s break down these ingredients and explore some tasty substitutions:

  • Avocado: For a twist, try mango or even roasted sweet potatoes if you’re looking for a different texture.
  • Cucumber: Zucchini or bell peppers can add a crunchy element to your salad.
  • Shrimp: Swap with chicken or tofu for a different protein source.
  • Spices: Don’t have smoked paprika? Regular paprika will work just fine!
  • Rice: Quinoa or cauliflower rice can make this dish lower in carbs.

How to Make Zesty Shrimp Bowls

Step 1: Make the Avocado-Cucumber Salad

In a large bowl, combine the sliced avocado, chopped cucumber, green onions, and cilantro. In a separate small bowl, whisk together the lime juice, olive oil, and salt. Pour this dressing over the salad and toss until everything is fully coated. Season with cracked black pepper to taste. Refrigerate the salad while you prepare the shrimp.

Step 2: Prepare the Shrimp

In a small bowl, mix together the chili powder, cumin, salt, smoked paprika, garlic powder, black pepper, and cayenne. Pat the shrimp dry with a paper towel, then place them in a large bowl. Add 1 tablespoon of olive oil and the spice mixture to the shrimp, tossing until they are fully coated.

Step 3: Cook the Shrimp

Heat the remaining tablespoon of olive oil in a sauté pan over medium heat. Once hot, add the seasoned shrimp and cook for 2 to 3 minutes on each side, or until they turn pink and are cooked through. Remove from heat.

Step 4: Assemble Your Bowls

To serve, add a generous scoop of warmed white rice to the bottom of each bowl. Top it with the spicy chili shrimp and the refreshing avocado-cucumber salad. Serve immediately with lime wedges and tortilla chips on the side if desired.

Pro Tips for Making Zesty Shrimp Bowls

  • Prep Ahead: Chop your veggies and marinate the shrimp in advance for a quick meal.
  • High Heat: Cooking shrimp at a high heat ensures they stay juicy and tender.
  • Fresh Ingredients: Use fresh lime juice for the best flavor in your salad and shrimp seasoning.
  • Don’t Overcook: Shrimp cook quickly, so keep a close eye on them to avoid toughness.
  • Experiment with Toppings: Add your favorite toppings like crumbled feta, pumpkin seeds, or even a drizzle of hot sauce!
  • Serve with Style: Present your bowls with lime wedges and colorful garnishes for a restaurant-worthy look.
  • Double the Recipe: Perfect for meal prep! Make extra for lunches throughout the week.
  • Adjust Spice Levels: Control the heat by reducing cayenne or chili powder to suit your palate.

Common Mistakes and Troubleshooting

Here are some pitfalls to watch out for and how to fix them:

  • Overcooked Shrimp: If they’re tough, reduce cooking time next time and remove from heat as soon as they turn pink.
  • Watery Salad: If your salad is too watery, try salting the cucumber ahead of time to draw out moisture.
  • Flavorless Bowls: Don’t skip the seasoning! Be generous with spices to enhance flavors.
  • Sticky Rice: Rinse your rice before cooking to remove excess starch for fluffier grains.

Variations to Explore

Get creative with these variations:

  • Mango Salsa Variation: Swap the cucumber for ripe mango for a sweet twist.
  • Spicy Black Bean Bowl: Add cooked black beans for extra protein and fiber.
  • Greek Style: Incorporate feta cheese and olives for a Mediterranean flair.
  • Grain Bowl: Use quinoa or farro instead of rice for a nutritious base.

Storage and Make-Ahead Instructions

Want to prepare this dish in advance? Here’s how:

  • Refrigeration: Store shrimp and salad separately in airtight containers. Consume within 2 days for freshness.
  • Make-Ahead: Chop veggies and marinate shrimp up to a day in advance. Cook shrimp just before serving.
  • Freezing: Shrimp can be frozen before cooking, but the salad should be made fresh.

Nutrition Tips and Dietary Adaptations

This recipe isn’t just tasty; it’s also packed with nutrients! Here’s how to make it even healthier:

  • Add Fiber: Serve with a side of black beans to boost fiber content.
  • Gluten-Free: This recipe is naturally gluten-free; just ensure your rice and seasonings are certified.
  • Low-Carb Option: Substitute rice with cauliflower rice for a low-carb alternative.
  • Vegan Adaptation: Replace shrimp with marinated tofu or chickpeas for a plant-based version.

Equipment Recommendations

  • Non-Stick Pan: For perfectly cooked shrimp without sticking.
  • Mixing Bowls: Have a variety of sizes for mixing salads and marinades.
  • Whisk: Essential for combining dressings smoothly.
  • Measuring Cups and Spoons: Accurate measurements ensure perfect seasoning every time.

Serving Suggestions

Here are some fun ways to present your Chili-Lime Shrimp Bowls:

  • Garnish: Top with fresh cilantro, lime wedges, or sliced jalapeños for an extra kick.
  • Serve with Sides: Pair with a light soup or fresh fruit salad to round out the meal.
  • Family Style: Serve all components separately and let everyone build their own bowls!

Frequently Asked Questions

  • Can I use frozen shrimp? Yes! Just make sure to thaw them thoroughly before cooking.
  • What can I substitute for lime juice? Lemon juice works well in a pinch but will alter the flavor slightly.
  • How do I store leftovers? Keep shrimp and salad in separate containers in the fridge for up to 2 days.
  • Can I make this dish spicy? Absolutely! Increase the cayenne or add sliced jalapeños for more heat.
  • What’s the best way to reheat shrimp? Reheat in a pan over low heat to avoid overcooking.
  • Can I make this recipe vegan? Yes! Substitute shrimp with marinated tofu or chickpeas.
  • Is this dish gluten-free? Yes, all ingredients are gluten-free; just ensure your rice is certified.
  • How can I make this recipe lower in calories? Use less oil and serve with a larger portion of salad instead of rice.

So there you have it! A comprehensive guide to creating the most delicious Chili-Lime Shrimp Bowls with a refreshing Avocado-Cucumber Salad. Not only will you impress your dinner guests, but you’ll also enjoy a meal that’s healthy, quick, and bursting with flavor! Get ready to elevate your dining experience and remember, cooking should be fun—so get creative and enjoy every bite!

Chili-Lime Shrimp Bowls with Avocado-Cucumber Salad

Prep Time 15 minutes
Cook Time 10 minutes
Total Time 25 minutes
Servings 4 servings
Calories 450
A vibrant and flavorful dish combining spicy shrimp with a refreshing avocado-cucumber salad, perfect for a quick and satisfying meal.

Ingredients

Salad

  • 1 large avocado, sliced
  • 1 large Persian cucumber
  • 3 green onions green onions, sliced
  • 2 tbsp cilantro, chopped (leaves & stems)
  • 2 tbsp lime juice
  • 1 tbsp olive oil
  • ¼ tsp salt
  • Cracked black pepper to taste

Spice Mix

  • 2 tsp chili powder
  • 1 tsp cumin
  • 1 tsp salt
  • ½ tsp smoked paprika
  • ½ tsp garlic powder
  • ¼ tsp black pepper
  • tsp cayenne

Shrimp

  • 1 lb raw shrimp, peeled & deveined
  • 2 tbsp olive oil, divided
  • for serving Cooked white rice
  • for serving Lime wedges
  • optional Tortilla chips

Instructions 

  • Mix avocado, cucumber, green onions, and cilantro in a bowl.
  • Whisk lime juice, olive oil, and salt; pour over salad and toss.
  • Prepare spice mix and coat shrimp with olive oil and spices.
  • Cook shrimp in a skillet over medium heat for 2-3 minutes per side until pink.
  • Assemble bowls with rice, topped with shrimp and salad. Serve with lime wedges and chips if desired.

Notes

For extra flavor, add a squeeze of fresh lime before serving.
Calories: 450kcal
Cost: $15
Course: Main Course
Cuisine: Mexican
Keyword: shrimp

Unleash the Flavor: BBQ Salmon Bowls with Tropical Mango Avocado Salsa

Welcome to a culinary adventure where flavor meets nutrition in the most exciting way! If you’ve been searching for a vibrant dish that elevates your dinner game, look no further. These BBQ Salmon Bowls topped with a zesty mango avocado salsa are more than just a meal—they’re a celebration of fresh ingredients and bold flavors! This recipe is perfect for busy weeknights or weekend gatherings, showing that healthy eating can be both fun and delicious. Let’s dive into the details!

Why You’ll Love This Recipe

  • Quick and Easy: With a total prep and cooking time of just 30 minutes, you can whip up this delightful dish even on the busiest of weeknights.
  • Flavor Explosion: The combination of BBQ salmon and a vibrant mango avocado salsa creates a symphony of flavors that will tantalize your taste buds.
  • Nutrient-Rich Ingredients: Packed with omega-3 fatty acids from the salmon, healthy fats from the avocado, and vitamins from the mango, this bowl is a nutritional powerhouse.
  • Customizable: This recipe is versatile! Feel free to swap out ingredients to suit your taste or dietary preferences.
  • Visual Appeal: The colorful presentation of this dish makes it Instagram-worthy, making healthy eating feel indulgent and exciting.

Ingredients Breakdown

Let’s gather our ingredients to ensure we have everything we need to create these delightful salmon bowls. Here’s what you’ll need:

  • Salmon: 1-2 lbs. of fresh salmon. You can substitute with chicken or tofu for a different protein option.
  • Spice Mixture: 2 tablespoons of brown sugar, 2 teaspoons of smoked paprika, 2 teaspoons of onion powder, 1 teaspoon of garlic powder, 1/2 teaspoon of chili powder, and 1/2 teaspoon of kosher salt.
  • Cooking Oil: 2 tablespoons of olive oil for the salmon rub.
  • Mango and Avocado: 2 ripe mangoes and 1 avocado, diced to create the fresh salsa.
  • Fresh Herbs: 1/4 cup of minced cilantro and 1/4 cup of minced red onion for added flavor.
  • Optional Spice: 1/2 jalapeño, minced (optional, to taste) for a kick.
  • Sweet & Sour: 1 teaspoon of honey and 2 tablespoons of lime juice + 1 teaspoon of lime zest to balance the flavors.
  • Rice: 1 1/2 cups of rice, cooked according to package instructions, serves as the base of the bowl.

How to Make BBQ Salmon Bowls with Mango Avocado Salsa

Side view of a vibrant BBQ Salmon Bowl with diced mango and avocado.

Now that we have everything ready, let’s get cooking! Follow these simple steps to create mouthwatering BBQ salmon bowls:

  1. In a mixing bowl, combine diced mango, avocado, cilantro, red onion, jalapeño (if using), honey, lime juice, lime zest, and a sprinkle of salt to prepare your vibrant salsa. Set aside.
  2. Cook your rice according to package instructions while you prepare the salmon.
  3. Preheat your oven to 475°F (or broil at 500°F for a crispy top). Line a baking sheet with foil for easy cleanup.
  4. In a small bowl, mix brown sugar, smoked paprika, onion powder, garlic powder, chili powder, salt, and olive oil to create a spice rub. Generously rub this mixture over the skin-side down salmon on the baking sheet.
  5. Bake the salmon for 6-12 minutes, depending on thickness, until it flakes easily with a fork.
  6. To assemble your bowls: Start with a base of rice, place the flaked salmon on top, add a generous scoop of mango avocado salsa, and finish with a drizzle of fresh lime juice.

Pro Tips for Perfection

  • Fresh Ingredients: Always use fresh, ripe mangoes and avocados for the best flavor in your salsa.
  • Cook Salmon to Perfection: Keep an eye on your salmon while baking—it’s better to undercook slightly than overcook to maintain its moisture.
  • Customize Your Salsa: Feel free to add other ingredients like bell peppers or corn for a twist on the salsa.
  • Make It Spicy: Adjust the heat level of your salsa by adding more jalapeño or a dash of hot sauce.
  • Meal Prep Friendly: Prepare the salsa and rice ahead of time for quick assembly during busy weeknights.
  • Storage: Store any leftovers in an airtight container in the refrigerator for up to 2 days.
  • Serving Size: This recipe serves 4, but it can easily be doubled for larger gatherings.
  • Experiment: Try different proteins or grains for a new twist on this classic recipe!

Common Mistakes & Troubleshooting

Cooking should be fun, but sometimes mistakes happen. Here are some common pitfalls and how to avoid them:

  • Overcooking the Salmon: Keep a close eye on cooking times. Salmon is best cooked until just flaky to retain moisture.
  • Too Much Heat: If your salsa turns out too spicy, add a bit more avocado or mango to balance the heat.
  • Rice Clumping: Rinse your rice before cooking to remove excess starch, preventing clumping.
  • Flavorless Salsa: Always taste and adjust seasoning in your salsa before serving—add more lime juice or salt as needed!

Delicious Variations to Try

Want to shake things up? Here are some fun variations to inspire your creativity:

  • Spicy Thai Version: Add chopped peanuts and a splash of fish sauce to your salsa for a Thai twist.
  • Grilled Veggie Bowls: Toss your favorite veggies like zucchini and bell peppers on the grill for added flavor.
  • Quinoa Base: Swap out rice for quinoa for a protein-packed, gluten-free alternative.
  • Tropical Twist: Use pineapple instead of mango for a different fruity flavor profile!

Storage and Make-Ahead Instructions

This recipe is perfect for meal prep! Here’s how to make it ahead of time:

  • Make Ahead: Prepare the mango avocado salsa and cook the rice a day in advance. Store them in airtight containers in the fridge.
  • Leftovers: Store leftover salmon and salsa separately to maintain freshness. Enjoy within 2 days for the best flavor.
  • Reheating: Reheat salmon in the oven at 350°F to retain moisture, and serve cold or at room temperature for salsa.

FAQs: Your Burning Questions Answered

  • Can I use frozen salmon? Yes! Thaw it completely before cooking for even results.
  • What can I substitute for rice? Try couscous, quinoa, or even a bed of greens for a low-carb option.
  • Is this recipe gluten-free? Absolutely! Just ensure your ingredients are labeled gluten-free.
  • How can I make this meal dairy-free? This recipe is already dairy-free, making it a great choice for those with lactose intolerance.
  • Can I use another type of fish? Certainly! This recipe works well with tilapia, trout, or even shrimp.
  • How do I know when the salmon is done? Salmon is cooked perfectly when it flakes easily with a fork and is still slightly translucent in the center.
  • Can I prepare the salsa in advance? Yes! The salsa can be made up to 2 days in advance. Just give it a stir before serving.
  • What’s the best way to serve these bowls? Serve warm and enjoy with extra lime wedges and your favorite hot sauce for an added kick!

Nutritional Tips and Dietary Adaptations

Eating healthy can be exciting and flavorful! Here are some nutritional insights:

  • High in Omega-3s: Salmon is an excellent source of omega-3 fatty acids, which are beneficial for heart health.
  • Vitamins Galore: The mango and avocado provide essential vitamins A, C, and E, boosting your immune system.
  • Low in Carbs: For a low-carb version, skip the rice and replace it with leafy greens or cauliflower rice.
  • Plant-Based Option: Substitute salmon with chickpeas or grilled tofu for a plant-based alternative that’s equally delicious.

Essential Equipment Recommendations

To make your cooking experience smoother, here are some kitchen essentials:

  • Sharp Knife: A good chef’s knife is key for dicing your ingredients efficiently.
  • Mixing Bowls: Invest in a set of mixing bowls for preparing the salsa and spice rub.
  • Baking Sheet: Use a sturdy baking sheet lined with foil for easy cleanup.
  • Rice Cooker: If you cook rice often, a rice cooker can save you time and effort.

Serving Suggestions

To elevate your dining experience, consider these serving tips:

  • Garnish: Top each bowl with extra cilantro or a sprinkle of sesame seeds for added crunch.
  • Pairing: Serve with a side of grilled veggies or a fresh salad for a complete meal.
  • Beverage Pairings: Enjoy with a refreshing iced tea or a light white wine to complement the dish.

In conclusion, these BBQ Salmon Bowls with Mango Avocado Salsa are not just a meal; they’re a vibrant experience bursting with flavor and nutrition. Whether you’re cooking for yourself, your family, or hosting friends, this dish will surely impress and satisfy. So roll up your sleeves and let’s make healthy eating a fun adventure!

BBQ Salmon Bowls with Mango Avocado Salsa

Prep Time 15 minutes
Cook Time 15 minutes
Total Time 30 minutes
Servings 4 servings
Calories 550
Enjoy a flavorful and healthy bowl featuring tender BBQ salmon topped with fresh mango avocado salsa.

Ingredients

Protein

  • 1-2 lbs fresh salmon (skin-on preferred)
  • 2 tablespoons brown sugar
  • 2 teaspoons smoked paprika
  • 2 teaspoons onion powder
  • 1 teaspoon garlic powder
  • 1/2 teaspoon chili powder
  • 1/2 teaspoon kosher salt (more for larger filet)
  • 2 tablespoons olive oil

Salsa

  • 2 mangoes mangoes, diced
  • 1 avocado avocado, diced
  • 1/4 cup minced cilantro
  • 1/4 cup minced red onion
  • 1/2 jalapeño minced jalapeño (optional) (to taste)
  • 1 teaspoon honey
  • 2 tablespoons lime juice
  • 1 teaspoon lime zest
  • salt to taste salt
  • 1 1/2 cups rice

Instructions 

  • Mix mango, avocado, cilantro, red onion, jalapeño, honey, lime juice, lime zest, and salt for salsa. Set aside.
  • Cook rice according to package instructions.
  • Preheat oven to 475°F (or broil at 500°F). Line a baking sheet with foil.
  • Mix spices and olive oil; rub over skin-side of salmon. Bake for 6-12 minutes.
  • Assemble bowls with rice, flaked salmon, salsa, and lime drizzle.

Notes

Adjust spice levels and salsa ingredients to taste.
Calories: 550kcal
Cost: $15
Course: Main Course
Cuisine: American
Keyword: Salmon

Discover the Zesty Avocado Couscous Salad: Your New Go-To Recipe!

If you’re ready to elevate your salad game, look no further! This Avocado Couscous Salad is not just a dish; it’s an experience bursting with vibrant flavors and colorful ingredients that will delight your taste buds. Packed with nutrients and designed for simplicity, this salad is perfect for a quick lunch, a lively dinner, or a refreshing side for any occasion. Let’s dive into the deliciousness!

Why You’ll Love This Recipe

Here are five irresistible reasons why this salad should grace your table:

  • Quick and Easy: Ready in under 30 minutes, allowing you to whip up a nutritious meal without the hassle.
  • Flavor Explosion: The combination of creamy avocado, fresh veggies, and zesty lime makes for a delightful burst of flavor in every bite.
  • Customizable: Easily adapt the salad with your favorite ingredients or seasonal produce for a fresh twist.
  • Perfect for Meal Prep: Make a large batch ahead of time; it stores well and tastes just as amazing the next day!
  • Healthy and Filling: With wholesome ingredients like couscous and veggies, this salad is packed with nutrients to fuel your day.

Ingredient Breakdown & Substitutions

Let’s take a closer look at the ingredients that make this salad shine, along with some handy substitutions!

  • Couscous: 4 cups. Use whole wheat couscous for a healthier option, or try quinoa for a gluten-free alternative.
  • Avocado: 1 ripe avocado, chopped. If you’re not a fan of avocado, try using diced mango or a handful of olives for creaminess.
  • Cherry Tomatoes: 1 cup, halved. Substitute with diced bell peppers for a crunchier texture!
  • Cucumbers: 1 cup, chopped. Any fresh vegetable works here; consider shredded carrots or radishes.
  • Feta Cheese: 1/2 cup. For a vegan option, substitute with crumbled tofu or omit for a dairy-free version.
  • Cilantro: 1/4 cup, chopped. If you’re not a cilantro fan, fresh parsley or basil adds a great flavor too!
  • Seasonings: Salt (1 tsp) and carne asada seasoning (2 tsp). Feel free to use any seasoning blend you love to enhance the flavor profile.
  • Lime Juice: 1 lime, juiced. Lemon juice works equally well for a different tang.
  • Avocado Oil: 1/4 cup. Substitute with olive oil or any neutral oil you prefer.

How to Make This Zesty Avocado Couscous Salad

Side view of a fresh couscous salad featuring ripe avocado and feta cheese.

Ready to get cooking? Follow these simple steps for a delightful salad:

  1. Cook couscous according to package directions until al dente. Rinse under cold water to cool.
  2. In a large mixing bowl, combine the chopped avocado, cherry tomatoes, cucumbers, feta cheese, and cilantro.
  3. In a small bowl, whisk together the lime juice, avocado oil, and carne asada seasoning.
  4. Drizzle the dressing over the salad ingredients, and gently toss to combine.
  5. Serve immediately or let it chill in the fridge for 15-20 minutes to enhance the flavors!

Pro Tips for Your Perfect Salad

Here are some expert insights to ensure your salad is a hit:

  • Perfect Avocado: Choose avocados that are slightly soft for the best texture. Dice them right before serving to prevent browning.
  • Flavor Boost: Add a sprinkle of chili flakes or a dash of hot sauce for an exciting kick.
  • Texture Matters: Mix in some toasted nuts or seeds for an added crunch!
  • Freshness is Key: Use the freshest ingredients possible for the best flavor and nutrients.
  • Chill Time: Letting the salad sit for a little while allows the flavors to meld beautifully.
  • Layering Flavors: Consider marinating the cucumbers in lime juice beforehand for extra zest.
  • Consider Your Audience: Adjust the seasoning based on who you’re serving; some may prefer less salt or spice.
  • Meal Prep: This salad keeps well in the fridge—just store the dressing separately to keep everything fresh.

Common Mistakes & Troubleshooting

Avoid these pitfalls to ensure your salad comes out perfectly:

  • Overcooking Couscous: Always follow package instructions; overcooked couscous can become mushy!
  • Too Much Dressing: Start with a little dressing; you can always add more if needed!
  • Soft Avocados: Use avocados that are ripe but not overly soft to ensure they hold their shape in the salad.
  • Ingredient Substitutions: Be cautious with substitutions; some ingredients may alter the flavor significantly.

Creative Variations to Try

Looking to mix things up? Here are some delicious variations:

  • Mexican Fiesta: Add black beans, corn, and diced jalapenos for a southwestern twist!
  • Mediterranean Flair: Incorporate artichoke hearts, olives, and roasted red peppers for a Mediterranean vibe.
  • Asian-Inspired: Toss in edamame, sesame seeds, and a splash of soy sauce for an Asian-inspired twist.
  • Protein-Packed: Add grilled chicken or chickpeas for a filling, protein-rich meal.

Storage & Make-Ahead Instructions

This salad is perfect for meal prep! Here’s how to store it:

  • Refrigerator: Store leftovers in an airtight container for up to 4 days. Keep dressing separate until ready to serve.
  • Make-Ahead: Prepare the couscous and chop the vegetables a day in advance for quick assembly.
  • Freezing: Not recommended for this salad, as the texture of fresh veggies and avocado will not hold up.

Comprehensive FAQ

Got questions? We’ve got answers!

  • Can I use regular couscous instead of whole wheat? Absolutely! Regular couscous works just as well.
  • Is this salad vegan? Yes, just omit the feta or use a vegan alternative.
  • How can I make it gluten-free? Substitute couscous with quinoa or another gluten-free grain.
  • Can I make this salad in advance? Yes! Just store the dressing separately and combine everything before serving.
  • What can I serve with this salad? It pairs well with grilled meats, fish, or as a standalone dish.
  • How do I prevent avocado from browning? Squeeze lime juice over the diced avocado immediately before adding it to the salad.
  • Can I add more vegetables? Of course! Feel free to get creative with seasonal veggies.
  • What’s the best way to serve this salad? Serve chilled or at room temperature for the best flavor!

Essential Equipment Recommendations

Here’s what you’ll need to whip up this salad:

  • Large Mixing Bowl: For combining all your fresh ingredients.
  • Small Mixing Bowl: For whisking up your zesty dressing.
  • Measuring Cups and Spoons: To ensure your ingredients are just right.
  • Chef’s Knife: A good knife makes chopping veggies a breeze!

Serving Suggestions

Now that your salad is ready, here are some serving suggestions:

  • Perfect Pairing: Serve alongside grilled chicken or shrimp for a well-rounded meal.
  • As a Side: This salad makes a vibrant side dish for summer barbecues or picnics!
  • Garnish: Top with extra cilantro or a sprinkle of nuts for added texture and flavor.

Wrap-Up: Your New Favorite Salad Awaits!

This Zesty Avocado Couscous Salad is a celebration of flavors and textures, making it a perfect addition to your healthy recipe collection. With its quick prep time and endless customization options, it’s sure to become a staple in your kitchen. So grab your ingredients, unleash your creativity, and enjoy a salad that’s not just nutritious but also a true delight. Happy cooking!

Fresh Avocado Couscous Salad Recipe

Prep Time 10 minutes
Cook Time 15 minutes
Total Time 25 minutes
Servings 4 servings
Calories 350
A vibrant and healthy couscous salad featuring fresh avocado, cherry tomatoes, and cucumbers, perfect for a light lunch or side dish.

Ingredients

Grains

  • 4 cups couscous

Produce

  • 1 ripe avocado avocado (chopped)
  • 1 cup cherry tomatoes (halved)
  • 1 cup cucumbers (chopped)

Dairy & Cheese

  • 1/2 cup feta cheese

Herbs & Seasonings

  • 1/4 cup cilantro (chopped)
  • 1 tsp salt (more to taste)
  • 1 lime lime juice
  • 1/4 cup avocado oil
  • 2 tsp carne asada seasoning (more to taste)

Instructions 

  • Cook couscous according to package instructions; rinse under cold water.
  • Prepare and add chopped avocado, cherry tomatoes, cucumbers, feta, and cilantro to a large bowl.
  • Mix vinaigrette with lime juice, avocado oil, salt, and seasoning; drizzle over salad and toss gently.

Notes

Feel free to add more seasoning or herbs for extra flavor.
Calories: 350kcal
Cost: $12
Course: Salad
Cuisine: Mediterranean
Keyword: avocado

Unleashing Flavor: The Joy of Oven Roasted Tomatoes & Burrata Salad

Welcome to a culinary adventure that will awaken your taste buds and transform your meals! The Oven Roasted Tomatoes & Burrata Salad is a vibrant dish that celebrates the sweet and savory marriage of roasted tomatoes and creamy burrata cheese. Perfect for any occasion, this recipe is not just a salad—it’s a celebration of freshness, flavor, and fun. Join me as we dive into the art of creating this delightful dish that’s sure to impress your friends and family!

Why You’ll Love This Oven Roasted Tomatoes & Burrata Salad

If you’re wondering what makes this salad so special, let me share five irresistible reasons:

  • Flavor Explosion: The roasting process intensifies the sweetness of the tomatoes, creating a burst of flavor that pairs beautifully with the rich, creamy burrata.
  • Textural Harmony: The combination of soft, juicy tomatoes and creamy burrata creates a delightful contrast, making every bite exciting.
  • Vibrant Visual Appeal: With its bright colors, this salad is a feast for the eyes, perfect for impressing guests at gatherings.
  • Health Packed: Loaded with vitamins and nutrients from fresh greens and tomatoes, this dish is as nutritious as it is delicious.
  • Quick & Easy: With simple ingredients and straightforward steps, you can whip up this exquisite salad in no time!

Ingredients for Oven Roasted Tomatoes & Burrata Salad

Gathering the right ingredients is key to creating this culinary masterpiece. Here’s what you’ll need:

  • 2 pints of cherry or grape tomatoes: Halved to maximize caramelization.
  • 2 tablespoons olive oil: Essential for roasting; choose extra virgin for rich flavor.
  • 1 teaspoon dried oregano: Adds an earthy note that complements the tomatoes.
  • 1 teaspoon garlic powder: Gives a subtle kick; fresh garlic can be used as a substitute.
  • Salt and pepper: To taste, enhancing all the flavors.
  • Fresh thyme or basil sprigs (optional): For an aromatic touch.
  • 1 ball of burrata cheese (about 8 oz): The star of the show, with its creamy interior.
  • 4 cups mixed greens: Arugula, spinach, or baby kale work wonderfully.
  • 1 tablespoon balsamic vinegar: Adds a tangy finish.
  • 1 tablespoon olive oil (extra virgin): For dressing the greens.
  • Fresh basil leaves: Roughly torn, for garnish.
  • 1 tablespoon toasted pine nuts or sunflower seeds (optional): For a delightful crunch.
  • A pinch of sea salt (for finishing, optional): Elevates the flavors.

How to Make Oven Roasted Tomatoes & Burrata Salad

A beautiful arrangement of roasted cherry tomatoes and creamy burrata atop mixed greens.

Ready to get cooking? Follow these simple steps to create your salad masterpiece:

  1. Preheat your oven to 400°F (200°C).
  2. Prepare the tomatoes: Wash and halve the cherry or grape tomatoes, placing them on a baking sheet lined with parchment paper.
  3. Season the tomatoes: Drizzle with olive oil and toss to coat evenly. Sprinkle with oregano, garlic powder, salt, and pepper, and add fresh herbs if desired.
  4. Roast the tomatoes: Bake for 25-30 minutes, stirring halfway through, until soft and caramelized.
  5. Cool the tomatoes: Remove from the oven and let them cool slightly.
  6. Prep the burrata: Gently tear the burrata into smaller pieces.
  7. Dress the greens: In a large salad bowl, toss the mixed greens with olive oil and balsamic vinegar, seasoning with sea salt.
  8. Assemble your salad: Arrange the dressed greens on a serving platter, scatter the roasted tomatoes on top, and place the torn burrata pieces over the salad.
  9. Garnish: Finish with fresh basil and optional toasted nuts or seeds.
  10. Serve immediately: Drizzle with extra olive oil for that finishing touch.

Pro Tips for a Perfect Salad

To elevate your oven roasted tomatoes & burrata salad, keep these expert tips in mind:

  • Choose ripe tomatoes: Opt for fresh, ripe cherry or grape tomatoes for the best flavor.
  • Don’t overcrowd the baking sheet: Give the tomatoes space to roast evenly and caramelize.
  • Experiment with herbs: Mix up the herbs used for seasoning; fresh basil or thyme can add a delicious twist.
  • Let the tomatoes cool: Allowing the roasted tomatoes to cool slightly before serving enhances the salad’s flavors.
  • Dress just before serving: To keep your greens crisp, avoid dressing them too early.
  • Make it ahead: Prepare the tomatoes and greens in advance for a quick assembly when you’re ready to eat.
  • Pair with protein: Add grilled chicken or chickpeas for a heartier meal.
  • Adjust the acidity: If you prefer a tangier salad, increase the balsamic vinegar.

Common Mistakes and Troubleshooting

Even the best chefs make mistakes! Here are some common pitfalls and how to avoid them:

  • Tomatoes not caramelizing: Ensure you’re roasting them at the right temperature (400°F) and not overcrowding the pan.
  • Greens wilting: Dress the salad just before serving to keep the greens crisp and fresh.
  • Under-seasoned salad: Always taste and adjust seasoning to ensure every bite is flavorful.
  • Overcooked burrata: Add the burrata at the end, just before serving, to maintain its creamy texture.

Variations to Try

Feeling adventurous? Here are some creative twists to make your salad uniquely yours:

  • Grilled Peaches: Add grilled peach slices for a sweet contrast to the savory elements.
  • Quinoa Base: Serve the salad over a bed of quinoa for extra protein and fiber.
  • Spicy Kick: Drizzle with a hot chili oil for a spicy flavor boost.
  • Nutty Addition: Include chopped walnuts or pecans for a delightful crunch.

Storage and Make-Ahead Instructions

Planning to make this salad in advance? Here’s how to store it:

  • Roasted tomatoes: Store in an airtight container in the refrigerator for up to 3 days.
  • Mixed greens: Keep them un-dressed in a separate container to maintain freshness.
  • Assemble when ready: Combine all ingredients right before serving for the best texture and flavor.

FAQs About Oven Roasted Tomatoes & Burrata Salad

Got questions? Here are some frequently asked questions to guide you:

  • Can I use store-bought burrata?: Absolutely! Just ensure it’s fresh for the best flavor.
  • What can I serve with this salad?: It pairs wonderfully with grilled meats, crusty bread, or as a standalone dish.
  • How do I know when tomatoes are perfectly roasted?: They should be soft, caramelized, and bursting with juice.
  • Can I add other vegetables?: Yes! Bell peppers or zucchini can add additional flavors and textures.
  • How long does the salad last?: It’s best enjoyed fresh, but the components can be stored separately for up to 3 days.
  • Is this salad gluten-free?: Yes! All ingredients are gluten-free.
  • Can I make this vegan?: Swap burrata for a vegan cheese alternative for a plant-based version.
  • What’s the best way to reheat roasted tomatoes?: Gently reheat in the oven to maintain their texture.

Nutrition Tips and Dietary Adaptations

Want to make your salad even healthier? Here are some nutritional insights:

  • Increase fiber: Add legumes like chickpeas or black beans for additional fiber and protein.
  • Lower fat: Use less oil or opt for a light vinaigrette to reduce calories.
  • Boost vitamins: Incorporate a variety of greens for a wider range of nutrients.

Essential Equipment for Success

Before you start, make sure you have the right tools on hand:

  • Baking sheet: For roasting the tomatoes evenly.
  • Parchment paper: To prevent sticking and make cleanup a breeze.
  • Large salad bowl: For tossing the salad ingredients together.
  • Sharp knife: For easily cutting the tomatoes and burrata.

Serving Suggestions

Elevate your dining experience with these serving suggestions:

  • Pair with a crisp white wine: A Sauvignon Blanc complements the salad’s flavors beautifully.
  • Serve with crusty bread: Perfect for scooping up the delicious burrata and tomatoes.
  • Garnish with edible flowers: For a stunning presentation that adds a pop of color.

With this guide, you’re well on your way to creating the ultimate Oven Roasted Tomatoes & Burrata Salad that’s not only delicious but also visually stunning. Remember, cooking should be about experimentation, joy, and a pinch of creativity. So go ahead, unleash your inner chef, and enjoy every bite of this extraordinary salad!

Oven Roasted Tomatoes & Burrata Salad

Prep Time 10 minutes
Cook Time 30 minutes
Total Time 40 minutes
Servings 4 servings
Calories 350
A fresh and flavorful salad featuring roasted cherry tomatoes, creamy burrata, and vibrant greens, perfect for a quick and elegant meal.

Ingredients

Vegetables

  • 2 pints cherry or grape tomatoes (halved)
  • 2 tablespoons olive oil
  • 1 teaspoon dried oregano
  • 1 teaspoon garlic powder
  • to taste Salt and pepper
  • 1 ball burrata cheese (about 8 oz)
  • 4 cups mixed greens (arugula, spinach, or baby kale)
  • 1 tablespoon balsamic vinegar
  • 1 tablespoon extra virgin olive oil
  • to garnish Fresh basil leaves (roughly torn)
  • 1 tablespoon toasted pine nuts or sunflower seeds (optional)
  • a pinch sea salt (for finishing, optional)

Instructions 

  • Preheat oven to 400°F (200°C). Halve tomatoes, toss with olive oil, oregano, garlic powder, salt, and pepper. Roast for 25-30 minutes.
  • Let tomatoes cool slightly. Tear burrata into smaller pieces. Toss greens with balsamic and olive oil, season with sea salt.
  • Arrange greens on a platter, scatter roasted tomatoes, top with burrata, garnish with basil and nuts, drizzle with extra olive oil, and serve.

Notes

For extra flavor, add fresh herbs or a drizzle of honey.
Calories: 350kcal
Cost: $15
Course: Salad
Keyword: Burrata, Salad, Tomatoes

Elevate Your Meal Game with Zesty Roasted Zucchini and Chickpea Salad

Hey there, food lovers! Are you ready to transform your lunch game with a dish that’s not only vibrant and nutritious but also bursting with flavor? Look no further than the Zesty Roasted Zucchini and Chickpea Salad! This salad is a delightful blend of roasted vegetables and chickpeas, drizzled with a zesty lemon dressing that will make your taste buds dance. Perfect for a quick lunch or a colorful side dish, this salad is packed with energy and nutrition!

Why You’ll Love This Recipe

This isn’t just any salad; it’s a flavor-packed experience! Here are five reasons why you’ll fall head over heels for this recipe:

  • Nutritious Powerhouse: Packed with protein from chickpeas and fiber from zucchini, this salad fuels your body while keeping you full and satisfied.
  • Quick and Easy: With just a few simple steps, you can whip up this salad in under 30 minutes, making it perfect for busy weekdays.
  • Flavor Explosion: The roasting process enhances the natural sweetness of zucchini while adding a delightful crispiness to the chickpeas.
  • Versatile Dish: Enjoy it as a stand-alone meal or as a side alongside grilled meats or fish, making it highly adaptable.
  • Meal Prep Friendly: This salad holds up well in the fridge, making it an excellent choice for meal prepping. Just store the dressing separately until you’re ready to dig in!

Ingredients Breakdown

Let’s dive into the ingredient list, shall we? Here’s what you’ll need to create this colorful salad:

  • 3 medium-sized zucchini: Slice them into 1/2-inch thick rounds for even roasting.
  • 1 (15 oz) can chickpeas: Drained and rinsed to remove excess sodium and enhance flavor.
  • 4 tbsp extra virgin olive oil: Divided for roasting and dressing—this will add a rich flavor.
  • Zest of 1 lemon: Adds a refreshing zing that brightens the dish.
  • Juice of 1 lemon: Works with the zest to create a deliciously tangy dressing.
  • Salt and pepper to taste: Essential for bringing out the flavors in your ingredients.

Feel free to experiment with your ingredients! For a twist, consider adding roasted bell peppers, cherry tomatoes, or even a sprinkle of feta cheese for a Mediterranean flair.

How to Make Zesty Roasted Zucchini and Chickpea Salad

A side view of a colorful salad featuring roasted zucchini slices and chickpeas.

Now, let’s get cooking! Follow these simple steps to create your salad:

  • Preheat the oven: Set it to 425°F (220°C). Line two baking sheets with foil and lightly spray with cooking spray.
  • Toss zucchini in olive oil: In a large bowl, mix the zucchini slices with 1 tablespoon of olive oil, ensuring they’re well-coated.
  • Arrange on baking sheets: Spread the zucchini on one baking sheet. On the second, scatter the rinsed chickpeas around the zucchini.
  • Roast for 20 minutes: Keep an eye on the veggies as they roast; we want them tender and slightly caramelized.
  • Whisk the dressing: In a separate bowl, whisk together the remaining 3 tablespoons of olive oil, lemon zest, lemon juice, and a pinch of salt and pepper.
  • Toss and serve: Once roasted, combine the zucchini and chickpeas in a large serving bowl. Pour over the lemon dressing, toss gently, and enjoy!

Expert Tips for Perfecting Your Salad

Want to take your salad to the next level? Check out these expert tips:

  • Uniform Cuts: Ensure all zucchini slices are cut to the same size for even roasting. This promotes even caramelization and flavor.
  • Check Midway: Halfway through roasting, give your veggies a little stir to ensure even cooking and prevent burning.
  • Rest Before Mixing: Allow the roasted veggies to cool slightly before mixing them with the dressing to maintain their crunch.
  • Customize the Dressing: Feel free to add fresh herbs like parsley or basil to the dressing for an extra flavor boost.
  • Serve Warm or Cold: This salad is delicious either way—try it warm right out of the oven or chilled the next day!

Common Mistakes and Troubleshooting

Even the best chefs make mistakes! Here are common pitfalls to watch out for:

  • Overcrowding the Tray: If the zucchini and chickpeas are too close together, they’ll steam instead of roast, leading to soggy veggies.
  • Undercooking: Make sure to roast until the zucchini is tender and slightly golden; this enhances the flavor.
  • Not Seasoning Enough: Don’t skimp on seasoning! Salt and pepper are crucial for bringing out the ingredients’ best flavors.

Delicious Variations to Try

Want to mix things up? Here are some tasty variations to consider:

  • Spicy Twist: Add a sprinkle of red pepper flakes to the zucchini before roasting for a spicy kick.
  • Grains Galore: Toss in some cooked quinoa or farro for added texture and nutrition.
  • Herb Infusion: Incorporate fresh herbs like thyme or oregano into the roasting process for an aromatic experience.
  • Tropical Version: Add diced mango or pineapple for a sweet and savory combination that sings summer!

Storage and Make-Ahead Instructions

Planning ahead? Here’s how to store your salad:

  • Refrigeration: Store leftover salad in an airtight container in the fridge for up to 3 days. Keep the dressing separate to maintain freshness.
  • Make-Ahead: You can roast the zucchini and chickpeas in advance, and assemble the salad just before serving for optimal texture.

Frequently Asked Questions

Got questions? We’ve got answers! Here are some common queries about this recipe:

  • Can I use frozen zucchini? No, fresh zucchini is best for roasting. Frozen zucchini tends to become mushy.
  • How can I make it vegan? This recipe is already vegan! Just ensure your olive oil is of good quality.
  • Can I add protein? Absolutely! Grilled chicken, shrimp, or tofu are excellent additions.
  • What’s the best way to reheat? If you prefer it warm, reheat in the oven briefly at a low temperature to avoid sogginess.
  • Is it gluten-free? Yes! All ingredients used in this recipe are gluten-free.
  • Can I use other legumes? Definitely! Feel free to swap chickpeas for black beans or white beans for a different flavor.
  • What should I serve with this salad? It pairs wonderfully with grilled meats, fish, or even on its own as a hearty vegetarian meal.
  • Can I freeze leftovers? It’s best to enjoy this salad fresh. Freezing may affect the texture of the zucchini.

Nutritional Tips and Dietary Adaptations

This salad is not only delicious but also loaded with health benefits. Here are some nutritional insights:

  • High in Fiber: The combination of chickpeas and zucchini provides a solid dose of dietary fiber, promoting digestion and gut health.
  • Rich in Antioxidants: Zucchini is packed with antioxidants, helping to combat oxidative stress in the body.
  • Heart-Healthy Fats: Extra virgin olive oil is rich in monounsaturated fats, which are beneficial for heart health.

Essential Equipment Recommendations

Before you start cooking, here’s a quick list of must-have tools:

  • Baking Sheets: Two baking sheets are ideal for roasting the zucchini and chickpeas simultaneously.
  • Mixing Bowls: A large bowl for tossing the salad ingredients and a smaller one for making the dressing.
  • Whisk: Essential for combining the dressing ingredients smoothly.

Serving Suggestions

Finally, let’s talk about how to serve this beautiful salad!

  • Garnish with Fresh Herbs: Top with chopped parsley or cilantro for added color and flavor.
  • Pair with a Protein: Serve along grilled chicken or falafel for a complete meal.
  • Enjoy with Crusty Bread: A slice of whole-grain bread makes for a delightful accompaniment.

And there you have it—your ultimate guide to making a stunning Zesty Roasted Zucchini and Chickpea Salad! With its vibrant colors, rich flavors, and nutritional powerhouse of ingredients, this salad is bound to become a favorite in your kitchen. So grab your apron and get ready to unleash your inner chef—this salad is waiting for you!

Roasted Zucchini and Chickpea Salad with Lemon

Prep Time 10 minutes
Cook Time 20 minutes
Total Time 30 minutes
Servings 4 servings
Calories 250
A fresh and vibrant salad combining roasted zucchini and chickpeas, brightened with lemon zest and juice for a healthy, flavorful meal.

Ingredients

Vegetables

  • 3 medium zucchini (sliced 1/2-inch thick)
  • 1 can chickpeas (15 oz, drained and rinsed)
  • 4 tbsp extra virgin olive oil (divided)
  • 1 zest lemon (zest of 1 lemon)
  • 1 juice lemon (juice of 1 lemon)
  • to taste salt and pepper

Instructions 

  • Preheat oven to 425°F (220°C). Line baking sheets with foil and spray with cooking spray.
  • Toss zucchini with 1 tbsp olive oil and spread on baking sheets. Add chickpeas around zucchini.
  • Roast for 20 minutes. Meanwhile, whisk remaining 3 tbsp olive oil, lemon zest, lemon juice, salt, and pepper.
  • Combine roasted vegetables with lemon dressing in a large bowl. Toss to coat and season with salt and pepper.

Notes

For extra flavor, add fresh herbs like parsley or mint before serving.
Calories: 250kcal
Cost: $12
Course: Salad
Cuisine: Mediterranean
Keyword: Chickpeas, Lemon, Zucchini

Are you ready to transform your weeknight dinners into a flavor fiesta? These Chipotle Lime Chicken Burrito Bowls are not just a meal; they’re a vibrant celebration of bold tastes and nutritious ingredients! Bursting with juicy chicken, zesty lime, and colorful toppings, this recipe is a game changer for meal prep or a quick dinner. Let’s dive into a world where healthy eating meets excitement!

Why You’ll Love This Recipe

Here are just a few reasons why these burrito bowls will become a staple in your kitchen:

  • Meal Prep Friendly: Perfect for busy weeks, these bowls can be made ahead and stored for delicious meals on the go.
  • Flavor Explosion: The smoky chipotle and fresh lime create a mouthwatering combination that elevates any meal.
  • Customizable: You can mix and match toppings to suit your taste—whether you’re a spice lover or prefer a milder flavor.
  • Nutrition Boost: Packed with protein from the chicken and fiber from black beans, these bowls keep you energized and satisfied.
  • Easy to Make: With simple ingredients and straightforward steps, cooking is a breeze, even for beginners!

Gathering Your Flavor Crew

Let’s talk ingredients! Here’s everything you’ll need to create your delicious burrito bowls:

Ingredients

  • 1 lb boneless, skinless chicken breasts or thighs: Choose thighs for juiciness or breasts for a leaner option.
  • 2 tbsp olive oil: Essential for marinating and grilling your chicken.
  • 1 tbsp chipotle in adobo, minced: The star ingredient that brings the smoky flavor.
  • Juice of 1 lime: Adds brightness and balances the spices.
  • 2 garlic cloves, minced: For an aromatic kick.
  • 1 tsp ground cumin: Provides warmth and depth.
  • Salt & pepper to taste: Essential for seasoning.
  • 1 cup uncooked long-grain white rice (like jasmine or basmati): The perfect base for your bowls.
  • 2 cups water or chicken broth: To cook the rice and enhance flavors.
  • Juice of 1 lime: For the cilantro-lime rice.
  • ¼ cup chopped fresh cilantro: Brightens up the rice.
  • 1 cup canned black beans, rinsed and drained: A fantastic source of protein and fiber.
  • 1 cup corn: Adds sweetness and texture.
  • 1 cup pico de gallo: Fresh salsa to top off your bowl.
  • Sliced avocado or guacamole (optional): For creaminess.
  • Shredded pepper jack or cotija cheese (optional): Adds a savory touch.
  • A dollop of cool Greek yogurt or sour cream (optional): To balance the spice.
  • Extra hot sauce (optional): For those who like it spicy!
  • Lime wedges for squeezing (optional): A final zing!

Let’s Build the Magic: Step-by-Step

Now that we’ve gathered our ingredients, it’s time to get cooking! Follow these easy steps to create your burrito bowls:

Step 1: Marinate the Chicken

In a medium bowl, whisk together the olive oil, minced chipotle in adobo, lime juice, garlic, cumin, salt, and pepper. Add your chicken and toss until every piece is thoroughly coated. Let it hang out for at least 15 minutes at room temperature or up to 4 hours in the fridge for maximum flavor.

Step 2: Cook the Rice

While the chicken marinates, combine the rice and water or broth in a saucepan. Bring to a boil, then reduce heat to low, cover, and simmer until the liquid is absorbed (about 15-18 minutes for white rice). Once done, fluff it with a fork, then gently fold in the lime juice, chopped cilantro, and a pinch of salt.

Step 3: Cook the Chicken

Heat a grill pan, outdoor grill, or a heavy skillet over medium-high heat. Add a tiny drizzle of oil. Place the marinated chicken on the hot surface and cook for 5-6 minutes per side, or until cooked through (internal temp of 165°F). Let the chicken rest for 5 minutes before slicing.

Step 4: Prep Your Toppings

While the chicken rests, warm your black beans and corn, chop your avocado, and prepare your pico and other toppings.

Step 5: Slice & Assemble

Slice the rested chicken against the grain. Start with a base of the cilantro-lime rice, then arrange your sliced chicken, black beans, corn, and pico de gallo. Add any chosen extras and finish with an extra squeeze of lime.

Pro Tips for Success

Side view of a delicious bowl featuring Chipotle Lime Chicken, rice, and toppings.

Here are some expert insights to ensure your burrito bowls turn out perfectly:

  • Marinate Longer: For even deeper flavor, marinate the chicken overnight.
  • Rice Cooking: Use chicken broth instead of water for richer rice flavor.
  • Rest the Chicken: Allowing the chicken to rest before slicing keeps it juicy.
  • Mix It Up: Swap black beans for pinto or kidney beans for a different twist.
  • Fresh is Best: Use fresh lime juice for the best flavor—bottled just doesn’t compare!
  • Layer It Up: When assembling, layer in the order of flavor intensity—start with rice, then beans, and finish with delicate toppings.
  • Don’t Rush: Take your time with each step; good things come to those who wait!
  • Garnish Generously: Don’t hold back on toppings; they add flavor and make the bowl visually appealing.

Common Mistakes and Troubleshooting

Even the best chefs make mistakes! Here’s how to avoid common pitfalls:

  • Overcooking the Chicken: Keep an eye on the internal temperature. Use a meat thermometer to avoid dry chicken.
  • Undercooking the Rice: Make sure your rice is fully cooked and fluffy; no one likes crunchy rice!
  • Skipping the Marinade: Don’t rush this step—it’s crucial for flavor!
  • Using Dull Knives: A sharp knife makes slicing the chicken easier and safer.

Make It Your Own: Delicious Twists

Feeling creative? Here are some variations to try:

  • Spicy Chipotle Chicken: Add more chipotle for an extra kick!
  • Vegetarian Delight: Substitute chicken with grilled portobello mushrooms or roasted cauliflower.
  • Southwestern Style: Add jalapeños and a drizzle of BBQ sauce for a smoky twist.
  • Breakfast Bowls: Top with scrambled eggs and avocado for a breakfast burrito bowl!

Storage and Make-Ahead Instructions

Want to save time? Here’s how to store your burrito bowls:

  • Refrigerate: Store assembled bowls in airtight containers for up to 4 days. Keep toppings separate to retain freshness.
  • Freezing: You can freeze the marinated chicken (raw) for up to 3 months. Defrost in the fridge before cooking.
  • Make Ahead: Prepare components separately and assemble just before serving for the best texture and flavor.

Frequently Asked Questions

Got questions? We’ve got answers:

  • Can I use frozen chicken? Yes! Just make sure to thaw it before marinating.
  • What if I don’t have chipotle in adobo? You can substitute with smoked paprika and a dash of hot sauce.
  • How can I make this a low-carb meal? Substitute rice with cauliflower rice.
  • Can I add more vegetables? Absolutely! Consider adding sautéed bell peppers or grilled zucchini.
  • What’s the best way to reheat leftovers? Microwave gently or heat in a skillet to keep the chicken juicy.
  • How spicy is this recipe? It’s mild to medium; adjust the chipotle to your heat preference!
  • Can I use brown rice instead of white rice? Yes, just increase cooking time to about 40-45 minutes.
  • Is this recipe gluten-free? Yes, it’s naturally gluten-free if you use gluten-free hot sauce.

Nutritional Tips and Dietary Adaptations

This recipe can easily fit into various dietary needs:

  • High Protein: Great source of protein from chicken and beans.
  • Low Carb: Use cauliflower rice to make it keto-friendly.
  • Dairy-Free: Skip cheese and sour cream for a dairy-free option.

Equipment Recommendations

Here’s what you’ll need to ensure a smooth cooking experience:

  • Grill Pan or Skillet: For perfectly cooked chicken.
  • Medium Bowl: For marinating chicken.
  • Saucepan: To cook the rice.
  • Meat Thermometer: To check chicken doneness.

Serving Suggestions

These burrito bowls are versatile! Here are some serving ideas:

  • Family Style: Serve all components separately and let everyone build their own bowls.
  • Party Platter: Create a burrito bowl bar with various toppings for gatherings.
  • On-the-Go: Pack individual bowls for a healthy lunch option.

Final Thoughts From My Kitchen To Yours

Cooking is an adventure, and with these Chipotle Lime Chicken Burrito Bowls, you’re sure to impress! Remember, the key to a satisfying meal is not just the ingredients but the joy you bring into the kitchen. So gather your flavor crew, get creative, and make this recipe your own. Happy cooking!

Chipotle Lime Chicken Burrito Rice Bowls

Prep Time 20 minutes
Cook Time 20 minutes
Total Time 40 minutes
Servings 4 servings
Calories 650
A flavorful and customizable bowl combining spicy marinated chicken, zesty lime rice, and fresh toppings for a satisfying meal.

Ingredients

Protein

  • 1 lb boneless, skinless chicken breasts or thighs
  • 2 tbsp olive oil
  • 1 tbsp chipotle in adobo, minced
  • 1 unit lime (Juice of 1 lime)
  • 2 cloves garlic, minced
  • 1 tsp ground cumin
  • to taste Salt & pepper

Rice

  • 1 cup uncooked long-grain white rice
  • 2 cups water or chicken broth
  • 1 unit lime (Juice of 1 lime)
  • ¼ cup chopped fresh cilantro
  • to taste Salt

Toppings

  • 1 cup canned black beans, rinsed and drained
  • 1 cup corn
  • 1 cup pico de gallo
  • optional Sliced avocado or guacamole
  • optional Shredded pepper jack or cotija cheese
  • optional Dollop of Greek yogurt or sour cream
  • optional Extra hot sauce
  • optional Lime wedges for squeezing

Instructions 

  • Whisk olive oil, chipotle, lime juice, garlic, cumin, salt, and pepper. Marinate chicken for 15 min to 4 hrs.
  • Cook rice with water or broth, then fluff and fold in lime juice, cilantro, and salt.
  • Grill or pan-fry chicken until cooked through, then rest and slice.
  • Warm beans and corn; prepare toppings.
  • Assemble bowls with rice, chicken, beans, corn, pico, and toppings. Squeeze lime before serving.

Notes

For extra flavor, marinate chicken longer and add your favorite toppings.
Calories: 650kcal
Cost: $15
Course: Main Course
Cuisine: Mexican
Keyword: Burrito, Chicken, Rice

Transform Your Dinner Table with This One-Pan Roasted Carrot and Chickpea Bowl

Welcome to a culinary adventure where healthy meets delicious! If you’re tired of the same old weeknight meals and want something that’s not only nutritious but also bursting with flavor, then you’re in for a treat. This One-Pan Roasted Carrot and Chickpea Bowl is the answer to your dinner prayers. With tender roasted carrots and protein-packed chickpeas, all drizzled with a creamy tahini dressing, this dish is perfect for anyone looking to elevate their dinner game. Let’s dive into why you’ll love this recipe and how to make it your own!

Why You’ll Love This Recipe

  • Quick and Easy: This dish comes together in just one pan, saving you time on cleanup while delivering a hearty meal that’s ready in under 45 minutes.
  • Flavorful Profile: The combination of smoked paprika and cumin enhances the natural sweetness of the carrots, creating a rich, satisfying taste experience.
  • Nutritious and Filling: Loaded with fiber and plant-based protein from chickpeas, this bowl keeps you satisfied without feeling heavy, making it a fantastic choice for lunch or dinner.
  • Meal Prep Friendly: Perfect for meal prepping! Make a big batch and portion it out for easy grab-and-go meals throughout the week.
  • Customizable: Adjust the spices and ingredients to suit your taste preferences, turning this one-pan meal into a unique creation every time!

Ingredients Breakdown

Here’s what you need to create this vibrant bowl.

  • 1 ½ pounds carrots: These are the star of the dish! You can substitute with sweet potatoes or parsnips for a different flavor.
  • 1 (15-ounce) can chickpeas: A fantastic source of protein that adds creaminess; feel free to use dried chickpeas—just soak and cook them until tender.
  • 3 tablespoons olive oil: This enhances richness and aids in roasting; avocado oil is a great alternative if you prefer.
  • Spices: Smoked paprika, ground cumin, garlic powder, salt, and black pepper are essential for flavor. Feel free to experiment with herbs like thyme or rosemary for added depth!
  • For the tahini dressing: You’ll need ¼ cup tahini, 3 tablespoons lemon juice, 1-2 tablespoons maple syrup (or honey), and water to thin. This dressing is a game-changer!

How to Make One-Pan Roasted Carrot and Chickpea Bowl

Close-up of a colorful roasted carrot and chickpea dish, showcasing the texture of the ingredients and dressing.

Ready to cook? Let’s get started!

  1. Preheat oven: Set your oven to 425°F (220°C) with a rimmed baking sheet inside. This helps achieve that perfect roasted texture.
  2. Prepare the veggies: In a mixing bowl, combine chopped carrots and drained chickpeas with olive oil, smoked paprika, cumin, garlic powder, salt, and black pepper. Toss until evenly coated.
  3. Roast: Carefully pour the mixture onto the hot baking sheet in a single layer. Roast for 25-30 minutes, tossing halfway through until golden brown and tender.
  4. Make the dressing: While the veggies are roasting, whisk together tahini, lemon juice, maple syrup, and olive oil in a small bowl. Gradually add water until creamy.
  5. Serve: Serve warm over grains or greens topped with tahini dressing. Enjoy your colorful creation!

Pro Tips for Perfection

  • Cut Uniformly: Ensure that your carrots are cut into similar sizes so they roast evenly.
  • Hot Baking Sheet: Starting with a hot baking sheet helps to achieve a crispy texture on your veggies.
  • Don’t Crowd the Pan: Give your vegetables space on the baking sheet; this allows them to roast rather than steam.
  • Experiment with Toppings: Add fresh herbs, nuts, or seeds after roasting for added texture and flavor!
  • Adjust the Dressing: Feel free to tweak the tahini dressing by adding garlic or herbs for an extra kick.
  • Leftover Magic: This dish tastes even better the next day as the flavors meld together, so save some for lunch!
  • Spice Variations: Try adding curry powder or chili flakes for a different flavor profile.
  • Serving Suggestions: Pair with quinoa or brown rice for a complete meal!

Common Mistakes and Troubleshooting

Even the best chefs make mistakes! Here are some common pitfalls to avoid:

  • Overcooking: Keep an eye on the veggies; roasting too long can lead to a mushy texture.
  • Not Enough Flavor: Don’t skimp on seasoning; it’s essential for a delicious outcome.
  • Thick Dressing: If the tahini dressing is too thick, add a little more water until you reach your desired consistency.

Variations to Try

Get creative! Here are some fun variations to switch things up:

  • Spicy Kick: Add jalapeños or chili powder for some heat!
  • Green Goddess: Toss in spinach or kale before serving for a pop of color and nutrition.
  • Sweet Twist: Add dried cranberries or raisins for a hint of sweetness.
  • Nutty Flavor: Sprinkle toasted almonds or sunflower seeds over the finished bowl for crunch.

Storage and Make-Ahead Instructions

This One-Pan Roasted Carrot and Chickpea Bowl is perfect for meal prep!

  • Storing: Store leftovers in an airtight container in the refrigerator for up to 4 days.
  • Reheating: Reheat in the oven for best results or in the microwave for a quick option.
  • Make-Ahead: Roast the carrots and chickpeas in advance and prepare the tahini dressing ahead of time for easy assembly during busy weekdays.

Frequently Asked Questions

  • What is the main ingredient in a One-Pan Roasted Carrot and Chickpea Bowl? The main star is the roasted carrots, complemented by chickpeas.
  • How long does it take to prepare this dish? Total time is about 45 minutes, including prep and cooking time!
  • Can I customize my bowl? Absolutely! You can add any vegetables or grains you like.
  • What can I substitute for tahini? Sunflower seed butter or yogurt can work as alternatives.
  • Is this dish vegan? Yes, it’s completely plant-based!
  • Can I use frozen carrots? Fresh is best, but frozen can work in a pinch; just adjust roasting time.
  • What sides pair well with this bowl? Serve with a side salad or crusty bread for a complete meal.
  • Can I make this dish gluten-free? Yes, it’s naturally gluten-free!

Nutritional Benefits and Dietary Adaptations

This colorful bowl is not just a feast for the eyes but also a powerhouse of nutrients:

  • High Fiber: Chickpeas and carrots provide a healthy dose of fiber that supports digestion.
  • Plant-Based Protein: Chickpeas are an excellent source of protein, making this dish filling and nutritious.
  • Vitamins and Minerals: Carrots are rich in vitamin A and antioxidants that benefit your skin and vision.

Essential Equipment Recommendations

  • Rimmed Baking Sheet: A sturdy baking sheet is crucial for even roasting.
  • Mixing Bowls: Use for tossing your veggies and preparing the dressing.
  • Whisk: Perfect for blending your tahini dressing smoothly.

Serving Suggestions

To elevate your dining experience, consider these serving ideas:

  • Over Greens: Serve your roasted mixture over a bed of fresh greens like spinach or arugula for extra nutrition.
  • With Grains: Pair with quinoa, farro, or brown rice for a heartier meal.
  • Top with Fresh Herbs: Garnish with parsley, cilantro, or dill for a burst of freshness.

So there you have it! This One-Pan Roasted Carrot and Chickpea Bowl is not only a delicious way to enjoy veggies but also a canvas for your culinary creativity. Get ready to impress your taste buds and those around you with this colorful, nutritious dish that proves healthy eating can be anything but boring. Happy cooking!

One-Pan Roasted Carrot and Chickpea Bowl

Prep Time 10 minutes
Cook Time 30 minutes
Total Time 40 minutes
Servings 4 servings
Calories 350
A flavorful and healthy vegan bowl featuring roasted carrots and chickpeas, topped with creamy tahini dressing.

Ingredients

Vegetables

  • 1.5 pounds carrots
  • 1 can (15-ounce) chickpeas (drained and rinsed)

Seasonings

  • 3 tablespoons olive oil
  • 1 teaspoon smoked paprika
  • 1 teaspoon ground cumin
  • ½ teaspoon garlic powder
  • ½ teaspoon salt (or to taste)
  • ¼ teaspoon black pepper (or to taste)

Dressing

  • ¼ cup tahini
  • 3 tablespoons lemon juice
  • 1-2 tablespoons maple syrup (or honey, if not vegan)
  • 3-5 tablespoons water (to thin the dressing as needed)

Instructions 

  • Preheat oven to 425°F (220°C) with a baking sheet inside.
  • Toss chopped carrots and chickpeas with olive oil and spices. Spread on hot baking sheet.
  • Roast for 25-30 minutes, tossing halfway until golden and tender.
  • Whisk tahini, lemon juice, maple syrup, and water to make dressing.
  • Serve warm over grains or greens, topped with tahini dressing.

Notes

Feel free to add fresh herbs or grains for extra flavor and texture.
Calories: 350kcal
Cost: $15
Course: Main Course
Cuisine: Mediterranean
Keyword: Healthy, Vegan, vegetarian