Author

Ryan

Browsing

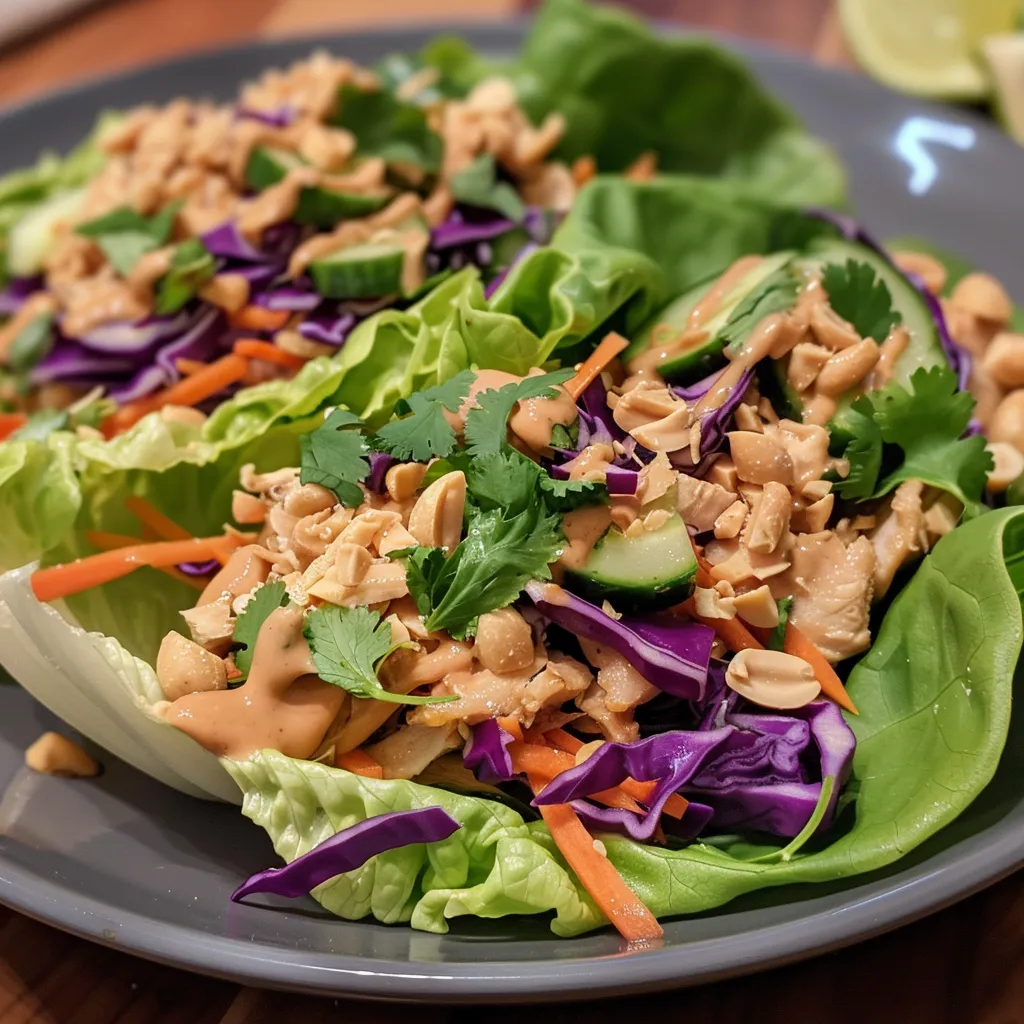
Unleash Flavor with Savory Thai Peanut Chicken Lettuce Wraps!

Welcome to an exciting culinary adventure! If you’re ready to transform your meals into a vibrant feast, then these Savory Thai Peanut Chicken Lettuce Wraps are your ticket to flavor town. This recipe is not only quick to prepare but is also packed with nutrients, making it a perfect choice for busy weeknights or meal prepping for the week ahead. With a delightful blend of textures and a creamy peanut sauce that will make your taste buds dance, let’s dive into why you’ll love this dish!

Why You’ll Love This Recipe

These Thai peanut chicken lettuce wraps are more than just a meal; they’re a celebration of flavors and health. Here are five compelling reasons to whip them up today:

  • Quick to Prepare: Ready in under 30 minutes, these wraps make weeknight dinners a breeze.
  • Nutritious Ingredients: Packed with fresh vegetables and lean protein, these wraps are a wholesome choice for any meal.
  • Customizable: Mix and match ingredients based on your preferences or dietary needs, making it suitable for everyone.
  • Fun to Eat: Eating with your hands is always a hit, especially when it comes to these delicious wraps!
  • Meal-Prep Friendly: Perfect for prepping ahead of time, so you can enjoy healthy meals all week long.

Essential Ingredients Breakdown

Let’s gather our ingredients! Here’s what you’ll need to create these scrumptious wraps, along with some handy substitutions:

  • 2 cups cooked chicken: Use rotisserie chicken for a quick option or sub with tofu for a vegetarian twist.
  • ½ cup creamy peanut butter: Natural peanut butter works best; if you have a nut allergy, try sunflower seed butter.
  • ¼ cup low-sodium soy sauce: Tamari is a great gluten-free alternative.
  • 2 tablespoons honey or maple syrup: Both provide sweetness—choose maple for a vegan option.
  • 1 tablespoon rice vinegar: This adds tang; apple cider vinegar can also work.
  • 1 tablespoon sesame oil: Infuses a nutty flavor; olive oil can be used in a pinch.
  • 1 teaspoon sriracha: Adjust this based on your spice tolerance; omit for a milder flavor.
  • 1 cup shredded carrots: Adds crunch; you can also use bell peppers for variation.
  • 1 cup red cabbage: For color and texture; green cabbage or even lettuce can substitute.
  • ½ cup cucumber: Provides a refreshing crunch; zucchini works too!
  • ¼ cup fresh cilantro: Brightens the dish; parsley can be a good alternative.
  • 4 large lettuce leaves: Iceberg or butter lettuce are perfect for wrapping.
  • ¼ cup chopped peanuts: For garnish and additional crunch; try cashews for a twist.
  • lime wedges: Serve on the side for a zesty finish.

Step-by-Step Instructions

Savory Thai chicken lettuce wraps garnished with cilantro and peanuts on a plate.

Let’s get cooking! Follow these simple steps for delicious Thai peanut chicken lettuce wraps:

  1. In a bowl, combine peanut butter, soy sauce, honey, rice vinegar, sesame oil, and sriracha to create the flavorful peanut sauce.
  2. In another bowl, mix the cooked chicken with half of the peanut sauce until well coated.
  3. Lay the lettuce leaves flat and spoon the chicken mixture onto each leaf.
  4. Top with shredded carrots, red cabbage, cucumber, and cilantro.
  5. Drizzle the remaining peanut sauce over the filling.
  6. Fold the lettuce around the filling to create your wraps.
  7. Serve with lime wedges and sprinkle with chopped peanuts for an extra crunch.

Pro Tips for Perfect Wraps

Here are some expert insights to elevate your lettuce wraps:

  • Prep Ahead: Make the peanut sauce and chicken mixture in advance for a quick assembly later.
  • Fresh is Best: Use fresh, crisp vegetables for maximum crunch and flavor.
  • Don’t Overfill: Keep the filling light to prevent tearing the lettuce leaves.
  • Adjust Flavor: Customize the sauce with more sriracha or lime juice for your desired taste.
  • Keep it Cool: Serve the wraps chilled for a refreshing summer meal.
  • Perfect Pairing: These wraps pair wonderfully with a side of jasmine rice or a light salad.
  • Use Leftovers: Any leftover filling can be used in salads or grain bowls for another meal.
  • Experiment with Textures: Add crispy shallots or fried garlic for an extra crunch.

Common Mistakes and Troubleshooting

Even the best chefs make mistakes! Here’s how to avoid common pitfalls:

  • Wraps Falling Apart: Ensure your lettuce leaves are sturdy and avoid overfilling them.
  • Too Dry: If your filling seems dry, add a splash of soy sauce or more peanut sauce.
  • Flavorless Wraps: Don’t skimp on seasoning; taste the filling and adjust as necessary before serving.
  • Overcooked Chicken: Use cooked chicken that’s moist; consider poaching for the best results.

Delicious Variations

Want to mix things up? Here are four delicious variations to try:

  • Vegetarian Delight: Substitute chicken with sautéed mushrooms or tofu for a hearty vegetarian option.
  • Spicy Shrimp: Swap chicken for shrimp marinated in lime and chili for a seafood twist.
  • Crunchy Veggie Wraps: Load up on extra veggies like bell peppers, radishes, and snap peas for a colorful crunch.
  • Thai Inspired Quinoa: Add cooked quinoa to the chicken mixture for a protein-packed wrap.

Storage and Make-Ahead Instructions

These wraps are best enjoyed fresh, but you can store components separately:

  • Chicken Mixture: Store in an airtight container in the fridge for up to 4 days.
  • Peanut Sauce: Keep it in the fridge for up to a week; it also freezes well!
  • Vegetables: Prep and store in a sealed container for maximum freshness.

Frequently Asked Questions

Got questions? Let’s tackle some common queries!

  • Can I make the peanut sauce ahead of time? Yes! Prepare it in advance and store it in the fridge.
  • What can I substitute for the chicken in Thai Peanut Chicken Lettuce Wraps? Tofu or tempeh are great substitutes for a vegetarian option.
  • How do I prevent my lettuce leaves from tearing? Choose sturdy leaves and avoid overfilling them.
  • Can I freeze the chicken mixture? Yes, you can freeze it for up to 2 months.
  • What should I serve with these wraps? They pair well with rice, quinoa, or a fresh salad.
  • Are these wraps gluten-free? Yes, if you use gluten-free soy sauce or tamari.
  • How long do leftovers last? Store them in the fridge for up to 4 days.
  • Can I make these wraps vegan? Absolutely! Use maple syrup and tofu to make it plant-based.

Nutritional Tips and Dietary Adaptations

These wraps are not only delicious but also nutritious. Here’s how to adapt them for different dietary needs:

  • Low-Carb Option: Use lettuce or cabbage leaves as the primary wrap, minimizing carbs.
  • Paleo-Friendly: Ensure all ingredients are whole and unprocessed, especially the peanut butter.
  • Dairy-Free: This recipe is naturally dairy-free; just ensure your peanut butter is also dairy-free.

Essential Kitchen Equipment

To make your cooking experience smooth and enjoyable, here’s a list of helpful kitchen tools:

  • Mixing Bowls: For combining ingredients and making the peanut sauce.
  • Measuring Cups and Spoons: To ensure accurate ingredient amounts.
  • Knife and Cutting Board: For chopping veggies with ease.
  • Whisk: Great for mixing the peanut sauce until smooth.
  • Serving Platter: For showcasing your beautiful lettuce wraps.

Serving Suggestions

When it’s time to serve, consider these ideas to elevate your meal:

  • Garnish With Fresh Herbs: Top with additional cilantro or green onions for a burst of freshness.
  • Side Dishes: Serve with a light Asian-inspired salad or steamed jasmine rice.
  • Complementary Dips: Offer extra peanut sauce or sweet chili sauce for dipping.

In conclusion, these Savory Thai Peanut Chicken Lettuce Wraps are a delightful way to bring excitement into your kitchen while keeping meals healthy and enjoyable. With vibrant colors, bold flavors, and a fun presentation, they’re perfect for any occasion. So, roll up your sleeves, gather your ingredients, and let’s get cooking—because healthy eating is all about joy and creativity! Enjoy your wraps and share the love with friends and family!

Savory Thai Peanut Chicken Lettuce Wraps Recipe

Prep Time 15 minutes
Cook Time 10 minutes
Total Time 25 minutes
Servings 4 servings
Calories 350
Enjoy these flavorful Thai-inspired lettuce wraps filled with tender chicken and crunchy vegetables, all coated in a creamy peanut sauce.

Ingredients

Protein

  • 2 cups cooked chicken
  • ½ cup creamy peanut butter
  • ¼ cup low-sodium soy sauce
  • 2 tablespoons honey or maple syrup
  • 1 tablespoon rice vinegar
  • 1 tablespoon sesame oil
  • 1 teaspoon sriracha
  • 1 cup shredded carrots
  • 1 cup red cabbage
  • ½ cup cucumber
  • ¼ cup fresh cilantro
  • 4 large lettuce leaves
  • ¼ cup chopped peanuts
  • to taste lime wedges lime wedges

Instructions 

  • Mix peanut butter, soy sauce, honey, rice vinegar, sesame oil, and sriracha to make the sauce.
  • Toss cooked chicken with half of the peanut sauce.
  • Place chicken mixture on lettuce leaves and top with vegetables and cilantro.
  • Drizzle remaining peanut sauce over the wraps and sprinkle with chopped peanuts.
  • Fold lettuce around filling and serve with lime wedges.

Notes

Use fresh lettuce for best results and adjust spice level with sriracha.
Calories: 350kcal
Cost: $15
Course: Appetizer
Cuisine: Thai
Keyword: Chicken, Lettuce Wraps, peanut

Elevate Your Lunch Game with a Zesty Caprese Pesto Pasta Salad

Are you ready to transform your lunch experience into a vibrant explosion of flavors? This Caprese Pesto Pasta Salad is here to shake things up! Bursting with the freshness of cherry tomatoes, the creamy goodness of mozzarella, and the zing of homemade basil pesto, this dish is a delightful blend of nutrition and taste that will make your taste buds dance. Perfect for busy days, picnics, or as a refreshing side dish, it’s a meal prep superstar. Let’s dive into why you’ll love this recipe and how to make it shine!

Why You’ll Love This Recipe

  • Quick and Easy: Prep and cooking time combined is just about 20 minutes, making it a fantastic option for those on-the-go.
  • Nutritious Ingredients: Packed with whole foods like fresh tomatoes and basil, this salad is a powerhouse of vitamins.
  • Customizable: Whether you want to add protein or switch up the veggies, this salad is your canvas!
  • Perfect for Any Occasion: Whether it’s a picnic, potluck, or a fancy dinner, this salad fits right in.
  • Delicious Leftovers: The flavors deepen as it sits, making it even tastier the next day!

Ingredients Breakdown

To make this zesty Caprese Pesto Pasta Salad, gather the following ingredients:

  • 12 oz rotini pasta: A fun shape that holds onto the flavors beautifully.
  • 1 cup cherry tomatoes, halved: Explosive flavor in every bite.
  • 1 cup mozzarella pearls: Creamy, chewy goodness that complements the tomatoes.
  • 1/2 cup homemade or store-bought basil pesto: The star of the show, delivering an aromatic punch.
  • 1/4 cup extra virgin olive oil: Adds richness and helps in flavor absorption.
  • 2 tablespoons balsamic glaze: A sweet and tangy drizzle to elevate the dish.
  • 1/4 cup fresh basil leaves, chopped: A burst of freshness on top.
  • Salt and freshly ground black pepper: Essential for seasoning to taste.

Substitutions

  • Pasta: Feel free to swap in whole wheat or gluten-free pasta for a healthier twist.
  • Cherry tomatoes: Any seasonal tomatoes will work, or even roasted tomatoes for a different flavor.
  • Cheese: Swap mozzarella for feta or goat cheese for a tangy kick.
  • Pesto: Try sun-dried tomato pesto for a unique flavor profile.
  • Balsamic glaze: Use lemon juice for a zesty, lighter alternative.

How to Make This Salad

Side view of a fresh Caprese Pesto Pasta Salad featuring vibrant ingredients like basil and balsamic glaze.

Ready to whip up this colorful dish? Follow these simple steps:

  1. Cook the rotini pasta according to package instructions until al dente. Drain and rinse under cold water to stop the cooking process. Set aside.
  2. In a large mixing bowl, combine the cooked pasta, cherry tomatoes, and mozzarella pearls.
  3. Add the basil pesto and olive oil, then gently toss until everything is well coated.
  4. Season with salt and black pepper to taste.
  5. Transfer the salad to a serving platter or bowl. Drizzle with balsamic glaze and sprinkle with chopped fresh basil before serving.
  6. Chill in the fridge for at least 15–30 minutes before serving for best flavor.

Pro Tips for Perfecting Your Salad

  • Chill Before Serving: For the best flavor, allow the salad to chill in the fridge.
  • Don’t Overcook the Pasta: Aim for al dente—this helps maintain texture.
  • Use Fresh Ingredients: Fresh basil and ripe tomatoes elevate the taste.
  • Experiment with Add-Ins: Add protein like grilled chicken or chickpeas for a heartier meal.
  • Season to Taste: Always taste and adjust seasoning before serving.
  • Presentation Matters: Layer ingredients for a beautiful display.
  • Make it Ahead: Perfect for meal prep; the flavors will deepen!
  • Keep it Covered: Store leftovers in an airtight container to maintain freshness.

Common Mistakes and Troubleshooting

Even the best chefs make mistakes. Here’s how to avoid common pitfalls:

  • Overcooked Pasta: Keep an eye on cooking times; pasta should be tender but firm.
  • Too Much Pesto: Start with a little and add more as needed to avoid overwhelming flavors.
  • Not Enough Salt: Seasoning enhances flavors, so don’t skip it!

Variations to Try

Want to mix things up? Here are some fun variations:

  • Protein-Packed: Add grilled chicken or shrimp for a satisfying meal.
  • Vegetarian Delight: Incorporate roasted vegetables like zucchini or bell peppers.
  • Nutty Crunch: Toss in some pine nuts or walnuts for added texture.
  • Spicy Kick: Add red pepper flakes for a little heat.

Storage and Make-Ahead Instructions

Planning ahead? Here’s how to store and prepare your salad:

  • Refrigerate: Store in an airtight container for up to 3 days.
  • Make Ahead: Prep the salad a day in advance for a quick meal and allow flavors to meld.
  • Freezing Not Recommended: This salad is best served fresh, as freezing can alter texture.

Comprehensive FAQ

Got questions? We’ve got answers!

  • Can I use store-bought pesto? Yes, store-bought pesto works great if you’re short on time!
  • Is this salad gluten-free? Use gluten-free pasta for a gluten-free option.
  • Can I add meat to this salad? Absolutely! Grilled chicken or bacon can add great flavor.
  • How long does this salad last? It will last in the fridge for about 3 days.
  • Can I use dried herbs instead of fresh? While fresh is best, dried herbs can work in a pinch; just use less.
  • What can I substitute for mozzarella? Try feta or goat cheese for a different taste.
  • Can I serve this salad warm? Yes, it can be enjoyed warm, though it’s typically served cold.
  • Is this salad vegan? It can be made vegan by omitting the cheese and using a vegan pesto.

Nutrition Tips and Dietary Adaptations

This Caprese Pesto Pasta Salad isn’t just delicious; it’s also nutritious! Here are some tips for making it even healthier:

  • Whole Grain Pasta: Opt for whole wheat or legume-based pasta for added fiber.
  • Increase Veggies: Add more veggies like spinach or arugula for extra nutrients.
  • Control Portions: Keep an eye on serving sizes if you’re watching calories.

Equipment Recommendations

To make your cooking experience smoother, here are a few kitchen essentials you’ll need:

  • Large Pot: For boiling pasta.
  • Mixing Bowl: Large enough to hold all ingredients for easy tossing.
  • Measuring Cups and Spoons: For precise ingredient measurements.
  • Sharp Knife: For chopping fresh basil and tomatoes.

Serving Suggestions

Ready to impress? Here’s how to serve your Caprese Pesto Pasta Salad:

  • Picnic Perfect: Pack it in mason jars for an easy-to-eat option.
  • Party Platter: Serve in an elegant bowl with extra basil on top for flair.
  • Pair with Grilled Proteins: Serve alongside grilled chicken or fish for a complete meal.

In conclusion, this Caprese Pesto Pasta Salad is not just a meal; it’s a celebration of fresh, vibrant ingredients that come together to create something oh-so-delicious. Whether you’re meal prepping for the week or looking for a standout dish for your next gathering, this salad is sure to please! So gather your ingredients, channel your inner chef, and enjoy the healthy, tasty journey ahead!

Caprese Pesto Pasta Salad

Prep Time 10 minutes
Cook Time 10 minutes
Total Time 20 minutes
Servings 4 servings
Calories 450
A fresh and flavorful pasta salad combining the classic flavors of Caprese with vibrant basil pesto, perfect for a quick lunch or side dish.

Ingredients

Pasta

  • 12 oz rotini pasta

Vegetables and cheese

  • 1 cup cherry tomatoes, halved
  • 1 cup mozzarella pearls

Sauces and oils

  • 1/2 cup homemade or store-bought basil pesto
  • 1/4 cup extra virgin olive oil
  • 2 tablespoons balsamic glaze

Herbs and seasonings

  • 1/4 cup fresh basil leaves, chopped
  • to taste Salt and freshly ground black pepper

Instructions 

  • Cook the pasta until al dente, then rinse with cold water and drain.
  • Combine cooked pasta, cherry tomatoes, and mozzarella in a large bowl.
  • Add pesto and olive oil, then toss to coat evenly.
  • Season with salt and black pepper to taste.
  • Drizzle with balsamic glaze, sprinkle with chopped basil, then chill before serving.

Notes

Chilling the salad enhances the flavors, so refrigerate for at least 15 minutes before serving.
Calories: 450kcal
Cost: $15
Course: Salad
Cuisine: Italian
Keyword: Basil, pasta, Tomatoes

Get Ready to Energize Your Day with This Refreshing Smoothie!

Welcome to the vibrant world of healthy eating, where every bite is an adventure! Today, we’re diving into an incredibly delicious and nutritious drink that can transform your mornings or serve as the perfect afternoon pick-me-up. Introducing the Energizing Spinach-Avocado Smoothie! Packed with fiber, protein, and a burst of flavor, this smoothie will not only tantalize your taste buds but also fuel your body with the nutrients it craves. Let’s get blending!

Why You’ll Love This Recipe

This smoothie isn’t just another green drink; it’s a powerhouse of health benefits. Here are five reasons why you’ll adore this recipe:

  • Quick and Easy: With just a few simple ingredients, you can whip this smoothie up in under 10 minutes—perfect for busy mornings or snack attacks!
  • Rich in Nutrients: Combining spinach and avocado provides a wealth of vitamins, minerals, and healthy fats, delivering the nourishment your body needs.
  • Deliciously Creamy: The addition of yogurt and avocado creates a smooth, satisfying texture that makes drinking your greens a delight.
  • Customizable: Feel free to get creative! Whether you want to switch up fruits or add in extras, this smoothie is super adaptable.
  • Perfect for Any Time: Enjoy it as a breakfast boost, a post-workout snack, or a refreshing afternoon treat.

Ingredients You’ll Need

To create your own Energizing Spinach-Avocado Smoothie, gather the following ingredients:

  • 1 cup nonfat plain yogurt: This adds creaminess and a protein kick. For a vegan option, substitute with almond or coconut yogurt.
  • 1 cup fresh spinach: A nutrient-dense leafy green that packs a punch without overpowering the flavor.
  • 1 frozen banana: Provides natural sweetness and a creamy texture. If you don’t have frozen bananas, fresh bananas will work, but you may need to add ice.
  • ¼ avocado: This ingredient adds healthy fats and a rich creaminess to your smoothie.
  • 2 tablespoons water: Adjust this based on your desired consistency—less for a thicker smoothie and more for a thinner blend.
  • 1 teaspoon honey: A hint of natural sweetness to balance the flavors. For a vegan option, use agave syrup or maple syrup.

Pro Tips for Making the Best Smoothie

Close-up image of a smoothie made with spinach and avocado, showcasing a creamy texture.

Master the art of smoothie-making with these expert insights:

  • Blend in the Right Order: Start with the liquids (yogurt and water) to ensure a smooth blend, followed by the leafy greens, then the fruits.
  • Use Frozen Ingredients: Frozen bananas not only chill your smoothie but also create a thicker texture, making it more satisfying.
  • Experiment with Flavors: Want to heighten the taste? Add a pinch of cinnamon or a splash of vanilla extract for a flavor boost.
  • Balance is Key: If it’s too thick, add a little more liquid; if it’s too thin, toss in some extra spinach or avocado for creaminess.
  • Garnish Creatively: Top your smoothie with chia seeds, nuts, or fresh berries for a fun and nutritious finishing touch!
  • Keep it Fresh: Consume your smoothie right after blending to enjoy all the nutrients at their peak.
  • Clean Up Fast: Rinse your blender immediately after use. A quick soak in warm soapy water makes cleanup a breeze!
  • Try Adding Superfoods: Boost your smoothie with ingredients like chia seeds, flax seeds, or protein powder for an extra health kick.

Common Mistakes and Troubleshooting

Even the best smoothie makers can run into some hiccups. Here are common mistakes to avoid:

  • Overpacking the Blender: If you cram too many ingredients in, your smoothie may not blend well. Stick to the recipe for optimal results.
  • Not Adjusting for Sweetness: If your smoothie is too tart, simply add more honey or banana to sweeten it up.
  • Skipping the Greens: Don’t underestimate the power of spinach! It adds nutrients without altering the flavor significantly.
  • Not Chilling Ingredients: For a refreshing drink, use frozen fruits or chill your ingredients beforehand.

Variations to Try

Feeling adventurous? Here are four fun variations of the Energizing Spinach-Avocado Smoothie:

  • Berry Blast: Add a cup of mixed berries (strawberries, blueberries, raspberries) for a fruity twist.
  • Peanut Butter Power: Toss in a tablespoon of peanut butter or almond butter for added protein and flavor.
  • Chocolate Delight: Add a tablespoon of cocoa powder for a rich, chocolatey treat that’s still healthy.
  • Citrus Zing: Squeeze in some fresh orange or lemon juice for a refreshing citrus kick.

Storage and Make-Ahead Instructions

Want to prep ahead? Here’s how to store your smoothie:

  • Make-Ahead Smoothie Packs: Pre-portion your ingredients (spinach, banana, avocado) into freezer bags and store them in the freezer. Just add yogurt and water when you’re ready to blend!
  • Storing Leftovers: If you have leftover smoothie, store it in an airtight container in the fridge for up to 24 hours. Just give it a good shake before drinking!

Comprehensive FAQ

Got questions? We’ve got answers! Here are some frequently asked questions about this smoothie:

  • Can I use a different type of yogurt? Absolutely! Greek yogurt, dairy-free options, or even kefir can work well.
  • Is this smoothie good for weight loss? Yes, it’s low in calories but high in nutrients, making it a satisfying choice for weight management.
  • How can I make this smoothie vegan? Substitute nonfat yogurt with almond or coconut yogurt and use maple syrup instead of honey.
  • Can I add protein powder? Definitely! A scoop of your favorite protein powder can enhance the nutritional profile.
  • What’s the best way to make it thicker? Use frozen fruits or add more avocado to achieve that creamy texture.
  • How long will this smoothie last? It’s best enjoyed fresh, but it can be stored in the refrigerator for up to 24 hours.
  • Can I use fresh spinach instead of frozen? Yes, fresh spinach is perfect, but remember that frozen spinach can provide a thicker texture.
  • What if I don’t like bananas? You can replace bananas with another sweet fruit like mango or a scoop of unsweetened applesauce.

Nutritional Tips and Dietary Adaptations

Looking to tailor this smoothie to your dietary needs? Here are some tips:

  • High-Protein Version: Use Greek yogurt or add a scoop of protein powder.
  • Low-Carb Adaptation: Omit the banana and use a smaller portion of avocado for a lower-carb option.
  • Gluten-Free: All ingredients are naturally gluten-free, making this smoothie a safe choice for gluten-sensitive individuals.
  • For a Vitamin Boost: Include a tablespoon of chia seeds or flaxseeds for added omega-3 fatty acids.

Equipment Recommendations

To make your smoothie journey smoother, here’s the essential equipment you’ll need:

  • High-Powered Blender: A quality blender is key for achieving that velvety smooth texture.
  • Measuring Cups and Spoons: For accurate ingredient measurements to replicate the recipe perfectly.
  • Spatula: Handy for scraping down the sides of the blender to ensure everything gets blended evenly.

Serving Suggestions

Want to elevate your smoothie experience? Here are some fun serving ideas:

  • In a Bowl: Pour your smoothie into a bowl and top with granola, sliced fruits, and nuts for a smoothie bowl.
  • To-Go Mason Jar: Perfect for busy mornings, pour your smoothie into a mason jar for a portable breakfast.
  • With a Side of Energy Bites: Pair your smoothie with homemade energy bites for a complete snack!

Conclusion

With its vibrant green color and refreshing flavor, the Energizing Spinach-Avocado Smoothie is sure to become a staple in your healthy eating repertoire. Not only is it easy to prepare, but it also offers a delicious way to fuel your day. So grab your blender, gather your ingredients, and let your culinary creativity flow. Here’s to your health and happiness—happy blending!

Spinach-Avocado Smoothie

Prep Time 5 minutes
Total Time 5 minutes
Servings 2 cups
Calories 250
A nutritious and refreshing smoothie combining the creaminess of avocado with the freshness of spinach and yogurt.

Ingredients

Dairy

  • 1 cup nonfat plain yogurt

Produce

  • 1 cup fresh spinach
  • 1 frozen banana frozen banana
  • 0.25 avocado avocado

Beverages

  • 2 tablespoons water
  • 1 teaspoon honey

Instructions 

  • Combine yogurt, spinach, banana, avocado, water, and honey in a blender.
  • Puree until smooth.

Notes

You can add ice for a colder smoothie or adjust sweetness with more honey.
Calories: 250kcal
Cost: $5
Course: Breakfast, Snack
Cuisine: Healthy
Keyword: avocado, Smoothie, spinach

A Flavor Explosion: Your Guide to Pesto Caprese Pasta Salad!

Welcome to the world of vibrant flavors and fresh ingredients! If you’re on the hunt for a dish that’s as delicious as it is easy to prepare, look no further than the Pesto Caprese Pasta Salad. This isn’t just any pasta salad; it’s a celebration of summer, a burst of color, and a delightful mix of textures that will tantalize your taste buds. With the perfect blend of creamy mozzarella, juicy cherry tomatoes, and aromatic basil pesto, this dish is a true crowd-pleaser. Whether you’re meal prepping for the week or hosting a dinner party, this salad is the answer to your culinary prayers. Let’s dive in and explore why you’ll absolutely love making this recipe!

Why You’ll Love This Recipe

  • Quick and Easy: Ready in just 30 minutes, this dish is perfect for busy weeknights or unexpected guests.
  • Fresh Ingredients: Packed with fresh cherry tomatoes, creamy mozzarella, and vibrant pesto, each bite is bursting with flavor.
  • Versatile Dish: Serve it as a main course, a side dish, or a potluck favorite—this salad adapts to any occasion.
  • Meal Prep Friendly: Make it ahead of time and store it in the fridge for a quick, nutritious meal throughout the week.
  • Customizable: With endless variations and substitutions, you can make this salad your own!

Ingredients Breakdown

To create this delightful Pesto Caprese Pasta Salad, here’s what you’ll need:

  • 8 ounces pasta: Any pasta works, but I recommend rotini or penne for their ability to hold onto the pesto.
  • 1 cup cherry tomatoes, halved: Sweet and juicy, these add a burst of freshness.
  • 1 cup mozzarella balls: Creamy and mild, they provide a delightful contrast to the tangy pesto.
  • 1/2 cup basil pesto: The star of the show! Use homemade or store-bought, but fresh is best.
  • 1/4 cup olive oil: A drizzle of high-quality olive oil enhances flavors and adds richness.
  • 1 tablespoon balsamic vinegar: Adds a touch of acidity and balances the dish beautifully.
  • Salt and black pepper to taste: Essential for seasoning!

Ingredient Substitutions

  • Gluten-Free: Use gluten-free pasta for a delicious alternative.
  • Vegan: Substitute mozzarella with vegan cheese or leave it out entirely.
  • Extra Veggies: Toss in some spinach or arugula for added nutrients.
  • Different Pesto: Try sun-dried tomato or avocado pesto for a unique twist!

How to Make Pesto Caprese Pasta Salad

Side view of a pasta salad featuring fresh basil, cherry tomatoes, and smooth pesto dressing.

Making this salad is a breeze! Here’s a step-by-step guide:

  1. Cook the pasta according to package instructions. Drain and rinse with cold water to stop the cooking process.
  2. In a large bowl, combine the cooked pasta, cherry tomatoes, mozzarella balls, and basil pesto.
  3. Drizzle with olive oil and balsamic vinegar. Toss gently to combine all ingredients.
  4. Season with salt and black pepper to taste, adjusting to your preference.
  5. Chill in the refrigerator for at least 30 minutes before serving to let the flavors meld.

Pro Tips for Perfect Pasta Salad

  • Use Fresh Ingredients: The quality of your ingredients makes a significant difference in flavor.
  • Don’t Overcook the Pasta: Aim for al dente to give the salad a nice bite.
  • Let It Chill: Allowing the salad to chill enhances its flavors.
  • Mix Gently: Over-mixing can break the mozzarella balls and make it mushy.
  • Experiment with Herbs: Fresh herbs like parsley or chives can elevate the dish.
  • Balance the Acidity: Adjust the balsamic vinegar to suit your taste preferences.
  • Keep It Colorful: Use a mix of heirloom tomatoes for visual appeal.
  • Make It Ahead: This salad tastes even better the next day!

Common Mistakes to Avoid

  • Using Dried Herbs: Fresh herbs bring more flavor and vibrancy than dried.
  • Not Rinsing Pasta: Rinsing helps prevent sticking and cools the pasta quickly.
  • Overdressing: Less is more when it comes to dressing; you can always add more later!
  • Forgetting to Chill: This salad benefits from sitting in the fridge to meld flavors.

Delicious Variations

Feeling adventurous? Here are some tasty twists you can try!

  • Caprese Pesto with Grilled Chicken: Add sliced grilled chicken for a protein-packed meal.
  • Avocado Pesto Caprese Salad: Swap basil pesto for creamy avocado pesto for a rich texture.
  • Roasted Veggie Pesto Pasta: Include roasted zucchini or bell peppers for added depth.
  • Spicy Pesto Caprese: Add red pepper flakes for a kick of heat!

How to Store Your Salad

Ensure your Pesto Caprese Pasta Salad stays fresh with these simple tips:

  • Refrigeration: Store leftovers in an airtight container in the fridge for up to 3 days.
  • Freezing: Not recommended, as the texture of the ingredients may change.
  • Before Serving: Give it a good stir and taste; you may need to add a little more olive oil or vinegar after chilling.

Nutrition Tips and Dietary Adaptations

This salad is not only delicious but can also fit various dietary needs. Here are some tips:

  • High Protein: Add chickpeas or grilled shrimp for an extra protein boost.
  • Low Carb: Substitute pasta with zucchini noodles or cauliflower rice.
  • Low-Fat Option: Use reduced-fat mozzarella or skip it altogether.

Frequently Asked Questions (FAQs)

  • Can I make this salad ahead of time? Yes! It’s perfect for meal prep and tastes great after sitting.
  • What pasta is best for this recipe? Rotini or penne work best as they hold the pesto well.
  • Can I use store-bought pesto? Absolutely! Just make sure it’s high-quality for the best flavor.
  • Is this salad gluten-free? Yes, if you use gluten-free pasta!
  • How long does this salad last? It stays fresh for up to 3 days in the refrigerator.
  • Can I add other vegetables? Definitely! Feel free to add bell peppers, spinach, or whatever you like!
  • What can I serve with this salad? It pairs wonderfully with grilled meats, seafood, or as part of a larger buffet.
  • Can I use different cheeses? Yes, feel free to experiment with feta or goat cheese for a different flavor.

Equipment Recommendations

Having the right tools can make your cooking experience easier and more enjoyable:

  • Large Pot: For boiling pasta.
  • Colander: For draining pasta.
  • Mixing Bowl: A large bowl is essential for combining ingredients.
  • Measuring Cups and Spoons: Precision matters in cooking!
  • Sharp Knife: For chopping tomatoes and herbs.

Serving Suggestions

Elevate your meal with these serving ideas:

  • Garnish: Top with fresh basil leaves or a sprinkle of Parmesan for extra flavor.
  • Pair: Serve alongside grilled chicken or fish for a complete meal.
  • Presentation: Use a beautiful serving bowl to make the dish pop!

Conclusion: Dive Into Flavor

The Pesto Caprese Pasta Salad is more than just a dish; it’s an invitation to explore fresh ingredients and vibrant flavors! With its ease of preparation and versatility, it’s bound to become a staple in your kitchen. So grab those ingredients, unleash your inner chef, and enjoy every delightful bite. Remember, healthy eating can be fun, flavorful, and satisfying. Happy cooking!

Pesto Caprese Pasta Salad

Prep Time 10 minutes
Cook Time 10 minutes
Total Time 20 minutes
Servings 4 servings
Calories 400
A fresh and flavorful pasta salad combining cherry tomatoes, mozzarella, and basil pesto for a quick, satisfying meal.

Ingredients

Pasta

  • 8 ounces pasta

Vegetables

  • 1 cup cherry tomatoes, halved

Dairy

  • 1 cup mozzarella balls

Sauces & Condiments

  • 1/2 cup basil pesto
  • 1 tablespoon olive oil
  • 1 tablespoon balsamic vinegar
  • to taste Salt
  • to taste Black pepper

Instructions 

  • Cook pasta, drain, and rinse with cold water.
  • Combine pasta, cherry tomatoes, mozzarella, and pesto in a large bowl.
  • Drizzle with olive oil and balsamic vinegar; toss to coat.
  • Season with salt and black pepper to taste.
  • Chill for 30 minutes before serving.

Notes

Use fresh basil pesto for best flavor.
Calories: 400kcal
Cost: $12
Course: Salad
Cuisine: Italian
Keyword: pasta

Get Ready to Dive into Flavor: The Zesty Thai Mango Salad!

Welcome to the vibrant and refreshing world of Thai Mango Salad! This dish is not just a salad; it’s a celebration of fresh ingredients, zesty flavors, and culinary creativity. Whether you’re looking for a quick meal, a side dish that impresses, or simply a burst of tropical goodness, this salad delivers on all fronts. Let’s explore why this salad is a must-try, how to make it, and all the flavorful twists you can add!

Why You’ll Love This Recipe

  • Quick & Easy: You can whip this salad up in just 15 minutes, making it perfect for busy weeknights or unexpected guests.
  • Fresh & Flavorful: Packed with juicy ripe mangoes, crunchy veggies, and a zesty dressing, every bite is a delightful explosion of flavor.
  • Healthy & Nutritious: This salad is not only delicious but also loaded with vitamins, fiber, and healthy fats from the peanuts and sesame oil.
  • Customizable: Feel free to adjust the ingredients based on your preferences or what you have on hand, and you can make it vegan by swapping out fish sauce!
  • Perfect for Any Occasion: Whether it’s a light lunch, a BBQ, or a festive gathering, this salad is versatile enough to shine at any meal.

Ingredients You’ll Need

Let’s get down to the essentials! Here’s what you’ll need to create this vibrant Thai Mango Salad:

  • 2 ripe mangoes: Peeled and julienned for that sweet, juicy base.
  • 1 cup shredded carrots: Adds a nice crunch and vibrant color.
  • 1 red bell pepper: Thinly sliced for sweetness and texture.
  • 1 cucumber: Julienned to keep things refreshing.
  • 0.25 cup fresh cilantro: Chopped to add a burst of herbaceous flavor.
  • 0.25 cup roasted peanuts: Crushed for that irresistible crunch.
  • 2 tablespoons sesame oil: Provides a nutty flavor that ties everything together.
  • 2 tablespoons lime juice: For that essential zesty kick!
  • 1 tablespoon soy sauce (or fish sauce): The umami base of the dressing.
  • 1 tablespoon honey or agave syrup: To balance out the zesty flavors.
  • 1 red chili (optional): Finely chopped for an extra kick of heat.

How to Make Thai Mango Salad

Side view of a fresh Thai Mango Salad featuring mangoes, carrots, and peppers.

Ready to get cooking? Follow these simple steps to create your flavorful Thai Mango Salad:

  • Step 1: In a large mixing bowl, combine the julienned mangoes, shredded carrots, sliced red bell pepper, and cucumber. Toss gently to mix.
  • Step 2: In a small bowl, whisk together the sesame oil, lime juice, soy sauce (or fish sauce), honey (or agave syrup), and chopped red chili until well blended.
  • Step 3: Pour the dressing over the salad mixture and toss gently to combine, ensuring every ingredient is coated.
  • Step 4: Season with salt and pepper to taste.
  • Step 5: Let the salad rest for about 10 minutes to allow the flavors to meld beautifully.
  • Step 6: Just before serving, add the chopped cilantro and crushed peanuts on top for that extra crunch and a pop of color.

Pro Tips for the Perfect Salad

  • Choose the Right Mango: Opt for ripe but firm mangoes for the best balance of sweetness and texture—overripe mangoes can make the salad mushy.
  • Control the Heat: Adjust the amount of chili to suit your taste—less for mild heat, more for a spicy kick!
  • Perfect Storage: If making ahead, store the dressing separately to keep the salad fresh and crunchy until serving.
  • Mix It Up: Feel free to add other veggies like bell peppers, radishes, or even some avocado for a creamier texture.
  • Fresh Herbs: Experiment with fresh mint or basil for a unique twist!

Common Mistakes and Troubleshooting

Making this salad should be a breeze, but here are a few common pitfalls to avoid:

  • Overdressing: Be cautious with the dressing; start with less, as you can always add more but can’t take it out!
  • Wrong Mango: Using the wrong type of mango can affect the flavor dramatically—avoid soft, overly ripe mangoes.
  • Skipping the Resting Time: Allowing the salad to sit helps the flavors meld, so don’t rush this step!

Delicious Variations to Try

Want to switch things up? Here are some fantastic variations of the Thai Mango Salad:

  • Protein-Packed: Add grilled chicken, shrimp, or tofu for a heartier meal.
  • Fruit Twist: Incorporate other fruits like pineapple or papaya for a tropical flair.
  • Nutty Delight: Try adding sesame seeds or cashews for an extra crunch.
  • Spicy Kick: Toss in some sliced jalapeños or a dash of sriracha for a fiery punch!

Storage and Make-Ahead Instructions

If you want to prepare this salad in advance, here’s what you need to know:

  • Refrigeration: Store the salad in an airtight container in the fridge for up to 2 days, but keep the dressing separate until ready to eat.
  • Make-Ahead: Prepare the veggies and store them in the fridge, then mix them with the dressing just before serving to maintain freshness.

Frequently Asked Questions

Got questions? We’ve got answers! Here are some common queries about the Thai Mango Salad:

  • Can I use ripe mangoes instead of green? Yes, while green mangoes are traditional, ripe mangoes add sweetness and can be used for a different flavor profile.
  • Is this salad vegan-friendly? Absolutely! Just replace fish sauce with soy sauce or tamari for a fully vegan option.
  • How can I make this salad spicy? Add more fresh chili or a splash of chili oil to the dressing for added heat.
  • What’s the best way to serve this salad? Serve it chilled as a refreshing side dish or as a light main course on a hot day.
  • Can I make this salad gluten-free? Yes! Just use tamari instead of soy sauce to keep it gluten-free.
  • How do I know when my mango is ripe? A ripe mango will yield slightly to pressure and have a sweet aroma near the stem.
  • Can I add other vegetables? Yes! Feel free to mix in any of your favorite crunchy veggies like bell peppers or snap peas.
  • How should I store leftovers? Keep leftovers in an airtight container in the fridge for up to 2 days, but eat them as soon as possible for the best taste.

Nutritional Tips and Dietary Adaptations

This Thai Mango Salad is not only delicious but also a powerhouse of nutrition! Here are some tips to enhance its health benefits:

  • Boost Fiber: Add more vegetables like spinach or kale to increase the fiber content.
  • Increase Protein: Incorporate chickpeas or lentils for plant-based protein.
  • Lower Sugar: Adjust the honey or agave to suit your dietary needs or use a sugar substitute.

Equipment Recommendations

Here’s a quick list of tools that will make your cooking experience smoother:

  • Sharp Knife: Essential for julienning your mangoes and veggies with precision.
  • Cutting Board: A sturdy board to protect your countertops and provide a safe chopping surface.
  • Mixing Bowls: A large bowl for tossing the salad and a smaller one for mixing the dressing.
  • Whisk: Ideal for blending the dressing ingredients thoroughly.

Serving Suggestions

Pair your Thai Mango Salad with these delightful options:

  • Grilled Meats: This salad complements grilled chicken, shrimp, or fish beautifully.
  • Rice Dishes: Serve alongside coconut rice or jasmine rice for a complete meal.
  • Wraps and Sandwiches: Use it as a filling in wraps or as a side with sandwiches for an exciting crunch.

Conclusion

And there you have it—the ultimate guide to creating a mouthwatering Thai Mango Salad! Whether you’re enjoying it as a light lunch, a vibrant side dish, or a refreshing entrée, this salad is sure to bring joy and flavor to your table. Remember, the kitchen is your playground, so don’t hesitate to get creative with ingredients and make this dish your own. Happy cooking!

Thai Mango Salad

Prep Time 15 minutes
Total Time 15 minutes
Servings 4 people
Calories 180
A fresh and tangy Thai Mango Salad combines ripe mangoes with crunchy vegetables and a flavorful dressing for a delightful appetizer or light meal.

Ingredients

Fruits and Vegetables

  • 2 pieces ripe mangoes, peeled and julienned
  • 1 cup shredded carrots
  • 1 red bell pepper red bell pepper, thinly sliced
  • 1 piece cucumber, julienned
  • 0.25 cup fresh cilantro, chopped
  • 0.25 cup roasted peanuts, crushed
  • 2 tablespoons sesame oil
  • 2 tablespoons lime juice
  • 1 tablespoon soy sauce (or fish sauce)
  • 1 tablespoon honey or agave syrup
  • 1 red chili finely chopped (optional for heat)

Instructions 

  • Combine mangoes, carrots, bell pepper, and cucumber in a large bowl.
  • Whisk together sesame oil, lime juice, soy sauce, honey, and chili to make the dressing.
  • Pour dressing over the salad and toss gently.
  • Add cilantro and peanuts on top before serving.

Notes

For extra flavor, let the salad rest for 10 minutes before serving.
Calories: 180kcal
Cost: $12
Course: Salad
Cuisine: Thai
Keyword: Mango

Welcome to the delicious world of Cold Peanut Sesame Noodles! This vibrant dish combines Asian noodles, crunchy cucumbers, and a savory sesame-peanut sauce for a tantalizing meal that’s quick to prepare and bursting with flavor. Perfect for warm days or a quick dinner fix, these noodles are not just a meal; they’re an experience!

Why You’ll Love This Recipe

This Cold Peanut Sesame Noodles recipe is a game-changer for anyone looking to spice up their meal rotation. Here are five irresistible reasons to dive in:

  • Quick and Easy: With just a few simple steps, you can whip up this mouthwatering dish in under 30 minutes!
  • Flavor Explosion: The combination of nutty peanut butter, savory soy sauce, and zesty vinegar creates a flavor profile that dances on your taste buds.
  • Customizable: Adjust the spice level or substitute ingredients to suit your personal taste or dietary needs.
  • Perfect for Meal Prep: These noodles store beautifully, making them an ideal choice for meal prepping lunches or quick dinners throughout the week.
  • Fresh and Healthy: Packed with crunchy vegetables and wholesome ingredients, this dish is as nutritious as it is delicious.

Ingredient Breakdown

Let’s break down the ingredients you’ll need for this recipe, along with some handy substitutions:

  • Asian noodles: Use your favorite type—rice noodles, soba, or even whole wheat pasta work great!
  • Cucumber strips: For a refreshing crunch; feel free to replace with bell peppers or shredded carrots.
  • Sesame seeds: These add texture and flavor; swap with crushed peanuts for extra crunch.
  • Gochugaru: This Korean red pepper powder adds a kick; replace it with chili flakes if you prefer.
  • Vegetable oil: Any neutral oil like canola or grapeseed works fine.
  • Soy sauce: Tamari is a great gluten-free alternative.
  • White vinegar: Apple cider vinegar can be used for a slightly different taste.
  • Peanut sesame paste: If you don’t have this, creamy peanut butter mixed with a bit of sesame oil works too.
  • Water: Adjust the amount to get your desired sauce consistency.

Pro Tips for Perfect Noodles

To ensure your Cold Peanut Sesame Noodles turn out perfectly every time, consider these expert insights:

  • Right Cooking Time: Cook the noodles just until al dente to avoid mushiness when they cool.
  • Chill the Noodles: Rinse your noodles under cold water to stop the cooking process and keep them from sticking together.
  • Adjust Consistency: If the sauce is too thick, gradually add more water until it reaches your desired consistency.
  • Flavor Infusion: Let the sauce sit for a few minutes before tossing it with the noodles to enhance the flavors.
  • Veggie Boost: Toss in some sautéed veggies for extra nutrition and flavor.
  • Garnish Wisely: Top with fresh herbs like cilantro or mint for an aromatic finish.
  • Batch Cooking: Make a double batch of the sauce and store it for future meals.
  • Experiment with Proteins: Add grilled chicken, shrimp, or tofu for a complete meal.
  • Flavor Layering: Add a sprinkle of sesame oil just before serving for an extra boost of flavor.

Common Mistakes and Troubleshooting

Juicy Cold Peanut Sesame Noodles displayed in a bowl, featuring vibrant cucumber and sesame seed toppings.

Even the best chefs make mistakes! Here’s how to avoid common pitfalls:

  • Overcooked Noodles: Always keep an eye on the noodles; they can turn mushy quickly!
  • Too Spicy?: If it’s too spicy for your taste, try adding a bit more peanut butter to balance the heat.
  • Stuck Noodles: If your noodles stick together, drizzle a little oil over them and toss to separate.
  • Not Enough Sauce: If you find the noodles dry, simply add more sauce to achieve your preferred coating.

Delicious Variations

Make this dish your own with these tasty variations:

  • Spicy Peanut Soba Noodles: Swap regular noodles for soba and add more Gochugaru for extra heat.
  • Veggie-Loaded Cold Noodles: Toss in steamed broccoli, shredded carrots, and snap peas for a colorful twist.
  • Protein-Packed Version: Add grilled chicken or shrimp for a hearty meal.
  • Asian-Inspired Salad: Turn this into a salad by adding mixed greens and a sesame dressing.

Storage and Make-Ahead Instructions

This dish is perfect for meal prep! Here’s how to store and prepare it:

  • Refrigeration: Store leftovers in an airtight container in the fridge for up to 3 days.
  • Freezing: While noodles can be frozen, it’s best to freeze the sauce separately and mix fresh noodles when serving.
  • Make Ahead: Prepare the sauce and chop the vegetables a day in advance to save time.

Frequently Asked Questions

Here are some common questions about Cold Peanut Sesame Noodles that might help you out:

  • Can I use a different nut butter?: Absolutely! Almond butter or cashew butter can be great alternatives.
  • Can this dish be served warm?: Yes, it can be enjoyed warm, although it’s traditionally served cold.
  • How long can leftovers stay out?: Best to consume leftovers within two hours if left at room temperature.
  • Can I use a different type of pasta?: Yes, any pasta shape you love can work in this recipe.
  • What if I don’t have a blender?: You can whisk the sauce ingredients together by hand for a chunkier texture.
  • How spicy is this dish?: The spice level can be adjusted based on the amount of Gochugaru you use.
  • Is this dish gluten-free?: Use gluten-free noodles and tamari to make it gluten-free.
  • How can I add more flavor?: Fresh herbs like cilantro or a squeeze of lime can enhance the flavor profile.

Nutrition Tips and Dietary Adaptations

Here are some ways to make this dish fit your dietary needs:

  • Lower Calorie: Substitute half the peanut butter with Greek yogurt for a lighter sauce.
  • Vegan Option: Ensure all sauces are plant-based and omit any animal proteins.
  • High-Protein Version: Add edamame or chickpeas for a protein boost.
  • Low-Carb Alternative: Use zucchini noodles or shirataki noodles instead of traditional noodles.

Equipment Recommendations

To make this recipe, you’ll need a few key pieces of equipment:

  • Pot: For boiling the noodles.
  • Heatproof Bowl: To mix the sauce ingredients.
  • Whisk or Blender: For mixing the sauce until smooth.
  • Cutting Board and Knife: Essential for chopping vegetables.

Serving Suggestions

Ready to serve? Here are some ideas to elevate your noodle dish:

  • Garnish: Top with extra sesame seeds and chopped scallions for added crunch.
  • Pairing: Serve alongside grilled chicken skewers or a fresh Asian salad.
  • Presentation: Serve in a colorful bowl for an eye-catching display.

In conclusion, Cold Peanut Sesame Noodles are your ticket to a delicious, satisfying meal that’s packed with flavor and nutrition. Whether you’re prepping for a busy week or hosting a summer gathering, this recipe is sure to impress. So grab your ingredients, unleash your creativity, and enjoy every flavorful bite!

Cold Peanut Sesame Noodles 花生麻醬冷麵

Prep Time 10 minutes
Cook Time 10 minutes
Total Time 20 minutes
Servings 2 servings
Calories 450
A refreshing and flavorful cold noodle dish with a rich peanut sesame sauce, perfect for warm days.

Ingredients

Noodles

  • 1 pack Asian noodles of your choice
  • 1 tbsp Gochugaru (Korean red pepper powder)
  • 1 tbsp sesame seeds
  • 1 tbsp chopped spring onion
  • 1 tbsp chopped garlic
  • 2-3 tbsp vegetable oil
  • 2-3 tbsp soy sauce
  • 1 tbsp white vinegar
  • 2 tbsp peanut sesame paste
  • 2 tbsp water

Garnish

  • to taste Cucumber strips (optional)
  • to taste Sesame seeds (for garnish)

Instructions 

  • Combine Gochugaru, sesame seeds, spring onion, and garlic in a heatproof bowl.
  • Heat vegetable oil until shimmering, then pour over spice mixture.
  • Add soy sauce and vinegar, stirring to combine.
  • Mix peanut sesame paste with water until smooth.
  • Combine sauces, cook noodles, rinse in cold water, then drain and place in a bowl.
  • Pour sauce over noodles, top with cucumber and sesame seeds, then serve.

Notes

Adjust the amount of Gochugaru for desired spice level.
Calories: 450kcal
Cost: $12
Course: Main Course
Cuisine: Asian
Keyword: Noodles

Discover the Vibrant World of Tropical Teriyaki Chicken Bowls

Welcome to a flavor adventure in every bite! Our Tropical Teriyaki Chicken and Pineapple Bowl is not just a meal; it’s an exciting journey through the sweet and savory landscape of culinary creativity. This quick and easy recipe unites tender chicken, juicy pineapple, and a zesty teriyaki sauce, all beautifully served over a fluffy bed of rice. Whether you’re racing against the clock on a busy weeknight or prepping for a weekend gathering, this dish is sure to transport your taste buds to tropical paradise!

In this article, we’ll explore every element of this delightful recipe, from the essential ingredients to cooking tips that will elevate your dish. Prepare to dive into a world where healthy eating meets delicious flavor!

Why You’ll Love This Recipe

Here are five irresistible reasons why our Tropical Teriyaki Chicken Bowls will become a staple in your kitchen:

  • Flavor Explosion: The homemade teriyaki sauce, with a perfect blend of sweet honey and savory soy sauce, creates a delightful glaze that perfectly coats the chicken and caramelizes the pineapple.
  • Quick & Easy: Ready in about 30 minutes, this recipe is perfect for those nights when you’re short on time but still want something delicious and satisfying.
  • Healthy & Nutritious: Packed with protein from the chicken and vitamins from fresh pineapple, this bowl is a nutritious option that doesn’t compromise on taste.
  • Customizable: Feel free to mix and match with your favorite veggies or proteins. This recipe is versatile enough to cater to various dietary preferences.
  • Meal Prep Friendly: Make a larger batch for easy meal prep throughout the week, ensuring you have delicious meals ready to go!

Ingredients Breakdown

Here’s what you’ll need to whip up this tropical delight, along with some handy substitutions:

  • 1.5 lbs boneless, skinless chicken thighs: Tender and juicy, perfect for soaking up the teriyaki sauce. Substitution: Use chicken breasts for a leaner option.
  • 2 cups fresh pineapple chunks: Adds a sweet and tropical element that complements the dish beautifully. Substitution: Canned pineapple can be used in a pinch, but fresh offers the best flavor.
  • 1/3 cup soy sauce: A key ingredient for the teriyaki sauce. Substitution: Low-sodium soy sauce is a great alternative to reduce sodium intake.
  • 1/4 cup honey: Provides natural sweetness and helps the sauce thicken. Substitution: Maple syrup can be used for a vegan option.
  • 3 cloves garlic (minced): Adds depth and richness to the flavor. Substitution: Garlic powder can be used in a pinch.
  • 1 tablespoon fresh ginger (minced): Offers a warm and spicy note that pairs well with chicken. Substitution: Ground ginger can be used, though fresh is preferred.
  • 1 tablespoon vegetable oil: Used for cooking the chicken and caramelizing the pineapple. Substitution: Olive oil or sesame oil can add unique flavors.
  • 2 cups cooked rice: Jasmine or white rice works best. Substitution: Quinoa or cauliflower rice for a low-carb option.
  • 2 tablespoons green onions (sliced, for garnish): Adds a fresh, crisp finish to the dish.
  • 1 teaspoon sesame seeds (for garnish): Optional, but they add a lovely crunch and nutty flavor.

Pro Tips for Perfecting Your Tropical Teriyaki Chicken Bowls

Side view of a bowl filled with teriyaki chicken, pineapple, and rice, garnished with green onions.

Want to take your dish to the next level? Here are some expert insights:

  • Marinate for Flavor: If time allows, marinate the chicken in the teriyaki sauce for at least 30 minutes or overnight for a deeper flavor.
  • High Heat Cooking: Cooking the chicken on medium-high heat helps achieve a golden-brown exterior while keeping the inside juicy.
  • Caramelization is Key: Allow the pineapple to cook until it’s golden brown for that delicious caramelized flavor.
  • Don’t Rush the Sauce: Let the teriyaki sauce simmer for a few minutes to thicken before serving; this enhances the flavor.
  • Serve Hot: For the best experience, serve your bowls immediately while everything is warm and fresh.
  • Add a Kick: For those who love heat, add a pinch of red pepper flakes or sriracha to the sauce.
  • Garnish Generously: Fresh herbs or chopped nuts can elevate the dish visually and flavor-wise.
  • Mix Up the Rice: Try using different types of rice or grains for a unique twist.

Common Mistakes and Troubleshooting

Even the best chefs can run into hiccups! Here’s how to avoid common pitfalls:

  • Overcooking Chicken: Keep an eye on your chicken to prevent it from becoming dry. It’s done when it reaches an internal temperature of 165°F.
  • Too Thick Sauce: If your teriyaki sauce thickens too much, add a splash of water to loosen it up.
  • Underseasoned Rice: Make sure to season your rice with a touch of salt while cooking for better flavor.
  • Skipping the Garnish: Don’t skip garnishing your bowl; it enhances presentation and flavor!

Delicious Variations to Try

Feeling adventurous? Here are some tasty twists on the classic recipe:

  • Vegetarian Delight: Swap the chicken for tofu or tempeh, marinating and cooking it in the same way for a plant-based option.
  • Spicy Teriyaki: Add sriracha or chili garlic sauce to the teriyaki sauce for an extra kick.
  • Surf and Turf: Combine shrimp with chicken for a delightful mix of flavors and textures.
  • Tropical Veggie Bowl: Add colorful bell peppers, snap peas, or zucchini to boost the veggie content and add crunch.

Storage and Make-Ahead Instructions

This dish is not only delicious but also practical! Here’s how to store and prepare ahead:

  • Storage: Store leftovers in an airtight container in the refrigerator for up to 3 days.
  • Reheating: Reheat in the microwave or on the stovetop until warmed through. Add a splash of water if the sauce has thickened.
  • Make-Ahead: Prepare the teriyaki sauce in advance and store it in the fridge for up to a week. Simply cook the chicken and pineapple when ready to serve.

Frequently Asked Questions

Got questions? We’ve got answers!

  • Can I use canned pineapple?: Yes, but for the best flavor and texture, fresh pineapple is recommended.
  • Is this recipe gluten-free?: Use gluten-free soy sauce or tamari to make it gluten-free.
  • Can this dish be prepared ahead of time?: Absolutely! You can marinate the chicken and prepare the sauce ahead of time.
  • What kind of rice works best?: Jasmine rice is ideal, but any rice or grain of your choice will work.
  • Can I freeze leftovers?: Yes, you can freeze the chicken and pineapple mixture, but it’s best to cook the rice fresh when serving.
  • How can I make this dish spicier?: Add red pepper flakes or sriracha to the teriyaki sauce for a spicy kick!
  • What vegetables can I add?: Bell peppers, broccoli, or snap peas work wonderfully in this dish.
  • Can I use other proteins?: Yes, try shrimp, beef, or even a meat substitute for a different flavor profile.

Nutritional Tips and Dietary Adaptations

This Tropical Teriyaki Chicken Bowl is not just tasty but also healthy! Here are a few tips:

  • Protein Boost: For an extra protein punch, add edamame or chickpeas.
  • Low-Carb Option: Serve over cauliflower rice instead of traditional rice for a lower-carb meal.
  • Vegan Version: Use tofu and maple syrup for a completely plant-based alternative.
  • Increase Fiber: Add more vegetables like spinach or kale to increase fiber content.

Equipment Recommendations

Here’s what you’ll need to make this dish:

  • Large Skillet: Ideal for cooking the chicken and pineapple evenly.
  • Mixing Bowl: For whisking together the teriyaki sauce ingredients.
  • Knife and Cutting Board: Essential for chopping chicken and fresh pineapple.
  • Measuring Cups and Spoons: For accurate measurements of ingredients.

Serving Suggestions

To elevate your dining experience, consider serving your Tropical Teriyaki Chicken Bowls with:

  • Fresh Fruit Salad: A refreshing side that complements the tropical flavors.
  • Asian-Inspired Slaw: Crunchy slaw adds texture and pairs beautifully with the sweet and savory dish.
  • Miso Soup: A warm, comforting soup works as a perfect starter.
  • Chilled Green Tea: Refreshing and light, green tea balances the rich flavors of the bowl.

Now that you’ve unlocked the secrets to creating the perfect Tropical Teriyaki Chicken Bowls, it’s time to get cooking! Embrace the vibrant flavors, enjoy the process, and most importantly, have fun in the kitchen. Healthy eating can be a joyful adventure, and this dish is a perfect example of how delicious it can be!

Teriyaki Chicken and Pineapple Bowl

Prep Time 10 minutes
Cook Time 15 minutes
Total Time 25 minutes
Servings 4 servings
Calories 550
A delicious and easy-to-make bowl combining tender chicken, sweet pineapple, and savory teriyaki sauce served over rice.

Ingredients

Protein

  • 1.5 lbs boneless, skinless chicken thighs (cut into bite-sized pieces)
  • 2 cups fresh pineapple chunks (about 1 small pineapple)

Sauce

  • 1/3 cup soy sauce (low-sodium preferred)
  • 1/4 cup honey
  • 3 cloves garlic (minced)
  • 1 tablespoon fresh ginger (minced)

Cooking

  • 1 tablespoon vegetable oil
  • 2 cups cooked rice (jasmine or white rice)
  • 2 tablespoons green onions (sliced, for garnish)
  • 1 teaspoon sesame seeds (for garnish)

Instructions 

  • Whisk soy sauce, honey, garlic, ginger, and water to make teriyaki sauce. Set aside.
  • Cook chicken in oil over medium-high heat until golden and cooked through, about 5-7 minutes per side. Remove and set aside.
  • Cook pineapple in the same skillet until caramelized, about 3-4 minutes.
  • Return chicken and pineapple to skillet, add sauce, and simmer until thickened, 2-3 minutes.
  • Serve over rice, garnished with green onions and sesame seeds.

Notes

For extra flavor, marinate the chicken in some of the sauce beforehand.
Calories: 550kcal
Cost: $15
Course: Main Course
Cuisine: Asian
Keyword: Chicken, Pineapple, Teriyaki

Why These 15-Minute Sesame Noodle Bowls Will Change Your Dinner Game

Welcome to a culinary adventure where flavor meets convenience! If you’re searching for a quick, nutritious meal that doesn’t skimp on taste, look no further than these 15-Minute Sesame Noodle Bowls. Whipped up in no time and bursting with vibrant flavors, this recipe is perfect for busy weeknights or meal prep. Let’s dive into why you’ll absolutely love this dish!

  • Speedy Meal Prep: Ready in just 15 minutes, these noodle bowls are perfect for those hectic days when you need a satisfying meal without the fuss.
  • Flavor Explosion: The combination of sesame paste, soy sauce, and fresh veggies creates a symphony of flavors that will tantalize your taste buds.
  • Nutrition Packed: With ingredients like edamame and cucumbers, this dish is loaded with protein, fiber, and vitamins to keep you energized.
  • Versatile Ingredients: Swap out proteins or add different vegetables based on what you have on hand—this recipe is all about flexibility!
  • Instagram-Worthy Presentation: Not only does it taste amazing, but these bowls are also a feast for the eyes. Perfect for sharing!

Ingredient Breakdown: What You’ll Need

This recipe is all about simple, accessible ingredients that pack a punch. Here’s what you need to make your sensational sesame noodle bowls:

  • 1/4 cup sesame paste (or tahini): This is the star of the show, providing that rich, nutty flavor.
  • 1/4 cup warm water: Helps to thin the sesame paste into a creamy sauce.
  • 3 tablespoons soy sauce: Adds savory depth and umami.
  • 1 tablespoon sesame oil: For that extra touch of sesame flavor and richness.
  • 1 tablespoon rice vinegar: A splash of acidity balances the richness of the sauce.
  • 1 clove garlic, grated: Adds a punch of flavor.
  • Sriracha and sugar to taste: Customize the heat and sweetness to your liking!
  • 6-8 ounces stir fry noodles: Use Chinese egg noodles or linguine in a pinch.
  • 2 cups edamame, cooked: A great source of plant-based protein.
  • 2 cucumbers, diced: For a refreshing crunch.
  • 1 lb. chicken breast, cooked and diced (optional): Boosts protein and makes this dish heartier.
  • Sesame seeds: For garnish and a bit of crunch.

Pro Tips for Perfect Noodle Bowls

Ready to elevate your noodle bowl game? Here are some expert insights to ensure your dish turns out perfectly every time:

  • Whisk it Well: Make sure to whisk your sauce ingredients thoroughly for a smooth consistency. No one wants clumpy sauce!
  • Cook Noodles Al Dente: Follow package instructions but cook for a minute less. You want them firm enough to hold up in the sauce.
  • Don’t Overcrowd the Bowl: When dividing the noodles and toppings, keep it balanced for the best flavor in every bite.
  • Chill Your Veggies: For an extra refreshing bite, chill your diced cucumbers in the fridge before adding them to the dish.
  • Customize Your Sauce: Don’t hesitate to adjust the Sriracha and sugar to fit your personal taste preferences. Make it your own!
  • Meal Prep Like a Pro: Divide your ingredients into individual containers for an easy grab-and-go meal option during the week.
  • Garnish Generously: Sprinkle extra sesame seeds or even chopped green onions for added flavor and texture.
  • Experiment with Proteins: Try tofu, shrimp, or even chickpeas as protein alternatives to keep things interesting!

Avoiding Common Mistakes

Side view of a vibrant sesame noodle bowl featuring stir-fried noodles and sesame seeds.

Even the best chefs make mistakes! Here are some common pitfalls and how to avoid them:

  • Sticky Noodles: Rinse noodles under cold water if they stick together after cooking to prevent clumping.
  • Too Thick Sauce: If your sauce is too thick, slowly add more warm water to reach your desired consistency.
  • Overcooked Veggies: Add cucumbers just before serving to maintain their crunch; overcooking can lead to a soggy texture.
  • Missing Flavor: Taste your sauce before tossing it with the noodles. Adjust seasonings as necessary to ensure it’s bursting with flavor!

Delicious Variations to Try

Want to shake things up? Here are some fun twists you can make on this classic recipe:

  • Spicy Peanut Butter Noodles: Swap sesame paste for peanut butter for a different flavor profile.
  • Veggie-Packed Delight: Boost the nutrition by adding bell peppers, carrots, or snap peas.
  • Asian-Inspired Chicken Salad: Use shredded rotisserie chicken and serve it cold for a refreshing salad option.
  • Sesame Zoodle Bowl: Use spiralized zucchini instead of noodles for a low-carb alternative.

Storage and Make-Ahead Instructions

Planning ahead? Here’s how to store and prepare your sesame noodle bowls:

  • Fridge Storage: Keep your noodle bowls in airtight containers in the fridge for up to 4 days. The flavors will continue to meld!
  • Make-Ahead: Prepare the sauce and cook the noodles a day in advance. Assemble bowls just before serving to keep everything fresh.
  • Freezing: While the noodles can be frozen, fresh veggies should be added just before serving for optimal texture.

Frequently Asked Questions

Got questions? We’ve got answers! Here are some common inquiries about these delicious noodle bowls:

  • Can I make this recipe vegan?: Absolutely! Just omit the chicken or use tofu, and ensure your soy sauce is gluten-free if needed.
  • What should I serve with these noodle bowls?: These bowls are hearty enough on their own but pair beautifully with a side of steamed broccoli or a simple green salad.
  • Can I use other types of noodles?: Yes! Feel free to substitute with rice noodles or whole wheat pasta based on your preference.
  • How spicy is this recipe?: The heat level is adjustable depending on how much Sriracha you add. Start with a little and build up to your liking!
  • What’s the best way to reheat leftovers?: Gently reheat in the microwave with a splash of water to keep the noodles from drying out.
  • Is this recipe gluten-free?: To make it gluten-free, use gluten-free soy sauce and noodles.
  • Can I add more protein?: Definitely! Cooked shrimp, beef, or chickpeas are great additions.
  • How can I make this dish less sweet?: Simply reduce the amount of sugar in the sauce to balance the sweetness.

Nutritional Benefits and Dietary Adaptations

This recipe isn’t just quick and delicious; it’s also packed with nutritional benefits:

  • Edamame: A fantastic source of plant-based protein and fiber, perfect for muscle recovery.
  • Cucumbers: Low in calories and high in water content, they help with hydration and digestion.
  • Sesame Paste: Rich in healthy fats and antioxidants, sesame paste is a great addition to any meal.
  • Flexible Diets: Easily adaptable for vegetarian, vegan, gluten-free, or low-carb diets.

Essential Equipment for Success

Here’s what you’ll need to whip up your sesame noodle bowls:

  • Large Pot: For boiling your noodles to the perfect texture.
  • Whisk or Food Processor: To blend your sauce ingredients until smooth.
  • Cutting Board and Knife: For chopping and preparing your fresh veggies.
  • Measuring Cups and Spoons: Precision is key in achieving the best flavor.

Serving Suggestions: How to Make It Pop

Make your noodle bowls not just delicious but visually stunning!

  • Garnish: Top with toasted sesame seeds, chopped green onions, or cilantro for a pop of color.
  • Serving Style: Present in colorful bowls for an appealing table setting.
  • Pair with Drinks: Serve alongside a refreshing iced tea or sparkling water with lemon to complement the flavors.

Now that you’re armed with all the information you need, it’s time to get cooking! Whip up these 15-Minute Sesame Noodle Bowls that wow and share your creation with friends and family. Remember, healthy eating is all about joy and creativity—so make it fun! Enjoy your delicious adventure in the kitchen!

15 Minute Meal Prep: Sesame Noodle Bowls

Prep Time 5 minutes
Cook Time 10 minutes
Total Time 15 minutes
Servings 4 servings
Calories 450
A quick and flavorful sesame noodle bowl perfect for a fast lunch or dinner, customizable with chicken and fresh vegetables.

Ingredients

Sauce ingredients

  • 1/4 cup sesame paste (or tahini)
  • 1/4 cup warm water
  • 3 tablespoons soy sauce
  • 1 tablespoon sesame oil
  • 1 tablespoon rice vinegar
  • 1 clove garlic, grated
  • to taste Sriracha and sugar

Noodles

  • 6-8 ounces stir fry noodles, Chinese egg noodles, or linguine

Vegetables and Protein

  • 2 cups edamame, cooked
  • 2 diced cucumbers
  • 1 lb. chicken breast, cooked and diced (optional) (optional)

Garnish

  • to taste sesame seeds

Instructions 

  • Whisk all sauce ingredients until smooth.
  • Cook noodles slightly less than package instructions, rinse if sticky, then toss with half of the sesame sauce.
  • Divide noodles, edamame, cucumber, and chicken into containers. Drizzle with extra sauce and sprinkle with sesame seeds.

Notes

This dish is best enjoyed fresh but can be stored in the fridge for 3-4 days. Adjust spice levels with Sriracha to taste.
Calories: 450kcal
Cost: $15
Course: Main Course
Cuisine: Asian
Keyword: Noodles, Quick, Sesame

Discover the Magic of Zesty Lemon Herb Couscous Salad

Welcome to a vibrant culinary adventure! If you think healthy eating is dull, you’re in for a delightful surprise with our Zesty Lemon Herb Couscous Salad. This dish isn’t just another salad; it’s a flavor fiesta that combines the nutty goodness of pearl couscous, the freshness of herbs, and the zest of lemon. Perfect for busy weeknights, picnics, or as a side for your next gathering, this salad brings a burst of energy and joy to your table. Let’s dive into why this recipe is not just delicious but also an essential addition to your healthy cooking repertoire.

Why You’ll Love This Recipe

This salad is more than just a pretty plate; it’s designed to impress your taste buds and nourish your body! Here are five reasons you’ll adore it:

  • Quick and Easy: With minimal cooking time, you can have this salad ready in under 30 minutes, making it perfect for busy schedules.
  • Flavor Explosion: The combination of lemon, fresh herbs, and savory chickpeas delivers a refreshing and satisfying taste in every bite.
  • Nutrition Powerhouse: Packed with protein from chickpeas, fiber from couscous, and essential vitamins from herbs, this salad is a well-rounded meal.
  • Versatile Base: Whether as a main dish or a side, this couscous salad adapts beautifully to your meal plans.
  • Meal Prep Friendly: Make it ahead of time for a quick grab-and-go option during the week.

Ingredients Breakdown

Gathering the right ingredients is key to a fantastic salad. Here’s what you’ll need:

  • 2 tablespoons vegan butter: Adds richness and flavor; can substitute with olive oil for a lighter option.
  • 8 ounces pearl couscous: This larger pasta version of couscous provides a delightful chewiness; regular couscous can be used but will require less cooking time.
  • 1 cup cherry tomatoes: Sweet and juicy, they enhance the salad’s freshness; feel free to substitute with diced bell peppers for a different crunch.
  • 2 1/2 cups broth: Using vegan chicken broth adds depth; vegetable broth works just as well.
  • 1 small red onion (diced): Adds a sharpness that balances the salad; shallots can be a milder alternative.
  • 1 15-ounce can chickpeas: A fantastic source of protein; you can also use black beans or lentils for variety.
  • 1/4 cup grated vegan parmesan: Provides a cheesy element; nutritional yeast is an excellent dairy-free substitute.
  • 1-2 cloves garlic (finely minced): Infuses the salad with aromatic flavor; roasted garlic can add a sweeter touch.
  • 1/3 cup fresh herbs: A mix of parsley, basil, and mint brightens the dish; use whatever fresh herbs you have on hand.
  • 1/4 cup olive oil: Essential for dressing; avocado oil can also work here.
  • 1 lemon (juiced): The star of the dish, its acidity balances the flavors; lime juice can be used for a twist.
  • 1 tablespoon dijon mustard: Adds a tangy kick; feel free to omit if you prefer a simpler dressing.
  • Salt & pepper (to taste): Essential for seasoning; adjust according to your preference.

How to Make Your Zesty Lemon Herb Couscous Salad

A side view showing a bowl of Lemon Herb Couscous Salad, featuring bright colors and textures.

Ready to create this culinary masterpiece? Follow these steps:

  1. Melt the vegan butter in a skillet over medium heat. Add the pearl couscous and toast for 2-3 minutes, stirring frequently. This step enhances the nutty flavor of the couscous!
  2. Pour in the cherry tomatoes and broth, then bring to a boil. Cover, reduce heat, and simmer for 12-15 minutes, or until the liquid is absorbed and the couscous is tender.
  3. Transfer the couscous and tomatoes to a bowl and allow to cool for about 30 minutes.
  4. Once cooled, add the chickpeas, red onion, garlic, vegan parmesan, herbs, olive oil, lemon juice, and dijon mustard. Toss to combine everything beautifully.
  5. Season with salt and pepper to taste. Feel free to adjust the lemon juice for extra zing!
  6. Serve immediately or refrigerate to chill for a refreshing side dish. This salad can be enjoyed right away or after it’s had some time to marinate in the fridge—flavors deepen and meld over time!

Pro Tips for Perfecting Your Salad

Take your salad to the next level with these expert insights:

  • Chill Out: Allowing the salad to chill enhances the flavors and gives a refreshing taste that’s perfect for hot days.
  • Customize Your Herbs: Experiment with different combinations of fresh herbs to find your favorite mix.
  • Toasting Couscous: Always toast the couscous before adding liquid; it enhances the flavor and texture.
  • Don’t Skip the Dressing: The dressing is crucial; it ties all the ingredients together and elevates the dish.
  • Make It Your Own: Feel free to add veggies like cucumbers or radishes for an extra crunch!
  • Be Mindful of Salt: Since broth can be salty, adjust your seasoning gradually to avoid over-salting.
  • Batch Cooking: Make a larger batch and store it for up to 5 days in the fridge for easy meals!
  • Garnish with Extra Herbs: Fresh herbs sprinkled on top right before serving add a beautiful touch and enhance the aroma.

Common Mistakes and Troubleshooting

Even the best chefs make mistakes! Here’s how to avoid common pitfalls:

  • Overcooking Couscous: Keep an eye on cooking time; overcooked couscous can become mushy.
  • Too Much Dressing: Start with less dressing and add more as needed; it’s easier to add than to take away!
  • Skipping the Cooling Step: Allowing the couscous to cool prevents wilting of the herbs and keeps the textures intact.
  • Not Tasting: Always taste and adjust seasoning before serving; what might seem fine during prep can be different when served.

Delicious Variations to Try

Want to switch things up? Here are some fun variations:

  • Greek Twist: Add feta cheese, olives, and a splash of red wine vinegar for a Mediterranean flair.
  • Spicy Kick: Include diced jalapeños or a sprinkle of red pepper flakes for a heat boost.
  • Protein-Packed: Toss in grilled chicken or shrimp for a heartier meal.
  • Fruity Addition: Mix in diced mango or pomegranate seeds for a sweet contrast to the savory elements.

Storage and Make-Ahead Instructions

This salad stores beautifully! Here’s how to keep it fresh:

  • Refrigerate in an airtight container for up to 5 days.
  • For make-ahead meals, prepare the couscous and dressing separately, then combine just before serving.
  • To revive leftovers, add a splash of olive oil and lemon juice before enjoying.

FAQ: Your Questions Answered

Curious minds want to know! Here are answers to frequently asked questions:

  • Can I make this salad gluten-free? Absolutely! Use gluten-free couscous or quinoa as a substitute.
  • How can I add more protein? Chickpeas are great, but you can also add nuts, seeds, or cooked lentils.
  • What can I serve this salad with? It pairs well with grilled veggies, tofu, or as a side for a protein main dish.
  • Is it suitable for meal prep? Yes, it’s perfect for meal prep and can be stored for up to a week!
  • Can I use dried herbs instead of fresh? While fresh is ideal, you can use dried herbs; just use less since they are more potent.
  • Can I freeze this salad? Freezing is not recommended as the texture may change upon thawing.
  • How do I make it vegan? This recipe is already vegan! Just ensure all ingredients, like the broth and parmesan, are vegan-friendly.
  • What’s the best way to serve it? Serve chilled or at room temperature, garnished with extra herbs for a visually appealing touch.

Nutrition Tips and Dietary Adaptations

This salad is naturally nutritious, but here are a few tips to enhance its health benefits:

  • Increase Fiber: Add more veggies like spinach or kale for added fiber and nutrients.
  • Healthy Fats: Incorporate avocado slices for creaminess and healthy fats.
  • Lower Carb Option: Substitute couscous with cauliflower rice for a low-carb alternative.

Recommended Equipment

To make your cooking experience seamless, here’s a list of handy tools:

  • Skillet: A non-stick skillet is ideal for toasting couscous without sticking.
  • Mixing Bowl: A large bowl for combining all ingredients easily.
  • Measuring Cups and Spoons: Ensure accurate ingredient measurements for perfect results.
  • Sharp Knife: For dicing vegetables and herbs with ease.

Serving Suggestions

Now that your Zesty Lemon Herb Couscous Salad is ready, here’s how to serve it:

  • Garnish with additional fresh herbs and a lemon wedge for presentation.
  • Serve alongside grilled meats, roasted veggies, or as part of a picnic spread.
  • Enjoy it as a light lunch on its own or pair with a refreshing beverage like iced tea or lemonade.

Are you excited to bring this vibrant dish to your kitchen? With its bold flavors, nutritious ingredients, and versatile nature, the Zesty Lemon Herb Couscous Salad is sure to become a favorite. Get cooking, and let your taste buds celebrate!

Lemon Herb Couscous Salad

Prep Time 10 minutes
Cook Time 15 minutes
Total Time 25 minutes
Servings 4 servings
Calories 350
A fresh and vibrant vegan couscous salad packed with herbs, chickpeas, and a zesty lemon dressing.

Ingredients

Main

  • 8 oz pearl couscous (see notes)
  • 2 tablespoons vegan butter
  • 1 cup cherry tomatoes
  • 2 1/2 cups broth (vegan chicken broth)
  • 1 small red onion (diced)
  • 1 15-ounce can chickpeas (drained & rinsed)
  • 1/4 cup grated vegan parmesan (Follow Your Heart)
  • 1-2 cloves garlic (finely minced)
  • 1/3 cup fresh herbs (parsley, basil & mint)
  • 1/4 cup olive oil
  • 1 lemon lemon juice
  • 1 tablespoon dijon mustard
  • to taste salt & pepper

Instructions 

  • Melt vegan butter and toast couscous for 2-3 minutes.
  • Add tomatoes and broth, bring to a boil, then simmer for 12-15 minutes until liquid is absorbed.
  • Cool the couscous mixture for 30 minutes.
  • Mix in remaining ingredients, toss, and adjust seasoning as needed.
  • Serve immediately or chill in the fridge.

Notes

Use fresh herbs for the best flavor and adjust seasoning to taste.
Calories: 350kcal
Cost: $12
Course: Salad
Cuisine: Mediterranean
Keyword: Couscous, Herbs, Vegan

Welcome to Your New Favorite Salad!

Are you ready to transform your mealtime with a dish that’s both vibrant and nutritious? Look no further than this Chickpea & Tomato Fusion salad! Packed with protein from the chickpeas and bursting with the fresh flavors of cherry tomatoes, this salad is not just a meal; it’s an experience. Whether you need a quick lunch or a colorful side dish for dinner, this recipe is the perfect blend of health and flavor. In just a few simple steps, you’ll create a masterpiece that dazzles both the eyes and the taste buds!

Why You’ll Love This Recipe

  • Quick and Easy: With only a handful of ingredients and minimal prep time, you can whip this salad up in under 30 minutes!
  • Plant-Powered Goodness: Rich in protein and fiber, chickpeas are a fantastic addition to your diet, making this salad both filling and nourishing.
  • Flavor Explosion: The combination of spices and fresh vegetables creates a mouthwatering burst of flavors that will keep you coming back for more.
  • Customizable: Feel free to mix and match ingredients based on what you have on hand or your personal preferences!
  • Perfect for Meal Prep: This salad stores well, making it an excellent option for healthy lunches throughout the week.

Ingredient Breakdown: What You’ll Need

Gather the following ingredients for your Chickpea & Tomato Fusion salad:

  • 2 x 400g cans of chickpeas, drained and rinsed
  • 400g cherry tomatoes
  • 3 tbsp olive oil
  • 1 tsp smoked paprika
  • 1/2 tsp ground cumin
  • 1/4 tsp garlic powder
  • 1/4 tsp chili flakes (optional)
  • Salt and freshly ground black pepper, to taste
  • 200g unsweetened plant-based yoghurt (e.g., coconut or soy)
  • 1 tbsp lemon juice
  • 1 small red onion, thinly sliced
  • 2 tbsp fresh parsley, chopped
  • Extra virgin olive oil, for drizzling
  • Chili flakes, for sprinkling (optional)

Substitutions and Variations

Close-up of a colorful vegan salad with chickpeas, tomatoes, and fresh herbs.

If you’re missing an ingredient or want to switch it up, here are some tasty alternatives:

  • Chickpeas: You can substitute with black beans or kidney beans for a different flavor profile.
  • Cherry Tomatoes: Diced regular tomatoes or grape tomatoes work as well!
  • Olive Oil: Avocado oil or sesame oil can be used for a unique taste.
  • Yoghurt: Try a cashew-based yoghurt for a creamier texture, or skip it altogether for a lighter salad.

The Cooking Process: Step-by-Step Instructions

Let’s get cooking! Follow these simple steps to create your Chickpea & Tomato Fusion salad:

  1. Preheat your oven to 200°C (180°C fan/gas mark 6). Line a large baking tray with parchment paper.
  2. Place the chickpeas and cherry tomatoes on the tray. Drizzle with olive oil, then sprinkle with smoked paprika, ground cumin, garlic powder, chili flakes (if using), salt, and black pepper. Toss everything together until well coated. Spread the mixture out evenly on the tray.
  3. Roast in the oven for 15-20 minutes, shaking the tray halfway through, until the tomatoes are blistered and slightly caramelized, and the chickpeas are lightly crispy.
  4. While the chickpeas and tomatoes roast, prepare the yoghurt base. In a small bowl, whisk together the plant-based yoghurt, lemon juice, garlic powder, and a pinch of salt. Spread the yoghurt evenly across the base of a large serving bowl or platter.
  5. Once the chickpeas and tomatoes are ready, spoon them over the yoghurt base, arranging them to create a vibrant presentation.
  6. Garnish with thinly sliced red onion, a sprinkle of fresh parsley, and a generous grind of black pepper. Drizzle with extra virgin olive oil and add a pinch of chili flakes if desired.
  7. Serve immediately as a main or side dish, paired with warm pita bread or a fresh green salad.

Pro Tips for the Perfect Salad

  • Quality Ingredients: Use the freshest vegetables and high-quality olive oil for the best flavor.
  • Roasting Time: Keep an eye on the chickpeas and tomatoes to avoid burning; you want them crispy, not charred!
  • Make it Ahead: You can roast the chickpeas and tomatoes in advance to save time during meal prep.
  • Spice It Up: Experiment with different spices—cumin, coriander, or even a pinch of cinnamon for a unique twist!
  • Garnish Boldly: Don’t skip the garnish—fresh herbs and a drizzle of olive oil make a huge difference in presentation and flavor.

Avoiding Common Mistakes

Here are some common pitfalls to avoid while making your salad:

  • Too Much Oil: While olive oil adds flavor, too much can make your salad greasy. Aim for just enough to coat your ingredients.
  • Overcooking: Keep an eye on the oven; roasted chickpeas should be crunchy, not burned.
  • Skipping Seasoning: Season at every stage—before roasting, in the yoghurt, and as a final touch. Trust me, it makes a world of difference!
  • Storing Leftovers: Store roasted chickpeas and salad separately to maintain crunch; otherwise, they may become soggy.

Storage and Make-Ahead Instructions

This salad is perfect for meal prep! Here’s how to store it:

  • Refrigerator: Store any leftovers in an airtight container in the fridge for up to 3 days. Keep the chickpeas and tomatoes separate from the yoghurt to maintain texture.
  • Freezer: Not recommended for freezing as the texture may change. However, the roasted chickpeas can be made ahead and stored in the fridge.
  • Make-Ahead: You can prepare the roasted chickpeas and tomatoes a day in advance. Just reheat them in the oven for a few minutes before serving.

Frequently Asked Questions

  • Can I make this salad gluten-free? Yes! All the ingredients listed are gluten-free!
  • Is this salad vegan? Absolutely! It’s 100% plant-based.
  • How can I make this salad more filling? Add some quinoa or a handful of nuts for extra protein and texture.
  • Can I use canned chickpeas? Yes! Canned chickpeas are perfect for this recipe—just rinse and drain them before use.
  • What can I serve this salad with? It pairs beautifully with pita bread, grilled vegetables, or even as a topping for tacos!
  • How long does this salad keep? The salad will last about 3 days in the fridge if stored properly, but it’s best enjoyed fresh.
  • Can I use different herbs? Definitely! Feel free to substitute the parsley with cilantro or mint for a different flavor.
  • What if I don’t have smoked paprika? Regular paprika or cayenne pepper can work as substitutes, but the flavor will vary slightly.

Nutritional Benefits

This Chickpea & Tomato Fusion salad is not only delicious but also packed with nutritional benefits:

  • High in Protein: Chickpeas provide a hearty dose of protein, essential for muscle repair and growth.
  • Rich in Fiber: Aids digestion and keeps you feeling full longer.
  • Vitamins and Minerals: Cherry tomatoes are an excellent source of vitamins C and K, while red onions provide antioxidants.
  • Healthy Fats: Olive oil is rich in monounsaturated fats that support heart health.

Essential Equipment for This Recipe

  • Baking Tray: A large, sturdy baking tray is essential for roasting your ingredients evenly.
  • Parchment Paper: Prevents sticking and makes cleanup a breeze.
  • Mixing Bowls: Use a couple of mixing bowls for tossing ingredients and preparing the yoghurt.
  • Whisk: For combining the yoghurt and spices smoothly.

Serving Suggestions

To elevate your meal, consider pairing your Chickpea & Tomato Fusion salad with:

  • Warm Pita Bread: The perfect vehicle for scooping up your vibrant salad.
  • Grilled Veggies: Add a side of grilled zucchini or eggplant for a Mediterranean feast.
  • Fresh Green Salad: Complement with a light side salad for added crunch.
  • Protein Boost: Top with grilled chicken, fish, or tofu for extra protein.

Conclusion: Celebrate Healthy Eating!

This Chickpea & Tomato Fusion salad is more than just a dish; it’s a celebration of color, flavor, and health. By combining simple ingredients and spices, you’ve created a meal that’s not only delightful but also nourishing. Enjoy every bite knowing that you’re fueling your body with the best. So roll up your sleeves, get into the kitchen, and let’s make healthy eating fun!

Roasted Chickpea & Tomato Vegan Salad

Prep Time 10 minutes
Cook Time 20 minutes
Total Time 30 minutes
Servings 4 servings
Calories 350
A vibrant and nutritious vegan salad featuring roasted chickpeas and cherry tomatoes, served over a creamy plant-based yoghurt base.

Ingredients

Canned Goods

  • 800 g canned chickpeas, drained and rinsed
  • 400 g cherry tomatoes

Seasonings & Oils

  • 3 tbsp olive oil
  • 1 tsp smoked paprika
  • 0.5 tsp ground cumin
  • 0.25 tsp garlic powder
  • 0.25 tsp chilli flakes (optional)

Yoghurt Base

  • 200 g unsweetened plant-based yoghurt
  • 1 tbsp lemon juice
  • 0.25 tsp garlic powder
  • Pinch salt

Additional Toppings

  • 1 small red onion, thinly sliced
  • 2 tbsp fresh parsley, chopped
  • to taste black pepper, freshly ground
  • for drizzling extra virgin olive oil
  • for sprinkling chilli flakes (optional)

Instructions 

  • Preheat oven to 200°C. Line a baking tray with parchment.
  • Place chickpeas and cherry tomatoes on tray, toss with olive oil and spices, then roast for 15-20 minutes.
  • Whisk yoghurt, lemon juice, garlic powder, and salt; spread over serving platter.
  • Top with roasted chickpeas, tomatoes, sliced red onion, parsley, and black pepper. Drizzle with olive oil and sprinkle chilli flakes if desired.
  • Serve immediately as a main or side dish.

Notes

For extra flavor, add a squeeze of lemon or a dash of hot sauce.
Calories: 350kcal
Cost: $15
Course: Main
Cuisine: Vegan
Keyword: Chickpeas