Author

Ryan

Browsing

Get Ready to Experience Flavor: The Thai Peanut Chicken Salad That Dances on Your Taste Buds!

Welcome to the vibrant world of healthy eating! If you’re seeking a dish that’s not just nutritious but also bursting with flavor, look no further than this Thai Peanut Chicken Salad. This salad is a colorful celebration of fresh ingredients, creamy peanut dressing, and protein-packed goodness. Every bite is a delightful dance of taste, making it the perfect meal for busy weeknights or a fun weekend gathering!

In this article, we’ll explore everything you need to know about making this delectable salad, from the ingredients and preparation steps to expert tips and variations that will keep your taste buds tingling. Plus, we’ll delve into the health benefits and provide storage tips to ensure your salad stays fresh and delicious. Let’s dive in!

Why You’ll Love This Recipe

  • Quick and easy: This Thai Peanut Chicken Salad comes together in under 30 minutes, making it a fantastic option for a busy weeknight meal.
  • Bold flavors: With a zesty peanut dressing packed with spices, every bite is a burst of flavor that will keep you coming back for more.
  • Nutritious and satisfying: Loaded with lean protein, fresh veggies, and healthy fats, this salad is as filling as it is nutritious.
  • Great for meal prep: Make a big batch and enjoy it throughout the week—perfect for lunch or a light dinner!
  • Customizable: Whether you’re a meat lover or prefer plant-based options, this salad can be easily tailored to suit your dietary needs.

Ingredients You’ll Need

Here’s a comprehensive breakdown of the ingredients for your Thai Peanut Chicken Salad. Make sure you have these on hand to create a dish that’s not only healthy but also delicious!

  • 2 cups cooked chicken (shredded): This protein powerhouse forms the base of your salad. Use rotisserie chicken for convenience or cook your own for a fresher taste.
  • 2 cups cabbage (shredded): A mix of green and purple cabbage adds a satisfying crunch and vibrant color.
  • 1 cup carrots (shredded): Sweet and crunchy, carrots enhance the texture and flavor profile of the salad.
  • ½ cup peanuts (chopped): These not only add a delightful crunch but are also packed with healthy fats and protein.
  • ½ cup fresh cilantro (chopped): A burst of freshness that complements the bold flavors of the dressing.
  • ¼ cup green onions (chopped): Adding a mild bite, green onions brighten up the dish.
  • 2 Thai chili peppers or jalapenos (optional): For those who crave a little heat, these peppers will spice things up!
  • 1 lime (sliced into wedges): Fresh lime juice adds a zesty kick that enhances the overall flavor.

How to Make the Creamy Peanut Dressing

A side angle photo of a delicious Thai Peanut Chicken Salad with chopped peanuts and fresh herbs.

The dressing is the star of this salad, bringing all the ingredients together with its rich and creamy texture. Here’s how to whip it up:

  • 2 tablespoons creamy peanut butter: Choose natural peanut butter for a healthier option without added sugars.
  • 1 tablespoon soy sauce: This adds depth and umami flavor to the dressing.
  • ½ tablespoon sesame oil: A hint of nuttiness that elevates the dressing to new heights.
  • 1 teaspoon rice vinegar: For a touch of acidity that balances the richness of the peanut butter.
  • 1 teaspoon maple syrup (or honey): A natural sweetener that adds a lovely contrast to the savory elements.
  • 1 teaspoon chili garlic sauce: This adds a kick of flavor and spice to the dressing.
  • ½ teaspoon fresh lime juice: A splash of freshness to brighten up the dressing.
  • 1 tablespoon water: To thin out the dressing to your desired consistency.

Step-by-Step Instructions for the Salad

Now that you have all your ingredients ready, let’s dive into the preparation process!

Step 1: Prepare the Peanut Dressing

Combine all the dressing ingredients in a blender or food processor. Blend until smooth and creamy. Taste and adjust the seasoning, adding more lime juice or sweetener as desired.

Step 2: Toss the Fresh Ingredients

In a large mixing bowl, combine the shredded chicken, cabbage, carrots, chopped peanuts, cilantro, green onions, and optional chili peppers. Toss gently to mix everything evenly.

Step 3: Combine and Dress the Salad

Pour the peanut dressing over the salad mixture. Toss thoroughly to ensure that every component is coated in the dressing. Serve chilled or at room temperature, garnished with lime wedges on the side.

Pro Tips for the Perfect Salad

  • Balance flavors: If you find the dressing too sweet, add a bit more soy sauce or lime juice to balance it out.
  • Texture matters: For added crunch, toss in some crispy fried wontons or chow mein noodles right before serving.
  • Make it ahead: Prepare the salad ingredients and dressing separately, then combine just before serving for maximum freshness.
  • Vegan option: Substitute chicken with shredded tofu or tempeh and use maple syrup instead of honey for a vegan-friendly version.
  • Spice it up: Feel free to add more chili garlic sauce if you enjoy a spicier dressing!
  • Fresh herbs: Experiment with adding fresh mint or basil for an aromatic twist.
  • Serving size: This recipe serves 4 as a main dish; adjust the quantities if you’re feeding a crowd.
  • Storage tips: Store leftovers in an airtight container in the fridge for up to 3 days. The salad may lose some crunch but will still be flavorful!

Common Mistakes and Troubleshooting

Even the best cooks make mistakes! Here are some common pitfalls and how to avoid them:

  • Overdressing: Avoid soggy salad by starting with half the dressing and adding more as needed.
  • Using dry chicken: Chicken should be moist and flavorful. If it’s leftover, make sure to warm it slightly before adding to the salad.
  • Too much heat: If the salad ends up too spicy, balance it with a touch of honey or additional peanut butter.
  • Missing textures: Add nuts or seeds for crunch if you find your salad lacking in texture.

Variations to Keep Things Exciting

Want to switch it up? Here are some delicious variations of the Thai Peanut Chicken Salad:

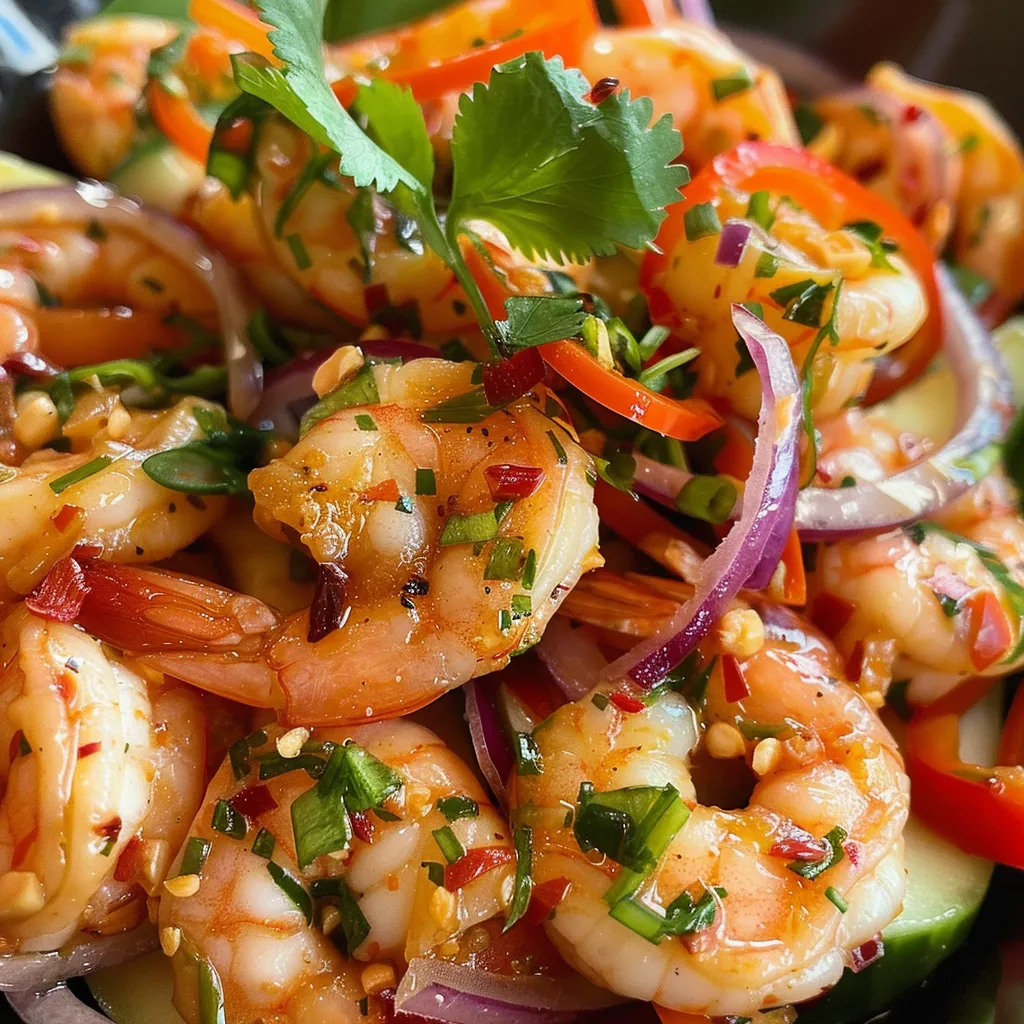
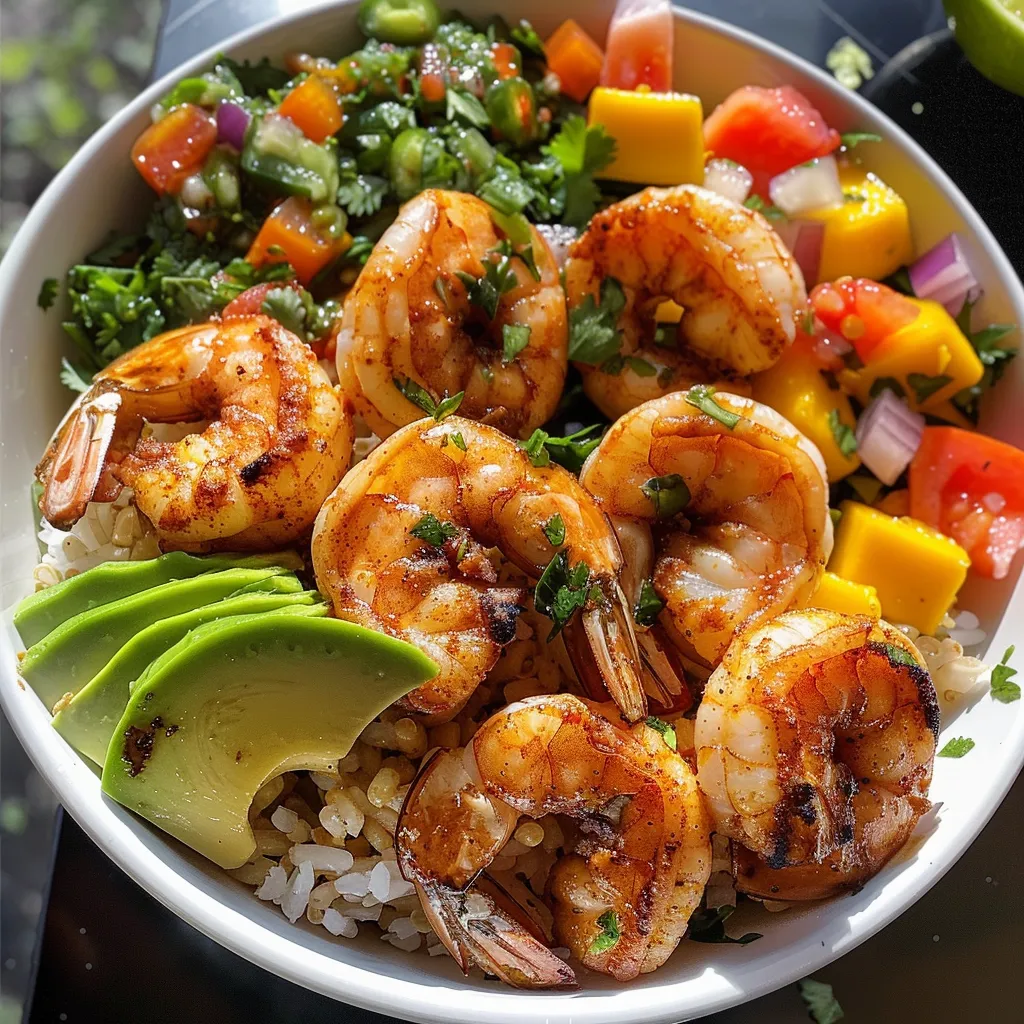
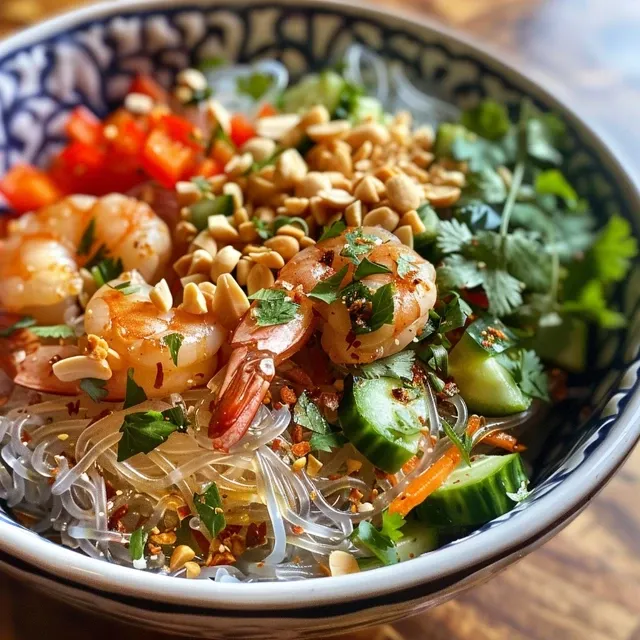
  • Thai Peanut Shrimp Salad: Swap chicken for shrimp, cooked until just tender. The sweet and spicy dressing pairs beautifully with seafood.
  • Asian Tofu Salad: For a plant-based option, replace chicken with grilled tofu and add in edamame for extra protein.
  • Crunchy Thai Quinoa Salad: Mix in cooked quinoa for added texture and nutrition, making it a more filling meal.
  • Thai Chicken Lettuce Wraps: Serve the salad mixture in lettuce cups for a fun, low-carb twist!

Storage and Make-Ahead Instructions

This salad is perfect for meal prepping! Here’s how to store it:

  • Refrigeration: Store the salad and dressing separately in airtight containers. The salad can last up to 3 days in the fridge, while the dressing will stay fresh for about a week.
  • Make-ahead tips: Chop veggies and cook the chicken in advance. Assemble the salad just before serving to keep it fresh and crisp.

Nutrition Tips and Dietary Adaptations

This salad is not only delicious but also packed with nutrients. Here’s how to make it fit various dietary preferences:

  • Low-carb: Use shredded lettuce instead of cabbage for a lower-carb option.
  • Paleo-friendly: Ensure to use a compliant soy sauce alternative, like coconut aminos, and skip the maple syrup.
  • Gluten-free: Opt for gluten-free soy sauce and check your peanut butter for gluten-free certification.
  • Keto-friendly: Reduce the amount of carrots and use more leafy greens to lower the carb count.

Equipment Recommendations

To make this Thai Peanut Chicken Salad, you’ll need a few essential tools:

  • Blender or Food Processor: For creating the creamy peanut dressing smoothly.
  • Large Mixing Bowl: To combine all the fresh ingredients without making a mess.
  • Cutting Board and Knife: For chopping vegetables and herbs efficiently.

Serving Suggestions

Here are some fun ways to serve your Thai Peanut Chicken Salad:

  • As a main dish: Serve it on a bed of mixed greens for a hearty, healthy meal.
  • As a side dish: Pair it with grilled fish or chicken for a delicious complement.
  • In lettuce wraps: Spoon the salad into crisp lettuce leaves for a fun finger food option.
  • With rice noodles: Mix in some cooked rice noodles for added heartiness and texture.

Frequently Asked Questions (FAQs)

  • Can I use different protein sources? Absolutely! This salad works well with grilled shrimp, tofu, or even chickpeas for a vegetarian option.
  • How can I make this salad vegan? Substitute chicken with tofu and use maple syrup instead of honey.
  • What if I don’t have peanut butter? Almond butter or sunflower seed butter can be great alternatives.
  • Can I freeze this salad? It’s best enjoyed fresh, but you can freeze the dressing separately. Just remember that freezing veggies may alter their texture.
  • How spicy is the salad? The heat level depends on the type and amount of chili you use. Adjust according to your taste!
  • What’s the best way to store leftovers? Store the salad and dressing separately in airtight containers in the fridge for optimal freshness.
  • Can I add more vegetables? Definitely! Feel free to toss in bell peppers, snap peas, or cucumbers for extra crunch.
  • What’s the serving size for this recipe? This recipe serves about 4 as a main dish, but you can easily scale it up for larger gatherings.

In conclusion, this Thai Peanut Chicken Salad is not just a meal; it’s an experience! With its vibrant colors, bold flavors, and nutritious ingredients, it’s sure to become a favorite in your home. Whether served as a main course or a delightful side dish, it embodies everything I believe in about healthy cooking—fun, flavor, and creativity. So grab your ingredients, unleash your inner chef, and let’s make some magic in the kitchen!

Thai Peanut Chicken Salad Recipe

Prep Time 15 minutes
Total Time 15 minutes
Servings 4 servings
Calories 350
A vibrant and flavorful salad combining shredded chicken, fresh vegetables, and a creamy peanut dressing, perfect for a quick and healthy meal.

Ingredients

Protein

  • 2 cups cooked chicken (shredded)

Vegetables

  • 2 cups cabbage (shredded)
  • 1 cup carrots (shredded)

Nuts & Herbs

  • ½ cup peanuts (chopped)
  • ½ cup fresh cilantro (chopped)
  • ¼ cup green onions (chopped)

Spice & Citrus

  • 2 pieces Thai chili peppers or jalapenos (optional) (for spice)
  • 1 piece lime (sliced into wedges)

Dressing

  • 2 tablespoons creamy peanut butter
  • 1 tablespoon soy sauce
  • ½ tablespoon sesame oil
  • 1 teaspoon rice vinegar
  • 1 teaspoon maple syrup (or honey)
  • 1 teaspoon chili garlic sauce
  • ½ teaspoon fresh lime juice
  • 1 tablespoon water

Instructions 

  • Blend peanut dressing ingredients until smooth.
  • Combine chicken, vegetables, peanuts, cilantro, green onions, and chili peppers in a large bowl.
  • Pour dressing over salad and toss to coat. Serve with lime wedges.

Notes

Adjust spice level with chili peppers as desired.
Calories: 350kcal
Cost: $15
Course: Salad
Cuisine: Thai
Keyword: Chicken

Unleash Flavor: Dive Into the Zesty Thai Shrimp Salad Adventure!

Welcome to a culinary escapade that’s not just a meal, but a vibrant celebration of flavors! Our Spicy Thai Shrimp Salad is a delightful blend of fresh ingredients and zesty spices that will dance on your taste buds. It’s a dynamic dish that showcases the beauty of healthy eating, proving that nutritious can be incredibly delicious! Whether it’s a midweek dinner or a weekend gathering, this salad is your ticket to a flavorful experience that’s simple to create and fun to devour!

Why You’ll Love This Recipe

This Spicy Thai Shrimp Salad is not just about taste; it’s about an experience! Here are five reasons why this recipe will become a favorite:

  • Flavor Explosion: The combination of zesty lime juice, spicy cashew dressing, and fresh herbs creates a vibrant flavor profile that’s anything but boring.
  • Quick and Easy: With minimal prep time and simple ingredients, you can whip up this salad in just 30 minutes—perfect for busy weeknights!
  • Nutritious Ingredients: Packed with protein-rich shrimp, crunchy veggies, and healthy fats from cashews, this salad provides a nourishing meal that fuels your body.
  • Versatile Dish: Customize it with your favorite toppings or proteins, making it suitable for any palate or dietary preference.
  • Make Ahead Friendly: Prep this salad in advance for a quick grab-and-go lunch or dinner, saving you time while keeping your meals exciting!

Ingredient Breakdown

Let’s get into the nitty-gritty of what makes this salad so special! Here’s a detailed breakdown of the ingredients and some fantastic substitutions:

  • Shrimp: Use large, peeled, and deveined shrimp for the best texture. You can also substitute with cooked chicken or tofu for a different protein source.
  • Cashews: Whole roasted, salted cashews add a wonderful crunch and nutty flavor. If nuts are an issue, try sunflower seeds or pumpkin seeds instead.
  • Fresh Herbs: Cilantro and basil bring a burst of freshness. If you’re not a fan of cilantro, parsley is a great alternative.
  • Veggies: Cabbage, arugula, romaine, corn, cucumber, and carrots provide crunch and nutrients. Feel free to mix in other favorites like bell peppers or snap peas!
  • Spices: Red pepper flakes, turmeric, and chili powder add layers of flavor and heat. Adjust these to suit your taste!
  • Dressing: The spicy cashew dressing is what truly elevates this salad. Don’t skip it! If you want a lighter option, you can use a yogurt-based dressing or a simple vinaigrette.

Pro Tips for the Perfect Salad

Juicy Spicy Thai Shrimp Salad displayed side view, showcasing colorful ingredients on a plate.

Before you dive into making this delicious dish, check out these expert tips to elevate your cooking game:

  • Fresh Ingredients: Always opt for fresh herbs and vegetables. They truly enhance the flavor and presentation of your salad.
  • Marinate the Shrimp: Let your shrimp marinate in the spices for 15-20 minutes before cooking to deepen the flavors.
  • Adjust the Heat: If you prefer a milder taste, reduce the amount of red pepper flakes or replace them with sweet chili sauce.
  • Mix Your Greens: A combination of different greens not only adds flavor but also visual appeal!
  • Make Extra Dressing: This spicy cashew dressing is so good, you’ll want it on everything! Make a double batch to use throughout the week.
  • Serve it Cold: For a refreshing twist, chill the salad for about 30 minutes before serving to allow the flavors to meld.
  • Presentation Matters: Layer your salad ingredients in a clear bowl to showcase the colorful veggies and make the dish more inviting.
  • Texture is Key: Include a range of textures—crunchy, creamy, and tender—to keep each bite interesting!

Avoid Common Mistakes

Even the best chefs encounter hiccups! Here’s how to steer clear of common pitfalls:

  • Overcooking the Shrimp: Shrimp cooks quickly; aim for just until it’s pink and opaque to avoid rubbery bites.
  • Skipping the Dressing: The dressing is what ties this salad together. Don’t skip it, and make sure to coat the salad evenly.
  • Using Dried Herbs: Fresh herbs significantly enhance flavor; dried ones won’t provide the same impact.
  • Not Balancing Flavors: Taste your dressing as you go! Adjust sweetness, acidity, and spice to your liking.

Creative Variations

Feeling adventurous? Here are some fun variations to switch things up:

  • Thai Shrimp Salad with Mango: Add diced fresh mango for a sweet and tropical twist.
  • Spicy Shrimp and Quinoa Bowl: Serve the salad over a bed of quinoa for added protein and texture.
  • Coconut Shrimp Salad: Toss in shredded coconut for a tropical flavor boost.
  • Grilled Shrimp Version: Grill the shrimp for a smoky flavor that takes this salad to the next level.

Storage and Make-Ahead Instructions

This salad is a great make-ahead option! Here’s how to store it:

  • In the Refrigerator: Store the salad in an airtight container for up to 2 days. Keep the dressing separate until you’re ready to serve to maintain freshness.
  • Freezing: It’s best not to freeze the salad due to the texture of the shrimp and fresh veggies, but you can freeze the dressing for up to a month.

Frequently Asked Questions

Got questions? We’ve got answers! Here are some common inquiries about this Spicy Thai Shrimp Salad:

  • Can I use frozen shrimp? Yes! Just ensure they are fully thawed and patted dry before cooking.
  • How spicy is this salad? It’s customizable! Adjust the amount of red pepper flakes to match your heat tolerance.
  • Can I meal prep this salad? Absolutely! Just keep the dressing separate until you’re ready to eat.
  • What can I serve with this salad? It pairs beautifully with jasmine rice or as a side to grilled meats.
  • How do I add more protein? Consider adding cooked chicken, tofu, or even boiled eggs for extra protein.
  • Is this salad gluten-free? Yes! As long as you use gluten-free soy sauce or tamari in the dressing.
  • Can I make this vegan? Yes! Use tofu or tempeh instead of shrimp and a vegan-friendly dressing.
  • What’s the best way to serve this salad? Serve it chilled or at room temperature for the best flavors!

Nutritional Tips and Dietary Adaptations

This salad is packed with nutritional benefits, but here are some ways to adapt it further:

  • Low-Carb Adaptation: Skip the corn and use more leafy greens to reduce carbs.
  • Higher Fiber Option: Add chickpeas or black beans to increase fiber content.
  • Heart-Healthy Choice: The olive oil and nuts provide healthy fats; just keep portion sizes in mind!

Essential Equipment Recommendations

To make this salad, you’ll need a few key kitchen tools:

  • Sharp Knife: For chopping veggies and shrimp with ease.
  • Cutting Board: Essential for food prep and keeping your workspace tidy.
  • Mixing Bowl: A large bowl to combine all your ingredients and dressings.
  • Whisk: Perfect for blending the dressing to achieve a smooth consistency.

Serving Suggestions

Ready to serve your Spicy Thai Shrimp Salad? Here are some fantastic serving ideas:

  • On a Bed of Greens: Serve the salad atop a mix of arugula and romaine for added crunch.
  • With Rice or Quinoa: For a heartier meal, serve alongside fluffy jasmine rice or protein-packed quinoa.
  • As a Wrap: Use large lettuce leaves to wrap the salad for a fun, handheld option.

In conclusion, this Spicy Thai Shrimp Salad isn’t just a meal; it’s a celebration of flavor and a testament to the fact that healthy eating can be an exciting adventure! So grab your ingredients and let’s get cooking! You’ll be amazed at how a few simple components can come together to create something so delicious and memorable. Happy cooking!

Spicy Thai Shrimp Salad

Prep Time 15 minutes
Cook Time 5 minutes
Total Time 20 minutes
Servings 4 servings
Calories 350
A vibrant and spicy Thai-inspired shrimp salad packed with fresh vegetables and herbs, perfect for a light and flavorful meal.

Ingredients

Dressing

  • 1 tablespoon olive oil
  • 3 tablespoons lime juice
  • 0.25 cup whole roasted (salted cashews)
  • 0.25 teaspoon red pepper flakes
  • 2 teaspoons honey
  • 1 piece 2-inch piece fresh ginger, roughly chopped
  • 1 tablespoon unseasoned rice vinegar
  • 0.25 cup cilantro
  • 1 clove garlic (roughly chopped)
  • 0.25 cup roughly chopped white onion
  • 0.5 teaspoon garlic powder
  • 0.5 teaspoon kosher salt
  • to taste Freshly ground black pepper
  • 0.5 pound large peeled (deveined tail-off shrimp)
  • 1 teaspoon garlic powder
  • 0.25 teaspoon ground ginger
  • 0.125 teaspoon turmeric
  • 0.125 teaspoon chili powder
  • to taste Freshly ground black pepper
  • 1 teaspoon toasted sesame oil
  • 1 cup shredded purple cabbage
  • 1.5 cups packed baby arugula
  • 1.5 cups packed chopped romaine lettuce
  • 1 small corn cob (kernels removed)
  • 0.5 medium cucumber (peeled, seeded and diced)
  • 0.5 cup shredded carrots
  • 2 tablespoons chopped basil
  • 2 tablespoons chopped cilantro
  • as needed Lime wedges (for serving)

Instructions 

  • Whisk together olive oil, lime juice, honey, rice vinegar, ginger, garlic, and red pepper flakes to make the dressing.
  • Cook shrimp in a skillet with garlic powder, ground ginger, turmeric, chili powder, and sesame oil until pink and cooked through, about 3-4 minutes.
  • In a large bowl, combine cabbage, arugula, romaine, corn, cucumber, carrots, basil, and cilantro.
  • Add cooked shrimp to the salad and toss with the dressing.
  • Serve garnished with lime wedges.

Notes

Adjust spice level with red pepper flakes and black pepper to taste.
Calories: 350kcal
Cost: $15
Course: Salad
Cuisine: Thai
Keyword: shrimp

Unleash the Flavor: Why Grilled Pineapple Chicken Salad is Your New Favorite Dish!

Are you ready to elevate your salad game? Dive into the vibrant world of Grilled Pineapple Chicken Salad! This mouthwatering dish isn’t just a salad; it’s a culinary adventure bursting with flavors and textures that will dance on your taste buds. Imagine juicy grilled chicken paired with sweet, caramelized pineapple, crunchy veggies, and a zesty honey-lime dressing. It’s a meal that’s not only healthy but also a festive treat perfect for any occasion.

In this comprehensive guide, you’ll discover everything you need to know to whip up this delightful salad, from ingredient breakdowns to pro tips and variations. Let’s get started!

Why You’ll Love This Recipe

This Grilled Pineapple Chicken Salad is a true crowd-pleaser, and here’s why:

  • Flavor Explosion: The combination of sweet grilled pineapple and savory chicken creates a delightful contrast that is simply irresistible.
  • Healthy & Nutritious: Packed with lean protein, fresh veggies, and healthy fats, this salad is a balanced meal that fuels your body.
  • Quick & Easy: With simple ingredients and straightforward steps, you can have this salad ready in under 30 minutes!
  • Customizable: Whether you’re a meat-lover or a vegetarian, there are endless ways to adapt this recipe to suit your taste.
  • Perfect for Meal Prep: This salad holds up well in the fridge, making it a fantastic option for meal prepping!

Ingredients Breakdown: What You’ll Need

Let’s talk about the stars of the show! Here’s what you’ll need to make this delicious Grilled Pineapple Chicken Salad:

  • 2 large chicken breasts: A lean source of protein—feel free to use boneless skinless thighs for extra juiciness.
  • 1 tbsp olive oil: Essential for grilling and adds a healthy fat component.
  • 1 tsp pink sea salt: Enhances flavor; you can substitute with regular sea salt.
  • 1/2 tsp black pepper: Adds a subtle heat; adjust to your taste.
  • 1 tsp dried thyme: A fragrant herb that pairs beautifully with chicken.
  • 1 tsp garlic powder: For that essential garlic flavor.
  • 1/2 tsp red pepper flakes: Adds a kick! Omit if you prefer a milder flavor.
  • 1 ripe pineapple: Fresh pineapple is a must for grilling; canned doesn’t compare!
  • 5 cups chopped romaine lettuce: A crunchy base for your salad.
  • 1/2 red onion: Adds a sharp flavor; you can substitute with green onions for a milder taste.
  • 1/2 cucumber: For a refreshing crunch.
  • 1 cup cherry tomatoes: Pop these in your mouth for bursts of sweetness.
  • 1 avocado: Creamy texture that balances the dish.
  • 1/4 cup extra virgin olive oil: For the dressing; a higher quality olive oil adds depth.
  • 1/4 cup lime juice: Fresh lime juice brings brightness to the dressing.
  • 2 tbsp honey: Balances acidity with its natural sweetness.
  • 1 tsp garlic powder: For the dressing; yes, we love garlic!
  • 1 tsp pink sea salt: Seasoning for the dressing.
  • 1/2 tsp black pepper: For seasoning the dressing.
  • 1/2 tsp red pepper flakes: Optional, for a spicy dressing.

How to Make Grilled Pineapple Chicken Salad

Juicy grilled chicken breast slices topped with grilled pineapple and fresh salad greens.

Now that you have all the ingredients, let’s get cooking! Follow these straightforward steps to create your salad:

  1. Start by preparing the pineapple: Cut off the skin, remove the core, and slice it into rings. Drizzle 1 tablespoon of olive oil over the pineapple rings and rub it in.
  2. Prepare the chicken: Pat dry the chicken breasts and drizzle with olive oil. Sprinkle with pink sea salt, black pepper, dried thyme, garlic powder, and red pepper flakes. Rub the spices into the chicken for an even coating.
  3. Preheat your grill to medium-high heat for about 10 minutes.
  4. Add the chicken and pineapple to the grill. Grill the chicken for about 7 minutes on each side, and the pineapple rings for 3-4 minutes on each side until caramelized and grill marks appear.
  5. While the chicken and pineapple grill, chop your romaine, thinly slice the red onion and cucumber, halve the cherry tomatoes, and slice the avocado.
  6. Prepare the dressing by whisking together olive oil, lime juice, honey, garlic powder, pink sea salt, black pepper, and red pepper flakes in a small bowl.
  7. Once the chicken is done, slice it into strips. In a large serving bowl, layer the ingredients: start with the chopped romaine, followed by cucumber, onions, tomatoes, and avocado. Top with the sliced grilled chicken and grilled pineapple.
  8. Finally, pour the dressing over the salad and give it a good toss. Serve immediately and enjoy your tropical delight!

Pro Tips for the Perfect Salad

Want to take your Grilled Pineapple Chicken Salad to the next level? Here are my top tips:

  • Choose a ripe pineapple: Look for a pineapple that gives slightly to pressure and has a sweet aroma at the base.
  • Marinate the chicken: For even more flavor, marinate the chicken in the olive oil and seasonings for a few hours before grilling.
  • Don’t skip the lime juice: The acidity of lime juice balances the sweetness of the pineapple and honey.
  • Use a meat thermometer: Ensure your chicken is fully cooked (internal temperature of 165°F) for safety and juiciness.
  • Grill the veggies too!: Consider adding grilled bell peppers or zucchini for additional flavor and texture.
  • Let the salad rest: Allow the salad to sit for a few minutes after tossing to let the flavors meld together.
  • Add nuts or seeds: For an extra crunch, sprinkle some toasted nuts or seeds over the top before serving.
  • Store dressing separately: If making ahead, keep the dressing separate until ready to serve to prevent sogginess.

Common Mistakes and Troubleshooting

Here are a few common pitfalls and how to avoid them:

  • Overcooking the chicken: Keep an eye on the grill; overcooked chicken can be dry. Use a meat thermometer for best results.
  • Choosing unripe pineapple: Avoid using green or hard pineapple as it won’t provide the sweet, caramelized flavor.
  • Neglecting to season: Don’t skimp on the seasoning! It’s essential for bringing out the flavors of the chicken and veggies.
  • Skipping the dressing: The dressing is what ties all the ingredients together; don’t skip it!
  • Making it too soggy: If your salad gets soggy, adjust the amount of dressing to your taste.

Delicious Variations to Try

This Grilled Pineapple Chicken Salad is versatile! Here are some fun variations:

  • Spicy Mango Chicken Salad: Swap grilled pineapple for grilled mango for a tropical twist.
  • Quinoa Chicken Salad: Add cooked quinoa for extra protein and fiber.
  • Vegan Option: Replace chicken with grilled tofu or chickpeas and use agave instead of honey.
  • Asian-Inspired Salad: Toss in shredded cabbage and use a sesame ginger dressing for an Asian flair.

Storage and Make-Ahead Instructions

This salad is perfect for meal prep! Here’s how to store it:

  • Refrigerate: Store in an airtight container in the refrigerator for up to 3 days.
  • Keep dressing separate: If you’re prepping ahead of time, store the dressing in a separate container to maintain freshness.
  • Reheat chicken if desired: You can warm the grilled chicken before adding it to the salad for a comforting meal.

Nutritional Benefits and Dietary Adaptations

This salad is not only delicious but also packed with nutrients:

  • High in Protein: The chicken provides a great source of lean protein, essential for muscle repair and growth.
  • Rich in Vitamins: The veggies add vitamins A and C, which are vital for immune function and skin health.
  • Healthy Fats: Avocado and olive oil provide heart-healthy fats that keep you satisfied.
  • Gluten-Free: This recipe is naturally gluten-free, perfect for those with dietary restrictions.

Essential Equipment Recommendations

To make this salad, you’ll need a few essential tools:

  • Grill or Grill Pan: For achieving those beautiful grill marks and smoky flavor.
  • Sharp Knife: For easily slicing the pineapple and veggies.
  • Cutting Board: A clean surface for all your chopping.
  • Whisk: For mixing the dressing ingredients smoothly.
  • Large Mixing Bowl: For tossing all the salad ingredients together.

Serving Suggestions

This salad can stand alone or be paired with:

  • Brown Rice or Quinoa: Serve over a bed of grains for a heartier meal.
  • Grilled Corn on the Cob: A sweet and smoky side that complements the salad perfectly.
  • Crusty Bread: Serve with a slice of toasted sourdough for a delightful crunch.
  • Chilled White Wine: A refreshing glass of white wine pairs beautifully with this tropical salad.

FAQs: Your Burning Questions Answered!

Here are some common questions about Grilled Pineapple Chicken Salad:

  • Can I use canned pineapple? Yes, but fresh pineapple yields the best flavor and texture.
  • Is this salad good for meal prep? Absolutely! Just keep the dressing separate until ready to serve.
  • What if I don’t have a grill? You can use a grill pan on the stovetop or bake the chicken and pineapple in the oven.
  • Can I make this salad vegan? Yes! Substitute chicken with grilled tofu or chickpeas.
  • How long can I store leftovers? Up to 3 days in the fridge in an airtight container.
  • Can I add nuts? Yes! Toasted almonds or walnuts add a nice crunch.
  • What dressing can I use? You can use any vinaigrette, but honey-lime dressing is the star here!
  • Is this salad gluten-free? Yes, all ingredients are gluten-free!

Conclusion: Your Flavorful Adventure Awaits!

There you have it—your ultimate guide to crafting a stunning Grilled Pineapple Chicken Salad! This dish not only brings a burst of flavor but also showcases how healthy eating can be exciting and fun. So gather your ingredients, fire up the grill, and let your kitchen become a playground of taste. You’ve got this! Enjoy your culinary adventure and share it with friends and family for a truly unforgettable meal!

Grilled Pineapple Chicken Salad

Prep Time 15 minutes
Cook Time 20 minutes
Total Time 35 minutes
Servings 4 servings
Calories 450
A vibrant and flavorful salad combining grilled pineapple, seasoned chicken, and fresh vegetables, perfect for a light and satisfying meal.

Ingredients

Protein

  • 2 large chicken breasts (Pat dry and season)
  • 1 tbsp olive oil (For chicken and pineapple)
  • 1 tsp pink sea salt
  • 1/2 tsp black pepper
  • 1 tsp dried thyme
  • 1 tsp garlic powder
  • 1 /2 red pepper flakes
  • 1 Pineapple Pineapple (Fresh, peeled and sliced)
  • 5 cups chopped romaine lettuce
  • 1/2 red onion red onion (Thinly sliced)
  • 1/2 cucumber cucumber (Sliced)
  • 1 cup cherry tomatoes (Halved)
  • 1 avocado avocado (Peeled and sliced)
  • 1/4 cup extra virgin olive oil (For dressing)
  • 1/4 cup lime juice (Freshly squeezed)
  • 2 tbsp honey
  • 1 tsp garlic powder (For dressing)
  • 1/2 tsp pink sea salt (For dressing)
  • 1/2 tsp black pepper (For dressing)
  • 1/2 tsp red pepper flakes (For dressing)

Instructions 

  • Preheat grill and prepare pineapple slices and seasoned chicken.
  • Grill chicken for 7 minutes per side and pineapple for 3-4 minutes per side.
  • Chop vegetables and prepare dressing by whisking olive oil, lime juice, honey, garlic, salt, pepper, and red pepper flakes.
  • Slice grilled chicken and pineapple; assemble salad with greens, vegetables, chicken, and pineapple.
  • Pour dressing over salad, toss gently, and serve immediately.

Notes

For extra flavor, marinate chicken with seasonings for 30 minutes before grilling.
Calories: 450kcal
Cost: $15
Course: Salad
Cuisine: fusion
Keyword: Chicken, Grilled, Pineapple

Welcome to Your New Favorite Dish: Sweet Chili Garlic Shrimp!

Dive into the deliciousness of Sweet Chili Garlic Shrimp, a dish that’s not just quick and simple but also packed with flavor! Perfect for any occasion, this recipe brings excitement to your table with a spicy kick and a touch of sweetness. Whether you’re hosting friends or just treating yourself, this dish proves that healthy eating can be fun and flavorful!

Why You’ll Love This Recipe

Here are some compelling reasons to whip up this Sweet Chili Garlic Shrimp:

  • Quick Cooking Time: Ready in just 15 minutes, making it perfect for busy weeknights or last-minute gatherings.
  • Flavor Explosion: The combination of sweet chili sauce and garlic creates a mouthwatering glaze that elevates the shrimp to new heights.
  • Versatile Serving Options: Serve it over rice, noodles, or as a part of an appetizer spread, making it adaptable for any occasion.
  • Nutritious Ingredients: Packed with protein from the shrimp and antioxidants from the garlic and chilis.
  • Beginner-Friendly: Even if you’re new to cooking, this recipe is straightforward and easy to follow!

Ingredient Breakdown

Let’s explore the ingredients that make this dish shine, along with some substitutions to suit your needs:

  • 1 1/2 pounds of jumbo shrimp: Fresh or frozen, peeled and deveined. For a sustainable option, consider using shrimp from responsible fisheries.
  • Salt and coarse black pepper: Essential for seasoning. Feel free to adjust to your taste!
  • 3-4 tablespoons of olive oil: This adds richness and a great base for cooking.
  • 3 tablespoons of unsalted butter: For a creamy finish. If you’re dairy-free, substitute with coconut oil or a vegan butter alternative.
  • 2 teaspoons of fresh garlic, minced: Fresh garlic is a must for flavor! You can also use garlic paste in a pinch.
  • 2 medium red chilis: Use birdseye chilis for an extra kick! If you prefer milder heat, use bell peppers instead.
  • 2 teaspoons of parsley, finely chopped: Adds freshness and color to the dish.
  • 4 tablespoons sweet garlic chili sauce: This is the star of the show! If you can’t find it, a mix of sweet soy sauce and hot sauce can work as a substitute.
  • Red pepper flakes: Perfect for garnishing and adding even more heat.
  • Lime wedges or lemon for serving: A splash of citrus brightens up the dish!

How to Make Sweet Chili Garlic Shrimp

Side view of succulent shrimp cooked in sweet chili and garlic sauce, served with lime wedges.

Follow these simple steps to create your own mouthwatering Sweet Chili Garlic Shrimp:

  1. Heat the Olive Oil: In a large non-stick pan, heat the olive oil over medium-high heat. Once hot, add the shrimp and season with salt and pepper. Cook for about 1 minute per side until they turn pink. Smaller shrimp will require less cooking time, about 30 seconds per side.
  2. Cook the Garlic and Chilis: Reduce the heat to medium-low. Deglaze the skillet with the broth, then add the minced garlic and chilis. Cook for about 30 seconds until the garlic is fragrant.
  3. Add the Sauce: Pour in the sweet garlic chili sauce and stir to combine.
  4. Coat the Shrimp: Return the shrimp to the pan, ensuring they are well-coated in the sauce. Cook for an additional 1-2 minutes.
  5. Plate the Shrimp: Remove the shrimp and place them on a serving plate.
  6. Finish the Sauce: In the remaining sauce, add butter and parsley. Adjust seasoning if needed and simmer for a couple of minutes to thicken.
  7. Serve Immediately: Pour the sauce over the shrimp and serve hot with rice, cauliflower rice, or noodles!

Pro Tips for Perfect Shrimp

These expert insights will help you nail this recipe every time:

  • Use Fresh Ingredients: Fresh shrimp and garlic make a huge difference in flavor.
  • Don’t Overcook the Shrimp: Keep a close eye on the shrimp as they cook; overcooked shrimp can become rubbery.
  • Experiment with Heat Levels: Adjust the number of chilis and the amount of red pepper flakes based on your heat preference.
  • Make It Ahead: You can prepare the sauce ahead of time and store it in the fridge for up to 3 days.
  • Pair with Sides: Consider pairing this dish with a fresh salad or steamed vegetables for a balanced meal.
  • Garnish Creatively: Add sliced green onions or sesame seeds for extra flair.
  • Preheat Your Pan: A hot pan is essential for achieving that perfect sear on the shrimp.
  • Experiment with Sauces: Try different sauces like teriyaki or a spicy peanut sauce for a twist!

Common Mistakes & Troubleshooting

Even the best cooks can make mistakes! Here are some common pitfalls and how to avoid them:

  • Rubbery Shrimp: This often results from overcooking. Aim for a light pink color and remove them from the heat as soon as they reach that point.
  • Bland Flavor: Make sure to season the shrimp well. Taste the sauce before serving and adjust the salt and sweetness levels.
  • Burned Garlic: Garlic can burn quickly. Be sure to add it to the pan only after the shrimp are mostly cooked, and keep the heat low.
  • Too Saucy or Too Dry: If the sauce is too thin, let it simmer longer to thicken. If too thick, add a little broth or water to loosen it.

Variations to Try

Feeling adventurous? Here are some tasty variations on the classic Sweet Chili Garlic Shrimp:

  • Honey Garlic Shrimp: Replace sweet chili sauce with honey and add soy sauce for a sweeter touch.
  • Spicy Mango Shrimp: Toss in diced mango for a fruity twist that pairs beautifully with the spicy sauce.
  • Garlic Butter Shrimp: Enhance the richness by adding more butter and omitting the chili sauce for a creamy garlic flavor.
  • Vegetarian Option: Substitute shrimp with tofu or tempeh for a plant-based delight!

Storage and Make-Ahead Instructions

This dish is great for meal prep! Here’s how to store it:

  • Refrigerate: Store leftovers in an airtight container for up to 3 days.
  • Freeze: You can freeze cooked shrimp for up to 2 months. Thaw in the fridge before reheating.
  • Reheat: Gently reheat on the stovetop or microwave, adding a splash of water or broth to keep it moist.
  • Make Ahead: Prepare the sauce and shrimp separately, then combine them just before serving for optimal freshness.

Frequently Asked Questions

Got questions? We’ve got answers! Here are some common queries about Sweet Chili Garlic Shrimp:

  • Can I use frozen shrimp? Yes! Just make sure to thaw them completely before cooking.
  • What if I don’t like spicy food? Reduce or omit the chilis and adjust the sweet chili sauce to your taste.
  • Can I use another type of protein? Absolutely! Chicken, scallops, or even firm tofu work well in this recipe.
  • How do I know when the shrimp are done cooking? They should be pink and opaque, curling into a C shape.
  • Can I double the recipe? Yes! Just ensure your pan is large enough to accommodate the extra shrimp.
  • What can I serve with this dish? Rice, noodles, or a fresh salad are excellent pairings.
  • Is this dish gluten-free? Use gluten-free soy sauce or tamari for the sauce to make it gluten-free.
  • How spicy is this recipe? The heat level can be adjusted based on the number of chilis you use!

Nutrition Tips and Dietary Adaptations

Here are some nutritional insights and adaptations to consider:

  • Protein-Packed: Shrimp are an excellent source of protein, making this dish a great post-workout meal.
  • Low-Carb Option: Serve the shrimp over cauliflower rice for a low-carb alternative to traditional rice.
  • Vegan Adaptation: Use plant-based shrimp alternatives to create a vegan version of this dish.
  • Rich in Antioxidants: Garlic and chilis are known for their health benefits, including anti-inflammatory properties.

Equipment Recommendations

To make this dish, you’ll need a few essential tools:

  • Non-Stick Pan: Ideal for cooking shrimp without sticking.
  • Spatula: A flexible spatula is perfect for flipping the shrimp.
  • Measuring Cups and Spoons: For precise ingredient measurements to ensure the perfect flavor balance.
  • Cutting Board and Knife: Essential for preparing ingredients like garlic and chilis.

Serving Suggestions

Make your meal even more enjoyable with these serving ideas:

  • Garnish with Fresh Herbs: Top with chopped cilantro or additional parsley for a burst of color and flavor.
  • Serve with Lime Wedges: A squeeze of lime adds a refreshing citrus note that elevates the dish.
  • Pair with a Light Salad: A simple green salad with a tangy vinaigrette complements the richness of the shrimp.
  • Offer a Variety of Sides: Consider serving with steamed veggies or a grain-based salad for a well-rounded meal.

Ready to Sizzle? Let’s Get Cooking!

Now that you have all the tips and tricks for making the perfect Sweet Chili Garlic Shrimp, it’s time to hit the kitchen! Remember, cooking is about having fun and experimenting. Enjoy the process and the delicious outcome. Happy cooking!

Easy Sweet Chili Garlic Shrimp

Prep Time 10 minutes
Cook Time 10 minutes
Total Time 20 minutes
Servings 4 servings
Calories 250
A quick and flavorful shrimp dish with sweet chili and garlic, perfect for a quick meal or appetizer.

Ingredients

Protein

  • 1.5 pounds jumbo shrimp with tails on (fresh or frozen thawed)
  • 3-4 tablespoons olive oil
  • 3 tablespoons butter (unsalted or salted)
  • 2 teaspoons fresh garlic (minced)
  • 2 tablespoons seafood broth or water (warm boiled)
  • 2 medium red chilis (thinly sliced with seeds)
  • 2 teaspoons parsley (finely chopped)
  • 4 tablespoons sweet garlic chili sauce (or spicy sauce)
  • to taste red pepper flakes (for garnish)
  • to taste lime wedges or lemon (for serving)

Instructions 

  • Heat olive oil in a large non-stick pan over medium-high heat. Add shrimp, season with salt and pepper, and cook 1 minute per side until pink. Set aside.
  • Reduce heat to medium-low. Deglaze with broth, add garlic and chilis, and cook 30 seconds. Stir in chili sauce.
  • Return shrimp to pan, coat with sauce, and cook 1-2 minutes. Remove shrimp to serving plate.
  • Add butter and parsley to sauce, simmer briefly, then pour over shrimp. Serve immediately with rice or noodles.

Notes

Adjust seasoning and spice level to taste. Serve with lime wedges for added flavor.
Calories: 250kcal
Cost: $15
Course: Main Course
Cuisine: Asian
Keyword: shrimp

Unlock a World of Flavor with Zesty Thai Peanut Chicken Lettuce Wraps

Welcome to a culinary adventure that will tantalize your taste buds and inspire your kitchen creativity! These Thai Peanut Chicken Lettuce Wraps are here to shake up your mealtime routine with a vibrant medley of flavors and textures. Imagine tender chicken, crisp veggies, and a creamy peanut sauce all wrapped up in fresh lettuce leaves—sounds delicious, right? Let’s dive into this exciting recipe that promises to be a hit whether you’re prepping a quick dinner or hosting a fun gathering!

Why You’ll Love This Recipe

Here’s why these wraps will become your new favorite:

  • Quick and Easy: Perfect for busy weeknights, these wraps come together in under 30 minutes, making them a fantastic choice for a fast and satisfying meal.
  • Flavor Explosion: The combination of savory chicken and creamy peanut sauce creates a harmonious balance that will have your taste buds dancing.
  • Healthy and Nutritious: Packed with lean protein and fresh vegetables, these wraps are a wholesome option that doesn’t skimp on flavor.
  • Customizable: Feel free to mix and match ingredients based on what you have on hand or your dietary preferences—this recipe is flexible!
  • Fun to Serve: Wrapping your own lettuce leaves adds an interactive element to your meal, making it a fun dining experience for everyone!

Ingredients Breakdown

Here’s what you’ll need to make these zesty wraps:

  • 1 lb boneless, skinless chicken breast, finely diced: This lean protein is the base of your wraps. Feel free to substitute with turkey or tofu for a different twist.
  • 1 head butter lettuce: The perfect vessel for your filling; its soft leaves are ideal for wrapping. Romaine can be a great alternative if you prefer extra crunch.
  • 1 cup shredded carrots: These add a delightful crunch and a touch of sweetness. You can also use pre-packaged coleslaw mix for convenience.
  • 1/2 cup thinly sliced red bell pepper: For a pop of color and sweetness, this ingredient is a must! Swap for cucumbers if you’re looking for a refreshing alternative.
  • 1/4 cup chopped fresh cilantro: This herb elevates the flavor of the dish. If you’re not a fan, fresh parsley works just as well.
  • 1/4 cup roasted peanuts, roughly chopped: For that satisfying crunch, and a rich nutty flavor. You can substitute with sunflower seeds for a nut-free option.
  • 2 green onions, thinly sliced: These provide a mild onion flavor that complements the dish. Chives can be used for a subtler taste.
  • 1 tbsp vegetable oil: Used for sautéing the chicken. Any neutral oil will work, such as canola or grapeseed.
  • Peanut Sauce: Combine 1/3 cup creamy peanut butter, 3 tbsp soy sauce (low sodium preferred), 1 tbsp fresh lime juice, 2 tsp brown sugar, 1 tsp grated fresh ginger, 1 garlic clove, minced, 1/4 cup warm water (to thin sauce as needed), and 1 tsp chili garlic sauce (optional, for heat).

Step-by-Step Instructions

Finely diced chicken nestled in butter lettuce leaves with vibrant shredded carrots and red bell pepper.

Let’s get cooking! Follow these simple steps to whip up your wraps:

  • Prepare the Thai peanut sauce: In a medium bowl, whisk together the peanut butter, soy sauce, lime juice, brown sugar, grated ginger, minced garlic, and chili garlic sauce if using. Gradually add warm water to achieve a smooth, pourable consistency. Set aside to let the flavors meld.
  • Cook the chicken: Heat the vegetable oil in a large skillet over medium-high heat. Add the diced chicken and sauté until cooked through and lightly golden, about 6-8 minutes, stirring often for even cooking.
  • Combine chicken and sauce: Lower the heat and pour the prepared peanut sauce over the chicken. Stir well to coat every piece evenly, cooking for an additional 2 minutes to thicken the sauce slightly. Remove from heat.
  • Assemble the wraps: Lay out the butter lettuce leaves and spoon a generous amount of the peanut chicken mixture into each leaf.
  • Add crunch and freshness: Top each wrap with shredded carrots, sliced red bell pepper, chopped peanuts, green onions, and cilantro for a vibrant texture and flavor boost.
  • Serve immediately: Encourage guests to fold their wraps gently around the filling and enjoy the delightful combination of creamy sauce and crisp veggies in every bite.

Expert Tips for Success

To ensure your Thai Peanut Chicken Lettuce Wraps turn out perfectly, keep these pro tips in mind:

  • Ingredient Freshness: Always use fresh veggies for the best flavor and crunch. This enhances the overall texture of your wraps.
  • Thinning the Sauce: If the peanut sauce is too thick, add a little more warm water gradually until it reaches your desired consistency.
  • Cooking Chicken: Ensure the chicken is cooked to an internal temperature of 165°F (75°C) for food safety.
  • Experiment with Flavors: Don’t hesitate to add in other ingredients like sliced jalapeños for a kick or mango for sweetness!
  • Make it Ahead: You can prepare the chicken and peanut sauce a day in advance. Just assemble the wraps right before serving to keep the lettuce crisp.
  • Storage Tips: Store any leftover chicken mixture in an airtight container in the refrigerator for up to 3 days.
  • Healthier Options: Swap the peanut butter for almond butter for a unique flavor and added nutrients.
  • Reduce Sodium: Opt for low-sodium soy sauce to keep your wraps light and healthy.

Common Mistakes and Troubleshooting

Here are some common pitfalls and how to avoid them:

  • Overcooking Chicken: Keep an eye on the chicken while cooking; overcooked chicken can be dry. Aim for a golden color and juicy texture.
  • Too Much Sauce: Be cautious with the peanut sauce; too much can overwhelm the wraps. Start with a small amount and adjust according to taste.
  • Wilty Lettuce: Ensure your lettuce leaves are crisp and fresh. Store them properly and wash right before use.
  • Not Enough Flavor: If your sauce lacks a punch, try adding more lime juice, or a pinch of salt to enhance the flavors.

Delicious Variations to Try

Switch things up with these fun variations:

  • Spicy Thai Peanut Chicken: Add more chili garlic sauce or some diced fresh chilies to the chicken for a spicy kick!
  • Vegetarian Delight: Swap chicken with sautéed mushrooms or tempeh for a meat-free option.
  • Asian Fusion: Use hoisin sauce instead of soy sauce for a different flavor profile.
  • Crunchy Veggie Wraps: Load up on extra veggies like bean sprouts, cucumbers, and radishes for added texture and flavor.

Storage and Make-Ahead Instructions

If you want to prepare these wraps ahead of time, here’s how:

  • Storing Leftovers: Keep any leftover chicken mixture in an airtight container in the refrigerator for up to 3 days.
  • Make-Ahead Sauce: The peanut sauce can be made in advance and stored in the fridge for up to a week—just give it a good stir before using.
  • Assemble Fresh: Always assemble the wraps just before serving to maintain the crispness of the lettuce.

FAQs About Thai Peanut Chicken Lettuce Wraps

Got questions? We’ve got answers!

  • Can I use different meats? Absolutely! Feel free to use turkey, shrimp, or even tofu for a plant-based option.
  • How do I make the wraps spicier? Add more chili garlic sauce to the peanut sauce or top with sliced jalapeños.
  • Can I make these wraps gluten-free? Yes! Use gluten-free soy sauce and ensure the peanut butter is also gluten-free.
  • What can I serve with these wraps? Pair with a refreshing cucumber salad or a side of rice for a complete meal.
  • How do I store leftovers? Place the chicken mixture in an airtight container in the fridge for up to 3 days.
  • Can I freeze the chicken mixture? Yes! Freeze in a sealable bag and thaw in the refrigerator before reheating.
  • What if my sauce is too thick? Gradually add warm water to reach your desired consistency.
  • Can I use other nut butters? Yes! Almond butter or cashew butter can be excellent alternatives to peanut butter.

Nutritional Insights

These wraps are not just delicious; they’re packed with nutrients:

  • Protein-Packed: With chicken and nuts as key ingredients, these wraps are a great source of protein.
  • Low-Carb Option: Using lettuce instead of tortillas helps keep the carb count down, perfect for low-carb diets.
  • Rich in Vitamins: Fresh veggies add essential vitamins and minerals to your meal, promoting overall health.

Essential Equipment for Making These Wraps

Here’s what you need:

  • Large Skillet: For sautéing the chicken.
  • Mixing Bowl: To prepare your peanut sauce.
  • Whisk: For smoothly combining the sauce ingredients.
  • Chopping Board: Essential for cutting your veggies and chicken.

Serving Suggestions

Make your meal even more enjoyable with these serving ideas:

  • Side Dishes: Serve alongside a refreshing cucumber salad or some quinoa for a wholesome meal.
  • Dipping Sauces: Offer extra peanut sauce or sweet chili sauce for dipping!
  • Garnish: Finish with lime wedges for an extra burst of freshness.

Conclusion

These Zesty Thai Peanut Chicken Lettuce Wraps are not just a meal; they’re a celebration of flavors and a testament to how easy healthy eating can be. With their fresh ingredients, bold flavors, and customizable options, they’re perfect for any occasion. So grab those lettuce leaves, unleash your inner chef, and get ready to wrap up some deliciousness. Happy cooking!

Crunchy Thai Peanut Chicken Lettuce Wraps

Prep Time 15 minutes
Cook Time 10 minutes
Total Time 25 minutes
Servings 4 servings
Calories 350
Enjoy these flavorful lettuce wraps filled with tender chicken and a creamy peanut sauce, topped with fresh vegetables and crunchy peanuts for added texture.

Ingredients

Protein

  • 1 lb boneless, skinless chicken breast, finely diced

Vegetables

  • 1 head butter lettuce, leaves separated and washed
  • 1 cup shredded carrots
  • 1/2 cup thinly sliced red bell pepper
  • 1/4 cup chopped fresh cilantro
  • 1/4 cup roasted peanuts, roughly chopped
  • 2 green onions green onions, thinly sliced

Sauce ingredients

  • 1 tbsp vegetable oil or neutral oil for sautéing
  • 1/3 cup creamy peanut butter
  • 3 tbsp soy sauce (low sodium preferred)
  • 1 tbsp fresh lime juice
  • 2 tsp brown sugar
  • 1 tsp grated fresh ginger
  • 1 garlic clove minced garlic
  • 1/4 cup warm water (to thin sauce as needed)
  • 1 tsp chili garlic sauce (optional, for heat)

Instructions 

  • Whisk peanut butter, soy sauce, lime juice, brown sugar, ginger, garlic, and chili sauce if using; add warm water to reach a smooth, pourable sauce. Set aside.
  • Sauté diced chicken in oil until cooked through and golden, about 6-8 minutes.
  • Pour sauce over chicken, stir to coat, and cook for 2 minutes until slightly thickened. Remove from heat.
  • Fill lettuce leaves with chicken mixture and top with vegetables, peanuts, green onions, and cilantro.
  • Fold wraps and serve immediately for a crunchy, flavorful bite.

Notes

For extra heat, add more chili garlic sauce or sliced chili peppers.
Calories: 350kcal
Cost: $15
Course: Main Course
Cuisine: Thai
Keyword: Chicken, Lettuce Wraps, peanut

Welcome to a culinary adventure that will take your taste buds on a wild ride! This Spicy Korean Chicken recipe is not just a meal; it’s a celebration of bold flavors and vibrant ingredients. Imagine juicy chicken thighs marinated in a luscious blend of gochujang, honey, and sesame oil, all perfectly balanced to give you that irresistible kick! Whether you’re cooking for family or friends, this dish promises to be a showstopper. Let’s dive into why this recipe is a must-try!

Why You’ll Love This Recipe

  • Flavor Explosion: Experience the perfect harmony of heat, sweetness, and umami in every bite.
  • Quick & Easy: With simple steps and minimal prep time, you’ll have dinner ready in under 30 minutes!
  • Healthier Choice: Packed with protein and essential nutrients, this dish supports your wellness goals without sacrificing flavor.
  • Versatile Serve Options: Pair it with rice, in lettuce wraps, or on top of a salad for a nutritious and satisfying meal.
  • Impress Your Guests: Serve this vibrant dish at your next gathering, and watch everyone rave about your cooking skills!

Ingredients You’ll Need

Ready to create magic in the kitchen? Here’s what you’ll need for this Korean chicken recipe:

  • 4 boneless, skinless chicken thighs: Tender cuts that soak up the marinade and stay juicy during cooking.
  • 1 tablespoon vegetable oil: Essential for achieving that crispy exterior.
  • 2 tablespoons gochujang: This Korean chili paste introduces the signature heat and flavor.
  • 1 tablespoon soy sauce: Adds depth to the marinade, enhancing the overall taste.
  • 1 tablespoon honey: Brings a touch of sweetness to balance the heat.
  • 1 teaspoon sesame oil: Imparts a lovely nutty aroma and flavor.
  • 1 teaspoon rice vinegar: A splash of acidity that brightens the dish.
  • 2 cloves garlic, minced: Adds aromatic depth and richness.
  • 1 teaspoon grated ginger: A fresh note that complements the other flavors beautifully.
  • ½ teaspoon red pepper flakes: Adjust according to your heat preference!
  • 1 teaspoon sesame seeds: For garnish, adding crunch and presentation.
  • 2 green onions, sliced: Freshness and color to elevate your dish.

How to Make Spicy Korean Chicken

Now, let’s get cooking! Follow these simple steps to whip up your spicy Korean chicken:

Step 1: Prepare the Marinade

In a large bowl, combine the gochujang, soy sauce, honey, sesame oil, rice vinegar, garlic, ginger, and red pepper flakes. Stir until well blended.

Step 2: Marinate the Chicken

Add the chicken thighs to the marinade, ensuring they are fully coated. Cover and let it marinate for at least 15 minutes (or up to 2 hours for maximum flavor!).

Step 3: Cook the Chicken

Heat the vegetable oil in a skillet over medium-high heat. Once hot, add the marinated chicken thighs. Cook for about 6-7 minutes on each side or until the chicken is cooked through and has a golden-brown crust.

Step 4: Garnish and Serve

Remove the chicken from the skillet and let it rest for a few minutes. Slice it up, then sprinkle with sesame seeds and green onions before serving.

Helpful Tips

Side view of tender chicken thighs coated in vibrant red gochujang sauce with herbs.
  • Marination time matters: For the best flavor, let the chicken marinate longer—up to 2 hours is ideal!
  • Cooking methods: You can grill or bake the chicken for a different texture. Just ensure it reaches an internal temperature of 165°F.
  • Fresh ingredients: Using fresh ginger and garlic enhances the dish’s overall flavor profile.
  • Adjust the heat: If you’re a spice lover, feel free to increase the amount of gochujang and red pepper flakes!
  • Leftovers? No problem!: This dish tastes even better the next day as the flavors meld together.

Common Mistakes and Troubleshooting

Even the best chefs make mistakes! Here’s how to avoid common pitfalls:

  • Overcooking the chicken: Keep an eye on your chicken to avoid dryness. Use a meat thermometer for perfect results!
  • Skipping the marination: Don’t rush this step! It’s essential for flavor.
  • Not adjusting seasoning: Taste the marinade before adding the chicken, and adjust the soy sauce or honey if needed.
  • Using the wrong cut of chicken: Thighs work best for their juiciness, but breasts can be used if preferred—just reduce cooking time.

Variations to Try

Get creative! Here are some fun twists on your spicy Korean chicken:

  • Spicy Korean Chicken Bowls: Serve over rice with steamed veggies for a hearty meal.
  • Chicken Lettuce Wraps: Use butter lettuce leaves for a fresh, low-carb option.
  • Gochujang Chicken Tacos: Use corn tortillas and top with slaw for a unique fusion dish.
  • Vegetarian Version: Substitute chicken with tofu or tempeh, adjusting cooking times accordingly.

Storage and Make-Ahead Instructions

Storing Leftovers

After enjoying your meal, store any leftovers in an airtight container in the refrigerator for up to 3 days. Reheat in the microwave or on the stovetop.

Freezing

If you want to make this ahead, marinate the chicken and freeze it in a zip-top bag. When ready to cook, thaw overnight in the refrigerator before cooking.

Frequently Asked Questions

Got questions? We’ve got answers!

  • Can I use chicken breasts instead of thighs?
    Yes, but be careful not to overcook them!
  • What if I can’t find gochujang?
    Try using sriracha mixed with miso paste as a substitute.
  • How spicy is this dish?
    This recipe is moderately spicy. Feel free to adjust the red pepper flakes to your liking!
  • Can I make this dish ahead of time?
    Yes! You can marinate the chicken and freeze it or store leftovers in the fridge.
  • What’s the best way to serve this?
    Serve it over rice or in lettuce wraps for a refreshing twist!
  • Is this recipe suitable for meal prep?
    Absolutely! It’s perfect for making ahead and portioning out for the week.
  • Can I add vegetables to the marinade?
    Yes! Bell peppers, onions, or carrots can be marinated and cooked alongside the chicken.
  • How do I know when the chicken is done?
    Use a meat thermometer to check for an internal temperature of 165°F.

Nutrition Tips and Dietary Adaptations

This Spicy Korean Chicken not only tastes incredible, but it also packs a punch in the nutrition department! Here are some tips:

  • Protein Power: Chicken thighs are rich in protein, making them an excellent choice for muscle recovery and energy.
  • Low-Calorie Option: Replace honey with a sugar-free alternative to lower the calorie count.
  • Gluten-Free: Use tamari instead of soy sauce for a gluten-free option!
  • Plant-Based: Substitute chicken with tofu or seitan for a delicious vegetarian version.

Equipment Recommendations

To make this recipe a breeze, here are some must-have kitchen tools:

  • Cast Iron Skillet: Ideal for achieving that perfect sear on the chicken.
  • Meat Thermometer: Ensures your chicken is cooked to perfection.
  • Mixing Bowl: For easy marinating and mixing of ingredients.
  • Cutting Board: A sturdy surface for prepping your chicken and vegetables.

Serving Suggestions

Bring out the best in your Spicy Korean Chicken with these serving ideas:

  • Over Steamed Rice: A classic pairing that soaks up the delicious sauce.
  • In a Wrap: Use lettuce or rice paper to create fresh wraps.
  • With a Side Salad: Add freshness with a cucumber and carrot salad.
  • As a Taco Filling: Use corn tortillas and top with salsa and avocado for a fusion twist.

So there you have it! A definitive guide to creating mouth-watering Spicy Korean Chicken that will wow your family and friends. Cooking healthy doesn’t have to be complicated or boring. Embrace the flavors, let your creativity shine, and enjoy every delicious bite. Happy cooking!

Spicy Korean Chicken

Prep Time 10 minutes
Cook Time 15 minutes
Total Time 25 minutes
Servings 4 servings
Calories 350
Enjoy this flavorful and spicy Korean-inspired chicken dish that's quick to prepare and packed with bold flavors.

Ingredients

Protein

  • 4 pieces boneless, skinless chicken thighs (or chicken breasts)
  • 1 tablespoon vegetable oil
  • 2 tablespoons gochujang (Korean chili paste)
  • 1 tablespoon soy sauce
  • 1 tablespoon honey
  • 1 teaspoon sesame oil
  • 1 teaspoon rice vinegar
  • 2 cloves garlic, minced
  • 1 teaspoon grated ginger
  • ½ teaspoon red pepper flakes (adjust to taste)
  • 1 teaspoon sesame seeds
  • 2 green onions sliced

Instructions 

  • Mix gochujang, soy sauce, honey, sesame oil, rice vinegar, garlic, ginger, and red pepper flakes to create the marinade.
  • Marinate the chicken in the sauce for at least 15 minutes.
  • Heat vegetable oil in a skillet over medium heat and cook the chicken until browned and cooked through, about 8-10 minutes per side.
  • Sprinkle with sesame seeds and sliced green onions before serving.

Notes

Adjust red pepper flakes for desired spice level.
Calories: 350kcal
Cost: $12
Course: Main Course
Cuisine: Korean
Keyword: Chicken

Unleashing Flavor: Your Ultimate Guide to Vibrant Quinoa and Roasted Red Pepper Salad

Welcome to a culinary adventure where healthy eating meets bold, vibrant flavors! Today, we’re diving into the world of the Vibrant Quinoa and Roasted Red Pepper Salad. This dish is not just a salad; it’s a celebration of nutritious ingredients that come together to create a flavor explosion in every bite! Packed with protein, fiber, and a rainbow of colors, this salad is perfect for meal prep, a quick weeknight dinner, or a stunning side dish at your next gathering. Let’s explore how this roasted red pepper salad can transform your mealtime into a nutritious feast!

Why You’ll Love This Recipe

  • Nutritious Powerhouse: With quinoa, chickpeas, and an array of fresh herbs, this salad is loaded with vitamins, minerals, and fiber, making it a perfect choice for those looking to boost their health.
  • Quick & Easy: In just about 30 minutes, you can whip up this delicious salad, making it an ideal option for busy weeknights or last-minute meals.
  • Versatile Ingredients: You can customize this salad to suit your taste—swap in your favorite veggies or make it vegan by leaving out the feta cheese.
  • Meal Prep Friendly: This salad keeps well in the fridge, allowing you to prepare it ahead of time for effortless lunches or dinners throughout the week.
  • Stunning Presentation: The vibrant colors of the roasted red peppers, fresh herbs, and quinoa create a visually appealing dish that looks as good as it tastes!

Ingredient Breakdown: What You Need

Let’s take a closer look at the key ingredients that make this roasted red pepper salad not just delicious but also packed with nutrition. Here’s what you’ll need:

  • Quinoa: 3/4 cup of dry quinoa provides a protein-rich base. You can substitute with brown rice or farro if you prefer.
  • Mini Red Peppers: 8 mini red peppers, quartered, add sweetness and a pop of color. Feel free to use regular bell peppers if mini ones are unavailable.
  • Red Onion: 1 small red onion, cut into wedges, gives a slightly spicy bite. You can use green onions for a milder flavor.
  • Chickpeas: 1 can of chickpeas, drained and rinsed, adds protein and creaminess. This can be replaced with black beans or white beans depending on your preference.
  • Olive Oil: A drizzle of high-quality olive oil enhances the flavor profile. Substitute with avocado oil for a different twist.
  • Fresh Herbs: 1/4 cup each of roughly minced dill and parsley brightens the dish. Experiment with cilantro or basil for a unique taste.
  • Feta Cheese: Optional for non-vegan versions, feta adds a salty creaminess. You can use vegan cheese or simply omit it.
  • For the Dressing: 1/4 cup olive oil, 1/4 cup lemon juice, 1-2 tbsp honey, 1/4 tsp kosher salt, 1/4 tsp cayenne pepper, and 1/4 tsp garlic granules or minced garlic create a zesty vinaigrette. Substitute agave syrup for honey to keep it vegan.

How to Make This Roasted Red Pepper Salad

Side perspective of a colorful salad featuring roasted red peppers and herbs.

Creating this salad is a breeze! Follow these step-by-step instructions to assemble your vibrant meal:

  • Cook the Quinoa: Rinse the quinoa under cold water. In a pot, combine 3/4 cup of quinoa with 1 1/2 cups of water and a pinch of salt. Bring it to a boil, then reduce the heat, cover, and let it simmer for 10-12 minutes until all the water is absorbed. Turn off the heat and let it sit for another 10 minutes to steam.
  • Prepare the Veggies: While the quinoa cooks, preheat your oven to 400°F (200°C). On a lined baking sheet, toss the quartered red peppers, onion wedges, and drained chickpeas with olive oil and a sprinkle of salt. Roast for 25-30 minutes until the peppers are charred and the chickpeas are crispy.
  • Make the Dressing: In a large jar, combine olive oil, lemon juice, honey, salt, cayenne pepper, and garlic. Seal and shake until well mixed. Taste and adjust sweetness or seasoning as desired.
  • Assemble the Salad: In a large bowl, combine cooked quinoa, roasted veggies, chickpeas, dill, and parsley. Drizzle with half of the dressing and toss gently to combine. Add more dressing and salt to taste.
  • Serve Warm: This salad is best enjoyed warm. Serve immediately, or let it cool and refrigerate for later!

Pro Tips for Perfection

To ensure your roasted red pepper salad turns out perfectly every time, consider these expert tips:

  • Fluffy Quinoa: Always rinse quinoa before cooking to remove bitterness. The 1:2 quinoa to water ratio is key for fluffy results!
  • Roasting Technique: For extra char, broil the veggies for the last 2-3 minutes of cooking. Keep an eye on them to avoid burning!
  • Dressing Balance: Adjust the honey in the dressing based on your taste preference. A touch more honey will enhance the sweetness of the peppers.
  • Herb Freshness: Use fresh herbs whenever possible for maximum flavor. Dried herbs can work in a pinch, but fresh is always best!
  • Mix and Match: Feel free to add other roasted vegetables like zucchini or eggplant for added texture and taste.
  • Garnish with Nuts: Sprinkle toasted pine nuts or pumpkin seeds before serving for an extra crunch!
  • Storage Tips: If storing, keep the dressing separate to prevent sogginess. This salad holds up well for 3-4 days in the fridge.
  • Make-ahead Option: Prepare the quinoa and roast the veggies a day ahead for quick assembly!

Common Mistakes & Troubleshooting

Even the best of us make mistakes in the kitchen! Here are some common pitfalls and how to avoid them:

  • Overcooked Quinoa: If you cook quinoa too long, it can become mushy. Stick to the recommended cooking time and let it steam afterward.
  • Underseasoned Veggies: Don’t be shy with the seasoning! A generous sprinkle of salt and pepper enhances the natural flavors of the veggies.
  • Too Much Dressing: Start with less dressing! You can always add more, but it’s hard to fix a salad that’s overdressed.
  • Missing Flavor: If your salad tastes flat, try adding a splash of vinegar or a squeeze of lemon juice to brighten it up!

Delicious Variations

Want to switch things up? Here are some exciting variations you can try:

  • Spicy Kick: Add diced jalapeños or a splash of hot sauce to the dressing for a spicy twist.
  • Protein Boost: Toss in shredded rotisserie chicken or cooked shrimp for a heartier meal.
  • Grains Galore: Swap out quinoa for bulgur, couscous, or farro for a different texture and flavor.
  • Seasonal Switch: Use seasonal vegetables like roasted butternut squash in the fall or fresh asparagus in the spring.

Storage and Make-Ahead Instructions

This roasted red pepper salad is a great make-ahead option! Follow these tips for optimal storage:

  • Refrigeration: Store the salad in an airtight container in the fridge for up to 4 days.
  • Dressing Storage: Keep the dressing separate until you’re ready to serve to keep the salad fresh and crisp.
  • Make-ahead Prep: You can roast the veggies and cook the quinoa a day in advance. Mix everything together just before serving.

Frequently Asked Questions

Got questions? We’ve got answers! Here are some common queries about this delicious recipe:

  • Can I use other types of peppers? Yes! Any bell pepper variety works well, including yellow or green.
  • Is this salad gluten-free? Absolutely! Quinoa is naturally gluten-free, making this a great option for gluten-sensitive diets.
  • Can I freeze this salad? While it’s best fresh, you can freeze the cooked quinoa and roasted veggies separately for later use.
  • What can I substitute for honey? Maple syrup or agave nectar can be used as a vegan alternative to honey.
  • How do I make this salad vegan? Simply omit the feta cheese and use a vegan-friendly dressing.
  • Can I add nuts or seeds? Yes! Toasted nuts or seeds add a great crunch and additional nutrients.
  • Is this salad good for meal prep? Yes! It stores well in the fridge and makes a great lunch option.
  • How can I make it spicier? Add cayenne pepper or red pepper flakes to the dressing for some heat.

Nutritional Tips and Dietary Adaptations

This salad is not only delicious but also adaptable to various dietary needs:

  • Low-Carb Option: Substitute quinoa with cauliflower rice for a low-carb alternative.
  • High-Protein Boost: Add grilled chicken or tofu for an extra protein kick.
  • Vegetarian/Vegan Friendly: The salad is vegetarian and can be easily adapted to be vegan by omitting the feta cheese.

Essential Equipment for Success

To make preparing this salad a breeze, here’s what you’ll need:

  • Medium Pot: For cooking quinoa perfectly.
  • Baking Sheet: A sturdy baking sheet is essential for roasting the veggies and chickpeas.
  • Mixing Bowl: A large bowl to combine all the ingredients and toss with dressing.
  • Jar with Lid: Perfect for shaking up the dressing!

Serving Suggestions

Wondering how to serve your vibrant quinoa and roasted red pepper salad? Here are some ideas:

  • As a Main Dish: Serve it as a hearty main dish for lunch or dinner, paired with a crisp green salad.
  • As a Side: It pairs beautifully with grilled meats or fish, making it a fantastic side dish for summer barbecues.
  • In Wraps: Use the salad as a filling for wraps or pita bread for a delicious, portable meal.

In conclusion, this Vibrant Quinoa and Roasted Red Pepper Salad is not just a dish; it’s an experience that invites you to explore healthy eating in a fun, delicious way. Whether you’re meal prepping for the week or looking for a quick and nutritious dinner, this salad has got you covered. So grab your ingredients, roll up your sleeves, and let’s create something delicious together! Enjoy every bite!

Roasted Red Pepper Salad

Prep Time 15 minutes
Cook Time 30 minutes
Total Time 45 minutes
Servings 4 servings
Calories 350
A vibrant and healthy salad combining roasted peppers, quinoa, chickpeas, and fresh herbs, perfect for a light lunch or side dish.

Ingredients

Grains

  • 0.75 cup dry quinoa

Vegetables

  • 8 mini red peppers mini red peppers (quartered, stems and seeds removed)
  • 1 small red onion (cut into wedges)
  • 1 can chickpeas (drained and rinsed)

Herbs

  • 0.25 cup roughly minced dill
  • 0.25 cup roughly minced parsley

Dressing ingredients

  • 0.25 cup olive oil
  • 0.25 cup lemon juice
  • 1 tbsp honey
  • 0.25 tsp kosher salt (plus more as needed)
  • 0.25 tsp cayenne pepper
  • 0.25 tsp garlic granules or minced garlic
  • 0.25 tsp cumin

Instructions 

  • Cook quinoa: rinse, then boil 1 1/2 cups water with a pinch of salt. Add quinoa, simmer 10-12 mins until water is absorbed, then let sit covered for 10 mins.
  • Roast peppers, onion, and chickpeas on trays at 400°F (200°C) for 25-30 mins until charred and crispy.
  • Whisk dressing: combine olive oil, lemon juice, honey, salt, cayenne, garlic, and cumin in a jar, then whisk or shake.
  • Assemble salad: combine cooked quinoa, roasted veggies, chickpeas, herbs, and half the dressing. Toss well, then adjust seasoning and serve warm.

Notes

Feel free to add more honey for sweetness or adjust salt to taste.
Calories: 350kcal
Cost: $15
Course: Salad
Cuisine: Mediterranean
Keyword: Herbs, Quinoa, Vegetables

Elevate Your Dinner Game with Zesty Lemon Garlic Pasta

Welcome to the culinary playground where flavors collide and nutrition meets excitement! Today, we’re diving into the delightful world of Zesty Lemon Garlic Pasta, a dish that transforms an ordinary weeknight into a celebration. This creamy, vibrant pasta dish is infused with the bright notes of fresh lemon, aromatic garlic, and sweet peas, making it the perfect choice when time is short but your cravings are high. Let’s unravel the magic of this recipe, packed with benefits to make you feel good about what’s on your plate!

Why You’ll Love This Recipe

Here are just a few reasons to get excited about our Zesty Lemon Garlic Pasta:

  • Quick and Easy: Ready in under 30 minutes, this dish is perfect for busy weeknights when you need something delicious without the fuss.
  • Nutritious Ingredients: Packed with fresh ingredients, you’ll enjoy a meal that’s not just tasty but also good for you.
  • Customizable: Want to make it your own? This recipe allows for a variety of substitutions and additions to suit your cravings.
  • Vegan-Friendly: Using plant-based ingredients ensures everyone can enjoy this creamy pasta without dairy.
  • Flavor Explosion: The combination of zesty lemon and savory garlic creates a flavor profile that dances on your taste buds.

Ingredient Breakdown

Let’s take a look at what you’ll need to whip up this delicious dish, along with some handy substitutions to cater to your dietary needs:

  • Pasta: 6 ounces of your favorite pasta (spaghetti, penne, or gluten-free options work well). Choose a thin pasta for even sauce coverage.
  • Vegan Butter: 1 tablespoon for richness. Feel free to swap it with olive oil if you prefer.
  • Extra Virgin Olive Oil: 1 tablespoon enhances flavor; opt for high-quality oil for the best taste.
  • Garlic: 3 cloves, minced. Adjust based on your love for garlic! (More for a bold flavor, less for a milder taste.)
  • Lemon: Juice and zest from 1 lemon. Fresh is best for that zesty flavor!
  • Chili Flakes: ½ teaspoon for a hint of heat; feel free to adjust based on your spice tolerance.
  • Vegan Cream or Coconut Milk: ½ cup for creaminess. Coconut milk will impart a subtle sweetness.
  • Pasta Water: ½ cup reserved for emulsifying the sauce and ensuring it clings perfectly to the pasta.
  • Vegan Parmesan Cheese: 2 tablespoons for that cheesy finish. Nutritional yeast can be a great alternative!
  • Peas: ½ cup for a pop of color and sweetness. Fresh or frozen work equally well.

How to Make This Zesty Lemon Garlic Pasta

Side view of creamy Lemon Garlic Pasta garnished with lemon zest.

This recipe is straightforward, making it an excellent choice for both novice cooks and seasoned chefs. Follow these steps to create your culinary masterpiece!

  1. Cook the pasta according to the package directions until al dente. Drain, reserving ¼ cup of the pasta water.
  2. In a large sauté pan, heat the vegan butter and olive oil over low-medium heat until melted.
  3. Add the minced garlic, followed by the lemon juice, lemon zest, and chili flakes. Sauté for about 30 seconds until fragrant.
  4. Pour in the reserved pasta water and vegan cream or coconut milk, stirring to combine. Allow it to heat through.
  5. Gently toss the cooked pasta into the sauce, adding the peas. Stir until well-coated.
  6. Finish with a sprinkle of vegan Parmesan cheese on top and serve immediately!

Pro Tips for Perfect Pasta

Here are some expert insights to ensure your Zesty Lemon Garlic Pasta turns out perfectly every time:

  • Don’t Overcook the Pasta: Aim for al dente to keep the pasta firm and avoid mushiness.
  • Flavor Balance: Adjust the amount of lemon juice and zest according to your taste preference. More lemon for brightness, less for subtlety!
  • Stirring Technique: Toss the pasta gently with the sauce to ensure every strand is coated without breaking.
  • Reserve More Pasta Water: If your sauce feels too thick, adding more pasta water will help loosen it to your desired consistency.
  • Experiment with Add-ins: Toss in some sautéed vegetables or grilled chicken for added texture and flavor.
  • Garnish Creatively: Fresh herbs like basil or parsley can elevate your dish’s presentation and flavor.
  • Storage: Leftovers can be stored in an airtight container in the fridge for up to 3 days. Reheat gently to avoid overcooking the pasta.

Common Mistakes and Troubleshooting

Even the best cooks can run into a few hiccups. Here’s how to avoid common pitfalls:

  • Too Dry: If your pasta feels dry, add more reserved pasta water or vegan cream until you achieve a silky consistency.
  • Too Salty: If you’ve added too much salt, a splash of lemon juice can help balance the flavors.
  • Overcooked Vegetables: Add peas just at the end of cooking to maintain their bright color and crunch.

Variations to Try

Feeling adventurous? Here are some tasty variations to keep your Zesty Lemon Garlic Pasta exciting:

  • Spinach & Artichoke: Add fresh spinach and artichoke hearts for a Mediterranean twist.
  • Mushroom Medley: Sauté a mix of mushrooms for an earthy flavor enhancement.
  • Pesto Lemon Garlic Pasta: Stir in a few tablespoons of pesto for a vibrant herbal note.
  • Spicy Lemon Garlic Shrimp: Toss in sautéed shrimp marinated in lemon and garlic for a protein-packed option.

Storage and Make-Ahead Instructions

This dish is perfect for meal prep! Here’s how to store and make it ahead of time:

  • Refrigerator: Store in an airtight container for up to 3 days. Reheat in a skillet with a splash of water or vegan cream to restore creaminess.
  • Freezer: While best enjoyed fresh, you can freeze leftovers for up to 2 months. Thaw overnight in the fridge before reheating.

Frequently Asked Questions

Got questions? We’ve got answers! Here are some common inquiries about our Zesty Lemon Garlic Pasta:

  • Can I use regular dairy cream instead of vegan cream? Absolutely! Just keep in mind it will no longer be vegan.
  • What pasta shapes work best? Long, thin shapes like spaghetti or fettuccine work best, but feel free to use your favorite!
  • Can I make this gluten-free? Yes! Use gluten-free pasta, and you’re all set.
  • Can I add protein? Definitely! Grilled chicken, shrimp, or chickpeas are excellent additions.
  • How do I add more flavor? Consider adding fresh herbs, more garlic, or a dash of white wine to the sauce.
  • Is it suitable for meal prep? Yes! This dish stores well and can be reheated easily.
  • Can I add extra vegetables? Absolutely! Broccoli, asparagus, or bell peppers make great additions.
  • What should I serve it with? This pasta pairs beautifully with a fresh salad or garlic bread.

Nutrition Tips and Dietary Adaptations

Eating healthy doesn’t have to be complicated! Here are some tips to adapt this recipe to meet your nutritional needs:

  • Lower Carb Option: Swap pasta for spiralized zucchini or spaghetti squash for a low-carb alternative.
  • Protein Boost: Add cooked lentils or chickpeas for a plant-based protein boost.
  • Healthy Fats: Use avocado or nuts for extra healthy fats if you prefer a richer sauce.

Equipment Recommendations

To make your cooking experience smoother, here are some essential tools:

  • Large Pot: For boiling pasta efficiently.
  • Sauté Pan: A wide pan allows for easy stirring and sauce mixing.
  • Measuring Cups: For precise ingredient quantities.
  • Garlic Press: To easily mince garlic, enhancing your dish’s flavor.

Serving Suggestions

Now that your Zesty Lemon Garlic Pasta is ready, here are a few ideas on how to serve it:

  • Top with Fresh Herbs: Garnish with chopped parsley or basil for a fresh pop of color.
  • Pair with a Side Salad: A crisp green salad with a light vinaigrette complements the creamy pasta beautifully.
  • Serve with Garlic Bread: Toasted garlic bread is a great sidekick to this dish, adding texture and flavor.

To wrap it all up, our Zesty Lemon Garlic Pasta isn’t just a recipe; it’s an experience! It’s quick, flavorful, and adaptable, making it the perfect addition to your weeknight menu. So gather your ingredients, unleash your inner chef, and enjoy a delightful meal that’s sure to impress!

Lemon Garlic Pasta

Prep Time 10 minutes
Cook Time 15 minutes
Total Time 25 minutes
Servings 2 servings
Calories 450
A quick and flavorful vegan pasta dish infused with lemon and garlic, perfect for a light meal.

Ingredients

Pasta

  • 6 ounces pasta
  • 1 tablespoon vegan butter
  • 1 tablespoon olive oil (extra virgin)
  • 3 garlic cloves garlic
  • 1 lemon (juice and zest) lemon
  • ½ teaspoon chili flakes
  • ½ cup vegan cream (or coconut milk)
  • ½ cup pasta water
  • 2 tablespoons vegan Parmesan cheese
  • ½ cup peas

Instructions 

  • Cook pasta according to package instructions; drain, reserving ¼ cup pasta water.
  • Heat vegan butter and olive oil in a pan over low-medium heat.
  • Add garlic, lemon juice, zest, and chili flakes; sauté 30 seconds. Add pasta water and cream, heat through.
  • Mix pasta into sauce, add peas, and garnish with vegan Parmesan.

Notes

Use fresh lemon for the best flavor and adjust chili flakes to taste.
Calories: 450kcal
Cost: $12
Course: Main Course
Cuisine: Italian
Keyword: pasta

Unlock the Secrets to Delicious Caramelised Soy Chicken in Garlic Ginger Broth

If you’re looking for a bold and flavorful dish that will make your taste buds dance, look no further! This Caramelised Soy Chicken in Garlic Ginger Broth served with fluffy jasmine rice is here to elevate your dinner game. With a perfect balance of sweet, savory, and a hint of spice, this dish is not just a meal; it’s an experience that brings comfort and satisfaction. Let’s dive into the world of flavors that come together in this simple yet sophisticated recipe.

Why You’ll Love This Recipe

  • Quick and Easy: Perfect for busy weeknights, you can whip this up in under an hour without sacrificing taste.
  • Flavor Explosion: The combination of caramelised soy sauce, garlic, and ginger creates a mouthwatering broth that elevates even the simplest ingredients.
  • Healthy & Nutritious: Packed with protein from the chicken and vitamins from the garlic and ginger, this dish supports your health while pleasing your palate.
  • Versatile & Adaptable: Feel free to play with the ingredients to suit your dietary needs, whether you’re looking for gluten-free options or a vegetarian alternative.
  • Perfect for Meal Prep: This dish stores well, making it an ideal candidate for leftovers and meal prep for the week ahead.

Ingredient Breakdown

Let’s get into the nitty-gritty of what you’ll need to create this culinary masterpiece. Here’s a detailed breakdown of each ingredient:

  • 1.5 lbs boneless skinless chicken thighs: Tender and juicy, they are ideal for quick cooking and absorb flavors beautifully. You can substitute with chicken breasts if you prefer a leaner cut.
  • 1/4 cup soy sauce: This is the star of the show, providing that essential umami flavor. For a gluten-free option, use tamari.
  • 3 tbsp brown sugar: Adds sweetness that balances the soy sauce’s saltiness. You can also use honey or maple syrup for a natural alternative.
  • 1 tbsp sesame oil: This brings a rich, nutty flavor to the dish. If you don’t have it, olive oil is a suitable substitute.
  • 4 cloves garlic, minced: A must for depth of flavor. You can use garlic powder in a pinch, but fresh is always best!
  • 2-inch piece fresh ginger, sliced: Ginger adds warmth and a touch of spice. If you’re in a rush, ginger paste can work as a substitute.
  • 4 cups chicken broth: The base of your broth, adding moisture and flavor. Homemade is best, but store-bought works just fine.
  • 1 cup jasmine rice: Fluffy and aromatic, it pairs beautifully with the broth. For a healthier option, you could use brown rice or quinoa.
  • 2 green onions, sliced: For garnish and a fresh crunch!
  • 1 tbsp vegetable oil: Essential for searing the chicken to perfection, giving it that golden crust.
  • Salt and pepper, to taste: Always season to your liking!

Step-by-Step Cooking Instructions

Close-up of tender, caramelised chicken thighs served in a savory garlic ginger broth alongside fluffy jasmine rice.

Ready to bring this dish to life? Follow these simple steps:

  1. Rinse the jasmine rice: Under cold water until the water runs clear, then cook according to package instructions and set aside.
  2. Prepare the marinade: In a bowl, combine soy sauce, brown sugar, and sesame oil. Add the chicken thighs and marinate for at least 15 minutes for maximum flavor.
  3. Sear the chicken: Heat vegetable oil in a large skillet over medium-high heat. Add the marinated chicken thighs and sear on both sides until caramelised and golden, about 3-4 minutes per side.
  4. Make the broth: Remove the chicken and set aside. In the same skillet, add garlic and ginger, sautéing until fragrant. Pour in chicken broth, scraping up any browned bits from the bottom.
  5. Simmer: Return the chicken to the skillet. Let it simmer in the broth for 15-20 minutes until the chicken is cooked through and flavors meld. Season with salt and pepper to taste.
  6. Serve: Dish up your caramelised soy chicken and garlic ginger broth over steamed jasmine rice. Garnish with sliced green onions for a pop of color!

Expert Tips for Perfecting Your Dish

  • Don’t Overcook: Be careful not to overcook your chicken, as it can become dry. Use a meat thermometer to ensure it reaches 165°F (75°C).
  • Adjust the Sweetness: If you prefer a sweeter broth, feel free to add a bit more brown sugar or honey.
  • Enhance the Umami: Adding a splash of fish sauce or a sprinkle of MSG can amplify the umami flavor.
  • Customize the Broth: Feel free to add vegetables like bok choy, mushrooms, or bell peppers for added nutrition and texture.
  • Marinate Longer: For even more flavor, marinate the chicken for a few hours or overnight if you have time.
  • Use Leftover Broth: Don’t waste the leftover broth! Use it as a base for soups or sauces.
  • Garnish Wisely: Fresh herbs like cilantro or basil can add a refreshing touch to your dish.
  • Save the Skin: If using chicken with skin, consider crisping it up in the pan before serving for added texture.

Common Mistakes and Troubleshooting

Even the best chefs encounter hiccups! Here are a few common mistakes to watch out for:

  • Skimping on Marinade Time: Don’t rush the marinating process; allow that chicken to soak up those flavors!
  • Inadequate Searing: Ensure your skillet is hot enough before adding the chicken to get that beautiful caramelisation.
  • Not Tasting: Always taste your broth before serving; adjust seasoning as needed.
  • Overcrowding the Pan: Cook in batches if needed to prevent steaming instead of searing.

Variations to Experiment With

Feeling adventurous? Here are some exciting variations to consider:

  • Crispy Tofu Version: Replace chicken with firm tofu for a delicious vegetarian option. Just ensure to press and marinate your tofu well.
  • Spicy Kick: Add sliced chili peppers or a dash of sriracha to the broth for a fiery twist.
  • Vegetable Medley: Toss in some bell peppers, broccoli, or snap peas for a colorful and nutritious boost.
  • Different Proteins: Swap chicken for shrimp or beef to change up the flavor profile.

Storage and Make-Ahead Instructions

This dish is perfect for meal prep! Here’s how to store and reheat:

  • Refrigeration: Store leftovers in an airtight container in the fridge for up to 3 days.
  • Freezing: For longer storage, freeze the chicken and broth separately. Use within 2 months for best quality.
  • Reheating: Reheat gently on the stove over low heat, adding a splash of water or broth to loosen the sauce.

Comprehensive FAQ

  • Can I use chicken breasts instead of thighs? Yes, chicken breasts can be used, but thighs are juicier and more flavorful.
  • Is this dish gluten-free? Yes, if you use gluten-free soy sauce or tamari.
  • Can I make this dish vegetarian? Absolutely! Substitute chicken with tofu or tempeh and use vegetable broth.
  • What can I serve with this dish? This dish pairs well with steamed vegetables, salad, or even crusty bread for dipping.
  • How can I make it spicier? Add chili flakes or fresh sliced chili peppers to the broth.
  • Can I add more vegetables? Yes! Feel free to toss in your favorite veggies.
  • What type of chicken broth should I use? Homemade is best, but low-sodium store-bought works too.
  • How can I adjust the sweetness? Simply modify the amount of brown sugar or honey to your taste.

Nutritional Tips and Dietary Adaptations

This dish is not only delicious but also nutritious:

  • High Protein: Chicken thighs provide ample protein, making this a filling meal.
  • Low Carb Option: Serve without rice or substitute with cauliflower rice for a low-carb alternative.
  • Rich in Antioxidants: Garlic and ginger are not only flavorful but also packed with health benefits.

Essential Equipment

Here’s what you’ll need in your kitchen:

  • Large Skillet: A heavy-bottomed skillet is ideal for searing and simmering.
  • Mixing Bowl: For marinating the chicken.
  • Meat Thermometer: To ensure your chicken is cooked perfectly.
  • Rice Cooker or Pot: For cooking jasmine rice to fluffy perfection.

Serving Suggestions

Now that your dish is ready, consider these serving ideas:

  • Garnish: Top with sliced green onions, sesame seeds, or fresh herbs for an extra flavor boost.
  • Side Dishes: Pair with a simple cucumber salad or steamed bok choy.
  • Presentation: Serve in deep bowls to highlight the broth, giving it a comforting and hearty appearance.

This Caramelised Soy Chicken in Garlic Ginger Broth with Rice is more than just a meal; it’s a delightful journey through flavors and textures that will impress your family and friends. So roll up your sleeves and get cooking! You’re about to savor one of the most delicious dishes you’ve ever made!

Caramelised Soy Chicken in Garlic Ginger Broth with Rice

Prep Time 15 minutes
Cook Time 30 minutes
Total Time 45 minutes
Servings 4 servings
Calories 550
A flavorful and comforting dish featuring caramelised soy chicken served over fragrant jasmine rice with a savory garlic ginger broth.

Ingredients

Protein

  • 1.5 lbs boneless skinless chicken thighs

Sauces and Oils

  • 1/4 cup soy sauce
  • 3 tbsp brown sugar
  • 1 tbsp sesame oil

Aromatics

  • 4 cloves garlic, minced
  • 2 inch fresh ginger, sliced

Broth and Rice

  • 4 cups chicken broth
  • 1 cup jasmine rice

Garnishes

  • 2 green onions sliced
  • 1 tbsp vegetable oil

Seasoning

  • to taste Salt and pepper

Instructions 

  • Cook jasmine rice according to package instructions and set aside.
  • Marinate chicken thighs in soy sauce, brown sugar, and sesame oil for at least 15 minutes.
  • Heat vegetable oil and sear chicken until caramelised, then set aside.
  • Sauté garlic and ginger, add broth, then return chicken and simmer for 15-20 minutes.
  • Serve chicken and broth over rice, garnished with green onions.

Notes

Adjust seasoning to taste and enjoy!
Calories: 550kcal
Cost: $15
Course: Main Course
Cuisine: Asian
Keyword: Chicken, Ginger, Soy Sauce

Elevate Your Meal Game with These Shrimp and Avocado Bowls!

Welcome to a vibrant culinary journey where flavor meets nutrition! These Shrimp and Avocado Bowls are not just meals—they’re experiences bursting with fresh ingredients and bright colors that will make your taste buds dance. With zesty Mango Salsa and a kick of Lime Chili Sauce, this dish is perfect for a quick, healthy meal that’s packed with flavor and fun. Let’s dive into this colorful recipe that promises to invigorate your kitchen and elevate your meal game!

Why You’ll Love This Recipe

  • Quick and Easy: Ready in under 30 minutes, these bowls are perfect for busy weeknights or spontaneous gatherings.
  • Flavor Explosion: Each component—from the grilled shrimp to the fresh mango salsa—offers a unique burst of flavors that complement each other beautifully.
  • Customizable: Make it your own! Swap ingredients based on your preferences, such as using different proteins or grains.
  • Nutrition-Packed: This dish is rich in protein, healthy fats, and vitamins, making it a wholesome choice for any meal.
  • Meal Prep Friendly: Perfect for meal prep! Prepare components in advance and assemble just before serving for a fresh experience.

Ingredient Breakdown

Here’s what you’ll need to make these delicious bowls:

For the Bowls:

  • 1 lb shrimp, peeled and deveined
  • 1 tablespoon olive oil
  • 1 teaspoon chili powder
  • 1 teaspoon cumin
  • 1/2 teaspoon paprika
  • 1/4 teaspoon garlic powder
  • 1/2 teaspoon salt
  • 2 cups cooked rice or quinoa (substitute with cauliflower rice for a low-carb option)
  • 1 avocado, sliced or cubed
  • 1/4 cup chopped fresh cilantro

For the Mango Salsa:

  • 1 mango, diced
  • 1/4 red onion, finely chopped
  • 1/2 red bell pepper, diced
  • 1 tablespoon chopped fresh cilantro
  • Juice of 1/2 lime
  • Pinch of salt

For the Lime Chili Sauce:

  • 1/4 cup mayonnaise
  • Juice of 1 lime
  • 1–2 teaspoons chili sauce (like Sriracha)
  • 1/2 teaspoon honey

How to Make Shrimp and Avocado Bowls

A vibrant shrimp and avocado bowl garnished with fresh mango salsa and lime chili sauce.

Step 1: Season and Cook the Shrimp

In a bowl, toss the shrimp with olive oil, chili powder, cumin, paprika, garlic powder, and salt until fully coated. Heat a skillet over medium-high heat and cook the shrimp for 2–3 minutes on each side, or until they’re pink, curled, and slightly charred. Set aside to cool slightly.

Step 2: Make the Mango Salsa

Combine diced mango, red onion, bell pepper, lime juice, chopped cilantro, and a pinch of salt in a small bowl. Stir gently to combine. Let it sit for a few minutes to allow the flavors to meld—it gets better the longer it rests.

Step 3: Whisk the Lime Chili Sauce

In a small bowl, whisk together the mayonnaise, lime juice, chili sauce, and honey. Adjust the chili sauce to your spice preference. This creamy, tangy sauce ties the whole bowl together.

Step 4: Assemble the Bowls

Start with a bed of cooked rice or quinoa in each bowl. Layer on the shrimp, mango salsa, avocado slices, and a sprinkle of fresh cilantro. Drizzle generously with the lime chili sauce and serve immediately.

Pro Tips for Perfect Bowls

  • Freshness Matters: Use ripe avocados and seasonal mangoes for the best flavor and texture.
  • Don’t Overcook the Shrimp: Keep an eye on the shrimp as they cook quickly; overcooking can make them tough.
  • Customize Your Grains: Feel free to use quinoa, brown rice, or even lettuce wraps to make this dish lighter.
  • Chill the Salsa: For an extra refreshing taste, chill the mango salsa in the fridge before serving.
  • Make It Spicy: Add more chili sauce or diced jalapeños if you like a bit more heat!
  • Storage Tip: Store components separately to maintain freshness; reassemble when ready to eat.
  • Double the Recipe: This recipe is perfect for meal prep, so consider making a double batch for future meals!
  • Add Nuts or Seeds: For added crunch, sprinkle some toasted pumpkin seeds or chopped nuts on top before serving.

Common Mistakes and Troubleshooting

Even the best cooks face challenges! Here’s how to avoid common pitfalls:

  • Shrimp Sticking: Ensure your skillet is hot enough before adding shrimp to prevent sticking.
  • Mango Salsa Too Watery: If your mango is too ripe, it may release excess juice. Use firmer mangoes for better texture.
  • Overly Spicy Sauce: If the lime chili sauce is too hot, balance it with a little more honey or mayonnaise.
  • Avocado Browning: If making ahead, sprinkle avocado with lime juice to keep it fresh and green.

Delicious Variations to Try

Want to mix things up? Here are some fun variations to keep your meals exciting:

  • Grilled Chicken Version: Substitute shrimp with grilled chicken for a different protein option.
  • Vegan Delight: Use tofu or chickpeas instead of shrimp for a plant-based twist.
  • Spicy Tuna Bowl: Swap shrimp for marinated sushi-grade tuna for a raw option.
  • Mexican-Inspired: Replace mango salsa with pico de gallo and add corn for a southwestern flair.

Storage and Make-Ahead Instructions

Planning ahead? Here’s how to store your bowls:

  • Store shrimp, rice, and avocado separately to retain freshness and texture.
  • Mango salsa can be made 1-2 days in advance and stored in an airtight container in the fridge.
  • The lime chili sauce can be prepared ahead and kept in the refrigerator for up to a week.

Frequently Asked Questions

  • Can I use frozen shrimp? Yes! Just thaw them in cold water before using.
  • What can I substitute for mayonnaise? Greek yogurt is a great alternative for a lighter sauce.
  • How can I make this dish gluten-free? Ensure your chili sauce is gluten-free and use rice or quinoa.
  • Is this recipe good for meal prep? Absolutely! Just store components separately until ready to eat.
  • Can I add more vegetables? Yes! Feel free to add bell peppers, cucumbers, or greens to the bowls.
  • What’s the best way to reheat the shrimp? Reheat gently in a skillet over low heat to avoid overcooking.
  • How long will leftovers last? Consume within 2 days for the best quality and freshness.
  • Can I make this low-carb? Yes! Replace rice with cauliflower rice for a low-carb option.

Nutrition Tips and Dietary Adaptations

Here are some nutrition tips to enhance your meal:

  • Boost Fiber: Add black beans or chickpeas for extra fiber and protein.
  • Healthy Fats: Incorporate nuts or seeds to enhance the healthy fat content.
  • Watch Portion Sizes: Keep track of your ingredient portions, especially grains, if you’re watching calories.

Equipment Recommendations

To make this dish, you’ll need:

  • A large skillet for cooking shrimp
  • A cutting board and sharp knife for chopping
  • Mixing bowls for salsa and sauce preparation
  • A whisk for mixing the lime chili sauce

Serving Suggestions

These bowls are not just a meal; they’re a feast for the senses! Serve them with:

  • A refreshing side salad to complement the rich flavors.
  • Chips and guacamole for a fun appetizer.
  • A light, fruity dessert like sorbet to cleanse the palate.

Now that you have everything you need to create these Bright and Bold Shrimp and Avocado Bowls with Zesty Mango Salsa, it’s time to unleash your inner chef and enjoy the colorful flavors of healthy cooking. Remember, the kitchen is your playground—so have fun and make this recipe your own! Happy cooking!

Shrimp and Avocado Bowls with Mango Salsa & Lime Chili Sauce

Prep Time 15 minutes
Cook Time 10 minutes
Total Time 25 minutes
Servings 4 servings
Calories 450
A vibrant and flavorful bowl combining succulent shrimp, creamy avocado, sweet mango salsa, and a spicy lime chili sauce for a satisfying meal.

Ingredients

For the bowls:

  • 1 lb shrimp, peeled and deveined
  • 1 tablespoon olive oil
  • 1 teaspoon chili powder
  • 1 teaspoon cumin
  • 1/2 teaspoon paprika
  • 1/4 teaspoon garlic powder
  • 1/2 teaspoon salt
  • 2 cups cooked rice or quinoa
  • 1 avocado sliced or cubed
  • 1/4 cup chopped fresh cilantro

For the mango salsa:

  • 1 mango diced
  • 1/4 red onion finely chopped
  • 1/2 red bell pepper diced
  • 1 tablespoon chopped fresh cilantro
  • Juice of 1/2 lime lime juice

For the lime chili sauce:

  • 1/4 cup mayonnaise
  • Juice of 1 lime lime juice
  • 1–2 teaspoons chili sauce like Sriracha (adjust spice level)

Instructions 

  • Season and cook the shrimp: Toss shrimp with oil and spices, then cook 2-3 minutes per side until pink and charred.
  • Make mango salsa: Combine mango, onion, bell pepper, lime juice, cilantro, and salt; let sit to meld flavors.
  • Whisk lime chili sauce: Mix mayonnaise, lime juice, chili sauce, and honey until smooth.
  • Assemble bowls: Layer rice, shrimp, mango salsa, avocado, cilantro, and drizzle with sauce. Serve immediately.

Notes

For extra flavor, garnish with additional cilantro or a squeeze of lime.
Calories: 450kcal
Cost: $15
Course: Main Course
Cuisine: fusion
Keyword: avocado, Mango, shrimp