Author

Ryan

Browsing

Dive into the Comfort of Beef Stroganoff

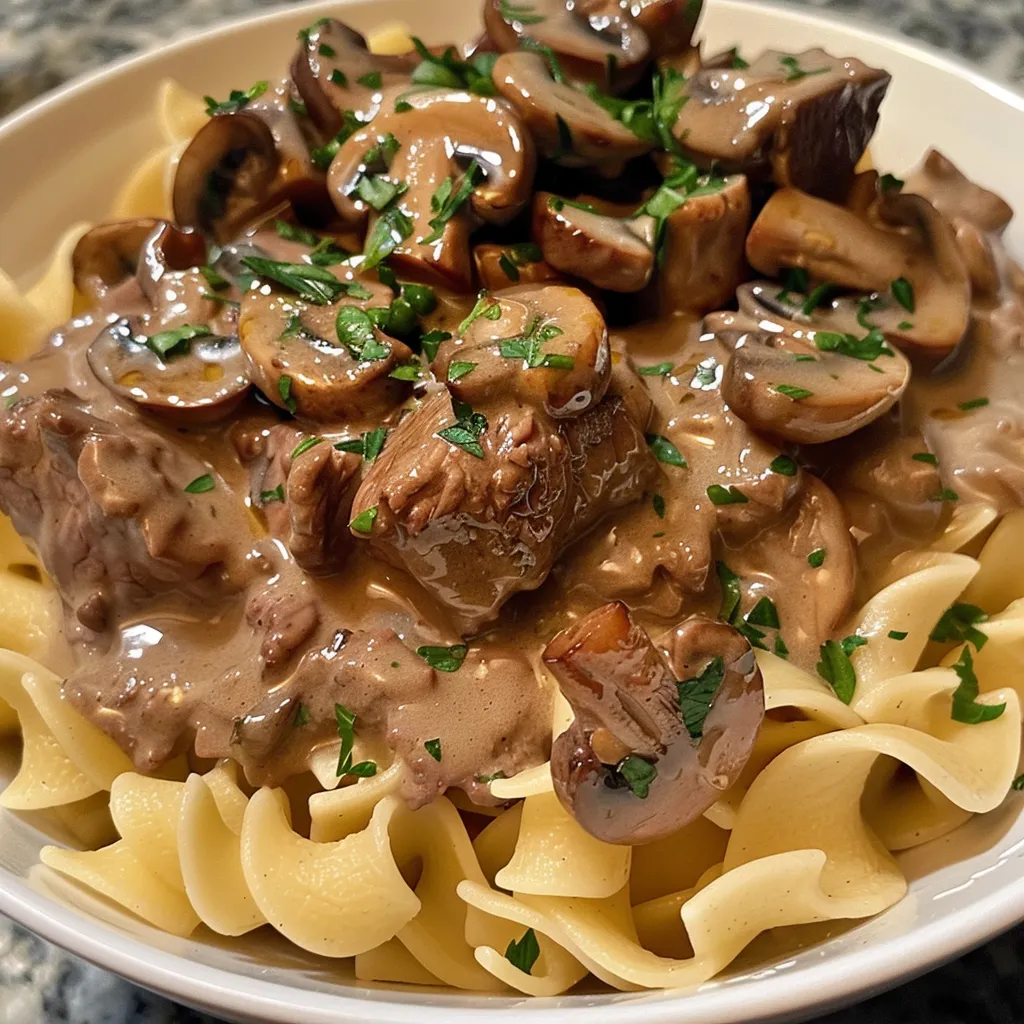
Welcome to a culinary adventure where rich flavors and heartwarming comfort unite! Beef Stroganoff is a classic dish that brings together tender strips of beef, earthy mushrooms, and a creamy sauce, all served over a bed of egg noodles. Whether you’re planning a cozy dinner at home or looking to impress friends with your cooking skills, this dish is a showstopper! With this comprehensive guide, you’ll learn how to create the ultimate Beef Stroganoff that’s not just delicious but also easy to prepare. Let’s get started!

Why You’ll Love This Recipe

This Beef Stroganoff recipe is not just a meal; it’s an experience! Here’s why you’ll adore it:

  • Quick and Easy: With a total prep and cook time of just under an hour, this dish is perfect for busy weeknights.
  • Flavor-Packed: The combination of sautéed mushrooms and a creamy sauce elevates the taste to a whole new level.
  • Comfort Food: It’s the ideal dish for cozy nights, filling your home with warm aromas and your belly with satisfaction.
  • Customizable: Easily adapt the recipe to suit dietary needs or personal preferences, making it versatile for everyone.
  • Leftover Friendly: This dish tastes even better the next day, making it great for meal prep or leftovers!

Essential Ingredients and Their Roles

To create the best Beef Stroganoff, you’ll need the following ingredients:

  • 1 pound boneless sirloin or tenderloin steak: Tender cuts provide the best texture and flavor.
  • 8 ounces fresh mushrooms: Button or cremini mushrooms add an earthy depth.
  • 1 medium onion: Sweet onions caramelize beautifully, enhancing the dish’s overall flavor.
  • 2 cloves garlic: Fresh garlic adds aromatic undertones.
  • 1 cup sour cream: This is the creamy component that elevates the sauce.
  • 1 cup low-sodium beef broth: A flavorful base that enriches the sauce.
  • 1 tablespoon Worcestershire sauce: Adds a savory depth that complements the beef.
  • 1 tablespoon all-purpose flour: Helps to thicken the sauce and create a silky texture.
  • 8 ounces egg noodles: The traditional base for serving this dish, but you can substitute with rice or gluten-free noodles.

Preparation Steps for Your Beef Stroganoff

Side view of a hearty Beef Stroganoff dish, showcasing tender beef and mushrooms in a rich sauce.

Ready to bring your Beef Stroganoff to life? Follow these steps:

  1. Sauté chopped onions in olive oil until translucent (about 3-4 minutes). Add minced garlic and cook for an additional minute.
  2. Incorporate sliced mushrooms and cook until softened, stirring occasionally (around 5-6 minutes).
  3. Remove the vegetables from the skillet and set aside. In the same skillet, brown the sliced beef over medium-high heat until seared but not fully cooked (about 3-4 minutes).
  4. Create a roux by adding flour to the skillet, stirring for about 1 minute. Gradually pour in beef broth and Worcestershire sauce, stirring until smooth.
  5. Reduce heat to low, then add sour cream, stirring until well combined. Return the beef and vegetables to the skillet, simmering for a few minutes to meld the flavors.
  6. Serve over cooked egg noodles, garnished with fresh parsley or chives if desired.

Expert Tips for the Perfect Beef Stroganoff

Maximize your cooking game with these pro tips:

  • Use a cast-iron skillet: This helps to achieve a perfect sear on your beef.
  • Slice against the grain: This ensures your beef is tender and easy to chew.
  • Adjust sour cream: For a lighter sauce, use Greek yogurt as a substitute for some or all of the sour cream.
  • Let it simmer: Allowing the dish to simmer gently melds the flavors beautifully.
  • Experiment with mushrooms: Try adding a mix of different mushrooms for a more complex flavor.
  • Keep it low and slow: Avoid cooking on high heat to prevent tough meat.
  • Garnish wisely: Fresh herbs like parsley or dill can brighten the dish and add visual appeal.
  • Make it cheesy: Consider adding a sprinkle of Parmesan cheese for an extra layer of flavor.

Avoid Common Mistakes

Steer clear of these common pitfalls:

  • Overcooking the beef: This can lead to tough, chewy meat. Only sear it until browned.
  • Skipping the roux: This step is crucial for a creamy, thick sauce. Don’t rush it!
  • Using high-sodium broth: Opt for low-sodium beef broth to control the saltiness of your dish.
  • Too much heat: Cook over medium heat to prevent burning the sauce.

Delicious Variations to Try

Feeling adventurous? Here are some fun variations:

  • Vegetarian Stroganoff: Substitute beef with hearty mushrooms and add lentils for protein.
  • Spicy Kick: Add some crushed red pepper flakes for a little heat.
  • Herb-infused: Incorporate fresh thyme or rosemary for a fragrant touch.
  • One-Pot Wonder: Combine all ingredients in a slow cooker for a hands-off approach.

Storage and Make-Ahead Instructions

Want to enjoy your Beef Stroganoff later? Here’s how:

  • Refrigerator: Store leftovers in an airtight container for up to 3 days.
  • Freezer: Freeze in portions for up to 3 months. Thaw overnight in the fridge before reheating.
  • Reheating: Gently reheat on the stovetop over low heat, adding a splash of broth to loosen the sauce.

Frequently Asked Questions

Here are some common questions about Beef Stroganoff:

  • Can I use ground beef? Yes, ground beef works; just adjust the cooking time accordingly.
  • What can I serve with Beef Stroganoff? It’s great with crusty bread, salad, or steamed vegetables.
  • Is it suitable for freezing? Absolutely! Just remember to store it correctly.
  • Can I make it gluten-free? Yes, use gluten-free flour and noodles.
  • How can I make it dairy-free? Substitute sour cream with coconut cream or cashew cream.
  • What’s the best way to reheat leftovers? Gently reheat on the stove with added broth to keep it creamy.
  • Can I add more vegetables? Definitely! Peas, bell peppers, or spinach can enhance the dish.
  • How spicy is this recipe? It’s not spicy, but feel free to add heat to your liking!

Nutritional Tips and Dietary Adaptations

For those watching their nutrition, here are some tips:

  • Reduce calories: Use lean cuts of beef and low-fat sour cream.
  • Boost fiber: Serve with a side of steamed veggies or a mixed green salad.
  • Control portions: Serve smaller portions over a generous bed of veggies for a lighter meal.

Equipment Recommendations

Here’s what you need to whip up this delicious dish:

  • Cast Iron Skillet: Perfect for searing meat and creating a rich sauce.
  • Wooden Spoon: Ideal for stirring without scratching your skillet.
  • Measuring Cups and Spoons: Accurate measurements are key for great flavor.
  • Cutting Board and Knife: Essential for prepping your ingredients.

Serving Suggestions

To make your meal even more inviting, consider these serving ideas:

  • Garnish: Sprinkle fresh herbs over the top for a pop of color.
  • Side Dishes: Pair with a crisp green salad or roasted vegetables to balance the richness.
  • Wine Pairing: A nice red wine, like Merlot or Cabernet Sauvignon, complements the dish beautifully.

Conclusion: Your Beef Stroganoff Awaits!

Now you’re equipped with everything you need to create a mouthwatering Beef Stroganoff that’s sure to impress! This dish is all about comfort, flavor, and creativity in the kitchen. Embrace the joy of cooking and enjoy every rich, creamy bite. So grab your ingredients, channel your inner chef, and let the cooking magic begin!

Authentic Beef Stroganoff Recipe for Comfort Food Lovers

Prep Time 10 minutes
Cook Time 20 minutes
Total Time 30 minutes
Servings 4 servings
Calories 550
A classic and hearty dish perfect for cozy nights, combining tender beef, mushrooms, and a creamy sauce served over noodles.

Ingredients

Meat

  • 1 pound boneless sirloin or tenderloin steak

Vegetables

  • 8 ounces fresh mushrooms (button or cremini)
  • 1 medium onion
  • 2 cloves garlic (minced)

Dairy

  • 1 cup sour cream

Broth

  • 1 cup low-sodium beef broth

Sauces & Condiments

  • 1 tablespoon Worcestershire sauce
  • 1 tablespoon all-purpose flour

Noodles

  • 8 ounces egg noodles

Instructions 

  • Sauté chopped onions in olive oil until translucent. Add minced garlic and cook for another minute.
  • Add sliced mushrooms and cook until softened. Remove vegetables and set aside.
  • Brown sliced beef in the same skillet until seared but not fully cooked.
  • Create a roux with flour, then add beef broth, Worcestershire sauce, and sour cream, stirring until smooth.
  • Return beef and vegetables to the skillet, simmer for a few minutes to combine flavors. Serve over cooked egg noodles.

Notes

For a richer flavor, use full-fat sour cream and sear the beef well.
Calories: 550kcal
Cost: $15
Course: Main Course
Cuisine: Russian
Keyword: Beef, Comfort Food

Elevate Your Grilling Game with Bang Bang Chicken Skewers!

Welcome to the ultimate guide on making mouthwatering Bang Bang Chicken Skewers that are guaranteed to pack a flavor punch! If you’re looking to spice up your next cookout or simply want to indulge in a delicious and healthy meal at home, you’ve come to the right place. These skewers are not just about taste; they are about making healthy cooking exciting and accessible. In this article, we’ll dive deep into the world of Bang Bang Chicken Skewers, exploring everything from ingredients to variations, pro tips, and more. Get ready to unleash your inner chef and make mealtime a delightful experience!

In under 30 minutes, you can transform simple ingredients into a dish that dazzles both the eyes and the palate. Perfect for summer BBQs, picnics, or a quick weeknight dinner, these skewers will become your go-to recipe for any occasion!

Why You’ll Love This Recipe

  • Flavor Explosion: The creamy, spicy bang bang sauce beautifully balances sweet and spicy notes, ensuring a crowd-pleasing dish every time.
  • Quick and Easy: You can whip these skewers up in just about 20 minutes, making them perfect for busy weeknights or last-minute gatherings.
  • Versatile Cooking Options: Whether you prefer grilling, air-frying, or baking, these skewers work wonderfully with any method.
  • Healthy and Nutritious: Packed with protein and made with fresh ingredients, these skewers are a guilt-free option for any meal.
  • Customizable: The recipe is flexible, allowing you to adjust the spices and ingredients to suit your taste or dietary needs.

Ingredients You’ll Need

To create these tasty Bang Bang Chicken Skewers, gather the following ingredients:

  • 1.5 lbs boneless, skinless chicken breasts or thighs: Cut into 1 to 1.5-inch chunks. Thighs offer a juicier bite, while breasts are leaner.
  • 1 tablespoon olive oil: Helps to keep the chicken moist and adds flavor.
  • 1 teaspoon salt: Essential for enhancing the natural flavor of the chicken.
  • ½ teaspoon black pepper: Adds a mild kick.
  • ½ teaspoon garlic powder (optional): For an extra layer of flavor.
  • ½ teaspoon smoked paprika (optional): Infuses a subtle smokiness.
  • 8-10 skewers: Use wooden or metal skewers; soak wooden skewers in water for at least 30 minutes to prevent burning.
  • ½ cup mayonnaise: For the creamy base of the bang bang sauce. You can substitute with ¼ cup mayo + ¼ cup Greek yogurt for a lighter version.
  • 2 tablespoons sriracha: Adjust to taste for desired heat level.
  • 1 tablespoon honey (or sugar): Adds sweetness to balance the spice.
  • 1 tablespoon rice vinegar (or lime juice): Provides acidity and brightness.
  • 1 tablespoon chopped green onions: For garnish and added flavor.
  • 1 teaspoon sesame seeds: Adds a delightful crunch.

Pro Tips for Making Bang Bang Chicken Skewers

Juicy chicken skewers drizzled with sauce, garnished with green onions and sesame seeds.
  • Marinate the Chicken: If you have time, marinating the chicken in olive oil, salt, pepper, and spices for at least 30 minutes will enhance the flavor.
  • Don’t Overcrowd the Skewers: Leave some space between the pieces of chicken to ensure even cooking.
  • Use a Meat Thermometer: Ensure the chicken is cooked through to an internal temperature of 165°F for safe consumption.
  • Adjust the Sauce to Suit Your Taste: Feel free to tweak the ingredients of the bang bang sauce to suit your preferences. Add more sriracha for heat or more honey for sweetness.
  • Focus on Garnishing: A sprinkle of chopped green onions and sesame seeds at the end can elevate the dish visually and in flavor.
  • Experiment with Cooking Methods: Try grilling for a smoky flavor, air-frying for a crispy texture, or baking for an easy, hands-off approach.
  • Make Ahead: You can prep the skewers in advance and store them in the fridge until ready to cook.
  • Save Leftovers: Store any leftover skewers in an airtight container in the fridge for up to three days.

Common Mistakes and Troubleshooting

Even the best chefs make mistakes, so here are some common pitfalls to avoid:

  • Skipping Soaking Wooden Skewers: Always soak wooden skewers to prevent them from burning on the grill.
  • Not Preheating the Grill: Ensure your grill is hot before adding the skewers for the best sear.
  • Overcooking the Chicken: Keep a close eye on cooking time; remove the chicken once it reaches the safe internal temperature.
  • Not Adjusting Sauce Ingredients: Don’t hesitate to modify the sauce to match your taste preferences.

Variations to Try

Here are some fun twists to make this recipe your own:

  • Vegetarian Option: Substitute chicken with tofu or tempeh for a plant-based version.
  • Spicy Bang Bang Shrimp: Use shrimp instead of chicken for a seafood twist.
  • Asian-Inspired Skewers: Add pineapple chunks or bell peppers for extra flavor and nutrition.
  • Herb-Infused: Add fresh herbs like cilantro or basil to the marinade for a fragrant touch.

Storage and Make-Ahead Instructions

If you want to prepare these skewers in advance, follow these tips:

  • Make Ahead: Assemble the skewers and store them in an airtight container in the fridge for up to 24 hours before cooking.
  • Leftovers: Store any leftover cooked skewers in the refrigerator for up to 3 days. Reheat in the microwave or on the grill until warmed through.
  • Freezing: You can freeze uncooked skewers for up to 3 months. Thaw in the fridge before cooking.

FAQs

Here are some common questions regarding Bang Bang Chicken Skewers:

  • Can I use store-bought bang bang sauce? Yes, you can use store-bought sauce for convenience, but homemade offers a fresher taste.
  • How spicy are these skewers? The spice level can be adjusted based on the amount of sriracha used in the sauce.
  • Can I cook these skewers in the oven or air fryer? Absolutely! Bake in a preheated oven at 400°F for 15-20 minutes or air fry for about 10-12 minutes.
  • How long do leftovers last? Store leftovers in an airtight container in the fridge for up to 3 days.
  • What can I serve with Bang Bang Chicken Skewers? Pair them with rice, a fresh salad, or grilled vegetables for a complete meal.
  • Can these skewers be made gluten-free? Yes, simply ensure that any sauce or condiments used are gluten-free.
  • How do I know when the chicken is done? Use a meat thermometer to check that the internal temperature has reached 165°F.
  • Can I make these skewers ahead of time? Yes, you can prepare the skewers a day in advance and store them in the fridge until cooking.

Nutrition Tips and Dietary Adaptations

These skewers are not only delicious but also nutritious! Here are some tips to make them even healthier:

  • Lean Protein: Use chicken thighs for juiciness or chicken breasts for lower fat content.
  • Healthy Fats: Olive oil is a heart-healthy choice for marinating the chicken.
  • Lower Calorie Options: Substitute mayonnaise with Greek yogurt to reduce calories and add protein.
  • Fresh Vegetables: Add bell peppers, onions, or zucchini to the skewers for extra vitamins and fiber.

Equipment Recommendations

To make the process smoother, consider using the following tools:

  • Grill or Grill Pan: For that delicious char and smoky flavor.
  • Meat Thermometer: To ensure perfectly cooked chicken every time.
  • Skewers: Choose between wooden or metal; just soak wooden skewers beforehand.
  • Mixing Bowl: For combining spices and marinating chicken.

Serving Suggestions

Make your meal complete with these serving ideas:

  • Fresh Salad: A light salad with greens and a vinaigrette pairs beautifully with the skewers.
  • Rice or Quinoa: Serve over rice or quinoa to soak up the fantastic bang bang sauce.
  • Grilled Vegetables: Add seasonal grilled vegetables to your plate for a colorful, nutritious side.
  • Wraps: Use the chicken skewers in wraps with lettuce and sauce for a fun handheld meal.

There you have it! An in-depth guide to making the most delicious Bang Bang Chicken Skewers that will impress your friends and family. Remember, cooking should be fun, and this recipe embodies that spirit! So grab your ingredients and get ready to grill up some joy!

Bang Bang Chicken Skewers Recipe

Prep Time 15 minutes
Cook Time 10 minutes
Total Time 25 minutes
Servings 4 servings
Calories 350
Enjoy these flavorful grilled chicken skewers coated in a spicy, creamy sauce, perfect for a quick and delicious meal or appetizer.

Ingredients

Chicken

  • 1.5 lbs boneless, skinless chicken breasts or thighs (cut into 1 to 1.5-inch chunks)
  • 1 tablespoon olive oil
  • 1 teaspoon salt
  • ½ teaspoon black pepper
  • ½ teaspoon garlic powder (optional)
  • ½ teaspoon smoked paprika (optional)
  • 8-10 skewers wooden or metal skewers (soak wooden skewers in water if using)
  • ½ cup mayonnaise (or use ¼ cup mayo + ¼ cup Greek yogurt for a lighter option)
  • 2 tablespoons sriracha (adjust to taste)
  • 1 tablespoon honey (or sugar)
  • 1 tablespoon rice vinegar (or lime juice)
  • 1 tablespoon chopped green onions
  • 1 teaspoon sesame seeds

Instructions 

  • Preheat grill and soak skewers if wooden.
  • Thread chicken chunks onto skewers and season with salt, pepper, garlic powder, and paprika.
  • Grill skewers until cooked through, about 8-10 minutes.
  • Mix mayonnaise, sriracha, honey, rice vinegar, green onions, and sesame seeds to make the sauce.
  • Brush the cooked skewers with the spicy sauce and serve garnished with additional green onions and sesame seeds.

Notes

Soak wooden skewers in water for at least 30 minutes to prevent burning.
Calories: 350kcal
Cost: $15
Course: Main Course
Cuisine: Asian
Keyword: Chicken, Skewers, Spicy

Welcome to Flavor Town: Your Ultimate Guide to Thai Cashew Chicken

Are you ready to embark on a culinary journey that will tantalize your taste buds and bring vibrant flavors to your dinner table? This Thai Cashew Chicken recipe is not only easy to make but also bursts with flavor, making it the perfect weeknight dinner. With juicy chicken, crunchy cashews, and a medley of colorful vegetables, this dish is a flavor explosion that you won’t want to miss. Let’s dive into the delicious world of Thai cooking!

Why You’ll Love This Recipe

This Thai Cashew Chicken recipe is a winner for several reasons:

  • Quick and Easy: With a preparation and cooking time of just under 30 minutes, this recipe is perfect for busy weeknights.
  • Flavor-Packed: The combination of garlic, soy sauce, and fish sauce creates a rich umami flavor that elevates the dish.
  • Nutritious and Balanced: Packed with protein from the chicken and healthy fats from the cashews, this dish offers a balanced meal.
  • Customizable: Whether you want to add extra veggies or switch up the proteins, this recipe allows for plenty of creativity.
  • Impress Your Guests: Serve this stunning dish at your next dinner party, and watch as your friends rave about your culinary skills!

Ingredients You’ll Need

Here’s what you need to create this mouthwatering dish, along with some helpful substitutions:

  • 600 g Chicken thighs: Boneless and skinless, cut into bite-size pieces. Feel free to substitute with chicken breast or tofu for a vegetarian option.
  • 2 tbsp Vegetable oil: Use canola or peanut oil for a higher smoke point.
  • 1 cup Cashew nuts: Roasted and unsalted. If you prefer, you can use almonds or peanuts.
  • 3 cloves Garlic: Minced for aromatic flavor.
  • 1 Onion: Chopped, preferably sweet onion for added flavor.
  • 1 Red bell pepper: Chopped for color and sweetness.
  • 1 Green bell pepper: Chopped for crunch.
  • 3 tbsp Soy sauce: Low sodium is a great choice for a healthier option.
  • 2 tbsp Oyster sauce: Adds depth; can be substituted with mushroom sauce for a vegan alternative.
  • 1 tbsp Fish sauce: This key ingredient brings a unique flavor profile; skip it for a vegetarian version.
  • 1 tsp Sugar: Balances the savory flavors.
  • 1/2 tsp White pepper: For a subtle heat; black pepper can be used instead.
  • 4 Green onions: Chopped for garnish and freshness.

Pro Tips for Perfect Thai Cashew Chicken

Ready to take your cooking skills to the next level? Here are some expert insights:

  • Marinate the Chicken: For even more flavor, marinate the chicken pieces in soy sauce and garlic for 15-30 minutes before cooking.
  • High Heat Cooking: Use a wok or a heavy skillet and cook on high heat to achieve that delightful stir-fry effect.
  • Toast Your Cashews: For a richer flavor, toast your cashew nuts in the pan before adding other ingredients.
  • Vegetable Prep: Cut your vegetables into similar sizes to ensure even cooking.
  • Don’t Overcrowd the Pan: Cook in batches if necessary to maintain high heat and achieve a good sear.
  • Serve Fresh: This dish is best enjoyed fresh; however, leftovers can be stored properly.
  • Garnish Wisely: Fresh herbs like cilantro can enhance the presentation and flavor.
  • Adjust the Sauce: Feel free to tweak the sauce ingredients to match your taste preference.

Avoiding Common Mistakes

Even the best chefs make mistakes! Here’s how to avoid common pitfalls:

  • Overcooked Chicken: Cook just until the chicken is no longer pink to keep it juicy.
  • Burnt Garlic: Add garlic towards the end of cooking to prevent it from burning.
  • Too Much Sauce: Start with less sauce and adjust according to your taste to avoid overpowering the dish.
  • Inadequate Stirring: Stir continuously while cooking to avoid sticking and ensure even cooking.

Variations to Spice Things Up

Want to mix things up? Here are some flavorful variations:

  • Vegetable Medley: Add broccoli, snap peas, or carrots for extra color and nutrition.
  • Spicy Kick: Add red pepper flakes or sriracha for a spicy version.
  • Pineapple Delight: Toss in some fresh pineapple chunks for a sweet and savory twist.
  • Cashew Chicken Lettuce Wraps: Serve in lettuce cups instead of rice for a fresh, crunchy option.

Storage and Make-Ahead Instructions

Planning ahead? Here’s how to store and prepare this dish:

  • Make-Ahead: Chop all your ingredients in advance and store them in the fridge for an easy meal prep.
  • Storing Leftovers: Keep leftovers in an airtight container in the refrigerator for up to 3 days.
  • Reheating: Reheat in a skillet over medium heat until warmed through, adding a splash of water or broth to keep it moist.

Frequently Asked Questions

Got questions? We’ve got answers!

  • Can I use frozen chicken? Yes, but make sure to thaw it completely and pat it dry before cooking for the best results.
  • What should I serve with Thai Cashew Chicken? Serve it over steamed jasmine rice, quinoa, or noodles for a complete meal.
  • Is this recipe gluten-free? Use gluten-free soy sauce and oyster sauce to make it gluten-free.
  • Can I substitute the cashews? Absolutely! Peanuts or almonds work well too.
  • How can I make this dish vegan? Replace chicken with tofu and omit fish sauce.
  • What is the best way to store leftovers? Store in an airtight container in the fridge for up to 3 days.
  • Can I add more vegetables? Yes! Feel free to add any of your favorites.
  • How spicy is this dish? It’s mildly spicy, but you can adjust the heat level by adding more chili if desired.

Nutritional Tips and Dietary Adaptations

This dish is not only delicious but also nutritious!

  • Protein-Packed: Chicken is a great source of protein and can be substituted with chickpeas for a plant-based option.
  • Healthy Fats: Cashews provide healthy fats; however, keep portions in check if you’re watching your calorie intake.
  • Fiber Boost: Add extra vegetables like bell peppers and broccoli to increase the fiber content.

Recommended Equipment

Here’s what you’ll need to whip up this dish:

  • Wok or Large Skillet: Essential for high-heat cooking and stir-frying.
  • Knife and Cutting Board: For prepping your ingredients.
  • Measuring Cups and Spoons: To ensure accuracy in your ingredients.
  • Spatula: For stirring and flipping ingredients in the pan.

Serving Suggestions

Make your meal complete with these serving ideas:

  • Steamed Rice: Serve over fluffy jasmine rice for a traditional touch.
  • Fresh Salad: Pair with a crisp cucumber salad for a refreshing side.
  • Herb Garnish: Top with fresh cilantro or basil for an aromatic finish.

Conclusion: Your New Favorite Recipe Awaits!

There you have it! This Thai Cashew Chicken is your ticket to a delightful meal that’s as easy as it is delicious. With vibrant flavors, customizable ingredients, and quick preparation, it’s a dish that everyone will love. So grab your apron, gather your ingredients, and let’s make some magic in the kitchen! Cooking healthy has never been this fun or exciting. Enjoy every bite!

Amazing Thai Cashew Chicken Recipe – Authentic and Easy to Make!

Prep Time 10 minutes
Cook Time 15 minutes
Total Time 25 minutes
Servings 4 servings
Calories 550
Enjoy this flavorful and easy-to-make Thai Cashew Chicken, packed with crunchy nuts and vibrant vegetables.

Ingredients

Protein

  • 600 g Chicken thighs (boneless, skinless, cut into bite-size pieces)

Oil

  • 2 tbsp Vegetable oil

Nuts

  • 1 cup Cashew nuts (roasted, unsalted)

Aromatics

  • 3 cloves Garlic (minced)
  • 1 piece Onion (chopped)
  • 1 red bell pepper Red bell pepper (chopped)
  • 1 green bell pepper Green bell pepper (chopped)

Sauces and seasonings

  • 3 tbsp Soy sauce
  • 2 tbsp Oyster sauce
  • 1 tbsp Fish sauce
  • 1 tsp Sugar
  • 1/2 tsp White pepper

Garnish

  • 4 green onions Green onions (chopped)

Instructions 

  • Heat oil in a wok and cook chicken until browned.
  • Add garlic, onion, and bell peppers; stir-fry until vegetables are tender.
  • Stir in soy sauce, oyster sauce, fish sauce, sugar, and white pepper; cook for 2 minutes.
  • Add cashew nuts and green onions; toss to combine and serve hot.

Notes

For extra flavor, garnish with additional green onions or a squeeze of lime.
Calories: 550kcal
Cost: $15
Course: Main Course
Cuisine: Thai
Keyword: Cashew, Chicken

Unlock the Secrets of One-Pan Cooking

Welcome to your new favorite weeknight meal that’s about to make your life a whole lot easier! Ground Beef and Onion Rice Skillet is not just a dish; it’s a culinary adventure that brings together hearty beef, aromatic onions, and fluffy rice—all cooked in one pan! If you’re tired of juggling multiple pots and pans after a long day, then this recipe is for you. In just about 30 minutes, you can prepare a satisfying and nutritious meal that the whole family will love, without the fuss of extensive cleanup.

Let’s dive into why this skillet meal is going to be a game changer for your kitchen!

Why You’ll Love This Recipe

  • Quick and Easy: This dish is ready in about 30 minutes, making it perfect for busy weeknights.
  • One-Pan Wonder: Say goodbye to multiple dishes; everything cooks in one skillet, keeping cleanup to a minimum.
  • Flavor-Packed: The combination of ground beef, onions, and soy sauce creates a savory explosion that will tantalize your taste buds.
  • Customizable: You can easily swap out ingredients or add your favorite veggies to make it your own.
  • Budget-Friendly: Uses affordable ingredients that you probably already have in your pantry.

Ingredient Breakdown

Let’s take a closer look at what you’ll need to create this delicious Ground Beef and Onion Rice Skillet:

  • 1 lb ground beef: Provides the hearty protein base for the dish. You can substitute with ground turkey or chicken for a lighter option.
  • 1 medium onion, chopped: Adds sweetness and depth of flavor. Shallots or leeks can also be used for a different taste.
  • 2 cups cooked rice: The heart of the dish! Use white, brown, or even cauliflower rice for a low-carb version.
  • 2 cloves garlic, minced: Fresh garlic enhances the dish’s aroma and flavor. Garlic powder can be used in a pinch.
  • 1 cup beef broth: Infuses moisture and depth; feel free to use vegetable broth for a vegetarian twist.
  • 1 tablespoon soy sauce: Adds a savory umami kick. For a gluten-free option, use tamari or coconut aminos.
  • Salt and pepper to taste: Essential for seasoning; don’t skip this step!
  • Chopped green onions for garnish: Brightens up the dish and adds a fresh crunch.

Step-by-Step Instructions

Juicy ground beef mixed with rice and onions in a skillet, garnished with green onions.

Now that you have all your ingredients, let’s get cooking!

  1. In a large skillet, brown the ground beef over medium heat until fully cooked. Drain excess fat if necessary.
  2. Add the chopped onions and minced garlic to the skillet. Sauté until the onions are translucent, about 3-4 minutes.
  3. Stir in the cooked rice, beef broth, and soy sauce. Mix well and season with salt and pepper.
  4. Let it simmer on low heat for about 5-7 minutes, allowing the flavors to blend. Stir occasionally.
  5. Serve hot, garnished with chopped green onions. Enjoy your delicious meal!

Pro Tips for Perfecting Your Skillet

  • Don’t rush the browning: Take your time browning the beef; it enhances the flavor.
  • Add veggies: Toss in some bell peppers, peas, or carrots for extra nutrition and color.
  • Adjust the seasoning: Taste as you go! You can always add more soy sauce or spices to suit your preferences.
  • Use leftover rice: This dish is perfect for using up leftover rice from previous meals.
  • Make it spicy: Add a splash of hot sauce or crushed red pepper flakes for a kick!
  • Store properly: Keep leftovers in an airtight container in the fridge for up to 3 days.
  • Reheat gently: When reheating, add a splash of beef broth to keep it moist.
  • Experiment with herbs: Fresh herbs like cilantro or parsley can elevate the dish’s freshness.

Avoid These Common Mistakes

  • Overcooking the beef: Be careful not to overcook the ground beef; it can become tough.
  • Skipping the seasoning: Don’t underestimate the importance of salt and pepper in bringing out the flavors.
  • Ignoring the simmer: Letting the dish simmer is crucial for allowing the rice to absorb the broth.

Variations to Spice Things Up

Feel free to mix and match according to your taste! Here are some fun variations:

  • Mexican Twist: Add taco seasoning, black beans, and corn for a fiesta in your skillet.
  • Asian Flair: Incorporate sesame oil, ginger, and vegetables like bok choy or snap peas.
  • Italian Style: Mix in diced tomatoes, Italian herbs, and mozzarella cheese for a comforting twist.
  • Vegetable Medley: Swap out half the ground beef for mushrooms or lentils for a plant-based version.

Storage and Make-Ahead Instructions

This dish is perfect for meal prep! Here’s how to store and make it ahead:

  • Refrigerator: Store in an airtight container for up to 3 days.
  • Freezer: Freeze portions in freezer-safe bags for up to a month. Thaw overnight before reheating.
  • Make-Ahead: You can prepare the beef and onion mixture ahead of time and just add the rice and broth when ready to serve.

Frequently Asked Questions

  • Can I use uncooked rice?
    No, this recipe requires cooked rice for the best texture and flavor.
  • What can I substitute for soy sauce?
    Use tamari for gluten-free or coconut aminos for a soy-free option.
  • How do I make it vegetarian?
    Substitute the ground beef with lentils or mushrooms and use vegetable broth.
  • Can I add more vegetables?
    Absolutely! Feel free to throw in any leftover veggies you have.
  • How do I make this dish spicier?
    Add crushed red pepper flakes or a dash of hot sauce to the skillet.
  • What sides go well with this dish?
    Serve with a fresh salad or steamed vegetables for a balanced meal.
  • Is it okay to reheat leftovers?
    Yes, but add a splash of broth to keep it moist when reheating.
  • How can I enhance the flavor?
    Fresh herbs or a squeeze of lime juice just before serving can brighten the dish.

Nutritional Tips and Dietary Adaptations

While this dish is already packed with nutrients, here are some tips to make it even healthier:

  • Whole grains: Use brown rice or quinoa instead of white rice for added fiber.
  • Lean proteins: Opt for lean ground turkey or chicken if you’re watching your fat intake.
  • Vegetable boost: Load up with colorful veggies to increase vitamins and minerals.

Essential Equipment for Your Skillet Success

To create this flavor-packed skillet meal, you’ll need:

  • Large skillet: A good-quality skillet is essential for even cooking.
  • Wooden spoon: Perfect for stirring and preventing scratches on your skillet.
  • Measuring cups and spoons: Accurate measurements ensure the best results.

Serving Suggestions for a Complete Meal

Make your meal even more delightful by pairing it with:

  • Fresh salad: A garden salad with lemon vinaigrette complements the savory flavors.
  • Steamed veggies: Broccoli or green beans add color and nutrients.
  • Crusty bread: A slice of crusty bread or rolls for mopping up the savory juices.

With this Ground Beef and Onion Rice Skillet, you’re not just making a meal; you’re creating an experience filled with flavor, nourishment, and joy. Whether it’s a busy weeknight or a cozy family dinner, this dish is here to save the day. Grab your ingredients, follow the steps, and let the magic unfold in your kitchen!

Ground Beef And Onion Rice Skillet

Prep Time 10 minutes
Cook Time 15 minutes
Total Time 25 minutes
Servings 4 servings
Calories 650
A quick and flavorful one-pan meal combining ground beef, onions, and rice for a satisfying dinner.

Ingredients

Meat and vegetables

  • 1 lb ground beef
  • 1 medium onion, chopped
  • 2 cups cooked rice
  • 2 cloves garlic, minced
  • 1 cup beef broth
  • 1 tablespoon soy sauce
  • to taste Salt and pepper
  • for garnish Chopped green onions

Instructions 

  • Brown the ground beef in a skillet until cooked. Drain excess fat.
  • Add chopped onions and minced garlic; sauté until translucent.
  • Stir in cooked rice, beef broth, and soy sauce; season with salt and pepper.
  • Simmer on low heat for 5-7 minutes, stirring occasionally.
  • Serve hot, garnished with chopped green onions.

Notes

You can add vegetables like peas or carrots for extra nutrition.
Calories: 650kcal
Cost: $15
Course: Main Course
Cuisine: American
Keyword: Beef, Rice

Unleash Your Energy with the Zesty Metabo Slim Juice!

Are you ready to kickstart your day with a burst of flavor and energy? Meet the Metabo Slim Juice, a vibrant blend featuring the power of Green Tea Extract, African Mango, and Milk Thistle. This refreshing juice is not just a treat for your taste buds, but it also supports your metabolism and overall wellness. Let’s dive into why this drink is an absolute game-changer!

Why You’ll Love This Recipe

There’s so much to adore about the Metabo Slim Juice. Here are just a few reasons why you should add this recipe to your morning routine:

  • Boosts Metabolism: The combination of Green Tea Extract and African Mango is known to enhance metabolic rate, helping you burn calories more efficiently.
  • Rich in Antioxidants: Green Tea is packed with antioxidants, which help combat oxidative stress and promote overall health.
  • Supports Digestive Health: Milk Thistle is recognized for its liver-supporting properties, helping your body detoxify and improve digestion.
  • Quick & Easy: Whip this juice up in minutes—perfect for busy mornings when you need a nutritious boost!
  • Delicious Flavor: Enjoy a refreshing and zesty taste that feels like a treat, making it easy to incorporate healthy habits into your day.

Ingredient Breakdown

Let’s take a closer look at the star ingredients of this energizing juice:

  • Green Tea Extract: A powerhouse of antioxidants, this extract aids metabolism and provides a natural energy lift.
  • African Mango: Known for its appetite-suppressing qualities, it helps in weight management and enhances metabolic function.
  • Milk Thistle: Famous for its liver-supporting benefits, it aids in detoxification and improves digestive health.

**Substitutions:** If you can’t find these ingredients, consider these alternatives:

  • Green Tea Powder: If you don’t have extract, use brewed green tea.
  • Other Fruits: Swap African Mango with similar fruits like papaya or pineapple for a tropical twist.
  • Herbal Teas: Use herbal teas rich in antioxidants if you’re looking for caffeine-free options.

Pro Tips for the Perfect Juice

Side view of a refreshing glass of Metabo Slim Juice showcasing its vibrant color.

Here are some expert insights to help you craft the best version of Metabo Slim Juice:

  • Fresh Ingredients: Use fresh ingredients for maximum flavor and nutritional benefits.
  • Chill Your Ingredients: Cold ingredients enhance the refreshing quality of the juice.
  • Blend Smoothly: Ensure a smooth consistency by blending thoroughly.
  • Hydration Boost: Add coconut water for an extra hydration boost and electrolyte support.
  • Pre-Prep: Prepare your ingredients the night before to save time in the morning.
  • Experiment with Spices: Add a pinch of ginger or cayenne for an extra kick.
  • Adjust Sweetness: If you prefer sweeter juice, add a drizzle of honey or agave.
  • Serve Chilled: Always serve the juice chilled for maximum refreshment.

Common Mistakes and Troubleshooting

Even the best recipes can go awry. Here’s how to troubleshoot common issues:

  • Too Bitter? If your juice tastes bitter, reduce the amount of Green Tea Extract or switch to a milder tea.
  • Too Thick? If your juice is too thick, add more water or juice until you reach your desired consistency.
  • Not Flavorful Enough? Boost flavor by adding a splash of lemon juice or a handful of fresh herbs like mint.

Varieties to Try

Want to mix things up? Here are some delicious variations of the Metabo Slim Juice:

  • Berry Blast: Add a cup of mixed berries for a fruity twist rich in antioxidants.
  • Citrus Zing: Include orange or grapefruit for a refreshing citrusy flavor.
  • Spicy Kick: Incorporate a pinch of cayenne pepper for a metabolism boost.
  • Green Power: Add spinach or kale for an additional nutrient boost.

Storage and Make-Ahead Instructions

Wondering how to store your juice? Here’s what you need to know:

  • Refrigerate: Store in an airtight container in the refrigerator for up to 48 hours.
  • Make-Ahead: Prepare ingredients the night before for a quick blend in the morning.
  • Freeze for Later: Freeze in ice cube trays for a quick addition to smoothies or drinks later.

Frequently Asked Questions

Got questions? We’ve got answers! Here are some common FAQs about the Metabo Slim Juice:

  • Can I use decaffeinated green tea? Absolutely! Decaf green tea works just as well and still provides benefits.
  • How often can I drink this juice? You can enjoy it daily as part of a balanced diet.
  • Is it suitable for everyone? While generally safe, consult a healthcare provider if you have specific health conditions.
  • Can I add protein powder? Yes! Adding a scoop of protein powder can make it a complete meal replacement.
  • What are the benefits of African Mango? It’s known for its potential to aid weight loss and boost metabolism.
  • How do I know if my milk thistle is fresh? Check the expiration date and ensure it has a strong, pleasant scent.
  • Can I customize the sweetness? Yes! Feel free to adjust sweeteners to suit your taste preferences.
  • Is this juice good for detox? Yes! The ingredients support liver health and detoxification processes.

Nutritional Tips and Dietary Adaptations

To maximize the health benefits of your Metabo Slim Juice, consider these dietary adaptations:

  • Balanced Diet: Pair your juice with a balanced diet rich in whole foods for optimal nutrition.
  • Active Lifestyle: Incorporate regular physical activity to complement the juice’s benefits.
  • Hydrate: Drink plenty of water throughout the day to stay hydrated and support digestion.

Equipment Recommendations

Having the right tools makes all the difference! Here are some essential pieces of equipment:

  • High-Speed Blender: A powerful blender ensures a smooth consistency.
  • Juicer: For those who prefer a juice extractor, a quality juicer will enhance flavor extraction.
  • Measuring Cups: Accurate measurements lead to consistent results.
  • Airtight Containers: Keep your juice fresh longer with proper storage solutions.

Serving Suggestions

Want to elevate your juice experience? Here are some fun serving ideas:

  • Garnish with Fresh Herbs: Top with mint or basil for a fragrant touch.
  • Serve with a Straw: Use colorful straws to make drinking your juice more fun.
  • Pair with Smoothies: Enjoy alongside your favorite smoothie for a nutrient-packed breakfast.

Conclusion

There you have it—a complete guide to crafting the ultimate Metabo Slim Juice. With its vibrant flavors and powerful health benefits, this juice not only revitalizes your mornings but also supports your wellness journey. So, roll up your sleeves, gather those ingredients, and let the kitchen become your playground. Remember, healthy eating is not about restrictions; it’s about embracing flavors, enjoying every sip, and feeling energized!

Metabo Slim Juice

Prep Time 5 minutes
Total Time 5 minutes
Servings 1 glass
Calories 10
A refreshing health-boosting juice designed to support metabolism and weight management with natural ingredients.

Ingredients

Beverage Base

  • 1 teaspoon Green Tea Extract
  • 1 tablespoon African Mango
  • 1 teaspoon Milk Thistle

Liquid

  • 8 oz water or juice (for mixing)

Instructions 

  • Mix one serving with water or juice in the morning.
  • Enjoy on an empty stomach for best results.
  • Stay hydrated & maintain light daily activity for faster benefits.

Notes

Use fresh ingredients for best flavor and effectiveness.
Calories: 10kcal
Cost: $12
Course: Beverage
Cuisine: Health
Keyword: Metabolism

Welcome to a vibrant journey that will boost your energy and tantalize your taste buds! In this article, we’re diving deep into the world of Spinach Apple Green Juice, a refreshing elixir that packs a punch in both flavor and nutrition. Whether you need a morning pick-me-up or an afternoon refresher, this juice is your go-to. Let’s explore why this delightful drink should be your new favorite!

Why You’ll Love This Recipe

This isn’t just another juice recipe; it’s a powerhouse of health benefits and deliciousness! Here are five reasons to love this Spinach Apple Green Juice:

  • Hydration Hero: Packed with water-rich ingredients, this juice helps keep your body hydrated and refreshed throughout the day.
  • Vitamin Boost: With ingredients like spinach and green apples, you get a hefty dose of Vitamin A and C, which support your immune system and skin health.
  • Detox Delight: Spinach and lemon work synergistically to aid digestion and promote detoxification, helping your body flush out toxins.
  • Quick Energy: The natural sugars from the green apple provide a quick energy boost without the crash associated with processed sugars.
  • Flavor Explosion: The combination of spinach, apple, and a touch of ginger creates a zingy flavor profile that’s both refreshing and satisfying!

Ingredient Breakdown

Let’s take a closer look at what you’ll need to whip up this energizing juice:

  • 2 cups fresh spinach (packed): This leafy green is the star of the show, providing essential nutrients and a vibrant green color.
  • 1 large green apple (Granny Smith = ideal): The tartness of the green apple adds a delicious zing that balances the flavors perfectly.
  • 1 small celery stalk (optional, but awesome): Celery adds a refreshing crunch and extra hydration without many calories.
  • 1/2 lemon (peeled): A squeeze of lemon brightens the juice and adds a punch of vitamin C.
  • 1/2-inch knob fresh ginger (optional): Ginger brings warmth and a little spice, enhancing the health benefits and flavor.
  • Cold water or ice, as needed: Adjust the texture to your liking, whether you prefer a thicker juice or a refreshing drink.

How to Make Spinach Apple Green Juice (Juicer & Blender)

Now that we’ve gathered our ingredients, let’s jump into the preparation!

Juicer Method: Clean, Crisp, and Pulp-Free

  1. Wash everything well to remove any dirt or pesticides.
  2. Feed spinach, green apple, celery, lemon, and ginger into your juicer.
  3. Pour over ice or chill before drinking for an ultra-refreshing experience.

Blender Method: Smoothie-Style Green Juice for Everyone

  1. Wash and chop the spinach, green apple, celery, lemon, and ginger.
  2. Add the chopped ingredients along with 1/2 cup cold water into the blender.
  3. Blend until smooth and creamy.
  4. Strain through a fine sieve or nut milk bag for a classic juice texture, or enjoy as a smoothie!

Pro Tips for Flavor and Freshness

To elevate your juicing game, keep these expert tips in mind:

  • Fresh Ingredients: Always use the freshest produce you can find for maximum flavor and nutrients.
  • Chill Before Serving: For the best experience, chill your ingredients beforehand or serve over ice.
  • Experiment with Greens: Mix up your greens! Try kale or Swiss chard for different flavors and benefits.
  • Sweetness Control: If you prefer a sweeter juice, add an extra apple or a splash of honey.
  • Batch Prep: Make a larger batch and store in the fridge for up to 24 hours for easy access.
  • Freeze for Later: Freeze into ice cubes for a refreshing addition to smoothies or flavored water.
  • Consider Texture: Adjust the amount of water for a juice or smoothie consistency that you love.
  • Use Organic Produce: Whenever possible, opt for organic ingredients to minimize pesticide exposure.

Common Mistakes and Troubleshooting

Here are some common pitfalls to avoid when making your juice:

  • Too Much Water: Adding too much water can dilute the flavor. Start with less and add more as needed.
  • Not Straining: If you prefer a smooth juice, make sure to strain properly to remove all pulp.
  • Over-Ripened Apples: Using overripe apples can lead to a mushy texture or overly sweet juice.
  • Skipping the Lemon: Don’t skip the lemon! It not only adds flavor but also helps preserve the juice’s freshness.

Variations to Try

Feel free to mix things up with these fun variations:

  • Berry Blast: Add a handful of blueberries or strawberries for a fruity twist.
  • Citrus Surprise: Use orange or lime instead of lemon for a different citrus flavor.
  • Herbal Infusion: Add fresh mint or basil for a refreshing herbal touch.
  • Protein Power: Blend in a scoop of protein powder or Greek yogurt for a post-workout boost.

Storage and Make-Ahead Instructions

If you want to prepare your juice in advance, here are some tips:

  • Refrigeration: Store your juice in an airtight container in the fridge for up to 24 hours. Shake before enjoying!
  • Freezing: Freeze in ice cube trays for up to 3 months. Pop them into smoothies for an instant chill.

Comprehensive FAQ

Got questions? We’ve got answers! Here are some frequently asked questions about Spinach Apple Green Juice:

  • Can I use other greens? Yes! Feel free to use kale, Swiss chard, or even romaine lettuce.
  • Is this juice good for weight loss? Absolutely! This juice is low in calories and high in nutrients, making it a great addition to a weight loss diet.
  • Can I make this juice without a juicer? Definitely! Use a blender and strain for a similar result.
  • How long does juice last? Fresh juice is best consumed within 24 hours for optimal taste and nutrition.
  • Can I add other fruits? Of course! Feel free to add pears, cucumbers, or even pineapple for a unique flavor.
  • Is the ginger necessary? While optional, ginger adds a delightful kick and additional health benefits.
  • Can I drink this juice daily? Yes! It’s a fantastic addition to your daily routine for a health boost.
  • What’s the best time to drink this juice? Morning is ideal, but it’s great any time you need a refreshing lift!

Nutrition Tips and Dietary Adaptations

This juice is not only delicious but also adaptable! Here are some tips for various dietary needs:

  • Vegan-Friendly: This recipe is naturally vegan and perfect for plant-based diets.
  • Paleo-Friendly: Enjoy this juice if you’re following a paleo lifestyle, as it’s free from processed sugars.
  • Low-Carb Option: Reduce the number of apples or substitute with a low-carb fruit to fit your low-carb regimen.

Equipment Recommendations

Here’s what you’ll need to make this juice:

  • Juicer: A quality juicer will yield the best results, ensuring a smooth and pulp-free juice.
  • High-Speed Blender: If using the blender method, a high-speed blender will give you a smoother consistency.
  • Fine Sieve or Nut Milk Bag: For straining your juice, ensuring a clean and smooth texture.

Serving Suggestions

Ready to serve your Spinach Apple Green Juice? Here are some fun ways to enjoy it:

  • Garnish: Add a sprig of mint or a slice of lemon on the rim of your glass for a stylish touch.
  • Pair It Up: Enjoy with a light breakfast or snack, like avocado toast or a fruit salad.
  • Brunch Delight: Serve it at a brunch gathering for a vibrant and healthy drink option.

Conclusion

There you have it—a comprehensive guide to making the most invigorating Spinach Apple Green Juice! Packed with nutrients, flavor, and energy, this juice is sure to become a staple in your kitchen. Remember, cooking and juicing should be fun, so don’t hesitate to experiment and make this recipe your own. Cheers to health, happiness, and delicious green juice!

Spinach Apple Green Juice

Prep Time 10 minutes
Total Time 10 minutes
Servings 2 cups
Calories 80
A refreshing and nutritious green juice packed with spinach, apple, and ginger, perfect for a healthy boost.

Ingredients

Produce

  • 2 cups fresh spinach (packed)
  • 1 large green apple (Granny Smith = ideal)
  • 1 small celery stalk (optional, but awesome) (optional)
  • 0.5 lemon lemon (peeled)
  • 0.5 inch knob fresh ginger (optional) (optional)
  • as needed Cold water or ice (as needed)

Instructions 

  • Wash all ingredients thoroughly.
  • Feed spinach, apple, celery, lemon, and ginger into your juicer or blend with water.
  • Add ice or chill before serving.
  • Strain if using a blender for a smooth juice.

Notes

Use organic ingredients for best flavor and nutrition.
Calories: 80kcal
Cost: $10
Course: Beverage
Keyword: Green Juice

Welcome to a Flavor Fiesta!

Chili Con Carne: A dish that embodies warmth, comfort, and vibrant flavors all wrapped into one hearty bowl! This classic Tex-Mex recipe is not just about the taste; it’s a celebration of spices, protein, and fresh ingredients that will excite your palate! Whether you’re hosting a game day party, a cozy family dinner, or simply craving a comforting meal, this chili con carne recipe is the perfect choice. Let’s dive in and explore how to create a dish that will leave you and your guests raving!

Why You’ll Love This Recipe

  • Protein Powerhouse: Packed with 80/20 ground beef and kidney beans, this chili is a fantastic source of protein, keeping you full and satisfied.
  • Flavor Burst: The combination of spices like chili powder and cumin creates a rich, bold flavor that makes each bite a delightful experience.
  • Versatile Dish: Customize this chili to your taste! Add more beans, toss in some veggies, or spice it up with jalapeños.
  • Easy to Make: With simple steps and minimal prep, you can whip up a delicious chili in no time, making it ideal for busy weeknights.
  • Meal Prep Friendly: This chili tastes even better the next day, making it perfect for meal prep or batch cooking!

Chili Con Carne Ingredients

Gather up these fresh ingredients to create your flavor-packed chili:

  • 2 pounds 80/20 ground beef
  • 1 large yellow onion, diced
  • 1 green bell pepper, diced
  • 1 red bell pepper, diced
  • 4 large garlic cloves, minced
  • 1 teaspoon sea salt, plus more to taste
  • ½ teaspoon freshly cracked black pepper
  • 1 (13.5-ounce) can kidney beans, drained and rinsed
  • 1 (14-ounce) can crushed tomatoes
  • 1 (6-ounce) can tomato paste
  • 2 beef bouillon cubes, crushed
  • ¼ cup mild chili powder
  • 2 teaspoons ground cumin
  • 1 teaspoon dried oregano
  • 1 tablespoon sugar
  • ½ teaspoon cayenne pepper (optional)
  • Chopped fresh cilantro
  • Chopped green onions
  • Sour cream
  • Grated cheddar or mozzarella cheese
  • Thinly sliced jalapeño

Ingredient Breakdown & Substitutions

Side view of a hearty serving of Chili Con Carne, showcasing meat and vegetables.

Let’s talk about each ingredient and some potential substitutions to tailor this chili to your needs:

  • Ground Beef: If you’re looking for a leaner option, consider using ground turkey or chicken. For a vegetarian version, swap in lentils or a mix of beans.
  • Beans: Kidney beans are traditional, but feel free to mix it up with black beans or pinto beans for different flavors and textures.
  • Tomatoes: Canned crushed tomatoes provide convenience, but you can use fresh tomatoes for a fresher taste. Just chop them finely!
  • Spices: Adjust the spice levels to your liking; if you love heat, increase the cayenne pepper or add some hot sauce!
  • Cheese: Swap cheddar for a creamier cheese like Monterey Jack or even a vegan alternative for a plant-based option.

How to Make Chili Con Carne

Now, let’s get cooking! Follow these simple steps to create your chili con carne:

  1. Heat a large Dutch oven or pot over medium-high heat. Add the beef, onion, peppers, garlic, salt, and pepper. Cook, breaking up the meat with a wooden spoon, until browned, about 8-10 minutes.
  2. Stir in the beans, crushed tomatoes, tomato paste, bouillon cubes, chili powder, cumin, oregano, sugar, and cayenne if you’re using it. Add just enough water to cover the beans (about 1 to 1½ cups) and mix well. Bring to a boil over high heat.
  3. Reduce the heat to low and let it simmer, stirring occasionally, for at least 2 hours (or up to 8 hours if you want to develop even more flavor). Taste and adjust seasoning with salt as needed.
  4. When ready to serve, ladle the chili into bowls and garnish with chopped cilantro, green onions, sour cream, cheese, and jalapeños if desired.

Pro Tips for the Best Chili

  • Balance the Flavors: Taste your chili as it cooks, adjusting spices and salt to create the perfect balance.
  • Low and Slow: For the richest flavor, let your chili simmer for as long as possible.
  • Layer the Spices: Bloom spices in oil before adding to deepen their flavor.
  • Customize the Heat: If you’re cooking for a crowd, serve hot sauces on the side to let guests adjust their spice levels.
  • Texture Matters: If you like a thicker chili, let it simmer uncovered during the final cooking stages.
  • Freezer Friendly: This chili freezes beautifully! Store in airtight containers for up to 3 months.
  • Serving Sides: Pair with homemade cornbread for a delightful meal experience!

Common Mistakes & Troubleshooting

Even the best chefs can encounter hiccups! Here are some common mistakes and how to fix them:

  • Too Salty: If your chili is too salty, add a bit of sugar or a splash of vinegar to balance it out.
  • Too Thin: If your chili is too watery, let it simmer uncovered for a while to thicken.
  • Not Enough Flavor: If it’s lacking depth, try adding more spices or a dash of Worcestershire sauce.
  • Too Spicy: If you’ve added too much heat, incorporate a dollop of sour cream or some sugar to mellow the flavors.

Chili Variations to Explore

Want to mix things up? Here are some exciting variations to try:

  • White Chicken Chili: Swap ground beef for shredded chicken and add white beans for a lighter take.
  • Vegetarian Chili: Replace the meat with a variety of beans and add diced zucchini and corn for a colorful, hearty dish.
  • Chili Verde: Use pork and green tomatillos instead of traditional red tomatoes for a tangy twist.
  • Smoky Chipotle Chili: Incorporate chipotle peppers in adobo sauce for a smoky depth and an extra kick!

Storage and Make-Ahead Instructions

Chili con carne is a meal-prepper’s dream! Here’s how to store and reheat it:

  • Refrigeration: Store leftovers in an airtight container in the fridge for up to 4 days.
  • Freezing: Freeze in airtight containers for up to 3 months. Thaw in the fridge overnight before reheating.
  • Reheating: Gently reheat on the stovetop over low heat, stirring occasionally to ensure even warming.
  • Make-Ahead: Prepare the chili a day in advance for even better flavor! Just store it in the fridge until ready to serve.

Frequently Asked Questions

Got questions? We’ve got answers! Check out these FAQs for more insights:

  • Can I use ground turkey instead of beef? Absolutely! Ground turkey is a leaner option and works beautifully in chili.
  • What can I serve with chili? Cornbread, rice, or tortilla chips make fantastic sides!
  • Can I make chili in a slow cooker? Yes! Brown the meat first, then transfer everything to the slow cooker and cook on low for 6-8 hours.
  • Is chili con carne gluten-free? Yes, as long as you use gluten-free broth and check your spices!
  • How can I make it spicier? Add more cayenne or some finely chopped jalapeños for a kick!
  • Can I add more vegetables? Definitely! Bell peppers, corn, and even carrots can add great flavors and textures.
  • What if I don’t have tomato paste? You can substitute with an equal amount of crushed tomatoes or reduce some of the liquid in the recipe.
  • How do I know when the chili is done? It’s done when the flavors have melded together, and the chili has thickened to your liking!

Nutritional Tips and Dietary Adaptations

This chili is not just delicious; it’s also nutritious! Here are some tips to make it even healthier:

  • Add More Veggies: Incorporate diced zucchini, carrots, or spinach for added vitamins and minerals without sacrificing flavor.
  • Use Lean Proteins: Opt for lean ground beef or turkey to reduce fat content while still packing protein.
  • Watch the Salt: Use low-sodium broth and check your spices to keep sodium levels in check.
  • Go Plant-Based: Swap meat for lentils or a variety of beans to create a hearty vegan chili that’s still filling and flavorful.

Equipment Recommendations

Here are some essential tools to make your chili-making process easier:

  • Heavy-Duty Dutch Oven: Perfect for even cooking and simmering your chili to perfection.
  • Wooden Spoon: A sturdy spoon for stirring and breaking up the beef as it cooks.
  • Sharp Knife: Ensure your knife is sharp for efficient chopping of vegetables.
  • Measuring Cups and Spoons: Accurate measurements help keep your flavors balanced.

Serving Suggestions

Presentation is key! Make your chili con carne even more appealing with these serving suggestions:

  • Garnish: Top with fresh cilantro, green onions, and a dollop of sour cream for a pop of color and flavor.
  • Cheese: Add a sprinkle of shredded cheese for richness and creaminess.
  • Crunchy Toppings: Serve with tortilla chips or crispy onions for added texture.
  • Side Dishes: Pair with cornbread or a fresh salad to complete the meal.

Wrap-Up: Your New Go-To Chili Recipe!

Now that you have the ultimate guide to crafting a delicious chili con carne, it’s time to unleash your culinary creativity! This dish is more than just a recipe; it’s a chance to experiment, share, and enjoy. Whether you stick to the classic version or try out one of the exciting variations, each bowl will be a celebration of flavor. So grab your ingredients, gather your loved ones, and get ready to enjoy a hearty, comforting dish that warms the soul. Happy cooking!

Chili Con Carne

Prep Time 15 minutes
Cook Time 2 hours
Total Time 2 hours 15 minutes
Servings 6 servings
Calories 650
A hearty and flavorful chili perfect for cozy nights, combining ground beef, beans, and spices for a satisfying meal.

Ingredients

Meat and Vegetables

  • 2 pounds 80/20 ground beef
  • 1 large yellow onion, diced
  • 1 green green bell pepper, diced
  • 1 red red bell pepper, diced
  • 4 large garlic cloves, minced
  • 1 teaspoon sea salt, plus more to taste
  • ½ teaspoon freshly cracked black pepper
  • 1 can (13.5-ounce) kidney beans, drained and rinsed
  • 1 can (14-ounce) crushed tomatoes
  • 1 can (6-ounce) tomato paste
  • 2 cubes beef bouillon cubes, crushed
  • ¼ cup mild chili powder
  • 2 teaspoons ground cumin
  • 1 teaspoon dried oregano
  • 1 tablespoon sugar
  • ½ teaspoon cayenne pepper, (optional)

Garnishes and extras

  • Chopped fresh cilantro
  • Chopped green onions
  • Sour cream
  • Grated cheddar or mozzarella cheese
  • Thinly sliced jalapeño

Instructions 

  • Cook beef, onion, peppers, garlic, salt, and pepper in a Dutch oven until browned, about 8-10 minutes.
  • Add beans, tomatoes, tomato paste, bouillon, spices, and water; bring to a boil, then simmer for 2 hours, stirring occasionally.
  • Serve hot, garnished with cilantro, green onions, sour cream, cheese, and jalapeños as desired.

Notes

This chili can be made ahead and tastes even better the next day.
Calories: 650kcal
Cost: $15
Course: Main Course
Cuisine: American
Keyword: Beef, Chili

Unleash Flavor with a Spicy Eggplant Stir Fry

Are you ready to elevate your dinner game? This Spicy Eggplant Stir Fry is not just a meal; it’s an adventure for your taste buds! In a world where healthy eating often feels dull, this vibrant dish proves that healthy cooking can indeed be an exciting adventure. With bold flavors, a delightful kick, and a medley of textures, you’ll discover that nutritious meals can be both satisfying and exhilarating. Dive in as we explore the ins and outs of this incredible recipe!

Why You’ll Love This Recipe

This recipe isn’t just about cooking; it’s about experiencing the joy of food! Here are five compelling reasons why you’ll adore this dish:

  • Quick and Easy: With a prep and cook time of just 30 minutes, this stir fry fits perfectly into your busy lifestyle.
  • Flavor Explosion: The combination of garlic, ginger, and Sichuan peppercorns creates a mouthwatering flavor profile you won’t forget.
  • Vegetarian and Vegan-Friendly: This spicy eggplant stir fry is packed with plant-based goodness, making it suitable for all diets.
  • Customizable: Adjust the spice level or toss in your favorite veggies to make it your own!
  • Healthy and Nutritious: Packed with antioxidants and vitamins, eggplant is an excellent addition to any meal.

Ingredient Breakdown

Let’s take a closer look at the ingredients that make this dish shine, as well as some substitutions you can consider.

  • Chinese or Japanese Eggplant: These varieties are perfect for stir-frying due to their tender texture. If unavailable, you can substitute with globe eggplant, but be sure to salt it to remove bitterness.
  • Canola Oil: A neutral oil is best for frying. Alternatives include vegetable or grapeseed oil.
  • Sichuan Peppercorns: For a unique flavor, these can be replaced with crushed red pepper flakes if you prefer a different spice.
  • Doubanjiang: This spicy fermented bean paste adds depth. If you can’t find it, try miso or a mix of chili paste and soy sauce.
  • Gochugaru: Korean chili flakes bring a slightly smoky flavor; substitute with cayenne pepper for heat.

Pro Tips for a Perfect Stir Fry

Side view of a plate of Spicy Eggplant Stir Fry showcasing rich colors and textures of eggplant and seasonings.

Here are some expert insights to ensure your stir fry is a hit every time:

  • Don’t Overcrowd the Pan: Cooking in batches allows for better frying and helps achieve that perfect crispy texture.
  • Prep Ingredients Ahead: Having everything chopped and measured before you start cooking speeds up the process and keeps things organized.
  • Use High Heat: Stir frying requires high temperatures to quickly cook ingredients while retaining their crunch.
  • Adjust Seasoning to Taste: Always taste your dish as it cooks; adjust the spice and salt levels according to your preference.
  • Garnish Creatively: Fresh herbs like cilantro or basil can elevate the dish, adding freshness and color.
  • Let it Rest: Allowing the stir fry to sit for a few minutes after cooking enhances the flavors.
  • Pair with the Right Side: Serve this stir fry with jasmine rice or a refreshing cucumber salad to balance the heat.
  • Experiment with Veggies: Feel free to add bell peppers, broccoli, or snap peas for added nutrition and color.

Common Mistakes and Troubleshooting

Let’s tackle some potential hiccups you might encounter while cooking:

  • Eggplant Turns Mushy: Ensure you’re using the right variety and avoid overcooking. A quick pan fry should keep it tender yet firm.
  • Too Spicy: If your dish ends up too hot, a splash of coconut milk or a dash of sugar can help balance the heat.
  • Sauce is Too Thin: Mixing a little cornstarch with water can help thicken your sauce to the desired consistency.
  • Flavor Lacking: Don’t hesitate to experiment with more garlic or ginger to enhance the dish’s flavor profile.

Variations to Keep Things Fresh

Here are some fun takes on the traditional recipe:

  • Thai-Inspired: Add Thai basil and a splash of lime juice for a Southeast Asian twist.
  • Sweet and Spicy: Incorporate honey or maple syrup for an added layer of sweetness.
  • Protein Boost: Toss in some tofu or tempeh for a protein-rich meal.
  • Grilled Version: Try grilling the eggplant slices for a smoky flavor before stir frying.

Storage and Make-Ahead Instructions

This dish can be prepped ahead of time:

  • Refrigerate: Store leftovers in an airtight container for up to 3 days.
  • Freezing: Freeze in portions for up to a month. Thaw before reheating.
  • Meal Prep: Chop your vegetables a day in advance and store them in the fridge for a quick cooking session.

Frequently Asked Questions

Here are some common questions to guide you through your cooking experience:

  • Can I use frozen eggplant? Frozen eggplant can work, but it may be more watery. Drain excess moisture before cooking.
  • What if I don’t have Sichuan peppercorns? You can substitute with black pepper or omit them altogether if you prefer a milder flavor.
  • How can I make this dish gluten-free? Use tamari instead of soy sauce and check your doubanjiang for gluten-free options.
  • Can I add more vegetables? Absolutely! Bell peppers, carrots, and zucchini can all be great additions.
  • Is this dish suitable for meal prep? Yes! It reheats well and can be made in advance.
  • What’s the best way to serve this stir fry? Pair it with jasmine rice or quinoa for a hearty meal.
  • How spicy is this recipe? The spice level can be adjusted; feel free to use less gochugaru or Sichuan peppercorns to suit your taste.
  • Can I make this dish ahead of time? While best fresh, you can prepare the sauce and chop your veggies a day ahead for convenience.

Nutrition Tips and Dietary Adaptations

Eating healthy doesn’t mean sacrificing flavor. Here’s how to keep this dish nutritious:

  • Incorporate Whole Grains: Serve with brown rice or quinoa for added fiber and nutrients.
  • Add More Veggies: The more colorful your plate, the better. Include a variety of vegetables for diverse nutrients.
  • Limit Oil Usage: To cut calories, reduce the amount of oil used in frying. You can use a non-stick pan.

Essential Equipment Recommendations

Having the right tools makes cooking easier:

  • Wok or Large Skillet: Essential for stir-frying; they provide enough space for even cooking.
  • Sharp Knife: A good knife is crucial for quickly and efficiently chopping vegetables.
  • Spatula: A sturdy spatula helps in tossing ingredients without breaking them apart.

Serving Suggestions

Looking for the perfect pairings? Try these:

  • Jasmine Rice: A classic choice that complements the flavors beautifully.
  • Quinoa: For a protein-packed alternative, serve your stir fry over quinoa.
  • Side Salad: A refreshing cucumber salad can balance the heat and add crunch.
  • Spring Rolls: Pair with fresh spring rolls filled with veggies for a light appetizer.

Conclusion

Cooking doesn’t have to be a chore. With this Spicy Eggplant Stir Fry, you’re set to impress family and friends with a dish that’s as healthy as it is delicious. So grab those ingredients, unleash your inner chef, and get ready for a flavor-packed journey that will leave you craving more. Let’s make healthy eating fun and flavorful!

Spicy Eggplant Stir Fry

Prep Time 10 minutes
Cook Time 15 minutes
Total Time 25 minutes
Servings 4 servings
Calories 250
A flavorful and spicy stir-fry featuring tender eggplant cooked with bold Sichuan spices and aromatics.

Ingredients

Vegetables

  • 1 pound Chinese or Japanese eggplant ((see note 1))
  • 3/4 cup canola oil ((or any neutral oil))
  • 1/2 cup water
  • 1/4 teaspoon cornstarch
  • 2 teaspoons red Sichuan peppercorn (optional (see note 2))
  • 2 tablespoons minced garlic
  • 1 tablespoon minced ginger
  • 2 tablespoons doubanjiang ((see note 3))
  • 1 1/2 teaspoons gochugaru (Korean pepper flakes) ((see note 4))
  • 2 teaspoons sugar ((see note 5))
  • 1/2 teaspoon kosher salt or sea salt (add more to taste)
  • sliced scallions (for garnish)
  • toasted sesame seeds (for garnish)

Instructions 

  • Slice the eggplant and toss with a little salt, then set aside.
  • Heat oil in a wok or large skillet over medium-high heat. Fry eggplant until golden and tender, about 5-7 minutes.
  • Add garlic, ginger, Sichuan peppercorn, doubanjiang, gochugaru, and sugar; cook for 2 minutes until fragrant.
  • Mix water with cornstarch and add to the pan; stir until sauce thickens.
  • Garnish with sliced scallions and toasted sesame seeds before serving.

Notes

Adjust the amount of Sichuan peppercorn and chili flakes to taste for spiciness.
Calories: 250kcal
Cost: $15
Course: Main Course
Cuisine: Chinese
Keyword: Eggplant

Unleash the Flavor: Your Ultimate Guide to Epic Loaded Nacho Platter!

Welcome to a culinary adventure where every crunchy bite meets vibrant flavors! This Epic Loaded Nacho Platter is not just a dish; it’s a fiesta of taste, perfect for game days, movie nights, or anytime you crave a hearty snack. With zesty Chili Con Carne, ooey-gooey cheese, and a rainbow of fresh toppings, you’re about to discover how easy it is to whip up this crowd-pleaser right in your own kitchen. Let’s dive in and elevate your nacho game!

Why You’ll Love This Recipe

  • Quick and Easy: Ready in under 30 minutes, this dish is perfect for busy weeknights or spontaneous gatherings.
  • Crowd-Pleasing: Loaded with flavors that appeal to everyone, making it a go-to for parties and family dinners.
  • Versatile: Customize with your favorite toppings and create a nacho experience that everyone will love.
  • Nutritious: Packed with protein from the chili and topped with fresh veggies, you can satisfy your cravings while staying healthy.
  • Budget-Friendly: Made with common ingredients, this recipe won’t break the bank!

Epic Loaded Nacho Platter Recipe

Ingredients

  • 1 (10-12 oz.) bag of tortilla chips
  • 1 cup leftover Chili Con Carne
  • 1 cup shredded cheddar cheese
  • 1/2 cup nacho cheese sauce (store-bought or homemade)
  • 1/2 cup sour cream
  • 1/4 cup red and green onions, finely chopped

Ingredient Substitutions

  • Tortilla chips: Use baked chips or sweet potato chips for a healthier option.
  • Chili Con Carne: Substitute with black bean chili for a vegetarian twist.
  • Cheese: Try pepper jack for a spicy kick or vegan cheese for a plant-based version.
  • Sour cream: Swap with Greek yogurt for a protein boost and tangy flavor.
  • Onions: Use diced jalapeños for extra heat or fresh cilantro for a burst of flavor.

How to Make the Perfect Loaded Nacho Platter

Side shot of a vibrant nacho dish with crispy tortilla chips, melted cheese, and chili con carne.

Step-by-Step Instructions

  1. Preheat your oven to 350°F (175°C). Line a baking sheet with parchment paper for easy cleanup.
  2. Spread the tortilla chips evenly on the baking sheet.
  3. Spoon the Chili Con Carne over the chips, ensuring each chip gets a topping of chili. Sprinkle shredded cheddar cheese over the top.
  4. Bake in the preheated oven for 4-5 minutes until the cheese is melted and the chili is warmed through.
  5. While baking, heat the nacho cheese sauce in the microwave until smooth and pourable.
  6. Remove the nachos from the oven. Drizzle with hot nacho cheese sauce and sour cream, then sprinkle with chopped red and green onions.
  7. Serve immediately and watch them disappear!

Pro Tips for Nacho Perfection

  • Layer it Right: For the best flavor, layer your ingredients. Start with chips, then add chili, cheese, and repeat!
  • Don’t Overload: While it’s tempting to pile on toppings, too many can make the nachos soggy. Balance is key!
  • Keep It Hot: Serve immediately after baking to keep the cheese melty and the chips crunchy.
  • Experiment with Toppings: Add jalapeños, olives, or guacamole to elevate your nacho experience.
  • Use Quality Ingredients: Fresh ingredients make all the difference in flavor. Go for quality cheese and fresh veggies!
  • Mind the Oven Time: Watch the nachos closely while baking, as oven times can vary.
  • Customize Your Chili: Use your favorite chili recipe or store-bought to save time.
  • Garnish with Freshness: A sprinkle of fresh cilantro or lime juice can brighten up the dish.

Common Mistakes and Troubleshooting

  • Too Soggy? Make sure to bake your nachos just until the cheese melts. Overbaking can lead to soggy chips.
  • Not Enough Flavor? Season your chili well! A pinch of salt and spices can enhance the overall taste.
  • Burnt Cheese? If your cheese is browning too quickly, cover the nachos loosely with foil while baking.

Variations to Try

  • BBQ Chicken Nachos: Swap chili for shredded BBQ chicken for a smoky twist.
  • Vegetarian Nachos: Use a mix of black beans, corn, and bell peppers for a veggie-packed platter.
  • Buffalo Cauliflower Nachos: Replace chili with buffalo cauliflower bites for a spicy, meatless option.
  • Breakfast Nachos: Top with scrambled eggs, salsa, and avocado for a fun brunch dish!

Storage and Make-Ahead Instructions

This dish is best enjoyed fresh, but if you have leftovers, you can store them in an airtight container in the refrigerator for up to 2 days. Reheat in the oven to maintain crispiness. For a make-ahead option, prepare the chili a day in advance and assemble the nachos just before serving.

Nutrition Tips and Dietary Adaptations

This loaded nacho platter can be tailored to fit various dietary needs:

  • Gluten-Free: Ensure your tortilla chips are labeled gluten-free.
  • Low-Carb: Use veggie chips or sliced bell peppers instead of traditional chips.
  • Vegan: Substitute cheese with a dairy-free option and use vegan sour cream.

Equipment Recommendations

  • Baking Sheet: A large, sturdy baking sheet is essential for evenly heating your nachos.
  • Parchment Paper: For easy cleanup and to prevent sticking.
  • Microwave Safe Bowl: For heating nacho cheese sauce.

Serving Suggestions

Serve your nachos with a variety of dipping sauces on the side, such as salsa, guacamole, or extra sour cream. Pair with refreshing beverages like margaritas or iced tea for the ultimate snack experience!

Frequently Asked Questions

  • Can I make nachos in advance? Yes, you can prepare the chili and toppings in advance, but assemble and bake right before serving to keep the chips crispy.
  • What can I use instead of tortilla chips? You can use pita chips, sweet potato chips, or even vegetable sticks for a healthier option.
  • How do I store leftovers? Store in an airtight container in the refrigerator for up to 2 days. Reheat in the oven before serving.
  • Can I freeze nachos? It’s best to freeze the chili separately and assemble fresh nachos when you’re ready to eat.
  • What toppings can I add? Get creative! Try diced tomatoes, jalapeños, olives, or even a drizzle of ranch dressing.
  • Are nachos healthy? They can be nutritious if loaded with veggies and lean proteins. Opt for baked chips to keep it lighter.
  • How spicy are these nachos? The spice level depends on the chili you use! Adjust jalapeños and seasoning to your preference.
  • Can I use store-bought chili? Absolutely! For a quick meal, store-bought chili works great.

Now that you have the ultimate guide to creating an Epic Loaded Nacho Platter, it’s time to gather your friends, pop open some drinks, and indulge in this flavorful feast. Remember, cooking should be fun and creative, so feel free to experiment with flavors and toppings. Happy cooking!

Loaded Nacho Platter with Chili Con Carne

Prep Time 10 minutes
Cook Time 5 minutes
Total Time 15 minutes
Servings 4 servings
Calories 650
A delicious and hearty nacho platter topped with chili con carne, melted cheese, and fresh toppings—perfect for sharing.

Ingredients

Main

  • 1 bag tortilla chips (10-12 oz.)
  • 1 cup leftover Chili Con Carne
  • 1 cup shredded cheddar cheese
  • 1/2 cup nacho cheese sauce (store-bought or homemade)
  • 1/2 cup sour cream
  • 1/4 cup red and green onions, finely chopped

Instructions 

  • Preheat oven to 350°F (175°C). Line a baking sheet with parchment.
  • Spread chips on the baking sheet, top with chili and shredded cheese.
  • Bake for 4-5 minutes until cheese melts and chili warms.
  • Heat nacho cheese sauce until smooth. Drizzle over nachos.
  • Remove from oven, add sour cream and chopped onions. Serve immediately.

Notes

For extra flavor, add jalapeños or cilantro as desired.
Calories: 650kcal
Cost: $15
Course: Appetizer
Cuisine: American
Keyword: Nachos

Unleash the Flavor: Zesty Chicken in Lemon Butter Sauce

Welcome to a culinary adventure that will transform your weeknight dinners into something extraordinary! Our Zesty Chicken in Lemon Butter Sauce is not just a meal; it’s an experience that combines vibrant flavors and wholesome ingredients for a dish that dances on your taste buds. Perfectly seasoned and bursting with flavor, this dish will make your weeknight dinners exciting and nutritious.

Why You’ll Love This Recipe

This chicken dish isn’t just about taste—it’s about making healthy eating fun, easy, and delicious! Here are five reasons why you’ll adore this recipe:

  • Quick and Easy: In less than 30 minutes, you can have a restaurant-quality meal on your table, making it perfect for busy weeknights.
  • Flavor Explosion: The combination of lemon butter sauce and perfectly seared chicken creates a symphony of flavors that will tantalize your taste buds.
  • Versatile Ingredients: With simple ingredients like chicken, lemon, and butter, you can easily customize or substitute based on what you have at home.
  • Healthy & Nutritious: Packed with protein and essential nutrients, this dish supports your healthy lifestyle without sacrificing flavor.
  • Impressive Presentation: The vibrant colors of the dish are sure to impress your family and guests, making it a great option for gatherings.

Ingredients Breakdown

Let’s dive into the essentials you need for this zesty delight!

  • Chicken: You can use chicken breasts or thighs, depending on your preference. Chicken thighs provide a richer flavor and stay juicier.
  • Lemon Juice: Freshly squeezed lemon juice is a must for that bright, zesty flavor. Bottled lemon juice can work in a pinch, but fresh is always better!
  • Salt and Pepper: Essential for seasoning the chicken to enhance its natural flavors.
  • Oil: A neutral oil, like canola or vegetable oil, is perfect for searing the chicken.
  • Butter: Use unsalted butter to control the saltiness of the dish and to create a rich, creamy sauce.

How to Make Zesty Chicken in Lemon Butter Sauce

Side view of succulent chicken in a rich lemon butter sauce.

Follow these simple steps to create your lemon butter chicken masterpiece:

  • Step 1: Marinate the chicken with lemon juice, salt, and pepper for at least 15 minutes to infuse flavor.
  • Step 2: Heat oil in a skillet over medium heat and pan-sear the marinated chicken until golden brown and cooked through, about 6-7 minutes per side.
  • Step 3: In the same skillet, reduce the heat and add butter. Allow it to melt and combine with the juices left in the pan, creating a luscious lemon butter sauce.
  • Step 4: Drizzle the lemon butter sauce over the chicken and serve hot with your favorite sides!

Pro Tips for Perfect Lemon Butter Chicken

Elevate your cooking with these expert insights!

  • Use a Meat Thermometer: Ensure your chicken reaches an internal temperature of 165°F (75°C) for perfect doneness.
  • Let It Rest: After cooking, allow the chicken to rest for 5 minutes before slicing to retain its juices.
  • Customize Your Sauce: Add garlic, fresh herbs, or spices like paprika for an extra flavor kick.
  • Experiment with Vegetables: Toss in steamed veggies like broccoli or green beans to make it a complete meal.
  • Make it Creamy: For a richer sauce, stir in a splash of heavy cream into the butter sauce.
  • Use Fresh Herbs: Garnish with freshly chopped parsley or basil to elevate the dish visually and flavor-wise.
  • Pair it Right: Serve with rice, quinoa, or a fresh salad to round out the meal.
  • Storage Tips: Store leftovers in an airtight container in the fridge for up to 3 days.

Common Mistakes and Troubleshooting

Even the best chefs can encounter hiccups! Here are some common issues and how to fix them:

  • Overcooked Chicken: If your chicken is tough, reduce the cooking time next time and ensure it’s not overcooked.
  • Sauce Separation: If your butter sauce separates, whisk it vigorously to bring it back together.
  • Too Salty: If your dish ends up too salty, balance it out with a squeeze of fresh lemon juice or a pinch of sugar.

Variations of Zesty Chicken in Lemon Butter Sauce

Get creative and try these delicious variations!

  • Herb-Infused: Add fresh thyme or rosemary to the butter sauce for aromatic flavors.
  • Spicy Kick: Incorporate red pepper flakes into the sauce for a zesty heat.
  • Honey Lemon Butter: Mix in a tablespoon of honey for a sweet and tangy twist.
  • Vegetable Medley: Toss in seasonal vegetables like asparagus, bell peppers, or zucchini for added nutrition and color.

Storage and Make-Ahead Instructions

Planning ahead? Here’s how to store and prepare your dish:

  • Refrigerate: Store leftover chicken in an airtight container in the fridge for up to 3 days.
  • Freeze: For longer storage, freeze the chicken (without the sauce) for up to 2 months. Thaw in the refrigerator before reheating.
  • Make-Ahead: You can marinate the chicken a day in advance to enhance the flavor.

Frequently Asked Questions

Here are some common queries about this delicious dish:

  • Can I use chicken breasts instead of thighs? Yes, chicken breasts can be used; however, they may require less cooking time.
  • Can I make this dish dairy-free? Absolutely! Substitute the butter with a plant-based alternative like coconut oil or vegan butter.
  • What can I serve with lemon butter chicken? Pair it with rice, quinoa, or a fresh salad for a complete meal.
  • How do I reheat leftovers? Gently reheat in a skillet over low heat to prevent drying out.
  • Can I add other spices? Definitely! Feel free to experiment with spices like paprika, cumin, or garlic powder.
  • Is this recipe suitable for meal prep? Yes, it’s perfect for meal prepping! Just store in individual containers.
  • Can I use other citrus? Yes! Substitute lemon with lime or orange for a different flavor profile.
  • How spicy is this dish? This recipe is not spicy, but you can add chili flakes for heat.

Nutritional Tips and Dietary Adaptations

Looking to tweak your dish for dietary needs? Here are some helpful tips:

  • Low-Carb Option: Serve with cauliflower rice instead of traditional rice for a low-carb alternative.
  • Paleo-Friendly: Use coconut oil instead of butter and serve with a side of steamed vegetables.
  • Gluten-Free: This recipe is naturally gluten-free; just ensure your sides are also gluten-free.

Equipment Recommendations

Here’s what you’ll need to make this recipe flawlessly:

  • Skillet: A large, heavy skillet for even cooking.
  • Meat Thermometer: For precise cooking of your chicken.
  • Spatula: A sturdy spatula to flip the chicken without damage.

Serving Suggestions

Make your meal complete with these serving ideas:

  • Rice or Quinoa: Serve the chicken over fluffy rice or quinoa to soak up the delicious lemon butter sauce.
  • Fresh Salad: A light salad with mixed greens and a lemon vinaigrette complements the richness of the chicken.
  • Crusty Bread: Serve with a side of warm, crusty bread to mop up the sauce.

In conclusion, our Zesty Chicken in Lemon Butter Sauce is not just a recipe, but a celebration of flavors that can brighten up any meal. With its easy preparation and delicious outcome, you can turn any night into a culinary adventure. Get in the kitchen, unleash your inner chef, and enjoy the vibrant tastes of this delightful dish!

Chicken In Lemon Butter Sauce

Prep Time 10 minutes
Cook Time 15 minutes
Total Time 25 minutes
Servings 4 servings
Calories 350
A flavorful chicken dish featuring a tangy lemon butter sauce, perfect for a quick and delicious meal.

Ingredients

protein

  • 2 pieces chicken breasts
  • 1/4 cup lemon juice (freshly squeezed)
  • 1 tsp salt
  • 1/2 tsp pepper
  • 2 tbsp oil
  • 3 tbsp butter

Instructions 

  • Marinate the chicken with lemon juice, salt, and pepper.
  • Pan sear the chicken on a skillet with oil until cooked through.
  • Top the chicken with lemon butter sauce before serving.

Notes

Use fresh lemon juice for the best flavor.
Calories: 350kcal
Cost: $12
Course: Main Course
Cuisine: international
Keyword: Chicken