Author

Ryan

Browsing

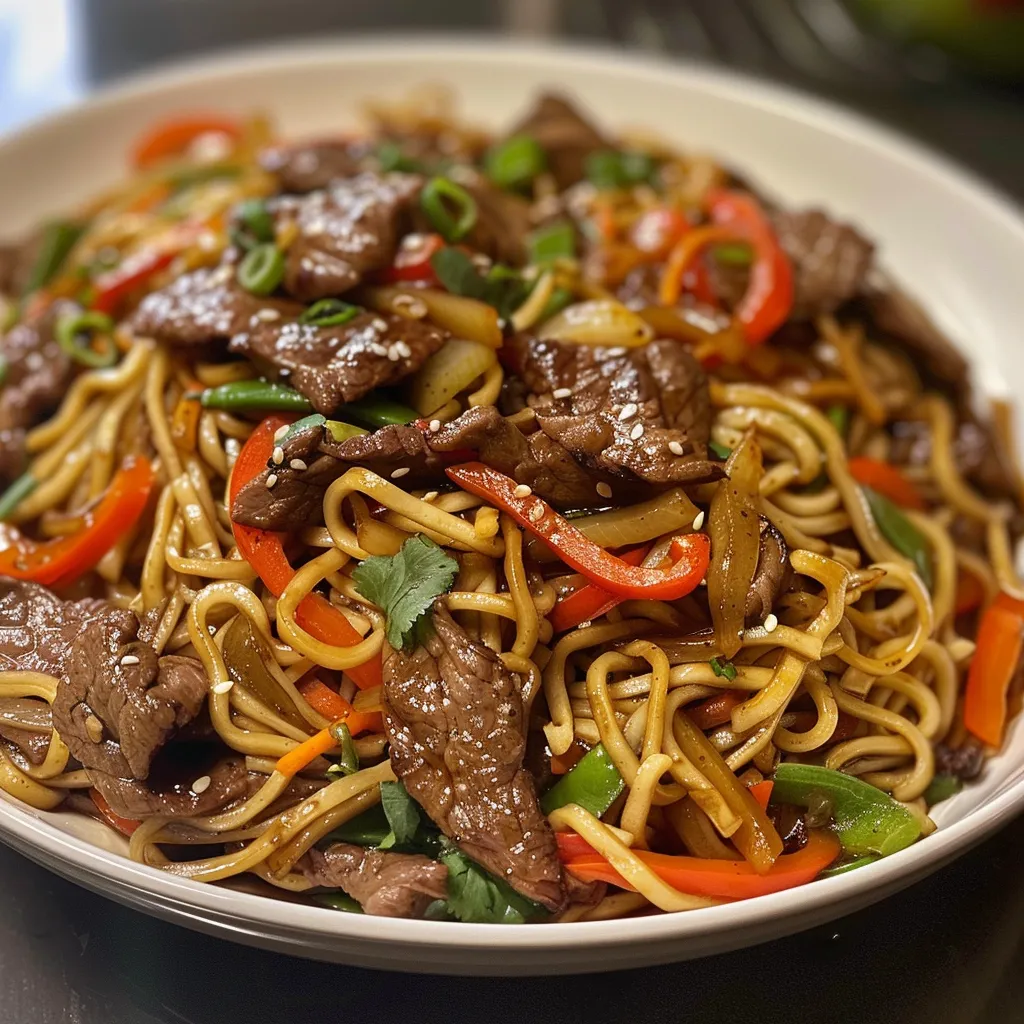
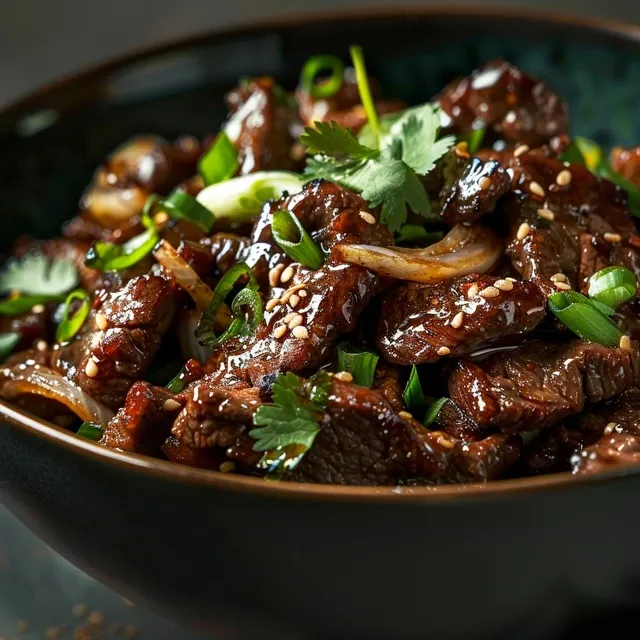
Transform Your Dinner with an Exciting Chinese Beef and Onion Stir-Fry

Welcome to a culinary adventure where each bite tells a story! This Chinese Beef and Onion Stir-Fry isn’t just another meal; it’s a vibrant celebration of flavors that will have you dancing in the kitchen. In under 30 minutes, you can whip up a dish that’s not only delicious but also packed with nutrition and energy. Let’s dive into why this recipe is a must-try!

Why You’ll Love This Recipe

  • Quick and Easy: Perfect for busy weeknights, this stir-fry can be on your table in just 30 minutes.
  • Flavor Explosion: A delightful blend of soy sauce, oyster sauce, and hoisin sauce creates a savory richness that’s irresistible.
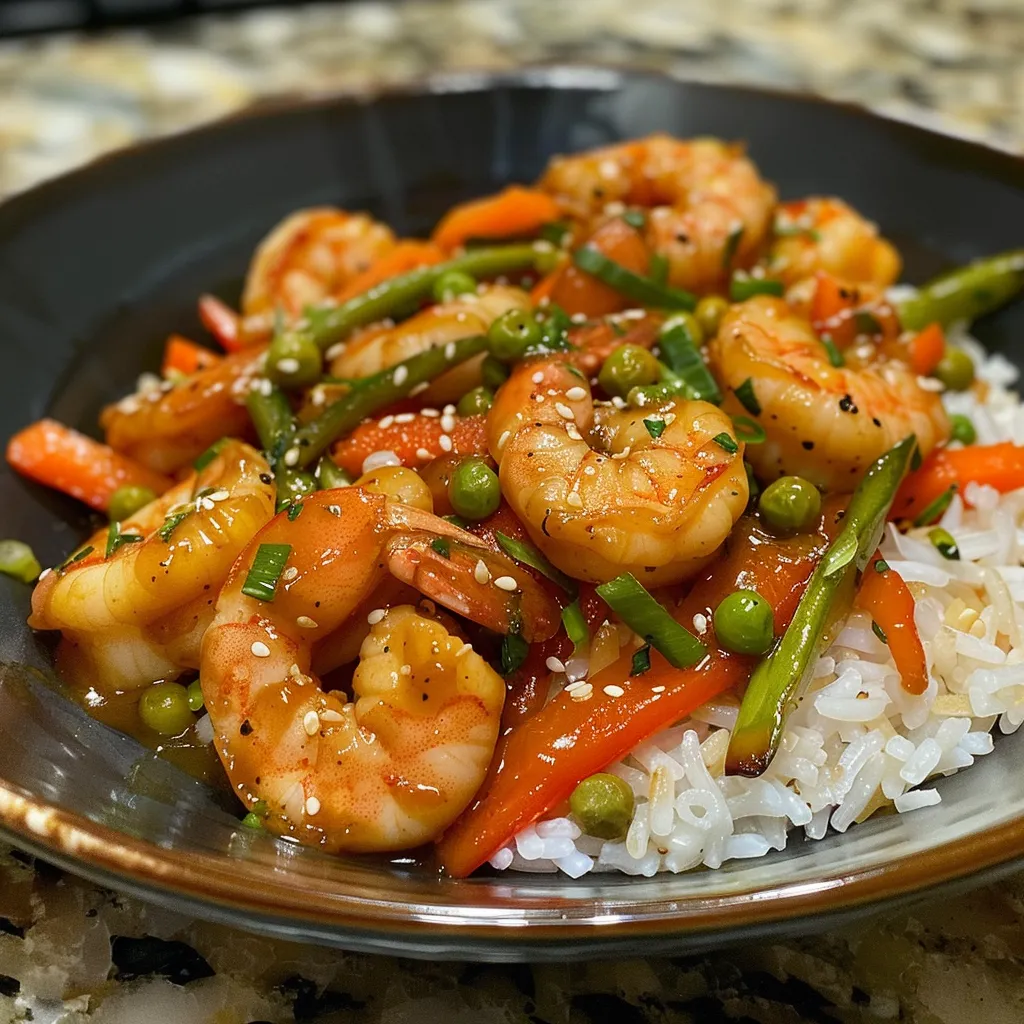
  • Customizable: Easily modify this dish with your favorite vegetables or protein options—chicken, tofu, or even shrimp!
  • Healthy and Nutritious: Packed with protein and fresh veggies, this dish supports your healthy lifestyle without sacrificing flavor.
  • One-Pan Wonder: Less cleanup means more time to enjoy your meal and less stress after cooking!

Ingredient Breakdown

Let’s take a closer look at what you’ll need to create this masterpiece:

  • 1 lb beef (flank steak or sirloin): Thinly sliced against the grain for maximum tenderness. You can substitute with chicken or tofu if preferred.
  • 1 large onion: Thinly sliced to caramelize beautifully, adding sweetness to the dish.
  • 2 tbsp vegetable oil: A neutral oil like canola or sunflower works best for high-heat stir-frying.
  • 2 cloves garlic, minced: For that aromatic kick that elevates the flavor profile.
  • 1 tbsp ginger, minced: Adds a zesty warmth that complements the beef.
  • 2 tbsp soy sauce: The base of our flavorful sauce; try low-sodium for a healthier option.
  • 1 tbsp oyster sauce: Rich umami flavor that enhances the savory notes.
  • 1 tbsp hoisin sauce: Sweet and tangy, it adds depth to the sauce.
  • 1 tbsp cornstarch (mixed with 2 tbsp water): This thickens your sauce for that perfect coating.
  • 1 tsp sesame oil: For that nutty finish that ties all the flavors together.
  • 1/4 cup beef broth or water: Adds moisture; you can use vegetable broth for a vegetarian option.
  • 1/4 tsp black pepper: Adds a subtle heat to the dish.
  • Green onions, chopped: For garnishing and a fresh crunch.
  • Sesame seeds (optional): A finishing touch for added texture.

How to Make Chinese Beef and Onion Stir-Fry

A tantalizing side view of a Chinese beef and onion stir-fry, highlighting glossy beef slices and aromatic vegetables.

Follow these simple steps for a dish that sings with flavor:

  1. Prepare the Beef: In a bowl, toss the thinly sliced beef with 1 tablespoon of soy sauce and a pinch of black pepper. Let it marinate for 10 minutes.
  2. Cook the Beef: Heat 1 tablespoon of vegetable oil in a large pan or wok over high heat. Stir-fry the beef in batches for 2-3 minutes until browned. Remove from the pan and set aside.
  3. Cook the Onion: Add the remaining tablespoon of oil to the same pan. Stir-fry the onions over medium-high heat for 4-5 minutes until soft and caramelized.
  4. Add Aromatics: Stir in the minced garlic and ginger, cooking for 1 minute until fragrant.
  5. Make the Sauce: In a small bowl, mix the remaining soy sauce, oyster sauce, hoisin sauce, sesame oil, and beef broth (or water). Stir well to combine.
  6. Combine Everything: Return the beef to the pan with the onions and aromatics. Pour in the sauce mixture and stir to coat evenly.
  7. Thicken the Sauce: Stir in the cornstarch slurry and continue cooking for another 1-2 minutes until the sauce thickens.
  8. Serve: Garnish with green onions and sesame seeds. Serve hot with steamed rice or noodles!

Pro Tips for Perfect Stir-Fry

  • Prep Ahead: Have all your ingredients prepped and ready to go. Stir-frying is quick, and you don’t want to scramble at the last minute!
  • High Heat: Cook on high heat to achieve that delicious char and keep the vegetables crisp.
  • Don’t Overcrowd: Cook in batches if necessary to prevent steaming the beef. This ensures a nice sear!
  • Fresh Ingredients: Use the freshest veggies you can find for the best flavor and texture.
  • Let it Rest: Allow the beef to rest after cooking to ensure it’s juicy and tender.
  • Garnish Generously: Don’t skimp on garnishes—green onions and sesame seeds add a wonderful crunch and presentation!
  • Experiment: Feel free to add other vegetables like bell peppers, broccoli, or snap peas for added color and nutrition.
  • Season to Taste: Adjust the flavors of the sauce to suit your preference—add more soy sauce for saltiness or hoisin for sweetness.

Common Mistakes to Avoid

  • Not Marinating: Skipping the marinade step can result in less flavorful beef; don’t rush this part!
  • Too Much Sauce: Ensure the sauce isn’t overwhelming; balance is key for a great stir-fry.
  • Cooking Too Long: Overcooking the beef will make it tough. Aim for quick cooking at high heat instead.
  • Inadequate Cutting: Not slicing the beef correctly (against the grain) can lead to chewy pieces. Take your time with this step!

Variations to Spice Up Your Stir-Fry

Switch things up with these delightful variations!

  • Spicy Kick: Add sliced jalapeños or a dash of chili flakes to your stir-fry for a spicy version!
  • Veggie Lovers: Toss in a colorful array of vegetables like bell peppers, snap peas, or carrots for added nutrition.
  • Sweet & Sour: Drizzle a bit of sweet and sour sauce for a tangy twist that balances the flavors.
  • Peanut Butter Delight: Stir in a tablespoon of peanut butter for a creamy, nutty addition to the sauce.

Storage & Make-Ahead Instructions

This dish is perfect for meal prep! Here’s how to store it:

  • Refrigerate: Store in an airtight container in the fridge for up to 3 days.
  • Freeze: You can freeze the stir-fry for up to 2 months. Just reheat in a skillet over low heat when ready to enjoy!
  • Make-Ahead: Marinate the beef a day in advance and chop your vegetables to save time on cooking day.

Comprehensive FAQ

  • Can I use chicken instead of beef? Absolutely! Chicken thighs or breasts work wonderfully in this recipe.
  • What can I serve with this stir-fry? It pairs perfectly with steamed rice, fried rice, or noodles for a filling meal.
  • Can I add more vegetables? Yes! Feel free to include any vegetables you enjoy; just adjust the cooking time accordingly.
  • How can I make it gluten-free? Use tamari instead of soy sauce and check the labels on your other sauces.
  • What type of beef is best for stir-fry? Flank steak or sirloin are ideal due to their tenderness when sliced thinly.
  • Can I meal prep this dish? Yes! Store leftovers in the fridge for quick lunches throughout the week.
  • How do I prevent the beef from getting tough? Slice against the grain and cook quickly over high heat to keep it tender.
  • What’s the best way to reheat leftovers? Reheat in a skillet over medium heat, adding a splash of water or broth to keep it moist.

Nutrition Tips and Dietary Adaptations

This Chinese Beef and Onion Stir-Fry is not only delicious but also nutritious! Here are some tips to enhance its health benefits:

  • Lean Proteins: Use lean cuts of beef like flank or sirloin to minimize saturated fat.
  • Incorporate Whole Grains: Serve with brown rice or quinoa for added fiber and nutrients.
  • Add More Veggies: Boost the vegetable content for more vitamins and minerals; colorful veggies also add visual appeal!
  • Low-Sodium Options: Opt for low-sodium soy sauce to reduce sodium intake.

Equipment Recommendations

To create this delicious stir-fry, here’s what you’ll need:

  • Wok or Large Skillet: Essential for even cooking and high heat.
  • Sharp Knife: For thinly slicing the beef and chopping vegetables.
  • Cutting Board: A sturdy surface is key for prepping your ingredients.
  • Measuring Cups and Spoons: To ensure accurate measurements for your sauces and ingredients.

Serving Suggestions

To elevate your meal, consider these serving ideas:

  • Steamed Rice: Jasmine or brown rice makes the perfect base for this stir-fry.
  • Fried Rice: For an extra layer of flavor, serve it alongside egg fried rice.
  • Noodles: Udon or rice noodles soak up the delicious sauce beautifully.
  • Fresh Salad: A light cucumber or sesame salad balances the richness of the stir-fry.

Conclusion

There you have it! This Chinese Beef and Onion Stir-Fry is more than just a recipe; it’s a canvas for your creativity in the kitchen. Whether you’re cooking for yourself or entertaining friends, this dish brings joy and excitement to your dinner table. So grab your ingredients, put on your favorite tunes, and get ready to sizzle up an unforgettable meal!

Chinese Beef and Onion Stir-Fry

Prep Time 10 minutes
Cook Time 15 minutes
Total Time 25 minutes
Servings 4 servings
Calories 450
A quick and flavorful stir-fry combining tender beef, sweet onions, and savory sauces, perfect for a satisfying meal.

Ingredients

Meat

  • 1 lb beef (flank steak or sirloin), thinly sliced
  • 1 large onion, thinly sliced

Oils and Aromatics

  • 2 tbsp vegetable oil
  • 2 cloves garlic, minced
  • 1 tbsp ginger, minced

Sauces and Liquids

  • 2 tbsp soy sauce
  • 1 tbsp oyster sauce
  • 1 tbsp hoisin sauce
  • 1 tsp sesame oil
  • 1/4 cup beef broth or water
  • 1 tsp black pepper

Garnishes

  • to taste Green onions, chopped (for garnish)
  • optional Sesame seeds (for garnish)

Instructions 

  • Toss beef with 1 tbsp soy sauce and black pepper; marinate 10 mins.
  • Heat 1 tbsp oil; stir-fry beef in batches until browned, then set aside.
  • Add remaining oil; stir-fry onions 4-5 mins until soft and caramelized.
  • Add garlic and ginger; cook 1 min until fragrant.
  • Mix soy, oyster, hoisin sauces, sesame oil, and broth; return beef to pan, add sauce, and stir.
  • Add cornstarch slurry; cook 1-2 mins until thickened. Garnish with green onions and sesame seeds.

Notes

Serve hot with steamed rice or noodles for a complete meal.
Calories: 450kcal
Cost: $15
Course: Main Course
Cuisine: Chinese
Keyword: Beef, Stir-Fry

Welcome to the vibrant world of Metabo Slim Juice! If you’re looking for a delicious way to elevate your wellness journey, you’ve just stumbled upon a gem. Packed with the energizing power of green tea extract, the tropical flair of African mango, and the detoxifying benefits of milk thistle, this juice is not just a drink; it’s your new go-to for a refreshing health boost. Sip your way to vitality in just minutes, and let’s dive into why this recipe is a game-changer!

Why You’ll Love This Recipe

This isn’t just a juice; it’s a celebration of health! Here are five compelling reasons to fall in love with Metabo Slim Juice:

  • Boosts Metabolism: The combination of green tea and African mango is known to enhance metabolic rates, helping you burn calories more efficiently.
  • Detoxifying Power: Thanks to milk thistle, this juice supports liver health, assisting in detoxification and promoting overall wellness.
  • Rich in Antioxidants: Both green tea and African mango are high in antioxidants, which combat oxidative stress and support your body’s defenses.
  • Quick and Easy: This recipe takes no time to prepare, making it perfect for those busy mornings when you need a quick health boost.
  • Deliciously Refreshing: With its tropical flavors, drinking this juice feels like sipping on a mini-vacation!

Ingredient Breakdown

Let’s break down the ingredients to showcase their nutritional benefits and potential substitutions:

  • Green Tea Extract: Rich in catechins, this ingredient not only helps with metabolism but also enhances fat oxidation. Substitution: You can use brewed green tea if extract is unavailable.
  • African Mango: This fruit is celebrated for its weight management properties and is loaded with vitamins and minerals. Substitution: Use regular mango or a blend of tropical fruits if African mango is hard to find.
  • Milk Thistle: Known for its liver-supporting qualities, it helps detoxify the body. Substitution: If unavailable, consider using dandelion root as a liver-supporting alternative.

Pro Tips for the Perfect Metabo Slim Juice

Here are some expert insights to ensure your juice is absolutely delicious:

  • Use Fresh Ingredients: Whenever possible, opt for fresh fruits and high-quality extracts to maximize flavor and health benefits.
  • Stay Hydrated: Drink plenty of water alongside your juice for optimal hydration and health.
  • Enjoy on an Empty Stomach: For the best results, drink your juice first thing in the morning to kickstart your metabolism.
  • Mix It Up: Don’t hesitate to experiment with adding spinach or kale for an extra nutrient boost.
  • Chill Your Ingredients: For a refreshing experience, use chilled ingredients or add ice cubes.
  • Opt for Organic: Whenever possible, choose organic ingredients to avoid pesticides and enhance flavor.
  • Sweeten Naturally: If you prefer a sweeter taste, consider adding a splash of honey or agave syrup.
  • Blend Thoroughly: Make sure to blend your mixture until smooth for the best texture.

Common Mistakes and Troubleshooting

Side angle of a Metabo Slim Juice bottle with visible ingredients on the label.

Even the best cooks can encounter pitfalls. Here’s how to avoid common mistakes:

  • Too Thick: If your juice is too thick, simply add more water or juice until it reaches your desired consistency.
  • Too Bitter: If the flavor is too strong, balance it with a splash of fresh lemon juice or a sweet fruit.
  • Unpleasant Texture: Blend longer if you find bits of fruit or extract; a smooth texture is key to enjoyment.

Variations on Metabo Slim Juice

Want to switch things up? Here are some variations you can try:

  • Green Tropical Twist: Add pineapple and coconut water for a tropical vibe.
  • Berry Boost: Incorporate mixed berries for added antioxidants and sweetness.
  • Minty Fresh: Toss in a handful of fresh mint leaves for a refreshing finish.
  • Citrus Zing: Add a squeeze of orange or grapefruit juice for a citrusy kick.

Storage and Make-Ahead Instructions

Want to prep your juice in advance? Here’s how:

  • Refrigeration: Store your juice in an airtight container in the fridge for up to 48 hours. Shake well before consuming.
  • Freezing: For longer storage, freeze in ice cube trays. Blend frozen cubes with water for a quick juice anytime!

Comprehensive FAQ

Got questions? We’ve got answers! Here are some frequently asked questions about Metabo Slim Juice:

  • Can I use pre-made green tea? Yes, pre-made green tea works great as a base!
  • How often can I drink this juice? You can enjoy it daily as part of a balanced diet.
  • Is it safe for everyone? Generally, yes, but consult a healthcare professional if you have specific health concerns.
  • Can I add protein powder? Absolutely! For an extra nutritional boost, add your favorite protein powder.
  • Will this help with weight loss? It can support weight loss efforts when combined with a healthy lifestyle.
  • Can I make this juice without a blender? Unfortunately, a blender is necessary to achieve the smooth consistency.
  • What’s the best time to drink this juice? First thing in the morning is ideal for metabolic benefits.
  • Is it suitable for kids? Yes, but adjust the sweetness based on their preferences.

Nutrition Tips and Dietary Adaptations

Here are some nutrition tips to enhance your Metabo Slim Juice experience:

  • Balance Your Diet: Pair your juice with a balanced meal to maximize nutritional benefits.
  • Monitor Sugar Intake: Be conscious of additional sweeteners; aim for natural options.
  • Include Healthy Fats: Add a source of healthy fats, like avocado, to your meal for satiety.

Equipment Recommendations

To make this delicious juice, you’ll need:

  • High-Speed Blender: A powerful blender ensures a smooth and creamy texture.
  • Measuring Cups: For precise ingredient measurements.
  • Airtight Container: For storing leftovers or make-ahead portions.

Serving Suggestions

Here’s how to enjoy your Metabo Slim Juice:

  • Garnish with Fresh Herbs: A sprig of mint or basil adds a lovely touch.
  • Serve Chilled: Enjoy it over ice for a refreshing experience.
  • Pair with a Healthy Snack: Enjoy it alongside a handful of nuts or a piece of fruit.

In conclusion, Metabo Slim Juice is more than just a drink; it’s an invitation to embrace a healthier lifestyle filled with vibrant flavors and energizing benefits. So grab your blender, whip up this juice, and toast to your health! Remember, cooking and nutrition should be fun, accessible, and exciting—just like life! Cheers to your wellness journey!

Metabo Slim Juice

Prep Time 5 minutes
Total Time 5 minutes
Servings 1 glass
Calories 10
A refreshing health-boosting juice designed to support metabolism and weight management with natural ingredients.

Ingredients

Liquid

  • 1 cup Green Tea Extract (prepared or concentrated)
  • 1 tablespoon African Mango (powder or extract)
  • 1 teaspoon Milk Thistle (ground or extract)

Instructions 

  • Mix all ingredients thoroughly in a glass.
  • Pour into a glass and serve immediately.
  • Enjoy on an empty stomach for best results.

Notes

Use fresh ingredients for optimal flavor and benefits.
Calories: 10kcal
Cost: $12
Course: Beverage
Cuisine: Health
Keyword: Metabolism

Unlock the Joy of Cooking with Classic Beef Lo Mein

Welcome to a world where flavor meets fun! Classic Beef Lo Mein is more than just a meal—it’s a vibrant culinary adventure that brings together tender beef, colorful vegetables, and savory sauces in a delightful one-bowl meal. In under 30 minutes, you can create a dish that’s not only delicious but also packed with nutrients. Let’s dive into this recipe that’s sure to become a family favorite!

Why You’ll Love This Recipe

  • Quick and Easy: Prepare a restaurant-quality beef lo mein in just 20 minutes, making it perfect for busy weeknights.
  • Flavor Explosion: Enjoy a harmonious blend of tender beef, fresh veggies, and a rich, savory sauce that will dance on your taste buds.
  • Customizable: This recipe is versatile! Swap in your favorite proteins or vegetables to create your perfect bowl.
  • Healthy Ingredients: Packed with colorful vegetables and lean beef, this dish is a nutritious way to satisfy your cravings.
  • One-Bowl Wonder: Enjoy a complete meal in one bowl, making cleanup a breeze!

Ingredients You’ll Need

Gather these fresh ingredients to whip up your Classic Beef Lo Mein:

  • 1 pound Flank steak or sirloin: Thinly sliced for a rich source of protein and hearty flavor.
  • 8 ounces Lo mein noodles: Fresh or dried; fresh cooks faster and adds a delightful chewiness.
  • 2 cups Assorted vegetables: Bell peppers, carrots, and snow peas—sliced thin for texture and color.
  • ¼ cup Soy sauce: Opt for low-sodium to keep it lighter without sacrificing flavor.
  • 2 tablespoons Oyster sauce: Enhances the savory notes of the dish.
  • 3 cloves Garlic, minced: Adds a fragrant aroma and bold flavor.
  • 1 tablespoon Ginger, freshly grated: Brings a warm, spicy note that elevates the dish.
  • 1 tablespoon Sesame oil: Adds a toasty flavor that complements the other ingredients.
  • ¼ cup Green onions, chopped: For garnish and an extra pop of freshness.
  • ½ teaspoon Black pepper, freshly ground: Adds warmth and spice to your dish.

How to Make Classic Beef Lo Mein

Side angle of a plate filled with Classic Beef Lo Mein, highlighting the vibrant colors of vegetables and noodles.

Follow these simple steps to create a delicious bowl of beef lo mein:

  1. Prepare the lo mein noodles according to package instructions until al dente. Drain and drizzle with sesame oil to prevent sticking.
  2. Marinate the beef: In a bowl, mix 2 tablespoons of soy sauce, 1 tablespoon of minced garlic, and a pinch of black pepper. Add the sliced beef and let it marinate for about 15 minutes.
  3. Prep your veggies: Slice the bell peppers, julienne the carrots, and trim the snow peas. Having everything ready will make cooking a breeze!
  4. Heat a large skillet or wok over medium-high heat. Add 1 tablespoon of oil and cook the marinated beef for 3-4 minutes until browned. Remove the beef and set aside.
  5. In the same skillet, add another tablespoon of oil. Sauté garlic and ginger for about 30 seconds until fragrant.
  6. Add your sliced vegetables and stir-fry for 3-5 minutes until they are crisp-tender.
  7. Return the beef to the skillet. Add the remaining soy sauce, oyster sauce, and a splash of sesame oil, cooking for an additional 2 minutes.
  8. Finally, toss in the cooked noodles, mixing everything together until well coated in the sauce and heated through.
  9. Garnish with chopped green onions and serve immediately for a delightful meal!

Pro Tips for Making Beef Lo Mein

  • Prep Ahead: Chop your veggies and marinate the beef in advance to save time during cooking.
  • Don’t Overcook: Stir-fry veggies until they are just crisp-tender to maintain their vibrant color and crunch.
  • Use High Heat: A hot skillet or wok ensures that your beef gets that beautiful sear and your noodles stay perfectly chewy.
  • Experiment with Sauces: Try adding hoisin sauce or a splash of rice vinegar for an extra depth of flavor.
  • Perfectly Cooked Noodles: Always cook your noodles according to the package instructions and rinse them briefly with cold water to stop the cooking process.
  • Garnish Generously: Fresh herbs like cilantro or basil can enhance the flavor and presentation of your dish.
  • Use Leftovers Wisely: Any leftover beef lo mein can be reheated in a skillet with a splash of water to keep it moist.
  • Mix Up the Proteins: Substitute beef with chicken, shrimp, or tofu for a different twist on this classic dish.

Common Mistakes and Troubleshooting

Even the most seasoned cooks can run into hiccups. Here are some common mistakes to avoid:

  • Overcooking the Beef: Be sure to remove the beef from the pan as soon as it’s browned to prevent it from becoming tough.
  • Too Much Sauce: Start with less sauce; you can always add more to taste later!
  • Sticking Noodles: Make sure to toss the noodles with sesame oil immediately after draining to prevent sticking.

Variations of Beef Lo Mein

Feel free to switch it up with these fun variations:

  • Vegetable Lo Mein: Skip the meat entirely and load up on your favorite vegetables for a vibrant vegetarian option.
  • Spicy Beef Lo Mein: Add chili oil or sliced jalapeños for a kick of heat.
  • Sesame Chicken Lo Mein: Swap beef for chicken, marinating it the same way for a delicious twist.
  • Garlic Shrimp Lo Mein: Use shrimp instead of beef, cooking them until just pink for a light and flavorful dish.

Storage and Make-Ahead Instructions

Want to enjoy this dish later? Here’s how to store and reheat:

  • Refrigerate: Store leftovers in an airtight container in the fridge for up to 3 days.
  • Freeze: You can freeze cooked lo mein, but it’s best to eat it fresh for optimal texture.
  • Reheat: Reheat in a skillet over medium heat with a splash of water to keep it moist.

Frequently Asked Questions (FAQs)

  • Can I make this dish vegetarian? Absolutely! Replace the beef with tofu and use vegetable broth instead of oyster sauce.
  • What type of noodles should I use? Lo mein noodles are ideal, but you can use egg noodles or even spaghetti in a pinch.
  • Can I use frozen vegetables? Yes! Just make sure to thaw and drain them before adding them to the stir-fry.
  • Is this dish spicy? It’s not inherently spicy, but you can add chili sauce if you prefer some heat!
  • What can I serve with lo mein? It pairs beautifully with spring rolls, dumplings, or a light salad.
  • How do I know when the beef is cooked? It should be browned on the outside and no longer pink in the center.
  • Can I use a different cut of beef? Yes! Cuts like sirloin or ribeye work well too.
  • How do I store leftovers? Keep them in an airtight container in the fridge for up to three days.

Nutrition Tips and Dietary Adaptations

This Classic Beef Lo Mein is not only delicious but can also be made healthier:

  • Whole Grain Noodles: Use whole grain or spiralized zucchini noodles for a fiber boost.
  • Low Sodium Options: Opt for low-sodium soy and oyster sauces to reduce salt intake.
  • Add More Veggies: Increase the vegetable content by adding broccoli, snap peas, or bok choy.

Equipment Recommendations

For the best results, here’s what you’ll need:

  • Wok or Large Skillet: Essential for high-heat cooking and stir-frying.
  • Sharp Knife: For precise slicing of your beef and vegetables.
  • Cutting Board: Keep your workspace clean and organized.
  • Measuring Cups and Spoons: Ensure accurate ingredient measurements.

Serving Suggestions

Elevate your meal with these serving ideas:

  • Garnish: Fresh cilantro or sesame seeds make a beautiful and flavorful topping.
  • Side Dishes: Serve with steamed dumplings or crispy spring rolls for a complete feast.
  • Beverage Pairings: A refreshing iced tea or a light beer complements the flavors perfectly.

Conclusion

There you have it—a delicious, vibrant, and nutritious recipe for Classic Beef Lo Mein that ticks all the boxes! Whether you’re cooking for family, friends, or just yourself, this dish is sure to impress and satisfy. Embrace your culinary creativity and make it your own. Happy cooking!

Classic Beef Lo Mein

Prep Time 10 minutes
Cook Time 15 minutes
Total Time 25 minutes
Servings 4 servings
Calories 550
A flavorful and hearty Chinese-inspired dish featuring tender beef, fresh vegetables, and savory noodles, perfect for a quick weeknight dinner.

Ingredients

Protein

  • 1 pound Flank steak or sirloin, thinly sliced (Provides a rich source of protein and adds hearty flavor.)

Noodles

  • 8 ounces Lo mein noodles (Fresh or dried; fresh cooks faster.)

Vegetables

  • 2 cups Assorted vegetables (bell peppers, carrots, snow peas) (Sliced thin for texture and color.)
  • 0.25 cup Soy sauce (Use low-sodium for a lighter taste.)
  • 2 tablespoons Oyster sauce (Enhances savory notes.)
  • 3 cloves Garlic, minced (Adds fragrant aroma and bold flavor.)
  • 1 tablespoon Ginger, freshly grated (Brings a warm, spicy note.)
  • 1 tablespoon Sesame oil (Adds a toasty flavor.)
  • 0.25 cup Green onions, chopped (For garnish and freshness.)
  • 0.5 teaspoon Black pepper, freshly ground (Adds warmth and spice.)

Instructions 

  • Cook noodles until al dente, drain, and toss with a little sesame oil.
  • Marinate beef with 2 tbsp soy sauce, garlic, and black pepper for 15 minutes.
  • Stir-fry beef in a hot skillet until browned, then set aside.
  • Sauté garlic, ginger, and vegetables until crisp-tender.
  • Return beef, add sauces, toss with noodles, garnish with green onions, and serve.

Notes

For extra flavor, add a splash of rice vinegar or chili oil.
Calories: 550kcal
Cost: $15
Course: Main Course
Cuisine: Chinese
Keyword: Beef, Noodles, Stir-Fry

Unleash the Power of the Mango Spinach Smoothie!

Welcome to the world of vibrant, nourishing smoothies that make healthy eating a joyful experience! Today, we’re diving into the delicious and nutrient-packed Healthy Mango Spinach Smoothie. This refreshing drink isn’t just a pretty face; it’s an energizing powerhouse that will elevate your breakfast game or give you a mid-afternoon boost. With its fusion of creamy almond milk, sweet mango chunks, and fresh baby spinach, this smoothie is the perfect way to kick off your day or recharge on the go. Let’s blend up some sunshine!

Why You’ll Love This Smoothie

  • Quick and easy: Whip up this smoothie in under 5 minutes—perfect for busy mornings or post-workout refueling.
  • Tropical flavor: The sweetness of mango and banana creates a deliciously smooth taste that masks the greens, making healthy eating enjoyable.
  • Nutritious ingredients: Packed with vitamins, minerals, and antioxidants, this smoothie supports your immune system and overall health.
  • Customizable: Easily adapt this recipe by swapping ingredients to suit your taste or dietary needs.
  • Family-friendly: Kids will love this fun drink, making it an excellent way to sneak in some greens!

The Star Ingredients

Let’s break down the ingredients that make this mango spinach smoothie a hit!

  • 1 1/2 cups frozen mango chunks: Approximately 10 ounces of frozen mango gives this smoothie its creamy texture and natural sweetness.
  • 1 ripe banana: Adds a delightful sweetness and enhances the creaminess of your smoothie.
  • 1 cup packed fresh baby spinach: Nutrient-rich and mild-tasting, spinach blends seamlessly into the mix.
  • 3/4 cup plain almond milk: Unsweetened almond milk contributes a smooth base. You can also use any plant-based milk you prefer!

Substitutions and Variations

If you want to mix things up, here are some fantastic substitutions and variations:

  • Other fruits: Try adding other fruits like pineapple, blueberries, or strawberries for a unique twist!
  • Greens galore: Substitute spinach with kale or Swiss chard for a different nutrient profile.
  • Protein boost: Add a scoop of your favorite protein powder or a tablespoon of nut butter for extra sustenance.
  • Nutty flavor: Swap almond milk for coconut milk for a tropical flavor boost!

Expert Tips for the Perfect Smoothie

Follow these expert tips to ensure your mango spinach smoothie is always a winner:

  • Use ripe ingredients: The riper the banana and mango, the sweeter and more flavorful your smoothie will be.
  • Blend in stages: If your blender struggles with frozen ingredients, blend the almond milk and greens first, then add the frozen mango and banana.
  • Adjust thickness: If your smoothie is too thick, add a splash more almond milk until you reach your desired consistency.
  • Chill your ingredients: For an even more refreshing drink, freeze your banana beforehand and use cold almond milk.
  • Texture check: Ensure all ingredients are thoroughly blended to avoid chunks. A high-powered blender works best!
  • Experiment with flavor: Add a dash of vanilla extract or a squeeze of lime juice to elevate the flavor profile.
  • Sweetness level: Taste your smoothie before serving; if it needs more sweetness, add honey or maple syrup to taste.
  • Visual appeal: Serve in a clear glass to showcase the beautiful color and texture of your smoothie!

Common Mistakes and Troubleshooting

Even the best of us can make mistakes in the kitchen. Here are some common missteps to avoid:

  • Too much liquid: Adding too much almond milk can lead to a watery smoothie. Start with less and add more as needed.
  • Not blending enough: Failing to blend thoroughly can leave chunks of spinach or mango. Blend until completely smooth!
  • Skipping the greens: Don’t skip the spinach! It’s packed with nutrients and adds minimal flavor.
  • Using unripe ingredients: Unripe bananas or mangoes can lead to a less sweet smoothie. Choose fully ripe fruits for the best results.

Make-Ahead and Storage Instructions

Want to prepare your smoothie in advance? Here’s how!

  • Prep ahead: You can pre-portion the frozen mango, banana, and spinach into freezer bags. Just blend with almond milk when you’re ready to enjoy!
  • Storage: If you have leftover smoothie, store it in an airtight container in the fridge for up to 24 hours. Shake well before drinking.
  • Freezing: You can freeze your smoothie in ice cube trays for a quick, healthy snack later on. Simply pop out the cubes and blend when needed!

Nutritional Benefits and Dietary Adaptations

This mango spinach smoothie is not only delicious but also nutritionally rich. Here’s why:

  • Vitamins and minerals: Spinach is loaded with vitamins A, C, and K, as well as iron and calcium.
  • Healthy fats: Almond milk adds healthy fats that help you feel satisfied and full.
  • Antioxidants: Mango is rich in antioxidants that promote healthy skin and boost your immune system.
  • Dairy-free and vegan: This smoothie is suitable for those following a vegan or dairy-free diet, making it accessible to everyone!

Serving Suggestions

Pair your mango spinach smoothie with these tasty options:

  • Granola: Top with a handful of your favorite granola for added crunch.
  • Toast: Serve alongside whole-grain toast topped with avocado or nut butter for a filling breakfast.
  • Nut bars: A healthy nut bar makes for a great snack alongside your smoothie.
  • Fruit salad: Pair with a colorful fruit salad for an extra dose of vitamins!

Frequently Asked Questions

  • Can I use fresh mango instead of frozen? Yes! If using fresh, add ice to achieve the desired thickness.
  • Is this smoothie good for meal prep? Absolutely! Just prepare ingredients ahead of time and blend when you’re ready.
  • How can I make it sweeter? Add a drizzle of honey or maple syrup to taste.
  • Can I add protein powder? Yes! A scoop of protein powder is a great addition for a post-workout smoothie.
  • How long does the smoothie last? It’s best consumed immediately but can be stored in the fridge for up to 24 hours.
  • Can I substitute other greens? Yes! Kale or Swiss chard can be used instead of spinach.
  • Is this smoothie suitable for kids? Definitely! It’s a fun way to get kids to enjoy their greens.
  • What’s the best time to drink this smoothie? Morning, midday, or as a post-workout treat—anytime is a good time!

Final Thoughts

There you have it—the ultimate guide to crafting the perfect Healthy Mango Spinach Smoothie. It’s delicious, nutritious, and incredibly versatile! Whether you’re looking for a quick breakfast, a post-workout recharge, or a vibrant snack for the kids, this smoothie has got you covered. So grab your blender, get blending, and sip your way to sunshine!

Healthy Mango Spinach Green Smoothie

Prep Time 5 minutes
Total Time 5 minutes
Servings 2 cups
Calories 180
A refreshing and nutritious smoothie combining sweet mango, creamy banana, and nutrient-packed spinach for a healthy start to your day.

Ingredients

Fruits

  • 1.5 cups mango chunks, frozen (approximately 10 ounces)
  • 1 piece ripe banana (sliced into chunks)

Vegetables

  • 1 cup packed fresh baby spinach

Liquids

  • 3/4 cup plain almond milk, unsweetened

Instructions 

  • Add all ingredients to a blender.
  • Blend until smooth and creamy.
  • Pour into glasses and serve immediately.

Notes

For extra creaminess, add a spoonful of Greek yogurt.
Calories: 180kcal
Cost: $8
Course: Breakfast, Smoothie
Keyword: Healthy, Mango, spinach

Welcome to the Delicious World of Chicken Stroganoff!

Are you ready to dive into a dish that brings comfort and rich flavor right to your table? Chicken Stroganoff is a culinary classic that combines tender chicken, savory mushrooms, and a luscious cream sauce. In this guide, not only will you learn how to prepare this delightful dish, but you’ll also discover tips, variations, and everything you need to make your version of stroganoff the best it can be!

Why You’ll Love This Recipe

This Chicken Stroganoff recipe is not just about flavor—it’s about making your cooking journey enjoyable and fulfilling! Here are five reasons why this dish will become a staple in your kitchen:

  • Quick and Easy: With just a few simple steps and under 30 minutes, you can create a mouthwatering meal that feels gourmet.
  • Flexible Ingredients: The ingredients are easily customizable to fit your pantry and dietary needs, making it accessible to everyone.
  • Rich and Creamy Sauce: The sauce is the star of the show! It’s silky smooth and bursting with flavors that will have you coming back for seconds.
  • Perfect for Meal Prep: This dish holds up beautifully in the fridge, making it ideal for make-ahead meals during busy weeks.
  • Comfort Food Vibes: There’s something inherently comforting about a warm plate of Chicken Stroganoff, perfect for family dinners or cozy nights in.

Ingredients Breakdown

Let’s dive into the essential ingredients for this Chicken Stroganoff and explore some fantastic substitutes:

  • Chicken Breasts: Use boneless, skinless chicken breasts for tenderness. You can also swap in ground beef or turkey if you prefer.
  • Garlic Powder: This adds depth to the flavor; however, feel free to use fresh minced garlic for a more robust taste.
  • Flour: Ideal for dredging the chicken and thickening the sauce. For a gluten-free option, substitute with cornstarch.
  • Olive Oil: A healthy fat for cooking. You can also use avocado oil or butter for richness.
  • Mushrooms: Sliced button or cremini mushrooms are perfect. If you’re feeling adventurous, try shiitake or portobello!
  • Onion: A half medium onion chopped gives sweetness and depth. Shallots can be a beautiful alternative.
  • Dijon Mustard: Adds a tangy punch. Don’t have any? Yellow mustard will work in a pinch.
  • Worcestershire Sauce: This adds umami flavor; however, soy sauce can be a great substitute for a different twist.

Step-by-Step Instructions

Prep Your Ingredients

Start by preparing your chicken and vegetables. Cubing the chicken into bite-sized pieces and chopping your onions and mushrooms will streamline the cooking process.

Cooking Your Chicken Stroganoff

Follow these steps to create a delicious Chicken Stroganoff:

  • Prep the Chicken: Cube chicken breasts into bite-sized pieces. Season with garlic powder, salt, and pepper.
  • Dredge: Lightly coat the chicken cubes in flour, shaking off the excess.
  • Brown the Chicken: In a large skillet, heat a mix of olive oil and butter over medium-high heat. Add the chicken and cook until golden brown, about 5-7 minutes. Remove the chicken and set it aside.
  • Sauté the Vegetables: In the same skillet, add more butter if needed and sauté onions and mushrooms until soft, about 5 minutes.
  • Add Flavor: Stir in minced garlic and Dijon mustard, cooking for another minute until fragrant.
  • Deglaze: Pour in chicken broth, scraping up any browned bits from the bottom of the pan.
  • Combine: Return the chicken to the skillet. Reduce heat to medium, simmering until the chicken is cooked through, about 10 minutes.
  • Creamy Finish: Lower the heat and stir in sour cream until well combined and heated through, about 2-3 minutes. Adjust seasoning with salt and pepper.

Pro Tips for a Perfect Stroganoff

These expert tips will help you craft the ultimate Chicken Stroganoff:

  • Balance Your Flavors: Adjust the amount of Dijon mustard and Worcestershire sauce to suit your taste—don’t be afraid to experiment!
  • Perfect Texture: If your stroganoff sauce is too thin, whisk in a little flour-water mixture to thicken it. Remember, the sauce will also thicken as it cools.
  • Use Fresh Herbs: Garnish your dish with fresh parsley or thyme for an aromatic lift.
  • Cook with Care: Avoid overcooking the chicken to keep it juicy and tender. Remove it as soon as it’s cooked through.
  • Prep Ahead: Cook the chicken and sauce ahead of time, then reheat gently on the stove with a splash of broth.
  • Serve Smart: This stroganoff pairs beautifully over rice, egg noodles, or mashed potatoes—get creative!

Common Mistakes and Troubleshooting

Even the best chefs can make mistakes! Here’s how to fix common issues:

  • Thin Sauce: If your stroganoff sauce is too thin, whisk in a little flour-water mixture to thicken it. This is the best way to achieve that creamy consistency.
  • Overcooked Chicken: If the chicken is rubbery, reduce cooking time and keep a close eye on it. The chicken is done when it reaches an internal temperature of 165°F.
  • Flavorless Sauce: If your stroganoff lacks flavor, add more seasoning or a splash of vinegar to brighten it up.

Variations to Spice Up Your Stroganoff

Feeling adventurous? Here are some tasty variations to try:

  • Beef Stroganoff: Substitute chicken with thinly sliced beef for a hearty twist.
  • Mushroom Stroganoff: Make it vegetarian by using only mushrooms and vegetable broth.
  • Spicy Stroganoff: Add a pinch of cayenne pepper or some diced jalapeños for a spicy kick.
  • Greek Yogurt Swap: Substitute sour cream with Greek yogurt for a tangy, protein-packed alternative.

Storage and Make-Ahead Instructions

Want to save some for later? Here’s how to store your stroganoff:

  • Refrigeration: Store leftovers in an airtight container in the fridge for up to 3 days.
  • Freezing: Freeze in individual portions for up to 3 months. Reheat gently on the stove, adding a splash of broth to loosen the sauce.
  • Make-Ahead: Prepare the chicken and sauce ahead of time, then reheat before serving for quick meals!

Frequently Asked Questions

Here are some common questions about Chicken Stroganoff:

  • Can I use other meats? Absolutely! Pork or turkey can be great alternatives to chicken.
  • What can I serve with Chicken Stroganoff? Egg noodles, rice, or mashed potatoes are traditional options. Get creative!
  • How do I make it gluten-free? Use gluten-free flour and broth, and ensure your Worcestershire sauce is gluten-free.
  • Can I make it dairy-free? Substitute sour cream with cashew cream or coconut yogurt.
  • How long does it take to make? This recipe can be ready in under 30 minutes!
  • Can I add vegetables? Absolutely! Peas, spinach, or bell peppers can add extra nutrition and color.
  • Is Chicken Stroganoff spicy? It’s generally not spicy, but feel free to add spices to suit your taste!
  • Can I double the recipe? Yes, just ensure you have a large enough pan to accommodate everything!

Nutritional Tips and Dietary Adaptations

Want to keep it healthy? Here are some tips:

  • Lean Protein: Opt for skinless chicken breasts or turkey for a lighter dish.
  • Reduce Fat: Use low-fat sour cream or Greek yogurt to cut down on calories without sacrificing flavor.
  • Load Up on Veggies: Add more vegetables, such as spinach or bell peppers, to boost the nutritional profile.

Essential Equipment for Your Chicken Stroganoff

Here’s what you’ll need to create your Chicken Stroganoff:

  • Large Skillet: A non-stick skillet is ideal for easy cooking and cleanup.
  • Measuring Cups and Spoons: Accurate measurements ensure the best results!
  • Cutting Board and Knife: For prepping your ingredients like a pro.

Serving Suggestions

Here are a few ideas to make your Chicken Stroganoff shine:

  • Over Rice: Serve it over fluffy white or brown rice for a hearty meal.
  • With Noodles: Egg noodles are the classic choice, but feel free to experiment with whole grain or zucchini noodles!
  • On Mashed Potatoes: Creamy mashed potatoes create a perfect base for your stroganoff.

Conclusion

Your adventure in making Chicken Stroganoff doesn’t just end here. This dish is a canvas for your culinary creativity! Remember, cooking is all about experimenting, so don’t hesitate to make adjustments and try new things. Get ready to impress your family and friends with this creamy, comforting dish that blends flavor and fun. Happy cooking!

Chicken Stroganoff Recipe

Prep Time 10 minutes
Cook Time 20 minutes
Total Time 30 minutes
Servings 4 servings
Calories 450
A creamy and savory Chicken Stroganoff perfect for a comforting meal. Quick to prepare with simple ingredients.

Ingredients

Protein

  • 2 pieces chicken breasts
  • 1/2 teaspoon garlic powder
  • Flour for dredging flour (for dredging chicken)
  • 3 tablespoons olive oil (divided)
  • 1 tablespoon butter
  • 8 ounces mushrooms (sliced)
  • 1/2 medium onion (chopped)
  • 1 tablespoon Dijon mustard (or more, to taste)
  • 1 tablespoon Worcestershire sauce (or more, to taste)
  • 3 cloves garlic (minced)
  • 2/3 cup chicken broth
  • 1/2 cup full fat sour cream

Seasoning

  • to taste salt & pepper

Instructions 

  • Cube chicken, season with garlic powder, salt, and pepper. Dredge in flour.
  • Heat 2 tablespoons olive oil and butter; cook chicken until golden, then set aside.
  • Sauté onions and mushrooms in the same skillet until soft.
  • Add garlic and mustard; cook briefly. Pour in broth, then return chicken. Simmer 10 minutes.
  • Lower heat, stir in sour cream, season with salt and pepper. Serve over rice or noodles.

Notes

Use full-fat sour cream for creaminess. Adjust seasonings to taste.
Calories: 450kcal
Cost: $15
Course: Main Course
Cuisine: Russian
Keyword: Chicken

Unlock the Flavor: Your Ultimate Guide to Quick & Zesty Shrimp Stir Fry!

Dive into a vibrant Shrimp Stir Fry that’s bursting with flavor! This quick and nutritious dish combines succulent shrimp with colorful veggies and a zesty sauce, making healthy eating an exciting adventure. Perfect for busy nights, this recipe is designed to be not only delicious but also a fun and easy way to bring joy into your kitchen. Let’s embark on this flavor journey together!

Why You’ll Love This Recipe

Here are just a few reasons why this shrimp stir fry will become a staple in your meal rotation:

  • Quick & Easy: This dish comes together in under 30 minutes, making it perfect for busy weeknights.
  • Flavor Explosion: A zesty stir fry sauce balances sweet, salty, and spicy flavors, ensuring every bite is packed with taste.
  • Customizable: Use whatever vegetables you have on hand for a personalized twist—this dish is versatile!
  • Healthy & Nutritious: Packed with lean protein and vibrant veggies, this stir fry is a satisfying meal that doesn’t compromise on nutrition.
  • Family-Friendly: Even picky eaters will love this dish, making it a great option for the whole family!

Ingredients You’ll Need

Let’s break down the ingredients for this scrumptious shrimp stir fry. Feel free to swap out any veggies based on what’s in your fridge!

  • ⅓ cup water (or chicken broth): This adds moisture to your stir fry without overwhelming the flavors.
  • ⅓ cup low sodium soy sauce: A key ingredient for that umami kick.
  • 2 tablespoons honey: Provides a hint of sweetness that balances the saltiness of the soy sauce.
  • 2 teaspoons sesame oil: Adds a nutty depth to the stir fry.
  • 2 tablespoons minced fresh ginger: For a warm, spicy note that complements the shrimp perfectly.
  • 4 cloves garlic (minced): Because everything is better with garlic!
  • 2 teaspoons cornstarch: This thickens the sauce and gives it a glossy finish.
  • ⅛ teaspoon crushed red pepper flakes: Adjust to taste for a spicy kick.
  • 2 ½ tablespoons olive oil (or avocado oil, divided): Essential for sautéing the shrimp and vegetables.
  • 1 ½ pounds large shrimp (peeled and deveined): The star of the dish!
  • 2 carrots (julienne cut): Adds crunch and sweetness.
  • 1 red bell pepper (thinly sliced): For vibrant color and flavor.
  • 8 ounces sugar snap peas: Provides a fresh, crisp texture.
  • 4 green onions (chopped): Brightens the dish with a burst of onion flavor.
  • 4 cups cooked rice: The perfect base to soak up all that delicious sauce.
  • Sesame seeds (optional): For garnish and added texture.

How to Make Shrimp Stir Fry

Juicy shrimp stir fry with bell peppers and snap peas on a white plate.

Ready to whip this up? Follow these simple steps for a restaurant-quality dish at home:

  1. Combine all of the stir fry sauce ingredients in a small bowl or liquid measuring cup. Whisk to combine, and set aside.
  2. Pat the shrimp dry with paper towels. Heat 1 tablespoon of olive oil in a large skillet over medium-high heat.
  3. Add the shrimp to the pan in a single layer (cook in batches if needed). Cook for about 2 minutes per side, until pink. Transfer the cooked shrimp to a clean plate.
  4. Add the remaining 1 ½ tablespoons of olive oil to the skillet. Add carrots, bell peppers, and sugar snap peas, cooking for 2-3 minutes or until the veggies are just crisp-tender.
  5. Whisk the stir fry sauce once more to ensure everything is well combined, then pour it into the skillet. Return the shrimp to the pan and cook, stirring, for 1 minute, until the sauce has thickened.
  6. Stir in the chopped green onions. Serve the stir fry over cooked rice, garnished with a sprinkle of sesame seeds if desired.

Pro Tips for the Perfect Stir Fry

Elevate your cooking game with these expert tips:

  • Prep Ingredients Ahead: Chop your veggies and shrimp in advance to make the cooking process seamless.
  • High Heat is Key: Stir frying works best at high temperatures to achieve that coveted crispy texture.
  • Don’t Overcrowd the Pan: If necessary, cook shrimp in batches to avoid steaming instead of frying.
  • Use Fresh Ingredients: Fresh ginger and garlic will enhance the flavors dramatically compared to dried versions.
  • Experiment with Sauces: Don’t hesitate to mix in different sauces like teriyaki or oyster sauce for a unique twist.
  • Serve Immediately: For the best texture, serve your stir fry as soon as it’s done cooking.
  • Garnish Generously: Fresh herbs or lime juice can add a bright finish to your dish.
  • Make it a Meal: Add protein-rich side dishes like edamame or a refreshing salad to round out your meal.

Common Mistakes and Troubleshooting

Here are some common pitfalls and how to avoid them:

  • Overcooking Shrimp: Keep an eye on the shrimp; they cook quickly and can become rubbery if overdone.
  • Too Much Sauce: Start with less sauce than you think you need; you can always add more later.
  • Uneven Cooking: Make sure to cut your vegetables uniformly for even cooking.
  • Not Enough Flavor: If your dish tastes bland, consider adding more spices or a splash of vinegar to brighten it up.

Delicious Variations to Try

Switch things up with these fun variations:

  • Spicy Shrimp Stir Fry: Add more crushed red pepper flakes or sriracha to spice things up!
  • Vegetarian Option: Substitute shrimp with tofu or chickpeas for a plant-based version.
  • Asian Noodle Stir Fry: Serve the stir fry over cooked noodles instead of rice for a delightful twist.
  • Sweet & Sour Shrimp: Incorporate pineapple chunks and a sweet and sour sauce for a fruity flavor profile.

Storage and Make-Ahead Instructions

This stir fry is great for meal prep! Here’s how to store it:

  • Refrigeration: Store leftovers in an airtight container in the fridge for up to 3 days.
  • Freezing: To freeze, place in a freezer-safe container for up to 2 months. Thaw in the fridge before reheating.
  • Reheating: Reheat in a skillet over medium heat until warmed through. Add a splash of water or broth to prevent drying out.

FAQ: Your Shrimp Stir Fry Questions Answered

Here are some common questions about shrimp stir fry:

  • Can I use frozen shrimp? Absolutely! Just make sure to thaw them before cooking.
  • What vegetables are best for stir fry? Broccoli, bell peppers, carrots, and snap peas work wonderfully!
  • Can I make this dish gluten-free? Yes! Use gluten-free soy sauce or tamari as a substitute.
  • How can I make this dish spicier? Add more crushed red pepper or a splash of hot sauce for extra heat.
  • What to serve with shrimp stir fry? It pairs perfectly with rice, noodles, or even a side salad!
  • How do I know when shrimp are cooked? They should be pink and opaque when fully cooked.
  • Can I double the recipe? Yes! Just ensure your pan is large enough to accommodate everything.
  • What’s the best oil for stir frying? Oils with a high smoke point, like avocado oil or peanut oil, are ideal for stir frying.

Nutritional Benefits and Dietary Adaptations

This shrimp stir fry isn’t just tasty; it’s also packed with nutrients! Here’s what you need to know:

  • High in Protein: Shrimp is an excellent source of lean protein, essential for muscle repair and overall health.
  • Rich in Vitamins: Colorful vegetables provide a wealth of vitamins and minerals to support your immune system.
  • Low in Calories: With a balanced ratio of protein and veggies, this dish is low in calories while being filling.
  • Adaptable for Diets: Easily made gluten-free, dairy-free, or low-carb depending on your dietary needs.

Essential Equipment for Stir Fry Success

To create the perfect stir fry, you’ll need a few essential tools:

  • Wok or Large Skillet: A wok is ideal for high-heat cooking, but a large skillet works just as well.
  • Spatula or Wooden Spoon: For stirring and flipping your ingredients.
  • Measuring Cups and Spoons: For precise ingredient measurements.
  • Cutting Board and Knife: To chop your veggies and shrimp efficiently.

Serving Suggestions

Make your shrimp stir fry even more delightful with these serving ideas:

  • Garnish with Fresh Herbs: Cilantro or basil can add a fresh burst of flavor.
  • Serve with Lime Wedges: A squeeze of lime juice brightens the dish!
  • Pair with a Side Salad: A light salad can complement the meal beautifully.

Now, your kitchen is ready for a flavor adventure that’s quick, nutritious, and absolutely delicious! Get your ingredients ready and dive into this exciting shrimp stir fry. Not only will you enjoy a meal that’s bursting with flavor, but you’ll also impress yourself and anyone lucky enough to share the table with you. Happy cooking!

Shrimp Stir Fry

Prep Time 10 minutes
Cook Time 15 minutes
Total Time 25 minutes
Servings 4 servings
Calories 350
A quick and flavorful shrimp stir fry with fresh vegetables and a savory sauce, perfect for a weeknight dinner.

Ingredients

Sauce

  • cup water (or chicken broth*)
  • cup low sodium soy sauce
  • 2 tablespoons honey
  • 2 teaspoons sesame oil
  • 2 tablespoons minced fresh ginger
  • 4 cloves garlic (minced)
  • 2 teaspoons cornstarch
  • teaspoon crushed red pepper flakes (or to taste*)

Vegetables and Oil

  • 2 ½ tablespoons olive oil (or avocado oil, divided)
  • 1 ½ pounds large shrimp (peeled and deveined, tail on or off)
  • 2 carrots julienne cut
  • 1 red bell pepper thinly sliced
  • 8 ounces sugar snap peas
  • 4 green onions white and light green parts only, chopped
  • 4 cups cooked rice

Optional Garnish

  • sesame seeds (optional) sesame seeds

Instructions 

  • Whisk sauce ingredients in a bowl and set aside.
  • Pat shrimp dry, cook in 1 tbsp oil until pink, then transfer to a plate.
  • Add remaining oil, cook vegetables 2-3 minutes, then return shrimp and sauce, cook 1 minute until thickened.
  • Stir in green onions and serve over rice, garnished with sesame seeds if desired.

Notes

Use fresh ginger and garlic for best flavor. Adjust red pepper flakes to taste.
Calories: 350kcal
Cost: $15
Course: Main Course
Cuisine: Asian
Keyword: shrimp

Unleash Flavor: The Ultimate Guide to Savory Korean Beef Bowls

Welcome, food lovers and meal prep enthusiasts! If you’re ready to elevate your weeknight dinners, you’re in for a treat! These Korean Beef Bowls are not only packed with flavor, but they also make meal prepping a breeze. Imagine diving into a bowl of tender ground beef, vibrant veggies, and delicious rice that’s waiting for you in the fridge. Say goodbye to boring meals and get ready for a culinary adventure that’s as fun as it is nutritious!

In this guide, we’ll explore everything you need to know about making these mouthwatering bowls. From ingredient breakdowns to expert tips and variations, you’ll find all the information you need to become a meal prep pro. Let’s dive in!

Why You’ll Love This Recipe

  • Time-Saving Magic: With a little prep on the weekend, you can enjoy a week’s worth of delicious meals in under 30 minutes each night.
  • Nutrition-Packed: Each bowl is loaded with protein and fresh veggies, ensuring you get the nutrients you need to thrive.
  • Flavor Explosion: The combination of soy sauce, ginger, and garlic brings a punch of flavor that makes every bite a delight!
  • Customizable: Whether you’re a meat lover or prefer plant-based options, these bowls can be adjusted to fit your dietary needs.
  • Kid-Friendly: The sweet and savory flavors of Korean beef are sure to please even the pickiest eaters!

Ingredient Breakdown

Let’s take a closer look at the ingredients that make these Korean Beef Bowls so delicious:

  • Brown Rice: This whole grain is a fantastic source of fiber and pairs perfectly with the beef. You can easily substitute it with quinoa or cauliflower rice for a low-carb option.
  • Ground Beef: We recommend using lean ground beef (90/10) for a healthier dish. You can also swap it for ground turkey or chicken if you prefer.
  • Fresh Vegetables: Carrots, cucumbers, and green onions add crunch and nutrition. Feel free to add bell peppers or broccoli for extra color!
  • Flavor Enhancers: Soy sauce, sesame oil, and ginger create an addictive sauce that brings the dish to life. You can use tamari for a gluten-free option.

Pro Tips for Perfect Korean Beef Bowls

Juicy Korean beef bowl featuring colorful vegetables and perfectly cooked rice in meal prep containers.
  • Cook Rice Ahead: Prepare your brown rice in advance and store it in the fridge. This small step saves you time when assembling your meals.
  • Don’t Skip the Marinade: Let your ground beef marinate in soy sauce and ginger for at least 30 minutes before cooking for the best flavor.
  • Batch Cooking: Make a double batch of the beef and freeze half for future meals. This way, you’ll always have a quick dinner option on hand.
  • Mix Up the Vegetables: Use whatever vegetables you have on hand! Zucchini, snap peas, or spinach work beautifully in this recipe.
  • Stay Organized: Use clear containers to store your meal prep bowls. Labeling them by day can help you stay on track!
  • Reheating: When reheating, add a splash of water or broth to keep the rice moist. Microwave on medium power to avoid drying out the beef.
  • Garnish Wisely: Top your bowls with sesame seeds and extra green onions for a pop of flavor and presentation.
  • Experiment with Sauces: Drizzle some sriracha or gochujang for an extra kick!

Common Mistakes and Troubleshooting

Even experienced cooks can run into a few snags. Here are some common mistakes and solutions to ensure your Korean Beef Bowls are a hit!

  • Overcooking the Beef: Ground beef cooks quickly, so avoid cooking it for too long. Aim for a nice brown color without drying it out.
  • Too Much Salt: If you find the dish too salty, balance it out with a little honey or orange juice to cut through the saltiness.
  • Rice Too Sticky: If your rice turns out sticky, rinse it under cold water before cooking. This helps remove excess starch.
  • Not Enough Flavor: If the sauce lacks depth, consider adding more garlic or a splash of rice vinegar for brightness.

Delicious Variations

Feeling adventurous? Here are some exciting variations to switch up your Korean Beef Bowls:

  • Spicy Tofu Bowls: Substitute tofu for ground beef and add extra sriracha for a spicy kick.
  • Beef and Broccoli: Stir-fry broccoli along with the beef for a classic combination!
  • Cauliflower Rice Bowls: Replace brown rice with cauliflower rice for a low-carb, veggie-packed meal.
  • Asian Noodle Bowls: Swap out rice for cooked udon or soba noodles for a fun twist.

Storage and Make-Ahead Instructions

Your Korean Beef Bowls can be prepped in advance and stored for quick meals throughout the week. Here’s how:

  • Refrigerate: Store assembled bowls in airtight containers in the fridge for up to 5 days.
  • Freeze: If you want to keep them longer, freeze the beef mixture and rice separately. They can last for up to 3 months.
  • Thawing Tips: When you’re ready to eat, thaw the beef in the fridge overnight, then reheat in a skillet or microwave.

Comprehensive FAQ

Got questions? We’ve got answers! Here are some frequently asked questions about Korean Beef Bowls:

  • How long do Korean Beef Bowls last in the fridge? They typically last for about 4-5 days when stored properly.
  • Can I use frozen ground beef? Yes! Just make sure to thaw it thoroughly before cooking for the best texture.
  • What if I don’t have soy sauce? You can substitute with tamari for a gluten-free option or coconut aminos for a slightly sweeter flavor.
  • Are these bowls kid-friendly? Absolutely! The sweet and savory flavors are sure to please even picky eaters.
  • Can I make this dish vegetarian? Yes! Simply replace the beef with sautéed mushrooms or tempeh.
  • How do I make the beef spicier? Add more crushed red pepper flakes or a drizzle of chili oil to amp up the heat!
  • What can I serve with Korean Beef Bowls? These bowls are delicious on their own, but you can also serve them with a side of kimchi or pickled vegetables.
  • Can I meal prep other foods with these bowls? Yes! These bowls can be paired with other meal prep items like roasted veggies or salads for a complete meal.

Nutritional Tips and Dietary Adaptations

Keeping your meals healthy is key! Here are some tips for making sure your Korean Beef Bowls are nutritious:

  • Lean Proteins: Opt for lean ground beef or substitute with turkey or chicken for lower fat content.
  • Whole Grains: Using brown rice or quinoa increases fiber and nutritional value.
  • Load Up on Veggies: The more colorful your bowls, the more nutrients you’re adding! Mix in bell peppers, spinach, or zucchini.
  • Watch the Sauces: Be mindful of the amount of soy sauce used; choose low-sodium options to keep sodium levels in check.

Equipment Recommendations

To make your cooking experience smooth and enjoyable, here’s what you’ll need:

  • Non-Stick Skillet: Perfect for browning ground beef without sticking.
  • Rice Cooker: An easy way to cook rice perfectly every time.
  • Meal Prep Containers: Airtight containers are essential for storing your delicious creations!

Serving Suggestions

To make your Korean Beef Bowls even more appealing, consider these serving ideas:

  • Garnish: Top with sesame seeds, sliced green onions, or a drizzle of sesame oil.
  • Side Dishes: Pair with steamed broccoli or a fresh cucumber salad for a refreshing crunch.
  • Spicy Kick: Add a side of kimchi or pickled radishes for an extra layer of flavor!

In conclusion, these Korean Beef Bowls are more than just a meal; they’re a celebration of flavor, nutrition, and creativity. Whether you’re a busy professional, a parent, or just someone who loves good food, this recipe fits perfectly into your lifestyle. So grab your ingredients, get cooking, and enjoy the magic of meal prep!

How To Meal Prep - Korean Beef Bowl

Prep Time 10 minutes
Cook Time 20 minutes
Total Time 30 minutes
Servings 4 servings
Calories 650
A flavorful and easy Korean beef bowl perfect for meal prep, combining savory beef, rice, and fresh vegetables.

Ingredients

Rice

  • 1.5 cups brown rice
  • 3.25 cups low sodium chicken broth

Vegetables

  • 5 carrots carrots, (cut into matchsticks)
  • 1/3 cup rice vinegar
  • 1 tbsp raw honey
  • 1.5 tsp fresh ginger, (minced)
  • 2 tsp low sodium soy sauce
  • 1/2 tsp sesame seeds
  • 1 tbsp olive oil
  • 3 cloves garlic, (minced)
  • 2 lbs lean ground beef
  • 1/3 cup coconut sugar
  • 1 1/2 tbsp fresh ginger, (minced)
  • 1 tbsp freshly squeezed orange juice
  • 1 tsp orange zest
  • 1 tbsp sesame oil
  • 1/2 tsp crushed red pepper flakes

Additional Vegetables

  • 1 cucumber cucumber, (sliced)
  • 3 medium-boiled eggs medium-boiled eggs
  • 4 green onions green onions, (thinly sliced)

Instructions 

  • Cook the brown rice in chicken broth until tender, about 20 minutes.
  • In a skillet, heat olive oil and cook ground beef until browned, then add ginger, garlic, soy sauce, coconut sugar, orange juice, orange zest, sesame oil, and red pepper flakes. Simmer for 5-7 minutes.
  • Prepare vegetables: slice carrots, cucumber, and green onions. Boil eggs for 7 minutes, then peel.
  • Assemble bowls with rice, beef mixture, vegetables, eggs, and garnish with sesame seeds.

Notes

For extra flavor, marinate the beef in soy and ginger beforehand.
Calories: 650kcal
Cost: $15
Course: Main Course
Cuisine: Korean
Keyword: Beef, Meal Prep, Rice

Welcome to Your Ultimate Chicken Pot Pie Adventure!

Are you ready to dive into the world of comfort food with a twist? Our Classic Chicken Pot Pie recipe is not just any ordinary dish; it’s a cozy, wholesome delight that brings warmth and nostalgia to your kitchen. Packed with tender chicken, vibrant veggies, and enveloped in a flaky, buttery crust, this dish transforms simple ingredients into a heartwarming meal that warms the soul. Let’s get cooking!

Why You’ll Love This Recipe

  • Comforting flavors: Experience the rich, creamy filling that envelops tender chicken and colorful vegetables; every bite is a hug in a bowl.
  • Easy to customize: This recipe allows you to swap ingredients based on your pantry staples or dietary needs, making it a versatile option for any meal.
  • Perfect for meal prep: Make it ahead of time and freeze for busy days—just pop it in the oven when you’re ready!
  • Kid-friendly: This dish is a hit with kids and adults alike, making it a great family meal that everyone will enjoy.
  • Nostalgic charm: Channel your inner chef and create a dish that reminds you of Sunday dinners at Grandma’s house!

Detailed Ingredient Breakdown

Before we roll up our sleeves, let’s gather our ingredients. Here’s what you’ll need for this heartwarming classic:

  • 1 lb boneless, skinless chicken breast: Cubed for tender bites of protein.
  • 1 cup sliced carrots: Adds sweetness and color to the filling.
  • 1 cup frozen green peas: For a pop of green and extra texture.
  • 1/2 cup sliced celery: A crunchy addition that enhances the flavor.
  • 1/3 cup unsalted butter: Essential for a rich, flavorful base.
  • 1/3 cup chopped onion: Adds depth to the filling.
  • 1/3 cup all-purpose flour: To thicken the sauce and create that creamy consistency.
  • 1/2 tsp salt: For enhancing all the flavors.
  • 1/4 tsp black pepper: A dash of spice to elevate the dish.
  • 1/4 tsp celery seed: For an aromatic touch.
  • 3/4 cup chicken broth: The foundation of the filling’s depth.
  • 2/3 cup milk: To create a creamy sauce.
  • 2 unbaked pie crusts (9 inch each): For that flaky, irresistible crust.

Substitutions and Variations

Juicy chicken pot pie with a flaky crust, showing filling of chicken and peas.

If you want to shake things up, try these substitutions:

  • Chicken: Use rotisserie chicken for a quicker option or swap it for turkey if you have leftovers!
  • Vegetables: Feel free to mix in your favorite veggies like corn, mushrooms, or even spinach for added nutrients.
  • Milk: Substitute with almond milk or coconut milk for a dairy-free option.
  • Herbs: Fresh herbs like thyme or rosemary can add a beautiful aroma and flavor.

Pro Tips for the Perfect Chicken Pot Pie

To achieve pot pie perfection, keep these expert insights in mind:

  • Use cold ingredients: When making your crust, use cold butter and water for flakiness.
  • Don’t overmix: When combining your crust ingredients, mix just until combined to avoid a tough crust.
  • Layer your filling: Add your filling to the crust in layers to ensure even distribution of flavors.
  • Seal the edges: Pinch the crust edges to ensure no filling escapes during baking.
  • Use foil: Cover the edges of your crust with foil if they brown too quickly during baking.
  • Let it rest: Allow your pot pie to sit for a few minutes after baking to set the filling.
  • Cook evenly: Rotate your pot pie halfway through baking for even cooking.
  • Check for doneness: The crust should be golden brown, and the filling should bubble at the edges.

Common Mistakes and Troubleshooting

Even the best chefs make mistakes! Here’s how to avoid common pitfalls:

  • Overcooked chicken: Ensure your chicken is cooked just right—too much heat can lead to dry meat.
  • Runny filling: If your filling is too watery, let it simmer longer to thicken, or add more flour.
  • Burnt crust: If the crust browns too quickly, shield the edges with foil.
  • Underseasoned filling: Taste your filling before assembling and adjust seasoning as needed.

Storage and Make-Ahead Instructions

This Chicken Pot Pie is perfect for making ahead of time! Here’s how to properly store it:

  • Refrigerator: Store leftovers in an airtight container for up to 3 days.
  • Freezer: To freeze, wrap the unbaked pot pie tightly in plastic wrap and aluminum foil. It can last up to 3 months. Bake from frozen, adding extra time.
  • Reheating: To reheat, cover with foil and warm in a 350°F oven until heated through.

Serving Suggestions

Pair your Chicken Pot Pie with these delightful sides:

  • Fresh salad: A crisp green salad with a tangy vinaigrette complements the richness.
  • Crusty bread: Serve with a side of warm, crusty bread for dipping!
  • Sautéed greens: Lightly sautéed greens like spinach or kale add a nutritious touch.

Frequently Asked Questions

Got questions? Let’s clear them up!

  • Can I use frozen chicken? Yes! Just make sure to cook it thoroughly before adding it to the filling.
  • How do I make my crust flaky? Use cold butter and minimal mixing to achieve that perfect texture.
  • What if I don’t have chicken broth? You can use vegetable broth or even water in a pinch.
  • Can I make it vegetarian? Absolutely! Substitute chicken with hearty vegetables and use vegetable broth.
  • How long does it take to bake? Bake for about 30-40 minutes at 425°F, or until golden brown.
  • Can I make mini pot pies? Yes! Use muffin tins for individual servings.
  • Can I use store-bought crust? Of course! It saves time while still delivering great taste.
  • What’s the best way to reheat leftovers? Cover with foil and warm in a 350°F oven for the best results.

Nutrition Tips and Dietary Adaptations

Make this dish fit your dietary needs:

  • Low-carb option: Substitute the crust with a cauliflower topping for a healthier twist.
  • Gluten-free version: Use gluten-free flour for the crust and thickeners.
  • Protein-packed: Add beans or lentils alongside the chicken for a boost of fiber.

Equipment Recommendations

Here’s what you’ll need to make your Chicken Pot Pie:

  • 9-inch pie dish: For the perfect crust and filling.
  • Mixing bowls: To combine your ingredients effortlessly.
  • Sharp knife: For chopping veggies and chicken with ease.
  • Measuring cups and spoons: Precision is key in baking!

Conclusion

Your journey into the world of Chicken Pot Pie has just begun! Embrace the creativity of cooking and let this recipe inspire you to experiment and add your personal touch. Remember, cooking is about joy, balance, and making memories around the table. So gather your loved ones, whip up this comforting dish, and savor every single bite. Happy cooking!

Old-Fashioned Chicken Pot Pie

Prep Time 20 minutes
Cook Time 40 minutes
Total Time 1 hour
Servings 6 servings
Calories 450
A comforting classic, this chicken pot pie combines tender chicken and vegetables in a flaky crust for a hearty meal.

Ingredients

Chicken

  • 1 lb boneless, skinless chicken breast, cubed

Vegetables

  • 1 cup sliced carrots
  • 1 cup frozen green peas
  • 1/2 cup sliced celery

Dairy and thickening

  • 1/3 cup unsalted butter
  • 1/3 cup chopped onion
  • 1/3 cup all-purpose flour
  • 3/4 tsp salt
  • 1/4 tsp black pepper
  • 1/4 tsp celery seed
  • 3/4 cup chicken broth
  • 2/3 cup milk
  • 2 unbaked pie crusts (9 inch each) pie crusts

Instructions 

  • Preheat oven to 425°F (220°C).
  • Cook chicken and vegetables in a skillet until tender.
  • In a saucepan, melt butter, stir in flour, salt, pepper, and celery seed to make a roux. Gradually add chicken broth and milk, cook until thickened.
  • Combine chicken mixture with sauce and pour into one pie crust.
  • Cover with second crust, seal edges, and cut slits on top. Bake for 40 minutes until golden brown.

Notes

Use a pie shield or foil to prevent over-browning.
Calories: 450kcal
Cost: $15
Course: Main Course
Cuisine: American
Keyword: Chicken

Welcome to the World of Gluten-Free Carbonara!

Are you ready to embark on a delightful culinary journey? This Gluten-Free Carbonara with Rice Noodles is not just a dish; it’s a celebration of flavor, comfort, and simplicity! Whether you’re gluten-sensitive or simply looking to explore new recipes, this creamy, savory delight is sure to satisfy your cravings any day of the week. With its rich flavors and easy prep, you’ll find yourself making this dish over and over again!

This recipe not only caters to dietary needs but also embraces a world of taste. Gluten-free doesn’t mean flavor-free! Let’s dive into why you’ll love this dish.

Why You’ll Love This Gluten-Free Carbonara

  • Quick and Easy: Perfect for busy weeknights! This dish can be whipped up in under 30 minutes, allowing you to enjoy a wholesome meal without the hassle.
  • Comfort Food with a Twist: Classic carbonara gets a gluten-free makeover with rice noodles, bringing all the comforting flavors you love while accommodating dietary preferences.
  • Versatile Ingredients: Customize it! You can easily swap out pancetta for chicken or add in your favorite vegetables to make it your own.
  • Rich and Creamy Sauce: With a luscious sauce made from eggs and Parmesan cheese, this dish offers a velvety texture that clings beautifully to the noodles.
  • Healthy and Wholesome: Packed with protein from eggs and cheese, this dish not only tastes great but also fuels your body with the nutrients it needs.

Ingredient Breakdown

Let’s take a closer look at the key ingredients that make this gluten-free carbonara a winner!

  • Rice Noodles: The star of our dish! These noodles are gluten-free and provide a slightly chewy texture that works beautifully with the sauce.
  • Pancetta: Adds a savory, smoky flavor. You can substitute it with turkey bacon or diced chicken for a lighter option.
  • Eggs: Essential for creating that creamy sauce. If you prefer a vegan version, consider using a plant-based egg substitute.
  • Parmesan Cheese: Adds a nutty, salty flavor. Grana Padano or nutritional yeast can be great alternatives for a dairy-free version.
  • Garlic: For an aromatic kick. Feel free to add more if you love garlic!
  • Salt and Pepper: Essential for seasoning your dish to perfection.
  • Fresh Parsley: A garnish that adds color and a fresh taste!

Expert Tips for the Perfect Carbonara

  • Reserve Pasta Water: Always save some pasta water! This starchy water helps to adjust the sauce consistency, ensuring it clings to your noodles.
  • Mix Off the Heat: Combine your hot noodles with the pancetta off the heat to avoid scrambling the eggs in the sauce.
  • Toss Vigorously: When adding the egg mixture, toss quickly to create a creamy sauce that coats every noodle.
  • Adjust Seasoning: Taste and adjust with salt and pepper as needed. The pancetta can be salty, so go easy on the salt initially.
  • Experiment with Cheese: Don’t be afraid to mix and match cheeses! A blend of Pecorino Romano and Parmesan can elevate the flavor.
  • Fresh Ingredients: Use fresh parsley for garnish. It brightens up the dish visually and adds a refreshing taste.
  • Don’t Overcook the Noodles: Aim for al dente; the noodles will absorb some sauce and continue to cook slightly after draining.
  • Make it Ahead: Prep ingredients in advance to save time. You can chop the pancetta and garlic a day ahead.

Avoiding Common Mistakes

Even the best of us can make mistakes in the kitchen! Here are a few common pitfalls to watch out for:

  • Scrambled Eggs: Mixing the egg mixture with hot noodles off the heat is crucial to prevent scrambling.
  • Too Thick Sauce: If your sauce is too thick, add a splash of reserved pasta water until you reach the desired creaminess.
  • Not Enough Flavor: Always taste your sauce before serving! Adjust with salt, pepper, or additional cheese as needed.
  • Overcooked Noodles: Keep an eye on the cooking time for the rice noodles. They should be firm to the bite!

Delicious Variations to Try

Want to switch things up? Here are some exciting variations to keep your carbonara experience fresh:

  • Vegetable Carbonara: Add sautéed zucchini, mushrooms, or spinach for a veggie-packed version.
  • Spicy Carbonara: Toss in some red pepper flakes for a spicy kick!
  • Seafood Carbonara: Substitute pancetta with shrimp or crab for a delightful seafood twist.
  • Herbed Carbonara: Experiment with fresh herbs like basil or thyme for added depth of flavor.

Storage and Make-Ahead Instructions

Planning to enjoy this dish later? Here’s how to store and prepare it ahead of time:

  • Refrigerate: Store leftovers in an airtight container in the fridge for up to 3 days.
  • Reheat: Gently reheat on the stovetop, adding a splash of reserved pasta water to loosen the sauce.
  • Make-Ahead: You can pre-cook the pancetta and garlic, and store them in the fridge for up to 2 days.

Frequently Asked Questions

Got questions? We’ve got answers!

  • Can I use other noodles? Absolutely! While rice noodles are gluten-free, you can use gluten-free spaghetti or any pasta you prefer.
  • Is this recipe suitable for meal prep? Yes! This dish can be prepped ahead, making it a perfect candidate for meal prepping.
  • Can I freeze carbonara? It’s best enjoyed fresh, but you can freeze it for up to a month. Just be aware it may change texture upon reheating.
  • What can I serve with carbonara? A light salad or steamed vegetables make great side dishes!
  • How can I make this dairy-free? Substitute Parmesan with nutritional yeast and use a dairy-free egg substitute.
  • What if I don’t have pancetta? Bacon or turkey bacon can be used as a substitute without losing that savory flavor.
  • How do I know when the sauce is ready? The sauce should be glossy and coat the noodles without being overly thick.
  • Can I make this vegetarian? Yes! Skip the pancetta and add in extra veggies for flavor.

Nutrition Tips and Dietary Adaptations

This gluten-free carbonara can cater to various dietary needs! Here are some tips:

  • Protein Boost: Add chickpeas or beans to up the protein content if desired.
  • Low-Calorie Option: Use a lighter cheese or reduce the amount of cheese used.
  • Whole Foods Focus: Stick to whole foods and fresh ingredients to maximize nutrition in this dish.

Essential Equipment for Your Carbonara

Here’s what you’ll need to whip up this delicious dish:

  • Large Pot: For boiling your rice noodles.
  • Skillet: A large skillet for cooking the pancetta and mixing the ingredients.
  • Mixing Bowl: To whisk together your eggs and cheese.
  • Measuring Cups: For precise measurements of ingredients.
  • Serving Plates: To present your beautiful dish!

Conclusion: Enjoy Your Culinary Adventure!

With this Gluten-Free Carbonara with Rice Noodles recipe, you’ve got a delicious, comforting meal at your fingertips. Remember, cooking is all about creativity and joy. Feel free to explore and make this dish your own! Enjoy every bite, and may your kitchen be filled with laughter and flavor!

Gluten-Free Carbonara with Rice Noodles

Prep Time 10 minutes
Cook Time 15 minutes
Total Time 25 minutes
Servings 4 servings
Calories 520
A quick and delicious gluten-free twist on classic carbonara using rice noodles and pancetta, perfect for a satisfying meal.

Ingredients

Main Ingredients

  • 8 oz rice noodles
  • 4 oz pancetta, diced
  • 2 cloves garlic, minced
  • 3 large eggs
  • 1 cup grated Parmesan cheese
  • to taste Salt and pepper
  • for garnish Fresh parsley, chopped

Instructions 

  • Cook rice noodles in salted boiling water until al dente, then drain and rinse with cold water.
  • Cook diced pancetta in a skillet until crispy, then add minced garlic in the last minute.
  • Whisk eggs and Parmesan cheese together in a bowl.
  • Remove skillet from heat, add noodles, toss, then pour egg mixture and toss vigorously.
  • If needed, add reserved pasta water to reach desired sauce consistency, then serve garnished with parsley.

Notes

Use fresh parsley for best flavor and adjust salt and pepper to taste.
Calories: 520kcal
Cost: $15
Course: Main Course
Cuisine: Italian
Keyword: gluten-free, Pancetta, Rice Noodles

Unleashing the Power of the Vegan Buddha Bowl

Welcome to the vibrant world of the Vegan Buddha Bowl! If you’re on a quest for a delicious, nutritious meal that’s as colorful as it is satisfying, look no further. This bowl is a celebration of flavors, textures, and nutrients, making healthy eating an exciting adventure. In this article, we’ll dive deep into everything you need to know about crafting the perfect vegan buddha bowl that will not only nourish your body but also tantalize your taste buds. Let’s get started!

Why You’ll Love This Recipe

There’s a reason why Buddha bowls have taken the culinary world by storm! Here are just a few reasons you’ll fall head over heels for this recipe:

  • Customizable goodness: Tailor your bowl to suit your taste preferences and dietary needs, making it perfect for everyone.
  • Quick and easy: With minimal prep and cook time, you can whip up a healthy meal in under an hour.
  • Nutrient-packed: Each ingredient is carefully selected to provide a balance of proteins, healthy fats, and complex carbs.
  • Colorful presentation: Eating with your eyes is just as important! This bowl is a feast for the senses.
  • Meal prep friendly: Make it ahead of time for busy weeknights, ensuring you always have a nutritious meal on hand.

Ingredient Breakdown

Let’s explore the essential components of our Vegan Buddha Bowl:

  • Butternut Squash: A sweet and hearty base, packed with vitamins A and C. You can substitute with sweet potatoes or pumpkin if desired.
  • Broccoli: This cruciferous vegetable adds crunch and is rich in fiber. Cauliflower or green beans can serve as alternatives.
  • Quinoa: A fantastic source of protein and gluten-free grain. Brown rice or farro are great substitutes.
  • Tofu: A versatile plant-based protein that absorbs flavors beautifully. Chickpeas or tempeh can be used instead.
  • Tahini: This creamy dressing ties the bowl together with a nutty flavor. Almond or sunflower seed butter can be used as a substitution.

Steps to Create Your Vegan Buddha Bowl

Close-up of a vibrant Vegan Buddha Bowl with fresh vegetables and a creamy sauce.

Ready to craft your masterpiece? Follow these simple steps:

  • Preheat the oven to 400°F (200°C).
  • Peel and cube 3 cups of butternut squash, toss with 1 tablespoon olive oil, and season with 1/4 teaspoon salt and pepper. Spread on a baking sheet and roast for 35 minutes.
  • In another bowl, toss 4 cups of broccoli florets with 1/2 tablespoon olive oil and seasonings. Add to the oven for the last 15 minutes of roasting.
  • While veggies roast, rinse and cook 1 cup of quinoa in 2 cups of water, simmering until fluffy (about 15-20 minutes).
  • Press 8 ounces of extra-firm tofu to remove excess moisture, then cube and sauté in a hot pan with 1 tablespoon olive oil until golden brown.
  • Add flavor by mixing in spices such as ground ginger, garlic powder, and a splash of soy sauce and maple syrup.
  • For the creamy tahini dressing, whisk together 1/4 cup tahini, 2 tablespoons lemon juice, 1/2 teaspoon crushed garlic, and water as needed for consistency.
  • To assemble, start with quinoa as the base, layering roasted veggies, tofu, and garnishing with avocado, cilantro, and cherry tomatoes. Drizzle the tahini dressing over the top.

Pro Tips for Buddha Bowl Perfection

Elevate your Buddha bowl game with these expert insights:

  • Mix and match: Experiment with seasonal veggies for a fresh twist, keeping your meals exciting.
  • Batch cooking: Prepare grains and proteins in advance to make meal prep a breeze.
  • Flavor explosion: Don’t shy away from herbs and spices; they can transform your bowl from simple to sensational!
  • Dress it up: Try different dressings like balsamic vinaigrette or a spicy peanut sauce for varied taste.
  • Texture is key: Incorporate crunchy toppings like nuts or seeds for an added layer of flavor and crunch.
  • Balance your bowl: Ensure a good mix of protein, fiber, carbs, and healthy fats for a complete meal.
  • Fresh herbs: Garnish with fresh herbs like basil or mint for an aromatic touch.
  • Color matters: Use a variety of colorful ingredients to make your bowl visually appealing and packed with nutrients.

Common Mistakes and Troubleshooting

To avoid any missteps, here are some common mistakes and how to troubleshoot them:

  • Overcooking veggies: Keep an eye on roasting times to prevent mushiness. Aim for a crispy texture!
  • Undercooked quinoa: Always rinse quinoa before cooking to remove bitterness and ensure it cooks evenly.
  • Too much dressing: Start with a little, as it’s easier to add more than to take away if it’s too saucy.
  • Flavorless tofu: Marinate tofu for at least 30 minutes to maximize flavor absorption.
  • Skipping the sauce: Don’t underestimate the power of a good dressing; it can elevate your bowl significantly.

Variations to Explore

Get creative with your Vegan Buddha Bowl by trying these delightful variations:

  • Mexican Fiesta Bowl: Swap roasted corn, black beans, and avocado for a spicy twist. Top with salsa and lime.
  • Asian-Inspired Bowl: Use soba noodles, edamame, and pickled ginger, drizzling with a sesame soy dressing.
  • Mediterranean Delight: Incorporate roasted chickpeas, olives, and cucumbers with a tahini lemon dressing.
  • Breakfast Buddha Bowl: Top with scrambled tofu, spinach, and avocado for a hearty breakfast option.

Storage and Make-Ahead Instructions

Want to enjoy your Buddha bowl throughout the week? Here’s how:

  • Store components separately in airtight containers in the fridge for up to 5 days.
  • Assemble your bowl right before eating to maintain freshness, especially for the dressing.
  • Reheat any grains and veggies, but serve cold toppings like avocado and cherry tomatoes fresh.

Comprehensive FAQ

Got questions? We’ve got answers!

  • Can I make this bowl gluten-free? Yes! Just use gluten-free grains like quinoa and gluten-free soy sauce.
  • How can I make it even healthier? Add leafy greens like spinach or kale for extra nutrients.
  • Is it suitable for meal prep? Absolutely! Just store components separately until ready to eat.
  • Can I replace quinoa? Yes, brown rice or farro are great alternatives.
  • What if I don’t like tahini? You can use any nut butter or a simple vinaigrette as a dressing.
  • How long will leftovers last? Store in the fridge for up to 5 days, but best enjoyed fresh.
  • Can I add fruit? Definitely! Fruits like mango or pomegranate seeds add a sweet touch.
  • What’s the best way to serve it? In a bowl, layered beautifully for a stunning presentation.

Nutrition Tips and Dietary Adaptations

Embrace the health benefits of your Vegan Buddha Bowl:

  • Protein boost: Enhance your protein intake by adding lentils or edamame.
  • Healthy fats: Include avocado or nuts for creamy texture and healthy fat.
  • Fiber rich: The combination of veggies and grains ensures a fiber-packed meal.
  • Low-carb option: Substitute quinoa with cauliflower rice for a low-carb alternative.

Essential Equipment Recommendations

Here’s what you’ll need to create your delicious Vegan Buddha Bowl:

  • Oven: For roasting your veggies to perfection.
  • Cooking pot: For boiling quinoa or any grains of choice.
  • Frying pan: To sauté your tofu for that delicious golden crust.
  • Cutting board: Essential for prepping your colorful ingredients.
  • Mixing bowls: For tossing your ingredients and mixing dressings.

Serving Suggestions

To make your meal even more delightful:

  • Pair with a side salad: Fresh greens with a light dressing complement the richness of the bowl.
  • Serve with warm bread: Whole grain or pita bread adds a satisfying crunch.
  • Enjoy with a smoothie: A fruity smoothie can be a refreshing addition to your meal.

Now that you’ve got the full scoop on creating an incredible Vegan Buddha Bowl, it’s time to hit the kitchen! Remember, the beauty of this dish lies in its versatility and your creative flair. Enjoy the process, savor the flavors, and celebrate the joy of healthy eating!

Vegan Buddha Bowl

Prep Time 15 minutes
Cook Time 40 minutes
Total Time 55 minutes
Servings 4 servings
Calories 550
A colorful and nutritious plant-based meal featuring roasted butternut squash, broccoli, crispy tofu, and a creamy tahini dressing.

Ingredients

Vegetables

  • 450 g Butternut Squash (peeled and cubed)
  • 320 g Broccoli Florets
  • 170 g Dry Quinoa
  • 226 g Extra Firm Tofu

Oils & Seasonings

  • 1 Tbsp Olive Oil
  • 1/4 tsp Salt
  • 1/4 tsp Ground Black Pepper
  • 1/2 Tbsp Olive Oil
  • 1/2 tsp Ground Ginger
  • 1/2 tsp Garlic Powder
  • 1/2 tsp Onion Flakes (or Onion Powder)
  • 1/8 tsp Cayenne Pepper
  • 2 Tbsp Soy Sauce
  • 1 Tbsp Hoisin Sauce
  • 1 Tbsp Maple Syrup

Dressing

  • 1/4 cup Tahini
  • 2 Tbsp Lemon Juice (freshly squeezed)
  • 1/2 tsp Crushed Garlic
  • 1 Tbsp Soy Sauce
  • 1 Tbsp Maple Syrup
  • 1-2 Tbsp Water (to thin out)

Toppings

  • 1 piece Sliced Avocado
  • to taste Fresh Cilantro
  • to taste Cherry Tomatoes (sliced)

Instructions 

  • Preheat oven to 400°F (200°C). Toss butternut squash with olive oil, salt, and pepper; roast for 35 minutes.
  • Add broccoli to a bowl, toss with olive oil, salt, and pepper; roast for 20 minutes, adding to oven with squash for last 15 minutes.
  • Press tofu for 20 minutes, then cube and fry until golden. Add spices, soy, hoisin, and maple syrup; cook until sticky.
  • Cook quinoa in water until tender, about 15-20 minutes, then fluff with a fork.
  • Assemble bowls with quinoa, roasted vegetables, tofu, and toppings. Drizzle with tahini dressing and serve.

Notes

For extra flavor, add a squeeze of lemon or lime over the bowl before serving.
Calories: 550kcal
Cost: $15
Course: Main Course
Cuisine: Vegan
Keyword: Tofu