Author

Ryan

Browsing

Discover the Irresistible Zesty Caesar Salad

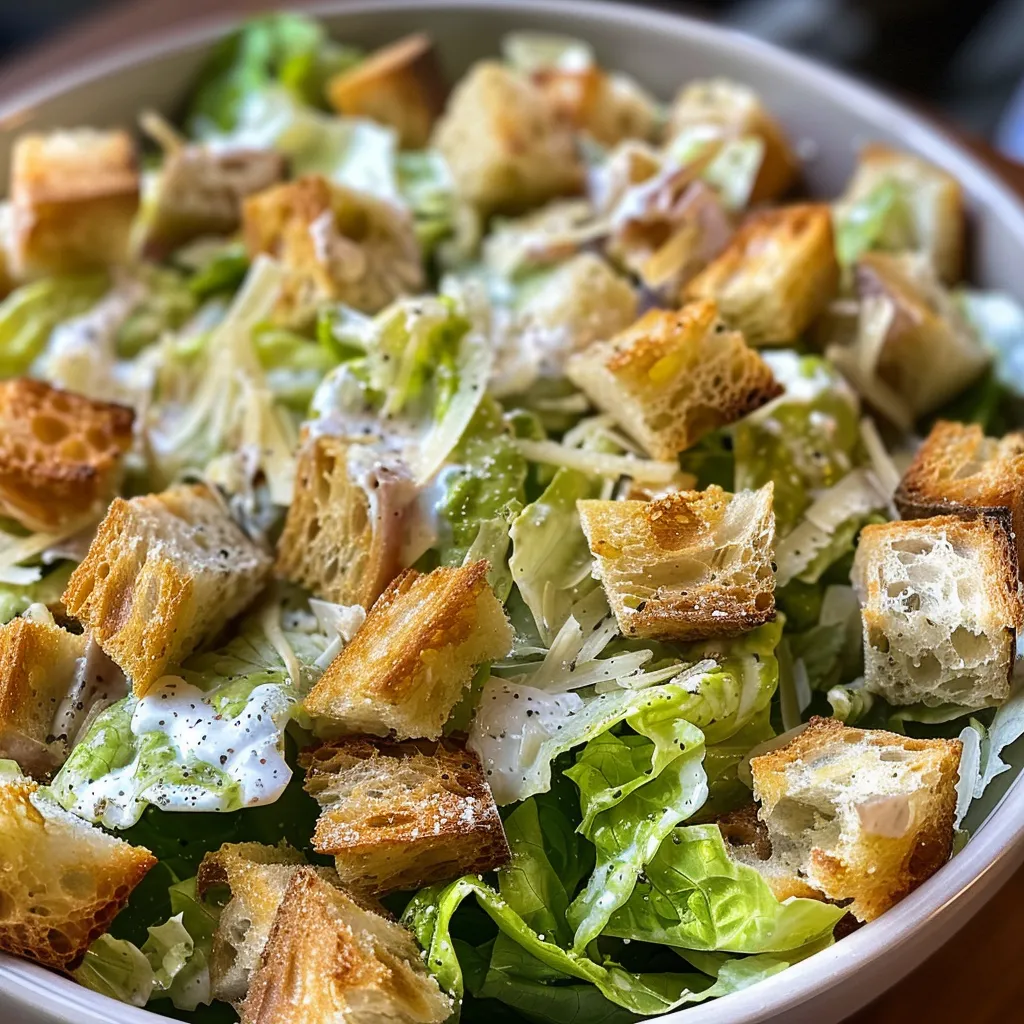
Welcome to the world of flavor-packed, nutritious eating! If you’ve ever thought that healthy food could be boring, this Caesar salad will change your mind. In this article, we’re diving into the delightful realm of the classic Caesar salad. This isn’t just any salad; it’s a vibrant combination of crunchy romaine, savory Parmesan, and crispy, homemade croutons, all drizzled with zesty dressing and a splash of fresh lemon! Perfect for a quick lunch or as a delightful side dish, this recipe will elevate your meal game. Let’s get started on making this delicious Caesar salad that even your kids will love!

Why You’ll Love This Recipe

  • Quick and Simple: This Caesar salad recipe can be prepared in under 15 minutes, making it perfect for busy weeknights or last-minute gatherings.
  • Flavor-Packed: With its rich and tangy dressing, this salad bursts with flavor, ensuring that eating healthy is never dull.
  • Customizable: You can easily adapt this salad to fit your dietary preferences, whether you’re looking for a gluten-free or vegetarian option.
  • Kid-Friendly: This Caesar salad is a hit with kids! They’ll love the crunchy texture and the cheesy goodness of the Parmesan.
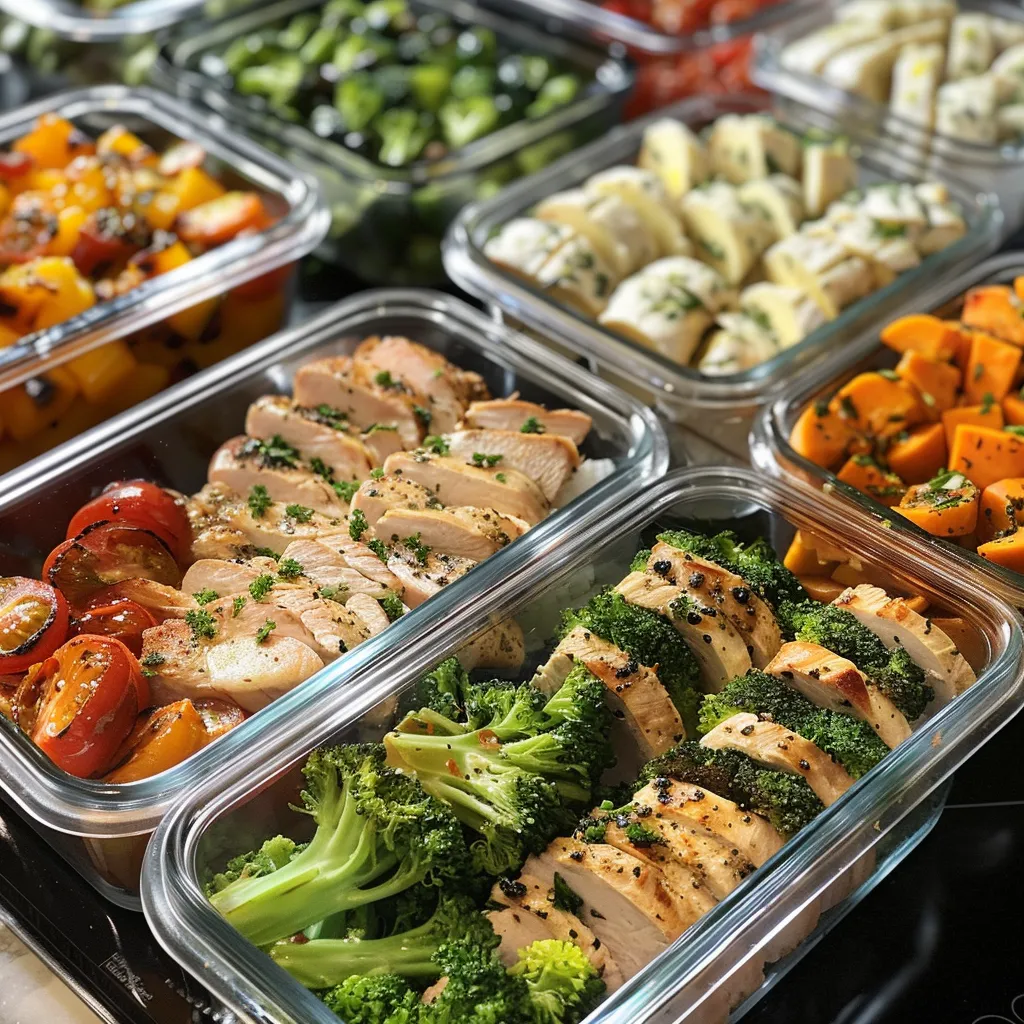
  • Perfect for Meal Prep: Make a big batch and enjoy it throughout the week—just keep the dressing separate until you’re ready to eat!

Ingredient Breakdown

Let’s explore the ingredients that make this Caesar salad a standout:

  • Romaine Lettuce: 1 large head, chopped. It’s crisp and refreshing, the perfect base for our salad. You can substitute with kale or spinach for a twist!
  • Homemade Croutons: 1 cup. These add the perfect crunch! You can easily make them from leftover bread baked with olive oil, garlic, and your favorite herbs.
  • Freshly Grated Parmesan: ½ cup. The cheese adds a savory depth of flavor. If you’re dairy-free, try nutritional yeast for a cheesy flavor without the dairy!
  • Caesar Dressing: ½ cup. You can use store-bought or make a homemade version for a fresher taste.
  • Lemon Juice: Juice of ½ lemon. Adding this brightens up the flavors!

Step-by-Step Instructions

A vibrant Classic Caesar Salad displayed side view with fresh greens, croutons, and dressing glistening.

Ready to make this vibrant Caesar salad? Follow these simple steps:

  • Wash and dry the *romaine lettuce* thoroughly. Chop into bite-sized pieces and place them in a large salad bowl.
  • Add the *croutons* to the bowl, ensuring they are crispy for optimal texture.
  • Sprinkle freshly grated *Parmesan cheese* over the top.
  • Drizzle the desired amount of *Caesar dressing* over the salad and toss gently until all ingredients are well-coated.
  • Squeeze fresh *lemon juice* over the salad before serving for added flavor.

Pro Tips for the Perfect Caesar Salad

  • Fresh Ingredients: Always use the freshest ingredients available for the best flavor.
  • Crispy Croutons: Bake your croutons until golden brown for the perfect crunch.
  • Shake it Up: For a fun twist, add grilled chicken or shrimp for extra protein!
  • Homemade Dressing: Try making your own Caesar dressing with garlic, anchovies, mayonnaise, lemon juice, and Parmesan for an enhanced flavor experience.
  • Layer Smart: Layer the ingredients in your bowl for a beautiful presentation.
  • Store Separately: If preparing ahead, keep the dressing separate until serving to avoid soggy greens.
  • Season Well: Taste and adjust seasoning as needed before serving—don’t be shy with that salt and pepper!
  • Presentation Matters: Serve your salad in a chilled bowl for a more appealing presentation!

Common Mistakes and Troubleshooting

Even the best can make mistakes! Here are some common missteps and how to avoid them:

  • Wilting Lettuce: Make sure to dry your lettuce thoroughly after washing to prevent wilting.
  • Soggy Croutons: If you add croutons too early, they’ll get soggy. Add them just before serving.
  • Too Much Dressing: Start with a little dressing; you can always add more, but you can’t take it away!
  • Overwhelming Garlic: If you love garlic, be cautious—too much can overpower the salad.

Delicious Variations

Mix it up with these creative variations of the classic Caesar salad:

  • Grilled Chicken Caesar: Add sliced grilled chicken breast for a protein-packed meal.
  • Vegetarian Caesar: Skip the anchovies in the dressing and replace Parmesan with nutritional yeast.
  • Seafood Caesar: Top with grilled shrimp or salmon for a seafood twist.
  • Caesar Pasta Salad: Combine cooked pasta with the salad ingredients for a filling side dish!

Storage and Make-Ahead Instructions

If you’re looking to prep this Caesar salad in advance, here are some tips:

  • Store the *salad* and *dressing* separately to keep the lettuce crisp.
  • The *salad* can be kept in the fridge for up to 2 days, but croutons are best added fresh.
  • Make *croutons* in bulk and store them in an airtight container to maintain their crunch.

Frequently Asked Questions

Here are some common questions and answers about making a Caesar salad:

  • Can I use pre-packaged lettuce? Yes! Just ensure it’s fresh and washed. Look for romaine hearts for convenience.
  • What can I substitute for Parmesan? Nutritional yeast or pecorino Romano are great alternatives.
  • Is Caesar dressing healthy? Homemade versions can be tailored to be healthier by using Greek yogurt instead of mayonnaise.
  • Can I make the dressing ahead of time? Absolutely! It can be stored in the fridge for up to a week.
  • How do I make this gluten-free? Use gluten-free bread for croutons and ensure your dressing is gluten-free.
  • Can I add other vegetables? Yes! Feel free to add tomatoes, cucumbers, or avocados for a twist.
  • How do I keep my salad fresh longer? Store in an airtight container and keep the dressing separate.
  • What’s the best way to serve Caesar salad? Serve chilled for the best flavor and texture.

Nutrition Tips and Dietary Adaptations

This Caesar salad can easily fit into various dietary lifestyles:

  • Low-Carb: Skip the croutons and add extra protein like grilled chicken or tofu.
  • Vegan: Use a vegan Caesar dressing and swap Parmesan for a nut-based cheese alternative.
  • Low-Calorie: Reduce the amount of dressing and use a light version or yogurt-based dressing.

Equipment Recommendations

Here’s what you’ll need to make your Caesar salad:

  • Salad Bowl: A large bowl for mixing and serving your salad.
  • Chef’s Knife: For chopping the romaine lettuce and other ingredients.
  • Cutting Board: A clean surface for all your chopping needs.
  • Mixing Spoon: To combine your salad ingredients evenly.

Serving Suggestions

Want to elevate your meal? Here are some serving ideas:

  • Pair with grilled chicken or fish for a complete meal.
  • Serve alongside a warm, crusty loaf of whole-grain bread.
  • Enjoy as a side dish to your favorite pasta or pizza.

Conclusion

This Zesty Caesar Salad is not just a salad; it’s a celebration of fresh flavors and nutritious ingredients. With this comprehensive guide, you can whip up a classic Caesar salad that is both delicious and healthy. So grab your ingredients and let’s make healthy eating exciting! Whether you’re enjoying it as a quick lunch or serving it at your next gathering, this salad will undoubtedly be a hit. Happy cooking!

Classic Caesar Salad

Prep Time 10 minutes
Cook Time 5 minutes
Total Time 15 minutes
Servings 4 servings
Calories 350
A timeless salad combining crisp romaine, crunchy croutons, and savory Parmesan, all tossed in a flavorful Caesar dressing.

Ingredients

Main

  • 1 large head romaine lettuce (chopped)
  • 1 cup homemade croutons
  • ½ cup freshly grated Parmesan cheese
  • ½ cup Caesar dressing (store-bought or homemade)
  • ½ lemon juice of lemon

Instructions 

  • Wash and chop the romaine lettuce, then place in a large bowl.
  • Add croutons and sprinkle Parmesan cheese over the lettuce.
  • Drizzle Caesar dressing over the salad and toss gently.
  • Squeeze lemon juice over the salad before serving.

Notes

For extra flavor, add freshly ground black pepper or anchovies.
Calories: 350kcal
Cost: $15
Course: Salad
Cuisine: American
Keyword: Lettuce

Welcome to a culinary adventure that celebrates the vibrant flavors and fresh ingredients of the classic Salade Niçoise! This dish is not just a salad; it’s a colorful masterpiece that brings together the best of Mediterranean cuisine, featuring tender vegetables, protein-packed tuna, and perfectly boiled eggs. Whether you’re looking for a quick lunch, a light dinner, or a stunning dish to impress guests, this recipe has got you covered.

In this article, we’ll dive deep into everything you need to know about crafting the perfect Salade Niçoise—from ingredient breakdowns and pro tips to common mistakes to avoid. Get ready to transform your meals into exciting culinary delights!

Why You’ll Love This Recipe

This vibrant salad isn’t just visually appealing; it also packs a nutritional punch! Here are five reasons to whip up this classic dish:

  • Balanced Nutrition: With a mix of protein, healthy fats, and vibrant veggies, this salad provides a complete meal that keeps you feeling energized.
  • Quick & Easy: Perfect for busy schedules, this dish comes together in less than 30 minutes, making it an ideal choice for lunch or dinner.
  • Customizable Flavor: Feel free to mix and match ingredients based on what you have at home, allowing you to personalize your own version of this classic.
  • Fresh Ingredients: The combination of fresh vegetables and quality tuna ensures that every bite is bursting with flavor and nutrients.
  • Impressive Presentation: Its vibrant colors and beautiful arrangement make it a showstopper at any gathering.

Ingredients Breakdown

Let’s get into the nitty-gritty of what you’ll need to create this delicious Salade Niçoise. Here’s a detailed list of ingredients along with some suggested substitutions:

  • 4 uova: Eggs are essential for protein and creaminess. For a vegan alternative, try using silken tofu.
  • 200 g fagiolini verdi freschi: Fresh green beans add crunch. You can substitute with blanched snap peas if unavailable.
  • 4 patate di medie dimensioni: Potatoes provide heartiness. Red or Yukon gold varieties work best.
  • 1 lattuga romana: Crisp romaine is perfect for a fresh bed. You can also use arugula for a peppery kick.
  • 1 cipolla rossa (affettata sottilmente): Red onions offer a mild sweetness—shallots are a great alternative.
  • 1 peperone rosso (affettato a strisce): Sweet red peppers add color; feel free to use yellow or orange peppers.
  • 200 g tonno sott’olio (sgocciolato): Tuna is the star protein here; canned salmon or chickpeas make great substitutes.
  • 100 g olive nere: Black olives provide a briny flavor—green olives work too.
  • 4 pomodori (tagliati a spicchi): Fresh, ripe tomatoes are key. You can use cherry tomatoes for sweetness.
  • 8 filetti di acciughe sott’olio (opzionale): Anchovies add depth to the flavor. Omit if you prefer a vegetarian dish.
  • 2 cucchiai capperi: These tiny flavor bombs enhance the salad; replace with diced pickles if needed.
  • q.b. Sale e pepe: Season to taste!
  • 6 cucchiai olio d’oliva extra vergine: Use high-quality olive oil for the vinaigrette; avocado oil is a great alternative.
  • 2 cucchiai aceto di vino rosso: This adds tanginess; try balsamic vinegar for a sweeter note.
  • 1 cucchiaino senape di Digione: Adds zest; you could use a grainy mustard for texture.

Step-by-Step Instructions

Now that you have your ingredients ready, let’s jump into the cooking process to create the most delicious Salade Niçoise!

  1. Boil the Eggs: Cook the eggs in boiling water for about 10 minutes. Once done, cool them under cold water, peel, and cut into quarters.
  2. Prepare the Green Beans: Blanch the green beans in salted water for 5-7 minutes until tender-crisp, then transfer them to ice water to stop cooking.
  3. Cook the Potatoes: Boil the potatoes in salted water until tender, about 15 minutes, then peel and slice into thick rounds.
  4. Make the Vinaigrette: In a bowl, whisk together olive oil, red wine vinegar, mustard, salt, and pepper until emulsified.
  5. Assemble the Salad: Lay the romaine leaves on a large serving platter. Top with potatoes, green beans, tomatoes, bell peppers, and red onions.
  6. Add the Proteins: Layer the tuna, olives, anchovies (if using), and capers over the vegetables. Finally, place the quartered eggs on top.
  7. Dress the Salad: Drizzle the vinaigrette over the salad just before serving. Toss gently to combine all ingredients.

Pro Tips for a Perfect Salade Niçoise

Side view of a colorful Salade Niçoise, showcasing arranged ingredients like tomatoes and olives.

To elevate your Salade Niçoise game, keep these expert tips in mind:

  • Use Fresh Ingredients: Fresh produce makes all the difference in flavor and nutrition.
  • Chill Your Salad: For an even more refreshing experience, chill the salad in the fridge for about 30 minutes before serving.
  • Don’t Overcook the Veggies: Aim for a tender-crisp texture to maintain vibrancy and crunch.
  • Experiment with Dressings: Try different vinaigrettes like lemon-basil or tahini for a unique twist.
  • Layer Flavors: Feel free to add herbs like basil or parsley for an extra flavor boost.
  • Mind the Eggs: For perfect boiled eggs, use older eggs, which are easier to peel.
  • Presentation Matters: Arrange the ingredients neatly for an Instagram-worthy dish!
  • Make It Ahead: Prepare components in advance and assemble just before serving to save time.

Common Mistakes and Troubleshooting

Even the best chefs can make mistakes! Here are some common issues and how to avoid them:

  • Overcooked Eggs: Keep an eye on cooking time—10 minutes is usually perfect for hard-boiled eggs.
  • Soggy Salad: Dress the salad only right before serving to prevent wilting.
  • Too Much Salt: Start with a little; you can always add more, but it’s hard to take it away.
  • Skipping the Ice Bath: This step is crucial for keeping green beans bright and crisp.

Variations to Try

Feeling adventurous? Here are some fun variations to put your own spin on this classic:

  • Chicken Niçoise: Substitute tuna with grilled chicken breast for a heartier option.
  • Vegan Niçoise: Replace tuna with chickpeas or tempeh, and skip the eggs for a plant-based delight.
  • Spicy Niçoise: Add sliced jalapeños or a dash of hot sauce to the vinaigrette for a kick.
  • Grain Bowl Style: Serve the salad over a bed of quinoa or farro for added texture and nutrition.

Storage and Make-Ahead Instructions

This salad is perfect for meal prep! Here’s how to store and make it ahead:

  • Refrigerate Components: Store individual components separately in airtight containers for up to 3 days.
  • Assemble Before Serving: For the best texture, assemble the salad just before you plan to eat it.
  • Leftover Storage: If you have leftovers, keep them in the fridge for up to 24 hours, but expect some sogginess.

Comprehensive FAQ

Here are some frequently asked questions about Salade Niçoise:

  • What is the origin of Salade Niçoise? It originates from Nice, France, and is a staple of Mediterranean cuisine.
  • Can I use canned tuna? Absolutely! Just make sure to choose high-quality, sustainably caught tuna.
  • Is there a gluten-free option? Yes! This salad is naturally gluten-free, just ensure your dressing ingredients are gluten-free.
  • How can I make it low-carb? Skip the potatoes or replace them with cauliflower for a low-carb version.
  • Can I make it vegetarian? Yes, simply skip the tuna and anchovies and add more veggies or beans.
  • What’s the best dressing for Salade Niçoise? A classic vinaigrette made with olive oil, vinegar, and mustard is traditional, but feel free to experiment!
  • How can I make it more filling? Add grains like quinoa or serve it with crusty whole-grain bread.
  • What are some good side dishes? Pair it with a light soup or some crusty bread for a well-rounded meal.

Nutritional Tips and Dietary Adaptations

This Salade Niçoise is a fantastic source of nutrients! Here’s how it stacks up:

  • High Protein: The tuna and eggs provide a great protein boost, perfect for muscle recovery.
  • Healthy Fats: Olive oil and olives are rich in monounsaturated fats, beneficial for heart health.
  • Rich in Vitamins: Fresh vegetables are packed with vitamins A, C, and K, contributing to overall health.
  • Balanced Meal: The combination of protein, healthy fats, and fiber makes it a satisfying meal option.

Equipment Recommendations

To make your cooking experience seamless, consider these tools:

  • Sharp Knife: For slicing vegetables and eggs with ease.
  • Cutting Board: A sturdy board to protect your countertops while prepping.
  • Mixing Bowl: Ideal for whisking your vinaigrette and tossing your salad.
  • Pot for Boiling: A large pot for boiling potatoes and eggs simultaneously.
  • Salad Spinner: To dry your greens thoroughly for the best texture.

Serving Suggestions

Once your Salade Niçoise is ready, here are a few serving ideas:

  • Plate it Beautifully: Use a large platter to showcase the colorful ingredients.
  • Pair with Wine: A crisp white wine like Sauvignon Blanc complements the flavors beautifully.
  • Add Bread: Serve with a side of crusty baguette or whole grain rolls for a complete meal.
  • Garnish: Fresh herbs like basil or parsley can add an aromatic touch.

There you have it! A comprehensive guide to crafting the perfect Salade Niçoise. With its fresh ingredients, vibrant flavors, and nutritional benefits, this dish is sure to become a favorite in your kitchen. Remember, cooking is all about creativity and enjoyment, so don’t hesitate to make this recipe your own. Happy cooking!

Salade Niçoise

Prep Time 15 minutes
Cook Time 20 minutes
Total Time 35 minutes
Servings 4 servings
Calories 350
A classic French salad combining fresh vegetables, tuna, and a tangy vinaigrette for a light, flavorful meal.

Ingredients

Eggs

  • 4 pieces uova

Fresh green beans

  • 200 g fagiolini verdi freschi

Potatoes

  • 4 pieces patate di medie dimensioni

Lettuce

  • 1 head lattuga romana

Red onion

  • 1 piece cipolla rossa (affettata sottilmente)

Red pepper

  • 1 piece peperone rosso (affettato a strisce)

Canned tuna

  • 200 g tonno sott'olio (sgocciolato)

Black olives

  • 100 g olive nere

Tomatoes

  • 4 pieces pomodori (tagliati a spicchi)

Anchovy fillets

  • 8 pieces filetti di acciughe sott'olio (opzionale)

Capers

  • 2 cucchiai capperi

Salt and pepper

  • q.b. Sale e pepe

Extra virgin olive oil

  • 6 cucchiai olio d'oliva extra vergine

Red wine vinegar

  • 2 cucchiai aceto di vino rosso

Dijon mustard

  • 1 cucchiaino senape di Digione

Salt and pepper

  • q.b. Sale e pepe

Instructions 

  • Cuocere le uova in acqua bollente per 10 minuti, raffreddare, sbucciare e tagliare a quarti.
  • Sbollentare i fagiolini in acqua salata per 5-7 minuti, raffreddare in acqua ghiacciata.
  • Cuocere le patate, sbucciarle e affettarle.
  • Preparare la vinaigrette mescolando olio, aceto, senape, sale e pepe.
  • Disporre lattuga, patate, fagiolini, pomodori, peperoni e cipolla su un piatto. Aggiungere tonno, olive, acciughe, capperi e uova. Condire con la vinaigrette.

Notes

Puoi aggiungere le acciughe opzionali per un sapore più intenso.
Calories: 350kcal
Cost: $15
Course: Salad
Cuisine: French
Keyword: Seafood

Unleash the Flavors: Why You’ll Crave This Waldorf Salad

Welcome to the wonderful world of the Waldorf Salad, a dish that combines vibrant colors, crunchy textures, and creamy goodness all in one bowl! This easy fruit salad recipe is not just a feast for your taste buds; it’s a celebration of fresh ingredients that make healthy eating a joy rather than a chore. Imagine biting into crisp, juicy apples, sweet grapes, and crunchy walnuts, all enveloped in a luscious dressing that elevates the entire experience. Let’s dive into why this salad is not just a side, but a star of the show!

Why You’ll Love This Recipe

  • Quick and Easy: This recipe takes less than 30 minutes to prepare, making it perfect for busy weeknights or spontaneous gatherings.
  • Nutritious and Delicious: Packed with fruits, nuts, and a creamy dressing, this salad provides a balanced mix of nutrients that are great for your body.
  • Versatile Ingredients: Feel free to swap ingredients based on what you have; this salad is adaptable to your taste and pantry!
  • Make-Ahead Wonder: Perfect for meal prep; this salad can be made a day in advance, allowing flavors to meld beautifully.
  • Kid-Friendly: Kids love the sweet and crunchy textures, making this salad a great way to sneak in healthy options!

Ingredient Breakdown

To create this vibrant Waldorf Salad, you’ll need the following ingredients:

  • 2 cups diced apples (preferably Honeycrisp or Granny Smith): These add a sweet crunch. For a twist, try using pears instead!
  • 1 cup thinly sliced celery: Adds a refreshing crunch. If you prefer a milder flavor, use cucumber slices.
  • 1 cup seedless red grapes, halved: Their sweetness balances the salad. You can substitute with blueberries for a different flavor.
  • 1/2 cup chopped walnuts: These provide healthy fats and crunch. To prevent allergies, use sunflower seeds.
  • 1/2 cup Greek yogurt: This creamy base adds protein. For a vegan option, substitute with dairy-free yogurt.
  • 2 tablespoons mayonnaise: Adds richness. Use a vegan mayo for a plant-based version.
  • 1 tablespoon lemon juice: Keeps the apples from browning and adds brightness. Lime juice works too!
  • 1 teaspoon honey: A touch of sweetness; maple syrup can be used for a vegan option.
  • Salt and pepper to taste: Essential for flavor enhancement.

Pro Tips for Perfection

Close-up image of a fresh Waldorf Salad featuring diced apples, grapes, and Greek yogurt dressing.

Maximize your Waldorf Salad experience with these expert insights:

  • Choose Fresh Ingredients: The fresher your produce, the tastier your salad will be. Look for firm apples and plump grapes.
  • Chill the Salad: Allowing the salad to chill for at least 30 minutes enhances the flavors and texture.
  • Gentle Tossing: When combining ingredients, toss gently to maintain the integrity of the apples and grapes.
  • Adjust to Taste: Feel free to add more lemon juice or honey according to your preference for sweetness and acidity.
  • Experiment with Textures: Consider adding crunchy ingredients like toasted almonds or crispy bacon for added flair.
  • Presentation Matters: Serve in a beautiful bowl or on a bed of greens to elevate your dish visually.
  • Garnish Wisely: Top with additional walnuts or a sprinkle of cinnamon for an appealing finish.
  • Keep It Colorful: Adding a variety of colorful fruits not only makes the salad more appealing but also boosts its nutritional value.

Avoiding Common Mistakes

Even the best of us can make mistakes in the kitchen! Here’s how to ensure your Waldorf Salad turns out just right:

  • Prevent Browning: Toss diced apples with lemon juice immediately after cutting to keep them crisp and fresh.
  • Don’t Overdress: Too much dressing can make the salad soggy. Start with less and add more if needed.
  • Use the Right Nuts: Ensure your walnuts are fresh. Stale nuts can ruin the flavor.
  • Timing is Key: Serve the salad within a few hours of preparing for the best texture and flavor.

Delicious Variations

Feeling adventurous? Here are some variations to spice up your Waldorf Salad:

  • Curried Waldorf Salad: Add 1 teaspoon of curry powder to the dressing for a warm, exotic twist.
  • Fruit-Loaded Delight: Incorporate seasonal fruits like berries or citrus for a refreshing change.
  • Grains Galore: Mix in cooked quinoa or farro for added texture and nutrition.
  • Protein-Packed: Add shredded rotisserie chicken or chickpeas to make this salad a hearty main dish.

Storage and Make-Ahead Instructions

This Waldorf Salad is not just a one-time dish! Here’s how to store and prepare it ahead of time:

  • Refrigeration: Store in an airtight container in the fridge for up to 2 days. The flavors will deepen and meld.
  • Make Ahead: Prepare the salad a day in advance and dress it just before serving to maintain texture.
  • Freezing Not Recommended: The ingredients may become mushy after freezing, so it’s best enjoyed fresh!

Frequently Asked Questions

Got questions? We’ve got answers! Here are some FAQs about the Waldorf Salad:

  • Can I use different nuts? Absolutely! Feel free to use pecans, almonds, or even pistachios for a different flavor.
  • Is this salad gluten-free? Yes, all the ingredients are naturally gluten-free, making it a great option for those with gluten sensitivities.
  • How can I make this salad vegan? Substitute Greek yogurt and mayonnaise with plant-based alternatives, and use maple syrup instead of honey.
  • Can I add protein to this salad? Yes! Grilled chicken, tuna, or chickpeas make fantastic additions for a heartier meal.
  • What’s the best way to serve it? Serve chilled, garnished with extra nuts or fresh herbs for a gourmet touch.
  • How do I keep leftovers fresh? Store in an airtight container and consume within 2 days for the best quality.
  • Can I use other fruits? Definitely! Pears, berries, or even tropical fruits can be delicious substitutes.
  • What’s the nutritional value of this salad? It’s a great source of vitamins, healthy fats, and protein, making it a balanced addition to any meal.

Nutritional Tips and Dietary Adaptations

Eating healthy doesn’t have to be boring! Here are some nutritional tips:

  • Balance is Key: This salad provides a mix of carbohydrates, proteins, and healthy fats, making it a well-rounded meal.
  • Mind Your Portions: While it’s nutritious, be mindful of portion sizes, especially if you’re watching calories.
  • Explore Dietary Needs: Adjust the recipe to suit specific dietary needs by swapping out ingredients based on allergies or preferences.

Essential Equipment Recommendations

To whip up your Waldorf Salad, you’ll need a few kitchen essentials:

  • Sharp Knife: For efficiently dicing apples and slicing celery.
  • Cutting Board: A sturdy surface for all your chopping and slicing.
  • Mixing Bowl: A large bowl to hold all your ingredients as you combine them.
  • Whisk: Perfect for blending your creamy dressing to perfection.
  • Airtight Container: To store any leftovers and keep them fresh.

Serving Suggestions to Elevate Your Meal

Take your Waldorf Salad to the next level with these serving ideas:

  • On a Bed of Greens: Serve over a bed of fresh mixed greens for added color and nutrition.
  • As a Sandwich Filling: Use it as a filling in whole grain wraps or sandwiches for a satisfying lunch.
  • With Grilled Protein: Pair it with grilled chicken or fish for a complete meal.
  • In a Picnic Basket: Pack it for picnics or potlucks; it travels well and is always a crowd-pleaser!

So, there you have it! The Waldorf Salad is not just a recipe; it’s a culinary adventure waiting to happen. With its delightful combination of flavors and textures, this salad is sure to become a staple in your kitchen. Whether you’re meal-prepping for the week or hosting a gathering, this dish is bound to impress. Grab your ingredients and let’s make some magic happen in the kitchen!

Waldorf Salad

Prep Time 15 minutes
Total Time 15 minutes
Servings 4 servings
Calories 250
A classic and refreshing fruit salad with crunchy walnuts and a creamy dressing, perfect for a light snack or side dish.

Ingredients

Fruits and Nuts

  • 2 cups diced apples (preferably Honeycrisp or Granny Smith) (Toss with lemon juice to prevent browning)
  • 1 cup thinly sliced celery
  • 1 cup seedless red grapes, halved
  • 1/2 cup chopped walnuts
  • 1/2 cup Greek yogurt
  • 2 tablespoons mayonnaise
  • 1 tablespoon lemon juice
  • 1 teaspoon honey

Seasoning

  • to taste Salt and pepper

Instructions 

  • Dice apples, slice celery, halve grapes, and chop walnuts. Toss with lemon juice.
  • Mix Greek yogurt, mayonnaise, lemon juice, and honey until smooth. Season with salt and pepper.
  • Pour dressing over fruit and nut mixture. Gently toss to coat evenly.
  • Cover and refrigerate for at least 30 minutes to chill and meld flavors.
  • Give the salad a final toss before serving. Garnish with extra walnuts if desired.

Notes

For added flavor, chill the salad thoroughly before serving.
Calories: 250kcal
Cost: $12
Course: Salad
Cuisine: American
Keyword: fruit, Walnut

Welcome to Your New Favorite Salad Adventure!

Are you ready to take your taste buds on a vibrant, refreshing journey? The Waldorf Salad is not just a dish; it’s a celebration of flavors that makes healthy eating an exciting adventure! This Waldorf Salad with Yogurt combines crisp apples, juicy grapes, and crunchy toasted walnuts, all enveloped in a creamy dressing that transforms each bite into a delightful experience. Whether you’re looking for a nutritious side or a satisfying main dish, this salad promises to deliver flavor and fun!

Why You’ll Love This Recipe

This isn’t just any salad; it’s a symphony of textures and tastes. Here are five reasons why this Waldorf Salad will become a staple in your kitchen:

  • Nutritious Ingredients: Packed with vitamins and minerals, this salad is a powerhouse of nutrition.
  • Variety of Flavors: The sweet apples and grapes contrast beautifully with the nutty walnuts and creamy dressing, making every bite exciting.
  • Versatile Dish: Perfect as a side for grilled chicken or as a light lunch on its own. You can customize it to fit any occasion!
  • Quick & Easy: With just a handful of ingredients and straightforward steps, you can whip up this salad in no time!
  • Make Ahead Friendly: This salad tastes even better after chilling, making it an ideal choice for meal prep or gatherings.

Ingredients Breakdown

To create your Waldorf Salad, you’ll need the following ingredients:

  • 2 large crisp red apples: Choose a sweet variety like Honeycrisp or Fuji for the best flavor.
  • 1 cup plain Greek yogurt: Provides a creamy texture and is a healthy source of protein.
  • ½ cup mayonnaise: For richness; you can substitute with a vegan mayo if desired.
  • 1 tablespoon fresh lemon juice: Adds brightness and helps prevent the apples from browning.
  • 1 cup celery stalks, finely diced: Adds crunch and a refreshing flavor.
  • 1 cup seedless red grapes, halved lengthwise: Sweet and juicy, they complement the apples perfectly.
  • ¾ cup walnuts, roughly chopped: Toasted for an irresistible crunch and nutty flavor.
  • ¼ cup raisins: For a touch of natural sweetness.
  • 2 tablespoons honey: Adjust to taste; maple syrup can be a great substitute for a vegan option.
  • ½ teaspoon salt: Enhances all the flavors.
  • ¼ teaspoon black pepper: Adds a hint of spice.
  • 2 tablespoons fresh parsley, minced: For garnish and fresh flavor.

Pro Tips for the Perfect Salad

Side perspective of a vibrant Waldorf salad with creamy yogurt, showcasing apples, grapes, and celery.

To ensure your Waldorf Salad turns out perfectly every time, keep these tips in mind:

  • Use fresh ingredients: Fresh apples and grapes provide the best flavor and texture.
  • Toast the walnuts: Toasting enhances their flavor. Aim for a golden brown color, about 8-10 minutes in a 350°F oven.
  • Soak the apples: Prevent browning by soaking the chopped apples in lemon water for 15 minutes.
  • Chill before serving: Allowing the salad to chill for at least 30 minutes helps meld the flavors.
  • Don’t overmix: Gently fold the salad to keep the apples and grapes intact.
  • Customize your dressing: Experiment with different herbs or a splash of yogurt for a tangier dressing.
  • Use a large mixing bowl: This gives you enough space to mix without making a mess.
  • Garnish with extra walnuts: This adds a nice visual element and extra crunch on top!

Common Mistakes and Troubleshooting

Even the best cooks make mistakes! Here are some common pitfalls and how to avoid them:

  • Apples turning brown: Soak them properly in lemon water to keep them vibrant and fresh!
  • Salad too watery: Make sure to drain the apples well after soaking, and don’t skip the drying step.
  • Overly sweet dressing: Adjust the honey to taste; you can always add more but can’t take it out!
  • Too chunky: Ensure even chopping of the ingredients for a better texture.

Delicious Variations

Feel free to mix things up! Here are some tasty variations to keep your meals exciting:

  • Chicken Waldorf Salad: Add shredded rotisserie chicken for extra protein and heartiness.
  • Vegan Waldorf Salad: Substitute Greek yogurt and mayo with plant-based options for a vegan-friendly version.
  • Spicy Waldorf Salad: Add a pinch of cayenne or diced jalapeños for a spicy kick!
  • Fruit-Forward Waldorf: Incorporate additional fruits like diced pears or mandarin oranges for extra sweetness.

Storage and Make-Ahead Instructions

This salad is perfect for meal prep! Here’s how to store it:

  • Refrigerate: Store in an airtight container for up to 3 days. The flavor will intensify as it sits!
  • Make ahead: Prepare the salad a day in advance, but add the dressing just before serving to maintain crunchiness.

Frequently Asked Questions

Got questions? I’ve got answers! Here are some common queries about the Waldorf Salad:

  • Can I use different nuts? Absolutely! Pecans or hazelnuts are great substitutes.
  • Is this salad gluten-free? Yes, all the ingredients are naturally gluten-free!
  • How do I make the dressing lighter? Use low-fat Greek yogurt and reduce the mayo for a lighter dressing.
  • Can I add spices to the dressing? Yes! A hint of curry powder can add an exciting flavor twist.
  • What can I serve with this salad? It pairs wonderfully with grilled meats or can be enjoyed on its own!
  • Can I freeze this salad? It’s best enjoyed fresh; freezing could alter the texture of the apples and grapes.
  • How long does it take to make? Prep time is about 15 minutes, plus a chilling time of at least 30 minutes.
  • Can I use a different dressing? Sure! A vinaigrette could provide a tangy contrast to the sweetness of the fruits.

Nutritional Tips and Dietary Adaptations

This Waldorf Salad is not only delicious but also nutritious! Here are some tips to keep it healthy:

  • Use low-fat dairy: Opt for low-fat Greek yogurt and mayo to reduce calories while keeping it creamy.
  • Increase fiber: Add more celery or toss in some leafy greens for added nutrients.
  • Swap sweeteners: Use stevia or a natural sweetener if you’re watching sugar intake.

Equipment Recommendations

Here’s what you’ll need to create this delightful salad:

  • Large mixing bowl: For combining all your ingredients effortlessly.
  • Small mixing bowl: For whisking together your creamy dressing.
  • Baking sheet: For toasting those walnuts to perfection.
  • Rubber spatula: For gently folding your salad ingredients without bruising them.

Serving Suggestions

When it’s time to serve, here are a few ideas to elevate your presentation:

  • Chic Plating: Serve it in a large bowl garnished with extra parsley and walnuts for a beautiful display.
  • Individual Servings: Consider serving in small mason jars for a fun, portable option!
  • With Proteins: Add grilled chicken or shrimp on top to transform this salad into a heartier meal.

In conclusion, the Waldorf Salad is a timeless dish that’s as delicious as it is nutritious. By integrating vibrant flavors and textures, you’ll not only satisfy your hunger but also delight your palate. So, gather your ingredients and let’s make this salad your new go-to recipe!

Happy cooking! 🌟

Waldorf Salad Recipe with Yogurt

Prep Time 15 minutes
Cook Time 10 minutes
Total Time 25 minutes
Servings 4 servings
Calories 350
A fresh and creamy Waldorf Salad with a healthy twist, combining crisp apples, grapes, celery, and toasted walnuts coated in a tangy yogurt dressing.

Ingredients

Fruits and Vegetables

  • 2 large crisp red apples (cored and chopped into ½-inch pieces)
  • 1 cup plain Greek yogurt
  • ½ cup mayonnaise
  • 1 tablespoon fresh lemon juice
  • 1 cup celery stalks (finely diced)
  • 1 cup seedless red grapes (halved lengthwise)
  • ¾ cup walnuts (roughly chopped)
  • ¼ cup raisins
  • 2 tablespoons honey
  • ½ teaspoon salt
  • ¼ teaspoon black pepper
  • 2 tablespoons fresh parsley (minced)

Instructions 

  • Submerge apple pieces in lemon water for 15 minutes, then drain and dry.
  • Toast walnuts at 350°F for 8-10 minutes until golden, then cool.
  • Mix yogurt, mayonnaise, honey, lemon juice, salt, and pepper until smooth.
  • Combine apples, celery, grapes, raisins, and walnuts in a bowl. Add dressing and fold gently.
  • Refrigerate for 30 minutes, then stir, garnish with parsley, and serve.

Notes

For extra crunch, add sliced almonds or serve with whole-grain crackers.
Calories: 350kcal
Cost: $15
Course: Salad
Cuisine: American
Keyword: apple, Walnut, yogurt

Are you ready to take your meals from ordinary to extraordinary? This creamy coleslaw recipe is your ticket to a flavor explosion! Whether you’re hosting a backyard BBQ, preparing for a picnic, or simply looking for a zesty side dish to elevate your dinner, this coleslaw is a must-try. Packed with crunch and creamy goodness, it’s easy to make and even easier to love. Dive in, and let’s discover how to create a creamy coleslaw that turns heads and tantalizes taste buds!

Why You’ll Love This Recipe

This creamy coleslaw isn’t just a pretty side dish; it’s packed with benefits that make it a staple for any meal:

  • Quick and Easy: With just a few simple ingredients and minimal prep time, you can whip this up in no time!
  • Versatile Flavor: The tangy dressing complements a variety of dishes, making it a perfect pairing with grilled meats, sandwiches, or even as a topping for tacos.
  • Texture Heaven: The crunchiness of the cabbage provides a satisfying bite that balances the creaminess of the dressing.
  • Make-Ahead Friendly: This coleslaw tastes even better after sitting for a while, allowing the flavors to meld beautifully.
  • Customizable: You can easily add your favorite ingredients, making this coleslaw uniquely yours!

Ingredients Breakdown

To create the perfect creamy coleslaw, you’ll need the following ingredients:

  • 1 package (14 ounces) coleslaw mix: This mix typically includes shredded cabbage and carrots. You can also use fresh cabbage if you prefer.
  • 3/4 cup mayonnaise: The foundation of your creamy dressing. For a healthier option, consider Greek yogurt as a substitute.
  • 1/3 cup sour cream: Adds richness and tang. You can use non-dairy sour cream for a vegan alternative.
  • 1/4 cup sugar: Balances the tanginess of the dressing. If you’re looking for a lower-calorie option, try honey or agave syrup.
  • 3/4 teaspoon seasoned salt: Enhances the overall flavor. Regular salt can be used, but adjust to taste.
  • 1/2 teaspoon ground mustard: Adds a subtle zing. Dijon mustard works well here, too.
  • 1/4 teaspoon celery salt: Infuses the dressing with a savory undertone.

Directions to Deliciousness

Follow these simple steps to create your creamy coleslaw:

  1. In a small bowl, whisk together the mayonnaise, sour cream, sugar, seasoned salt, ground mustard, and celery salt until smooth.
  2. In a large bowl, place the coleslaw mix. Pour the dressing over it, and toss to coat thoroughly. Editor’s Tip: If you plan on adding onion, do so sparingly. The onion’s flavor will intensify over time, especially if the coleslaw sits overnight, potentially overpowering the other delicious flavors.
  3. Store the mixture in the fridge, covered, until serving. Editor’s Tip: Coleslaw tastes better the longer it sits. If you can prep it a day ahead, the flavor will be worth the wait. Bear in mind, after several days, it may start to get soggy.

Pro Tips for the Perfect Coleslaw

Side view of a bowl of creamy coleslaw with a rich texture and vibrant ingredients.

Want to ensure your coleslaw is a showstopper? Check out these expert insights:

  • Fresh is Best: Use fresh cabbage and carrots for maximum crunch and flavor.
  • Make it Colorful: Add colored bell peppers or purple cabbage for a vibrant look.
  • Adjust the Sweetness: Taste the dressing before adding to the coleslaw mix and adjust sugar to your preference.
  • Chill Out: Let your coleslaw chill in the fridge for at least an hour before serving for the best flavor.
  • Experiment with Spices: Feel free to add spices like paprika or cayenne for a kick!
  • Texture Variation: Consider adding nuts or seeds for an extra crunch.
  • Vegan Twist: Swap mayo and sour cream for plant-based alternatives to make it vegan-friendly.
  • Use a Food Processor: For quick shredding, use a food processor to chop your cabbage and carrots.

Common Mistakes to Avoid

Even the best cooks can make mistakes! Here are some common pitfalls to dodge:

  • Overdressing: Too much dressing can make the coleslaw soggy. Start with less and add more as needed.
  • Skipping the Chill: Not allowing the coleslaw to sit can result in less flavor. Give it time!
  • Using Old Ingredients: Ensure your cabbage and carrots are fresh for the best texture and taste.
  • Neglecting to Taste: Always taste and adjust seasonings before serving to ensure a balanced flavor.

Coleslaw Recipe Variations

Want to switch things up? Here are some tasty variations to try:

  • Southwestern Coleslaw: Add black beans, corn, and a hint of lime for a zesty twist.
  • Apple & Cranberry Coleslaw: Mix in chopped apples and dried cranberries for a sweet and tangy flavor.
  • Asian-Inspired Coleslaw: Incorporate sesame oil, rice vinegar, and shredded almonds for a unique taste.
  • Spicy Jalapeño Coleslaw: Add finely chopped jalapeños for a kick that pairs well with BBQ.

How to Store Coleslaw

Proper storage is key to keeping your coleslaw fresh:

  • Refrigeration: Store in an airtight container in the fridge for up to 3 days. The flavors will continue to meld, enhancing the taste!
  • Freezing: It’s best not to freeze coleslaw as it can change the texture. However, if necessary, freeze without dressing and add fresh dressing after thawing.

Make-Ahead Instructions

Want to make your life easier? Here’s how to prep ahead:

  • Day Before Serving: Prepare the dressing and store in the fridge. Chop your cabbage and carrots, but keep them separate until serving.
  • Mix Just Before Serving: Combine the dressing with the coleslaw mix the day you’re serving for optimal freshness and crunch.

Frequently Asked Questions (FAQ)

Got questions? We’ve got answers!

  • Can I make coleslaw without mayonnaise? Yes! You can use Greek yogurt, buttermilk, or a vinaigrette for a lighter option.
  • How long does coleslaw last in the fridge? Properly stored, it can last 3-5 days.
  • Can I add fruits to coleslaw? Absolutely! Fruits like apples and grapes add a fun sweetness.
  • What’s the best way to shred cabbage? A sharp knife or a food processor works best for quick and even shreds.
  • Can I use pre-packaged coleslaw mix? Yes! It’s a great shortcut for busy days.
  • What can I serve coleslaw with? Coleslaw pairs wonderfully with BBQ dishes, fried foods, or as a topping for sandwiches.
  • Is coleslaw healthy? It can be! By using fresh vegetables and lighter dressings, you can make a nutritious side.
  • Can I customize the dressing? Yes! Feel free to experiment with different herbs and spices to make it your own.

Nutrition Tips and Dietary Adaptations

This creamy coleslaw can be adapted to fit various dietary needs:

  • Low-Calorie Option: Substitute full-fat mayonnaise with a light version or Greek yogurt.
  • Gluten-Free: This recipe is naturally gluten-free; just ensure all ingredients are certified gluten-free if necessary.
  • Vegan: Use vegan mayonnaise and sour cream to make it plant-based.
  • Low-Carb: Replace sugar with a low-carb sweetener like erythritol.

Essential Equipment

Here’s what you’ll need to whip up this delicious coleslaw:

  • Mixing Bowls: A large bowl for mixing the coleslaw and a smaller one for the dressing.
  • Whisk: For combining the dressing ingredients until smooth.
  • Sharp Knife or Food Processor: For shredding cabbage quickly and easily.
  • Airtight Containers: To store your coleslaw in the fridge and keep it fresh.

Serving Suggestions

Your creamy coleslaw can shine in various settings:

  • As a Side Dish: Serve alongside grilled chicken, burgers, or hot dogs for a classic combo.
  • As a Topping: Layer on tacos, sandwiches, or wraps for added crunch and flavor.
  • In a Bowl: Serve it in a bowl as a standalone dish at parties or picnics.

So there you have it! This creamy coleslaw recipe is your passport to a delicious, colorful, and satisfying side dish. With its crunchy texture and rich flavor, it’s sure to be a crowd-pleaser. Don’t hesitate to experiment with flavors and ingredients to make it your own. Happy cooking!

Creamy Coleslaw

Prep Time 10 minutes
Total Time 10 minutes
Servings 6 servings
Calories 180
A classic side dish with a creamy, tangy flavor that pairs perfectly with grilled meats or sandwiches.

Ingredients

Main

  • 14 ounces coleslaw mix
  • 0.75 cup mayonnaise
  • 0.33 cup sour cream
  • 0.25 cup sugar
  • 0.75 teaspoon seasoned salt
  • 0.5 teaspoon ground mustard
  • 0.25 teaspoon celery salt

Instructions 

  • Whisk mayonnaise, sour cream, sugar, seasoned salt, mustard, and celery salt until smooth.
  • Combine coleslaw mix with the dressing and toss to coat.
  • Cover and refrigerate for at least 1 hour before serving.

Notes

For extra flavor, add a small amount of chopped onion, but do so sparingly as its flavor intensifies over time.
Calories: 180kcal
Cost: $8
Course: Side Dish
Cuisine: American
Keyword: coleslaw

Revitalize Your Plate with a Creamy Coleslaw That Dances with Flavor

Welcome to the exciting world of creamy coleslaw! This vibrant and delicious dish is not just another salad; it’s a flavor explosion that will brighten up your summer picnics, barbecues, and every gathering in between. Imagine crunchy, fresh cabbage and carrots enveloped in a luscious dressing that dances on your taste buds. Ready to dive in? Let’s transform your next meal with this easy-to-make, crowd-pleasing recipe!

Why You’ll Love This Recipe

This creamy coleslaw isn’t just a side dish; it’s an experience. Here are some reasons to fall in love with this dish:

  • Quick and Easy: Whip it up in under 15 minutes! Perfect for busy days or last-minute gatherings.
  • Flavorful Fusion: The combination of fresh vegetables and creamy dressing creates a taste sensation that complements any meal.
  • Customizable: You can easily add your favorite ingredients or make substitutions to suit your taste.
  • Make Ahead: Prepare it in advance to allow flavors to meld, enhancing the deliciousness!
  • Visually Stunning: The vibrant colors of the cabbage and carrots make this dish a feast for the eyes.

Essential Ingredients

Let’s break down the ingredients you need to create this creamy coleslaw:

  • 4 cups green cabbage: Finely shredded for a crunchy base. You can substitute with red cabbage for a pop of color!
  • 2 medium carrots: Grated to add sweetness and texture. Feel free to use other root vegetables like radishes for a twist.
  • 1 cup mayonnaise: The creamy base. For a healthier option, swap with Greek yogurt or a vegan mayo alternative.
  • 2 tbsp apple cider vinegar: Adds tanginess that balances the sweetness of the carrots.
  • 2 tbsp sugar: Enhances the overall flavor. You can replace it with honey or a sugar substitute if desired.
  • ½ tsp salt: To taste; enhances all the flavors.
  • ½ tsp black pepper: For a hint of spice.

Let’s Make It Together!

Side view of a delicious creamy coleslaw, showcasing shredded cabbage and grated carrots.

Ready to get started? Follow these simple steps to whip up your creamy coleslaw:

  1. Finely shred the green cabbage and grate the carrots using a sharp knife or box grater.
  2. In a large bowl, mix together the mayonnaise, apple cider vinegar, and sugar until smooth.
  3. Add the shredded cabbage and grated carrots to the dressing mixture; stir until well coated.
  4. Season with salt and pepper to taste.
  5. Cover and refrigerate for at least 30 minutes before serving to allow the flavors to meld.

Pro Tips for the Best Creamy Coleslaw

Here are some expert insights to help you perfect your coleslaw:

  • Use Fresh Ingredients: Fresh, crisp cabbage and carrots make a world of difference in texture and flavor.
  • Experiment with Dressings: Try adding a splash of lemon juice or a teaspoon of mustard for a unique twist on the dressing.
  • Chill Before Serving: Allowing the coleslaw to chill enhances the flavors and makes it even more refreshing.
  • Mix It Up: Consider adding diced apples, raisins, or nuts for extra texture and flavor.
  • Don’t Overmix: Gently fold the ingredients together to keep the cabbage and carrots crisp.
  • Adjust Seasonings: Taste as you go; don’t hesitate to adjust salt, pepper, or sugar to match your preference.
  • Use the Right Tools: A good knife and a sturdy bowl will make the prep easier and more enjoyable.
  • Store Properly: Keep it in an airtight container in the fridge for up to 3 days for best results.

Common Mistakes and Troubleshooting

Even the best chefs can make mistakes! Here’s how to avoid common pitfalls:

  • Too Watery: If your coleslaw is watery, make sure to drain excess liquid from the cabbage after shredding.
  • Overly Sweet: If it’s too sweet, balance it out by adding a bit more vinegar or salt.
  • Too Creamy: If you find the dressing too heavy, lighten it by mixing in a bit of yogurt or extra vinegar.
  • Not Enough Flavor: If it lacks zing, tweak the seasonings and add more vinegar or spices as needed.

Variations to Try

Feeling adventurous? Here are some delicious variations to shake things up:

  • Spicy Coleslaw: Add diced jalapeños or a dash of hot sauce for a kick!
  • Asian-Inspired Slaw: Use sesame oil instead of mayonnaise and add shredded snap peas and cilantro.
  • Tex-Mex Twist: Mix in black beans, corn, and lime juice for a fiesta in a bowl.
  • Tropical Slaw: Add diced pineapple or mango for a sweet, fruity flavor profile.

Storage and Make-Ahead Instructions

Planning for the future? Here’s how to store your coleslaw:

  • Refrigerate: Store in an airtight container in the fridge for up to 3 days.
  • Make Ahead: You can prepare the coleslaw up to 24 hours in advance. Just keep the dressing separate until ready to serve to maintain crispness.
  • Freezing: For best quality, avoid freezing as it alters the texture of the cabbage.

Comprehensive FAQ

Got questions? We’ve got answers! Here are some frequently asked questions:

  • What is the best type of cabbage for creamy coleslaw? Green cabbage is traditional, but red cabbage adds color and a slight sweetness!
  • Can I make creamy coleslaw ahead of time? Yes! It’s best to prepare it at least 30 minutes in advance to allow flavors to meld.
  • How do I make coleslaw dressing without mayonnaise? Use yogurt or a vinaigrette made with olive oil, vinegar, and seasonings.
  • Can I use pre-packaged coleslaw mix? Absolutely! It saves time and typically contains a good variety of cabbage and carrots.
  • What can I serve with coleslaw? It pairs well with BBQ meats, sandwiches, and grilled dishes.
  • How long does coleslaw last in the fridge? It can last up to 3 days if stored properly in an airtight container.
  • Can I add fruits to coleslaw? Definitely! Apples, raisins, or pineapple can add a delightful sweetness.
  • Is coleslaw gluten-free? Yes, if made with gluten-free ingredients, coleslaw is naturally gluten-free!

Nutrition Tips and Dietary Adaptations

Want to make your coleslaw healthier? Here are some tips:

  • Go Light: Substitute half of the mayonnaise with Greek yogurt for a protein boost and fewer calories.
  • Vegan Option: Use plant-based mayonnaise to keep it vegan-friendly.
  • Increase Fiber: Add more veggies like bell peppers or broccoli to up the fiber content.
  • Low-Sugar Version: Reduce the sugar or use a sugar alternative to make it diabetic-friendly.

Equipment Recommendations

Here’s what you’ll need to bring your creamy coleslaw to life:

  • Sharp Knife or Box Grater: Essential for shredding cabbage and grating carrots.
  • Mixing Bowl: A large bowl for mixing the ingredients together.
  • Whisk: Perfect for blending the dressing until smooth.
  • Storage Container: Airtight containers for storing your coleslaw in the fridge.

Serving Suggestions

Your creamy coleslaw is ready to shine! Here are some creative serving ideas:

  • As a Side Dish: Serve alongside grilled meats, burgers, or sandwiches.
  • In Tacos: Use it as a crunchy topping for fish or pulled pork tacos.
  • In Wraps: Add to wraps for extra crunch and flavor.
  • Garnish: Use it as a colorful garnish on any plate to elevate the presentation.

Conclusion

And there you have it! A creamy coleslaw recipe that’s not only packed with flavor but also offers endless possibilities for customization. Whether you’re serving it at a family gathering or enjoying it on a quiet evening, this vibrant dish is sure to impress. Now, grab your ingredients and let your culinary creativity flourish in the kitchen. Here’s to delicious meals that nourish your body and excite your taste buds!

Creamy Coleslaw

Prep Time 10 minutes
Total Time 10 minutes
Servings 4 servings
Calories 180
A classic side dish with crunchy cabbage and carrots in a creamy, tangy dressing.

Ingredients

Vegetables

  • 4 cups green cabbage, finely shredded
  • 2 medium carrots, grated

Dressing

  • 1 cup mayonnaise
  • 2 tbsp apple cider vinegar
  • 2 tbsp sugar
  • ½ tsp salt (to taste)
  • ½ tsp black pepper (to taste)

Instructions 

  • Shred cabbage and grate carrots.
  • Mix mayonnaise, vinegar, and sugar until smooth.
  • Add vegetables to dressing and stir.
  • Season with salt and pepper.
  • Refrigerate for 30 minutes before serving.

Notes

For extra crunch, add a handful of chopped apples or nuts.
Calories: 180kcal
Cost: $8
Course: Side Dish
Cuisine: American
Keyword: coleslaw

Welcome to your new favorite salad extravaganza! The Niçoise Salad is not just a dish; it’s a culinary adventure bursting with nutrients, colors, and flavors. Imagine sinking your fork into a vibrant plate of fresh veggies, protein-rich tuna, and a zesty dressing that dances on your palate. This easy Niçoise Salad recipe is perfect for any occasion, whether you’re hosting a summer picnic or enjoying a casual dinner at home. Ready to dive in? Let’s get started!

Why You’ll Love This Recipe

This recipe isn’t just about taste; it’s about experience and joy in cooking! Here are five reasons to embrace this delightful dish:

  • Nutrient-Packed: With a medley of fresh vegetables and protein, it’s a well-rounded meal that fuels your body.
  • Quick and Easy: Perfect for busy days, this salad comes together in under 30 minutes!
  • Customizable: Feel free to swap ingredients based on your preferences. Don’t like olives? No problem!
  • Flavor Explosion: The combination of fresh ingredients and a tangy dressing elevates your taste buds.
  • Meal Prep Friendly: Make it ahead of time for a delicious lunch or dinner that’s ready when you are!

Ingredient Breakdown

Let’s take a closer look at the star players in this Niçoise Salad and explore some exciting substitutions:

  • Salad Potatoes: These waxy potatoes hold their shape well. You can substitute with small Yukon Gold or new potatoes.
  • Green Beans: Fresh green beans add a crisp texture. If unavailable, use blanched frozen beans or snap peas.
  • Eggs: Soft-boiled eggs are traditional, but hard-boiled work just as well for a firmer texture.
  • Little Gem Lettuce: For a crunchy base, replace with arugula, spinach, or mixed greens if you prefer.
  • Black Olives: Kalamata olives add richness. If you’re not a fan, consider capers or pickles for a punchy alternative.
  • Tomatoes: Juicy heirloom tomatoes provide sweetness. Cherry tomatoes are a fantastic substitute!
  • Tuna: Canned tuna is classic, but feel free to use seared tuna or grilled chicken for a twist.

How to Make a Classic Niçoise Salad

Follow these simple steps for a stunning salad that’s sure to impress:

  1. Whisk together the dressing ingredients: 1 garlic clove (crushed), 1 tbsp Dijon mustard, juice of 1 lemon, and 6 tbsp olive oil. Season to taste and set aside.
  2. Bring a pot of salted water to a boil. Cook 400g halved salad potatoes for about 15 minutes, adding 100g green beans in the last 4 minutes. Drain and let cool.
  3. Boil 4 eggs for 6 minutes, then immediately run under cold water to stop cooking.
  4. Arrange 2 torn little gem lettuce, 100g black olives, 3 cut tomatoes, and 300g drained tuna on a serving platter. Top with halved eggs and drizzle with dressing.
  5. Serve and enjoy your vibrant creation!

Pro Tips for the Perfect Niçoise Salad

Side angle of a delicious Niçoise salad with juicy ingredients including tuna and eggs.

Want to elevate your Niçoise experience? Here are some insider tips:

  • Fresh is Best: Always use the freshest ingredients you can find for maximum flavor and nutrition.
  • Season Your Water: Adding salt to your boiling water enhances the flavor of your potatoes and beans.
  • Don’t Overcook: Keep your green beans crisp by blanching them briefly before plunging them into cold water.
  • Make Ahead: Prepare the salad components separately and assemble just before serving for the best texture.
  • Experiment with Dressings: Try adding herbs like basil or dill to your vinaigrette for an extra flavor kick.
  • Layer for Flavor: Arrange ingredients in a way that allows diners to enjoy different flavors together on each bite.
  • Garnish Wisely: Add fresh herbs or microgreens on top for a beautiful presentation.
  • Balance is Key: Ensure each bite has a good mix of protein, veggies, and dressing for a complete experience.

Common Mistakes and Troubleshooting

Even the best chefs can run into hiccups! Here are some common pitfalls and how to avoid them:

  • Soggy Salad: Avoid this by allowing your potatoes and beans to cool before assembling.
  • Overcooked Eggs: Stick to 6 minutes for a perfect soft-boiled egg that’s not rubbery.
  • Too Much Dressing: Start with a small amount and add more to taste rather than drowning the salad.
  • Unbalanced Flavors: Taste as you go! Adjust your seasoning and dressing for a harmonious blend.

Variations to Try

Make this salad your own with these fun variations:

  • Seared Tuna Niçoise: Swap canned tuna for fresh seared tuna steaks for a gourmet twist.
  • Salmon Niçoise: Replace tuna with grilled or smoked salmon for a rich flavor.
  • Vegetarian Niçoise: Use chickpeas or tofu instead of tuna for a plant-based protein boost.
  • Mediterranean Twist: Add feta cheese and artichoke hearts for a Mediterranean flair.

Storage and Make-Ahead Instructions

Want to prep this salad for later? Here’s how to store it:

  • Chilled Storage: Store individual components in airtight containers in the fridge for up to 3 days.
  • Assembled Salad: Best eaten fresh, but if you must store it, keep the dressing separate until ready to serve.
  • Make Ahead: You can prepare the potatoes, beans, and eggs a day in advance for an easy assembly.

Comprehensive FAQ

Got questions? Let’s clear up some common queries about the Niçoise Salad:

  • Can I use canned tuna? Absolutely! Canned tuna is traditional and super convenient.
  • What kind of potatoes should I use? Waxy potatoes like salad potatoes or Yukon Gold are best for this recipe.
  • How do I make it gluten-free? This recipe is inherently gluten-free, just check your mustard and dressing ingredients.
  • Can I add more vegetables? Yes! Feel free to add bell peppers, radishes, or any seasonal veggies you love.
  • How can I make it more filling? Add quinoa or farro to the salad for extra fiber and protein.
  • What dressing is best? A simple vinaigrette made with olive oil and lemon works beautifully!
  • Is it suitable for meal prep? Yes, just store each component separately to maintain freshness.
  • Can I serve it warm? While it’s traditionally served cold, you can enjoy it warm if you prefer!

Nutrition Tips and Dietary Adaptations

This Niçoise Salad is a nutritional powerhouse, providing a balance of macronutrients and essential vitamins:

  • Protein-Rich: Tuna and eggs offer high-quality protein for muscle maintenance and repair.
  • Heart-Healthy Fats: Olive oil and olives provide monounsaturated fats that are good for your heart.
  • Fiber-Filled: The variety of vegetables contributes to your daily fiber intake, promoting digestion.
  • Low Carb Option: Skip the potatoes and focus on leafy greens and proteins for a low-carb version.

Equipment Recommendations

For a smooth cooking experience, consider having these kitchen tools on hand:

  • Sharp Knife: A good knife is essential for chopping and prepping ingredients efficiently.
  • Cutting Board: Use a large cutting board for easy prep of your veggies and proteins.
  • Mixing Bowl: A medium-sized bowl is ideal for whisking your dressing.
  • Pot for Boiling: A large pot will help you boil your potatoes and beans perfectly.

Serving Suggestions

Ready to serve? Here are some delightful ideas for presenting your Niçoise Salad:

  • Platter Style: Arrange all ingredients beautifully on a large platter for a family-style meal.
  • Individual Bowls: Serve in individual bowls for a more personal touch.
  • Pair with Bread: Serve alongside crusty French bread to soak up the delicious dressing.
  • Wine Pairing: Enjoy with a chilled Sauvignon Blanc or a light rosé for a refreshing meal.

In conclusion, this Niçoise Salad is more than just a recipe; it’s an invitation to explore flavors, colors, and healthy living. Whether you stick to the classic recipe or make it your own, you’ll find joy in every bite. So grab your ingredients, unleash your inner chef, and let’s make magic happen in the kitchen!

Niçoise Salad {Easy French Classic}

Prep Time 10 minutes
Cook Time 20 minutes
Total Time 30 minutes
Servings 4 servings
Calories 350
A vibrant and classic French Niçoise Salad that's quick to prepare and perfect for a light, flavorful meal.

Ingredients

Dressing

  • 1 clove Garlic (Crushed)
  • 1 tbsp Dijon mustard
  • 1 lemon Juice only
  • 6 tbsp Olive oil

Salad potatoes

  • 400 g Salad potatoes (Halved)

Green beans

  • 100 g Green beans

Eggs

  • 4 Eggs (Boiled for 6 minutes)

Little gem lettuce

  • 2 pieces Little gem lettuce (Torn into large pieces)

Black olives

  • 100 g Black olives

Tomatoes

  • 3 wedges Tomatoes (Cut into wedges)

Tuna

  • 300 g Tuna (drained weight) (Chunks or flaked)

Instructions 

  • Whisk dressing ingredients together, season, and set aside.
  • Cook potatoes for 15 mins, add green beans for last 4 mins, then drain and cool.
  • Boil eggs for 6 mins, then cool under cold water.
  • Arrange all ingredients on a platter, top with eggs and tuna, then spoon over dressing.

Notes

This salad is best served fresh and can be customized with your favorite vegetables or proteins.
Calories: 350kcal
Cost: $12
Course: Salad
Cuisine: French
Keyword: Seafood

Unlock the Joy of Meal Prep: A Flavorful Journey Begins!

Welcome to your ultimate guide on meal prep magic! Whether you’re juggling a busy schedule or just looking to eat healthier, meal prep is your secret weapon. With our energizing recipes, you’ll discover how cooking can be both fun and fulfilling. Let’s dive into the world of vibrant, nutritious meals that keep you fueled throughout the week. Get ready to transform your kitchen into a creative playground where healthy eating is a delightful adventure!

Why You’ll Love This Recipe

Let’s talk about the perks of mastering meal prep! Here’s why you’ll fall head over heels for our energizing meal prep ideas:

  • Time-saving magic: With just a few hours of prep, you’ve got healthy meals ready for the entire week!
  • Flavor-packed variety: Say goodbye to boring meals! Enjoy a colorful array of dishes that excite your taste buds.
  • Health benefits: Control what goes into your meals, ensuring they are nutritious and balanced.
  • Budget-friendly: Meal prepping helps you save money by reducing food waste and encouraging smart grocery shopping.
  • Stress reduction: With meals ready to go, you’ll feel less overwhelmed during busy weekdays.

Ingredient Breakdown: Make It Your Own!

Let’s explore the vibrant ingredients that will elevate your meal prep game. Here’s what you need for our delicious meal prep magic:

  • Base grains: Quinoa, brown rice, or farro—perfect for adding fiber and substance.
  • Proteins: Chicken, chickpeas, or tofu—great for building muscle and keeping you full.
  • Colorful veggies: Spinach, bell peppers, and carrots—packed with vitamins and antioxidants.
  • Flavor boosters: Fresh herbs, spices, and citrus—these will take your meals from bland to grand!

Feel free to swap out any ingredients based on your taste preferences or dietary needs. For instance, if you’re vegan, chickpeas or lentils are fantastic protein substitutes!

Pro Tips for Meal Prep Success

Vibrant meal prep dish showcasing a balanced assortment of healthy ingredients.

Ready to elevate your meal prep game? Here are some expert insights:

  • Batch cooking: Prepare larger quantities of grains and proteins at once to save time.
  • Storage containers: Invest in clear, airtight containers to keep meals fresh and visible.
  • Labeling: Use labels with dates to track freshness of your meals throughout the week.
  • Freeze extras: Don’t hesitate to freeze portions for those busy days when cooking isn’t an option.
  • Mix and match: Create different meals using the same base ingredients to keep things interesting.
  • Spice it up: Keep a variety of spices on hand to change the flavor profile of your meals.
  • Prep once, eat twice: Make double portions of a dish and enjoy leftovers for lunch or dinner.
  • Stay organized: Plan your meals ahead of time to streamline your shopping and prep process.

Avoiding Common Mistakes

Even seasoned meal preppers can make mistakes! Here’s how to sidestep the common pitfalls:

  • Too much variety: Keep it simple with a few core dishes to avoid feeling overwhelmed.
  • Neglecting seasonality: Use seasonal produce for the best flavor and cost-effectiveness.
  • Ignoring portion sizes: Be mindful of serving sizes to prevent overeating or waste.
  • Inadequate storage: Ensure your meals are stored properly to avoid spoilage.

Delicious Variations to Spice Things Up

Feeling adventurous? Here are some fun variations to keep your meal prep exciting:

  • Mediterranean Bowl: Swap your grains for couscous and add olives and feta for a Mediterranean twist.
  • Asian-Inspired Stir Fry: Use jasmine rice, tofu, broccoli, and a savory soy sauce for an Asian flair.
  • Southwestern Fiesta: Black beans, corn, and avocado with a cilantro lime dressing create a zesty flavor.
  • Breakfast Prep: Prepare overnight oats or smoothie packs for a quick, nutritious breakfast option.

Storage and Make-Ahead Instructions

Maximize freshness with these storage tips:

  • Refrigeration: Most meal prep dishes can be stored in the fridge for up to 4 days.
  • Freezing: For longer storage, freeze meals in individual portions for up to 3 months.
  • Thawing: Always thaw in the fridge overnight for best results, then reheat thoroughly before eating.

FAQs: Your Meal Prep Questions Answered

Got questions? We’ve got answers! Here are some common queries about meal prep:

  • How do I get started with meal prep? Begin with simple recipes, plan your meals for the week, and shop accordingly.
  • Can I meal prep for an entire month? Yes! Just ensure meals are frozen properly to maintain freshness.
  • What’s the best way to reheat my meals? Use a microwave or stovetop for even heating, adding a splash of water to prevent drying out.
  • Can I meal prep for a family? Absolutely! Adjust portion sizes and recipes based on your family’s preferences.
  • How do I keep my meals from getting boring? Experiment with different spices, sauces, and preparation methods to keep things lively.
  • Are meal prep recipes healthy? Yes! Meal prep allows you to control ingredients, making it easier to eat healthy.
  • What containers are best for meal prep? Look for BPA-free glass or plastic containers that are microwave and dishwasher safe.
  • How long can I store meal prep in the fridge? Generally, up to 4 days is safe for most meals.

Nutritional Tips and Dietary Adaptations

When it comes to healthy eating, nutrition is key! Here’s how to tailor your meal prep:

  • Protein Power: Consider plant-based proteins like lentils or beans for a vegetarian option.
  • Fiber Boost: Incorporate whole grains and a variety of vegetables to keep meals filling.
  • Healthy Fats: Include sources like avocados, nuts, or olive oil for added richness and satisfaction.

Essential Equipment for Successful Meal Prep

Having the right tools can make meal prep a breeze! Here’s what I recommend:

  • Sharp knives: A good knife set makes chopping and prepping efficient.
  • Cutting boards: Have multiple boards to prevent cross-contamination.
  • Mixing bowls: Opt for various sizes for all your mixing needs.
  • Measuring cups and spoons: Precision is key in cooking!
  • Food processor or blender: Great for sauces, dips, and smoothies.
  • Storage containers: Airtight containers in various sizes ensure your meals stay fresh.

Serving Suggestions: Elevate Your Meal Experience

Ready to serve up some deliciousness? Here are some creative serving ideas:

  • Garnish: Fresh herbs, lemon zest, or nuts can add a beautiful finishing touch.
  • Pair with dips: Hummus, tzatziki, or salsa can enhance your meal and add flavor.
  • Side salads: A simple green salad can complement your meal and add crunch.

So there you have it! Your comprehensive guide to making meal prep not just nutritious, but also exciting and enjoyable. Remember, the kitchen is your canvas—paint it with flavors, colors, and creativity. Happy prepping!

Classic Spaghetti Carbonara

Prep Time 10 minutes
Cook Time 15 minutes
Total Time 25 minutes
Servings 4 servings
Calories 550
A quick and creamy Italian pasta dish made with eggs, cheese, pancetta, and pepper.

Ingredients

Pasta

  • 400 grams spaghetti
  • 150 grams pancetta or bacon (diced)
  • 3 large eggs (beaten)
  • 1 cup Parmesan cheese (grated)
  • 1 teaspoon black pepper (freshly ground)

Other

  • Salt (to taste)

Instructions 

  • Cook spaghetti in boiling salted water until al dente, then drain.
  • Cook pancetta in a skillet until crispy.
  • Mix eggs, Parmesan, and pepper in a bowl.
  • Combine hot pasta with pancetta, then quickly mix in the egg mixture to create a creamy sauce.
  • Serve immediately with extra Parmesan and pepper if desired.

Notes

Use fresh eggs for best flavor and texture.
Calories: 550kcal
Cost: $12
Course: Main Course
Cuisine: Italian
Keyword: pasta

Discover the Joy of a Waldorf Salad: A Fresh Take on a Classic

Welcome to a vibrant culinary adventure with our Healthy Waldorf Salad! This dish is not just a salad; it’s a celebration of flavors and textures that will invigorate your taste buds. Imagine crisp apples, crunchy celery, juicy grapes, and toasted nuts all coming together in a creamy dressing that’s both healthy and satisfying. Whether you’re looking for a quick lunch, a delightful side dish, or a crowd-pleasing potluck option, this salad has you covered. Let’s dive into why you’ll love this recipe and how to make it your own!

Why You’ll Love This Recipe

  • Nutritious and Delicious: Packed with fresh ingredients, this salad is a powerhouse of vitamins and minerals, making it a guilt-free indulgence.
  • No Cooking Required: Perfect for those warm days when you want something refreshing without turning on the stove.
  • Quick and Easy: With just a few simple steps, you can whip up this salad in under 20 minutes!
  • Customizable: From the type of apples to the nuts you choose, this recipe allows you to personalize it to your taste.
  • Make-Ahead Friendly: This salad can be prepared in advance, making it an excellent choice for meal prep or entertaining.

Ingredient Breakdown: The Building Blocks of Flavor

Let’s explore the essential ingredients that make this Waldorf Salad a standout dish, along with some tasty substitutions to suit your preferences.

  • Apples: Use 2 cups of chopped tart apples (like Granny Smith) for a crisp, tangy flavor. Want a sweeter twist? Try Fuji or Honeycrisp apples!
  • Granulated Sugar: Just 1 tablespoon enhances the sweetness. For a healthier option, consider honey or maple syrup.
  • Lemon Juice: 2 teaspoons of lemon juice keeps the apples from browning and adds a refreshing zing. Freshly squeezed is best!
  • Celery: 1 cup of chopped celery provides a satisfying crunch. For a twist, try adding diced cucumber.
  • Grapes: 1 cup of halved grapes (red or green) adds juiciness and color. Dried cranberries can also be a sweet alternative!
  • Nuts: 1/2 cup of toasted walnuts or pecans gives a rich, nutty flavor. If allergies are a concern, sunflower seeds are a great substitute.
  • Whipped Cream: 1/2 cup adds creaminess. For a lighter option, consider Greek yogurt or a dairy-free alternative.
  • Mayonnaise: 1/4 cup binds the salad together. Swap for avocado or a vegan mayo for a healthier twist.
  • Kosher Salt: A pinch (1/2 teaspoon) enhances all the flavors. Adjust to taste!

Pro Tips for a Perfect Waldorf Salad

Side view of a fresh Waldorf salad showcasing chopped apples and celery.

To elevate your salad-making game, here are some expert insights:

  • Choose the Right Apples: For the best flavor, use a mix of tart and sweet apples to create a balance.
  • Prep Ahead: Chop your ingredients a few hours in advance, but toss them with the dressing just before serving to maintain freshness.
  • Chill Before Serving: Let the salad sit in the fridge for about 30 minutes to allow the flavors to meld beautifully.
  • Add Texture: Consider adding a handful of mini marshmallows or coconut flakes for an unexpected crunch and sweetness.
  • Experiment with Dressings: Try adding a splash of balsamic vinegar to your creamy dressing for an extra layer of flavor.
  • Always Taste: Before serving, taste your salad and adjust the seasoning if necessary—salt and lemon juice can make a big difference!
  • Use Fresh Ingredients: Freshly picked produce enhances both taste and nutritional value, so shop local when possible.
  • Go Vegan: Substitute the mayo and cream with cashew cream and coconut yogurt for a fully plant-based dish.

Avoid These Common Mistakes

Even the best cooks can make missteps! Here’s how to avoid common pitfalls:

  • Overmixing: Gently fold the ingredients together to maintain the integrity of the apples and grapes.
  • Using Old Produce: Always opt for the freshest apples and grapes to ensure maximum flavor and crunch.
  • Skipping the Lemon Juice: Don’t forget this step! It not only prevents browning but also adds vital acidity.
  • Neglecting to Toast Nuts: Toasting enhances the nutty flavor. Skipping this step can lead to a lackluster taste.
  • Not Adjusting for Dietary Needs: Be mindful of allergies and dietary preferences—always have alternative ingredients on hand!

Delicious Variations to Try

Feel free to get creative! Here are some variations to inspire your Waldorf Salad:

  • Fruit Medley: Add diced pears or pomegranate seeds for an extra burst of flavor and color.
  • Protein-Packed: Toss in shredded chicken or chickpeas for a heartier meal.
  • Spicy Kick: Add a pinch of chili powder or cayenne pepper to the dressing for a surprising twist.
  • Herb Infusion: Incorporate fresh herbs like parsley or mint to brighten the dish.

Storage and Make-Ahead Instructions

This salad is perfect for meal prep! Here’s how to store it:

  • **Refrigeration**: Store in an airtight container in the fridge for up to 3 days. The flavors will deepen, but the apples will lose some crunch.
  • **Make-Ahead**: Prepare the salad base (fruits and nuts) and dressing separately. Combine them just before serving for optimal freshness.
  • **Freezing**: Not recommended, as the apples and grapes will become mushy upon thawing.

Frequently Asked Questions

Got questions? We’ve got answers! Here are some common queries about the Waldorf Salad:

  • Can I make this salad vegan? Yes! Use plant-based alternatives for mayo and cream.
  • How long does the Waldorf Salad last? It can be stored in the fridge for up to 3 days, but it’s best enjoyed fresh.
  • What can I serve with Waldorf Salad? Pair it with grilled chicken, fish, or as a side to your favorite sandwich.
  • Can I use different nuts? Absolutely! Feel free to substitute with almonds, pistachios, or sunflower seeds.
  • How do I prevent the apples from browning? Toss them with lemon juice immediately after cutting.
  • Is this salad gluten-free? Yes, all the ingredients are naturally gluten-free!
  • Can I add more vegetables? Definitely! Consider adding shredded carrots or bell peppers for added crunch.
  • What is the nutritional value of Waldorf Salad? It’s loaded with vitamins and healthy fats, but specific values depend on your ingredient choices.

Nutrition Tips and Dietary Adaptations

This salad can fit into various dietary lifestyles:

  • Low-Calorie: Replace heavy cream with Greek yogurt or a dairy-free option.
  • Low-Carb: Skip the grapes and sugar, and add more nuts and celery instead.
  • Heart-Healthy: Use avocado oil-based mayo and pack in extra nuts or seeds for healthy fats.

Essential Equipment for Success

Here’s what you’ll need to create this delightful salad:

  • Cutting Board: For chopping your fresh ingredients.
  • Sharp Knife: A good knife makes all the difference in prep time.
  • Mixing Bowl: A large bowl for combining all the ingredients.
  • Whisk: For mixing the dressing smoothly.

Serving Suggestions: Make It a Meal!

Your Waldorf Salad can shine as the star of any meal. Here are some serving ideas:

  • **As a Side Dish**: Complement your main course with this refreshing salad.
  • **On a Bed of Greens**: Serve it atop a bed of spinach or arugula for added nutrients.
  • **With Grains**: Mix it with quinoa or farro for a satisfying lunch bowl.

With its vibrant flavors and nutritious ingredients, this Waldorf Salad is sure to become a staple in your kitchen. Remember, cooking is all about joy, creativity, and sharing great meals with loved ones. So grab your ingredients, channel your inner chef, and let’s make a salad that’s not just healthy, but absolutely delicious!

Healthy Waldorf Salad

Prep Time 15 minutes
Cook Time 5 minutes
Total Time 20 minutes
Servings 4 servings
Calories 250
A light and refreshing salad combining crisp apples, crunchy celery, sweet grapes, and toasted nuts, all coated in a creamy dressing.

Ingredients

Fruits and Vegetables

  • 2 cups chopped tart apples (or 2 whole apples)
  • 1 tablespoon granulated sugar
  • 2 teaspoons lemon juice
  • 1 cup chopped celery
  • 1 cup grapes (cut in half)
  • 1/2 cup toasted walnuts or pecans (coarsely chopped)
  • 1/2 cup whipped cream
  • 1/4 cup mayo
  • 1/2 teaspoon kosher salt

Instructions 

  • Combine chopped apples, celery, grapes, and toasted nuts in a large bowl.
  • In a small bowl, mix mayonnaise, whipped cream, lemon juice, sugar, and salt until smooth.
  • Pour the dressing over the fruit and nut mixture and toss gently to combine.
  • Chill in the refrigerator for at least 10 minutes before serving.

Notes

For a dairy-free version, substitute whipped cream with coconut cream.
Calories: 250kcal
Cost: $10
Course: Salad
Cuisine: American
Keyword: fruit, Healthy, Nut

Delight in Crunchy Coleslaw Bliss

Welcome to the ultimate guide for making the best coleslaw! This crunchy coleslaw recipe brings together the vibrant flavors of crunchy cabbage, sweet carrots, and a zesty dressing, creating a side dish that’s perfect for summer BBQs, family picnics, or any meal that needs a refreshing twist. Whether you’re a seasoned chef or a kitchen novice, you’ll find that this recipe is not only easy to follow but also bursting with flavor. Let’s dive into this exciting and nutritious journey!

Why You’ll Love This Recipe

This coleslaw recipe is a crowd-pleaser for several reasons. Here are just a few benefits that make it stand out:

  • Quick Preparation: In just 10 minutes, you can whip up a delicious coleslaw, making it perfect for last-minute gatherings.
  • Crisp Textures: The combination of shredded cabbage and carrots creates a satisfying crunch that’s delightful in every bite.
  • Versatile Usage: This coleslaw not only complements any meal but also serves as a fantastic topping for sandwiches and tacos.
  • Creamy and Tangy: The unique blend of creamy dressing and tangy flavors ensures a flavor explosion that everyone will love.
  • Make-Ahead Friendly: It’s ideal for meal prepping; the flavors deepen and improve after chilling in the fridge!

Ingredient Breakdown

Let’s explore the components that make this coleslaw both delicious and nutritious. Here’s what you’ll need:

  • ¾ cup mayonnaise: A classic base that adds creaminess.
  • ¼ cup Greek yogurt: Offers a tangy twist while reducing calories.
  • 2½ tablespoons white vinegar: Provides acidity that balances the creamy flavors.
  • ½ teaspoon Dijon mustard: Adds depth and a hint of spice.
  • 3 teaspoons granulated sugar: Sweetens the dressing just enough to enhance the flavors.
  • ½ teaspoon celery seeds: Infuses a subtle flavor that is characteristic of classic coleslaw.
  • ¼ teaspoon onion powder: Adds a gentle onion flavor without overpowering the dish.
  • Salt and pepper: Essential for seasoning to taste.
  • 8 cups coleslaw mix (shredded cabbage and carrots): The star of the show, delivering crunch and color!

If you’re looking for substitutions, try replacing mayonnaise with avocado or using a vinegar-based dressing for a lighter version. You can also swap out Greek yogurt with sour cream for a different flavor profile.

Step-by-Step Instructions

A side view of a fresh coleslaw dish featuring creamy dressing and colorful vegetables.

Now, let’s get cooking! Follow these simple steps to create your coleslaw:

  1. In a medium bowl, whisk together the mayonnaise, Greek yogurt, white vinegar, Dijon mustard, sugar, celery seeds, onion powder, salt, and pepper until smooth.
  2. Place the coleslaw mix in a large serving bowl. Pour the dressing over the slaw and toss to coat evenly.
  3. For the best flavor, cover and refrigerate for at least one hour before serving. This allows the ingredients to meld beautifully!

Pro Tips for the Best Coleslaw

Want to elevate your coleslaw game? Check out these expert insights:

  • Chill Time: Allowing your coleslaw to chill not only develops the flavors but also enhances the texture.
  • Experiment with Add-Ins: Try adding diced apples, raisins, or nuts for a twist on the classic recipe.
  • Fresh Ingredients: Using fresh, high-quality vegetables will enhance the overall taste of your dish.
  • Adjust to Taste: Don’t hesitate to modify the sweetness or acidity level according to your preference.
  • Batch It Up: Make a larger batch for parties; coleslaw keeps well and is always a hit!
  • Use a Food Processor: Shred your cabbage and carrots quickly and uniformly with a food processor, saving time.
  • Get Creative with Dressings: Don’t be afraid to try different dressings; a vinegar-based dressing can add a refreshing touch!
  • Leave the Veggies Crunchy: Don’t overmix the coleslaw; you want to maintain that delightful crunch!

Common Mistakes and Troubleshooting

Even the best chefs make mistakes! Here’s how to avoid common pitfalls:

  • Too Watery: If your coleslaw becomes watery, ensure you drain excess moisture from the shredded cabbage before mixing.
  • Overly Sweet: If your coleslaw ends up too sweet, simply add a splash more vinegar or a pinch of salt to balance the flavors.
  • Flavorless Dressing: Always taste your dressing before adding it to the slaw; adjust seasoning as needed!
  • Too Creamy: If it’s too creamy for your liking, add a bit more coleslaw mix or fresh vegetables to balance it out.

Variations to Try

Get creative! Here are some fun variations of coleslaw to suit different tastes:

  • Apple and Walnut Coleslaw: Add diced apples and chopped walnuts for a sweet crunch.
  • Spicy Sriracha Coleslaw: Mix in Sriracha or your favorite hot sauce for a spicy kick.
  • Asian-Inspired Coleslaw: Use sesame oil and rice vinegar in the dressing, and add sliced almonds and mandarin oranges.
  • Tropical Coleslaw: Incorporate pineapple chunks and coconut for a tropical vibe!

Storage and Make-Ahead Instructions

This coleslaw stores well in the refrigerator. It can last for up to 3 days, but keep in mind that it may lose some crunch over time. For the best texture, follow these tips:

  • Store in an Airtight Container: This prevents the coleslaw from absorbing other flavors in the fridge.
  • Make Ahead: Prepare the dressing in advance and mix it with the slaw just before serving.
  • Freeze with Caution: Avoid freezing as the texture of cabbage and carrots can become mushy upon thawing.

Frequently Asked Questions

Here are some common questions about coleslaw:

  • Can I make coleslaw the day before? Yes, but for the best flavor and texture, mix the dressing with the slaw just before serving.
  • What can I serve with coleslaw? Coleslaw pairs beautifully with grilled meats, sandwiches, and tacos.
  • Is coleslaw healthy? Yes, coleslaw can be healthy, especially with a lighter dressing and fresh vegetables.
  • Can I use vinegar instead of mayonnaise? Absolutely! A vinegar-based dressing can create a lighter, tangy coleslaw.
  • How do I cut cabbage for coleslaw? Cut the cabbage into quarters, remove the core, and thinly slice it into shreds.
  • What is the best type of cabbage for coleslaw? Green cabbage is traditional, but red cabbage or a mix of both adds color and flavor!
  • Can I add other vegetables to coleslaw? Yes, shredded bell peppers, radishes, or even broccoli can enhance your coleslaw.
  • How long can I keep coleslaw in the fridge? It can last for up to 3 days in the refrigerator if stored properly.

Nutritional Tips and Dietary Adaptations

This coleslaw can be adapted to fit various dietary needs:

  • Low-Calorie Option: Substitute full-fat mayonnaise with a light version or Greek yogurt.
  • Vegan Version: Use vegan mayo and skip the Greek yogurt for a completely plant-based dish.
  • Gluten-Free: This recipe is naturally gluten-free; just ensure all ingredients are certified gluten-free.
  • Low-Sugar Modification: Reduce the sugar or use a sugar substitute to make it lower in sugar.

Equipment Recommendations

To make your coleslaw preparation smooth and efficient, consider these essential kitchen tools:

  • Mixing Bowls: A set of different-sized bowls is perfect for mixing ingredients.
  • Whisk: A good whisk helps blend your dressing ingredients smoothly.
  • Sharp Knife: For cutting your cabbage and vegetables with ease.
  • Food Processor: A great tool for quickly shredding cabbage and carrots.
  • Airtight Storage Containers: To store your coleslaw and keep it fresh.

Serving Suggestions

To truly enjoy your coleslaw, here are some delicious serving suggestions:

  • As a Side Dish: Serve it alongside grilled chicken, burgers, or hot dogs for that classic BBQ feel.
  • On Sandwiches: Use coleslaw as a tasty topping for pulled pork or roast beef sandwiches.
  • With Tacos: Add a scoop of coleslaw to fish or shrimp tacos for extra crunch and flavor.
  • As a Salad Base: Use coleslaw as a base and top it with your favorite proteins for a meal!

Conclusion

Making coleslaw doesn’t have to be complicated or boring! With this definitive recipe, you’re equipped to create a vibrant, flavor-packed dish that will elevate any meal. So grab your veggies, whip up that dressing, and enjoy the crunch! Remember, the kitchen is your playground—get creative and make this coleslaw your own. Happy cooking!

Best Coleslaw

Prep Time 10 minutes
Total Time 10 minutes
Servings 8 cups
Calories 250
A creamy and tangy coleslaw perfect for picnics and barbecues. Easy to prepare and full of flavor.

Ingredients

Dressing

  • 0.75 cup mayonnaise
  • 0.25 cup Greek yogurt
  • 2.5 tablespoons white vinegar
  • 0.5 teaspoon Dijon mustard
  • 3 teaspoons granulated sugar
  • 0.5 teaspoon celery seeds
  • 0.25 teaspoon onion powder
  • as needed Salt (to taste)
  • to taste Freshly ground black pepper
  • 8 cups coleslaw mix (shredded cabbage and carrots)

Instructions 

  • Whisk together mayonnaise, Greek yogurt, vinegar, mustard, sugar, celery seeds, onion powder, salt, and pepper until smooth.
  • Pour dressing over coleslaw mix and toss to coat evenly.
  • Cover and refrigerate for at least one hour before serving.

Notes

For extra flavor, add a splash of lemon juice or a pinch of paprika.
Calories: 250kcal
Cost: $10
Course: Side Dish
Cuisine: American
Keyword: coleslaw