Author

Ryan

Browsing

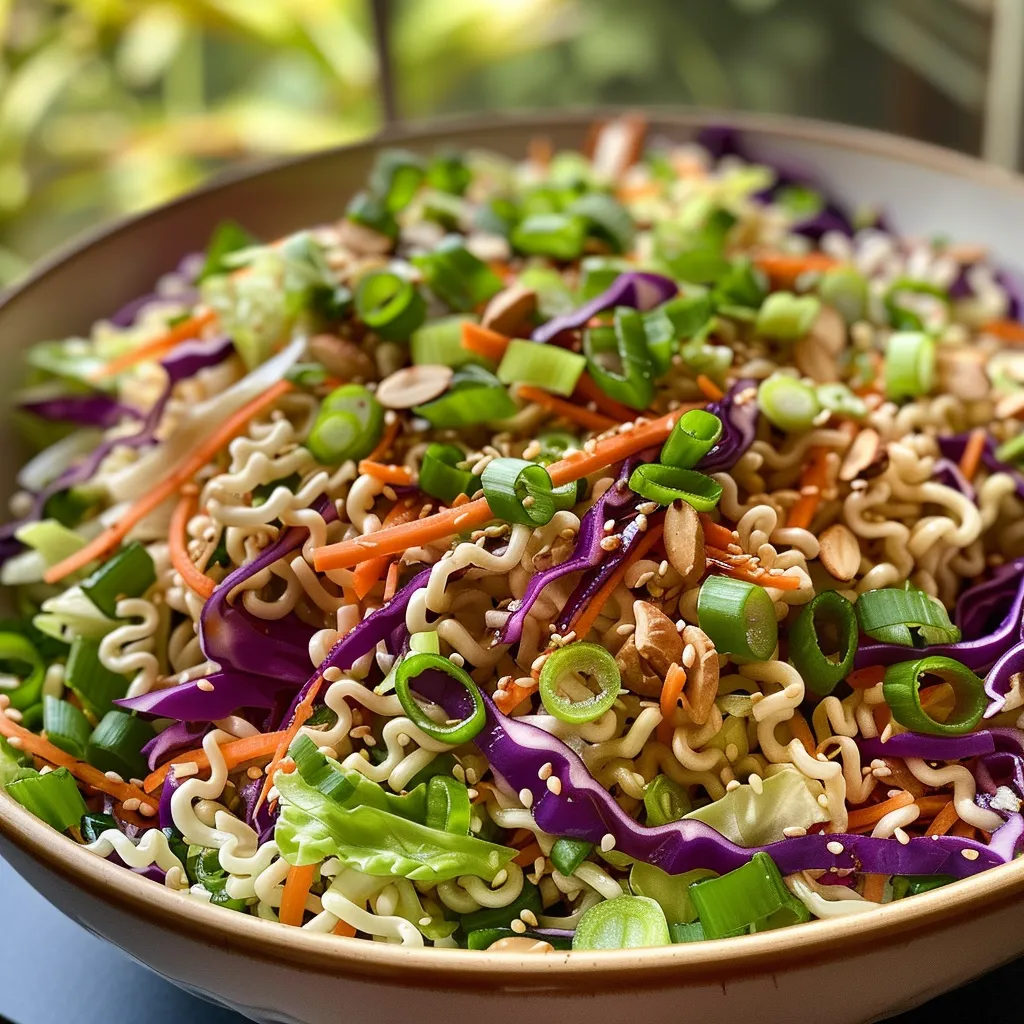
Dive into the Crunchy Ramen Noodle Salad Experience!

Welcome to your new favorite dish! The Crunchy Ramen Noodle Salad is not just a salad; it’s a vibrant explosion of flavor, texture, and nutrition that will keep your taste buds dancing! If you’re looking for a quick, satisfying meal that’s packed with wholesome goodness, you’ve hit the jackpot! In this guide, we’ll explore everything you need to know to create this colorful salad that’s as fun to make as it is to eat.

Why You’ll Love This Recipe

Here are just a few reasons why this salad will become a staple in your kitchen:

  • Quick and Easy: With minimal prep time, you can whip this salad up in under 30 minutes, making it perfect for busy weeknights or last-minute gatherings.
  • Flavor-Packed: Combining savory soy sauce, zesty rice vinegar, and a medley of crunchy vegetables creates a symphony of taste that’s truly irresistible.
  • Versatile: This noodle salad is great on its own or as a complementary side dish for grilled meats or stir-fries.
  • Nutritious: Packed with fresh veggies, healthy fats from nuts, and fiber-rich ramen noodles, this salad is not only delicious but also good for you!
  • Customizable: You can easily swap ingredients to suit your taste or dietary preferences. Go wild with your creativity!

The Ultimate Ingredient Breakdown

Let’s take a closer look at what makes this salad shine and some alternatives you can consider:

  • Sliced Almonds: These provide a delightful crunch and an extra protein boost. If you’re nut-free, try sunflower seeds or pumpkin seeds for a similar texture.
  • Olive Oil: A must for the dressing, use extra virgin olive oil for the best flavor. Avocado oil is a great alternative if you prefer.
  • Rice Vinegar: This adds a tangy punch! You can substitute with apple cider vinegar if needed.
  • Soy Sauce: This is the base of the dressing. For a gluten-free option, use tamari or coconut aminos.
  • Prepackaged Cole Slaw and Broccoli Slaw: These mixes save time! Feel free to use fresh shredded cabbage or a mix of your favorite salad greens.
  • Ramen Noodles: You can use whole grain ramen or even zucchini noodles for a low-carb version.
  • Sesame Seeds: These little seeds add flavor and crunch. You can also use chopped peanuts for a different taste.

Step-by-Step Instructions

Side view of a vibrant Ramen Noodle Salad featuring cole slaw and Ramen noodles.

Ready to get cooking? Follow these simple steps to create your delicious Crunchy Ramen Noodle Salad:

  1. Preheat your oven to 300°F. This helps toast the almonds perfectly.
  2. Toast the almonds: Spread the sliced almonds on a baking sheet and bake for about 8 minutes until fragrant but not golden. Remove and let cool.
  3. Make the dressing: In a medium bowl, whisk together olive oil, rice vinegar, soy sauce, and sugar until the sugar dissolves. Set aside.
  4. Combine the slaw: In a large bowl, mix the prepackaged cole slaw and broccoli slaw.
  5. Prepare the ramen: Before opening the packages, break the ramen noodles into small pieces. Open the packages and add the noodles to your slaw mix, reserving the seasoning packets.
  6. Add the almonds: Toss in the cooled almonds and sesame seeds, mixing well.
  7. Incorporate the dressing: Pour the reserved seasoning packet into the dressing, mix, and then pour over the slaw mixture. Toss to combine.
  8. Chill: Refrigerate the salad for at least 3 hours or overnight to let those flavors meld beautifully. Serve chilled and enjoy!

Pro Tips for the Best Ramen Noodle Salad

Want to elevate your salad game? Check out these expert insights:

  • Chill time matters: Allowing your salad to sit in the fridge helps the flavors develop. Aim for at least 3 hours!
  • Mix it up: Don’t hesitate to add proteins like grilled chicken, shrimp, or tofu to make this a complete meal.
  • Season wisely: Be sure to taste and adjust the seasoning of your dressing. A splash of lime juice can add an extra zest!
  • Get colorful: Use a variety of colorful veggies to make your salad visually appealing and more nutritious.
  • Batch prep: This salad can be made in larger quantities for meal prep. Just omit the almonds until serving to keep them crunchy!
  • Experiment with flavors: Try adding different herbs like cilantro or mint for a fresh twist.
  • Don’t skip the crunch: The toasted nuts are essential for that satisfying crunch, so don’t skip this step!
  • Use high-quality soy sauce: A good soy sauce can elevate the entire dish—opt for low-sodium versions if you’re watching your salt intake.

Common Mistakes and Troubleshooting

Even the best chefs can make mistakes! Here are some common pitfalls and how to avoid them:

  • Overcooking the almonds: Keep a close eye while toasting; they can go from perfect to burnt quickly!
  • Too soggy? If your salad is too wet, try adding more noodles or nuts to absorb the excess dressing.
  • Flavorless dressing: Adjust the soy sauce and vinegar to your taste. Don’t be afraid to experiment!
  • Pasta-like texture? If your ramen is too soft, break them into smaller pieces before adding, and don’t overmix.

Variations to Try

One of the best parts about this salad is how easily it can be adapted! Here are some fun variations:

  • Spicy Kick: Add a teaspoon of Sriracha or chili flakes to the dressing for some heat.
  • Asian Fusion: Incorporate edamame and seaweed salad for a unique twist.
  • Southwestern Style: Swap the dressing for a lime-cilantro vinaigrette and add black beans and corn.
  • Fruit Infusion: Toss in diced mango or pineapple for a sweet and tropical flavor.

Storage and Make-Ahead Instructions

This salad is perfect for meal prep! Here’s how to store it:

  • Refrigeration: Store in an airtight container in the fridge for up to 3 days. The flavors will continue to meld as it sits.
  • Make-Ahead: You can prepare the salad a day in advance. Just add the nuts right before serving to keep them crunchy.

Frequently Asked Questions

Got questions? We’ve got answers!

  • Can I use whole wheat ramen? Absolutely! Whole wheat ramen is a great option for a healthier twist.
  • Is this salad suitable for vegans? Yes! Just ensure you use vegan-friendly soy sauce.
  • How long can I keep leftovers? Leftovers can be stored in the fridge for up to 3 days, but the salad is best enjoyed fresh.
  • Can I freeze this salad? It’s not recommended to freeze the salad as the texture of the noodles and veggies may suffer.
  • What can I serve with this salad? This salad pairs wonderfully with grilled chicken, fish, or as a side to Asian-inspired dishes.
  • Can I add protein to this salad? Definitely! Grilled chicken, shrimp, or tofu are all excellent additions.
  • What if I don’t like soy sauce? You can substitute with a low-sodium soy sauce or coconut aminos for a different flavor.
  • Is this salad gluten-free? You can make it gluten-free by using gluten-free ramen and tamari instead of soy sauce.

Nutrition Tips and Dietary Adaptations

This Crunchy Ramen Noodle Salad is not only delicious but also nutritious. Here are some tips:

  • Boost fiber: Add more veggies like bell peppers, cucumbers, or carrots for added crunch and fiber.
  • Protein power: For a complete meal, include grilled chicken, tofu, or chickpeas.
  • Low-carb option: Swap noodles for spiralized zucchini or cabbage for a lighter version.
  • Watch the dressing: Use less sugar or a sugar substitute to reduce calories while maintaining flavor.

Essential Equipment Recommendations

To make your cooking experience smooth and enjoyable, here are some essential tools:

  • Sharp Knife: A good knife is crucial for chopping vegetables evenly.
  • Cutting Board: A sturdy board makes prep easy and safe.
  • Mixing Bowls: Have a variety of sizes for combining ingredients.
  • Baking Sheet: Essential for toasting nuts and seeds perfectly.
  • Whisk: A must for mixing dressings thoroughly.

Serving Suggestions

Now that you’ve created this stunning salad, here are some fun serving ideas:

  • As a main: Serve it as a standalone meal, topped with grilled chicken or tofu.
  • As a side: Perfect alongside grilled meats, Asian-style dishes, or at potlucks!
  • In a wrap: Use the salad as a filling for lettuce wraps or whole grain tortillas.
  • With a drizzle: Top with extra dressing or a sprinkle of sesame seeds before serving for added flair.

Conclusion: Your New Go-To Salad Awaits!

The Crunchy Ramen Noodle Salad is a delightful, versatile dish that can easily become a favorite in your household. With its vibrant flavors and textures, it’s not just a meal; it’s a celebration of healthy eating. Whether you’re making it for a quick lunch, a family dinner, or a gathering with friends, this salad is sure to impress. So grab your ingredients, unleash your creativity, and enjoy a bowl of this deliciousness. Happy cooking!

Ramen Noodle Salad

Prep Time 15 minutes
Cook Time 10 minutes
Total Time 25 minutes
Servings 8 servings
Calories 350
A flavorful and crunchy ramen noodle salad perfect for potlucks and gatherings, combining fresh slaw, toasted almonds, and a savory dressing.

Ingredients

Dressing

  • 1/2 cup olive oil
  • 1/4 cup rice vinegar
  • 3 tablespoons Soy Sauce
  • 1/4 cup sugar
  • 1 package prepackaged cole slaw mix
  • 1 package prepackaged broccoli slaw mix
  • 2 packages Ramen Noodles (beef or oriental flavor) (broken into small pieces)
  • 1/4 cup seeded sesame seeds (or sunflower seeds or raw chopped peanuts)

Instructions 

  • Preheat oven to 300°F (150°C). Toast almonds for 8 minutes until fragrant.
  • Mix olive oil, vinegar, soy sauce, and sugar to make dressing. Set aside.
  • Combine slaw mixes in a large bowl. Break ramen noodles into small pieces and add to slaw.
  • Add cooled almonds and sesame seeds to the slaw. Mix in seasoning from ramen packets into dressing, then combine with slaw mixture.
  • Refrigerate for at least 3 hours. Serve chilled.

Notes

For extra crunch, add chopped peanuts or sunflower seeds.
Calories: 350kcal
Cost: $15
Course: Salad
Cuisine: American
Keyword: Almonds, ramen, Slaw

Unleash the Flavor: Why This Keto Taco Salad Bowl is a Must-Try!

Welcome to a culinary adventure where flavor meets health! This Keto Taco Salad Bowl is not just another salad; it’s a vibrant explosion of tastes and textures that will make your taste buds dance. Imagine crispy lettuce paired with savory ground beef, creamy avocado, and zesty pico de gallo, all topped with a squeeze of fresh lime. Whether you’re on a ketogenic journey or just looking to spice up your meal prep, this keto-friendly dish promises satisfaction without the carbs. Dive into this deliciously balanced bowl that celebrates the essence of Mexican cuisine while keeping your macros in check!

Why You’ll Love This Recipe

Here’s why this Keto Taco Salad will quickly become your new favorite:

  • Quick and Easy: Ready in under 30 minutes, it’s perfect for busy weeknights.
  • Full of Flavor: Packed with spices and fresh ingredients, this salad is bursting with taco goodness.
  • Low Carb Delight: Enjoy a satisfying meal without the guilt—ideal for your keto lifestyle.
  • Meal Prep Friendly: Great for make-ahead meals; stores well in the fridge for quick lunches.
  • Customizable: Easily swap ingredients to suit your taste preferences or dietary needs.

Ingredients Breakdown

Here’s what you’ll need to create your stunning Keto Taco Salad Bowl:

  • 1 cup Romain lettuce, chopped: A fresh and crunchy base to hold all the delicious toppings.
  • 1/2 lb ground beef, cooked in street taco seasoning: The star protein that brings savory depth.
  • 2 green onions, chopped: For a mild onion flavor and a pop of color.
  • 1/4 cup chiles piquin, finely chopped: Adds a spicy kick to elevate your salad.
  • 1/2 cup black soy beans: A low-carb alternative to traditional beans that adds protein.
  • 1/2 cup shredded cheese: Choose a blend suitable for tacos to enhance the flavor.
  • 1/2 cup pico de gallo: Fresh salsa for that zesty, tangy burst.
  • 1/2 avocado, sliced: Creamy texture that complements the crunchy ingredients.
  • 2 wedges of lime: For a refreshing citrusy finish.

Step-by-Step Instructions

Juicy Keto Taco Salad Bowl featuring Romaine lettuce, ground beef, and avocado.

Follow these simple steps to assemble your Keto Taco Salad Bowl:

  1. Begin by laying a bed of chopped Romain lettuce at the bottom of your bowl.
  2. In a skillet, cook the ground beef with street taco seasoning until fully cooked. Mix in the green onions and chiles piquin.
  3. On top of the lettuce, evenly distribute the cooked beef mixture.
  4. Add the black soy beans over the beef.
  5. Sprinkle the shredded cheese generously across the bowl.
  6. Add dollops of pico de gallo around the bowl for bursts of flavor.
  7. Place the sliced avocado around the bowl for creamy texture.
  8. Finally, garnish with lime wedges for a fresh, citrusy zing.

Pro Tips for the Perfect Salad

Maximize your taco salad experience with these expert tips:

  • Fresh Ingredients: Always use the freshest produce available for maximum flavor.
  • Homemade Taco Seasoning: For a personal touch, make your own seasoning blend using chili powder, cumin, garlic powder, and salt.
  • Meal Prep: Prepare ingredients in advance and assemble just before serving to maintain freshness.
  • Spice it Up: Add jalapeños or hot sauce for an extra kick if you enjoy heat.
  • Cheese Variations: Experiment with different types of cheese like pepper jack for a spicy twist.
  • Protein Alternatives: Substitute ground beef for turkey, chicken, or even tofu for a plant-based version.
  • Vegan Option: Replace beef with lentils and use vegan cheese for a completely plant-based salad.
  • Texture Matters: Combine soft and crunchy toppings for a more satisfying eating experience.

Common Mistakes to Avoid

Ensure your taco salad is a hit by steering clear of these pitfalls:

  • Overcooking the Beef: Avoid dry meat by cooking just until browned and no longer.
  • Too Many Toppings: Balance is key; too many ingredients can overwhelm the salad.
  • Skipping the Lime: Don’t forget the lime—its acidity brightens the entire dish.
  • Using Low-Quality Ingredients: Quality matters; opt for fresh, organic where possible.

Creative Variations to Try

Mix things up with these exciting variations:

  • Southwest Chicken Salad: Swap ground beef for grilled chicken breast and add corn.
  • Mexican Cauliflower Rice Bowl: Replace lettuce with cauliflower rice for a unique twist.
  • Fish Taco Salad: Use grilled tilapia or shrimp for a seafood version.
  • Spicy Zucchini Taco Bowl: Incorporate sautéed zucchini for added veggies and flavor.

Storage and Make-Ahead Instructions

This Keto Taco Salad Bowl can be prepped in advance:

  • Fridge Storage: Store components separately in airtight containers for up to 4 days.
  • Assemble Just Before Serving: Combine ingredients right before eating to keep lettuce crisp.
  • Freezing: Avoid freezing assembled salad; freeze cooked beef separately if needed.

Frequently Asked Questions

Got questions? We’ve got answers!

  • Can I make this recipe vegetarian? Yes! Substitute ground beef with lentils or black beans.
  • How many carbs are in this salad? Approximately 8-10 grams per serving, depending on the toppings.
  • What can I use instead of Romain lettuce? Any leafy greens, such as spinach or kale, work well.
  • Is this salad suitable for meal prep? Absolutely! Store ingredients separately for easy assembly during the week.
  • Can I add fruits? Yes! Consider adding diced mango or pineapple for a tropical twist.
  • How do I make it spicier? Incorporate jalapeños or a drizzle of hot sauce during assembly.
  • What’s the best cheese to use? A taco blend, cheddar, or pepper jack are all excellent choices.
  • Can I use canned beans? Yes, just rinse them thoroughly to reduce sodium content.

Nutrition Tips and Dietary Adaptations

Customize your salad to fit your dietary needs:

  • Low Carb: Stick to the basic ingredients and avoid high-carb toppings.
  • Gluten-Free: This salad is naturally gluten-free—enjoy without worry!
  • Dairy-Free: Opt for non-dairy cheese or skip cheese altogether for a dairy-free version.

Essential Equipment for Preparation

To whip up your Keto Taco Salad Bowl, you’ll need:

  • Skillet: For cooking the ground beef to perfection.
  • Cutting Board: A sturdy surface for chopping veggies and assembling.
  • Sharp Knife: Essential for slicing ingredients quickly and efficiently.
  • Mixing Bowls: For combining ingredients during prep.

Serving Suggestions

Elevate your dining experience with these serving ideas:

  • Pair with Chilled Beverages: Serve with sparkling water or a low-carb drink for refreshment.
  • Side Dishes: Accompany with a side of guacamole or low-carb tortilla chips.
  • Family Style: Present a large bowl for everyone to customize their servings.

In conclusion, the Sizzling Keto Taco Salad Bowl is not just a meal; it’s a celebration of flavors that fits right into your healthy lifestyle. Whether you’re preparing it for a family dinner or meal prepping for the week, this dish is sure to impress! So grab your ingredients and get ready to savor the vibrant, delicious, and healthful goodness that awaits!

Keto Taco Salad Bowl

Prep Time 10 minutes
Cook Time 15 minutes
Total Time 25 minutes
Servings 2 servings
Calories 550
A flavorful low-carb salad bowl combining seasoned ground beef, fresh vegetables, and cheese for a satisfying keto meal.

Ingredients

Vegetables

  • 1 cup Romain lettuce, chopped
  • 2 green onions green onions, chopped
  • 1/4 cup chiles piquin, finely chopped
  • 1/2 cup black soy beans

Protein

  • 1/2 lb ground beef, cooked in street taco seasoning

Dairy & Cheese

  • 1/2 cup shredded cheese (preferably a blend suitable for tacos)
  • 1/2 cup pico de gallo
  • 1/2 avocado sliced
  • 2 wedges lime

Instructions 

  • Lay chopped lettuce in your bowl.
  • Cook ground beef with taco seasoning; mix in green onions and chiles piquin.
  • Distribute beef mixture over lettuce.
  • Add black soy beans, cheese, pico de gallo, and avocado slices.
  • Garnish with lime wedges before serving.

Notes

For extra flavor, add a squeeze of lime before eating.
Calories: 550kcal
Cost: $15
Course: Main Course
Cuisine: Mexican
Keyword: Beef, Keto, Salad

Discover the Joy of Our Green Goddess Salad!

Welcome to the vibrant world of the Green Goddess Salad! Packed with a delightful mix of textures and flavors, this salad is not just a feast for the eyes but also a powerhouse of nutrition. With crisp romaine, fresh spinach, and creamy avocado, it’s the perfect dish to whip up for any occasion. Whether you’re looking for a quick lunch, a side for dinner, or a standout dish for a gathering, this salad will elevate your plate and spark joy!

Why You’ll Love This Recipe

Here are just a few reasons why this Green Goddess Salad will become a staple in your kitchen:

  • Nutritious Ingredients: Packed with leafy greens, healthy fats, and protein-rich yogurt, this salad is a nutritional powerhouse.
  • Quick and Easy: With minimal prep time, you can whip up this salad in under 30 minutes, making it perfect for busy weekdays.
  • Customizable: You can easily tweak this goddess salad to fit your taste preferences or dietary needs.
  • Impressive Presentation: The vibrant colors make this salad visually appealing, perfect for impressing guests at gatherings.
  • Deliciously Satisfying: The combination of creamy avocado and crunchy veggies provides a satisfying mix of textures that will keep you coming back for more.

Ingredient Breakdown

Let’s dive into the ingredients that make this Green Goddess Salad a standout dish:

  • 4 cups romaine lettuce, chopped: The crunchy base that adds a refreshing crunch.
  • 1 cup baby spinach, roughly chopped: Nutrient-dense and packed with flavor.
  • 1 cup asparagus, trimmed and blanched: Adds a pop of color and a delightful crunch.
  • 1 avocado, sliced: Creamy and rich, it balances the crunch beautifully.
  • 1/4 cup pumpkin seeds: Adds a nutty crunch and healthy fats.
  • 1/4 cup microgreens or sprouts: A beautiful finishing touch that boosts nutrition.
  • 1/2 cup Greek yogurt: Creamy base for the dressing, packed with protein.
  • 1/4 cup fresh parsley, chopped: Freshness that enhances flavor.
  • 1/4 cup fresh chives, chopped: Adds a mild onion flavor.
  • 2 tbsp lemon juice: A zesty kick to brighten the salad.
  • 1 clove garlic, minced: Adds depth and flavor.
  • Salt and pepper, to taste: Essential for seasoning.

How to Make the Green Goddess Salad

Side view of a delicious Green Goddess Salad with fresh ingredients visible, including avocado and spinach.

Ready to whip up this delicious salad? Follow these simple steps:

  1. Chop your greens: Start by chopping the romaine lettuce and roughly chopping the baby spinach. Toss them together in a large salad bowl for that crunchy base.
  2. Add the asparagus: Take your blanched asparagus and chop it into bite-sized pieces. Toss it into the bowl with the greens.
  3. Slice the avocado: Carefully slice your avocado and add it to the salad for creamy goodness.
  4. Sprinkle on the seeds: Toss in the pumpkin seeds for a nutty crunch that elevates your salad.
  5. Top with microgreens: Finish off your salad by adding the microgreens or sprouts on top.
  6. Make the dressing: In a bowl, combine the Greek yogurt, chopped parsley, chopped chives, lemon juice, and minced garlic. Whisk until smooth and creamy.
  7. Season it up: Add salt and pepper to the dressing to taste.
  8. Toss it all together: Drizzle the dressing over the salad and give everything a good toss.
  9. Serve and enjoy: Plate up your vibrant Green Goddess Salad and dig in!

Pro Tips for the Perfect Salad

  • Fresh Ingredients: Always use the freshest ingredients for the best flavor and nutrition.
  • Customize Your Greens: Feel free to mix in other greens like kale or arugula for an extra nutrient boost.
  • Seasonal Add-ins: Change up the veggies based on the season or what you have on hand.
  • Make It Ahead: Prepare the salad and dressing separately to keep it fresh for longer.
  • Experiment with Dressings: Try different dressings like tahini or balsamic vinaigrette for a twist.
  • Chill Before Serving: Letting the salad chill in the fridge for about 15 minutes enhances the flavors.
  • Garnish Generously: Don’t be shy with the toppings—more is more!
  • Enjoy with Protein: Add grilled chicken or chickpeas to make it a complete meal.

Common Mistakes & Troubleshooting

Here are a few common mistakes to avoid:

  • Overdressing: Too much dressing can make the salad soggy. Use just enough to coat the greens.
  • Undercooking Asparagus: Ensure the asparagus is blanched enough to retain its crunch but still tender.
  • Skipping Seasoning: Salt and pepper are crucial; don’t skip them to enhance flavors.
  • Not Chilling: Serving a warm salad can dull the flavors; refrigerate for a refreshing bite.

Variations to Try

Make this Green Goddess Salad your own! Here are some fun tweaks:

  • Protein-Packed: Add grilled chicken, shrimp, or chickpeas for extra protein.
  • Nutty Delight: Swap pumpkin seeds for sunflower seeds or sliced almonds for a different crunch.
  • Cheesy Goodness: Sprinkle feta or goat cheese for a creamy, tangy addition.
  • Fruit Twist: Add sliced strawberries or apple for a sweet contrast to the savory flavors.

Storage & Make-Ahead Instructions

Want to prepare this salad in advance? Here’s how:

  • Store Separately: Keep the salad and dressing in separate containers to maintain freshness.
  • Refrigerate: The salad can be stored in the fridge for up to 2 days, but it’s best enjoyed fresh.
  • Dress Just Before Serving: To prevent sogginess, only add the dressing right before you enjoy it.

Frequently Asked Questions

  • Can I use different greens? Absolutely! Feel free to mix and match your favorite greens.
  • Is this salad vegan? You can make it vegan by substituting Greek yogurt with a plant-based alternative.
  • How long does the dressing last? The dressing can be stored in the fridge for up to a week.
  • Can I add cooked grains? Yes! Quinoa or farro would be fantastic additions for more texture.
  • What’s the best way to chop the greens? Use a sharp knife to ensure clean cuts without bruising the leaves.
  • Can I freeze this salad? It’s best enjoyed fresh, but you can freeze the dressing separately.
  • What can I substitute for avocado? Try using hummus or tahini for a creamy texture without the avocado.
  • How can I make this salad more filling? Add your favorite protein source or grains to make it more substantial.

Nutrition Tips and Dietary Adaptations

This Green Goddess Salad is not only delicious but also nutritious! Here are some tips:

  • Balanced Meal: Pair with a lean protein to make it a complete meal.
  • Low-Calorie Option: Reduce the amount of dressing to lower calorie intake.
  • Gluten-Free: This salad is naturally gluten-free; just ensure your dressing is also gluten-free.
  • Boost Fiber: Add beans or lentils for extra fiber and protein.

Recommended Equipment

To make your salad-making easier, here’s a list of handy kitchen tools:

  • Sharp Chef’s Knife: For precise vegetable chopping.
  • Cutting Board: A sturdy surface for all your chopping needs.
  • Large Mixing Bowl: To toss all your ingredients together.
  • Whisk: For mixing the dressing until smooth.
  • Salad Tongs: For serving and tossing the salad effortlessly.

Serving Suggestions

This Green Goddess Salad is incredibly versatile! Here are some great serving ideas:

  • As a Side Dish: Serve alongside grilled chicken, steak, or fish for a balanced meal.
  • For Meal Prep: Portion the salad into containers for easy grab-and-go lunches.
  • At Gatherings: This salad is a crowd-pleaser at parties and potlucks!
  • With Whole Grains: Pair with quinoa or a slice of whole-grain bread for a wholesome meal.

In conclusion, the Green Goddess Salad is not just a dish; it’s an experience! With a burst of flavors, colors, and textures, it’s sure to please everyone at the table. So, gather your ingredients and get ready to whip up this deliciously nutritious salad that sparks joy every time you serve it. Happy cooking!

Green Goddess Salad

Prep Time 15 minutes
Cook Time 5 minutes
Total Time 20 minutes
Servings 4 servings
Calories 250
A vibrant and nutritious salad featuring fresh greens, creamy avocado, and a herby yogurt dressing, perfect for a healthy meal.

Ingredients

Greens

  • 4 cups romaine lettuce, chopped
  • 1 cup baby spinach, roughly chopped

Vegetables

  • 1 cup asparagus, trimmed and blanched
  • 1 each avocado, sliced

Seeds & Microgreens

  • 1/4 cup pumpkin seeds
  • 1/4 cup microgreens or sprouts

Dressing

  • 1/2 cup Greek yogurt
  • 1/4 cup fresh parsley, chopped
  • 1/4 cup fresh chives, chopped
  • 2 tbsp lemon juice
  • 1 clove garlic, minced

Seasoning

  • to taste Salt and pepper

Instructions 

  • Chop and toss the greens in a bowl.
  • Add chopped, blanched asparagus and sliced avocado.
  • Sprinkle pumpkin seeds and microgreens on top.
  • Mix Greek yogurt, parsley, chives, lemon juice, and garlic to make the dressing.
  • Season the dressing with salt and pepper, then toss with the salad.
  • Serve immediately and enjoy!

Notes

Feel free to customize with your favorite herbs or add grilled chicken for extra protein.
Calories: 250kcal
Cost: $15
Course: Salad
Cuisine: Healthy
Keyword: Vegetables

Discover the Zesty Chickpea Avocado Salad: A Flavorful Escape!

Welcome to a world of vibrant flavors with our Zesty Chickpea Avocado Salad! This delightful dish is not just a salad; it’s a celebration of nutrition and taste that energizes your lunch break. Packed with protein from chickpeas and healthy fats from avocados, this salad will keep you satisfied and full of energy throughout your day. In this article, we’ll explore everything you need to know about this invigorating dish, from its ingredients to variations and tips for perfecting your salad-making skills.

Why You’ll Love This Chickpea Avocado Salad

Let’s dive into the reasons why this salad should become a staple in your kitchen:

  • Quick and Easy: If you’re short on time, this salad comes together in just 15 minutes, making it perfect for busy days.
  • Nutrient-Packed: With chickpeas providing plant-based protein and avocados offering healthy fats, this salad is a nutritional powerhouse.
  • Customizable: You can easily modify ingredients based on what you have on hand or your personal preferences.
  • Meal Prep Friendly: This salad is ideal for meal prep; it keeps well in the fridge and is perfect for grab-and-go lunches.
  • Deliciously Versatile: Whether enjoyed as a side dish or a main course, this salad fits seamlessly into any meal.

Ingredients You’ll Need

Here’s a breakdown of the ingredients for your Zesty Chickpea Avocado Salad:

  • 1 can of chickpeas: Drained and rinsed, these provide the bulk of protein.
  • 2 ripe avocados: Diced, they add creaminess and healthy fats.
  • 1 cup cherry tomatoes: Halved for a burst of sweetness.
  • 1/4 cup red onion: Finely chopped for a bit of bite.
  • 1/4 cup fresh cilantro: Chopped to brighten the dish.
  • Juice of 2 limes: Provides a zesty kick and prevents browning of the avocados.
  • Salt and pepper: To taste, enhancing all the flavors.

Feel free to substitute ingredients based on your dietary needs or what you have available. For instance, if you’re looking for an additional protein boost, consider adding grilled chicken or quinoa!

How to Make Your Chickpea Avocado Salad

Side angle shot of a fresh salad with chickpeas, avocados, and cherry tomatoes.

This section breaks down the preparation into simple steps:

Step 1: Prep Your Ingredients

Gather all your ingredients and wash the veggies carefully. Chop the avocados, cherry tomatoes, and cilantro, ensuring they are ready to go.

Step 2: Combine the Veggies

In a large mixing bowl, combine the chickpeas, diced avocados, halved cherry tomatoes, finely chopped red onion, and fresh cilantro.

Step 3: Make the Dressing

In a small bowl, whisk together the lime juice, salt, and pepper until well combined. This dressing brings the salad to life!

Step 4: Toss and Serve

Pour the dressing over the salad and gently toss to mix everything together. Serve immediately or let it chill in the fridge for up to 2 hours for flavors to meld.

Pro Tips for Perfecting Your Salad

Here are some expert insights to elevate your salad game:

  • Choose ripe avocados: They should be slightly soft to the touch but not mushy for optimal texture.
  • Add lime juice immediately: This helps prevent the avocados from browning and keeps your salad looking fresh.
  • Experiment with spices: Try adding cumin, chili powder, or even a dash of paprika for an extra flavor boost.
  • For added crunch: Toss in some chopped nuts or seeds like pumpkin seeds or sliced almonds.
  • Make it a meal: Add grilled chicken, shrimp, or tofu for a hearty meal option.
  • Store properly: To keep leftovers fresh, store the salad without dressing and add it just before serving.
  • Use fresh herbs: Fresh herbs like basil or parsley can be a great addition for added flavor.
  • Keep it colorful: Mixing in colorful vegetables not only makes it visually appealing but adds various nutrients!

Common Mistakes & Troubleshooting

Here are some common pitfalls and how to avoid them:

  • Overripe avocados: Make sure to check your avocados; if they’re too mushy, they won’t hold up in the salad.
  • Too much dressing: Start with a little dressing; you can always add more, but it’s tougher to fix a soggy salad!
  • Chickpeas not rinsed: Always rinse canned chickpeas to remove excess sodium and improve flavor.
  • Ingredients too large: Ensure you chop your ingredients into bite-sized pieces for easier eating.

Delicious Variations of Chickpea Avocado Salad

Feeling adventurous? Here are some fun variations to try:

  • Mexican Twist: Add black beans, corn, and diced jalapeños for a fiesta in a bowl!
  • Greek Style: Mix in feta, olives, and diced cucumber for a Mediterranean flair.
  • Spicy Kick: Add diced red chili or a splash of hot sauce for those who love heat!
  • Fruit Fusion: Incorporate diced mango or pineapple for a tropical twist.

Storage and Make-Ahead Instructions

This salad is perfect for meal prep! Here’s how to store it:

  • Refrigeration: Store in an airtight container in the fridge for up to 2 days. Keep the dressing separate until ready to eat.
  • Make-Ahead: Prep all ingredients except the avocados and dressing a day ahead. Add them just before serving for freshness.

Frequently Asked Questions (FAQ)

Here are some common questions about the Zesty Chickpea Avocado Salad:

  • Can I use frozen chickpeas? Yes! Just thaw and rinse them before using.
  • Is this salad vegan? Absolutely! It’s completely plant-based.
  • What can I substitute for lime juice? Lemon juice works well in a pinch.
  • Can I make this salad spicy? Yes! Add diced jalapeños or a sprinkle of cayenne pepper.
  • How can I make it lower in calories? Reduce the amount of avocado or use less dressing.
  • What is the best way to serve this salad? It’s delicious on its own or served in a wrap!
  • Can I add grains? Definitely! Quinoa or brown rice can be wonderful additions.
  • How long does it last? Best consumed within 2 days for optimal freshness.

Nutrition Tips and Dietary Adaptations

This salad is naturally healthy, but here are some tips for enhancing its nutritional value:

  • For extra fiber: Add chia seeds or flaxseeds.
  • For a protein boost: Incorporate cooked quinoa, grilled chicken, or tofu.
  • To make it gluten-free: Ensure all ingredients are certified gluten-free.
  • For a low-carb version: Swap chickpeas with diced zucchini or cauliflower.

Equipment Recommendations

To make this salad, you’ll need:

  • Mixing bowl: A large bowl for combining all the ingredients.
  • Small bowl: For whisking the dressing.
  • Cutting board and knife: Essential for chopping your veggies.
  • Whisk: To blend your dressing smoothly.

Serving Suggestions

To enjoy your Zesty Chickpea Avocado Salad, consider these serving ideas:

  • As a side dish: Perfect with grilled meats or fish.
  • In a wrap: Roll it up in a tortilla for a portable meal.
  • On top of greens: Serve it over a bed of spinach or arugula for extra nutrients.
  • With whole-grain crackers: A great snack or light meal option!

Conclusion

Your Zesty Chickpea Avocado Salad is more than just a meal; it’s a delightful, nutritious experience that brings joy to your table. With its vibrant colors, fresh flavors, and endless possibilities, this salad is sure to become a favorite in your home. So gather your ingredients, unleash your inner chef, and enjoy a healthy dish that’s as fun to make as it is to eat!

Chickpea Avocado Salad: Refreshing Recipe for a Healthy Lunch

Prep Time 10 minutes
Total Time 10 minutes
Servings 4 servings
Calories 350
A quick and nutritious salad combining chickpeas, ripe avocados, and fresh vegetables, perfect for a healthy lunch.

Ingredients

Canned Goods

  • 1 can chickpeas (drained and rinsed)
  • 2 pieces ripe avocados (diced)
  • 1 cup cherry tomatoes (halved)
  • 1/4 cup red onion (finely chopped)
  • 1/4 cup fresh cilantro (chopped)
  • 2 pieces limes (juiced)
  • to taste salt and pepper

Instructions 

  • Combine chickpeas, avocados, cherry tomatoes, red onion, and cilantro in a large bowl.
  • Whisk lime juice with salt and pepper in a small bowl.
  • Pour dressing over salad and toss gently.
  • Serve immediately or refrigerate up to 2 hours.

Notes

For extra flavor, add a pinch of chili flakes or cumin.
Calories: 350kcal
Cost: $10
Course: Salad
Cuisine: international
Keyword: avocado, Chickpeas

Transform Your Dinner Game With This Bold Big Mac Salad

Are you ready to elevate your dinner experience? Dive into the vibrant world of nutrition with our Big Mac Salad! This exciting recipe takes all the bold flavors you love and transforms them into a nutritious, hearty meal. Perfect for busy days and bursting with goodness, this salad will fuel your adventures without sacrificing taste. Whether you’re a fan of fast food or just in need of a quick, satisfying meal, this Big Mac salad is a must-try!

Why You’ll Love This Recipe

This recipe isn’t just about taste; it’s packed with benefits that will make you fall in love with healthy eating!

  • Quick and Easy: You can whip up this Big Mac salad in under 30 minutes, making it a perfect weeknight dinner option.
  • Low Carb Delight: This salad provides all the Big Mac flavors without the carbs of a traditional burger, ideal for low-carb diets.
  • Customizable: Tailor the ingredients to your taste—swap out vegetables or proteins to suit your mood!
  • Meal Prep Friendly: Great for meal prep! Make a big batch and enjoy it throughout the week.
  • Family-Friendly: Kids will love the flavors, making it a hit at the dinner table!

Ingredient Breakdown

Let’s dive into the ingredients that make this salad a winner and explore some substitutions to keep things fresh!

  • Ground Beef (1 pound): The star protein of our salad. You can swap it for turkey, chicken, or even plant-based options like lentils or quinoa for a vegetarian twist.
  • Romaine Lettuce (8 cups, chopped): The crunchy base of the salad. You can use iceberg lettuce or mixed greens for a different vibe.
  • Cherry Tomatoes (1 cup, halved): Adds a burst of sweetness. Feel free to replace them with diced bell peppers or cucumbers.
  • Red Onion (½ medium, sliced): For a sharp flavor. You can substitute with green onions or omit it if you prefer.
  • Pickle Chips (2 tablespoons): Essential for that Big Mac taste. You can use dill pickles or relish if you like.
  • Cheddar Cheese (1 cup, shredded): Adds creaminess. Swap it for feta or omit for a dairy-free version!

For the Big Mac dressing, here’s what you’ll need:

  • Mayonnaise (½ cup): The base of the dressing. Use Greek yogurt for a lighter option.
  • Sweet Relish (2 tablespoons): For that tangy sweetness. You can also use chopped pickles.
  • Ketchup (1 tablespoon): Adds a classic flavor. Opt for sugar-free or homemade ketchup for a healthier choice.
  • Apple Cider Vinegar (1 tablespoon): For acidity. Lemon juice works too!
  • Yellow Mustard (1 tablespoon): Adds a kick. Dijon mustard can also be used.
  • Garlic Powder (1 teaspoon): For flavor enhancement.
  • Onion Powder (1 teaspoon): Complements the garlic.
  • Paprika (1 teaspoon): Adds a subtle smoky flavor.
  • Sugar (1 tablespoon): Balances acidity. You can use honey or a sugar substitute.

Pro Tips for the Perfect Big Mac Salad

Fresh Big Mac Salad displayed in a bowl, showcasing layers of lettuce, tomatoes, onions, and dressing.

Here are some expert insights to ensure your salad is a hit every time:

  • Cook the Beef Right: Use 80/20 ground beef for the best flavor, but leaner options will work too if you prefer.
  • Don’t Overdress: Start with a little dressing and add more to taste. You want to enhance, not drown the salad.
  • Chill Your Ingredients: For a refreshing salad, chill your veggies beforehand.
  • Layer for Texture: Toss your salad with the dressing just before serving to keep the lettuce crisp.
  • Experiment with Spices: Feel free to add your favorite spices or herbs to the beef for an extra flavor boost.
  • Garnish Wisely: Top with sesame seeds or fresh herbs to elevate presentation.
  • Get Creative: This salad is a canvas! Add sliced avocado, bacon bits, or even a hard-boiled egg for variety.

Avoid These Common Mistakes

  • Overcooking the Beef: Keep it juicy by not cooking it beyond medium.
  • Using Wilted Lettuce: Always opt for fresh, crisp greens to maintain texture.
  • Skipping the Dressing: The dressing is key to achieving that Big Mac flavor. Don’t skip it!
  • Not Tasting as You Go: Always taste your dressing and adjust the flavors to your liking.

Delicious Variations of the Big Mac Salad

Want to shake things up? Here are some fun variations to try!

  • Mexican Twist: Add black beans, corn, and avocado with a spicy dressing.
  • Buffalo Style: Use shredded chicken tossed in buffalo sauce instead of ground beef.
  • Greek Inspiration: Incorporate feta cheese, olives, and a lemon-oregano dressing.
  • Asian Fusion: Swap the dressing for a sesame ginger dressing and add edamame and shredded carrots.

How to Store and Make Ahead

This Big Mac salad is meal-prep friendly! Here’s how to store it:

  • In the Fridge: Store the salad components separately to keep the lettuce crisp. Use airtight containers.
  • For Meal Prep: Prepare the dressing and cook the beef ahead of time. Assemble just before serving.
  • Storage Life: When stored properly, the ingredients can last up to 3-4 days in the fridge.

Comprehensive FAQ

Got questions? We’ve got answers!

  • Can I make this salad vegetarian? Absolutely! Substitute the ground beef with beans, lentils, or mushrooms.
  • How long does the dressing last? Homemade dressing can be stored in the fridge for up to a week.
  • Can I freeze this salad? It’s best to avoid freezing as the texture of the veggies will change.
  • What can I serve with this salad? Pair it with whole-grain bread or a side of fruit for a complete meal.
  • Is this salad gluten-free? Yes, as long as you use gluten-free ketchup and mustard.
  • How can I make the salad spicier? Add jalapeños or a dash of hot sauce into the dressing!
  • Can I use other types of cheese? Yes! Try Swiss, pepper jack, or even a dairy-free cheese.
  • What if I don’t like pickles? You can omit them or substitute with diced cucumbers.

Nutrition Tips and Dietary Adaptations

This salad is already a healthy choice, but here are some additional tips:

  • Increase Fiber: Add more veggies like carrots, bell peppers, or cucumbers.
  • Protein Boost: Incorporate beans or chickpeas for extra protein.
  • Low-Calorie Dressing: Use Greek yogurt instead of mayonnaise for a lighter touch.

Essential Equipment Recommendations

To make this salad, you’ll need:

  • Sharp Knife: For chopping veggies and slicing the beef.
  • Cutting Board: A sturdy surface for all your preparation.
  • Mixing Bowls: For combining ingredients and dressing.
  • Skillet: To cook the ground beef to perfection.
  • Salad Spinner: To wash and dry your lettuce efficiently.

Serving Suggestions

Ready to serve? Here’s how to present your salad!

  • Family Style: Serve in a large bowl and let everyone help themselves.
  • Individual Bowls: For a more elegant presentation, serve in individual bowls with the dressing drizzled over.
  • Garnish: Top with extra pickles, cheese, or sesame seeds for a beautiful finish.

Conclusion

Incorporating this Big Mac salad into your meal rotation is a game-changer! It’s a flavorful, nutritious option that satisfies your cravings without the guilt. Whether you enjoy it as is or customize it to your liking, this salad proves that healthy eating can be fun and delicious. So grab your ingredients and get ready to impress your taste buds!

Big Mac Salad (Copy Cat Recipe)

Prep Time 10 minutes
Total Time 10 minutes
Servings 4 servings
Calories 650
A delicious salad mimicking the flavors of a classic Big Mac burger, perfect for a quick and satisfying meal.

Ingredients

Dressing

  • 0.5 cup mayonnaise
  • 2 tablespoons sweet relish
  • 1 tablespoon ketchup
  • 1 tablespoon apple cider vinegar
  • 1 tablespoon yellow mustard
  • 1 teaspoon garlic powder
  • 1 teaspoon onion powder
  • 1 teaspoon paprika
  • 1 tablespoon sugar
  • 1 pound ground beef
  • 8 cups Romaine lettuce (chopped)
  • 1 cup cherry tomatoes (halved)
  • 0.5 medium red onion (sliced)
  • 2 tablespoons pickle chips
  • 1 cup Cheddar (shredded)
  • 1 teaspoon sesame seeds (optional, toasted) (see notes for instructions)

Instructions 

  • Cook ground beef until browned, then drain excess fat.
  • Mix mayonnaise, relish, ketchup, vinegar, mustard, garlic powder, onion powder, paprika, and sugar to make the dressing.
  • Combine chopped lettuce, tomatoes, red onion, pickle chips, cooked beef, and shredded cheese in a large bowl.
  • Pour dressing over the salad and toss to combine. Sprinkle sesame seeds if desired.

Notes

For toasted sesame seeds, lightly toast in a dry skillet until golden before sprinkling on top.
Calories: 650kcal
Cost: $15
Course: Salad
Cuisine: American
Keyword: Beef, Burger, Salad

Are you ready to supercharge your lunch with a meal that’s not only bursting with flavor but also packed with nutrition? Say hello to the Quinoa Power Protein Salad! This colorful and vibrant salad is a delightful blend of quinoa, chickpeas, and fresh roasted vegetables, all drizzled with a creamy tahini lemon dressing. Perfect for meal prep or a quick, energizing dinner, this dish ensures that healthy eating is anything but boring. Let’s dive into why this salad deserves a spot on your table!

Why You’ll Love This Recipe

  • Complete Protein Source: Quinoa, paired with chickpeas, provides all nine essential amino acids, making this salad a powerhouse of plant-based protein.
  • Flavor Explosion: The combination of roasted veggies and a zesty tahini dressing creates a savory, satisfying taste that will keep your taste buds dancing!
  • Meal Prep Friendly: This salad tastes even better the next day, making it an ideal option for meal prep. Enjoy it as a quick lunch or a hearty dinner.
  • Vibrant and Colorful: Packed with various vegetables, this salad is as visually appealing as it is delicious, making it a feast for the eyes!
  • Customizable: Easily adjust ingredients based on your preferences or what you have on hand. This salad is versatile enough to suit any palate.

Ingredients Breakdown

Here’s what you’ll need to create this incredible salad:

  • 1 cup quinoa: Rinsed. This ancient grain is not only gluten-free but also provides a fluffy texture and a nutty flavor.
  • 1 can (15 oz) chickpeas: Drained and rinsed. Chickpeas add a creamy texture and a boost of fiber.
  • 1 red bell pepper: Diced. Sweet and crunchy, it adds a pop of color and flavor.
  • 1 zucchini: Diced. This veggie brings a tender texture and absorbs the dressing beautifully.
  • 1 small red onion: Chopped. It gives a mild sweetness when roasted that complements the other ingredients.
  • 1 cup cherry tomatoes: Halved. They add juiciness and a burst of flavor.
  • 2 cups baby spinach: Roughly chopped. A nutrient-packed leafy green that brightens the dish.
  • 2 tablespoons olive oil: For roasting and the dressing. It adds healthy fats and richness.
  • Salt and freshly ground black pepper: To taste. Essential for enhancing flavors.
  • 1/4 cup tahini: A creamy sesame paste that gives the dressing a rich texture.
  • Juice of 1 large lemon: For freshness and acidity.
  • 2 tablespoons olive oil: For the dressing; it enhances creaminess.
  • 1 tablespoon maple syrup or honey: Adds a touch of sweetness to balance the tahini.
  • 1 clove garlic: Minced. It infuses the dressing with depth of flavor.
  • 2 to 3 tablespoons water: To adjust the dressing consistency.
  • 2 tablespoons fresh parsley or cilantro: Chopped. Fresh herbs brighten up the dish.
  • 2 tablespoons toasted pumpkin seeds or sunflower seeds (optional): For crunch and added nutrition.

Instructions

Let’s get cooking! Follow these easy steps:

  1. Preheat your oven to 425°F. Line a baking sheet with parchment paper.
  2. Toss the bell pepper, zucchini, red onion, and cherry tomatoes with 2 tablespoons of olive oil, salt, and pepper. Spread evenly on the baking sheet and roast for 20 to 25 minutes, stirring halfway through until they are tender and caramelized.
  3. In a medium saucepan, combine quinoa and 2 cups of water. Bring to a boil, then reduce heat to low, cover, and simmer for 15 minutes or until the water is absorbed. Remove from heat and let stand, covered, for 5 minutes. Fluff with a fork.
  4. In a small bowl, whisk together tahini, lemon juice, olive oil, maple syrup or honey, minced garlic, salt, and pepper. Add water one tablespoon at a time until the dressing is smooth and pourable.
  5. In a large bowl, combine cooked quinoa, chickpeas, roasted vegetables, and baby spinach. Drizzle with the dressing and toss gently to mix.
  6. Taste and adjust seasoning with salt and pepper as needed.
  7. Serve the salad garnished with fresh herbs and toasted seeds if desired.

Pro Tips for the Perfect Quinoa Power Salad

Side view of a vibrant quinoa protein salad featuring spinach, tomatoes, and seeds.
  • Rinse quinoa: Always rinse quinoa before cooking to remove its natural coating, which can taste bitter.
  • Let it cool: Allow the quinoa to cool completely before mixing it with other ingredients to prevent wilting the greens.
  • Customize your veggies: Feel free to swap out vegetables based on the season or what you have in your fridge!
  • Batch cooking: Make a larger batch of quinoa on meal prep day to save time during the week.
  • Adjust the dressing: Make the tahini dressing thinner by adding more water, or thicker by reducing the water; it’s all about personal preference.
  • Make it spicy: Add a pinch of cayenne pepper or red pepper flakes to the dressing for a kick!
  • Use fresh herbs: Don’t skip the herbs; they add a burst of flavor and freshness!
  • Store separately: If meal prepping, store the salad and dressing separately to maintain freshness.

Common Mistakes and Troubleshooting

Here are some pitfalls to avoid when making your salad:

  • Overcooking quinoa: Ensure you follow cooking times closely to keep quinoa fluffy and not mushy.
  • Skipping the cooling step: Mixing warm quinoa with fresh veggies can cause wilting. Always let it cool!
  • Not seasoning enough: Since quinoa is bland on its own, don’t skimp on seasoning with salt and pepper!
  • Forget the dressing: The tahini dressing is what brings everything together; don’t skip it!

Delicious Variations

Switch things up with these fun twists on the classic recipe:

  • Mediterranean Twist: Add olives, feta cheese, and artichoke hearts for a Mediterranean flair.
  • Southwest Style: Mix in corn, black beans, and diced avocado, and use lime juice instead of lemon.
  • Asian-Inspired: Use sesame oil in the dressing and add shredded carrots, edamame, and chopped green onions.
  • Seasonal Roasted Veggies: Swap in seasonal vegetables like butternut squash or Brussels sprouts for different flavors.

Storage and Make-Ahead Instructions

Want to make this salad in advance? Here’s how:

  • Store the salad in an airtight container in the fridge for up to 4 days.
  • Keep the dressing in a separate jar and drizzle it right before serving to maintain freshness.
  • This salad is perfect for meal prep—just portion out servings for the week!

Comprehensive FAQ

  • Can I use quinoa flour instead of whole quinoa? No, quinoa flour will not provide the same texture or protein content.
  • Is this salad gluten-free? Yes, quinoa is naturally gluten-free, making this salad a great option for gluten-sensitive individuals.
  • How can I make this salad vegan? Simply ensure the dressing uses maple syrup instead of honey.
  • What can I substitute for tahini? You can use sunflower seed butter or almond butter for a similar creamy texture.
  • How long does the tahini dressing last? The dressing can be stored in the fridge for about 1 week.
  • Can I freeze the salad? It’s best enjoyed fresh, but you can freeze cooked quinoa and roasted veggies separately.
  • What other proteins can I add? Consider grilled chicken, shrimp, or tofu for added protein.
  • Is this salad suitable for kids? Absolutely! The flavors are mild and appealing, and it’s a great way to introduce kids to quinoa and veggies.

Nutrition Tips and Dietary Adaptations

This salad is not just delicious but also packed with nutrition! Here are some tips:

  • High in Protein: Each serving is loaded with protein, making it perfect for post-workout recovery.
  • Rich in Fiber: With quinoa and chickpeas, this salad supports digestive health.
  • Vitamins and Minerals: The variety of veggies provides essential vitamins like A and C, plus minerals like iron.
  • Adjust for Allergies: Customize the ingredients to cater to allergies—just replace any offenders!

Essential Equipment Recommendations

To whip up this salad, you’ll need:

  • Medium saucepan: For cooking quinoa.
  • Baking sheet: For roasting vegetables.
  • Mixing bowl: A large bowl is perfect for combining everything.
  • Whisk: An essential tool for mixing the tahini dressing smoothly.
  • Measuring cups and spoons: For accurate ingredient measurements.

Serving Suggestions

This salad can stand alone as a main dish, but pairing it with these options takes it to the next level:

  • Grilled Chicken: Add a protein punch with grilled chicken breast.
  • Pita Bread: Serve with warm pita for a Mediterranean vibe.
  • Soup: Pair with a light soup for a balanced meal.
  • Wine: A crisp white wine complements the flavors nicely.

With all these elements combined, you’re not just making a salad; you’re creating a vibrant, nutritious meal that delights the senses and energizes the body! So grab your ingredients and get cooking. Enjoy the journey of flavor and health!

Quinoa Power Protein Salad

Prep Time 15 minutes
Cook Time 25 minutes
Total Time 40 minutes
Servings 4 servings
Calories 450
A vibrant and nutritious salad combining quinoa, roasted vegetables, chickpeas, and a tangy tahini lemon dressing, perfect for a healthy meal or side dish.

Ingredients

Grains

  • 1 cup quinoa, rinsed

Canned Goods

  • 1 can chickpeas, drained and rinsed

Vegetables

  • 1 red bell pepper red bell pepper, diced
  • 1 zucchini zucchini, diced
  • 1 small red onion red onion, chopped
  • 1 cup cherry tomatoes, halved

Greens

  • 2 cups baby spinach, roughly chopped

Dressing

  • 2 tablespoons olive oil
  • 1/4 cup tahini
  • Juice of 1 large lemon lemon juice
  • 1 tablespoon maple syrup or honey
  • 1 clove garlic minced garlic
  • 2 to 3 tablespoons water, to thin as needed

Herbs & Seeds

  • 2 tablespoons fresh parsley or cilantro, chopped
  • 2 tablespoons toasted pumpkin seeds or sunflower seeds (optional)

Instructions 

  • Roast diced bell pepper, zucchini, red onion, and cherry tomatoes at 425°F for 20-25 minutes, stirring halfway.
  • Cook quinoa in 2 cups water for 15 minutes, then let stand covered for 5 minutes and fluff.
  • Whisk tahini, lemon juice, olive oil, maple syrup, garlic, salt, and pepper; add water until smooth.
  • Combine cooked quinoa, chickpeas, roasted vegetables, and spinach; drizzle with dressing and toss gently.
  • Adjust seasoning, garnish with herbs and seeds, and serve.

Notes

For extra flavor, add a squeeze of fresh lemon before serving.
Calories: 450kcal
Cost: $15
Course: Salad
Keyword: Quinoa

Transform Taco Night with This Keto Taco Salad!

Are you ready to spice up your weeknight dinners? Dive into this Keto Taco Salad! It’s a vibrant, flavor-packed dish that proves healthy eating doesn’t have to be bland or boring. With seasoned ground beef, fresh veggies, and creamy toppings, this keto taco salad offers everything you love about traditional tacos, minus the carbs. In this article, we’ll explore why this recipe is a must-try, the benefits of keto eating, and how to customize this meal to suit your tastes!

Why You’ll Love This Keto Taco Salad

This Keto Taco Salad isn’t just a meal; it’s an experience bursting with flavor and nutrition. Here are five reasons why you’ll want to make it part of your regular meal rotation:

  • Quick and Easy: Ready in less than 30 minutes, this recipe is perfect for busy weeknights or last-minute meals.
  • Low Carb Delight: A fantastic option for those following a low-carb lifestyle, keeping you satiated without the carbs.
  • Customizable: You can easily adjust the ingredients to suit your dietary preferences, whether you’re vegetarian, dairy-free, or need a different protein.
  • High in Protein: Packed with ground beef and cheese, this salad provides a satisfying protein boost to fuel your day.
  • Family-Friendly: This dish is loved by both kids and adults, making it a great choice for family dinners.

Ingredients Breakdown

Let’s take a closer look at the ingredients that make this Keto Taco Salad a hit:

  • 1 lb ground beef: Use 80/20 beef for optimal flavor, or substitute with ground turkey or plant-based meat for a lighter option.
  • Homemade taco seasoning: This is where the magic happens! You can use store-bought, but homemade seasoning adds freshness.
  • ½ cup beef broth: Keeps the meat juicy and flavorful; feel free to use chicken or vegetable broth if desired.
  • 1 large head Romaine lettuce: Provides a crisp base; iceberg lettuce can be used for extra crunch.
  • 4 oz sharp and white cheddar cheese: Combine for a rich flavor; substitute with vegan cheese for dairy-free options.
  • ½ avocado sliced: Creamy goodness that adds healthy fats and flavor.
  • ¼ cup red onion: For a sweet and tangy crunch; can be omitted for a milder taste.
  • ¾ cup grape tomatoes: Halved for sweetness; substitute with diced bell peppers if desired.
  • ¼ cup bell pepper chopped: Adds color and crunch; any color works!
  • Freshly chopped cilantro: A must for freshness; parsley can be used if you’re not a fan of cilantro.
  • Jalapenos, sliced (optional): For those who like it spicy!
  • ½ cup chunky salsa: Choose your favorite brand or make your own for a fresher taste.
  • ½ cup ranch dressing: Creamy dressing that ties everything together; ranch can be replaced with a vinaigrette for a lighter option.
  • 1 tsp freshly squeezed lime juice: Brightens the flavors and adds a zesty kick.

Step-by-Step Instructions

A vibrant side view of a Keto Taco Salad featuring ground beef, lettuce, and sliced avocado.

Now that we’ve gathered our ingredients, let’s bring this Keto Taco Salad to life!

  1. In a medium skillet, brown the ground beef over medium-high heat. Drain any excess liquid.
  2. Add the taco seasoning and beef broth to the skillet. Simmer for about 5 minutes until the mixture thickens.
  3. While the meat cooks, wash and chop your Romaine lettuce into bite-sized pieces and place it in a large bowl.
  4. Top the lettuce with the seasoned ground beef, followed by the shredded cheeses and the remaining toppings (except the avocado).
  5. In a small bowl, mix together the salsa, ranch dressing, and lime juice until well combined.
  6. Drizzle about ¼ of the dressing over the salad, reserving the rest for serving.
  7. Finish with sliced jalapenos, avocado, and cilantro for garnish.

Pro Tips for Perfecting Your Keto Taco Salad

Want to elevate your salad game? Here are some expert insights:

  • Fresh Ingredients: Always opt for the freshest veggies you can find—they make a huge difference in flavor!
  • Make Your Own Seasoning: Homemade taco seasoning can be tailored to your taste. Consider adding cumin, paprika, or chili powder for extra depth.
  • Don’t Skip the Lime: A squeeze of lime juice can elevate the entire dish, adding brightness and balancing flavors.
  • Layering is Key: Layer your ingredients in the bowl for a better distribution of flavors and textures.
  • Chill Your Dressing: For added flavor, prepare your dressing ahead of time and let it chill in the fridge.
  • Add Crunch: Consider adding some crispy tortilla chips on top for a satisfying crunch (just be mindful of carbs!).
  • Keep It Balanced: If you’re planning for leftovers, store the dressing separately to maintain the salad’s freshness.
  • Experiment with Proteins: This recipe is versatile—try it with grilled chicken, shrimp, or even a plant-based protein for variety.

Common Mistakes and Troubleshooting

Even the best chefs encounter hiccups! Here’s how to avoid common pitfalls:

  • Too Watery Salad: If your salad becomes soggy, use less dressing or serve it on the side.
  • Overcooked Beef: Keep an eye on the beef to ensure it doesn’t dry out. Cook until just browned!
  • Unbalanced Flavors: If the salad tastes bland, add seasoning gradually and taste as you go.
  • Too Much Heat: If your salad is too spicy, add a dollop of sour cream or extra avocado to mellow it out.

Variations to Keep It Exciting

Change things up with these fun variations:

  • Vegetarian Delight: Swap ground beef for black beans or lentils for a hearty vegetarian option.
  • Fiesta Taco Salad: Add corn, black olives, and diced jalapenos for a zesty twist.
  • BBQ Taco Salad: Mix in shredded BBQ chicken for a smoky flavor that pairs beautifully with ranch dressing.
  • Buffalo Chicken Taco Salad: Use shredded buffalo chicken and top with crumbled blue cheese for a tangy kick!

Storage and Make-Ahead Instructions

Planning ahead? Here’s how to store your Keto Taco Salad:

  • Refrigerate: Store leftovers in an airtight container in the fridge for up to 3 days.
  • Keep Dressing Separate: To maintain freshness, store the dressing separately until you’re ready to eat.
  • Make Ahead: You can prepare the beef mixture and chop veggies ahead of time for quick assembly later.

Frequently Asked Questions

Here are some common questions about this Keto Taco Salad:

  • Can I use ground turkey instead of beef? Absolutely! Ground turkey or chicken works well in this recipe.
  • Is this salad gluten-free? Yes, as long as you use gluten-free taco seasoning and dressings.
  • Can I make this salad dairy-free? Yes! Use dairy-free cheese or omit cheese altogether.
  • How can I add more fiber? Incorporate black beans or kidney beans for extra fiber without too many carbs.
  • What if I don’t like ranch dressing? Feel free to substitute with a vinaigrette or a creamy avocado dressing!
  • Can I freeze the taco meat? Yes! Cooked taco meat can be frozen for up to 3 months.
  • How can I spice it up? Add more jalapenos or a spicy salsa for an extra kick!
  • What’s the best way to serve this salad? Serve it in a big bowl for sharing or in individual portions for a fun presentation!

Nutritional Benefits and Dietary Adaptations

This Keto Taco Salad is not just delicious; it’s also packed with nutrition:

  • Low Carb: Perfect for keto dieters, helping you stay within your daily carb limit.
  • High Protein: Supports muscle building and repair with a generous protein content.
  • Rich in Nutrients: Fresh veggies provide essential vitamins and minerals.
  • Healthy Fats: Avocado and cheese contribute to your daily fat intake, crucial for energy on a keto diet.

Equipment Recommendations

Here’s what you’ll need to whip up this Keto Taco Salad:

  • Skillet: A medium skillet for browning the beef.
  • Cutting Board: For chopping veggies and prepping ingredients.
  • Mixing Bowls: To combine your dressing and assemble the salad.
  • Measuring Cups: For accurate ingredient measurements.

Serving Suggestions

To round out your meal, consider pairing this Keto Taco Salad with:

  • Keto Tortilla Chips: Crunchy chips to dip in your leftover salsa and ranch.
  • Cauliflower Rice: A great low-carb side dish that adds extra volume to your meal.
  • Grilled Veggies: A side of grilled zucchini or bell peppers complements the salad beautifully.

Conclusion

There you have it! A delicious, nutritious, and satisfying Keto Taco Salad that everyone will love. With its vibrant flavors and customizable options, this recipe is not just a meal—it’s a celebration of healthy eating. So, gather your ingredients, unleash your inner chef, and enjoy every bite of your flavorful creation. Happy cooking!

Keto Taco Salad

Prep Time 10 minutes
Cook Time 15 minutes
Total Time 25 minutes
Servings 4 servings
Calories 650
A delicious low-carb taco salad packed with fresh ingredients and bold flavors, perfect for a quick and satisfying meal.

Ingredients

Meat

  • 1 lb ground beef
  • homemade taco seasoning ((or store-bought if preferred)) taco seasoning
  • ½ cup beef broth

Vegetables & Cheese

  • 1 large head Romaine lettuce (approx. 6 cups washed and chopped)
  • 4 oz sharp cheddar cheese
  • 4 oz white cheddar cheese
  • ½ avocado sliced avocado
  • ¼ cup red onion
  • ¾ cup grape tomatoes (halved)
  • ¼ cup bell pepper chopped
  • to taste freshly chopped cilantro (garnish)
  • optional jalapenos, sliced
  • ½ cup chunky salsa
  • ½ cup ranch dressing
  • 1 tsp freshly squeezed lime juice

Instructions 

  • Brown ground beef in a skillet; drain liquids.
  • Add taco seasoning and beef broth; simmer until thickened, about 5 minutes.
  • Wash and chop lettuce; place in a large bowl.
  • Top lettuce with beef mixture, shredded cheeses, and toppings (except avocado).
  • Mix salsa, ranch, and lime juice; drizzle over salad. Garnish with jalapenos, avocado, and cilantro.

Notes

Use homemade taco seasoning for best flavor and control over ingredients.
Calories: 650kcal
Cost: $15
Course: Main Course
Cuisine: Mexican
Keyword: Beef, Keto, Salad

Welcome to a Flavorful Fall Adventure!

As the leaves turn and the air gets crisp, it’s time to embrace the delicious flavors of autumn with a vibrant and delightful dish: the 10-Minute Autumn Harvest Salad. This salad isn’t just a side dish; it’s a celebration of the season, packed with nourishing ingredients that will tantalize your taste buds and recharge your spirit. In this comprehensive guide, we’ll dive into everything you need to know about creating this scrumptious salad that will become your go-to for quick, healthy meals.

Why You’ll Love This Recipe

This salad is more than just a pretty plate. Here’s why it’s destined to become a fall favorite:

  • Quick & Easy: Ready in just 10 minutes, this salad is perfect for busy weeknights or last-minute gatherings.
  • Nutritious & Wholesome: Packed with crunchy apples, protein-rich pecans, and vitamins from mixed greens, it’s a powerhouse of nutrition.
  • Flavor Explosion: The sweet-tangy dressing elevates the natural flavors of the ingredients, creating a delightful harmony.
  • Seasonal Freshness: Celebrate fall with seasonal ingredients that showcase the best of autumn’s bounty.
  • Versatile & Customizable: Easily adapt this recipe to fit your dietary preferences or what you have on hand!

Ingredient Breakdown

Let’s take a closer look at the star ingredients and some tasty substitutions you can make:

  • Mixed Greens: A mix of arugula, spinach, and kale provides a nutrient-dense base. You can substitute with romaine or any salad greens you prefer.
  • Apples: Use your favorite variety! Crisp apples like Honeycrisp or Granny Smith add crunch. If you prefer a sweeter taste, opt for Fuji or Gala apples.
  • Dried Cranberries: These add a burst of sweetness. If you’re looking for an alternative, try dried cherries or raisins.
  • Pecans: Rich in healthy fats, pecans are a delightful crunchy addition. Swap them for walnuts or almonds if you like.
  • Feta Cheese: Optional, but it adds a creamy, tangy flavor! For a dairy-free option, try crumbled tofu or skip it altogether.
  • Apple Cider Vinegar: This provides the tangy base for the dressing. You can use balsamic vinegar for a sweeter profile.
  • Olive Oil: A good quality extra virgin olive oil enhances flavor. Avocado oil works as a great alternative.
  • Honey: This natural sweetener balances the dressing. Maple syrup can be used for a vegan option.
  • Salt & Pepper: Essential for enhancing flavors—feel free to adjust to your taste!

How to Make the Autumn Harvest Salad

Side angle of a colorful salad showcasing fresh ingredients typical of autumn, with vibrant greens and fruits.

Here’s a step-by-step guide to whip up this flavorful dish:

  1. Wash and dry your mixed greens thoroughly to ensure they’re crisp and fresh.
  2. Slice your apple into thin pieces. Keep the skin on for added nutrients and color!
  3. In a large bowl, combine the greens, apple slices, dried cranberries, and chopped pecans.
  4. For the dressing, whisk together apple cider vinegar, olive oil, honey, salt, and pepper in a small bowl until well combined.
  5. Drizzle the dressing over the salad and toss gently to coat all ingredients evenly.
  6. If desired, top with crumbled feta cheese for extra flavor and creaminess.
  7. Serve immediately and enjoy your burst of autumn flavors!

Pro Tips for Perfection

Want to elevate your salad game? Here are my top expert tips:

  • Use Fresh Ingredients: The fresher your ingredients, the better the flavors. Visit your local farmer’s market for the best produce.
  • Toast Your Pecans: For an extra layer of flavor, toast your pecans in a dry skillet over medium heat for a few minutes until fragrant.
  • Make Ahead: Prepare the salad base (greens, apples, cranberries, and pecans) in advance, but wait to add the dressing until just before serving to keep it crisp.
  • Add Protein: For a heartier meal, consider adding grilled chicken, tofu, or chickpeas!
  • Experiment with Dressings: Try different dressings like a maple vinaigrette or tahini dressing for a unique twist.
  • Mix Up the Greens: Use a combination of greens for varied textures and flavors, such as spinach, arugula, and kale.
  • Seasonal Variations: Feel free to add roasted butternut squash or sweet potatoes to embrace the fall vibe even more!
  • Adjust for Sweetness: If you prefer a sweeter salad, increase the honey in the dressing or add more dried fruits.

Common Mistakes & Troubleshooting

Even the best chefs make mistakes! Here are some common pitfalls and how to avoid them:

  • Overdressing: Adding too much dressing can make your salad soggy. Start with a small amount and add more as needed.
  • Using Old Greens: Wilted or brown greens can ruin your salad. Always check freshness before assembling.
  • Neglecting Texture: A balanced salad should have various textures. Ensure you have crunch (pecans), softness (feta), and juiciness (apples).
  • Skipping the Salt: A pinch of salt enhances flavors. Don’t skip it in the dressing!

Delicious Variations

Feeling adventurous? Here are some fun variations to keep things exciting:

  • Winter Wonderland Salad: Swap apples for pears and add pomegranate seeds for a festive twist.
  • Protein-Packed Salad: Add grilled chicken or chickpeas for a filling meal.
  • Spicy Kick: Toss in some sliced jalapeños or a dash of red pepper flakes for a spicy kick.
  • Cheese Lovers: Mix in goat cheese for a creamy, tangy flavor that pairs wonderfully with the sweet apples.

Storage & Make-Ahead Instructions

Want to enjoy this salad later? Here’s how to store it:

  • Refrigeration: Store leftovers in an airtight container for up to 2 days.
  • Make-Ahead: Prep the salad base ahead of time, but keep the dressing separate until you’re ready to serve.
  • Freezing: It’s not recommended to freeze this salad due to the fresh ingredients.

Frequently Asked Questions

Here are some common questions about this salad:

  • Can I make this salad vegan? Absolutely! Just skip the feta cheese or use a vegan alternative and replace honey with maple syrup.
  • What other fruits can I add? Try adding sliced oranges, grapes, or even berries for a different flavor profile!
  • Can I use different nuts? Yes! Walnuts or almonds also work beautifully in this salad.
  • Is this salad gluten-free? Yes, all the ingredients are naturally gluten-free!
  • How do I make the dressing ahead of time? You can whisk the dressing ingredients together and store in the fridge for up to a week.
  • Can I use fresh cranberries instead of dried? Fresh cranberries will be much more tart. If using them, consider adding more honey to balance the flavors.
  • How can I add more crunch? Consider adding seeds like sunflower or pumpkin seeds for additional texture and nutrition.
  • What’s the best way to serve this salad? Serve it immediately after dressing to maintain the crispness of the greens.

Nutrition Tips and Dietary Adaptations

This salad is not just delicious; it’s also packed with nutrients! Here’s how to make it even healthier:

  • Load Up on Greens: The more greens, the better! They’re low in calories but high in vitamins.
  • Healthy Fats: Pecans provide healthy fats that are great for heart health. Don’t skip them!
  • Use Whole Foods: Opt for whole ingredients and avoid processed items to maximize health benefits.
  • Portion Control: While this salad is healthy, be mindful of serving sizes, especially with higher-calorie ingredients like cheese and nuts.

Equipment Recommendations

To whip up this incredible salad, you’ll need:

  • Salad Bowl: A large mixing bowl for assembling your salad.
  • Whisk: For mixing up your dressing to perfection.
  • Cutting Board and Knife: For slicing your fruits and vegetables.

Serving Suggestions

This salad is incredibly versatile! Here are a few ideas for serving:

  • As a Side Dish: Pair it with roasted chicken or grilled salmon for a balanced meal.
  • For Lunch: Enjoy it as a standalone meal by adding protein.
  • At Gatherings: Serve it at potlucks or holiday dinners for a refreshing side.

Conclusion

So there you have it! The 10-Minute Autumn Harvest Salad is your ticket to a burst of fall flavors that’s nutritious, delicious, and incredibly easy to make. With its vibrant colors and harmonious textures, it’s not just a salad; it’s a celebration of the season! Whether you’re enjoying it as a side dish or a main course, this salad is sure to impress. Get ready to bring joy to your kitchen and fuel your body with this delightful dish. Happy cooking!

10-Minute Autumn Harvest Salad – A Magical Fall Delight!

Prep Time 10 minutes
Total Time 10 minutes
Servings 2 servings
Calories 250
A quick and vibrant salad perfect for celebrating the flavors of fall with fresh ingredients and a tangy dressing.

Ingredients

Mixed Greens

  • 1 cup mixed greens

Fruits and Nuts

  • 1 medium apple (thinly sliced)
  • 0.25 cup dried cranberries
  • 0.25 cup pecans (chopped)

Dairy & Dressing

  • 2 tbsp feta cheese (optional)
  • 2 tbsp apple cider vinegar
  • 1 tbsp olive oil
  • 1 tsp honey
  • 0.25 tsp salt
  • 0.25 tsp black pepper

Instructions 

  • Wash and dry greens, slice apple thinly.
  • Combine greens, apple, cranberries, and pecans in a bowl.
  • Whisk together vinegar, oil, honey, salt, and pepper.
  • Drizzle dressing over salad and toss gently.
  • Top with feta cheese if desired, serve immediately.

Notes

Use fresh ingredients for best flavor and crunch.
Calories: 250kcal
Cost: $10
Course: Salad
Cuisine: American
Keyword: Fall, Healthy, Quick

Brighten Up Your Plate with This Zesty Sweet Corn & Chickpea Salad

Are you ready to dive into a vibrant bowl of goodness? This Sweet Corn Chickpea & Avocado Salad is not just a feast for the eyes; it’s a powerhouse of flavor and nutrition! Bursting with fresh ingredients, this salad makes healthy eating feel exciting and satisfying. Perfect as a refreshing side dish or a light main course, it’s here to prove that nutritious meals can be fun and full of zest. Let’s uncover why this salad will become your new go-to recipe!

Why You’ll Love This Salad

Here are just a few reasons why this Sweet Corn Chickpea Salad will steal your heart:

  • Quick and Easy Prep: Whip it up in just 30 minutes, making it ideal for busy weeknights!
  • Nutritious Powerhouse: Packed with protein from chickpeas and healthy fats from avocados, this dish fuels your body right.
  • Vibrant Flavors: The combination of sweet corn, creamy avocado, and zesty lime creates a delightful flavor explosion.
  • Customizable: Easily adapt the ingredients to suit your preferences or what you have on hand.
  • Perfect for Meal Prep: Make a batch ahead of time for quick lunches or dinners during the week.

Ingredients Breakdown

Getting started with this Chickpea Avocado Salad is a breeze! Here’s everything you’ll need:

  • 2 ears sweet corn (kernels removed, about 250g / 1 cup): Fresh corn is best, but frozen works too!
  • 1 can chickpeas (15 oz / 425g): Drain and rinse for a clean taste.
  • 2 ripe avocados: Choose firm but slightly soft avocados for the best texture.
  • 1/4 cup red onion (finely chopped, about 30g): Adds a nice crunch and flavor.
  • 1/2 bell pepper (diced, about 75g): Use any color you like for a pop of color!
  • 1/4 cup fresh cilantro (chopped, about 15g): This herb lifts the salad with freshness.
  • 2 tablespoons lime juice (30ml): Freshly squeezed is best for bright flavor.
  • 3 tablespoons olive oil (45ml): A drizzle of healthy fat for richness.
  • 1/2 teaspoon cumin (2.5ml): A warm spice that complements the other flavors.
  • 1/4 teaspoon chili powder (1.25ml): Adjust according to your spice preference!
  • Salt and pepper to taste: Essential for bringing out all the flavors.

Step-by-Step Instructions

Colorful salad featuring diced avocados, sweet corn kernels, and chickpeas arranged attractively.

Ready to create this delicious salad? Follow these simple steps:

  1. If using fresh corn, remove kernels from the cob.
  2. In a large mixing bowl, combine corn, chickpeas, avocado, red onion, bell pepper, and cilantro.
  3. In a small bowl, whisk together lime juice, olive oil, cumin, chili powder, salt, and pepper.
  4. Pour dressing over the salad and gently toss to coat.
  5. Taste and adjust seasonings. Serve immediately or chill for later.

Pro Tips for Perfect Results

Want to elevate your salad game? Here are some expert tips:

  • Use fresh ingredients: The fresher your produce, the better your salad will taste!
  • Don’t overmix: Gently toss to keep the avocado intact and creamy.
  • Adjust spice levels: If you like it spicy, add more chili powder or even a dash of hot sauce!
  • Make it colorful: Mix in additional veggies like cherry tomatoes or cucumbers for extra crunch.
  • Go vegan: This salad is already plant-based, but omit any non-vegan additions to keep it pure!
  • Refresh with herbs: Experiment with fresh basil or mint for a twist!
  • Serve chilled: Let it sit in the fridge for 30 minutes before serving for flavors to meld.
  • Store properly: Keep leftovers in an airtight container to maintain freshness.

Common Mistakes and Troubleshooting

Even the best chefs can hit a snag! Here are some common issues and how to avoid them:

  • Brown avocado: Add avocado just before serving to prevent browning.
  • Soggy salad: Dress only when ready to serve to keep everything crisp.
  • Bland flavor: Always taste and adjust seasonings as needed!
  • Overripe ingredients: Choose ripe but firm produce for the best texture in your salad.

Delicious Variations

Feeling adventurous? Try these fun twists on the classic recipe:

  • Add protein: Toss in grilled chicken, shrimp, or quinoa for a heartier meal.
  • Switch up the beans: Use black beans or kidney beans instead of chickpeas.
  • Switch the dressing: Try a balsamic vinaigrette or a tahini dressing for different flavors.
  • Make it a wrap: Serve the salad in a whole wheat wrap for a portable lunch option.

Storage and Make-Ahead Instructions

This salad is great for meal prep! Here’s how to store it:

  • Refrigerate: Store in an airtight container for up to 3 days.
  • Make-ahead: Prep the ingredients in advance but wait to add the avocado and dressing until just before serving.

Frequently Asked Questions

Here are some commonly asked questions to help you master this recipe:

  • Can I use frozen corn? Yes! Just thaw and drain before using.
  • How can I make this salad spicier? Add more chili powder or a dash of hot sauce.
  • Is this salad gluten-free? Absolutely! All ingredients are naturally gluten-free.
  • Can I add other vegetables? Yes! Feel free to mix in your favorites like cucumbers or radishes.
  • How long does this salad last? It stays fresh for about 3 days in the fridge.
  • Can I make this salad in advance? Yes, but wait to add the avocado until serving to keep it fresh.
  • Is this salad vegan? Yes! All ingredients are plant-based.
  • What can I serve this salad with? It pairs well with grilled meats, tacos, or as a standalone dish!

Nutrition Tips and Dietary Adaptations

This Sweet Corn Chickpea & Avocado Salad is not only delicious but also nutritious. Here are some tips to adapt it to your dietary needs:

  • Low-carb option: Replace chickpeas with diced zucchini or cauliflower.
  • High-protein: Add grilled chicken or tofu to boost protein content.
  • Heart-healthy: Use less olive oil or substitute with a light vinaigrette.

Equipment Recommendations

To make your salad prep a breeze, here are some essential kitchen tools:

  • Sharp knife: For easy chopping of all fresh ingredients.
  • Cutting board: A spacious board for safe and efficient prep.
  • Mixing bowls: A large bowl for mixing the salad and a small one for dressing.
  • Measuring cups and spoons: Ensure accurate ingredient measurements for perfect results.

Serving Suggestions

This salad is versatile! Here are some serving ideas:

  • As a side dish: Perfect alongside grilled chicken or fish.
  • On its own: Serve it as a light lunch or quick dinner.
  • In wraps: Use it as a filling for whole grain wraps.
  • With chips: Serve it with tortilla chips for a crunchy snack!

Final Thoughts

There you have it! A thorough guide to creating the ultimate Sweet Corn Chickpea & Avocado Salad. With its delightful flavors, vibrant colors, and nourishing ingredients, this salad is guaranteed to make your taste buds dance. Whether you whip it up for a family gathering or a simple lunch, it’s sure to impress. Enjoy your culinary adventure, and remember, cooking should always be fun!

Sweet Corn, Chickpea & Avocado Salad

Prep Time 10 minutes
Total Time 10 minutes
Servings 4 servings
Calories 350
A fresh and vibrant salad combining sweet corn, chickpeas, and creamy avocados, perfect for a quick, healthy meal.

Ingredients

Main

  • 250 g sweet corn kernels (removed from cob)
  • 425 g canned chickpeas (drained and rinsed)
  • 2 pcs ripe avocados (diced)
  • 30 g red onion (finely chopped)
  • 75 g bell pepper (diced)
  • 15 g fresh cilantro (chopped)
  • 30 ml lime juice
  • 45 ml olive oil
  • 2.5 ml cumin
  • 1.25 ml chili powder
  • to taste salt and pepper

Instructions 

  • If using fresh corn, remove kernels from the cob.
  • Combine corn, chickpeas, avocado, red onion, bell pepper, and cilantro in a large bowl.
  • Whisk lime juice, olive oil, cumin, chili powder, salt, and pepper in a small bowl.
  • Pour dressing over the salad and toss gently.
  • Adjust seasonings, serve immediately or chill.

Notes

This salad is best enjoyed fresh but can be refrigerated for later.
Calories: 350kcal
Cost: $15
Course: Salad
Cuisine: international
Keyword: vegetarian

Welcome to the world of healthy eating that doesn’t sacrifice flavor or fun! If you’re craving that iconic Big Mac experience but want a meal that fits your healthy lifestyle, then you’re in for a treat with this Big Mac Salad. This vibrant, deconstructed salad incorporates all the delicious elements of a classic Big Mac, from the zesty special sauce to the savory ground beef, while packing in plenty of fresh veggies. In this article, we’ll dive deep into the recipe, share tips for making it your own, and ensure you’re set up for salad success!

Why You’ll Love This Recipe

There are so many reasons to fall in love with this Big Mac Salad. Here are just a few:

  • Quick and Easy: This salad comes together in under 30 minutes, making it perfect for weeknight dinners.
  • Healthier Option: Enjoy all the flavor of a Big Mac without the extra calories and carbs from the bun.
  • Customizable: Use whatever ingredients you have on hand to make it your own—there are endless variations!
  • Meal Prep Friendly: Make it ahead of time for easy lunches or dinners throughout the week.
  • Kid-Approved: A fun and colorful twist that even picky eaters will love, making it a great family meal!

Ingredients Breakdown

Let’s explore the ingredients that make this salad shine! Below, I’ve broken down each component, along with some tasty substitutions to fit your dietary needs.

  • Iceberg Lettuce: The crisp base of your salad. Feel free to swap with romaine or mixed greens for added nutrients.
  • Lean Ground Beef: I recommend 85/15 for a balance of flavor and health. For a leaner option, go for ground turkey or even plant-based crumbles!
  • American Cheese: Torn into pieces for that iconic cheeseburger vibe. You can use cheddar or a dairy-free cheese alternative as a substitute.
  • Dill Pickles: Chopped for that tangy crunch. If you’re not a pickle fan, try chopped olives for a different twist!
  • White Onion: Finely diced for a sharp flavor punch. Red onion or green onions work just as well.
  • Sesame Seeds: Toasted for extra flavor and crunch. You can skip these for a nut-free version.
  • For the Special Sauce: A combination of mayonnaise, sweet pickle relish, yellow mustard, white vinegar, tomato paste, paprika, and onion powder. Adjust the balance to your taste!

Step-by-Step Instructions

Ready to assemble your masterpiece? Follow these easy steps for a salad that’s bursting with flavor!

  1. Make the Special Sauce: Whisk together mayonnaise, sweet pickle relish, yellow mustard, white vinegar, tomato paste, paprika, and onion powder in a bowl until smooth. Set aside.
  2. Cook the Ground Beef: In a skillet over medium-high heat, brown the ground beef, breaking it into smaller pieces as it cooks. Season with salt and pepper. Drain any excess fat.
  3. Assemble Your Salad: Create a base of chopped lettuce in bowls or on plates. Top with the warm cooked ground beef.
  4. Drizzle the Sauce: Generously drizzle the prepared special sauce over the salad.
  5. Finish with Toppings: Scatter the torn cheese, chopped pickles, and diced onion over the top, and finish with a sprinkle of toasted sesame seeds.
  6. Serve and Enjoy: Toss everything together before digging in for the best flavor experience!

Pro Tips for the Best Big Mac Salad

Juicy Big Mac salad featuring chopped lettuce and toppings.

Here are some expert insights to elevate your Big Mac Salad game:

  • Warm Ingredients: Use warm ground beef to slightly melt the cheese for a deliciously creamy texture.
  • Chill the Sauce: For even more flavor, chill the special sauce for at least 30 minutes before serving.
  • Layering is Key: Layer ingredients thoughtfully to ensure every bite has a balance of flavors!
  • Prep Ahead: Make the sauce and cook the beef in advance to save time on busy nights.
  • Experiment with Greens: Don’t hesitate to mix in some spinach or kale for added nutrients!
  • Garnish with Fresh Herbs: Fresh parsley or cilantro adds a pop of freshness.
  • Think Outside the Bowl: Try serving this salad in a wrap or on a whole grain bun for a fun twist!

Common Mistakes and Troubleshooting

Here are a few common pitfalls and how to avoid them:

  • Overcooked Beef: Avoid drying out your beef by cooking it just until browned and no longer.
  • Too Much Dressing: Drizzle lightly at first; you can always add more, but it’s tough to take it away!
  • Stale Lettuce: Use fresh, crisp lettuce for the best texture; wilted greens will ruin your salad experience.

Variations to Mix It Up

Feeling adventurous? Here are some delicious variations to try with your Big Mac Salad:

  • Veggie Delight: Substitute ground beef with black beans or lentils for a plant-based twist!
  • Spicy Kick: Add jalapeños or hot sauce to the special sauce for some extra heat.
  • Greek Style: Swap pickles for sliced kalamata olives and add feta cheese for a Mediterranean flair.
  • Asian-Inspired: Use a sesame ginger dressing instead of the special sauce and top with shredded carrots and sliced scallions.

Storage and Make-Ahead Instructions

This salad is perfect for meal prep! Here’s how to store it:

  • Refrigeration: Store ingredients separately in airtight containers. Assemble just before serving to keep the lettuce crisp.
  • Make-Ahead: Prepare the sauce and cook the beef up to 2 days in advance. Just assemble the salad when you’re ready to eat!

Comprehensive FAQ

Got questions? I’ve got answers! Here are some frequently asked questions about the Big Mac Salad:

  • Can I use ground turkey instead of beef? Absolutely! Ground turkey is a leaner option that works wonderfully in this salad.
  • Is this salad gluten-free? Yes, as long as you use gluten-free mayonnaise and double-check any other ingredients.
  • Can I add more vegetables? Yes! Feel free to add bell peppers, cucumbers, or any other veggies you love.
  • How long will leftovers last? The assembled salad is best eaten fresh, but the components can last in the fridge for up to 3 days.
  • Can I freeze this salad? It’s not recommended to freeze the salad once assembled, but the cooked beef can be frozen for later use.
  • What’s the best way to serve this salad? Serve it chilled or at room temperature for the best flavor.
  • Can I use a different dressing? Definitely! Feel free to experiment with your favorite dressings.
  • Is this salad kid-friendly? For sure! The flavors are familiar, making it appealing to kids.

Nutritional Tips and Dietary Adaptations

This Big Mac Salad is naturally low in carbs and high in protein, making it a great option for various diets. Here are some nutritional tips:

  • Low-Carb: Skip the cheese and use a vinegar-based dressing for a lighter option.
  • Keto-Friendly: Stick to lean ground beef, and add more leafy greens to keep carbs low.
  • Vegan Option: Use plant-based ground meat and a vegan mayo for the special sauce.

Equipment Recommendations

Here are some kitchen tools that will make preparing your Big Mac Salad a breeze:

  • Non-stick Skillet: Perfect for cooking the ground beef without sticking.
  • Mixing Bowl: A large bowl for whisking the special sauce together.
  • Sharp Knife: Essential for chopping veggies and slicing pickles.
  • Cutting Board: A stable surface for all your chopping needs.

Serving Suggestions

This salad is versatile and can be served in many fun ways:

  • In a Wrap: Use a whole grain wrap to hold all the salad ingredients for a portable meal.
  • On a Plate: Serve it in individual bowls for a casual family dinner.
  • With a Side: Pair it with sweet potato fries or roasted veggies for a complete meal.

In conclusion, the Big Mac Salad is not just a meal; it’s a celebration of flavors and creativity in the kitchen! Dive into this nutritious, satisfying dish that brings the joy of a classic favorite into your healthy eating routine. So grab your ingredients, and let’s get cooking! Enjoy your culinary adventure!

Big Mac salad recipe

Prep Time 10 minutes
Cook Time 15 minutes
Total Time 25 minutes
Servings 4 servings
Calories 650
A delicious salad inspired by the classic Big Mac, featuring seasoned beef, special sauce, and fresh toppings.

Ingredients

Vegetables

  • 1 large head iceberg lettuce (chopped)
  • 1 lb lean ground beef (85/15)
  • 4 slices American cheese (torn)
  • 0.5 cup dill pickles (chopped)
  • 0.5 cup white onion (finely diced)
  • 1 tbsp sesame seeds (toasted)
  • 0.5 cup mayonnaise
  • 3 tbsp sweet pickle relish
  • 1 tbsp yellow mustard
  • 2 tsp white vinegar
  • 1 tsp tomato paste
  • 0.5 tsp paprika
  • 0.5 tsp onion powder

Salt and black pepper

Instructions 

  • Whisk all sauce ingredients until smooth to make the Special Sauce.
  • Cook ground beef until browned; season with salt and pepper. Drain excess fat.
  • Assemble salads with chopped lettuce, cooked beef, and drizzle with sauce.
  • Top with torn cheese, chopped pickles, diced onion, and sesame seeds.
  • Serve immediately and toss before eating.

Notes

For best flavor, prepare the sauce ahead of time and let it chill.
Calories: 650kcal
Cost: $15
Course: Salad
Cuisine: American
Keyword: Beef, Sandwich