Author

Ryan

Browsing

Why You Need This Decadent Chicken Alfredo Pasta in Your Life

Welcome to the world of creamy, dreamy goodness! If you’re searching for an easy yet indulgent dish that promises to impress, look no further than Decadent Chicken Alfredo Pasta. This recipe combines tender chicken, luscious fettuccine, and a rich Alfredo sauce that will make your taste buds dance. Perfect for cozy dinners or quick weeknight treats, this dish is not just about flavor; it’s about creating a moment of joy in your kitchen. In under 30 minutes, you can whip up a restaurant-quality experience that will leave everyone asking for seconds!

  • Quick and Easy: With just a few simple ingredients and minimal preparation time, this dish is ideal for busy weeknights.
  • Rich and Creamy: The luscious Alfredo sauce envelops the fettuccine, creating a comforting, decadent experience.
  • Versatile: This recipe can easily be customized with your favorite vegetables or proteins, making it suitable for everyone!
  • Great for Meal Prep: Perfect for making in larger batches and reheating throughout the week, saving you time and effort.
  • Kid-Approved: The creamy texture and mild flavor make it a hit with children and adults alike!

Ingredients Breakdown for Your Perfect Alfredo

Before diving into the cooking process, let’s take a closer look at the key ingredients that make this Chicken Alfredo Pasta a standout dish. Below, you’ll find the full list of ingredients, along with suggestions for substitutions to cater to your taste and dietary needs.

  • 8 oz fettuccine pasta: Cook according to package instructions. If you prefer a different pasta shape, feel free to swap it out for penne or rigatoni!
  • 2 pieces boneless, skinless chicken breasts (about 1 to 1.25 lb total): Season with salt and pepper. You can substitute with chicken thighs for more flavor or even use grilled shrimp!
  • 1 tablespoon olive oil: Can substitute with avocado oil for a slightly different flavor profile.
  • 2 cloves garlic, minced: Fresh garlic adds a punch of flavor; jarred garlic works in a pinch!
  • 1 cup heavy cream: For a lighter version, use 3/4 cup whole milk combined with 1/4 cup mascarpone cheese.
  • 1 cup grated Parmesan cheese: Use freshly grated for the best melting and flavor; pre-grated can work in a hurry.
  • Chopped parsley: For garnish, adds a fresh touch to your creamy dish.

Step-by-Step Directions to Culinary Bliss

Now that you have your ingredients ready, let’s get cooking! Follow these simple steps to create your own Decadent Chicken Alfredo Pasta.

  1. Cook the Pasta: Begin by boiling a large pot of salted water. Add the fettuccine pasta and cook according to package instructions until al dente. Reserve 1 cup of pasta water before draining.
  2. Cook the Chicken: In a large skillet, heat the olive oil over medium heat. Season the chicken breasts with salt and pepper, then add them to the skillet. Cook for 6-7 minutes on each side or until fully cooked. Remove and let rest before slicing into strips.
  3. Prepare the Alfredo Sauce: In the same skillet, add minced garlic and sauté for about 30 seconds until fragrant. Pour in the heavy cream, stirring constantly. Allow it to simmer for 2-3 minutes.
  4. Add the Cheese: Gradually stir in the grated Parmesan cheese, mixing until melted and creamy. If the sauce is too thick, add a splash of reserved pasta water to reach your desired consistency.
  5. Combine Everything: Toss the cooked fettuccine and sliced chicken into the sauce, ensuring everything is well coated. Adjust seasoning with salt and pepper as needed.
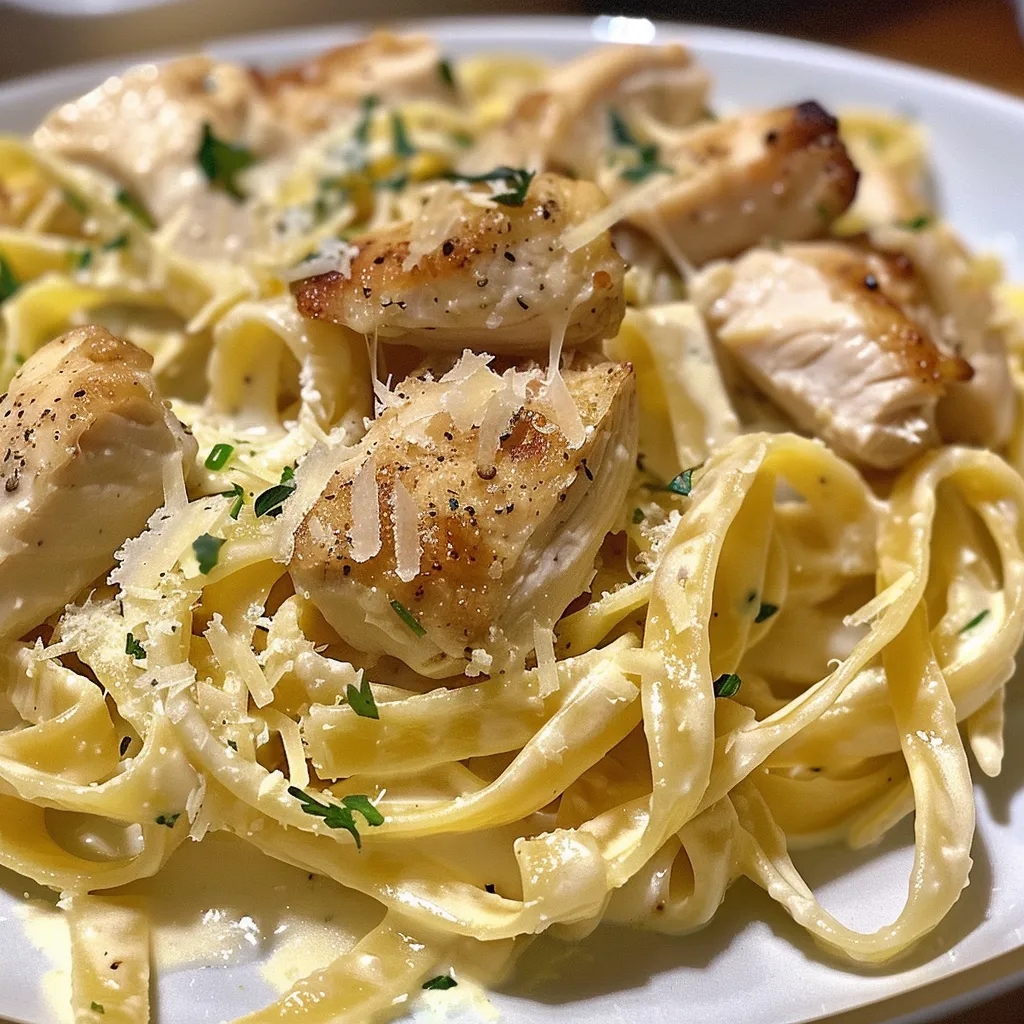
  6. Serve: Plate your Chicken Alfredo Pasta, garnish with chopped parsley, and enjoy!

Pro Tips for Alfredo Perfection

Juicy Chicken Alfredo Pasta arranged on a plate, featuring fettuccine noodles and a rich sauce.

Here are some expert insights to elevate your Chicken Alfredo experience:

  • Use Fresh Ingredients: Fresh garlic and freshly grated cheese make a world of difference in flavor.
  • Don’t Overcook the Pasta: Aim for al dente; the pasta will continue cooking when combined with the sauce.
  • Reserve Pasta Water: This starchy water helps adjust the sauce consistency while adding flavor.
  • Balance the Creaminess: If the sauce feels too rich, a splash of lemon juice can brighten the flavors.
  • Add Vegetables: Consider adding sautéed spinach, peas, or broccoli for a nutritious twist!
  • Experiment with Proteins: Swap chicken for shrimp, scallops, or even tofu for a plant-based option!
  • Make it Spicy: Add a pinch of red pepper flakes for a kick!
  • Storage Tips: Store leftovers in an airtight container in the refrigerator for up to 3 days.

Common Mistakes & Troubleshooting

Even the best chefs make mistakes! Here are some common pitfalls and how to avoid them:

  • Too Thick Sauce: If your sauce is too thick, simply add reserved pasta water gradually until it reaches your desired consistency.
  • Overcooked Chicken: Always check the internal temperature of your chicken; it should reach 165°F for safety.
  • Grainy Cheese: Ensure your cheese is fresh and add it gradually to prevent clumping.
  • Bland Sauce: Taste as you go! Adjust seasoning with salt, pepper, or a splash of lemon.

Delicious Variations to Try

Want to mix things up? Here are some variations to keep your Chicken Alfredo exciting:

  • Chicken Alfredo with Broccoli: Stir in steamed broccoli florets for added nutrients and color.
  • Garlic Shrimp Alfredo: Substitute chicken for shrimp for a seafood twist!
  • Mushroom Alfredo: Add sautéed mushrooms for an earthy flavor boost.
  • Spicy Alfredo: Mix in some crushed red pepper flakes or diced jalapeños for heat!

Storage & Make-Ahead Instructions

Want to prep in advance? Here’s how:

  • Refrigeration: Store leftovers in an airtight container in the fridge for up to 3 days. Reheat gently on the stovetop with a splash of cream or pasta water.
  • Freezing: While it’s best fresh, you can freeze the sauce separately. To reheat, thaw overnight in the fridge and warm gently on the stove.

Frequently Asked Questions

Got questions? We’ve got answers! Here are some common queries about Chicken Alfredo Pasta:

  • Can I use milk instead of heavy cream? Yes, for a lighter version, use 3/4 cup whole milk with 1/4 cup mascarpone.
  • How do I prevent the sauce from separating? Keep the heat low and stir frequently while adding cheese gradually.
  • What pasta can I use instead of fettuccine? Any pasta shape works well; penne or rigatoni are great alternatives.
  • Can I make this dish vegetarian? Absolutely! Use vegetable broth and skip the chicken for a vegetarian Alfredo.
  • How can I make it gluten-free? Substitute regular pasta for gluten-free pasta.
  • Is this recipe suitable for meal prep? Yes! It stores well and can be reheated throughout the week.
  • Can I add more vegetables? Definitely! Spinach, peas, or roasted red peppers make great additions.
  • What should I serve with Chicken Alfredo Pasta? A simple salad or garlic bread pairs beautifully!

Nutritional Insights & Dietary Adaptations

For those mindful of nutrition, here are some tips:

  • Watch Your Portions: While delicious, remember that creamy pasta can be calorie-dense, so enjoy it in moderation.
  • Protein Boost: Add more protein by including beans or legumes if you’re going vegetarian.
  • Fiber Up: Include whole grain pasta or add veggies for extra fiber!
  • Low-Carb Option: Substitute traditional pasta with zucchini noodles for a lighter, low-carb meal.

Cooking Equipment You’ll Need

Here’s what you’ll need to create this delightful dish:

  • Large Pot: For boiling the pasta.
  • Skillet: A large skillet works best for sautéing chicken and preparing the sauce.
  • Measuring Cups: To ensure accurate measurements.
  • Wooden Spoon: Perfect for stirring without scratching your cookware.
  • Chef’s Knife: Essential for slicing the chicken and chopping garlic.

Serving Suggestions for Your Alfredo Delight

To make your meal even more special, consider these serving ideas:

  • Garnish with Fresh Herbs: A sprinkle of chopped parsley or basil adds a beautiful touch.
  • Pair with Wine: A crisp white wine like Sauvignon Blanc complements the creaminess of Alfredo sauce.
  • Serve with a Side Salad: A simple mixed greens salad with vinaigrette balances the richness of the pasta.
  • Accompany with Garlic Bread: Nothing beats a side of warm garlic bread to mop up that luscious sauce!

In Conclusion: Your Chicken Alfredo Adventure Awaits!

Now that you’re equipped with everything you need to create the best Chicken Alfredo Pasta, it’s time to get cooking! Remember, cooking is all about joy and creativity. Don’t be afraid to experiment with flavors and make this dish your own. Whether it’s a cozy family dinner or a fun date night, this recipe promises to bring smiles and satisfaction to your table. So roll up your sleeves, gather your ingredients, and embark on this delicious culinary journey. Happy cooking!

Chicken Alfredo Pasta

Prep Time 10 minutes
Cook Time 15 minutes
Total Time 25 minutes
Servings 4 servings
Calories 650
A creamy and flavorful pasta dish featuring tender chicken and rich Alfredo sauce, perfect for a comforting meal.

Ingredients

Pasta

  • 8 oz fettuccine pasta (Cook according to package instructions.)

Chicken

  • 2 pieces boneless, skinless chicken breasts (About 1 to 1.25 lb total. Season with salt and pepper.)

Oil

  • 1 tablespoon olive oil (Can substitute with avocado oil.)

Garlic

  • 2 cloves garlic, minced (Or 1 teaspoon jarred garlic.)

Cream

  • 1 cup heavy cream (Can substitute with 3/4 cup whole milk + 1/4 cup mascarpone.)

Cheese

  • 1 cup grated Parmesan cheese (Use freshly grated for best melting and flavor.)

Garnish

  • Chopped parsley (For garnish.)

Instructions 

  • Cook the fettuccine pasta according to package instructions. Drain and set aside.
  • Season chicken breasts with salt and pepper, then cook in olive oil until golden and cooked through. Remove and slice.
  • In the same pan, sauté minced garlic until fragrant, then add heavy cream and Parmesan cheese. Stir until smooth and heated through.
  • Add cooked pasta and sliced chicken to the sauce, tossing to combine. Garnish with chopped parsley before serving.

Notes

For a lighter version, use half-and-half instead of heavy cream.
Calories: 650kcal
Cost: $15
Course: Main Course
Cuisine: Italian
Keyword: Chicken, Creamy, pasta

Discover the Zesty Lemon Chicken Salad: A Flavor Explosion Awaits!

Welcome to a culinary adventure where healthy eating meets vibrant flavors! The Zesty Lemon Chicken Salad offers a delightful burst of freshness that perfectly balances nutritious ingredients and tantalizing tastes. This recipe, inspired by the iconic Ina Garten, is not just a meal; it’s a celebration of wholesome ingredients that you can whip up in no time. Whether you’re prepping for a light lunch or a satisfying dinner, this salad is designed to energize your body and excite your palate!

In this comprehensive guide, we’ll dive deep into the elements that make this lemon chicken salad a must-try. Get ready for detailed insights, expert tips, and creative variations that elevate this dish from ordinary to extraordinary!

Why You’ll Love This Recipe

This salad isn’t just another chicken dish; it’s a vibrant, refreshing medley that’s both satisfying and guilt-free. Here are five compelling reasons why you’ll adore this recipe:

  • Quick and easy preparation: With minimal fuss, you can have this salad ready in under 30 minutes, making it perfect for busy weekdays.
  • Flavor-packed: The zesty lemon dressing combined with tender chicken and crunchy vegetables creates a symphony of flavors that will dance on your taste buds.
  • Nutritious and balanced: Packed with lean protein, fresh veggies, and healthy fats, this salad provides essential nutrients without compromising on taste.
  • Customizable: With various options for ingredients and dressings, you can easily adapt this salad to suit your personal taste or dietary needs.
  • Perfect for meal prep: This chicken salad stores well, making it an excellent choice for make-ahead lunches or easy dinners throughout the week.

Ingredient Breakdown: What You Need

To create this vibrant lemon chicken salad, here’s everything you’ll need:

  • Boneless chicken breasts: 2 large, grilled or poached to perfection for optimal tenderness.
  • Olive oil: 3 tablespoons, a healthy fat that enhances flavor and moisture.
  • Fresh lemon juice: 3 tablespoons, to brighten the salad with a zesty kick.
  • Lemon zest: 1 teaspoon, a concentrated burst of lemon flavor.
  • Dijon mustard: 1 teaspoon, for a subtle tanginess.
  • Garlic: 1 teaspoon, minced, adding aromatic depth.
  • Celery: ½ cup, chopped, for a satisfying crunch.
  • Red onion: ¼ cup, finely chopped, for a hint of sweetness.
  • Fresh parsley: ¼ cup, chopped, for a pop of color and freshness.
  • Salt: 1 teaspoon, to enhance all the flavors.
  • Black pepper: ½ teaspoon, for a subtle heat.

**Substitutions:** If you’re looking to mix things up, consider using chicken thighs for a richer flavor or quinoa for a hearty vegetarian option. You can also swap out vegetables or use Greek yogurt instead of mayonnaise for a lighter dressing.

Pro Tips for the Best Lemon Chicken Salad

Juicy Lemon Chicken Salad displayed in a bowl, showcasing its colorful ingredients.

Want to elevate your lemon chicken salad to new heights? Here are some expert insights:

  • Use fresh ingredients: Freshly squeezed lemon juice and high-quality olive oil make a significant difference in flavor.
  • Chill your chicken: Let your chicken cool before combining it with the other ingredients to ensure a refreshing salad.
  • Marinate for flavor: If time allows, marinate the chicken in lemon juice, olive oil, and spices for at least 30 minutes before cooking.
  • Mix your dressing separately: Whisk together the dressing ingredients before adding them to the salad for even distribution.
  • Adjust seasoning: Taste and adjust the seasoning before serving; a pinch more salt or lemon can enhance the flavors.
  • Include nuts or seeds: Add toasted almonds or sunflower seeds for an extra crunch and nutritional boost.
  • Serve chilled or at room temperature: This salad is delicious both ways, making it versatile for any occasion.
  • Incorporate seasonal veggies: Rotate your vegetables with the seasons for a fresh take every time.

Avoiding Common Mistakes

Even a simple recipe can have its pitfalls. Here are common mistakes to steer clear of:

  • Overcooking the chicken: This can lead to dry, tough meat. Aim for a juicy, tender finish.
  • Skipping the zest: Lemon zest is crucial for adding deep flavor; don’t leave it out!
  • Using low-quality ingredients: Invest in good olive oil and fresh produce to enhance the overall taste.
  • Not allowing time for flavors to meld: Letting the salad sit for a bit after mixing can improve flavor integration.

Exciting Variations to Try

Ready to switch things up? Here are some fun variations to consider:

  • Mediterranean Twist: Add olives, feta cheese, and sun-dried tomatoes for a Mediterranean flair.
  • Spicy Southwest: Incorporate black beans, corn, and a chipotle dressing for a spicy kick.
  • Fruit Fusion: Toss in diced apples or grapes for a sweet contrast to the savory elements.
  • Asian-Inspired: Substitute soy sauce for the Dijon mustard, and add sesame oil and chopped scallions for an Asian twist.

Storage and Make-Ahead Instructions

This salad is ideal for meal prep! Here’s how to store and enjoy it later:

  • Refrigeration: Store in an airtight container in the refrigerator for up to 3 days.
  • Make-ahead: Prepare the chicken and dressing in advance. Mix with fresh veggies on the day you plan to serve.
  • Freezing: While it’s best fresh, you can freeze the chicken separately if needed. The mixed salad doesn’t freeze well.

Frequently Asked Questions

Got questions? Here are some common queries about this lemon chicken salad:

  • Can I use rotisserie chicken? Absolutely! Rotisserie chicken is a great time-saver and adds flavor.
  • Is this salad gluten-free? Yes, as long as you ensure your mustard and other condiments are gluten-free.
  • What can I serve with this salad? It pairs well with crusty bread, a light soup, or even on its own as a standalone meal.
  • Can I make this salad vegan? Yes! Substitute chicken with chickpeas or tofu, and use a vegan dressing.
  • How can I make it lower in calories? Use less olive oil or substitute Greek yogurt for mayonnaise to reduce calories.
  • What’s the best way to slice chicken for salads? Slice against the grain for a more tender bite.
  • How long does it take to marinate the chicken? A minimum of 30 minutes is recommended for best flavor.
  • Can I add other vegetables? Absolutely! Feel free to mix in your favorites like bell peppers or cucumbers.

Nutrition Tips and Dietary Adaptations

This salad is not only delicious but also a powerhouse of nutrition:

  • Protein-rich: The chicken provides lean protein essential for muscle repair and growth.
  • High in vitamins: Fresh vegetables add vitamins A and C, crucial for immune health and skin.
  • Healthy fats: Olive oil offers heart-healthy fats that support overall wellness.
  • Low-carb option: Perfect for those on low-carb diets; enjoy without bread or high-carb sides.

Recommended Equipment

To make your cooking experience smooth and enjoyable, here’s a list of kitchen essentials:

  • Sharp knife: For easy slicing of chicken and vegetables.
  • Cutting board: A sturdy surface for food prep.
  • Mixing bowls: For combining all your salad ingredients effectively.
  • Whisk: Essential for mixing your dressing thoroughly.

Serving Suggestions: How to Enjoy Your Salad

Serving this salad can be as creative as the dish itself:

  • Chilled: Serve it straight from the refrigerator for a refreshing meal.
  • On a bed of greens: Place the salad on a bed of arugula or mixed greens for added texture.
  • Wrap it up: Use lettuce leaves to create a delightful chicken salad wrap.
  • Garnish: Sprinkle with extra parsley or lemon slices for a vibrant presentation.

Wrapping Up: Your Flavorful Journey Awaits!

With its lively flavors and nutritious ingredients, the Zesty Lemon Chicken Salad is a recipe that will not only nourish your body but also tantalize your taste buds. Don’t hesitate to experiment with variations, and remember that the kitchen is your playground. Embrace the joy of cooking healthy meals that excite you and your loved ones!

So go ahead, give this recipe a try, and share your delicious creations with friends and family. Happy cooking!

Ina Garten Lemon Chicken Salad Recipe

Prep Time 15 minutes
Cook Time 20 minutes
Total Time 35 minutes
Servings 4 servings
Calories 350
A fresh and tangy chicken salad featuring lemon and herbs, perfect for a light lunch or dinner.

Ingredients

Protein

  • 2 large Boneless chicken breasts

Dressing

  • 3 tablespoons Olive oil
  • 3 tablespoons Fresh lemon juice
  • 1 teaspoon Lemon zest
  • 1 teaspoon Dijon mustard
  • 1 teaspoon Minced garlic

Vegetables

  • ½ cup Chopped celery
  • ¼ cup Finely chopped red onion
  • ¼ cup Chopped fresh parsley
  • 1 teaspoon Salt
  • ½ teaspoon Black pepper

Instructions 

  • Cook the chicken breasts until fully cooked, then let cool and chop.
  • In a bowl, whisk together lemon juice, lemon zest, Dijon mustard, garlic, olive oil, salt, and pepper to make the dressing.
  • Combine chopped chicken, celery, red onion, and parsley in a large bowl.
  • Pour the dressing over the chicken mixture and toss to combine.
  • Serve immediately or chill before serving.

Notes

For extra flavor, add a squeeze of fresh lemon before serving.
Calories: 350kcal
Cost: $15
Course: Salad
Cuisine: American
Keyword: Chicken, Lemon

Kickstart Your Day with the Ultimate Berry Bliss Smoothie!

Welcome to the vibrant world of smoothies, where flavor meets nutrition! Today, we’re diving into the Ultimate Berry Bliss Smoothie, a delightful concoction that’s not just a treat for your taste buds but also a powerhouse of health benefits. This smoothie is your perfect morning companion, packed with deliciousness and essential nutrients to fuel your day. Made with frozen mixed berries, creamy Greek yogurt, and a hint of honey, it’s ready in just 5 minutes. Let’s blend our way to health!

Why You’ll Love This Recipe

  • Quick and Easy: Whip this smoothie up in under 5 minutes—perfect for busy mornings!
  • Nutrition Boost: Each serving is packed with antioxidants from mixed berries, supporting your immune system.
  • Protein Power: The Greek yogurt adds protein that helps keep you full and satisfied.
  • Customizable: You can easily adapt this recipe with your favorite fruits or add-ins.
  • Deliciously Kid-Friendly: Even picky eaters will love the sweet, fruity flavor!

Ingredient Breakdown

Let’s take a closer look at the ingredients that make this smoothie so special:

  • 1.5 cups frozen mixed berries: These are not only delicious but also packed with vitamins and antioxidants. You can use any combination of strawberries, blueberries, raspberries, or blackberries.
  • 0.5 frozen banana: Adds natural sweetness and creaminess. If you’re not a fan of bananas, you can substitute with avocado or another frozen fruit.
  • 0.5 cup plain Greek yogurt: This ingredient provides a protein boost and a nice creaminess. For a dairy-free option, try coconut yogurt.
  • 1 cup unsweetened almond milk: This keeps the smoothie light and adds a subtle nutty flavor. You can use any milk of your choice!
  • 1 tablespoon honey: A touch of sweetness that balances the tartness of the berries. You can replace it with maple syrup for a vegan option.
  • 0.5 teaspoon pure vanilla extract: Enhances the overall flavor profile.
  • 1 tablespoon chia seeds: These tiny seeds add healthy fats and fiber, making your smoothie even more satisfying.

Pro Tips for the Perfect Smoothie

A side view of a healthy berry smoothie with mixed berries and yogurt, captured on a smartphone.

Here are some expert insights to elevate your smoothie game:

  • Layer your ingredients: Always pour liquids first, followed by softer ingredients, and finish with frozen items to ensure a smooth blend.
  • Start slow: Begin blending on a low speed, then ramp up to high to avoid splashing and to achieve a silky texture.
  • Check consistency: If you notice a ‘bridge’ of frozen fruit forming over the blades, stop and stir to ensure everything blends evenly.
  • Adjust sweetness: If the smoothie isn’t sweet enough, add more honey or a splash of maple syrup, but remember to taste as you go!
  • Chill your ingredients: For an extra frosty smoothie, keep your fruits in the freezer until you’re ready to blend.
  • Experiment with add-ins: Boost your smoothie with superfoods like spirulina, protein powder, or a handful of spinach for extra nutrients without altering the flavor.
  • Blend in batches: If you’re making smoothies for the whole family, double the recipe and blend in batches to save time.
  • Keep it fresh: Use fresh, high-quality ingredients for the best flavor and nutritional value.

Avoiding Common Mistakes

Even experienced smoothie-makers can run into hiccups. Here’s how to troubleshoot:

  • Too thick?: If your smoothie is too thick, add a splash more liquid and blend again.
  • Too sweet?: Balance sweetness with a squeeze of lemon juice or a handful of greens to cut through the sugar.
  • Too chunky?: Blend longer! Smoothies should be creamy and smooth, not chunky.
  • Taste off?: Always taste your smoothie before serving. You can adjust flavors as needed.

Flavor Variations to Try

Feel free to mix things up with these fun variations:

  • Berry Banana Bliss: Add an extra banana for a creamier texture.
  • Green Berry Smoothie: Toss in a handful of spinach or kale for a nutrient boost without overpowering the flavor.
  • Peanut Butter Berry: Add a tablespoon of peanut butter for a nutty twist and added protein.
  • Coconut Berry Delight: Substitute almond milk with coconut milk for a tropical flair.

Storage and Make-Ahead Instructions

Planning is key to smoothie success!

  • Make ahead: Prep your ingredients by portioning them into freezer bags. Just grab a bag and blend in the morning!
  • Storage: If you have leftovers, store them in an airtight container in the fridge for up to 24 hours. Give it a good shake before drinking.

Comprehensive FAQ

Still have questions? Here are some common ones:

  • Can I use fresh berries instead of frozen? Yes, but you may need to add ice to achieve the desired texture.
  • Is this smoothie vegan? You can make it vegan by omitting the honey and using plant-based yogurt.
  • Can I add protein powder? Absolutely! Just blend it in with the other ingredients for a nutritious boost.
  • How do I make it dairy-free? Use almond milk and coconut yogurt instead of dairy yogurt.
  • Can I use other fruits? Yes! Feel free to experiment with other frozen fruits, like mango or peaches.
  • How to thicken my smoothie? Add more frozen fruit or Greek yogurt to thicken it up.
  • How long will it last in the fridge? Enjoy it within 24 hours for the best taste and texture.
  • Can I meal prep smoothies? Definitely! Pre-pack your ingredients and blend them when you’re ready.

Nutrition Tips and Dietary Adaptations

For different dietary needs, consider these tips:

  • Low-calorie option: Use unsweetened almond milk and skip the honey.
  • High-protein option: Use Greek yogurt and add a scoop of protein powder.
  • Fiber-rich option: Add oats or flaxseed for extra fiber.

Equipment Recommendations

To create the perfect smoothie, here’s what you’ll need:

  • High-speed blender: Invest in a good-quality blender for smooth, creamy results.
  • Measuring cups: Ensure accurate ingredient measurements for consistency.
  • Storage containers: Have some glass jars or BPA-free containers for meal prep.

Serving Suggestions

How to enjoy your smoothie:

  • Top with Fresh Fruit: Garnish your smoothie with sliced bananas or berries for a beautiful presentation.
  • Add Granola: A sprinkle of granola on top adds crunch and makes it more filling.
  • Serve in a Fun Glass: Use colorful glasses to make your smoothie feel like a special treat!

Final Thoughts

There you have it! The Ultimate Berry Bliss Smoothie is your go-to recipe for a quick, nutritious breakfast that’s bursting with flavor. With endless variations and easy prep options, it’s a recipe that fits any lifestyle. So grab your blender, unleash your creativity, and enjoy a deliciously healthy start to your day!

Healthy Berry Smoothie Recipe

Prep Time 5 minutes
Total Time 5 minutes
Servings 2 cups
Calories 250
A delicious and nutritious smoothie perfect for a quick breakfast or snack, packed with berries, banana, and wholesome seeds.

Ingredients

Liquid

  • 1 cup unsweetened almond milk

Yogurt

  • 0.5 cup plain Greek yogurt

Sweeteners

  • 1 tablespoon honey
  • 0.5 teaspoon pure vanilla extract

Seeds

  • 1 tablespoon chia seeds

Fruits

  • 0.5 frozen banana frozen banana
  • 1.5 cups frozen mixed berries

Instructions 

  • Pour 1 cup almond milk into blender.
  • Add Greek yogurt, honey, and vanilla extract.
  • Sprinkle chia seeds and add banana and berries.
  • Blend on low until liquid covers fruit, then high for 45–60 seconds.
  • Stop if a 'bridge' forms, then pour into glasses and serve.

Notes

Use frozen berries for a thicker, colder smoothie.
Calories: 250kcal
Cost: $10
Course: Breakfast, Snack
Cuisine: Healthy
Keyword: Berry, Smoothie

Elevate Your Meal Game with a Quinoa and Spinach Salad!

Get ready to transform your mealtime into a celebration of flavor and nourishment with this Quinoa and Spinach Salad. Packed with vibrant colors and rich nutrients, this recipe is not only delightful to the taste buds but also a powerhouse for your health. Perfect for busy weekdays or leisurely weekends, this salad brings together the goodness of quinoa and fresh spinach, creating a dish that truly dances on your palate!

In this article, we’ll delve deep into the magic of this salad, offering you an array of insights, tips, and variations to make it your own. By the end, you’ll be ready to whip up this energetic dish, knowing exactly how to impress yourself and your loved ones!

Why You’ll Love This Recipe

  • Quick and Easy: With minimal prep and cooking time, this salad is ready in just 15 minutes, making it perfect for those busy days.
  • Nutritious Powerhouse: Quinoa is a complete protein, while spinach is loaded with vitamins A, C, and K, making this salad a nutrient-dense choice.
  • Versatile Ingredients: Customize your salad with various vegetables or fruits, ensuring you never get bored!
  • Great for Meal Prep: This salad is perfect for make-ahead lunches or dinners. It stores well in the fridge, maintaining its freshness.
  • Delightfully Refreshing: The zesty olive oil and lemon dressing gives the salad a bright flavor that is both refreshing and satisfying, making it a hit at any gathering.

Ingredients Breakdown

Let’s take a closer look at what you’ll need to create this delicious Quinoa and Spinach Salad:

  • Cooked Quinoa: Use well-rinsed quinoa to avoid bitterness. For a nutty flavor, consider toasting it lightly before cooking.
  • Fresh Spinach: Baby spinach leaves are best for their tender texture and vibrant color. Spinach is packed with iron and antioxidants!
  • Diced Bell Peppers: Choose a mix of colors for a visually appealing dish. They add crunch and sweetness.
  • Chopped Apples: Sweet, crisp apples, like Honeycrisp or Fuji, provide a refreshing contrast to the savory elements.
  • Olive Oil: A high-quality extra virgin olive oil enhances flavor and provides healthy fats.
  • Lemon Juice: Freshly squeezed lemon juice brightens the salad and balances the flavors beautifully.

Pro Tips for the Best Salad

Fresh Quinoa and Spinach Salad displayed with a side view showcasing its ingredients.

If you want to elevate your salad-making skills, consider these expert insights:

  • Rinse Quinoa: Always rinse quinoa in cold water to remove its natural coating, called saponin, which can taste bitter.
  • Cool Quinoa: Allow your cooked quinoa to cool before mixing with fresh ingredients to maintain their crispness.
  • Season Generously: Don’t be shy with seasoning! A pinch of salt and pepper can significantly enhance overall flavor.
  • Mix and Match: Feel free to swap ingredients based on what you have on hand—carrots, cucumbers, or even chickpeas work great!
  • Dress Just Before Serving: To keep ingredients fresh and crisp, drizzle the dressing right before serving.
  • Experiment with Dressings: Try adding balsamic vinegar or a yogurt-based dressing for a different flavor profile.
  • Protein Boost: Add grilled chicken, tofu, or beans for an extra protein kick to make this a complete meal.
  • Garnish Wisely: Consider topping with nuts, seeds, or herbs like parsley for added texture and flavor.

Avoid Common Mistakes

Here are some common pitfalls to avoid when making your salad:

  • Overcooked Quinoa: Cook quinoa until it’s fluffy and the germ is visible. Overcooking can result in mushy grains.
  • Skip the Dressing: Without a good dressing, even the freshest salad can taste bland. Make sure to dress your salad!
  • Too Much Dressing: Conversely, too much dressing can drown your salad. Start with a little and add more if needed.
  • Not Enough Texture: Balance crunchy and soft ingredients for a more interesting bite.

Variations of Quinoa and Spinach Salad

Want to switch things up? Here are some fun variations to try:

  • Fruit Fiesta: Add strawberries, walnuts, and feta cheese for a sweet and savory twist.
  • Mexican-Inspired: Toss in black beans, corn, avocado, and a lime-cilantro dressing for a zesty kick.
  • Asian Fusion: Mix in shredded carrots, edamame, and sesame dressing for an Asian flair.
  • Herbed Delight: Incorporate fresh herbs like basil or mint for an aromatic boost.

Storage and Make-Ahead Instructions

This salad is perfect for meal prep! Here’s how to store it:

  • Refrigerate: Store in an airtight container in the fridge for up to 3 days. Keep dressing separate until serving.
  • Freeze: While fresh spinach doesn’t freeze well, you can freeze the quinoa and veggies separately for up to a month. Just thaw and mix when ready to eat.
  • Make Ahead: Prepare all ingredients and store them separately. Combine them the night before for a quick grab-and-go lunch.

Frequently Asked Questions

Got questions? We’ve got answers! Here are some common queries about this salad:

  • Can I use frozen spinach? Yes, thawed frozen spinach can work, but be sure to squeeze out excess water.
  • Is quinoa gluten-free? Absolutely! Quinoa is naturally gluten-free, making it a great option for those with gluten sensitivities.
  • Can I use a different grain? Of course! Try farro, bulgur, or even brown rice as a base for a different texture.
  • Is this salad vegan? Yes, this salad is entirely vegan-friendly! It’s packed with plant-based goodness.
  • How can I make this dish low-carb? Substitute quinoa with cauliflower rice for a lower-carb version.
  • What dressing pairs well? A light vinaigrette or tahini dressing complements this salad beautifully.
  • Can I add protein? Absolutely! Grilled chicken, tofu, or beans can elevate this salad into a complete meal.
  • How do I know when quinoa is cooked? Quinoa is done when it appears fluffy, and the germ has spiraled out from the grain.

Nutritional Tips and Dietary Adaptations

Here are some additional tips to enhance the nutritional quality of your salad:

  • Boost Fiber: Incorporate high-fiber ingredients like beans or seeds for a more filling meal.
  • Healthy Fats: Drizzle with avocado oil or sprinkle with nuts for added healthy fats.
  • Watch the Sodium: If you’re watching your sodium intake, opt for low-sodium dressings and seasoning.
  • Mind Your Portions: While healthy, it’s important to keep portion sizes in check for balanced eating.

Essential Equipment for Success

To make your salad-making experience smooth and efficient, here’s what you’ll need:

  • Cooking Pot: A medium-sized pot for cooking quinoa.
  • Mixing Bowl: A large bowl to combine all your ingredients easily.
  • Sharp Knife: For chopping vegetables and fruits.
  • Measuring Cups and Spoons: To ensure accurate ingredient measurements.

Serving Suggestions

This salad shines on its own, but it also pairs beautifully with:

  • Grilled Chicken: A protein-rich addition that complements the salad’s freshness.
  • Baked Fish: Light and flaky fish adds an elegant touch to your meal.
  • Whole Grain Bread: Serve with a slice of whole grain bread for a satisfying dinner.
  • Soup: Pair it with a warm bowl of soup for a comforting meal.

Conclusion

There you have it! Your ultimate guide to creating a Quinoa and Spinach Salad that bursts with flavor and nutrition. This dish is not just a salad; it’s a celebration of health, taste, and creativity in the kitchen. Whether you’re meal prepping for the week or impressing guests at a dinner party, this salad is sure to become a staple in your recipe repertoire. So, gather your ingredients, unleash your culinary creativity, and enjoy the vibrant flavors of this energizing salad!

Quinoa and Spinach Salad

Prep Time 10 minutes
Cook Time 15 minutes
Total Time 25 minutes
Servings 4 servings
Calories 250
A fresh and healthy salad combining protein-rich quinoa with crisp vegetables and a tangy lemon dressing.

Ingredients

Main

  • 1 cup cooked quinoa
  • 2 cups fresh spinach
  • 1 cup diced bell peppers
  • 1 cup chopped apples
  • 2 tablespoons olive oil
  • 1 tablespoon lemon juice

Instructions 

  • Toss cooked quinoa, spinach, bell peppers, and apples together.
  • Drizzle with olive oil and lemon juice.
  • Mix well and serve.

Notes

For extra flavor, add some chopped herbs or nuts.
Calories: 250kcal
Cost: $12
Course: Salad
Cuisine: international
Keyword: Quinoa

Discover the Ultimate Flavor Explosion: Stuffed Bell Peppers That Make Healthy Eating Irresistible!

Welcome to a culinary adventure where nutrition meets excitement! Packed with vibrant flavors and wholesome ingredients, this Stuffed Bell Peppers Chicken recipe is your ticket to a healthy dinner that doesn’t skimp on satisfaction. In less than an hour, you can create a stunning dish that’s not only delicious but also visually appealing. Whether you’re a busy professional, a parent juggling schedules, or simply someone who loves good food, these stuffed bell peppers are here to make your meal prep a breeze. From the tender bell peppers to the flavorful filling, every bite is a celebration of taste and health. Let’s dive in!

Why You’ll Love This Recipe

These Stuffed Bell Peppers aren’t just a feast for the eyes; they come with a multitude of benefits that make them a staple in healthy cooking. Here’s why you’ll fall in love:

  • Meal Prep Friendly: Make these ahead of time and enjoy them throughout the week. They store well in the fridge for up to 4 days, making busy weeknights a breeze.
  • Customizable: The filling can be easily adapted to suit your dietary preferences. Swap chicken for turkey, add beans for a vegetarian twist, or pile on your favorite toppings!
  • Portion Control: Each bell pepper serves as its own individual meal, making it perfect for portion control and easy meal planning.
  • Nutritious and Filling: Loaded with lean protein, fiber, and essential nutrients, these peppers will keep you satisfied without weighing you down.
  • Kid-Friendly: The colorful presentation and familiar flavors make these stuffed bell peppers a hit with picky eaters. Get the kids involved in the preparation process for extra fun!

Ingredient Breakdown: What You’ll Need

Creating these stuffed bell peppers is simple, and the ingredients are easy to find! Here’s everything you’ll need:

  • 4 large bell peppers: Choose any color—red, yellow, green, or orange. Each brings a unique flavor and vibrant color to your dish.
  • 2 cups cooked chicken breast, shredded: Opt for rotisserie chicken for quick prep, or cook your own! This is the protein powerhouse of the meal.
  • 1 tablespoon olive oil: For sautéing the veggies and enhancing flavor.
  • 1 medium onion, thinly sliced: Adds sweetness and depth to the filling.
  • 1 red bell pepper, sliced thin: An additional layer of flavor and color.
  • 1 teaspoon chili powder: For a kick of spice!
  • 1 teaspoon cumin: Adds a warm, earthy flavor.
  • 1 teaspoon paprika: Enhances color and flavor.
  • 1/2 teaspoon garlic powder: A must-have for any savory dish.
  • 1/2 teaspoon salt: To taste.
  • 1/4 teaspoon black pepper: Adds a subtle heat.
  • 1/2 cup diced tomatoes, drained: Brings moisture and acidity to the filling.
  • 1/2 cup shredded cheese (optional): For a creamy topping.
  • 2 tablespoons fresh cilantro, chopped: A fresh finish that brightens the dish.

If you need substitutions, here are some options:

  • Chicken: Swap for ground turkey, beef, or even beans for a vegetarian version.
  • Cheese: Use dairy-free cheese or skip it entirely for a lighter version.
  • Rice: Quinoa or cauliflower rice can be used for a lower-carb alternative.
  • Spices: Adjust based on your taste—add more chili for heat or switch to Italian herbs for a different flavor profile.

Step-by-Step Instructions

Juicy stuffed bell peppers with a side view, showcasing the savory chicken filling.

Ready to get cooking? Let’s walk through the steps to make these mouthwatering Stuffed Bell Peppers!

Step 1: Preheat Your Oven

Start by preheating your oven to 375 degrees Fahrenheit. This ensures the peppers cook evenly and thoroughly.

Step 2: Prepare Your Peppers

Cut the tops off the bell peppers and remove the seeds and membranes. If you’re using large peppers, slicing them in half lengthwise can make serving easier. Place the peppers upright in a baking dish and brush them lightly with olive oil. Bake for about 10 minutes to soften them slightly before filling.

Step 3: Make the Filling

In a skillet over medium heat, heat the olive oil. Add the sliced onion and red bell pepper, cooking until softened but not browned. Add the shredded chicken along with the chili powder, cumin, paprika, garlic powder, salt, and pepper. Stir well to coat the chicken evenly. Add the diced tomatoes, cooking for an additional 3-4 minutes until the mixture is moist but not watery. Stir in the chopped cilantro, and remove from heat.

Step 4: Stuff the Peppers

Remove the partially baked peppers from the oven. Spoon the chicken mixture evenly into each pepper, pressing gently to ensure they’re filled without crushing the pepper walls. If you’re using cheese, sprinkle it over the top.

Step 5: Bake the Peppers

Return the baking dish to the oven and bake for 20-25 minutes, or until the peppers are tender but hold their shape. The filling should be heated through and slightly golden on top. Allow the stuffed bell peppers to rest for 5 minutes before serving.

Pro Tips for Perfect Stuffed Peppers

Here are some expert insights to elevate your stuffed bell pepper game:

  • Choose the Right Peppers: Opt for firm, unblemished bell peppers to ensure a good texture and flavor.
  • Don’t Overstuff: While it’s tempting to pack in as much filling as possible, overstuffing can lead to a messy bake. Aim for a generous but manageable amount.
  • Use a Meat Thermometer: Ensure the chicken reaches a safe internal temperature of 165°F for optimal safety.
  • Experiment with Spices: Don’t hesitate to adjust the spices based on your preference. Taco seasoning or Italian seasoning can give a fun twist!
  • Broil for a Crispy Finish: If you like a crispy top, broil the stuffed peppers for an additional 2-3 minutes after baking.
  • Let Them Rest: Allowing the peppers to rest for a few minutes enhances flavors and makes them easier to serve.
  • Pair with a Side Salad: A light salad can complement the stuffed peppers beautifully, adding a fresh crunch.
  • Freeze for Future Meals: These peppers freeze well, making them a great option for meal prep!

Common Mistakes and Troubleshooting

Even the best chefs can face challenges! Here are common mistakes and how to fix them:

  • Peppers Still Crunchy: If your peppers are undercooked, simply return them to the oven for an additional 5-10 minutes until tender.
  • Filling Too Watery: Ensure you drain the diced tomatoes well before adding them to prevent excess moisture.
  • Cheese Not Melting: If the cheese isn’t melting, try covering the dish with foil during baking to trap heat.
  • Flavor Lacking: Experiment with adding more spices or even a splash of hot sauce to enhance the flavor profile.

Delicious Variations to Try

Feeling adventurous? Here are some variations to keep your stuffed bell peppers exciting:

  • Mexican Fiesta: Add black beans, corn, and taco seasoning for a fiesta-inspired filling.
  • Italian Style: Substitute chicken with Italian sausage and mix in marinara sauce for a comforting Italian twist.
  • Veggie Lovers Delight: Pack the filling with zucchini, mushrooms, and spinach for a hearty vegetarian option.
  • Breakfast Peppers: Use scrambled eggs, cheese, and diced veggies for a protein-packed breakfast version!

Storage and Make-Ahead Instructions

Planning ahead is the key to a stress-free week! Here’s how to store and reheat your stuffed bell peppers:

  • Refrigeration: Store leftovers in an airtight container in the fridge for up to 4 days.
  • Freezing: Freeze stuffed peppers before baking for up to 3 months. When ready to eat, bake directly from frozen, adding extra baking time.
  • Reheating: To reheat, place in the oven at 350°F for 15-20 minutes or until heated through. You can also use the microwave for a quick fix!

Frequently Asked Questions (FAQs)

Got questions? We’ve got answers! Here are some common inquiries about stuffed bell peppers:

  • Can I use other types of peppers? Yes! Feel free to experiment with poblano or jalapeño peppers for a spicy kick.
  • What can I serve with stuffed bell peppers? They pair beautifully with a side salad, quinoa, or roasted veggies.
  • Can I make these vegetarian? Absolutely! Just swap the chicken for beans, lentils, or additional vegetables.
  • How do I know when the peppers are done? They should be tender but still maintain their shape. The filling should be heated through.
  • Can I prepare these in advance? Yes! You can prepare the filling and stuff the peppers a day ahead. Just bake them when ready to serve.
  • Are stuffed peppers healthy? Definitely! They are packed with lean protein, fiber, and essential nutrients, making them a nutritious meal option.
  • Can I grill stuffed peppers? Yes! Grill them over medium heat for a smoky flavor.
  • What’s the best way to cut bell peppers for stuffing? Cut the tops off or slice in half lengthwise for easier stuffing and serving.

Nutrition Tips and Dietary Adaptations

This recipe is inherently healthy, but here are some tips for further nutritional boosts:

  • Add More Vegetables: Mix in diced carrots, zucchini, or spinach to increase your intake of vitamins and minerals.
  • Use Whole Grains: Swap regular rice for brown rice or quinoa to enhance fiber content.
  • Mind Your Portions: Keep track of serving sizes, especially if using cheese or high-calorie toppings.
  • Go Low-Carb: For a low-carb option, skip the rice and add extra vegetables to the filling.

Equipment Recommendations

To make your cooking experience even better, consider these kitchen tools:

  • Baking Dish: A sturdy glass or ceramic baking dish will help cook the peppers evenly.
  • Skillet: A non-stick skillet is ideal for sautéing the veggies and chicken.
  • Sharp Knife: A good knife is essential for cutting the peppers and prepping ingredients.
  • Measuring Cups and Spoons: For accurate ingredient measurements, especially when it comes to spices.

Serving Suggestions

Once your stuffed bell peppers are ready, here are some fun ways to serve them:

  • Garnish with Fresh Herbs: Sprinkle fresh cilantro or parsley on top for a burst of flavor and color.
  • Serve with a Side Salad: A light, crisp salad can balance the meal nicely and add freshness.
  • Offer Dipping Sauces: A side of salsa, guacamole, or a yogurt-based dip can elevate the dish.
  • Pair with Whole Grains: Serve alongside brown rice or quinoa for a wholesome meal.

In conclusion, these Stuffed Bell Peppers Chicken are not just a meal; they’re an experience that brings joy to the table. With their vibrant colors, delightful flavors, and nutritious ingredients, they’re sure to become a go-to recipe in your home. So roll up your sleeves, gather your ingredients, and let the flavor explosion begin! Happy cooking!

Stuffed Bell Peppers Chicken - Flavor Packed, Healthy Dinner

Prep Time 15 minutes
Cook Time 35 minutes
Total Time 50 minutes
Servings 4 servings
Calories 350
A delicious and healthy dinner featuring bell peppers stuffed with seasoned shredded chicken and cheese, baked to perfection.

Ingredients

Bell Peppers

  • 4 large bell peppers, any color
  • 2 cups cooked chicken breast, shredded
  • 1 tablespoon olive oil
  • 1 medium onion, thinly sliced
  • 1 red bell pepper sliced thin
  • 1 teaspoon chili powder
  • 1 teaspoon cumin
  • 1 teaspoon paprika
  • 1/2 teaspoon garlic powder
  • 1/2 teaspoon salt
  • 1/4 teaspoon black pepper
  • 1/2 cup diced tomatoes, drained
  • 1/2 cup shredded cheese, optional
  • 2 tablespoons fresh cilantro, chopped

Instructions 

  • Preheat oven to 375°F. Slice tops off peppers, remove seeds, and bake for 10 minutes.
  • Cook onion and red bell pepper in olive oil until softened. Add chicken, spices, and tomatoes; cook briefly. Stir in cilantro.
  • Stuff partially baked peppers with chicken mixture. Top with cheese if desired.
  • Bake stuffed peppers for 20-25 minutes until tender and golden. Rest 5 minutes before serving.

Notes

For extra flavor, add a squeeze of lime before serving.
Calories: 350kcal
Cost: $15
Course: Main Course
Cuisine: American
Keyword: Chicken, Stuffed Peppers

Welcome to Your New Favorite Beverage: Caramel Iced Coffee

Are you ready to elevate your coffee game? This Easy Homemade Caramel Iced Coffee is not just another drink; it’s a delightful experience that will transform your coffee breaks into moments of bliss. Whether you’re gearing up for a busy day or winding down in the afternoon, this refreshing beverage is your ticket to indulgence without the guilt. In this guide, we’ll walk you through everything you need to know to create the perfect caramel iced coffee at home.

Let’s dive into the sweet world of caramel iced coffee!

Why You’ll Love This Recipe

This recipe isn’t just easy; it’s packed with benefits that make it the go-to choice for coffee lovers:

  • Quick and Simple: With just a few ingredients and steps, you can whip up this delicious drink in under 5 minutes.
  • Customizable: Adjust the sweetness and creaminess to suit your taste. Want it sweeter? Add more caramel syrup!
  • Budget-Friendly: Save money by making your favorite coffeehouse drink at home without sacrificing flavor.
  • Perfect for Any Time: Enjoy it as a morning pick-me-up or an afternoon refresher—it’s versatile!
  • Healthier Option: Control the ingredients for a lighter version without the added sugars and calories found in store-bought versions.

Ingredients You’ll Need

Gather these simple ingredients to create your caramel iced coffee masterpiece:

  • 2 tbsp caramel simple syrup: This is the star of the show—add more or less depending on your sweetness preference.
  • 8 oz brewed coffee (or cold brew): Use your favorite blend, whether it’s robust or smooth.
  • 1 cup ice: This keeps your drink chilled and refreshing.
  • 2 tbsp half and half (or your favorite creamer): This adds creaminess; feel free to use non-dairy options!

Step-by-Step Instructions to Make Your Caramel Iced Coffee

Glass filled with caramel iced coffee, ice cubes, and a layer of creamy half and half.

Follow these easy steps to create your perfect drink:

  1. In a tall glass, add 2 tbsp of caramel syrup (homemade or store-bought). Drizzle it down the sides for a beautiful presentation.
  2. Add 8 oz of cold brew or chilled coffee on top of the caramel syrup.
  3. Fill the glass with 1 cup of ice or more, depending on your preference.
  4. Pour in 2 tbsp of half and half or your chosen milk or creamer.
  5. Stir well, taste, and adjust the sweetness if necessary. Enjoy!

Pro Tips for the Best Caramel Iced Coffee

Want to take your caramel iced coffee to the next level? Here are some insider tips:

  • Use Fresh Ingredients: Freshly brewed coffee and high-quality caramel syrup will significantly enhance the flavor.
  • Chill Your Glass: For an extra refreshing drink, chill your glass in the freezer for a few minutes before preparing.
  • Experiment with Flavors: Add a splash of vanilla extract or a dash of cinnamon for a unique twist.
  • Try Coffee Ice Cubes: Freeze leftover coffee in ice cube trays to prevent dilution as your drink melts.
  • Sweeten Gradually: Start with less caramel syrup and add more as needed to avoid overpowering the coffee flavor.
  • Use a Strong Brew: A bolder coffee can stand up to the sweetness of caramel and create a balanced flavor.
  • Make It Vegan: Substitute the half and half with almond, oat, or coconut milk for a plant-based treat.
  • Serve It Up: Garnish with whipped cream and a drizzle of caramel sauce for an indulgent presentation.

Common Mistakes and Troubleshooting

Even seasoned coffee lovers can make a few missteps. Here’s how to avoid them:

  • Too Sweet?: If your drink turns out too sweet, balance it with more coffee or a splash of milk.
  • Weak Flavor?: Brew your coffee stronger next time, or use less ice to maintain the flavor.
  • Messy Presentation?: Drizzle the caramel syrup carefully along the sides of the glass for a beautiful look.
  • Not Cold Enough?: Ensure your coffee is chilled before mixing, and use enough ice to keep it refreshing.

Variations to Try

Feeling adventurous? Here are some fun variations to spice up your caramel iced coffee:

  • Salted Caramel Iced Coffee: Add a pinch of sea salt to enhance the caramel flavor.
  • Mocha Caramel Iced Coffee: Stir in a tablespoon of cocoa powder or chocolate syrup for a rich mocha twist.
  • Spiced Caramel Iced Coffee: Add a dash of nutmeg or pumpkin spice for a seasonal flavor.
  • Caramel Almond Iced Coffee: Use almond milk instead of regular milk for a nutty flavor.

Storage and Make-Ahead Instructions

If you want to prep this drink ahead of time, here’s how:

  • Make the Syrup Ahead: Prepare a batch of caramel syrup and store it in an airtight container in the fridge for up to two weeks.
  • Chill Coffee in Advance: Brew your coffee the night before and let it cool in the refrigerator.
  • Prep Ice Cubes: Freeze coffee in ice cube trays to have ready for future drinks.

Frequently Asked Questions (FAQs)

Got questions? Here are answers to some common queries:

  • Can I use decaf coffee? Yes! Decaf works perfectly if you want to enjoy the flavor without the caffeine kick.
  • What’s the best caramel syrup to use? Homemade is best, but high-quality store brands can also provide great flavor.
  • How can I make this drink lower in calories? Use sugar-free caramel syrup and low-fat milk or a non-dairy alternative.
  • Can I make this with cold brew coffee? Absolutely! Cold brew is a fantastic choice for a smooth flavor.
  • What’s the difference between caramel syrup and caramel sauce? Syrup is typically thinner and designed for coffee, while sauce is thicker and more versatile for desserts.
  • How long does caramel syrup last? Homemade syrup can last about two weeks in the fridge; store-bought has a longer shelf life.
  • Can I use whipped cream? Yes! Topping your drink with whipped cream adds a deliciously indulgent touch.
  • What’s the best way to clean my coffee maker? Regularly clean it with vinegar or a descaling solution to keep your coffee tasting fresh.

Nutritional Tips and Dietary Adaptations

Your caramel iced coffee can fit into a healthy lifestyle with a few tweaks:

  • Opt for Low-Fat Dairy: Use low-fat or non-dairy milk to reduce calories and fat.
  • Control the Sugar: Adjust the amount of caramel syrup to manage sugar intake.
  • Boost the Nutrients: Add a scoop of protein powder or a tablespoon of collagen for added health benefits.

Essential Equipment for Your Iced Coffee

Here’s what you need to perfectly prepare your drink:

  • Coffee Maker or French Press: Choose your preferred brewing method for a fresh cup.
  • Ice Cube Tray: Freeze coffee for the ultimate iced coffee experience without dilution.
  • Tall Glasses: A tall glass showcases the beautiful layers of your drink.
  • Stirring Spoon: Use a long spoon for easy mixing of your ingredients.

Serving Suggestions

Enhance your caramel iced coffee experience with these serving ideas:

  • Pair with Breakfast Treats: Serve alongside a pastry or muffin for a delightful brunch.
  • Create a Coffee Bar: Set up a mini coffee bar with various syrups, creamers, and toppings for guests.
  • Add a Fun Straw: Use a colorful or reusable straw to make sipping even more enjoyable.

Wrap-Up: Sip and Savor

Now that you have all the tips and tricks, it’s time to bring this Easy Homemade Caramel Iced Coffee into your daily routine. Enjoy the invigorating flavors, share with friends, or keep it as your little secret indulgence. Remember, healthy eating and drinking can be exciting, flavorful, and utterly satisfying. Cheers to your new favorite iced coffee recipe!

Easy Homemade Caramel Iced Coffee

Prep Time 5 minutes
Total Time 5 minutes
Servings 1 cup
Calories 150
Enjoy a delicious and refreshing caramel iced coffee made easily at home with simple ingredients and quick steps.

Ingredients

Caramel Syrup

  • 2 tbsp caramel simple syrup ((or to taste))

Coffee

  • 8 oz coffee (or cold brew)

Ice

  • 1 cup ice

Creamer

  • 2 tbsp half and half (or favorite creamer)

Instructions 

  • Add 2 tbsp caramel syrup to a tall glass, drizzling it down the sides.
  • Pour in 8 oz of cold brew or coffee.
  • Add 1 cup ice to the glass.
  • Stir in 2 tbsp half and half or your favorite creamer.
  • Mix well, taste, and enjoy!

Notes

Adjust caramel syrup to your preferred sweetness.
Calories: 150kcal
Cost: $5
Course: Beverage
Cuisine: American
Keyword: Caramel, iced coffee, refreshing

Welcome to the Vibrant World of Spring Garden Pasta Salad!

Dive into the delightful world of our Spring Garden Pasta Salad! Bursting with fresh veggies and zesty flavors, this easy-to-make dish is perfect for any occasion. Tossed in a light dressing, it’s a colorful, nutritious option that brings the taste of spring to your table! Whether you’re hosting a gathering or just looking for a refreshing meal to enjoy at home, this pasta salad is about to become your go-to recipe.

Why You’ll Love This Recipe

This garden pasta salad isn’t just a feast for the eyes; it’s packed with benefits that will make your taste buds dance! Here are five reasons why you’ll adore this recipe:

  • Fresh and Flavorful: The combination of cherry tomatoes, cucumbers, and bell peppers delivers a burst of freshness in every bite.
  • Quick and Easy: Ready in just 20 minutes, this salad is perfect for busy weeknights or last-minute gatherings.
  • Customizable: Feel free to swap in your favorite veggies or add proteins like grilled chicken or chickpeas for a heartier dish.
  • Perfect for Meal Prep: Make it ahead of time and store it in the fridge for a quick lunch or side dish throughout the week.
  • Healthy and Nutritious: Packed with vitamins and minerals, this salad is a guilt-free way to enjoy a rainbow of flavors.

Essential Ingredients

This Spring Garden Pasta Salad is made with simple, wholesome ingredients. Here’s what you’ll need:

  • 8 oz rotini pasta
  • 1 cup cherry tomatoes, halved
  • 1 medium cucumber, diced
  • 1 bell pepper, sliced (any color)
  • 1/4 red onion, finely chopped
  • 1/4 cup fresh basil or parsley, chopped
  • 3 tbsp extra virgin olive oil
  • 2 tbsp lemon juice (freshly squeezed)
  • Salt & pepper to taste
  • 1/2 cup feta cheese or mozzarella balls (optional)

How to Make Spring Garden Pasta Salad

Side view of a fresh pasta salad with cherry tomatoes, cucumber, and bright herbs.

Ready to whip up your delicious garden pasta salad? Follow these simple steps:

  • Cook the rotini pasta in salted boiling water according to package instructions until al dente. Drain and rinse under cold water to cool.
  • While the pasta cools, chop the cherry tomatoes, cucumber, bell pepper, and red onion.
  • In a large mixing bowl, combine the cooled pasta and chopped vegetables. Toss gently to mix.
  • Drizzle olive oil and lemon juice over the salad mixture. Season with salt and pepper; add herbs and toss to combine.
  • Serve immediately or chill in the fridge for later enjoyment.

Pro Tips for Perfecting Your Salad

Want to elevate your Spring Garden Pasta Salad to the next level? Here are some expert tips:

  • Al Dente is Key: Cooking the pasta al dente ensures it holds its shape and texture, preventing it from becoming mushy.
  • Chill for Flavor: Let the salad chill in the fridge for at least 30 minutes before serving to allow the flavors to meld beautifully.
  • Use High-Quality Olive Oil: A good extra virgin olive oil enhances the dressing and adds depth to the salad.
  • Fresh Herbs Matter: Fresh basil or parsley takes the flavor up a notch, making each bite refreshing and vibrant.
  • Don’t Overdress: Start with a small amount of dressing; you can always add more if needed.
  • Mix and Match Veggies: Feel free to switch up the veggies based on what you have on hand or what’s in season.
  • Make It a Meal: Add grilled shrimp, chicken, or chickpeas for a protein boost that makes it more filling.
  • Garnish Creatively: Top with a sprinkle of feta cheese or mozzarella balls for added creaminess and flavor.

Common Mistakes and Troubleshooting

Even the best chefs encounter hiccups in the kitchen! Here are some common mistakes and how to avoid them:

  • Pasta Overcooked: Always watch your pasta closely; overcooking can lead to a mushy texture. A good rule of thumb is to taste it a minute or two before the package time is up.
  • Lack of Flavor: If your salad tastes bland, it may need more seasoning. Don’t shy away from salt, pepper, or herbs!
  • Too Wet: If your salad ends up too soggy, reduce the amount of dressing or add more pasta and veggies to balance it out.
  • Not Enough Crunch: If you find your salad lacks crunch, consider adding nuts or seeds for an extra texture boost!

Variations on Your Spring Garden Pasta Salad

Get creative with your garden pasta salad! Here are some tasty variations to try:

  • Italian Delight: Add sliced salami or pepperoni, along with olives and Italian herbs for a delicious twist.
  • Greek Style: Swap in kalamata olives, cucumbers, and feta cheese for a Mediterranean flair.
  • Veggie Loaded: Toss in roasted zucchini, asparagus, or even artichokes for a hearty veggie-packed salad.
  • Asian Inspired: Use sesame oil, soy sauce, and add edamame and shredded carrots for a fusion twist!

Storing and Make-Ahead Instructions

Want to enjoy your Spring Garden Pasta Salad throughout the week? Here’s how to store it:

  • Store any leftovers in an airtight container in the fridge. It should last for about 3-4 days.
  • If making ahead, prepare the salad without dressing and add it just before serving to maintain freshness.
  • Freezing is not recommended as the texture of the vegetables and pasta may change upon thawing.

Comprehensive FAQ

Got questions? We’ve got answers! Here’s a comprehensive FAQ about our Spring Garden Pasta Salad:

  • What pasta types work best for this salad? Rotini, farfalle, or penne are great choices because they hold dressing well.
  • Can I use different vegetables? Absolutely! Feel free to include any seasonal vegetables you love.
  • How do I make this salad gluten-free? Use gluten-free pasta options available in stores.
  • Is this recipe vegan? Yes, simply omit the cheese or use a vegan cheese alternative.
  • Can I add protein? Yes! Grilled chicken, shrimp, or chickpeas make excellent additions.
  • How do I make the dressing healthier? Use less olive oil or substitute with a yogurt-based dressing for a lighter version.
  • Can I meal prep this salad? Definitely! Just keep the dressing separate until you’re ready to serve.
  • What’s the best way to serve this salad? It’s best served chilled, making it great for picnics or potlucks!

Nutritional Tips and Dietary Adaptations

This Spring Garden Pasta Salad offers a wealth of nutrients:

  • Vitamins Galore: The variety of colorful veggies ensures a great mix of vitamins and antioxidants.
  • Fiber Rich: The pasta and vegetables provide fiber, keeping you full and satisfied.
  • Low-Calorie Option: By using less olive oil and cheese, you can reduce the calorie count significantly.
  • Dietary Adaptations: Easily adaptable for various diets—vegan, gluten-free, or Mediterranean!

Equipment Recommendations

To create your perfect Spring Garden Pasta Salad, you’ll need:

  • Large Pot: For boiling the pasta.
  • Colander: To drain and rinse the pasta.
  • Mixing Bowl: A large bowl for combining ingredients.
  • Cutting Board and Knife: For chopping vegetables and herbs.
  • Measuring Cups and Spoons: To accurately measure ingredients.

Serving Suggestions

Want to impress at your next meal? Here are some serving suggestions for your Spring Garden Pasta Salad:

  • Pair with Grilled Proteins: Serve alongside grilled chicken, fish, or tofu for a well-rounded meal.
  • Serve with Crusty Bread: A piece of crusty bread or garlic bread makes for a great accompaniment.
  • Garnish with Extra Herbs: A sprinkle of fresh herbs on top adds a lovely touch before serving.
  • Great for Potlucks: This salad travels well, making it perfect for gatherings and picnics!

Are you ready to bring a burst of freshness to your table with this Spring Garden Pasta Salad? Embrace the vibrant flavors of spring and enjoy this delicious, nutritious dish that’s sure to impress!

Spring Garden Pasta Salad

Prep Time 15 minutes
Cook Time 10 minutes
Total Time 25 minutes
Servings 4 servings
Calories 350
A fresh and vibrant pasta salad perfect for spring gatherings, combining crisp vegetables, herbs, and a tangy lemon dressing.

Ingredients

Pasta

  • 8 oz rotini pasta
  • 1 cup cherry tomatoes, halved
  • 1 medium cucumber, diced
  • 1 bell pepper sliced (any color)
  • 1/4 red onion finely chopped
  • 1/4 cup fresh basil or parsley, chopped
  • 3 tbsp extra virgin olive oil
  • 2 tbsp lemon juice (freshly squeezed)
  • to taste Salt & pepper Salt & pepper to taste
  • 1/2 cup feta cheese or mozzarella balls (optional)

Instructions 

  • Cook the pasta in salted boiling water until al dente, then drain and rinse with cold water.
  • Chop the vegetables and herbs, then combine with the cooled pasta in a large bowl.
  • Drizzle with olive oil and lemon juice, then season with salt and pepper. Toss gently.
  • Sprinkle feta or mozzarella if using, then serve immediately or chill.

Notes

For extra flavor, add a pinch of red pepper flakes or more herbs.
Calories: 350kcal
Cost: $15
Course: Salad
Cuisine: American
Keyword: pasta

Welcome to a Flavor Journey with Crispy Buttermilk Fried Chicken!

Are you ready to dive into the delicious crunch of classic buttermilk fried chicken? This recipe combines juicy chicken thighs marinated in tangy buttermilk with a perfectly seasoned crispy coating. Prepare yourself for a flavor explosion that’s not only simple to make but utterly satisfying! Whether you’re a kitchen novice or a seasoned chef, this dish is sure to impress your taste buds and your guests. Let’s embark on this culinary adventure together!

Why You’ll Love This Recipe

What makes this crispy buttermilk fried chicken a must-try? Here are five fantastic benefits:

  • Irresistible Flavor: The marination in buttermilk infuses the chicken with a tangy richness that’s hard to resist.
  • Perfectly Crispy Coating: The combination of flour and cornstarch gives the chicken a light, crunchy texture that adds depth to every bite.
  • Endless Versatility: This recipe is a canvas for customization, allowing you to explore different spices and flavors.
  • Easy to Prepare: With straightforward steps, you can whip this up even on a busy weeknight!
  • Great for Meal Prep: This dish holds up well, making it perfect for meal prep and leftovers.

Ingredient Breakdown with Substitutions

Let’s take a closer look at the ingredients that make this chicken dish shine:

  • 4 bone-in chicken thighs: For the juiciest, most flavorful results. You can substitute with drumsticks or wings if preferred.
  • 2 cups buttermilk: This is the star ingredient! If you don’t have buttermilk, mix regular milk with 1 tablespoon of vinegar or lemon juice.
  • 1 cup all-purpose flour: Use gluten-free flour blend as a substitute for a gluten-free option.
  • 1/2 cup cornstarch: This is essential for that extra crunch! No substitutes recommended here.
  • 3 tsp garlic powder: A key flavor enhancer. Feel free to adjust based on your taste.
  • 3 tsp onion powder: Adds depth and sweetness.
  • 2 tsp smoked paprika: For a smoky kick! If you prefer less heat, reduce the amount.
  • 1/2 tsp cayenne pepper: Optional for extra heat. Omit if you prefer a milder flavor.
  • Salt and pepper to taste: Essential for balancing flavors.
  • Cooking spray: Helps achieve that golden brown finish without sticking.

Pro Tips for the Perfect Fried Chicken

Juicy fried chicken with a crispy coating, presented from the side for detailed texture.

Ready to take your chicken to the next level? Here’s a collection of expert insights to ensure your fried chicken is nothing short of spectacular:

  • Marinate Generously: Let your chicken soak in the buttermilk for at least 2 hours, or overnight for maximum tenderness.
  • Use a Thermometer: Ensure your oil temperature is around 350°F (175°C) for optimal frying.
  • Don’t Crowd the Pan: Fry in batches to avoid lowering the oil temperature, which can lead to soggy chicken.
  • Rest Before Serving: Let the chicken rest on a wire rack after frying to maintain its crunch.
  • Experiment with Spices: Customize the seasoning mix to suit your flavor preferences!
  • Double-Dip for Extra Crunch: For an extra crispy coating, dip the chicken back into buttermilk and coat with flour again before frying.
  • Use Fresh Ingredients: Fresh spices and ingredients make a world of difference in flavor!
  • Keep It Hot: Maintain oil temperature by adjusting the heat as necessary during frying.

Avoiding Common Mistakes

Even the best chefs make mistakes! Here are some common pitfalls to avoid:

  • Skipping the Marination: Don’t rush this step; marination is key for juicy chicken.
  • Using Cold Oil: Always preheat your oil to the right temperature before frying.
  • Not Enough Salt: Seasoning is crucial; taste your flour mixture before coating!
  • Frying Too Many Pieces: Limit the number of chicken pieces in the pan to ensure even cooking.

Recipe Variations to Spice Things Up

Want to shake things up? Here are four delicious variations to consider:

  • Spicy Buttermilk Fried Chicken: Add more cayenne pepper or a dash of hot sauce to the buttermilk marinade for a fiery kick!
  • Herb-Infused Chicken: Mix dried herbs (like oregano and thyme) into the flour for an aromatic twist.
  • Asian-Inspired Fried Chicken: Replace garlic powder with five-spice powder and serve with a soy dipping sauce.
  • BBQ Glazed Fried Chicken: Brush with your favorite barbecue sauce just after frying for a sweet and smoky flavor.

Storage and Make-Ahead Instructions

Planning ahead? Here’s how to store and prepare your chicken:

  • Storing: Keep leftover chicken in an airtight container in the fridge for up to 3 days.
  • Reheating: For best results, reheat in an oven at 350°F (175°C) until hot and crispy.
  • Make-Ahead: You can marinate the chicken a day in advance for extra flavor. Just coat and fry when ready!

Comprehensive FAQ

Got questions? We’ve got answers! Here are some frequently asked questions about making fried chicken:

  • Can I use boneless chicken? Yes, but adjust cooking time as boneless chicken cooks faster.
  • What oil is best for frying? Use oils with high smoke points, like canola or peanut oil.
  • How do I know when the chicken is done? The internal temperature should reach 165°F (75°C).
  • Can I bake instead of fry? Yes! Bake at 400°F (200°C) for a healthier version, but it won’t be as crispy.
  • Can I freeze fried chicken? Yes, freeze cooked chicken in an airtight container for up to 3 months.
  • How can I make this dish less greasy? Ensure oil is hot enough and avoid overcrowding the pan.
  • What sides pair well with fried chicken? Classic sides include coleslaw, mashed potatoes, and cornbread!
  • Can I make this recipe with a different type of meat? Absolutely! This recipe works well with pork chops or even tofu for a vegetarian option.

Nutrition Tips and Dietary Adaptations

Want to make this recipe fit your dietary needs? Here’s how:

  • Lowering Calories: Use skinless chicken and reduce the amount of oil used for frying.
  • Gluten-Free Option: Substitute all-purpose flour with a gluten-free flour blend.
  • Low-Fat Version: Consider using baking spray instead of frying in oil.

Essential Equipment Recommendations

Before you start frying, make sure you have the right tools:

  • Deep Fryer or Heavy-Duty Pot: A deep fryer or a heavy pot is essential for even frying.
  • Thermometer: A cooking thermometer ensures your oil is at the right temperature.
  • Wire Rack: Ideal for cooling your fried chicken and keeping it crispy.
  • Mixing Bowls: For marinating and mixing your dry ingredients.

Serving Suggestions for Your Fried Chicken

How to present this delicious dish? Here are some serving ideas:

  • Classic Presentation: Serve hot on a platter with fresh herbs for garnish.
  • With Dipping Sauces: Provide a variety of sauces like ranch, honey mustard, or hot sauce.
  • As Part of a Meal: Pair with sides like mac and cheese, coleslaw, or potato salad for a hearty feast.

Conclusion: Let’s Get Cooking!

Now that you’re equipped with everything you need to make the best crispy buttermilk fried chicken, it’s time to get cooking! Remember, the kitchen is your playground—experiment, taste, and have fun. Whether you serve it for a special occasion or a cozy weeknight dinner, this dish is sure to become a favorite in your home. Happy cooking!

Classic Buttermilk Fried Chicken

Prep Time 15 minutes
Cook Time 30 minutes
Total Time 45 minutes
Servings 4 servings
Calories 450
Crispy, flavorful fried chicken with a tangy buttermilk marinade, perfect for a comforting meal.

Ingredients

Chicken

  • 4 pieces bone-in chicken thighs
  • 2 cups buttermilk (substitute: regular milk mixed with 1 tablespoon vinegar or lemon juice)
  • 1 cup all-purpose flour (substitute: gluten-free flour blend)
  • 1/2 cup cornstarch
  • 3 tsp garlic powder (divided)
  • 3 tsp onion powder (divided)
  • 2 tsp smoked paprika (divided)
  • 1/2 tsp cayenne pepper (optional for extra heat)
  • to taste Salt and pepper
  • as needed Cooking spray

Instructions 

  • Marinate chicken thighs in buttermilk for at least 30 minutes.
  • Mix flour, cornstarch, garlic powder, onion powder, paprika, cayenne, salt, and pepper in a shallow dish.
  • Dredge marinated chicken in the flour mixture, ensuring even coating.
  • Spray chicken with cooking spray and fry in hot oil until golden and cooked through, about 15-20 minutes.
  • Drain on paper towels and serve hot.

Notes

Ensure oil is hot enough before frying to achieve crispy coating.
Calories: 450kcal
Cost: $15
Course: Main Course
Cuisine: American
Keyword: Fried Chicken

Elevate Your Dinner Game with Delicious Chicken Burrito Bowls

Are you ready to embark on a culinary adventure that satisfies your cravings while keeping it healthy? Dive into these Irresistible Chicken Burrito Bowls bursting with zesty flavors and fresh ingredients! This dish is not just a meal; it’s a fiesta in a bowl that’s easy to make and fully customizable, making it the perfect go-to dinner for any day of the week.

Why You’ll Love This Recipe

  • Flavor Explosion: Each bite is a symphony of vibrant flavors, from seasoned chicken to fresh cilantro lime rice.
  • Customizable Goodness: Personalize your bowl with various toppings like avocado, guacamole, and sour cream to suit your taste.
  • Quick and Easy: With simple ingredients and straightforward steps, you can whip up a delicious meal in under 30 minutes!
  • Healthy and Wholesome: Packed with proteins, fiber, and essential nutrients, these bowls are a nutritious choice for any meal.
  • Meal Prep Friendly: Perfect for meal prep; store components separately for a quick and easy weeknight dinner.

Ingredients for Your Chicken Burrito Bowls

Let’s gather the magic ingredients that will make your chicken burrito bowls unforgettable. Here’s what you’ll need:

  • 1 1/2 pounds chicken thighs: Juicy and tender, perfect for soaking up the spices.
  • 2 tablespoons olive oil, divided: Adds richness and helps in cooking.
  • 2 limes, juiced, divided: For that zesty kick!
  • 2 tablespoons taco seasoning: A mix of spices that delivers bold flavor.
  • 2/3 cup fresh cilantro, chopped, divided: Brightens up the dish with freshness.
  • 3 cloves garlic, minced: A must for aromatic depth.
  • Salt and black pepper, to taste: Essential for seasoning.
  • 1 cup jasmine rice, rinsed: The perfect base for your bowl.
  • 1 cup water (for rice): Needed for cooking the rice.
  • Pinch of salt (for rice): Enhances the flavor of the rice.
  • 1/2 large onion, thinly sliced (2 cups/150 grams): Adds sweetness and texture.
  • 3 medium bell peppers, julienned (about 5 heaping cups/500 grams): Colorful and crunchy!
  • 1 (15-ounce) can black beans, rinsed and drained: A hearty addition.
  • 1.5 cups corn kernels (fresh, frozen & thawed, or canned & drained): Sweet and delicious.
  • 1 small jalapeño, seeded and minced (optional): For those who like a bit of heat!
  • Optional toppings: Sliced avocado, guacamole, sour cream, plain Greek yogurt, shredded cheese, salsa, chopped lettuce, hot sauce.

Step-by-Step Instructions

Side view of a juicy chicken burrito bowl filled with rice, beans, and peppers.

Let’s get cooking! Here’s how to create your chicken burrito bowls step by step:

  • Prepare the Zesty Chicken: Cut chicken thighs into 1-inch pieces. In a bowl, combine chicken with 1 tablespoon olive oil, 2 tablespoons taco seasoning, juice of 1 lime, and 2 cloves minced garlic. Season with salt and pepper. Marinate for at least 30 minutes, or up to 4 hours in the refrigerator. For cooking, heat the remaining olive oil in a large skillet over medium-high heat. Cook chicken in a single layer for 3-4 minutes per side until cooked through and golden (internal temperature should reach 165°F/74°C). Alternatively, bake at 400°F (200°C) for 18-25 minutes, flipping halfway.
  • Cook the Flavorful Cilantro Lime Rice: Rinse 1 cup jasmine rice under cold water until clear. In a medium saucepan with a tight-fitting lid, combine rinsed rice, 1 cup water, and a pinch of salt. Bring to a boil, then reduce heat to lowest, cover, and simmer for 15 minutes. Remove from heat and let sit, covered, for 10 minutes. Fluff with a fork, then stir in 1 tablespoon lime juice and 1/3 cup chopped cilantro until evenly distributed.
  • Simmer Savory Black Beans: Rinse and drain the canned black beans. In a small saucepan, heat 1 tablespoon olive oil over medium heat. Add finely diced red onion and sauté until translucent. Add 1 clove minced garlic, 1/2 tsp ground cumin, and 1/4 tsp chili powder (or some taco seasoning) and cook for 30 seconds until fragrant. Stir in the black beans and 1/4 cup water or vegetable broth. Bring to a gentle simmer, cover, and cook for 5-7 minutes. Season with salt and pepper to taste.
  • Craft Fresh Corn Salsa: In a medium bowl, combine corn kernels (fresh, thawed frozen, or drained canned) with finely diced red onion, minced jalapeño (if using), 1/3 cup chopped cilantro, and juice of 1/2 lime. Add a pinch of salt and toss gently to combine. Taste and adjust seasoning as needed.
  • Assemble Your Perfect Chicken Burrito Bowls: In wide, shallow bowls, start with a generous scoop of Cilantro Lime Rice. Arrange portions of the Zesty Chicken, Savory Black Beans, and Fresh Corn Salsa alongside. Customize with your favorite toppings: add slices of avocado or guacamole, a dollop of sour cream or Greek yogurt, shredded cheese, extra salsa, chopped lettuce, and a squeeze of fresh lime. Serve immediately and enjoy!

Pro Tips for Perfect Chicken Burrito Bowls

  • Marinate for Flavor: Allow the chicken to marinate for at least 30 minutes; if you have more time, overnight is even better!
  • Rinse Your Rice: Rinsing jasmine rice removes excess starch, preventing it from becoming gummy.
  • Customize Your Spice Level: Adjust the amount of jalapeño or taco seasoning to suit your heat preference.
  • Fresh Ingredients: Use fresh produce for the best flavors, especially in the corn salsa.
  • Mix and Match: Feel free to swap ingredients based on what you have on hand—this recipe is flexible!
  • Meal Prep: Store components separately to keep everything fresh for quick meals throughout the week.
  • Don’t Skip the Lime Juice: It brightens up the flavors and balances the richness of the chicken.
  • Try Different Proteins: Swap chicken for beef, shrimp, or even tofu for a plant-based version.

Common Mistakes and Troubleshooting

Even the best chefs make mistakes! Here are some common issues and how to avoid them:

  • Overcooked Chicken: Keep an eye on the cooking time; chicken thighs can dry out if overcooked. Aim for an internal temperature of 165°F (74°C).
  • Sticky Rice: If your rice is sticky, it might not have been rinsed enough. Always rinse until the water runs clear.
  • Too Much Spice: If your dish turns out too spicy, add a dollop of sour cream or yogurt to mellow it out.
  • Dry Beans: If your black beans seem dry, add a splash of vegetable broth or water while simmering.

Delicious Variations to Try

Get creative with your chicken burrito bowls! Here are some exciting variations:

  • Vegetarian Delight: Replace chicken with grilled vegetables or a mix of beans for a hearty vegetarian option.
  • Spicy Southwest Bowl: Add diced chipotle peppers in adobo sauce to the chicken marinade for a smoky flavor.
  • Mango Salsa Twist: Swap out corn for diced mango in your salsa for a sweet and tangy kick.
  • BBQ Chicken Burrito Bowl: Use BBQ sauce in place of taco seasoning for a completely different flavor profile.

Storage and Make-Ahead Instructions

Want to enjoy these delicious chicken burrito bowls throughout the week? Here’s how to store and prep:

  • Refrigerate Components: Store cooked chicken, beans, rice, and salsa in airtight containers in the fridge for up to 4 days.
  • Freezing Options: Cooked chicken and beans freeze well. Store in freezer-safe bags for up to 3 months.
  • Make Ahead: Prepare the rice and beans in advance, then assemble your bowls on the day of serving for maximum freshness.

Frequently Asked Questions

Here are some common queries about chicken burrito bowls:

  • Can I use brown rice instead of jasmine rice? Yes, brown rice is a healthy alternative, but cooking times will vary.
  • What can I substitute for taco seasoning? You can create your own mix using chili powder, cumin, garlic powder, and paprika.
  • Are these burrito bowls gluten-free? Yes, all the ingredients can be gluten-free; just check labels on pre-packaged items.
  • How can I make it dairy-free? Skip cheese and sour cream, or use dairy-free alternatives like cashew cream.
  • Can I add more veggies? Absolutely! Feel free to include your favorites like zucchini, spinach, or corn.
  • What’s the best way to reheat leftovers? Microwave or heat in a skillet, adding a splash of water to keep it moist.
  • Is this recipe suitable for meal prep? Yes! It’s perfect for meal prep; just store components separately.
  • How can I make this dish spicier? Add more jalapeños or chili powder to the chicken marinade for extra heat.

Nourishing Nutrition Tips

These chicken burrito bowls are not just tasty; they’re also packed with nutrients:

  • Protein Power: Chicken thighs provide a good source of protein essential for muscle recovery.
  • Fiber Boost: Black beans and corn offer fiber that aids digestion and keeps you feeling full longer.
  • Vitamin Rich: Bell peppers and cilantro are rich in vitamins A and C, supporting your immune system.
  • Healthy Fats: Avocado and olive oil provide healthy fats that are good for heart health.

Essential Equipment for Success

To make your cooking experience smooth and enjoyable, here’s what you’ll need:

  • Skillet: A large skillet for browning the chicken and sautéing vegetables.
  • Medium Saucepan: For cooking the rice perfectly.
  • Mixing Bowls: To marinate chicken and combine ingredients for salsa.
  • Measuring Cups and Spoons: Precision is key to great flavor!

Serving Suggestions

Ready to serve up your chicken burrito bowls? Here are some ideas:

  • Garnish: Top with fresh cilantro, lime wedges, and a drizzle of hot sauce for an extra kick.
  • Side Dishes: Serve with tortilla chips and salsa or a fresh garden salad for a complete meal.
  • Drink Pairing: A refreshing limeade or iced tea complements the zesty flavors beautifully.

There you go! Now you have all the tools and tips you need to create the ultimate chicken burrito bowls. Whether you’re cooking for yourself or a crowd, this recipe is sure to impress. So roll up your sleeves, unleash your inner chef, and enjoy a bowl filled with flavor, nutrition, and joy!

Irresistible Chicken Burrito Bowls: Zesty, Fresh & So Easy!

Prep Time 20 minutes
Cook Time 30 minutes
Total Time 50 minutes
Servings 4 servings
Calories 650
Enjoy a vibrant and flavorful chicken burrito bowl packed with fresh ingredients and bold spices, perfect for a quick and satisfying meal.

Ingredients

Protein

  • 1.5 pounds chicken thighs
  • 2 tablespoons olive oil (divided)
  • 2 limes limes, juiced (divided)
  • 2 tablespoons taco seasoning
  • 2/3 cup fresh cilantro, chopped (divided)
  • 3 cloves garlic, minced
  • to taste Salt and black pepper
  • 1 cup jasmine rice, rinsed
  • 1 cup water (for rice)
  • Pinch salt (for rice)
  • 1/2 large onion, thinly sliced (about 2 cups/150 grams)
  • 3 medium bell peppers, julienned (about 5 heaping cups/500 grams)
  • 1 15-ounce can black beans, rinsed and drained
  • 1.5 cups corn kernels (fresh, frozen & thawed, or canned & drained)
  • 1 small jalapeño, seeded and minced (optional)

Optional toppings

  • to taste sliced avocado, guacamole, sour cream, Greek yogurt, shredded cheese, salsa, chopped lettuce, hot sauce

Instructions 

  • Cut chicken into 1-inch pieces. Marinate with 1 tbsp olive oil, taco seasoning, 1 lime juice, and garlic for 30 min. Cook in a skillet or bake until done.
  • Rinse rice, then cook with water and salt for 15 min. Fluff and stir in lime juice and cilantro.
  • Sauté diced onion in olive oil, add garlic, cumin, chili powder, then stir in black beans and simmer for 5-7 min. Season to taste.
  • Mix corn with diced onion, jalapeño, cilantro, and lime juice. Toss gently.
  • Assemble bowls with rice, chicken, beans, and corn. Top with avocado, sour cream, cheese, salsa, lettuce, and lime as desired. Serve immediately.

Notes

For extra flavor, marinate chicken longer or add your favorite toppings.
Calories: 650kcal
Cost: $15
Course: Main Course
Cuisine: Mexican
Keyword: Burrito, Chicken, Healthy

Welcome to a culinary adventure that will tantalize your taste buds and inspire your kitchen creativity! Today, we’re diving into the world of crispy tofu bites—those delightful nuggets that combine crunch, flavor, and fun! Perfect for snacking, meal prep, or as a lively addition to salads and bowls, these tofu bites are not just a dish; they’re a vibrant experience. Let’s get cooking!

Why You’ll Love This Recipe

  • Quick and Easy: In less than 30 minutes, you can whip up these crispy tofu bites, making them a perfect snack for busy days.
  • Healthy and Nutritious: Packed with plant-based protein, these bites are a guilt-free indulgence that fuels your body.
  • Customizable Flavors: With a few ingredient swaps and variations, you can customize the flavor profile to suit your taste buds.
  • Perfect for Meal Prep: Make a big batch ahead of time, and you have a crunchy snack ready to go whenever hunger strikes!
  • Kid-Friendly Fun: These crispy bites make healthy eating exciting for kids, encouraging them to enjoy plant-based meals.

Ingredient Breakdown: Key Components

Understanding the ingredients that create those crispy tofu bites is essential for achieving the perfect texture and flavor. Let’s break them down!

  • Extra-Firm Tofu: This is the star of the show! Pressing the tofu to remove excess moisture is crucial; it leads to a crispy exterior while keeping the inside tender.
  • Cornstarch or Arrowroot Powder: Both options give a delightful crunch to the tofu bites. Cornstarch creates a light coating that crisps beautifully when fried.
  • Soy Sauce: This ingredient is vital for flavor and seasoning, adding a savory depth to every bite.
  • Neutral Oil: For frying, use oils like canola or vegetable oil, which have high smoke points, ensuring that your tofu bites fry evenly and don’t absorb too much oil.
  • Garlic Powder: This ingredient adds a warm aroma and enhances the overall flavor profile without overpowering the dish.
  • Sesame Seeds: Lightly toasting these adds a nutty flavor that elevates the final dish.
  • Lemon Juice: A squeeze of lemon brightens the flavors, making each bite a small savory adventure.

How to Make Crispy Tofu Bites

Ready to create some magic in your kitchen? Follow these simple steps to achieve crispy perfection!

  1. Press the Tofu: Start by wrapping the tofu block in a clean kitchen towel and pressing it with a weight for 15-20 minutes to remove excess moisture. This step is crucial for achieving that crispy exterior.
  2. Cut into Cubes: Once pressed, cut the tofu into uniform bite-sized cubes, about 1 inch in size, for even frying.
  3. Prepare the Coating: In a small bowl, mix cornstarch and garlic powder. Dredge each tofu piece in this mixture, pressing lightly so it adheres well.
  4. Heat the Oil: Pour enough neutral oil into a heavy-bottomed skillet or deep fryer to submerge the tofu pieces. Heat the oil to 180°C (350°F); test readiness by dropping in a small piece—if it sizzles, it’s ready!
  5. Fry in Batches: Carefully add the coated tofu cubes in small batches to the hot oil. Fry for 3-4 minutes, turning occasionally until they are golden brown and crispy.
  6. Drain and Season: Using a slotted spoon, transfer the fried tofu to a plate lined with paper towels to drain excess oil. Let them sit for 2 minutes to set the crispness.
  7. Add Final Touches: While still hot, sprinkle with toasted sesame seeds and add a quick squeeze of lemon juice for a burst of flavor.
  8. Serve Immediately: Enjoy your crispy tofu bites on a platter, dipping them into your favorite sauces or adding them to salads and bowls.

Pro Tips for Ultimate Crispiness

Juicy, fried tofu pieces with a crunchy texture, presented on a plate.
  • Pressing is Key: Always take the time to press your tofu; it’s the secret to achieving that crispy exterior.
  • Don’t Overcrowd the Pan: Fry in small batches to ensure even cooking and prevent steaming.
  • Control the Oil Temperature: Maintain the oil temperature for consistent frying; too low and they’ll absorb oil, too high and they’ll burn.
  • Experiment with Coatings: Try other coatings like panko breadcrumbs for an even crunchier texture.
  • Flavor Infusion: Marinate tofu in soy sauce or spices before coating for added flavor.
  • Try Baking: For a healthier option, bake the coated tofu at 400°F (200°C) for 25-30 minutes, flipping halfway.
  • Use a Slotted Spoon: This helps gently transfer the tofu without losing its crispy coating.
  • Serve with Dipping Sauces: Pair your crispy tofu bites with spicy mayo, tahini dressing, or sweet chili sauce for extra flavor.

Common Mistakes and Troubleshooting

Even the best chefs can face challenges in the kitchen! Here’s how to avoid common pitfalls:

  • Too Oily?: If your bites are greasy, the oil temperature was too low. Ensure the oil is hot enough before frying.
  • Not Crispy Enough?: This could be due to insufficient pressing of the tofu or overcrowding in the pan. Always press well and fry in small batches.
  • Burnt Exterior?: If they burn quickly, lower the heat. Adjusting the temperature can help achieve a golden brown without burning.
  • Sticking to the Pan?: Make sure your oil is hot and use a non-stick pan for best results.

Delicious Variations to Try

Feeling adventurous? Here are some tasty twists on the classic crispy tofu bites!

  • Buffalo Tofu Bites: Toss cooked tofu in buffalo sauce for a spicy kick!
  • Herbed Tofu Bites: Mix dried herbs like oregano and thyme into the cornstarch coating for added flavor.
  • Sweet and Sour Tofu Bites: Glaze with a homemade sweet and sour sauce after frying for a delightful contrast.
  • Sesame-Ginger Tofu Bites: Add ginger powder to the coating and serve with a sesame dipping sauce for an Asian flair.

Storage and Make-Ahead Instructions

Want to prepare these crispy tofu bites ahead of time? Here’s how to store them:

  • Refrigeration: Store leftovers in an airtight container in the fridge for up to 3 days. Reheat in the oven for about 10 minutes to regain crispiness.
  • Freezing: Freeze cooked tofu bites in a single layer on a baking sheet, then transfer to a freezer bag for up to 2 months. Reheat directly from frozen.

Frequently Asked Questions (FAQs)

  1. Can I use soft tofu for this recipe? Soft tofu doesn’t hold its shape well and won’t yield the same crispy texture, so stick with extra-firm.
  2. Can I bake these instead of frying? Yes! Bake at 400°F (200°C) for 25-30 minutes, flipping halfway for even cooking.
  3. What dipping sauces pair well with crispy tofu? Consider spicy mayo, tahini, sweet chili sauce, or soy sauce for delicious options.
  4. How do I know when the oil is ready? Test by dropping a small piece of tofu in; if it sizzles immediately, it’s ready!
  5. Can I make these in advance? Yes, prepare them ahead of time and store in the fridge or freezer as mentioned above.
  6. What can I serve with crispy tofu bites? They are fantastic on their own or as a crunchy addition to salads, bowls, or as a snack with dipping sauces.
  7. How spicy can I make these? You can adjust the spice level by adding chili flakes or using spicy sauces when serving.
  8. Can I use gluten-free alternatives? Absolutely! Use gluten-free soy sauce and cornstarch to keep it gluten-free.

Nutritional Insights and Dietary Adaptations

Crispy tofu bites are not only delicious but also nutrient-dense! Here are some insights:

  • High in Protein: Tofu is an excellent source of plant-based protein, making it a great option for vegetarians and vegans.
  • Low in Calories: When prepared with minimal oil, these bites can be a low-calorie snack option.
  • Rich in Nutrients: Tofu contains calcium, iron, and magnesium, contributing to a balanced diet.
  • Customizable for Dietary Needs: Easily adapt this recipe to fit gluten-free, vegan, or other dietary preferences.

Essential Equipment Recommendations

To make your cooking experience smooth and enjoyable, here are some essential tools you might need:

  • Heavy-Bottomed Skillet or Deep Fryer: For even frying and maintaining the oil temperature.
  • Slotted Spoon: Perfect for transferring the tofu without losing that crispy coating.
  • Kitchen Towel: Essential for pressing the tofu to remove moisture effectively.
  • Airtight Containers: For storing leftovers or meal prep.

Serving Suggestions

These crispy tofu bites are versatile and can be enjoyed in various ways:

  • As a Snack: Serve with your favorite dipping sauce for a quick and satisfying snack.
  • In Salads: Toss them into salads for a crunchy protein boost.
  • In Bowls: Add them to grain or noodle bowls for texture and flavor.
  • At Parties: Serve on a platter for a crowd-pleasing appetizer at gatherings.

Now that you have the ultimate guide to making irresistibly crispy tofu bites, it’s time to roll up your sleeves and get cooking! Remember, the kitchen is your playground, so have fun experimenting with flavors and textures. Enjoy your crispy adventure!

Crispy Tofu Bites

Prep Time 20 minutes
Cook Time 10 minutes
Total Time 30 minutes
Servings 4 pieces
Calories 250
Enjoy these crispy, golden tofu bites that are perfect as an appetizer or snack, with a flavorful coating and a bright squeeze of lemon.

Ingredients

Main

  • 1 block extra-firm tofu (pressed to remove excess water)
  • 3 tablespoons cornstarch (or arrowroot powder)
  • 2 tablespoons soy sauce (for flavor and seasoning)
  • 1 cup neutral oil (for frying, like canola or vegetable oil)
  • 1 teaspoon garlic powder (adds warm aroma)
  • 1 tablespoon sesame seeds (lightly toasted for nutty flavor)
  • 1 squeeze lemon juice (brightens the dish)

Instructions 

  • Press the tofu for 15-20 minutes to remove excess moisture, then cut into 1-inch cubes.
  • Mix cornstarch and garlic powder; coat tofu pieces evenly.
  • Heat oil to 180°C (350°F). Fry tofu in batches for 3-4 minutes until golden and crispy.
  • Drain on paper towels, then sprinkle with toasted sesame seeds and squeeze lemon juice over hot tofu.

Notes

Serve immediately for best crispiness and flavor.
Calories: 250kcal
Cost: $10
Course: Appetizer
Keyword: Tofu