Author

Ryan

Browsing

Welcome to the world of refreshing indulgence! If you’re looking for a delicious way to beat the heat while enjoying a caffeine kick, you’ve landed in the right spot. This vanilla iced coffee recipe is not just any drink; it’s a creamy, dreamy experience that dazzles your taste buds and revitalizes your spirit. With just a few ingredients and a sprinkle of creativity, you can create the perfect iced coffee right in the comfort of your kitchen. Ready to elevate your coffee game? Let’s dive in!

Why You’ll Love This Recipe

This vanilla iced coffee isn’t merely a drink; it’s a celebration of flavor, simplicity, and freshness! Here are the top reasons you’ll adore it:

  • Quick and Easy: This recipe is a breeze, taking less than 10 minutes to whip up! Perfect for busy mornings or lazy afternoons.
  • Customizable Flavor: Adjust the sweetness and creaminess to suit your unique palate. Experiment with different syrups or milk alternatives!
  • Homemade Goodness: Use fresh ingredients to create a delightful coffee experience that’s tastier and healthier than store-bought options.
  • Budget-Friendly: Save money by making your own iced coffee at home. It’s not just delicious; it’s also wallet-friendly!
  • Perfect for Any Time: Whether you need a morning boost or an afternoon pick-me-up, this vanilla iced coffee is versatile and satisfying.

Ingredients You’ll Need

Let’s gather what you need to make this delightful drink. Here’s a detailed breakdown of the ingredients, along with some fantastic substitutions:

  • 8 ounces chilled coffee or cold brew: Use your favorite brew method! Cold brew is smooth and less acidic, but any strong coffee will do.
  • 1 tablespoon vanilla-flavored simple syrup: You can opt for store-bought or make your own! For homemade, dissolve equal parts sugar and water over low heat until clear.
  • 1 cup ice cubes: Freshly made ice cubes are best, but you can use leftover coffee ice cubes for a flavor boost!
  • 2 tablespoons half and half (or creamer of your choice): Try oat milk, almond milk, or coconut cream for a dairy-free alternative.

Pro Tips for Creating the Perfect Vanilla Iced Coffee

Ready to master the art of vanilla iced coffee? Here are some expert insights to help you create a drink that’s nothing short of perfection:

  • Brew Strong Coffee: Use a bold coffee blend to ensure your iced coffee retains its flavor even when chilled.
  • Pre-Chill Your Ingredients: If you’re in a rush, chill your coffee and milk beforehand to minimize dilution from melting ice.
  • Experiment with Flavors: Add spices like cinnamon or nutmeg for an exciting twist, or blend in some cocoa powder for a mocha vibe.
  • Use Quality Ice: Freshly made ice cubes won’t alter the taste of your coffee, unlike old, freezer-tasting ice.
  • Sweeten to Taste: Always taste your iced coffee before serving. You can adjust the sweetness based on your preference.
  • Garnish Creatively: Top with whipped cream, chocolate shavings, or even a sprinkle of sea salt for a gourmet touch!
  • Batch Prep: Make a larger batch of coffee and store it in the fridge for quick access throughout the week.
  • Try Different Milks: Almond, soy, or oat milk can change the flavor profile and create a unique experience.

Avoid These Common Mistakes

Side view of a delicious vanilla iced coffee with condensation on the glass.

Even the best recipes can go awry! Here are some pitfalls to dodge when making your vanilla iced coffee:

  • Using Weak Coffee: Avoid watery iced coffee by using strong brews. Cold brew is often a winner!
  • Skipping the Sweetener: Coffee can taste bitter when iced. A good simple syrup balances the flavors perfectly.
  • Not Using Enough Ice: Insufficient ice can lead to a lukewarm drink. Fill that cup to the brim!
  • Overwhelming with Milk: Too much cream can overpower the coffee flavor. Aim for balance!
  • Not Prepping Ahead: If you’re making this for a gathering, prep your coffee and syrup ahead of time to save stress!

Variations to Try

Once you’ve mastered the basic vanilla iced coffee, why not switch things up? Here are some exciting variations to explore:

  • Mocha Iced Coffee: Add cocoa powder or chocolate syrup to your mix for a rich, chocolatey delight.
  • Spiced Iced Coffee: Incorporate ground cinnamon or nutmeg into your coffee for a seasonal twist.
  • Caramel Iced Coffee: Drizzle caramel sauce over the top for a sweet, indulgent treat.
  • Nutty Iced Coffee: Use almond milk and add a splash of hazelnut syrup for a nutty flavor explosion!

Storage Instructions

If you make a larger batch of vanilla iced coffee, here’s how to store it for maximum freshness:

  • In the Fridge: Store in an airtight container in the fridge for up to 5 days. Give it a good stir before serving!
  • Freezing: Freeze leftover coffee in ice cube trays. Use these cubes in future iced coffees to prevent dilution.

Frequently Asked Questions

Here are some common questions about vanilla iced coffee:

  • Can I use instant coffee? Absolutely! Just dissolve it in hot water and chill for a quick coffee base.
  • How can I make my iced coffee sweeter? Try adding more vanilla syrup or experimenting with flavored syrups.
  • Is cold brew better than regular coffee? Cold brew is smoother and less acidic, making it a great choice for iced drinks.
  • Can I make this dairy-free? Yes! Substitute half and half with any plant-based milk.
  • What’s the best way to cool down my coffee quickly? Pour it over ice and use chilled milk to lower the temperature without losing flavor.
  • How do I prevent my iced coffee from getting watered down? Use coffee ice cubes instead of regular ice!
  • Can I add alcohol to my iced coffee? Yes! A splash of coffee liqueur or whiskey can elevate your drink for happy hour.
  • What’s the nutritional content of this recipe? It depends on your ingredient choices, but it’s generally lower in calories than coffee shop versions!

Nutritional Tips and Dietary Adaptations

For those mindful of their health, here are some tips to adapt this recipe:

  • Low-Calorie Sweeteners: If you’re watching calories, consider using stevia or monk fruit as a sweetener.
  • High-Protein Boost: Add a scoop of protein powder to your iced coffee for a post-workout treat.
  • Vegan Options: Ensure your syrup is vegan and use plant-based milk for a fully vegan iced coffee.
  • Reducing Sugar: You can skip the syrup altogether and use flavored extracts for a lower-sugar option!

Equipment Recommendations

To make your vanilla iced coffee preparation a breeze, here’s what you’ll need:

  • Coffee Maker or French Press: Essential for brewing your coffee base.
  • Ice Cube Trays: Perfect for making coffee ice cubes or regular ice cubes.
  • Measuring Cups: Ensure you get the right proportions for your ingredients.
  • Blender (optional): Use a blender if you prefer a frothy texture.

Serving Suggestions

To make your vanilla iced coffee even more delightful, consider these serving suggestions:

  • Garnish with Whipped Cream: A dollop of whipped cream adds a touch of luxury!
  • Serve with Pastries: Pair your iced coffee with a croissant or muffin for a delightful breakfast.
  • Creative Glassware: Serve in colorful or unique glassware to elevate the presentation.
  • Ice Cream Float: For a decadent dessert, add a scoop of vanilla ice cream to your iced coffee!

Now that you’ve got all the tools and knowledge to craft your own irresistible vanilla iced coffee, it’s time to get brewing! Whether you enjoy it as a morning pick-me-up or a refreshing afternoon treat, this recipe is here to elevate your coffee experience. So grab your ingredients, let your creativity flow, and enjoy a sip of bliss in every cup. Cheers to delicious coffee moments!

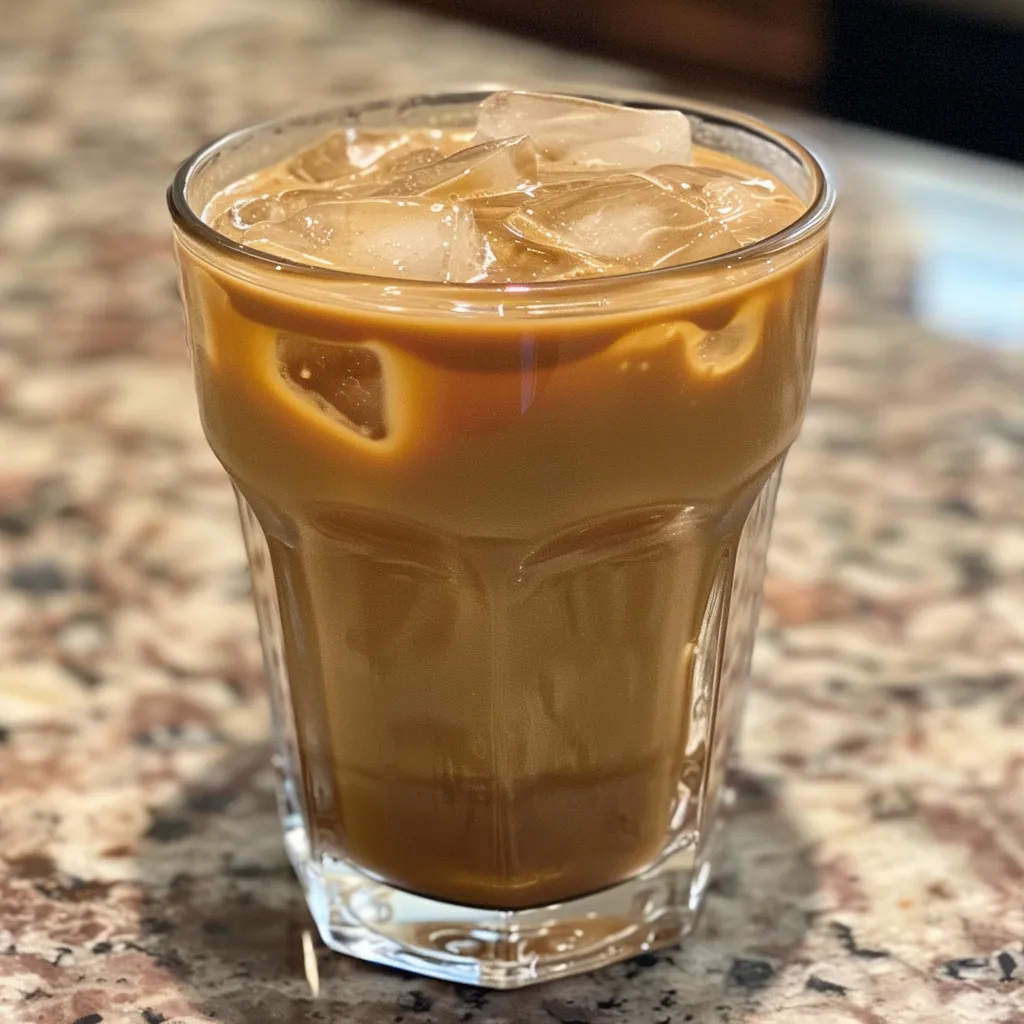
Easy Homemade Vanilla Iced Coffee

Prep Time 5 minutes
Total Time 5 minutes
Servings 1 cup
Calories 150
Enjoy a refreshing and creamy vanilla iced coffee made easily at home with just a few simple ingredients.

Ingredients

Beverages

  • 8 ounces chilled coffee or cold brew
  • 1 tablespoon vanilla-flavored simple syrup (store-bought or homemade)
  • 1 cup ice cubes
  • 2 tablespoons half and half (or creamer of your choice)

Instructions 

  • Fill a glass with ice cubes.
  • Pour the chilled coffee over the ice.
  • Add vanilla simple syrup to the coffee.
  • Stir in the half and half until well combined.
  • Serve immediately and enjoy!

Notes

You can adjust the sweetness by adding more or less vanilla syrup.
Calories: 150kcal
Cost: $5
Course: Beverage
Keyword: iced coffee, refreshing, Vanilla

Welcome to a culinary adventure that transforms your weeknight meals into a vibrant flavor fiesta! This 30-Minute Teriyaki Chicken Bowl is not just quick and easy; it’s a delightful explosion of juicy chicken, fresh veggies, and creamy avocado that will have your family asking for seconds. Cooking healthy doesn’t have to be boring, and with this recipe, you’ll discover how fun and exciting nutritious meals can be. Ready to dive in? Let’s get cooking!

Why You’ll Love This Recipe

  • Quick and Easy: In just 30 minutes, you can whip up a meal that’s both healthy and delicious—perfect for busy weeknights!
  • Flavor-Packed: Featuring a homemade teriyaki sauce that’s sweet, savory, and utterly addictive, this dish brings bold flavors to your table.
  • Customizable: You can easily swap out veggies, proteins, or bases to suit your family’s taste preferences—flexibility at its finest!
  • Meal Prep Friendly: Make a big batch and store it for easy lunches throughout the week. Enjoy fresh flavors even on the busiest days!
  • Family-Approved: This dish is a hit with both kids and adults, making it a go-to recipe for family dinners!

Ingredients You’ll Need

Gather these ingredients to create your scrumptious teriyaki chicken bowls. Each component works harmoniously to deliver a delightful meal your family will love!

  • 1 ½ lb boneless, skinless chicken thighs: Tender and juicy, these thighs soak up the teriyaki sauce beautifully.
  • 1 cup teriyaki sauce: You can use store-bought or homemade for a punch of flavor!
  • 1 tablespoon vegetable oil: Essential for searing the chicken to a crispy finish.
  • 2 cups cooked white rice: This acts as a hearty base; feel free to swap for brown rice or quinoa for a healthier option.
  • 2 cups broccoli florets: Steamed to retain nutrients and provide a vibrant crunch.
  • 1 cup shredded carrots: Adds sweetness and color to your bowl.
  • 1 ripe avocado, sliced: Creamy texture that complements the dish perfectly.
  • 2 tablespoons mayonnaise: For a creamy dressing.
  • 1 tablespoon sriracha: Adds a kick of heat—adjust to your spice tolerance!
  • 1 teaspoon sesame oil: For that nutty aroma that elevates the dish.
  • 1 tablespoon sesame seeds: For garnish and extra crunch.

How to Make Your 30-Minute Teriyaki Chicken Bowl

Follow these simple steps to create a delicious teriyaki chicken bowl that will wow your taste buds!

  • Step 1: Heat the Oil – In a skillet over medium-high heat, warm the vegetable oil until it shimmers.
  • Step 2: Cook the Chicken – Add the chicken thighs to the skillet and cook for about 4–5 minutes per side until golden brown and cooked through.
  • Step 3: Sauce the Chicken – Pour the teriyaki sauce over the chicken and simmer for 2–3 minutes until it thickens and becomes glossy.
  • Step 4: Slice the Chicken – Remove the chicken from heat and slice it into strips.
  • Step 5: Prepare the Spicy Mayo – In a small bowl, mix the mayonnaise, sriracha, and sesame oil to create a zesty sauce.
  • Step 6: Assemble Your Bowls – Start with a base of rice, then add steamed broccoli, shredded carrots, and sliced avocado to each bowl.
  • Step 7: Top It Off – Place the sliced teriyaki chicken on top, drizzle with spicy mayo, and sprinkle with sesame seeds before serving.

Pro Tips for Success

Side view of a colorful teriyaki chicken bowl with broccoli, carrots, and avocado.
  • Quality Ingredients: Use high-quality teriyaki sauce for the best flavor—homemade is always a winner!
  • Don’t Overcook: Keep an eye on your veggies to maintain their vibrant color and nutrients—steaming is the way to go!
  • Prep Ahead: Chop your veggies and marinate the chicken the night before for a quicker cooking experience!
  • Customize Your Bowl: Feel free to swap in your favorite vegetables, such as bell peppers, snap peas, or even pineapple chunks!
  • Texture Matters: Ensure your chicken is cooked through but not dry—juicy chicken is key!
  • Perfect Portions: Adjust the recipe based on your family size—this dish is easily scalable!
  • Experiment with Toppings: Try adding chopped green onions, cilantro, or even crushed peanuts for added flavor!
  • Use Leftovers Wisely: Leftover teriyaki chicken makes a fantastic topping for salads or wraps!

Common Mistakes and Troubleshooting

Sometimes, cooking can throw a curveball. Here’s how to avoid common pitfalls:

  • Overcooked Chicken: If your chicken is dry, try cooking it for a shorter time next time, or use a meat thermometer to ensure it’s just right.
  • Too Saucy: If your dish is too saucy, let it simmer longer to reduce the sauce before serving.
  • Veggies Too Soft: Make sure you steam your veggies just until tender but still vibrant—don’t let them turn mushy!

Variations to Spice Things Up

Want to mix things up? Here are some fun variations to elevate your teriyaki chicken bowl:

  • Teriyaki Salmon Bowl: Swap out chicken for salmon fillets for a rich, flavorful alternative.
  • Vegetarian Teriyaki Bowl: Use tofu or tempeh instead of chicken, and load up on your favorite vegetables.
  • Spicy Chicken Bowl: Add extra sriracha or a splash of chili oil to amp up the heat level!
  • Rice or Quinoa Bowl: Experiment with different bases like brown rice, quinoa, or even cauliflower rice for a lower-carb option.

Make Ahead and Storage

Meal prep like a pro with these tips:

  • Store in the Fridge: Keep leftovers in an airtight container for up to 3-4 days.
  • Freezing: You can freeze the cooked chicken and teriyaki sauce for up to 3 months. Thaw overnight in the fridge before reheating.
  • Reheat Carefully: Use a microwave or stovetop, adding a splash of water or extra sauce to keep the chicken moist.

Frequently Asked Questions

Got questions? We’ve got answers!

  • Can I use chicken breasts instead of thighs? Yes! Just be aware that chicken breasts can dry out more easily, so monitor cooking times closely.
  • What can I substitute for teriyaki sauce? You can use soy sauce mixed with honey, garlic, and ginger for a quick alternative.
  • Is this recipe gluten-free? Absolutely! Just ensure to use gluten-free teriyaki sauce.
  • Can I meal prep this dish? Yes! It’s perfect for meal prep—just keep the components separate until you’re ready to eat.
  • How can I make this dish spicier? Add more sriracha or sprinkle in some red pepper flakes for an extra kick!
  • What veggies work best? Broccoli, bell peppers, snap peas, and carrots are all fantastic choices!
  • Can I use frozen veggies? Yes, but be sure to thaw and drain them to avoid excess moisture in the dish.
  • What’s the best way to serve this? Serve warm and top with sesame seeds and sliced green onions for an extra pop of flavor!

Nutritional Tips and Dietary Adaptations

This dish is not only delicious but can be adjusted to fit various dietary needs:

  • Low-Carb: Substitute cauliflower rice for white rice to cut down on carbs.
  • Higher Protein: Add edamame or chickpeas to boost protein content without meat.
  • Vegan Option: Use tofu or tempeh instead of chicken and ensure your teriyaki sauce is vegan-friendly.

Equipment Recommendations

To make your cooking experience seamless, here’s what you’ll need:

  • Skillet: A non-stick skillet works best for cooking the chicken and preventing sticking.
  • Mixing Bowls: For preparing sauces and mixing ingredients.
  • Cutting Board and Knife: Essential for chopping veggies and slicing chicken.

Serving Suggestions

Enhance your teriyaki chicken bowl experience with these serving ideas:

  • Garnish: Top with chopped green onions, cilantro, or additional sesame seeds for that extra flair.
  • Side Dishes: Pair with a light salad or steamed dumplings for a well-rounded meal.
  • Drink Pairings: Serve with a refreshing green tea or sparkling water infused with citrus for a delightful twist.

Now that you have all the tools to create the ultimate 30-Minute Teriyaki Chicken Bowl, it’s time to get cooking! Embrace the vibrant flavors, and watch your family enjoy every last bite. Remember, the kitchen is your playground—so have fun, experiment, and make this delicious dish your own!

30-Minute Teriyaki Chicken Bowl

Prep Time 10 minutes
Cook Time 20 minutes
Total Time 30 minutes
Servings 4 servings
Calories 650
A quick and flavorful bowl combining tender chicken, fresh vegetables, and a spicy mayo for a satisfying meal in just 30 minutes.

Ingredients

Protein

  • 1.5 lb boneless, skinless chicken thighs
  • 1 cup teriyaki sauce
  • 1 tablespoon vegetable oil

Carbohydrates

  • 2 cups cooked white rice
  • 2 cups broccoli florets, steamed
  • 1 cup shredded carrots

Fats & Oils

  • 1 ripe avocado, sliced

Sauces & Condiments

  • 2 tablespoons mayonnaise
  • 1 tablespoon sriracha
  • 1 teaspoon sesame oil
  • 1 tablespoon sesame seeds

Instructions 

  • Heat oil in a skillet over medium-high heat.
  • Cook chicken thighs 4-5 minutes per side until cooked and crispy.
  • Add teriyaki sauce and simmer 2-3 minutes until thickened.
  • Slice chicken into strips and prepare spicy mayo by mixing mayonnaise, sriracha, and sesame oil.
  • Assemble bowls with rice, vegetables, avocado, chicken, drizzle spicy mayo, and sprinkle sesame seeds.

Notes

Feel free to customize with your favorite vegetables or adjust spice levels.
Calories: 650kcal
Cost: $15
Course: Main Course
Cuisine: Asian
Keyword: Chicken

Discover the Magic of Quick Honey Garlic Shrimp

Welcome to the vibrant world of Quick Honey Garlic Shrimp! This dish is not just a meal; it’s an experience that brings together the sweet allure of honey, the aromatic punch of garlic, and the umami richness of tamari. Whether you’re a busy professional, a parent juggling schedules, or simply someone who loves delicious food, this recipe is your go-to solution for an exciting dinner in under 30 minutes. It’s perfect for impressing guests or simply treating yourself to a flavorful night in. Let’s dive in!

Why You’ll Love This Recipe

  • Speedy Preparation: Whip up this dish in just 20 minutes! Perfect for hectic weeknights when time is of the essence.
  • Flavor Explosion: The combination of honey and garlic creates a sticky, irresistible glaze that will have your taste buds dancing.
  • Versatile Ingredients: Most of these ingredients are pantry staples, making this recipe easy to prepare at a moment’s notice.
  • Healthy and Wholesome: Packed with protein from shrimp, this dish is not just delicious but also nutritious, keeping you energized.
  • Customizable: Feel free to switch up the veggies or proteins to suit your preferences—this recipe is your canvas!

Ingredient Breakdown with Substitutions

Here’s what you’ll need to create this honey garlic sensation:

  • 1/2 cup honey: I recommend using a high-quality honey like Nature Nate’s for a clean floral taste.
  • 1/3 cup tamari: For a richer umami flavor, opt for San-J brand tamari; it’s gluten-free, making it a great choice for dietary restrictions.
  • 4 garlic cloves: Freshly minced for the best flavor and aroma—don’t skimp on the garlic!
  • 1 tsp ginger: Adds a warm, spicy note that complements the sweetness of the honey perfectly.
  • 1/4 tsp pepper flakes: For a subtle heat that balances the sweetness—feel free to adjust to your spice preference.
  • 1/2 tbsp lime juice: Brightens the dish and enhances the flavors; fresh lime juice is always best.
  • 1 lb shrimp: Use peeled and deveined shrimp with tails left on for presentation and flavor.
  • 1 tbsp olive oil: For cooking the shrimp—adds a nice richness.
  • 1 tbsp cilantro: Fresh cilantro for garnish; it adds a pop of color and freshness.
  • 1 green onion: Sliced, for that crunchy topping.

Pro Tips for Cooking Perfect Honey Garlic Shrimp

Side view of succulent shrimp glazed in honey garlic sauce with fresh herbs.
  • Pat the shrimp dry: Ensures they sear rather than steam, giving you that beautiful golden color.
  • Don’t overcrowd the pan: Cook shrimp in batches to avoid steaming and ensure even cooking.
  • Marinate for flavor: Allow shrimp to marinate for at least 15 minutes to absorb all the delicious flavors.
  • Watch the cooking time: Shrimp cook quickly, so keep an eye on them to avoid overcooking.
  • Use a large skillet: A wide pan helps with even cooking and gives you enough space to maneuver the shrimp.
  • Experiment with veggies: Add bell peppers, broccoli, or snap peas for extra color and nutrition.
  • Finish with a sprinkle of sesame seeds: For an extra crunch and a nutty flavor.
  • Pair with a side: Serve over rice or noodles to soak up the delicious sauce.

Common Mistakes and Troubleshooting

Even the best cooks can encounter challenges. Here are some common mistakes and how to avoid them:

  • Overcooking the shrimp: Keep an eye on them—shrimp should be pink and opaque. They cook in just 2-3 minutes!
  • Using too much sauce: Balance is key. Use just enough to coat the shrimp without drowning them.
  • Not using fresh ingredients: Fresh garlic and ginger make all the difference in flavor.
  • Skipping the marinade: Allowing your shrimp to soak up the flavors is essential for a truly tasty dish.

Delicious Variations to Try

Feel free to get creative with this recipe! Here are some tasty variations:

  • Honey Garlic Chicken: Swap shrimp for chicken breast or thighs, marinating and cooking them the same way.
  • Vegetarian Option: Use firm tofu or tempeh instead of shrimp for a plant-based twist.
  • Spicy Honey Garlic Shrimp: Add more pepper flakes or a splash of sriracha for an extra kick.
  • Citrus Honey Garlic Shrimp: Incorporate orange juice along with lime for a zesty flavor profile.

Storage and Make-Ahead Instructions

This dish is best enjoyed fresh, but you can store leftovers easily:

  • Refrigerate: Store in an airtight container for up to 2 days.
  • Reheat: Gently in a skillet over low heat to maintain texture and flavor.
  • Make ahead: Marinate the shrimp a few hours in advance for more flavor, but cook just before serving.

Frequently Asked Questions

  • Can I use frozen shrimp?: Absolutely! Just thaw them properly before cooking for the best results.
  • What can I serve with honey garlic shrimp?: Rice, quinoa, or even a fresh salad are excellent pairings.
  • How do I know when the shrimp are done?: They should be pink and opaque; overcooked shrimp turn rubbery.
  • Can I add vegetables to this dish?: Yes! Bell peppers, snap peas, or broccoli make great additions.
  • How can I make it gluten-free?: Use tamari instead of soy sauce for a gluten-free option.
  • Can I use this sauce for other proteins?: Definitely! It works wonderfully with chicken, tofu, or even salmon.
  • Is this recipe spicy?: It has a mild kick from pepper flakes, but you can adjust to your preference.
  • How long does it take to cook?: The entire dish comes together in about 20 minutes!

Nutritional Tips and Dietary Adaptations

This recipe can fit various dietary needs:

  • Low-carb: Serve with cauliflower rice instead of regular rice for a low-carb option.
  • Dairy-free: This dish is naturally dairy-free, making it suitable for those with lactose intolerance.
  • Paleo-friendly: Use honey and fresh ingredients to keep it compliant with paleo diets.
  • Keto-friendly: Adjust the honey quantity or substitute with a keto-friendly sweetener to lower carbs.

Essential Equipment for Success

To make this recipe a breeze, you’ll need:

  • Large Skillet: A non-stick or cast iron skillet works best for searing shrimp.
  • Measuring Cups and Spoons: For accurate ingredient proportions.
  • Sharp Knife: For easy mincing of garlic and ginger.
  • Spatula: To flip and toss the shrimp without damaging them.

Serving Suggestions

Now that you’ve created this delightful dish, here’s how to serve it:

  • Over Rice: Serve on a bed of jasmine rice or brown rice to soak up that delicious honey garlic sauce.
  • With Noodles: Toss with rice noodles for an Asian-inspired feast.
  • As an Appetizer: Serve skewered shrimp as a finger food at your next gathering.
  • On a Bed of Greens: For a lighter option, serve on a bed of mixed greens with a drizzle of dressing.

In conclusion, Quick Honey Garlic Shrimp is not just a meal; it’s a celebration of flavors, textures, and creativity in the kitchen. This dish is designed for you—whether you’re a novice cook or a seasoned chef looking for something fresh and fun. Enjoy making this delightful recipe, and remember, cooking healthy can be simple, bold, and most importantly, enjoyable!

Quick Honey Garlic Shrimp

Prep Time 10 minutes
Cook Time 10 minutes
Total Time 20 minutes
Servings 4 servings
Calories 250
A quick and flavorful shrimp dish glazed with honey and garlic, perfect for a weeknight dinner.

Ingredients

Sauces and liquids

  • 1/2 cup honey (I use Nature Nate's for a clean floral taste)
  • 1/3 cup tamari (San-J brand provides a richer umami flavor)
  • 1 tsp ginger (freshly minced)
  • 1/4 tsp pepper flakes
  • 1/2 tbsp lime juice
  • 1 lb shrimp (peeled and deveined with tails left on)
  • 1 tbsp olive oil
  • 1 tbsp cilantro

Instructions 

  • In a bowl, whisk together honey, tamari, minced garlic, ginger, pepper flakes, and lime juice.
  • Heat olive oil in a large skillet over medium-high heat.
  • Add shrimp to the skillet and cook until pink and opaque, about 3-4 minutes per side.
  • Pour the honey garlic sauce over the shrimp and cook for another 2-3 minutes until glazed.
  • Garnish with chopped cilantro and sliced green onion before serving.

Notes

Serve immediately over rice or with steamed vegetables for a complete meal.
Calories: 250kcal
Cost: $12
Course: Main Course
Cuisine: Asian-inspired
Keyword: shrimp

Welcome to the Vibrant World of Rainbow Carrot Sesame Salad!

Spring is here, and with it comes a celebration of fresh flavors and colorful ingredients! Today, we’re diving into the delightful realm of Shaved Rainbow Carrot Sesame Salad. This salad is not just a feast for the eyes; it’s also a powerhouse of nutrition and taste. Bursting with bright colors and bold flavors, this dish is perfect for sunny days, picnics, or as a vibrant side to any meal. So, let’s get ready to whip up this refreshing salad that’s sure to energize your meals!

Why You’ll Love This Recipe

This shaved rainbow carrot sesame salad isn’t just another salad; it’s a culinary experience! Here are some reasons why you’ll fall head over heels for this dish:

  • Eye-Catching Colors: The mix of rainbow carrots, scallions, and fresh herbs creates a stunning visual appeal that will brighten up any table.
  • Nutritious Ingredients: Packed with vitamins, minerals, and antioxidants, this salad is a healthy addition to your diet.
  • Quick Preparation: With minimal cooking involved, you can whip this up in under 30 minutes!
  • Versatile Dish: Perfect as a main course or a side, this salad complements a variety of dishes.
  • Flavor Explosion: The combination of sesame oil, rice vinegar, and fresh herbs delivers a burst of flavor in every bite.

Ingredient Breakdown

Let’s take a closer look at the key ingredients that make this salad shine:

  • Rainbow Carrots: About 1.5 lbs of rainbow carrots, peeled and julienned, provide a crunchy and colorful base for the salad. If unavailable, regular carrots can work just fine.
  • Scallions: 1/4 cup finely chopped scallions add a mild onion flavor that enhances the dish. You can substitute with chives if desired.
  • Cilantro & Basil: 2 tablespoons each of chopped cilantro and basil introduce fresh herbal notes. Feel free to swap with parsley if you prefer.
  • Toasted Sesame Seeds: 1.5 tablespoons of these seeds give a nutty flavor and a satisfying crunch.
  • For the Dressing: This includes 3 tablespoons of rice vinegar, 2 tablespoons of sesame oil, 1.5 tablespoons of low-sodium Tamari (or soy sauce), 1 tablespoon of mild white miso, 1 teaspoon of sriracha, 1 teaspoon of coconut sugar, 1 teaspoon of minced garlic, and 1 teaspoon of grated ginger. This dressing ties the salad together beautifully!

Pro Tips for Perfecting Your Salad

Close-up view of a colorful salad featuring julienned rainbow carrots and scallions.

Even though this salad is simple to prepare, a few tips can elevate it to perfection:

  • Use Fresh Ingredients: Always opt for fresh, high-quality ingredients for the best flavor and nutritional value.
  • Chill Before Serving: Allow the salad to chill in the refrigerator for at least an hour. This not only enhances the flavors but also improves the texture!
  • Adjust the Dressing: Feel free to modify the dressing ingredients to suit your taste. A little extra sriracha can add more heat if you love spice!
  • Experiment with Herbs: Try different herbs based on what you have on hand. Dill or mint can be delightful alternatives.
  • Make it Ahead: This salad keeps well in the fridge, making it perfect for meal prep. Just toss the dressing in right before serving.
  • Mix Well: When combining the salad and dressing, toss well to ensure every bite is flavorful.
  • Texture Matters: For a delightful crunch, consider adding toasted nuts or seeds just before serving.
  • Customize Your Carrots: If you can’t find rainbow carrots, you can also use a mix of different colored root vegetables for variety.

Common Mistakes to Avoid

Even the best of us can stumble—here are some common pitfalls and how to avoid them:

  • Overdressing: Too much dressing can make the salad soggy. Start with less and add more to taste.
  • Skipping the Chill: Not letting the salad chill can mute the flavors. This step is crucial!
  • Using Old Ingredients: Check the freshness of your veggies and herbs before preparing the salad.
  • Inadequate Mixing: Not mixing the salad thoroughly can lead to uneven flavor distribution.

Variations to Try

Get creative with your salad! Here are some fun variations to keep things exciting:

  • Asian Noodle Twist: Add cooked soba noodles for a heartier meal.
  • Protein Boost: Toss in some grilled chicken, tofu, or chickpeas for added protein.
  • Fruit Fusion: Add diced mango or oranges for a sweet, tropical twist.
  • Spicy Crunch: Incorporate crushed peanuts or cashews for an added crunch and flavor.

Storage and Make-Ahead Instructions

This salad is perfect for meal prep! Here’s how to store it:

  • Refrigerate: Store in an airtight container in the refrigerator for up to 3 days.
  • Make Ahead: You can prepare the ingredients a day in advance. Just add the dressing right before serving.
  • Freezing Not Recommended: It’s best to enjoy this salad fresh; freezing may affect the texture of the vegetables.

Frequently Asked Questions

Got questions? We’ve got answers! Here are some FAQs about this delicious salad:

  • Can I use regular carrots instead of rainbow? Yes! Regular carrots will work just fine if rainbow carrots aren’t available.
  • Is this salad vegan? Yes! All the ingredients are plant-based, making it a fantastic vegan option.
  • What can I serve this salad with? It pairs well with grilled meats, fish, or can be enjoyed on its own as a light lunch.
  • How do I make it gluten-free? Use gluten-free Tamari instead of soy sauce.
  • Can I prepare this salad the night before? Absolutely! Just add the dressing right before serving for the best flavor.
  • What if I don’t like sesame oil? You can substitute with olive oil or avocado oil, but the flavor will change slightly.
  • How spicy is the salad? The sriracha adds a mild kick; you can adjust the amount to suit your spice preference.
  • Can I add nuts to this salad? Yes! Toasted nuts like almonds or sunflower seeds make a delicious addition.

Nutritional Tips and Dietary Adaptations

This shaved rainbow carrot sesame salad is not just tasty but also nutritious! Here’s how to adapt it for your dietary needs:

  • Low-Carb Option: Substitute carrots with spiralized zucchini for a low-carb version.
  • High-Protein Version: Add edamame or cooked quinoa to boost protein content.
  • Low-Sodium Option: Use coconut aminos instead of Tamari for a lower-sodium alternative.

Essential Equipment for Preparation

Here’s what you need to create this delicious salad:

  • Sharp Knife: For julienning the carrots efficiently.
  • Cutting Board: A sturdy board for all your chopping needs.
  • Mixing Bowl: A large bowl for combining all the ingredients.
  • Whisk or Blender: For mixing the dressing until smooth.
  • Measuring Cups and Spoons: To ensure accurate ingredient measurements.

Serving Suggestions

Ready to serve your amazing salad? Here are some suggestions to complement it:

  • Grilled Chicken or Fish: Serve alongside for a complete meal.
  • Rice or Quinoa: For a filling side, pair with a grain.
  • Fresh Bread: A crusty baguette or pita complements the salad beautifully.
  • Light Wine: Pair with a crisp white wine for an elegant touch.

Conclusion

Now you’re ready to impress with your very own Shaved Rainbow Carrot Sesame Salad! This dish not only brings a pop of color to your table but also delivers on flavor and nutrition. So grab those colorful carrots, gather your ingredients, and let your culinary creativity shine. Remember, healthy eating can be fun, exciting, and oh-so-delicious!

Easy Shaved Rainbow Carrot Sesame Salad for Spring

Prep Time 15 minutes
Cook Time 7 minutes
Total Time 22 minutes
Servings 4 servings
Calories 150
A vibrant and fresh salad perfect for spring, combining colorful carrots with a flavorful sesame dressing.

Ingredients

Vegetables

  • 1.5 lbs carrots, peeled and julienned
  • 0.25 cup finely chopped scallions
  • 2 tbsp chopped fresh cilantro
  • 2 tbsp chopped fresh basil
  • 1.5 tbsp toasted sesame seeds
  • 3 tbsp rice vinegar
  • 2 tbsp sesame oil
  • 1.5 tbsp low sodium Tamari (or soy sauce)
  • 1 tbsp mild white miso
  • 1 tsp sriracha
  • 1 tsp coconut sugar
  • 1 tsp finely minced fresh garlic
  • 1 tsp grated fresh ginger

Instructions 

  • Toast sesame seeds in a pan over medium heat for 5-7 minutes until golden, then remove.
  • Julienne the carrots and place in a large bowl.
  • Add scallions, cilantro, and basil; mix well.
  • Blend dressing ingredients until smooth, then pour over the carrots and toss.
  • Chill for at least one hour before serving.

Notes

Chilling the salad enhances the flavors and texture.
Calories: 150kcal
Cost: $15
Course: Salad
Cuisine: fusion
Keyword: Carrots, Sesame, Spring

Transform Your Dinner with This Flavor-Packed Chicken Parmesan!

Are you tired of the same old dinner routine? Say goodbye to boring meals and hello to a tantalizing dish that combines tender chicken, vibrant spinach, and a zesty tomato sauce, all topped off with rich Parmesan cheese. This easy chicken parmesan recipe is not just a feast for the taste buds; it’s a celebration of healthy, flavorful cooking that proves nutritious meals can be fun and exciting!

Whether you’re cooking for a busy weeknight or impressing friends at a dinner party, this recipe is your go-to solution. Ready to dive in? Let’s break down why you’ll absolutely love this dish!

Why You’ll Love This Recipe

  • Quick and Easy: Whip up this mouthwatering meal in under 45 minutes, perfect for busy evenings.
  • One-Skillet Wonder: Save time on cleanup with this delightful one-pan meal that packs in flavor without the mess.
  • Healthy and Delicious: Filled with nutrient-dense spinach and lean chicken breasts that keep it light yet satisfying.
  • Customizable: Easily adjust ingredients to fit dietary preferences or what you have on hand!
  • Impressive Presentation: Serve this dish straight from the skillet for a rustic, inviting dinner table vibe.

Ingredients Breakdown

Here’s what you’ll need to create this delicious chicken parmesan:

  • 3 boneless, skinless chicken breasts: Pounded to one inch thick for even cooking.
  • 1/4 cup flour: For coating the chicken; can substitute with gluten-free flour if needed.
  • Salt & pepper: Essential for seasoning.
  • 1 tbsp olive oil: For sautéing; feel free to use avocado oil for a different flavor!
  • 1 cup baby spinach leaves: Adds a burst of color and nutrition.
  • 1 28 oz can diced tomatoes: The base of your sauce, bringing in rich flavors.
  • 1 5.5 oz can no salt added tomato paste: Intensifies the tomato flavor without extra additives.
  • 2 garlic cloves (minced): Because everything’s better with garlic!
  • 2 tsp dried basil: A classic Italian herb that elevates your dish.
  • 1 tsp dried oregano: Complements the basil for a fragrant flavor profile.
  • 1 cup grated Parmesan cheese: The star of the show that adds creamy, salty goodness.

Step-by-Step Instructions

Side view of a delicious chicken Parmesan served with a rich tomato sauce and herbs.

Let’s get cooking! Follow these easy steps to create your chicken parmesan masterpiece:

  • Preheat your oven to 350°F (175°C).
  • Pound chicken breasts to an even thickness, about one inch, using the flat side of a meat mallet.
  • Season both sides of the chicken breasts generously with salt and pepper.
  • Place the chicken in a ziplock bag, seal it, and add flour. Shake to coat the chicken evenly.
  • In a bowl, whisk together diced tomatoes, tomato paste, minced garlic, oregano, and basil.
  • Heat an ovenproof skillet over medium-high heat and add olive oil.
  • Transfer the coated chicken breasts to the skillet and sear them for 2-3 minutes on each side until they are golden brown.
  • Remove the skillet from heat and distribute spinach leaves over the chicken.
  • Pour the tomato mixture over the chicken and sprinkle with Parmesan cheese.
  • Bake in the oven for 20 minutes or until the chicken is cooked through and the cheese is golden.
  • Serve hot, ideally with a side of pasta!

Pro Tips for Perfect Chicken Parmesan

  • Use Fresh Ingredients: Fresh spinach and good-quality chicken can significantly enhance the flavor.
  • Pound Evenly: Ensure even cooking by pounding chicken to the same thickness.
  • Don’t Overcook: Chicken is done when it reaches an internal temperature of 165°F (75°C).
  • Try Different Cheeses: Mix in mozzarella for added creaminess or substitute with vegan cheese for a plant-based option.
  • Serve with Sides: Pair with a simple salad or garlic bread for a complete meal.
  • Make It Ahead: Prepare the chicken and sauce in advance, then just bake when ready to serve.
  • Experiment with Herbs: Fresh herbs like basil or parsley can brighten up the dish just before serving.
  • Use a Cast Iron Skillet: For an even better crust and heat retention.

Common Mistakes and Troubleshooting

  • Chicken Isn’t Cooked Through: Always check the internal temperature with a meat thermometer.
  • Cheese is Soggy: Make sure to bake until the cheese is golden for that perfect texture.
  • Tomato Sauce is Too Thin: If you prefer a thicker sauce, reduce it on the stove for a few minutes before adding it to the chicken.
  • Overly Salty: Opt for low-sodium canned tomatoes to control salt levels.

Variations to Shake Things Up

  • Chicken Parmesan Bake: Layer chicken in a baking dish with sauce and cheese, bake until bubbly.
  • Eggplant Parmesan: Substitute chicken with breaded eggplant slices for a vegetarian option!
  • Spicy Chicken Parmesan: Add crushed red pepper flakes to the sauce for a kick.
  • One-Pan Mediterranean: Incorporate olives and artichokes into the tomato sauce for a Mediterranean twist.

Storage and Make-Ahead Instructions

This chicken parmesan is as versatile in storage as it is in flavor! Here’s how to keep it fresh:

  • Refrigeration: Store leftovers in an airtight container for up to 3 days.
  • Freezing: Freeze portions in freezer-safe containers for up to 2 months.
  • Reheating: Reheat in the oven or microwave until warmed through, adding a sprinkle of cheese if desired.
  • Make-Ahead: Prepare the chicken and sauce a day ahead, and bake just before serving.

Frequently Asked Questions (FAQs)

  • Can I use chicken thighs instead of breasts? Yes! Thighs add extra juiciness and flavor.
  • Is this recipe gluten-free? Absolutely! Just substitute the flour with a gluten-free option.
  • What can I serve with chicken parmesan? Pasta, a fresh salad, or garlic bread make perfect sides!
  • Can I make this dish vegetarian? Yes! Swap chicken with breaded eggplant or zucchini slices.
  • How can I make this dish spicier? Add red pepper flakes or diced jalapeños to the tomato sauce.
  • What’s the best way to store leftovers? Keep leftovers in an airtight container in the fridge for up to 3 days.
  • Can I use fresh tomatoes? Yes! Use about 2 cups of chopped fresh tomatoes in place of canned tomatoes.
  • How long does this chicken parmesan last in the fridge? It can last up to 3 days, but it’s best enjoyed fresh!

Nutrition Tips and Dietary Adaptations

Eating healthy doesn’t mean sacrificing flavor. Here are some tips to make this chicken parmesan even more nutritious:

  • Lean Proteins: Opt for skinless chicken breasts for a low-fat option.
  • Veggie Boost: Add more vegetables like zucchini or bell peppers to the sauce.
  • Whole-Grain Options: Use whole-wheat flour for a fiber boost while coating the chicken.
  • Portion Control: Serve smaller portions alongside a hearty salad to balance the meal.

Equipment Recommendations

To make this chicken parmesan recipe a success, here are a few kitchen essentials:

  • Cast Iron Skillet: For even cooking and a beautiful crust.
  • Meat Mallet: To pound chicken breasts to the perfect thickness.
  • Mixing Bowls: For prepping your sauce and coating.
  • Meat Thermometer: To ensure your chicken is cooked to perfection.

Serving Suggestions

Ready to serve? Here are some fun ideas for plating:

  • Over Pasta: Serve this delicious chicken parmesan over spaghetti or your favorite pasta.
  • With a Side Salad: A fresh garden salad complements the rich flavors beautifully.
  • Garlic Bread: A slice of garlic bread is always a hit!
  • On a Bed of Spinach: For a low-carb option, serve it on a bed of sautéed spinach.

Conclusion

This easy chicken parmesan recipe is more than just a meal; it’s an experience filled with flavor, creativity, and fun! With a few simple ingredients and easy steps, you can transform your dinner into a mouthwatering feast that your family and friends will love. So grab your ingredients and let’s get cooking—because healthy eating should be a joyful adventure!

Easy Chicken Parmesan Recipe

Prep Time 15 minutes
Cook Time 25 minutes
Total Time 40 minutes
Servings 4 servings
Calories 550
A delicious and straightforward Chicken Parmesan that combines crispy chicken, fresh spinach, and flavorful tomato sauce, baked to perfection.

Ingredients

Protein

  • 3 pieces boneless, skinless chicken breasts (Pounded to one inch thick)
  • 1/4 cup flour
  • salt & pepper salt & pepper
  • 1 tbsp olive oil
  • 1 cup baby spinach leaves
  • 1 28 oz can oz diced tomatoes
  • 1 5.5 oz can oz no salt added tomato paste
  • 2 cloves garlic (minced)
  • 2 tsp dried basil
  • 1 tsp dried oregano
  • 1 cup grated Parmesan cheese

Instructions 

  • Preheat oven to 350°F (175°C). Pound chicken to even thickness, season with salt & pepper.
  • Coat chicken with flour in a ziplock bag. Whisk together tomatoes, tomato paste, garlic, basil, oregano.
  • Heat oil in ovenproof skillet, sear chicken 2-3 minutes per side, then add spinach and tomato mixture. Top with Parmesan.
  • Bake in oven for 20 minutes until cooked through and cheese is golden. Serve hot.

Notes

Use fresh basil if available for extra flavor.
Calories: 550kcal
Cost: $15
Course: Main Course
Cuisine: Italian
Keyword: Chicken, parmesan

Dive into Flavor with Honey BBQ Chicken Rice!

Welcome to a culinary adventure that’s about to take your taste buds on a joyride! This Honey BBQ Chicken Rice recipe is not just a meal; it’s a celebration of flavors, colors, and textures that will invigorate your dinner table. Packed with sweet and savory goodness, this dish is perfect for busy weeknights and promises to satisfy your cravings without compromising on health. Let’s get cooking!

Why You’ll Love This Recipe

Here’s why you’ll be head over heels for this Honey BBQ Chicken Rice:

  • Quick and Easy: Ready in just 30 minutes, it’s a perfect solution for busy evenings when you need a delicious meal in a flash.
  • One-Pan Wonder: Minimal cleanup required! Everything cooks in a single skillet, meaning less time scrubbing and more time enjoying your meal.
  • Flavor Explosion: The combination of honey and BBQ sauce creates a sweet, tangy glaze that coats the chicken and rice, making every bite a burst of flavor.
  • Versatile Ingredients: Use leftover chicken or rotisserie chicken to save time, and customize with your favorite veggies!
  • Healthy Comfort Food: Packed with protein and nutrients, this dish is a wholesome meal that doesn’t skimp on taste.

Ingredients Breakdown

Let’s get into the nitty-gritty of what you’ll need for this recipe. Here’s a detailed ingredient list along with some handy substitutions!

  • 2 tablespoons olive oil: For sautéing and adding a rich flavor. You can substitute with coconut oil for a tropical twist.
  • 1 medium onion, diced: Adds sweetness and depth. Use shallots if you prefer a milder flavor.
  • 1 red bell pepper, diced: For color and crunch. Feel free to swap in any color bell pepper or even zucchini!
  • 2 garlic cloves, minced: Essential for that aromatic punch! Garlic powder can be used in a pinch (1/2 teaspoon).
  • 2 cups cooked chicken breast, chopped or shredded: The star of the show! You can use rotisserie chicken, leftovers, or even tofu for a vegetarian option.
  • 1 cup barbecue sauce: Choose your favorite brand or make your own for a healthier version!
  • 3 tablespoons honey: Provides natural sweetness. Maple syrup works as a vegan alternative.
  • 1½ cups cooked white rice: Leftover or day-old rice works best for texture. Brown rice is a great substitute but may require more cooking time.
  • Salt and pepper to taste: Essential for enhancing flavor.
  • Fresh parsley or green onions, for garnish: A pop of freshness to elevate the dish!

Step-by-Step Instructions

A delicious serving of Honey BBQ Chicken Rice, highlighting the colorful ingredients and glossy barbecue sauce.

Ready to whip up this delicious dish? Follow these easy steps!

  1. Sauté the aromatics: In a large skillet over medium heat, warm the olive oil. Add diced onion and bell pepper and sauté for about 4–5 minutes until softened. Add the minced garlic and cook for another 30 seconds until fragrant.
  2. Add the chicken: Stir in the chopped or shredded chicken, letting it heat through for 2–3 minutes. If you’re using rotisserie chicken or leftovers, this step is super fast.
  3. Make it saucy: Pour in the barbecue sauce and drizzle the honey over the chicken. Stir to coat everything well. Let it simmer for 3–4 minutes so the sauce slightly thickens and glazes the chicken.
  4. Fold in the rice: Add the cooked rice to the skillet. Break up any clumps and stir to combine with the sauce and chicken. Season with salt and pepper to taste. Let it cook for another 3–5 minutes, allowing the rice to absorb all that delicious honey BBQ flavor.
  5. Garnish and serve: Sprinkle chopped parsley or green onions over the top for a burst of freshness. Serve hot and enjoy!

Pro Tips for Perfection

Want to take your Honey BBQ Chicken Rice to the next level? Here are some expert insights:

  • Use Day-Old Rice: Cold rice from the fridge helps achieve the perfect texture and prevents clumping.
  • Don’t Skip the Searing: A quick sear on the chicken before adding the sauce enhances flavor and gives a beautiful color.
  • Adjust Sweetness: Feel free to add more or less honey based on your taste preference.
  • Add Veggies: Sneak in some frozen peas or corn for added nutrients and color.
  • Make it Spicy: Add a pinch of cayenne pepper or red pepper flakes for a spicy kick!
  • Meal Prep Friendly: This dish stores well; make a big batch for easy lunches throughout the week.
  • Garnish Smart: Fresh herbs like cilantro or chives can also be used for different flavor profiles.
  • Try Different Sauces: Experiment with teriyaki or sweet chili sauce for a unique twist!

Common Mistakes and Troubleshooting

Here are some common pitfalls to avoid while making this dish:

  • Overcooking the Chicken: Be careful not to overcook the chicken when reheating. It should be just heated through.
  • Using Sticky Rice: Stick with long-grain rice for the best texture. Short-grain rice can become mushy.
  • Skipping Seasoning: Don’t forget to taste and adjust seasoning! A little salt can elevate the flavors significantly.
  • Too Much Sauce: If the mixture is too saucy, add a bit more rice to balance it out.
  • Not Letting it Simmer: Allowing the dish to simmer helps the rice absorb the flavors fully. Don’t rush this step!

Flavor Variations

Mix it up with these fun variations:

  • Mexican Twist: Add black beans, corn, and taco seasoning for a southwestern flair.
  • Asian-Inspired: Use soy sauce instead of BBQ sauce and add broccoli and snap peas for a stir-fry vibe.
  • Vegetarian Delight: Substitute chicken with roasted chickpeas or tofu for a hearty plant-based option.
  • Breakfast Bowl: Top with a fried egg and some avocado slices for a protein-packed breakfast!

Storage and Make-Ahead Instructions

If you want to make this dish ahead of time or save leftovers, here’s how:

  • Refrigeration: Store leftovers in an airtight container in the fridge for up to 4 days.
  • Freezing: This dish freezes well! Portion it out and freeze for up to 3 months. Thaw overnight in the fridge before reheating.
  • Reheating: Reheat gently in a skillet over medium heat. Add a splash of water or broth to keep it moist.

Frequently Asked Questions

Got questions? We’ve got answers!

  • Can I use brown rice? Yes, just increase the broth to 2½ cups and simmer longer.
  • Can I make this dish spicy? Absolutely! Add some diced jalapeños or red pepper flakes for heat.
  • What can I serve with this dish? It pairs well with a simple green salad or steamed vegetables.
  • Is this recipe gluten-free? Yes, use gluten-free BBQ sauce to make it gluten-free.
  • Can I double the recipe? Yes, just ensure your skillet is large enough or cook in batches.
  • What’s the best way to reheat leftovers? Gently reheat in a skillet over medium heat with a splash of broth.
  • How can I make this dish vegan? Substitute chicken with tofu and use maple syrup instead of honey.
  • Can I use frozen vegetables? Yes! Just add them in during the last few minutes of cooking.

Nutrition Tips and Dietary Adaptations

Here are some tips to make this dish even healthier:

  • Lean Protein: Use skinless chicken breast or turkey for a leaner option.
  • Whole Grains: Opt for brown rice or quinoa for added fiber and nutrients.
  • Low-Sugar BBQ Sauce: Choose a sugar-free or low-sugar BBQ sauce to cut down on added sugars.
  • Load Up on Veggies: Feel free to add more vegetables to increase the nutritional value.

Equipment Recommendations

Here’s what you’ll need to make this dish:

  • Large Skillet: A non-stick skillet is perfect for easy cooking and cleanup.
  • Cutting Board and Knives: Essential for prepping all your ingredients.
  • Measuring Cups and Spoons: For precise ingredient measurements.
  • Spatula or Wooden Spoon: For stirring and mixing everything together.

Serving Suggestions

Make your meal even more delightful!

  • Pair with a Salad: A fresh garden salad or coleslaw complements the richness of the dish.
  • Add a Side: Serve with roasted veggies or sweet potato fries for a complete meal.
  • Garnish with Extras: Consider adding sliced avocados, lime wedges, or extra herbs for freshness.

Now that you’ve unlocked the secret to an amazing Honey BBQ Chicken Rice dish, it’s time to gather your ingredients and dive into this flavorful adventure! Remember, cooking is all about having fun and experimenting, so don’t hesitate to make this recipe your own. Happy cooking!

Honey BBQ Chicken Rice

Prep Time 10 minutes
Cook Time 15 minutes
Total Time 25 minutes
Servings 4 servings
Calories 520
A quick and flavorful dish combining tender chicken, sweet honey, and smoky barbecue sauce served over rice.

Ingredients

Main ingredients

  • 2 tablespoons olive oil
  • 1 medium onion, diced
  • 1 red bell pepper, diced red bell pepper
  • 2 cloves garlic, minced
  • 2 cups cooked chicken breast, chopped or shredded
  • 1 cup barbecue sauce
  • 3 tablespoons honey
  • cups cooked white rice (cold or day-old rice works best)
  • to taste Salt and pepper
  • for garnish Fresh parsley or green onions

Instructions 

  • Sauté onion and bell pepper in olive oil until softened, then add garlic and cook briefly.
  • Add chicken and cook for 2–3 minutes to heat through.
  • Stir in barbecue sauce and honey, simmer for 3–4 minutes until slightly thickened.
  • Add rice, season with salt and pepper, and cook for 3–5 minutes to absorb flavors.
  • Garnish with parsley or green onions and serve hot.

Notes

Use day-old rice for best texture and flavor absorption.
Calories: 520kcal
Cost: $12
Course: Main Course
Cuisine: American
Keyword: BBQ, Chicken, Honey

Welcome to a culinary adventure where fresh ingredients meet vibrant flavors! If you’re ready to elevate your lunch game with a salad that’s anything but ordinary, you’re in for a treat. Our **Asian Chicken Crunch Salad** bursts with color, taste, and texture, making it the perfect choice for anyone looking to eat well and feel fantastic. With crispy cabbage, tender chicken, and a zingy sesame dressing, this salad is not just food; it’s a celebration of wellness!

This recipe is not only delicious but also quick to prepare, ensuring you can whip up a nutritious meal even on your busiest days. Plus, it’s versatile enough to fit any dietary preference and can easily be made ahead of time. Let’s dive into why you’ll love this recipe!

Why You’ll Love This Recipe

  • Quick and Easy: Whip up this salad in just 25 minutes, making it a perfect option for busy weeknights or a nutritious lunch on the go.
  • Flavor-Packed: With a delightful mix of crunchy vegetables, tender chicken, and a tangy dressing, your taste buds will dance with joy!
  • Meal Prep Friendly: This salad stores beautifully, so you can make it in advance and enjoy it throughout the week. Just keep the dressing separate until serving!
  • Customizable: Easily adjust ingredients to suit your preferences—add more protein, swap veggies, or kick up the spice level!
  • Nutrient-Rich: Packed with vitamins, minerals, and antioxidants, this salad not only tastes good but is also good for you!

Ingredient Breakdown

Let’s get into the nitty-gritty of what makes this salad so special. Here’s a detailed breakdown of each ingredient, along with substitutions if you’re looking to tweak things a bit!

  • 3 cups shredded green cabbage: Provides a crisp base that’s full of fiber. Substitution: Use kale or spinach for a different texture.
  • 1 cup shredded red cabbage: Adds color and crunch, plus antioxidants. Substitution: You can omit this if you prefer just green cabbage.
  • 2 cups cooked chicken breast, sliced: A protein powerhouse that makes the salad satisfying. Substitution: Use tofu or chickpeas for a plant-based option.
  • 1 cup shredded carrots: Sweet and crunchy, these add a beautiful pop of color. Substitution: Use bell peppers for added sweetness.
  • 1 red bell pepper, sliced: Provides a fresh, juicy contrast. Substitution: Any color bell pepper works!
  • 3 green onions: Adds a mild onion flavor that elevates the salad. Substitution: Chives or shallots can work as well.
  • 1/2 cup edamame: For protein and a bit of texture. Substitution: Use black beans for a different flavor.
  • 1/2 cup wonton strips: Brings irresistible crunchiness. Substitution: Use crispy noodles or croutons if desired.
  • 1/4 cup sliced almonds: Adds healthy fats and a nutty flavor. Substitution: Peanuts or sunflower seeds can also work here.

Making The Zingy Dressing

What’s a salad without a fabulous dressing? Here’s how to create the perfect **sesame dressing** that ties all the flavors together:

  • 3 tbsp rice vinegar: Provides the tangy base. Substitution: Apple cider vinegar can work if you’re in a pinch.
  • 2 tbsp soy sauce: Adds umami and saltiness. Substitution: Use tamari for a gluten-free version.
  • 1 tbsp sesame oil: Gives that characteristic nutty flavor. Substitution: Olive oil can be used, but you’ll miss the sesame flavor.
  • 1 tbsp honey: Balances the tang with a touch of sweetness. Substitution: Maple syrup for a vegan alternative.
  • 1 tsp ginger: Freshly grated for a zing! Substitution: Ground ginger can be used, but fresh is best.
  • 1 tsp garlic: Minced for depth. Substitution: Garlic powder in a pinch.

Step-by-Step Instructions

Side view of a fresh Asian Chicken Crunch Salad featuring shredded cabbage and bright vegetables.

Ready to bring this delicious salad to life? Follow these simple steps:

  1. Whisk dressing ingredients: In a bowl, combine rice vinegar, soy sauce, sesame oil, honey, ginger, and garlic. Adjust flavors to your liking.
  2. Combine vegetables: In a large mixing bowl, add shredded green cabbage, red cabbage, carrots, bell pepper, green onions, and edamame.
  3. Add chicken: Toss in the sliced cooked chicken breast.
  4. Toss with dressing: Pour the dressing over the salad and gently toss until everything is well coated.
  5. Top with crunchy toppings: Just before serving, sprinkle wonton strips and sliced almonds on top for that perfect crunch!

Pro Tips for Perfection

Here are some expert insights to help you nail this salad every time:

  • Texture matters: Mix your crunchy toppings just before serving to keep them crispy.
  • Flavor balance: Taste and adjust your dressing. If it’s too tangy, add a bit more honey; if it’s too sweet, a splash of soy sauce will help.
  • Make it colorful: The more colors on your plate, the more nutrients you’re getting! Feel free to add additional veggies.
  • For added protein: Consider adding grilled shrimp or tofu if you want to mix it up.
  • Batch cooking: Make extra chicken on a Sunday for quick salad assembly throughout the week.
  • Control the heat: If you love spice, consider adding a dash of Sriracha to the dressing!
  • Leftovers: This salad holds up for a day in the fridge, but keep the dressing separate to avoid sogginess.
  • Perfect for parties: This salad can easily be scaled up for gatherings—just double or triple the ingredients!

Common Mistakes and Troubleshooting

Here are some common pitfalls and how to avoid them:

  • Overdressing: Less is more! Start with a small amount of dressing and add more as needed.
  • Using old veggies: Fresh ingredients are key! Make sure your veggies are crisp and vibrant for the best results.
  • Not balancing flavors: Don’t forget to taste. Adjust the sweetness and acidity to your liking.
  • Too much crunch: If you find it too crunchy for your taste, consider lightly steaming the cabbage to soften it a bit.

Variations to Spice It Up!

Feel free to get creative with this recipe! Here are some fun variations to consider:

  • Spicy Crunch Salad: Add sliced jalapeños or a drizzle of spicy mayo to kick it up a notch.
  • Fruit Infusion: Toss in some mandarin oranges or diced mango for a refreshing twist!
  • Quinoa Bowl: Serve the salad over a bed of quinoa for added fiber and protein.
  • Asian Noodle Salad: Incorporate cooked rice noodles for a heartier version.

Storage and Make-Ahead Instructions

This salad is perfect for meal prep! Here’s how to store it:

  • In the fridge: Store the salad in an airtight container for up to 3 days. Keep the dressing separate until ready to eat.
  • Make-ahead: Prep all the ingredients and store them in separate containers. Combine them just before serving for maximum freshness.

Frequently Asked Questions

Here are some common questions about the Asian Chicken Crunch Salad:

  • Can I make this salad vegan? Absolutely! Substitute the chicken with tofu and omit the honey for a plant-based option.
  • How do I make it gluten-free? Use gluten-free soy sauce or tamari in the dressing.
  • Can I add other veggies? Yes! Feel free to add bell peppers, cucumbers, or snap peas for extra crunch!
  • How long can I store leftovers? The salad will last 2-3 days in the fridge, but keep the dressing separate.
  • Can I use rotisserie chicken? Definitely! It’s a great time-saver and adds flavor!
  • What’s the best way to serve this salad? Serve chilled as a refreshing lunch or dinner, or enjoy it as a side dish at your next BBQ!
  • Can I freeze this salad? It’s not recommended as the vegetables will become soggy when thawed.
  • What can I serve with this salad? Pair it with grilled shrimp, spring rolls, or a light soup for a balanced meal!

Nutrition Tips and Dietary Adaptations

To enhance the nutritional profile of your salad, consider these tips:

  • Increase fiber: Add more vegetables or include legumes like chickpeas for a fiber boost.
  • Healthy fats: Use avocado slices as a creamy addition to the salad.
  • Protein-packed: Incorporate hemp seeds or chia seeds for healthy plant-based protein.

Equipment Recommendations

To make your salad-making experience easier, here are some kitchen tools you might find helpful:

  • Mixing bowls: A set of various sizes will help you manage ingredients easily.
  • Whisk: Essential for blending your dressing smoothly.
  • Sharp knife: A good knife will make chopping veggies a breeze!
  • Cutting board: Opt for a large board to comfortably chop all your ingredients.
  • Storage containers: Airtight containers are key for meal prep and storage!

Serving Suggestions

Now that you’ve created your masterpiece, here are some ideas for serving:

  • On a platter: Serve the salad on a large platter for family-style dining.
  • As a side: Pair it with grilled meats or fish for a complete meal.
  • In jars: Perfect for lunches on the go! Layer salad ingredients in jars for easy transport.

In conclusion, the **Asian Chicken Crunch Salad** is your go-to recipe for flavor-packed nutrition that’s as fun to prepare as it is to enjoy. Whether you’re meal prepping for the week or looking for a quick dinner solution, this salad has you covered. So grab your ingredients, and let’s get crunching! Enjoy your culinary adventure, and remember, eating healthy can be exciting and delicious!

Asian Chicken Crunch Salad

Prep Time 15 minutes
Cook Time 10 minutes
Total Time 25 minutes
Servings 4 servings
Calories 350
A vibrant and crunchy salad combining fresh vegetables, tender chicken, and a tangy Asian-inspired dressing.

Ingredients

Vegetables

  • 3 cups shredded green cabbage
  • 1 cup shredded red cabbage
  • 1 cup shredded carrots
  • 1 red bell pepper sliced
  • 3 green onions sliced
  • 1/2 cup edamame

Protein

  • 2 cups cooked chicken breast, sliced

Crunchy toppings

  • 1/2 cup wonton strips
  • 1/4 cup sliced almonds

Dressing

  • 3 tbsp rice vinegar
  • 2 tbsp soy sauce
  • 1 tbsp sesame oil
  • 1 tbsp honey
  • 1 tbsp olive oil
  • 1 tsp ginger
  • 1 tsp garlic

Instructions 

  • Whisk dressing ingredients.
  • Combine vegetables and chicken in a bowl.
  • Toss with dressing and top with crunchy toppings.

Notes

For extra crunch, add more wonton strips or almonds.
Calories: 350kcal
Cost: $15
Course: Salad
Cuisine: Asian
Keyword: Chicken

Unlock the Vibrant World of Chicken Shawarma Bowls!

Are you ready to elevate your dinner game? Dive into the delicious and nutritious realm of Chicken Shawarma Bowls! This recipe is not just a meal; it’s an experience bursting with flavor, color, and the kind of energy that makes you want to dance in your kitchen. Juicy, spiced chicken served over a bed of wholesome grains and fresh veggies, topped with a creamy tahini dressing is the perfect combination for a delightful dinner. Whether you’re planning a cozy night in or impressing guests, this dish is sure to be a hit!

Why You’ll Love This Recipe

Let’s face it: healthy meals can sometimes feel bland or boring. But not with this Chicken Shawarma Bowl! Here are five reasons why you’ll be head over heels for this dish:

  • Flavor Explosion: The marinated chicken combines aromatic spices with fresh veggies and a zingy tahini sauce, creating a symphony of tastes that will leave you craving more.
  • Quick & Easy Prep: This recipe can be whipped up in under an hour, making it perfect for busy weeknights when you still want something delicious and nutritious.
  • Customizable Ingredients: You can easily swap out any ingredients based on your preferences or what you have on hand. Love spice? Add more cayenne. Prefer a vegan twist? Check out our variations!
  • Meal Prep Friendly: Make a big batch and enjoy leftovers throughout the week. These bowls are perfect for lunch or dinner, keeping your meals exciting and healthy.
  • Visually Stunning: The vibrant colors of fresh veggies and spices make this bowl a feast for the eyes—perfect for sharing on social media!

Ingredients Breakdown

Ready to gather your ingredients? Here’s what you’ll need for your Chicken Shawarma Bowl, along with some smart substitutions to keep it exciting:

  • 1.5 lbs boneless chicken thighs (or breasts): Thighs are juicier, but breasts work well for a leaner option.
  • 3 tablespoons olive oil: You can substitute with avocado oil for a different flavor profile.
  • Juice of 1 lemon: Fresh lemon juice brightens up the dish; bottled juice is fine in a pinch.
  • Spices: This recipe calls for ground cumin, coriander, paprika, turmeric, cinnamon, garlic powder, and cayenne pepper. Feel free to play around with these spices based on your taste preferences!
  • 2 cups cooked rice (quinoa or cauliflower rice): For a low-carb option, go with cauliflower rice or try farro for a nutty flavor.
  • Fresh Veggies: Cucumbers, cherry tomatoes, red onion, and bell pepper add crunch and color. Customize with your favorites!
  • 2 cups lettuce or mixed greens: A great base for your bowl, but kale or spinach can also work.
  • ¼ cup tahini: This creamy ingredient ties everything together; if you don’t have tahini, blend some nut butter with a bit of water and lemon juice.

How to Make Your Chicken Shawarma Bowl

A side view of a colorful Chicken Shawarma Bowl with vibrant vegetables and creamy sauce.

Follow these steps to create your culinary masterpiece:

  1. Marinate the chicken with olive oil, lemon juice, and spices for at least 30 minutes.
  2. Cook the marinated chicken in a skillet over medium-high heat for about 5–7 minutes per side until golden brown and cooked through.
  3. While the chicken cooks, mix the tahini sauce ingredients until smooth and creamy. Adjust with water as needed for your desired consistency.
  4. Assemble your bowls by layering rice, sliced chicken, fresh veggies, and a generous drizzle of tahini sauce on top.

Pro Tips for the Perfect Bowl

Want to take your Chicken Shawarma Bowl to the next level? Here are some expert insights:

  • Marinate Longer: If you have time, marinating the chicken overnight allows the flavors to deepen, making each bite irresistible.
  • Grill for Extra Flavor: For a smoky taste, consider grilling the chicken instead of pan-frying.
  • Balance Your Dish: Add a sprinkle of feta cheese or olives for a Mediterranean twist.
  • Serve with Pita: Pair your bowls with warm pita bread for a fun, interactive meal!
  • Mind Your Greens: Choose a mix of crunchy and leafy greens for texture and nutrients.
  • Chill Your Tahini Sauce: Serving your tahini sauce chilled gives it a refreshing taste that complements the warm chicken.
  • Fresh Herbs Matter: Garnish your bowls with fresh parsley or mint for an extra burst of flavor.
  • Stay Organized: Prep your ingredients ahead of time to streamline the cooking process!

Common Mistakes and Troubleshooting

Even the best chefs make mistakes! Here’s how to avoid common pitfalls:

  • Overcooking Chicken: Keep an eye on your chicken to avoid dryness. It should be cooked to an internal temperature of 165°F.
  • Too Much Tahini: Start with a little tahini sauce and add more as needed to avoid overpowering the other flavors.
  • Forget the Seasoning: Taste as you go! Adjust spices and salt to suit your preferences.

Variations to Try

Feeling adventurous? Here are some exciting variations to mix things up:

  • Vegan Shawarma Bowl: Substitute the chicken with roasted chickpeas or grilled tempeh for a plant-based option.
  • Spicy Shawarma Bowl: Add sliced jalapeños or a dash of sriracha to your tahini sauce for some extra heat!
  • Greek-Style Bowl: Use Greek yogurt instead of tahini and top with olives and feta for a Mediterranean delight.
  • Asian-Inspired Bowl: Replace spices with ginger and soy sauce, using rice noodles instead of grains.

Storage & Make-Ahead Instructions

Want to prep ahead? Here’s how to store your Chicken Shawarma Bowl:

  • Refrigeration: Store cooked chicken and veggies in an airtight container for up to 4 days.
  • Freezing: While the cooked chicken can be frozen, fresh veggies are best added just before serving.
  • Make-Ahead Tip: Prepare your tahini sauce and marinate your chicken a day in advance for an even quicker meal on busy nights.

Frequently Asked Questions

Got questions? We’ve got answers! Here are some common queries about Chicken Shawarma Bowls:

  • Can I use chicken breasts instead of thighs? Absolutely! Just keep in mind that they may be less juicy.
  • What can I substitute for tahini? Nut butter or store-bought hummus can work as alternatives.
  • How do I make this gluten-free? Ensure your grains are gluten-free, and use gluten-free tahini or sauces.
  • Can I prepare this ahead of time? Yes! Marinate and store your chicken and tahini sauce ahead for a quick assembly.
  • What sides pair well with this dish? Consider serving with a side salad, hummus, or even a refreshing yogurt dip.
  • Is this recipe suitable for meal prepping? Definitely! It’s perfect for meal prep and keeps well in the fridge.
  • How spicy is this dish? You control the spice level! Adjust cayenne and add spicy toppings to your taste.
  • Can I use a different protein? Yes! This recipe works well with beef, lamb, or even seafood.

Nutrition Tips & Dietary Adaptations

Here are some ways to make your Chicken Shawarma Bowl fit your health goals:

  • Protein Boost: Add extra protein with chickpeas or legumes for a vegetarian option.
  • Low-Carb Option: Swap out grains for cauliflower rice to reduce carbs.
  • Healthy Fats: Incorporate avocado slices for added creaminess and healthy fats.

Essential Equipment Recommendations

Make your cooking experience a breeze with these tools:

  • High-quality knife: A chef’s knife is essential for chopping veggies and slicing chicken.
  • Non-stick skillet: This makes cooking the chicken easy and cleanup a breeze!
  • Mixing bowls: Use these for marinating and preparing your tahini sauce.

Serving Suggestions

Make your meal extra special with these serving ideas:

  • Garnish: Fresh herbs like parsley or cilantro add a burst of flavor and color.
  • Accompaniments: Serve with a side of warm pita or flatbread.
  • Drinks: Pair with a light, refreshing drink like lemonade or sparkling water!

Now that you have the ultimate guide to creating a mouthwatering Chicken Shawarma Bowl, it’s time to get cooking! Remember, cooking is a playground—experiment, adjust, and most importantly, have fun! Enjoy your vibrant, healthy meals and share your creations with friends and family. Bon appétit!

Chicken Shawarma Bowl

Prep Time 10 minutes
Cook Time 15 minutes
Total Time 25 minutes
Servings 4 servings
Calories 550
A flavorful and healthy Chicken Shawarma Bowl combining marinated chicken, fresh vegetables, and creamy tahini sauce for a satisfying meal.

Ingredients

Protein

  • 1.5 lbs boneless chicken thighs (or breasts)
  • 3 tablespoons olive oil
  • 1 piece lemon (juice of 1 lemon)
  • 2 teaspoons ground cumin
  • 2 teaspoons ground coriander
  • 2 teaspoons paprika
  • 1 teaspoon turmeric
  • 1 teaspoon cinnamon
  • 1 teaspoon garlic powder
  • 0.5 teaspoon cayenne pepper (optional)
  • to taste Salt and pepper

Carbohydrates

  • 2 cups cooked rice (quinoa or cauliflower rice)

Vegetables

  • 1 piece cucumber (diced)
  • 1 cup cherry tomatoes (halved)
  • 1 red onion red onion (thinly sliced)
  • 1 bell pepper bell pepper (diced)
  • 2 cups lettuce or mixed greens

Sauce

  • 0.25 cup tahini
  • 2 tablespoons lemon juice
  • 1 clove garlic (minced)

Water to thin as needed

  • to taste Salt

Instructions 

  • Marinate chicken with olive oil, lemon juice, and spices for at least 30 minutes.
  • Cook chicken in a skillet over medium-high heat for 5–7 minutes per side until golden brown.
  • Mix tahini, lemon juice, garlic, and water until smooth.
  • Assemble bowls with rice, sliced chicken, fresh veggies, and tahini sauce.

Notes

Adjust spice levels and toppings to taste for best results.
Calories: 550kcal
Cost: $15
Course: Main Course
Cuisine: Middle Eastern
Keyword: Bowl, Chicken, Shawarma

Why This Waldorf Chicken Pasta Salad Will Become Your Go-To Dish

Are you ready to elevate your cookout game? This Waldorf Chicken Pasta Salad is not just any salad; it’s a vibrant, flavor-packed dish that will impress your guests and make healthy eating feel exciting! With juicy chicken, crunchy veggies, and a creamy dressing, this salad is bursting with delightful flavors that are perfect for any gathering. Let’s dive into why this recipe deserves a spot on your table.

  • Balanced Nutrition: Packed with protein from chicken and essential vitamins from fresh vegetables, this salad supports a healthy lifestyle.
  • Quick & Easy: With a prep time of just 15 minutes, you can whip this up even on your busiest days.
  • Customizable: The ingredient list is flexible, allowing you to substitute based on what you have at home or your dietary needs.
  • Make-Ahead Friendly: This salad tastes even better when chilled, making it a perfect dish to prepare in advance.
  • Flavor Explosion: The combination of sweet grapes, crunchy celery, and creamy dressing creates a mouthwatering taste experience that your guests will love!

Ingredient Breakdown & Substitutions

Let’s explore the key ingredients that make this Waldorf Chicken Pasta Salad a standout dish, along with some creative substitutions for dietary preferences.

  • Cooked Chicken: 2 cups of cooked chicken (Rotisserie chicken can save time and add flavor.)
  • Bow Tie Pasta: 8 ounces (Cook to al dente for the perfect texture.)
  • Celery: 1 cup, chopped (Can substitute with diced apples for a sweeter crunch.)
  • Green Onions: 1/2 cup (Can substitute with red onions for a bolder flavor.)
  • Red Seedless Grapes: 1 cup (Can substitute with dried cranberries for a tangy twist.)
  • Sliced Almonds: 1/2 cup (Can substitute with walnuts or pecans for different crunch.)
  • Mayonnaise: 1 cup (For a lighter version, consider Greek yogurt.)
  • Lemon Juice: 2 tablespoons for a zesty kick.
  • Coarse Ground Pepper: 1/2 teaspoon (Adjust according to taste.)
  • Dried Parsley: 1 tablespoon (Fresh parsley can enhance the taste and add color.)

Step-by-Step Instructions

Making this Waldorf Chicken Pasta Salad is a breeze! Follow these simple steps to create a dish that will be the star of your cookout.

  • Cook the Pasta: Boil salted water in a large pot, add the bow tie pasta, and cook according to package instructions until al dente. Drain and rinse under cold water to stop the cooking process.
  • Prepare the Ingredients: While the pasta cools, chop the celery, slice the green onions, and halve the grapes. If using rotisserie chicken, shred it into bite-sized pieces.
  • Make the Dressing: In a large mixing bowl, combine mayonnaise, lemon juice, and coarse ground pepper. Stir until smooth.
  • Combine Ingredients: Add the cooled pasta, chicken, celery, green onions, grapes, and sliced almonds to the dressing. Toss gently until everything is well-coated.
  • Adjust Flavors: Taste the salad and adjust seasoning if necessary. Feel free to add more lemon juice or pepper according to your preference.
  • Chill the Salad: Cover the bowl with plastic wrap and refrigerate for at least 30 minutes before serving. This allows the flavors to meld beautifully!

Pro Tips for the Perfect Salad

A side angle shot showcasing a vibrant mix of chicken, grapes, and pasta salad.

To ensure your Waldorf Chicken Pasta Salad turns out perfectly every time, keep these expert tips in mind:

  • Perfect Texture: Ensure the pasta is not overcooked; al dente pasta holds its shape better and adds a delightful bite.
  • Fresh Ingredients: Use fresh, high-quality ingredients to enhance the flavor and nutritional value of your salad.
  • Season Gradually: When adding salt and pepper, do so gradually to avoid over-seasoning.
  • Mix Gently: Use two forks to toss the salad, lifting the ingredients rather than stirring vigorously to prevent breaking the pasta.
  • Let it Chill: Allow the salad to chill in the refrigerator for at least 30 minutes; the flavors improve as they meld together.
  • Experiment with Nuts: Try different nuts like pecans, walnuts, or even sunflower seeds for a unique twist.
  • Consider the Dressing: If you prefer a lighter dressing, Greek yogurt is a fantastic alternative that still tastes creamy.
  • Presentation Matters: Serve in a colorful bowl or plate to make the dish visually appealing!

Common Mistakes to Avoid

Even the best cooks make mistakes! Here are some common pitfalls to avoid when making this salad:

  • Overcooking Pasta: Cooking pasta too long can lead to a mushy texture; always check for al dente.
  • Skipping the Chill Time: Don’t serve immediately; allowing the salad to chill enhances flavor.
  • Using Warm Ingredients: Make sure all ingredients are cooled before combining to prevent wilting.
  • Too Much Dressing: Start with less dressing and add more as needed; it’s easier to add than to remove excess.
  • Ignoring Seasoning: Don’t forget to taste as you go; seasoning is key to a flavorful dish.

Variations to Try

Feeling adventurous? Here are some fun variations to give your Waldorf Chicken Pasta Salad a unique twist:

  • Italian Flair: Add diced mozzarella and basil for a Mediterranean twist.
  • Fruit Fusion: Incorporate diced apples, oranges, or even pomegranate seeds for added sweetness.
  • Spicy Kick: Mix in diced jalapeños or a splash of hot sauce for a spicy version.
  • Herb Infusion: Experiment with different herbs like dill, cilantro, or thyme to change the flavor profile.

Storage and Make-Ahead Instructions

This salad is perfect for meal prep! Here’s how to store and prepare it in advance:

  • Refrigeration: Store the salad in an airtight container in the refrigerator for up to 3 days.
  • Make-Ahead: Prepare the salad a day in advance. Just store the dressing separately until ready to serve to keep the pasta fresh.
  • Freezing: While not recommended due to the mayonnaise’s texture, you can freeze the chicken and pasta separately if needed.

Frequently Asked Questions

Got questions? Let’s answer some common queries about the Waldorf Chicken Pasta Salad:

  • Can I use whole wheat pasta?: Absolutely! Whole wheat bow tie pasta is a great way to add fiber.
  • Is it gluten-free?: You can make it gluten-free by using gluten-free pasta and ensuring all other ingredients are also gluten-free.
  • Can I make it vegan?: Substitute chicken with chickpeas or tofu, and use a vegan mayonnaise alternative.
  • How can I make it spicier?: Add diced jalapeños or a sprinkle of cayenne pepper for heat.
  • What can I serve with this salad?: It pairs wonderfully with grilled meats, bread rolls, or a fresh garden salad.
  • Can I use other fruits?: Yes! Feel free to experiment with seasonal fruits for a unique flavor.
  • How long will leftovers last?: Store leftovers in the refrigerator for up to 3 days.
  • Can I substitute the mayonnaise?: Yes, Greek yogurt is a fantastic alternative for a healthier option.

Nutritional Tips & Dietary Adaptations

Looking to make this salad even healthier? Here are a few tips:

  • Protein Boost: Add extra protein by including chickpeas or kidney beans.
  • Lower Calorie Dressing: Swap mayonnaise for a mix of Greek yogurt and mustard for a lighter dressing.
  • Veggie Power: Incorporate more vegetables like spinach, bell peppers, or cucumbers for added nutrients.
  • Mindful Serving: Portion your salad to maintain balance in your meal.

Essential Equipment for Success

To create the perfect Waldorf Chicken Pasta Salad, here’s what you’ll need:

  • Large Pot: For boiling the pasta.
  • Mixing Bowl: A large bowl for combining ingredients.
  • Measuring Cups and Spoons: For accurate ingredient measurements.
  • Cutting Board and Knife: Essential for prepping vegetables and chicken.
  • Refrigerator: To chill the salad before serving.

Serving Suggestions

To make your presentation pop, consider these serving ideas:

  • Colorful Bowls: Use vibrant salad bowls to enhance the dish’s visual appeal.
  • Garnish: Top with fresh parsley or a sprinkle of paprika for color.
  • Pair with Sides: Serve alongside grilled meats or crusty bread for a complete meal.

In conclusion, this Waldorf Chicken Pasta Salad is more than just a recipe; it’s a celebration of flavors and nutrition that’s perfect for any occasion. By making it your own, experimenting with ingredients, and keeping it fresh, you’ll be the star of your next cookout. So grab your ingredients, get creative, and enjoy the delightful journey of cooking and sharing this fabulous dish!

Delicious Waldorf Chicken Pasta Salad for Your Next Cookout

Prep Time 15 minutes
Cook Time 10 minutes
Total Time 25 minutes
Servings 6 servings
Calories 450
A refreshing and hearty pasta salad combining tender chicken, crisp vegetables, and a creamy dressing, perfect for outdoor gatherings.

Ingredients

Protein

  • 2 cups Cooked Chicken (Rotisserie chicken can save time.)
  • 8 ounces Bow Tie Pasta (Cook to al dente.)

Vegetables & Fruits

  • 1 cup Celery (Chopped; can substitute with apples.)
  • 1/2 cup Green Onions (Can substitute with red onions.)
  • 1 cup Red Seedless Grapes (Can substitute with dried cranberries.)
  • 1 cup Mayonnaise (Greek yogurt can be used for a lighter version.)

Flavorings & Seasonings

  • 2 tablespoons Lemon Juice
  • 1/2 teaspoon Coarse Ground Pepper (Adjust according to taste.)
  • 1 tablespoon Dried Parsley (Fresh parsley can enhance the taste.)

Instructions 

  • Cook pasta until al dente, then drain and let cool.
  • In a large bowl, combine cooked chicken, chopped celery, green onions, and grapes.
  • Mix mayonnaise, lemon juice, pepper, and parsley to make the dressing.
  • Stir the cooked pasta into the chicken mixture and toss to coat evenly.
  • Chill in the refrigerator for at least 30 minutes before serving.

Notes

For a healthier option, substitute mayonnaise with Greek yogurt.
Calories: 450kcal
Cost: $15
Course: Salad
Cuisine: American
Keyword: Chicken, pasta, Salad

Discover the Magic of One Skillet Chicken Alfredo

Welcome to a culinary adventure that will transform your dinner routine! If you’re looking for a quick, delicious meal that’s bursting with flavor, you’ve landed in the right spot. This One Skillet Chicken Alfredo is not just a recipe; it’s a celebration of creamy goodness and tender chicken, all while keeping things simple. In just about 30 minutes, you’ll whip up a dish that feels indulgent but is easy to make, making it the perfect weeknight dinner solution. Ready to dive in? Let’s go!

Why You’ll Love This Recipe

Here are a few reasons why this One Skillet Chicken Alfredo will quickly become your go-to meal:

  • Quick & Easy: With just one skillet and 30 minutes, you’ll have a mouthwatering meal ready to serve.
  • Flavor-Packed: Each bite features tender chicken, rich Alfredo sauce, and al dente penne pasta—pure comfort food!
  • Minimal Cleanup: Cooking everything in one pan means less time washing dishes and more time enjoying your meal.
  • Customizable: This recipe is a blank canvas! Add veggies, swap proteins, or try different pasta shapes to suit your taste.
  • Meal Prep Friendly: Perfect for leftovers, you can easily make it ahead or store it for quick lunches throughout the week.

Ingredients You’ll Need

Before you start cooking, let’s gather all the ingredients for this delicious One Skillet Chicken Alfredo. Here’s what you’ll need:

  • ½ cup butter
  • 2 pounds boneless skinless chicken breasts (cut into 1-inch pieces)
  • 1 teaspoon salt
  • ½ teaspoon black pepper
  • ½ tablespoon Italian seasoning
  • 1 tablespoon minced garlic
  • 4 cups chicken broth
  • 4 cups uncooked penne pasta
  • 2 cups heavy cream
  • 1½ cups freshly shredded Parmesan cheese
  • Fresh parsley (for garnish)
  • Extra Parmesan cheese (for serving)

How to Make One Skillet Chicken Alfredo

Side view of a delicious One Skillet Chicken Alfredo topped with fresh parsley and Parmesan cheese.

Now, let’s get cooking! Follow these simple steps to create your One Skillet Chicken Alfredo masterpiece:

  1. Heat butter in a very large skillet over medium-high heat. Add the chicken in a single layer and season with salt, pepper, and Italian seasoning. Cook for 5-7 minutes until golden and cooked through. Transfer the chicken to a plate but do not clean the pan.
  2. Reduce heat to medium. Add the minced garlic and sauté for 30 seconds until fragrant. Pour in the chicken broth, scraping up the delicious browned bits from the bottom of the pan.
  3. Stir in the uncooked penne pasta. Bring to a gentle simmer and cook for 10-12 minutes, stirring occasionally, until the pasta is al dente and some of the liquid is absorbed.
  4. Stir in the heavy cream and simmer for 2-3 minutes until slightly thickened.
  5. Add the freshly shredded Parmesan cheese and stir until melted into a creamy sauce.
  6. Return the cooked chicken to the skillet and simmer for an additional 5 minutes, until heated through and coated in the sauce.
  7. Garnish with fresh parsley and extra Parmesan before serving. Enjoy!

Pro Tips for Perfecting Your Alfredo

Want to take your One Skillet Chicken Alfredo to the next level? Here are some expert tips:

  • Use Fresh Ingredients: Freshly shredded Parmesan melts better than pre-grated cheese, which often contains anti-caking agents.
  • Don’t Overcook the Pasta: Since the pasta will continue to cook in the sauce, aim for it to be just under al dente when you add the cream.
  • Add Fresh Herbs: A sprinkle of fresh basil or thyme can elevate the flavors and add a pop of color.
  • Experiment with Proteins: Swap chicken for shrimp or tofu for a different twist on flavor and texture.
  • Make It Veggie-Packed: Toss in some spinach, broccoli, or mushrooms for added nutrition and flavor.

Common Mistakes & Troubleshooting

Even the best chefs make mistakes! Here are some common pitfalls and how to avoid them:

  • Clumpy Sauce: If your sauce is clumpy, it could be due to adding cheese too quickly. Stir continuously when adding cheese to ensure a smooth sauce.
  • Sauce Too Thick: If your sauce thickens too much, simply add more chicken broth or cream to loosen it up.
  • Underseasoned Dish: Don’t be afraid to taste as you go! Adjust salt and pepper based on your preferences.

Variations to Elevate Your Dish

Feeling adventurous? Here are some tasty variations you can try:

  • Garlic Parmesan Alfredo: Add more minced garlic for a punch of flavor, and consider roasting garlic for a sweeter note.
  • Spicy Cajun Alfredo: Sprinkle cayenne pepper or Cajun seasoning for a spicy kick that pairs beautifully with the creamy sauce.
  • Mushroom Alfredo: Sauté sliced mushrooms with the garlic for a hearty, earthy flavor.
  • Vegetable Primavera Alfredo: Add colorful veggies like zucchini, bell peppers, and cherry tomatoes for a vibrant, nutritious dish.

Storage & Make-Ahead Instructions

If you want to prepare this dish in advance, here are some helpful tips:

  • Make-Ahead: You can cook the chicken and sauce ahead of time. Store separately in airtight containers and combine when ready to serve.
  • Refrigeration: Store leftovers in the fridge for up to 3 days. Reheat gently on the stove, adding a splash of chicken broth to restore creaminess.
  • Freezing: While not ideal, you can freeze the dish for up to a month. Thaw in the fridge overnight before reheating.

Frequently Asked Questions

Got questions? We’ve got answers! Here are some common queries about this delicious dish:

  • Can I use a different type of pasta? Absolutely! Feel free to substitute with fettuccine, rigatoni, or even gluten-free pasta.
  • Is it possible to make this dish dairy-free? Yes! Use coconut cream and dairy-free cheese alternatives to create a creamy sauce.
  • How can I make it spicier? Add crushed red pepper flakes or a dash of hot sauce to the sauce for an extra kick.
  • What should I serve with Chicken Alfredo? A crisp green salad or garlic bread pairs perfectly with this creamy dish.
  • Can I prepare this dish in advance? Yes! You can make the sauce and chicken ahead of time, then simply combine and heat when ready to eat.
  • How do I prevent the sauce from getting too thick? If the sauce thickens too much, add a little more chicken broth or cream until you reach your desired consistency.
  • What’s the best way to reheat leftovers? Reheat gently on the stovetop, adding a splash of broth to keep it creamy.
  • Can I use frozen chicken? While fresh is best for flavor, you can use frozen chicken. Just ensure it’s fully cooked before serving.

Nutrition Tips and Dietary Adaptations

This One Skillet Chicken Alfredo is not only delicious but can be tailored to fit various dietary needs:

  • Low-Carb Option: Swap pasta for zucchini noodles or spaghetti squash for a lighter meal.
  • High-Protein Version: Add beans or chickpeas to boost protein content without adding meat.
  • Vegetarian Option: Replace chicken with grilled vegetables or tofu for a hearty, meat-free meal.

Equipment Recommendations

To make this dish effortless, here’s what you’ll need:

  • Large Skillet: A heavy-duty skillet distributes heat evenly and prevents sticking.
  • Measuring Cups and Spoons: Precision is key for the perfect sauce and seasoning.
  • Wooden Spoon: Ideal for stirring and scraping up those delicious browned bits!

Serving Suggestions

When it comes to serving your One Skillet Chicken Alfredo, here are some ideas to elevate your meal:

  • Garnish: Finish with freshly chopped parsley and extra Parmesan for a restaurant-style touch.
  • Pair with Wine: A glass of Chardonnay or Pinot Grigio complements the creamy sauce beautifully.
  • Add a Side Salad: A light arugula salad with lemon vinaigrette balances the richness of the pasta.

Ready to make your own One Skillet Chicken Alfredo? Gather your ingredients, follow these steps, and prepare for a flavor explosion that will make your taste buds dance with joy! Cooking healthy doesn’t have to be boring—it can be a creative, joyful experience! Let’s make mealtime fun!

One Skillet Chicken Alfredo

Prep Time 10 minutes
Cook Time 20 minutes
Total Time 30 minutes
Servings 4 servings
Calories 850
A creamy and flavorful chicken Alfredo made easily in one skillet, perfect for a quick and satisfying meal.

Ingredients

Dairy and Seasonings

  • 0.5 cup butter
  • 1.5 cups freshly shredded Parmesan cheese
  • 1 tablespoon minced garlic
  • 1 teaspoon salt
  • 0.5 teaspoon black pepper
  • 0.5 tablespoon Italian seasoning

Main Ingredients

  • 2 pounds boneless skinless chicken breasts (cut into 1-inch pieces)
  • 4 cups chicken broth
  • 4 cups uncooked penne pasta
  • 2 cups heavy cream

Garnish and Serving

  • Fresh parsley (for garnish)
  • Extra Parmesan cheese (for serving)

Instructions 

  • Heat butter in a large skillet. Cook chicken with salt, pepper, and Italian seasoning until golden, then transfer to a plate.
  • Reduce heat, sauté garlic, then add chicken broth, scraping browned bits from the pan.
  • Add pasta, simmer 10-12 minutes until al dente, then stir in heavy cream and cook 2-3 minutes.
  • Mix in Parmesan cheese until melted, return chicken, and simmer 5 minutes. Garnish with parsley and extra cheese.

Notes

Use freshly shredded Parmesan for best flavor.
Calories: 850kcal
Cost: $15
Course: Main Course
Cuisine: Italian
Keyword: Chicken, pasta