Author

Ryan

Browsing

Unleash a Flavor Explosion with Spicy Shrimp Salad!

Welcome to your new favorite dish: the Spicy Shrimp Salad with Honey-Lime Dressing! This vibrant, bold meal is perfect for anyone looking to spice up their healthy eating routine without sacrificing flavor. With fresh ingredients like succulent shrimp, zesty lime, creamy avocado, and sweet mango, this salad isn’t just a feast for the eyes—it’s a deliciously nutritious powerhouse that will leave you feeling energized and satisfied. Whether you’re hosting a gathering or simply treating yourself to a delightful lunch, this recipe has got you covered!

In this article, we’ll dive deep into everything you need to know about creating the perfect Spicy Shrimp Salad. From the essential ingredients to expert tips and variations, we’ve got the tools to make this dish a showstopper!

Why You’ll Love This Recipe

  • Flavor-Packed Delight: This salad combines the spicy kick of shrimp with the sweetness of honey-lime dressing, creating a flavor explosion in every bite!
  • Nutrient-Rich Ingredients: Featuring fresh arugula, juicy mango, and healthy fats from avocado, this dish is brimming with vitamins and minerals.
  • Quick and Easy: Ready in under 30 minutes, this recipe is perfect for busy weeknights or last-minute meal prep.
  • Versatile Base: The salad can easily be customized with various toppings and ingredients, making it a go-to for any occasion.
  • Meal-Prep Friendly: Make this salad ahead of time for a quick lunch option that stays fresh and flavorful.

Ingredient Breakdown

To get started on your culinary adventure, here’s a detailed look at the ingredients you’ll need, along with some handy substitutions.

  • Shrimp: 1 lb raw, peeled, and deveined. Look for wild-caught shrimp for the best flavor and sustainability.
  • Spices: The blend of smoked paprika, chili powder, garlic powder, onion powder, cayenne, and cumin adds a depth of flavor. Adjust the cayenne if you prefer less heat.
  • Olive Oil: Use 2 tbsp for cooking the shrimp and ¼ cup for the dressing. You can substitute with grass-fed ghee for a richer taste.
  • Limes: The juice of 3 limes is essential for that zesty zing. Fresh limes are preferable!
  • Honey: 1 tbsp for sweetness. Maple syrup can be a great vegan alternative.
  • Fresh Produce: A bag of arugula (~4 cups), 1 mango (peeled and cubed), 1 red onion (thinly sliced), 1 cup cherry tomatoes (halved), and 1 avocado (sliced) add vibrant colors and textures.

Pro Tips for the Best Shrimp Salad

Ready to elevate your cooking game? Here are some expert insights to ensure your Spicy Shrimp Salad is a hit!

  • Perfect Shrimp Texture: Avoid overcooking the shrimp! Aim for a total cooking time of just 4-6 minutes until they turn opaque.
  • Prep Ahead: Chop your veggies and mix the dressing in advance to save time on busy nights.
  • Layer Flavors: Let the shrimp marinate in the spice blend for 15-30 minutes before cooking for an even bolder flavor profile.
  • Keep It Fresh: Combine the salad ingredients and dressing just before serving to maintain the crispness of the greens.
  • Experiment with Dressings: Try adding Greek yogurt for a creamy twist or fresh herbs for added freshness.
  • Make It a Meal: Serve your salad with a side of quinoa or brown rice for a heartier dish.
  • Add Crunch: Toss in some toasted nuts or seeds for an extra layer of texture.
  • Season to Taste: Always taste as you go. Adjust salt, lime, and honey to suit your palate.

Avoid These Common Mistakes

Here are a few pitfalls to steer clear of while making your Spicy Shrimp Salad:

  • Overcooking Shrimp: This can lead to rubbery shrimp. Remember, they cook quickly!
  • Skipping the Spice Blend: The spices are what make this salad pop, so don’t leave them out!
  • Using Overripe Avocado: Ensure your avocado is ripe but not mushy for the best texture in your salad.
  • Underdressing: Be generous with the honey-lime dressing—it enhances the overall flavor!
  • Chopping Ingredients Too Early: Vegetables can lose their freshness; chop them shortly before serving.

Delicious Variations

If you’re looking to mix things up, here are a few tasty variations of the Spicy Shrimp Salad!

  • Tropical Twist: Add diced pineapple and coconut flakes for a tropical flavor.
  • Mexican Flair: Incorporate black beans, corn, and cilantro for a southwestern vibe.
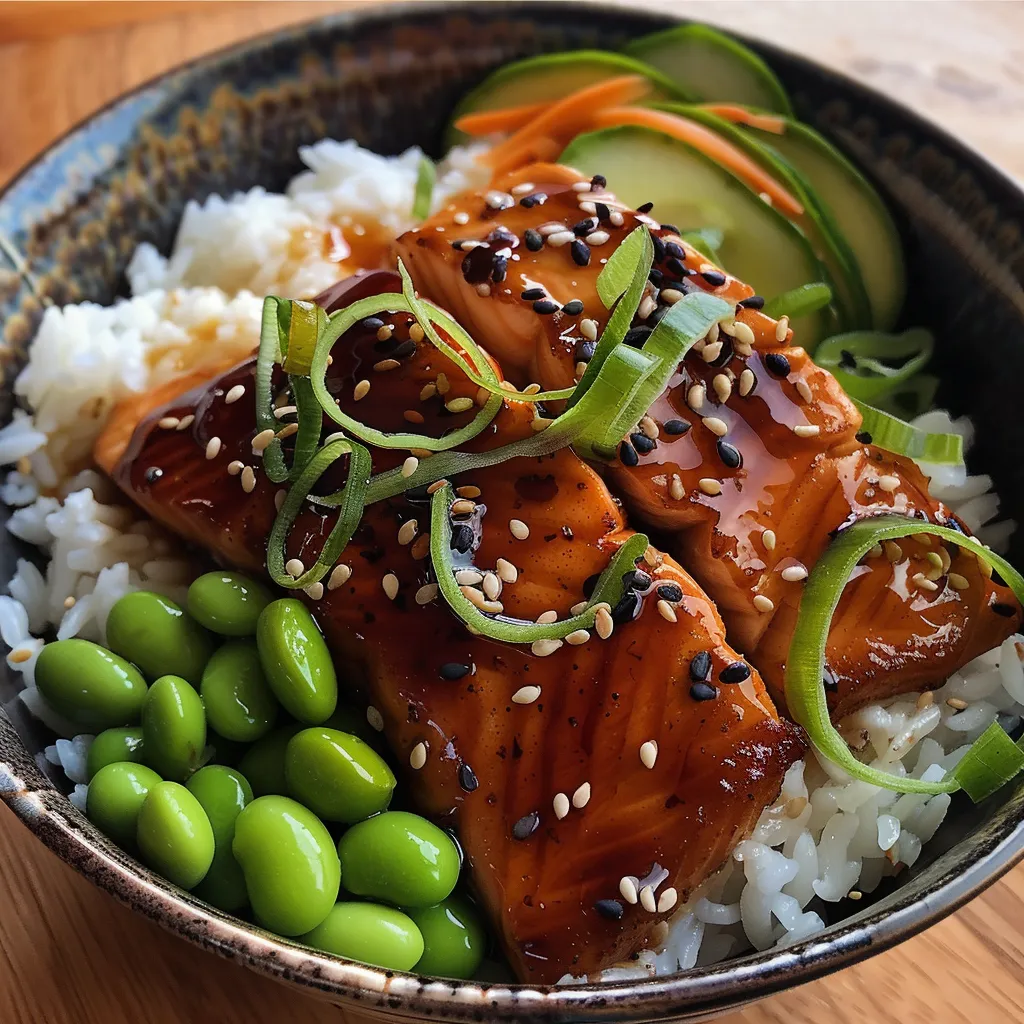
  • Asian Inspiration: Swap the dressing for a sesame-ginger vinaigrette and add sliced cucumbers and shredded carrots.
  • Grilled Goodness: Grill the shrimp instead of sautéing for a smoky flavor.

Storage and Make-Ahead Instructions

Wondering how to keep your Spicy Shrimp Salad fresh? Here’s what you need to know:

  • Refrigeration: Store leftovers in an airtight container for up to 2 days. Keep the dressing separate to avoid sogginess.
  • Freezing: While it’s not recommended to freeze the salad, you can freeze cooked shrimp for up to 3 months. Thaw and add fresh ingredients when ready to serve.
  • Meal Prep: Prepare all ingredients except avocado and dressing. Combine them just before eating.

Frequently Asked Questions

Here are some common questions about making the perfect Spicy Shrimp Salad:

  • Can I use frozen shrimp? Yes! Just make sure to thaw them thoroughly and pat them dry before cooking.
  • How do I make this dish gluten-free? The recipe is naturally gluten-free, just double-check your spices and any additional ingredients.
  • Can I use other proteins instead of shrimp? Absolutely! Chicken or tofu can be great alternatives.
  • Is this salad suitable for meal prep? Yes! Just keep the dressing separate until you’re ready to eat.
  • How spicy is this salad? The spice level can be adjusted by altering the cayenne and chili flakes to your preference.
  • Can I make this salad vegan? Yes! Substitute shrimp with chickpeas or grilled vegetables, and use maple syrup for the honey.
  • What drinks pair well with this salad? A refreshing iced tea or a light white wine complements the flavors beautifully.
  • How do I know when the shrimp is cooked? Cooked shrimp should be opaque and firm. If they curl tightly, they may be overcooked.

Nutritional Tips and Dietary Adaptations

This Spicy Shrimp Salad is packed with nutrients, but here’s how to tailor it further:

  • Low-Carb Option: Skip the mango and tomatoes for a lower-carb version, focusing on leafy greens.
  • Protein Boost: Add a scoop of your favorite protein powder to the dressing for an extra protein punch.
  • Heart-Healthy Fats: Include a sprinkle of chia or flaxseeds for added omega-3 fatty acids.
  • Vegan-Friendly: Use plant-based proteins like lentils or chickpeas instead of shrimp.

Essential Equipment for Success

Having the right tools can make all the difference:

  • Large Skillet: For sautéing shrimp to perfection.
  • Mixing Bowls: Use various sizes for prepping and mixing ingredients.
  • Whisk: Essential for combining the dressing smoothly.
  • Sharp Knives: For efficiently chopping your veggies and shrimp.
  • Measuring Cups and Spoons: Accuracy is key in cooking!

Serving Suggestions

How you present your Spicy Shrimp Salad can elevate the dining experience:

  • Serve in a large bowl: Perfect for family-style meals.
  • Individual Plates: For a more elegant approach, plate each serving with a drizzle of extra dressing.
  • Garnish: A sprinkle of fresh herbs or a wedge of lime can add a beautiful touch.

Now that you have all the tools and tips to master the Spicy Shrimp Salad with Honey-Lime Dressing, it’s time to get cooking! Remember, the kitchen is your playground, so have fun experimenting with flavors and presentation. Enjoy this dish as a celebration of health, flavor, and creativity!

Spicy Shrimp Salad with Honey-Lime Dressing

Prep Time 15 minutes
Cook Time 10 minutes
Total Time 25 minutes
Servings 4 servings
Calories 350
A vibrant and flavorful salad combining spicy shrimp with fresh fruits and a tangy honey-lime dressing, perfect for a light and satisfying meal.

Ingredients

Protein

  • 1 lb raw, peeled and deveined shrimp

Spices

  • 1 tbsp smoked paprika
  • 1 tbsp chili powder
  • 1 tsp garlic powder
  • 1 tsp onion powder
  • ½ tsp cayenne
  • ½ tsp cumin
  • to taste Salt and Pepper
  • 2 tbsp olive oil or grass-fed ghee (for cooking)
  • Juice of 3 limes lime juice
  • ¼ cup olive oil
  • 1 tbsp honey
  • 1 tsp red chili flakes

Salad

  • 1 bag/box arugula (~4 cups)
  • 1 each mango, peeled and cubed
  • 1 red onion, halved and thinly sliced
  • 1 cup cherry tomatoes, halved
  • 1 each avocado, sliced

Instructions 

  • Rinse and dry the shrimp, then coat with spices.
  • Cook shrimp in oil until opaque, about 2-3 minutes per side.
  • Whisk together olive oil, honey, lime juice, and chili flakes for dressing.
  • Combine arugula, mango, onion, and tomatoes; top with shrimp, avocado, and dressing. Serve immediately.

Notes

For extra flavor, marinate the shrimp with spices for 15 minutes before cooking.
Calories: 350kcal
Cost: $15
Course: Salad
Cuisine: fusion
Keyword: shrimp

Welcome to the culinary playground! Today, we’re diving into the world of vibrant flavors and nutritious ingredients with a delightful dish: the Teriyaki Salmon Bowl. You know, this isn’t just any meal; it’s a flavor explosion that combines wholesome goodness with an exciting twist. Whether you’re a busy professional, a student, or simply looking for a fresh take on dinner, this bowl is here to rev up your mealtime. Let’s explore why this recipe is a game-changer and how you can easily whip it up in your kitchen.

Why You’ll Love This Recipe

  • Quick and Easy: You can prepare this meal in under 30 minutes, making it perfect for those hectic weeknights.
  • Flavorful Explosion: The homemade teriyaki sauce is a game-changer, bringing a sweet and savory punch to your salmon.
  • Health-Packed: With fresh veggies and protein-rich salmon, this dish is loaded with nutrients that keep you energized.
  • Customizable: This bowl can be tailored to your taste. Switch up the veggies or add toppings to make it your own!
  • Beautiful Presentation: The colorful arrangement of ingredients makes this dish as visually appealing as it is delicious.

Ingredient Breakdown

Here’s what you’ll need for your Teriyaki Salmon Bowl, along with some handy substitutions:

  • 4 salmon fillets (about 6oz each): Fresh or frozen works, but if you’re looking for a plant-based option, try marinated tofu!
  • 1 tablespoon vegetable oil: Olive oil or sesame oil can add more flavor to your dish.
  • Salt and pepper: Essential for seasoning your salmon to perfection.
  • 1/4 cup soy sauce: Use tamari for a gluten-free option.
  • 2 tablespoons mirin: Can be replaced with rice vinegar and a teaspoon of sugar if needed.
  • 2 tablespoons honey: Maple syrup is a great vegan substitute.
  • 1 clove garlic, minced: Fresh garlic is best, but garlic powder can work in a pinch.
  • 1 teaspoon fresh ginger, grated: Ground ginger can also be used, but fresh brings a vibrant zing.
  • 1 teaspoon cornstarch + 1 tablespoon water: This thickens your sauce, ensuring it clings beautifully to the salmon.
  • Steamed jasmine or sushi rice: Quinoa or cauliflower rice can serve as low-carb alternatives.
  • 1 avocado, sliced: Adds creaminess; you can also use sliced mango for a tropical twist!
  • 1 cup edamame, shelled: If unavailable, try green peas or chickpeas.
  • 1 cucumber, sliced or ribboned: Radishes or zucchini can be fun substitutes.
  • Pickled ginger: Optional, but it adds a delightful tang.
  • Sesame seeds: Toasted nuts can add a nice crunch if you’re out of seeds.
  • Sriracha mayo: Mix your favorite hot sauce with mayo for a zesty kick.

The Art of Assembly

Now that you have all your ingredients, let’s assemble this beautiful bowl!

Steps to Create Your Teriyaki Salmon Bowl

  • Make the Teriyaki Sauce: Combine soy sauce, mirin, honey, garlic, and ginger in a small saucepan. Bring to a simmer over medium heat. Add the cornstarch slurry and stir until the sauce thickens into a glossy glaze—about 2 minutes. Set aside.
  • Cook the Salmon: Season your salmon fillets with salt and pepper. Heat oil in a skillet over medium-high heat. Place the salmon skin-side up and sear for 3-4 minutes until a golden crust forms. Flip the fillets over, brush the teriyaki sauce generously over the top, and cook for another 3-4 minutes until cooked through—still slightly pink in the center.
  • Assemble the Bowls: Scoop warm rice into bowls. Lay the teriyaki salmon on top, and artfully arrange avocado slices, edamame, cucumber, and pickled ginger around the salmon. Drizzle with sriracha mayo and finish with a sprinkle of sesame seeds.

Pro Tips for a Perfect Bowl

Close-up of a Teriyaki Salmon Bowl with salmon fillets, avocado slices, and edamame.
  • Quality Ingredients: Always opt for the freshest salmon you can find—this makes a noticeable difference in flavor.
  • Temperature Matters: Let your salmon come to room temperature before cooking for more even cooking.
  • Don’t Overcook: Aim for slightly undercooked salmon; it will continue to cook after being removed from the heat.
  • Customize Your Bowl: Experiment with seasonal vegetables or grains to keep things interesting.
  • Prep in Advance: Make the teriyaki sauce and cut your veggies ahead of time for a quicker dinner prep.
  • Umami Boost: Add a sprinkle of furikake or bonito flakes for an extra flavor punch.
  • Balance Textures: Combine crunchy and creamy ingredients to make each bite exciting.
  • Save Leftovers: Use leftover salmon in salads or sandwiches for a quick lunch!

Common Mistakes and Troubleshooting

Even the best chefs can make a mistake! Here’s how to avoid some common pitfalls:

  • Overcooking Salmon: Keep an eye on the cooking time to avoid dry salmon. It should flake easily but remain moist.
  • Sauce Too Thick: If your teriyaki sauce becomes too thick, simply whisk in a bit of warm water until desired consistency.
  • Rice Clumping: Rinse your rice before cooking to remove excess starch and prevent clumping.
  • Bowl Arrangement: Don’t just dump everything in the bowl! Take a moment to arrange ingredients for visual appeal.

Flavor Variations to Explore

Want to mix things up? Here are some fun variations to try:

  • Spicy Teriyaki: Add more sriracha to your mayo or sprinkle chili flakes on the salmon for an extra kick.
  • Sweet and Sour: Incorporate pineapple chunks into your bowl for a fruity twist.
  • Asian-Inspired Quinoa Bowl: Swap rice for quinoa, and add shredded carrots and bok choy.
  • Vegan Delight: Use tofu or tempeh and a maple-soy glaze for a plant-based alternative.

Storage and Make-Ahead Instructions

This Teriyaki Salmon Bowl can be prepped ahead of time. Here’s how to store it:

  • Refrigeration: Store assembled bowls in airtight containers for up to 3 days. Keep the sauce separate to avoid sogginess.
  • Freezing: Freeze cooked salmon and rice separately for up to 2 months. Thaw in the refrigerator before reheating.
  • Make-Ahead: Prep the teriyaki sauce and chop veggies in advance for quick assembly.

Frequently Asked Questions

Curious minds want to know! Here are some common questions:

  • Can I use frozen salmon? Yes! Just ensure it’s thawed completely before cooking.
  • What if I’m allergic to soy? Try coconut aminos or a homemade soy sauce alternative.
  • Can I make this in an air fryer? Absolutely! Cook the salmon at 400°F for about 8-10 minutes.
  • How can I make it gluten-free? Use tamari instead of soy sauce and ensure your other ingredients are gluten-free.
  • Can I add more veggies? Yes! Broccoli, bell peppers, and snap peas are great additions.
  • What’s the best way to reheat leftovers? Gently reheat in the microwave or on the stovetop with a splash of water to keep it moist.
  • Is this dish suitable for meal prep? Definitely! It’s perfect for preparing healthy lunches for the week.
  • What sides go well with this bowl? Serve with a light salad, miso soup, or steamed veggies for a complete meal.

Nutrition Tips and Dietary Adaptations

Eating healthy doesn’t have to be a chore! Here are some tips to enhance the nutrition of your bowl:

  • Add Fiber: Include a variety of vegetables to boost fiber content.
  • Protein Power: Add chickpeas or edamame for an extra protein kick if you’re vegetarian.
  • Healthy Fats: Avocado adds healthy fats; consider topping with nuts for crunch.
  • Low-Carb Option: Substitute rice with cauliflower rice or zoodles for a lighter meal.

Essential Equipment for Your Cooking Adventure

Before you dive into cooking, make sure you have the right tools:

  • Skillet: A non-stick skillet is ideal for searing the salmon.
  • Small saucepan: For making your teriyaki sauce.
  • Rice cooker or pot: Perfect for cooking rice to fluffy perfection.
  • Cutting board and knife: Essential for prepping all those colorful veggies.
  • Measuring cups and spoons: Accuracy is key for the best flavor!

Serving Suggestions

Make your Teriyaki Salmon Bowl a feast for the eyes and palate:

  • Garnish: Add a sprinkle of toasted sesame seeds and fresh herbs like cilantro or green onions for an extra pop of flavor.
  • Pairing: Serve with a refreshing cucumber salad or miso soup to round out the meal.
  • Family Style: Set up a buffet-style spread so everyone can customize their bowls to their liking.

In conclusion, the Teriyaki Salmon Bowl is not just a meal; it’s an experience that brings joy and flavor to your dining table. With its versatility, quick prep time, and vibrant ingredients, it’s bound to become a staple in your kitchen. So, grab those ingredients and let’s get cooking! Remember, in the kitchen, there are no limits—only delicious possibilities!

Teriyaki Salmon Bowl

Prep Time 10 minutes
Cook Time 15 minutes
Total Time 25 minutes
Servings 4 servings
Calories 550
A delicious and healthy bowl featuring perfectly seared salmon glazed with homemade teriyaki sauce, served over rice with fresh vegetables and flavorful toppings.

Ingredients

Salmon

  • 4 fillets salmon fillets (about 6oz each)
  • 1 tablespoon vegetable oil
  • Salt and pepper Salt and pepper (to taste)

Teriyaki Sauce

  • 1/4 cup soy sauce
  • 2 tablespoons mirin (or rice vinegar + 1 tsp sugar)
  • 2 tablespoons honey
  • 1 clove garlic, minced
  • 1 teaspoon fresh ginger, grated
  • 1 teaspoon cornstarch + 1 tablespoon water (for slurry)

Base

  • Steamed jasmine or sushi rice Steamed jasmine or sushi rice

Toppings

  • 1 piece avocado, sliced
  • 1 cup edamame, shelled
  • 1 piece cucumber, sliced or ribboned
  • to taste Pickled ginger
  • for garnish Sesame seeds
  • Sriracha mayo (mayo + sriracha, mixed) Sriracha mayo

Instructions 

  • Combine soy sauce, mirin, honey, garlic, and ginger in a saucepan. Simmer, add slurry, and thicken into a glaze.
  • Season salmon with salt and pepper. Sear skin-side up in oil for 3-4 minutes, flip, brush with sauce, and cook until just done.
  • Assemble bowls with rice, salmon, avocado, edamame, cucumber, ginger, drizzle sriracha mayo, and sprinkle sesame seeds.

Notes

Feel free to customize toppings and spice level to taste.
Calories: 550kcal
Cost: $15
Course: Main Course
Cuisine: Japanese
Keyword: Salmon

Why This Zesty Quick Asian Coleslaw Will Become Your Go-To Dish!

Are you ready to transform your view of coleslaw? This Quick Asian Coleslaw recipe is here to change the game! Bursting with vibrant colors, crunch, and a delightful nutty flavor from the sesame dressing, this dish is perfect as a side for any meal or as a refreshing lunch on its own. It’s not just a salad; it’s a celebration of freshness!

In this article, we’ll dive deep into the magic of this recipe, offering you tips, variations, and everything you need to make this coleslaw a staple in your kitchen. Whether you’re a seasoned chef or just starting out, this dish is simple, engaging, and full of flavor.

Why You’ll Love This Zesty Quick Asian Coleslaw

  • Vibrant Flavors: The combination of fresh vegetables and a tangy sesame dressing creates a lively taste explosion that is far from boring.
  • Easy to Prepare: With just a few simple steps, you can whip up this coleslaw in no time—perfect for busy weeknights or spontaneous gatherings!
  • Customizable: This recipe encourages creativity! Toss in your favorite veggies or nuts to make it uniquely yours.
  • Meal Prep Friendly: The flavors meld beautifully after a few hours in the fridge, making it ideal for preparing ahead of time.
  • Nutritious and Delicious: Packed with vitamins from fresh vegetables, this coleslaw is a guilt-free addition to your meals.

Ingredient Breakdown and Substitutions

Here’s what you’ll need to create this Asian coleslaw:

  • 2/3 cup cider vinegar: I recommend Bragg for its extra zing!
  • 3.5 tbsp sugar: Balance the tanginess of the vinegar.
  • 2 tbsp sesame oil: Opt for La Tourangelle for a rich, toasted flavor.
  • 2.5 tbsp sesame seeds: These add a delightful crunch and nutty flavor.
  • 1/2 tsp salt: Essential for bringing out the flavors.
  • 1/4 tsp ground ginger: For a hint of spice.
  • Black pepper: To taste.
  • 1 carrot: Shredded into matchsticks for that satisfying crunch.
  • 1.5 bunches cilantro: Adds freshness and brightness.
  • 2 scallions: Chopped for a mild onion flavor.
  • 1/2 head red cabbage: Thinly sliced (a mandoline works wonders!).
  • 1/2 head green cabbage: For a mix of colors and textures.
  • 1/2 cup shelled edamame: A protein boost and vibrant green color.
  • 1/3 red bell pepper: Diced for sweetness and crunch.
  • 1/4 cup peanuts: Chopped for an added crunch and flavor.

You can easily adjust this ingredient list based on what you have at home or your dietary preferences. Here are some substitution ideas:

  • Vinegar: Use apple cider vinegar or rice vinegar for a different flavor profile.
  • Sweeteners: Swap sugar with honey or maple syrup for a natural sweetness.
  • Vegetables: Add sliced bell peppers, radishes, or even julienned jicama for extra crunch.
  • Proteins: Incorporate grilled chicken or tofu for a more filling option.

Pro Tips for Making the Best Coleslaw

A side view of fresh coleslaw with red and green cabbage, carrots, and garnished with sesame seeds.
  • Shred the Veggies: Use a mandoline or food processor to achieve even, thin slices for better texture.
  • Let it Marinate: Allow the coleslaw to sit for at least 30 minutes (or up to overnight) to let the flavors meld.
  • Don’t Overdress: If you’re making this coleslaw ahead, keep the dressing separate and add it just before serving to maintain crunch.
  • Season to Taste: Always taste the dressing before adding it to the slaw; adjust sweetness and seasoning as needed.
  • Use Fresh Ingredients: Fresh, high-quality vegetables will elevate the taste of your coleslaw significantly.
  • Experiment with Textures: Mix in crispy toppings like fried wonton strips or nuts for a fun crunch.
  • Go for Color: A colorful mix of veggies not only looks appealing but also packs in more nutrients!
  • Store Properly: Keep in an airtight container in the fridge to maintain freshness for up to three days.

Common Mistakes and Troubleshooting

Even the best chefs can make mistakes! Here are some common pitfalls when making coleslaw and how to avoid them:

  • Too Watery: If your coleslaw becomes soggy, it may be due to the salt drawing out excess moisture. Always add salt gradually and adjust to taste.
  • Not Enough Flavor: If your coleslaw tastes bland, revisit the dressing. A splash more vinegar or a pinch of salt can make a world of difference!
  • Overmixing: Mixing too vigorously can bruise the vegetables. Gently toss to combine for the best texture.
  • Wrong Vegetable Size: Make sure all vegetables are cut to a similar size for even marinating and texture.

Variations to Spice It Up!

Feeling adventurous? Here are some fun variations on the classic Asian coleslaw recipe:

  • Spicy Kick: Add sliced jalapeños or a drizzle of sriracha to elevate the heat!
  • Tropical Twist: Toss in diced mango or pineapple for a sweet, fruity addition.
  • Crunchy Asian Pea Slaw: Substitute peas for edamame for a different type of crunch.
  • Herb-Infused: Experiment with different herbs like mint or basil for an exciting flavor profile.

Storage and Make-Ahead Instructions

This coleslaw is incredibly make-ahead friendly! Here’s how to store it:

  • Refrigerate: Store in an airtight container in the fridge for up to three days.
  • Dress Before Serving: To keep the crunch, dress the coleslaw just before serving. If you’re prepping for later, store the dressing separately.
  • Freeze with Caution: While freezing is an option, it’s best enjoyed fresh due to the texture of the cabbage.

Frequently Asked Questions (FAQs)

Got questions? Here are some common queries about this coleslaw:

  • Q: Can I make this coleslaw in advance?
    A: Yes! You can prepare it a day ahead, but wait to add the dressing until just before serving for maximum crunch.
  • Q: What can I serve with Asian coleslaw?
    A: This slaw pairs wonderfully with grilled meats, tacos, or as a topping for sandwiches and bowls.
  • Q: Is this coleslaw vegan?
    A: Absolutely! All ingredients used in this recipe are plant-based and vegan-friendly.
  • Q: Can I add other vegetables?
    A: Yes! Feel free to customize with your favorite veggies like cucumbers, bell peppers, or even radishes.
  • Q: How long will leftovers last?
    A: The coleslaw can be stored in the fridge for up to three days but is best eaten fresh.
  • Q: What type of cabbage is best?
    A: A mix of red and green cabbage provides color and texture, but you can use any cabbage variety.
  • Q: Can I use a store-bought dressing?
    A: While homemade dressing is best, you can use a store-bought Asian dressing in a pinch.
  • Q: Can I make this gluten-free?
    A: Yes! Just ensure that the soy sauce or any alternative used is gluten-free.

Nutrition Tips and Dietary Adaptations

This Asian coleslaw is not only delicious but also packed with nutrients. Here’s how to make it even healthier:

  • Low Sugar: Substitute sugar with a natural sweetener like stevia or monk fruit to reduce calories.
  • High Protein: Add grilled chicken, tofu, or chickpeas for a protein boost.
  • Low Carb: Skip the sugar entirely and focus on fresh veggies for a low-carb option.
  • Dairy-Free: This recipe is inherently dairy-free, making it suitable for lactose-intolerant diets.

Essential Equipment Recommendations

Here’s what you’ll need to make this coleslaw:

  • Mandoline or Sharp Knife: For slicing cabbage and carrots thinly.
  • Mixing Bowl: A large bowl is essential for tossing all ingredients together.
  • Whisk: For mixing the dressing evenly.
  • Airtight Container: For storing leftovers securely.

Serving Suggestions

Now that your coleslaw is ready, here are some fun ways to serve it:

  • On Tacos: Use it as a crunchy topping for fish or chicken tacos.
  • As a Side Dish: Serve it alongside grilled meats for a refreshing contrast.
  • In Wraps: Roll it up in a tortilla with your favorite protein for a quick meal.
  • As a Salad Base: Use it as a base for a healthy grain bowl topped with quinoa or brown rice.

There you have it! This Zesty Quick Asian Coleslaw is not just a recipe; it’s an invitation to explore flavors and textures in your cooking. Remember, the kitchen is your creative playground—have fun with it! Enjoy this vibrant dish, and watch it become a staple in your healthy eating journey. Cheers to delicious, nutritious eating!

Quick Asian Coleslaw with Sesame Dressing

Prep Time 15 minutes
Total Time 15 minutes
Servings 4 people
Calories 250
A vibrant and crunchy coleslaw tossed in a flavorful sesame dressing, perfect for a quick and healthy side.

Ingredients

Dressing

  • 0.67 cup cider vinegar (preferably Bragg for tanginess)
  • 3.5 tbsp sugar
  • 2 tbsp sesame oil (La Tourangelle for toasted aroma)
  • 2.5 tbsp sesame seeds
  • 0.5 tsp salt
  • 0.25 tsp ground ginger
  • to taste black pepper black pepper
  • 1 piece carrot (shredded into matchsticks)
  • 1.5 bunches cilantro
  • 2 scallions scallions
  • 0.5 head red cabbage (thinly sliced)
  • 0.5 head green cabbage
  • 0.5 cup shelled edamame
  • 0.33 red bell pepper red bell pepper (diced)
  • 0.25 cup peanuts

Instructions 

  • Whisk together vinegar, sugar, sesame oil, sesame seeds, salt, and ginger to make the dressing.
  • Shred the carrots and thinly slice the cabbages using a mandoline.
  • Combine all vegetables, edamame, cilantro, scallions, and red bell pepper in a large bowl.
  • Pour the dressing over the vegetables and toss to combine.
  • Sprinkle peanuts and sesame seeds on top before serving.

Notes

For extra crunch, add toasted sesame seeds just before serving.
Calories: 250kcal
Cost: $12
Course: Side Dish
Cuisine: Asian
Keyword: coleslaw

Unleash Flavorful Nutrition: A Deep Dive into Pesto Chicken Cauliflower Rice

Welcome to the vibrant world of healthy cooking, where every meal is an opportunity for creativity and nourishment! Today, we’re diving into a sensational recipe that’s not just nutritious, but also bursting with flavor: Pesto Chicken Cauliflower Rice. This dish is perfect for busy nights when you want something that’s quick, easy, and incredibly satisfying. With its delightful combination of tender chicken, zesty pesto, and fluffy cauliflower rice, you’ll see why this dish quickly becomes a staple in your kitchen. Join me as we explore the ins and outs of this recipe, packed with tips, tricks, and variations that will elevate your cooking game!

Why You’ll Love This Recipe

Let’s highlight the amazing benefits of this pesto chicken cauliflower rice dish:

  • Quick & Easy: Ready in just 15 minutes, this recipe is perfect for those hectic weeknights when time is of the essence.
  • Low Carb Delight: A fantastic alternative to traditional rice, cauliflower rice keeps the carb count low while delivering fiber and nutrients.
  • Flavor Explosion: The bold flavors of pesto combined with succulent chicken create a meal that’s anything but boring.
  • Customizable: You can easily swap ingredients or adjust seasoning to suit your personal taste.
  • Meal Prep Friendly: This dish stores beautifully, making it an excellent option for meal prep or leftovers.

Gather Your Ingredients: The Key to Flavor

Before we jump into cooking, let’s gather the ingredients that will make this dish sing:

  • 2 chicken breasts, boneless and skinless
  • 1/2 cup pesto sauce (store-bought or homemade)
  • Salt and pepper to taste
  • 2 tablespoons olive oil (for cooking chicken)
  • 1 head of cauliflower, riced (or 4 cups store-bought cauliflower rice)
  • 1 tablespoon olive oil (for sautéing cauliflower)
  • 3 garlic cloves, minced
  • 1 cup cherry tomatoes, halved
  • Optional: fresh basil for garnish

Feeling adventurous? Here are some substitutions you can try:

  • Chicken: Use leftover shredded chicken or even turkey for a quick protein swap.
  • Pesto: Experiment with different pestos (like red pesto) or make your own using nuts, herbs, and olive oil.
  • Cauliflower Rice: Use zucchini noodles or quinoa for a different twist on the base.
  • Cherry Tomatoes: Substitute with roasted red peppers or spinach for added color and nutrients.

The Cooking Process: Step-by-Step Instructions

Juicy pesto chicken atop a bed of riced cauliflower, garnished with cherry tomatoes and basil.

Now that we have everything ready, let’s get cooking!

Step 1: Prepare the Cauliflower Rice

To create the perfect cauliflower rice:

  • Cut the cauliflower head into florets.
  • Place the florets in a food processor and pulse until it resembles rice.

Step 2: Cook the Chicken

Next, let’s cook the chicken:

  • Season the chicken breasts with salt and pepper.
  • Heat 2 tablespoons of olive oil in a skillet over medium heat.
  • Add the chicken and cook for about 6-7 minutes on each side until cooked through.
  • Once cooked, remove from the skillet and let it rest before slicing.

Step 3: Sauté the Cauliflower Rice

In the same skillet for added flavor:

  • Add 1 tablespoon of olive oil and sauté minced garlic for about 1 minute until fragrant.
  • Stir in the riced cauliflower and cook for 5-7 minutes until tender.
  • Add halved cherry tomatoes and cook for another 2-3 minutes.

Step 4: Combine Everything

Finally, let’s bring it all together:

  • Slice the rested chicken into bite-sized pieces.
  • Add the sliced chicken to the skillet with cauliflower rice.
  • Pour in the pesto sauce and gently mix until everything is well-coated.

Pro Tips for Pesto Perfection

Want to elevate your dish even further? Here are some pro tips:

  • Fresh Ingredients: Use fresh basil in your pesto for a vibrant flavor boost.
  • Don’t Overcook: Be careful not to overcook the cauliflower rice; it should be tender but still have a bit of bite.
  • Flavor Boost: Add a splash of lemon juice or zest right before serving for an extra zing!
  • Garnish: A sprinkle of grated Parmesan or a handful of pine nuts can take this dish to the next level.
  • Batch Cooking: Prepare multiple servings and store in the fridge for quick meals throughout the week.
  • Flavor Variations: Experiment with different herbs or spices in your pesto for unique flavor profiles.
  • Protein Swap: Try using shrimp or tofu for a different protein source.
  • Mix-Ins: Add in some leafy greens like spinach or kale while sautéing the cauliflower for more nutrients.

Common Mistakes & Troubleshooting

Cooking can sometimes be unpredictable, so here’s how to avoid common pitfalls:

  • Watery Cauliflower Rice: Ensure you don’t over-process cauliflower; it should resemble rice, not mush.
  • Overcooked Chicken: Use a meat thermometer; chicken should reach an internal temperature of 165°F.
  • Pesto Too Thick: If your pesto is too thick, thin it with a bit of olive oil or a splash of water.

Variations to Keep Things Exciting

Here are some fun variations to try with your pesto chicken cauliflower rice:

  • Italian Twist: Add Italian sausage and spinach for a heartier meal.
  • Mexican Flair: Swap pesto for salsa and add black beans and corn.
  • Asian Influence: Use teriyaki sauce instead of pesto, and add bell peppers and snap peas.
  • Cheesy Goodness: Stir in some mozzarella or feta cheese for a creamy texture.

Storage & Make-Ahead Instructions

This dish is perfect for meal prep:

  • Refrigerator: Store in an airtight container in the fridge for up to 4 days.
  • Freezer: Freeze portions in airtight containers for up to 3 months. Just reheat in the microwave when ready to enjoy.
  • Make-Ahead: Prepare the cauliflower rice and chicken ahead of time, then combine and heat when ready to serve.

Nutrition Tips & Dietary Adaptations

This pesto chicken cauliflower rice dish isn’t just delicious—it’s nutritious too! Here are some tips to enhance its health benefits:

  • Increase Fiber: Add additional veggies like bell peppers or zucchini to boost the fiber content.
  • Protein Power: For a vegetarian version, use chickpeas or lentils instead of chicken.
  • Healthy Fats: Consider making your own pesto with nuts and healthy oils for added nutrients.

Frequently Asked Questions

Got questions? Here are some answers to common queries:

  • Can I use frozen cauliflower rice? Yes! Just sauté it for a few minutes longer to ensure it’s heated through.
  • Is this recipe gluten-free? Absolutely! All ingredients are gluten-free, making it a great choice for those with gluten sensitivities.
  • Can I make this vegan? Yes! Substitute chicken with tofu and use a vegan pesto.
  • How do I make homemade pesto? Blend fresh basil, garlic, pine nuts, Parmesan cheese, and olive oil for a quick and easy pesto.
  • What can I serve this with? Pair it with a simple green salad or crusty bread for a complete meal.
  • How do I store leftovers? Store in an airtight container in the fridge for up to 4 days.
  • Can I reheat this dish? Yes! Reheat in the microwave or on the stove until warmed through.
  • What’s the best way to make cauliflower rice? Use a food processor for the best texture, but you can also grate it if you don’t have one.

Equipment Recommendations

Here’s what you’ll need to make this dish:

  • Food Processor: Essential for quickly ricing cauliflower.
  • Skillet: A large skillet is perfect for cooking everything in one pan.
  • Meat Thermometer: Useful for ensuring your chicken is cooked to perfection.

Serving Suggestions

To elevate your meal even further, consider these serving tips:

  • Garnish: A sprinkle of fresh basil or a squeeze of lemon can brighten up the dish.
  • Pairings: Serve with a side of roasted vegetables or a crisp salad for added nutrients.
  • Drinks: Enjoy with a refreshing iced tea or sparkling water for a complete dining experience.

And there you have it—a comprehensive guide to creating a mouthwatering Pesto Chicken Cauliflower Rice dish that will not only tantalize your taste buds but also nourish your body. With its vibrant flavors, quick prep time, and endless possibilities for customization, this recipe is sure to become a favorite in your home. So, roll up your sleeves, put on your apron, and let’s get cooking! Remember, the kitchen is your playground, so have fun and enjoy every bite!

Pesto Chicken Cauliflower Rice

Prep Time 10 minutes
Cook Time 20 minutes
Total Time 30 minutes
Servings 4 servings
Calories 350
A flavorful low-carb dish combining tender chicken, fresh cauliflower rice, cherry tomatoes, and vibrant pesto for a quick and healthy meal.

Ingredients

Protein

  • 2 pieces chicken breasts, boneless and skinless
  • 1/2 cup pesto sauce
  • Salt and pepper to taste Salt and pepper (for seasoning)

Vegetables

  • 1 head cauliflower, riced (or 4 cups store-bought cauliflower rice)
  • 1 tablespoon olive oil
  • 3 cloves garlic, minced
  • 1 cup cherry tomatoes, halved
  • Optional fresh basil for garnish

Instructions 

  • Cook cauliflower until tender and set aside.
  • Season chicken with salt and pepper, then cook in a skillet over medium heat for 6-7 minutes per side.
  • Remove chicken, let rest, then slice into bite-sized pieces.
  • In the same skillet, sauté garlic in olive oil for 1 minute, then add cauliflower rice and cook for 5-7 minutes.
  • Add cherry tomatoes and cook for 2-3 minutes, then stir in sliced chicken and pesto until well coated.

Notes

For extra flavor, garnish with fresh basil before serving.
Calories: 350kcal
Cost: $15
Course: Main Course
Cuisine: American
Keyword: cauliflower rice, Chicken, Pesto

Indulge in the Irresistible No-Bake Lotus Biscoff Pie: The Ultimate Dessert Experience!

Welcome to the world of delightful desserts, where flavor and ease collide! Today, I’m excited to share my recipe for a No-Bake Lotus Biscoff Pie, a treat that’s not just a feast for the taste buds, but also a simple indulgence you can whip up in no time. With its luscious cream cheese filling and the uniquely caramelized flavor of Lotus Biscoff cookies, this pie is perfect for any occasion—be it a summer picnic, a cozy family dinner, or just a sweet treat to brighten your day.

In this article, you’ll discover everything you need to know to make this stunning dessert, including tips for success, storage advice, and even variations to customize your pie. So let’s dive into this exciting culinary adventure!

Why You’ll Love This Recipe

This No-Bake Lotus Biscoff Pie is not just delicious; it’s also incredibly easy to prepare! Here are five reasons why it will quickly become a favorite:

  • Quick and Easy: With only a few ingredients and no baking required, you can have this pie ready in under an hour!
  • Decadent Flavor: The combination of creamy filling and crunchy Biscoff crust creates a delightful contrast that’s simply irresistible.
  • Make-Ahead Friendly: Perfect for busy schedules, you can prepare this pie a day in advance and let it chill in the fridge.
  • Impressive Presentation: This pie looks stunning, making it the perfect showstopper for your gatherings.
  • Versatile Ingredients: You can easily customize the filling or crust to suit your taste preferences!

Ingredient Breakdown

Let’s gather our ingredients for this delectable pie:

  • 200 g Lotus Biscoff biscuits: These cookies provide a crunchy, flavorful crust. You can substitute with any similar cookie if needed.
  • 100 g melted butter: This helps bind the crust together. You can use coconut oil for a dairy-free option.
  • 200 g cream cheese (room temperature): This gives the filling its creamy texture. For a lighter version, opt for low-fat cream cheese.
  • 1 cup whipping cream (cold): Whipped to perfection, this adds fluffiness to the filling.
  • ½ cup powdered sugar: Sweetens the filling without making it overly sugary.
  • ½ cup Lotus Biscoff spread: For an extra layer of flavor, mix this into the filling!

How to Make Your No-Bake Lotus Biscoff Pie

Delicious No-Bake Lotus Biscoff Pie displayed on a plate, showcasing its creamy texture.

Ready to create your masterpiece? Follow these simple steps:

Preparation Steps:

  1. Prepare the Crust: In a food processor, crush the Lotus Biscoff biscuits into fine crumbs. Mix with melted butter until combined. Press the mixture firmly into the bottom and sides of a pie dish to form a crust. Chill in the fridge for 15 minutes.
  2. Make the Filling: In a mixing bowl, beat the cream cheese until smooth. Gradually add the powdered sugar, mixing well. In a separate bowl, whip the cold whipping cream until stiff peaks form, then gently fold it into the cream cheese mixture.
  3. Add Flavor: Fold in the Lotus Biscoff spread until well combined. This will give your filling an extra hit of flavor!
  4. Fill the Crust: Pour the cream cheese filling into the chilled crust and smooth the top with a spatula. Cover and refrigerate for at least 4 hours, or overnight for best results.
  5. Serve and Enjoy: Once set, slice and serve your pie. You can garnish with additional whipped cream or crushed Biscoff cookies for that extra touch!

Pro Tips for Success

To ensure your No-Bake Lotus Biscoff Pie turns out perfectly, keep these expert tips in mind:

  • Room Temperature: Ensure your cream cheese is at room temperature before mixing to avoid lumps.
  • Chill Time: Don’t rush the chilling process; allowing it to set properly is key to the texture.
  • Whipping the Cream: Whip your cream until stiff peaks form for a fluffier filling.
  • Crust Firmness: Press the crust mixture firmly into the pie dish to avoid it crumbling when sliced.
  • Flavors: Experiment with adding a splash of vanilla extract to the filling for an extra flavor boost.

Common Mistakes and Troubleshooting

Even the best chefs face challenges! Here are some common mistakes and how to troubleshoot them:

  • Filling is Too Runny: Ensure the whipping cream is whipped to stiff peaks and that the pie has chilled long enough.
  • Crust Falls Apart: Make sure the butter is well mixed with the biscuit crumbs. Press firmly when forming your crust.
  • Too Sweet: Adjust the sugar according to your taste, or opt for less Biscoff spread if you find it too sweet.

Variations to Try

Feeling adventurous? Here are some fun variations to customize your No-Bake Lotus Biscoff Pie:

  • Chocolate Delight: Add cocoa powder to the cream cheese filling for a chocolate twist!
  • Nutty Crunch: Incorporate crushed nuts into the crust for an added crunch.
  • Fruit Fusion: Top the pie with fresh fruits like strawberries or bananas for a refreshing contrast.
  • Dairy-Free Version: Swap cream cheese and whipping cream with coconut cream and dairy-free cream cheese.

Storage and Make-Ahead Instructions

This pie is perfect for making ahead of time! Here’s how to store it:

  • Refrigerate: Store the pie covered in the fridge for up to 4 days.
  • Freeze: You can freeze the pie for up to 2 months. Just ensure it’s well-wrapped to prevent freezer burn.
  • Thawing: If frozen, thaw in the fridge overnight before serving.

Frequently Asked Questions

Got questions? I’ve got answers! Here are some common queries about this delicious dessert:

  • Can I use another type of cookie for the crust? Absolutely! Any similar cookie will work, but the flavor will vary.
  • How can I make it more chocolatey? Consider adding chocolate chips to the filling or drizzling chocolate sauce on top!
  • Is this pie gluten-free? Yes, if you use gluten-free Biscoff cookies and ensure all other ingredients are gluten-free.
  • Can I use low-fat ingredients? Yes, you can opt for low-fat cream cheese and whipped topping to lighten the recipe.
  • What’s the best way to slice the pie? Run a sharp knife under hot water before slicing for clean cuts.
  • Can I add a layer of fruit? Definitely! Fresh fruit can be added on top or mixed into the filling.
  • How long does it take to set? Ideally, let it chill in the fridge for at least 4 hours.
  • What can I use instead of whipping cream? Coconut cream is a great alternative for a dairy-free version.

Nutritional Tips and Dietary Adaptations

This No-Bake Lotus Biscoff Pie can fit into various dietary preferences:

  • Low-Carb: Use sugar substitutes and almond flour for a keto-friendly version.
  • Vegan: Substitute cream cheese and whipping cream with vegan alternatives.
  • High-Protein: Add Greek yogurt into the filling for an extra protein boost!

Equipment Recommendations

To whip up this scrumptious pie, you’ll need:

  • Food Processor: For crushing cookies and mixing ingredients smoothly.
  • Mixing Bowls: A set of various sizes for mixing your filling.
  • Electric Mixer: Essential for whipping cream and cream cheese.
  • Pie Dish: A standard 9-inch pie dish works perfectly for this recipe.

Serving Suggestions

When serving your No-Bake Lotus Biscoff Pie, consider these delightful ideas:

  • Garnish: Top with whipped cream, crushed Biscoff cookies, or a drizzle of chocolate sauce.
  • Pair with Coffee: This pie pairs beautifully with a cup of coffee or tea.
  • Personalize: Allow guests to add their favorite toppings, like caramel sauce or fresh fruit!

And there you have it—a complete guide to making the most delicious No-Bake Lotus Biscoff Pie! With its rich flavors and simple preparation, this dessert is sure to impress. So gather your ingredients, channel your inner chef, and get ready to enjoy a slice of heaven. Happy baking!

Easy No-Bake Lotus Biscoff Pie

Prep Time 20 minutes
Total Time 20 minutes
Servings 8 slices
Calories 450
This creamy and crunchy no-bake pie combines the rich flavor of Lotus Biscoff cookies with a smooth cream cheese filling, perfect for a quick dessert.

Ingredients

Crust

  • 200 g Lotus Biscoff biscuits
  • 100 g melted butter

Filling

  • 200 g cream cheese (room temperature)
  • 1 cup whipping cream (cold)
  • ½ cup powdered sugar
  • ½ cup Lotus Biscoff

Instructions 

  • Crush the Biscoff biscuits and mix with melted butter to form the crust. Press into a pie dish and refrigerate for 10 minutes.
  • In a bowl, beat the cream cheese until smooth. In a separate bowl, whip the cold cream with powdered sugar until stiff peaks form.
  • Fold the whipped cream into the cream cheese, then stir in crushed Biscoff cookies.
  • Pour the filling over the crust and smooth the top. Chill in the refrigerator for at least 4 hours before serving.

Notes

For a firmer pie, let it chill overnight.
Calories: 450kcal
Cost: $12
Course: Dessert
Cuisine: international
Keyword: Biscoff

Welcome to a flavor explosion that will transform your meal prep and impress your dinner guests! This Thai Crunch Salad is your go-to for a vibrant, nutritious meal that’s quick to whip up and absolutely delicious. With fresh veggies, tender chicken, and a creamy peanut ginger sauce, this dish is not just a salad; it’s a celebration of taste and texture! Whether you’re looking to elevate your lunch game or impress at dinner, this salad is a winner!

In this guide, we’ll dive deep into everything you need to know about creating the perfect Thai Crunch Salad. From ingredient breakdowns to expert tips, you’ll be fully equipped to make this dish shine. So, let’s get started!

Why You’ll Love This Recipe

  • Quick and Easy: Prep this salad in under 30 minutes, making it ideal for busy weeknights or last-minute gatherings.
  • Flavor-Packed: The combination of crunchy veggies and creamy peanut ginger dressing creates an explosion of flavors in every bite.
  • Nutrient-Dense: Loaded with vitamins and proteins, this salad is as healthy as it is delicious, fueling your body with energy.
  • Meal Prep Friendly: This salad stays fresh in the fridge, making it perfect for meal prepping lunches or dinners for the week.
  • Customizable: With various ingredient options and substitutions, you can tailor this salad to fit your dietary needs and preferences.

Ingredient Breakdown: Essentials and Substitutions

Let’s take a look at the key ingredients in our Thai Crunch Salad and explore some clever substitutions to cater to your tastes or dietary restrictions.

  • Napa Cabbage: The star of our salad! Its crisp texture is perfect for salads. Substitution: Use green cabbage or bok choy if needed.
  • Red Cabbage: Adds a pop of color and crunch. Substitution: You can replace it with more Napa cabbage or mixed greens.
  • Carrots: For sweetness and crunch. Substitution: Try zucchini noodles or bell peppers for a different twist.
  • Edamame: Provides protein and a satisfying bite. Substitution: Use cooked chickpeas or black beans for a plant-based protein boost.
  • Cilantro and Green Onions: These herbs add freshness and flavor. Substitution: Swap with parsley or chives if you’re not a cilantro fan.
  • Cucumber: For a refreshing crunch. Substitution: Any crunchy vegetable like bell peppers or radishes work well.
  • Cooked Chicken Breast: For added protein. Substitution: Use tofu or tempeh for a vegetarian option.
  • Pepper Ginger Sauce: The heart of the salad! Substitution: Use tahini or a tahini-based dressing for a nut-free option.

Expert Pro Tips for the Perfect Salad

Ready to take your Thai Crunch Salad to the next level? Here are some expert tips to ensure your dish is a showstopper!

  • Uniform Cuts: Slice your vegetables uniformly to ensure an even crunch and consistent flavor in every bite.
  • Chill Your Ingredients: Use cold chicken and chilled veggies for a refreshing salad that feels like a treat.
  • Balance Your Dressing: Adjust the sweetness or tanginess of the peanut ginger sauce to suit your palate. Taste as you go!
  • Don’t Skimp on the Crunch: Just before serving, add your wonton strips and crushed peanuts to keep them crispy!
  • Storage Savvy: Keep the dressing separate until serving to prevent sogginess and maintain the salad’s crunch.
  • Make Ahead: You can prep most of the ingredients a day in advance, making assembly a breeze!
  • Layering Technique: Layer your ingredients in the bowl starting with the heavier items at the bottom to create a visually appealing presentation.
  • Herb Variations: Experiment with different herbs like mint or basil for a fresh twist.

Avoiding Common Mistakes

Side view of a vibrant Thai Crunch Salad featuring shredded cabbages and peanut dressing.

Even the best chefs run into hiccups! Here are some common mistakes to avoid when making your Thai Crunch Salad:

  • Overdressing: Don’t drown your salad; start with a little dressing and add more as needed.
  • Using Old Ingredients: Fresh ingredients are key; always check your produce for freshness before use.
  • Skipping the Chill: Avoid serving warm chicken; chilling it enhances the salad’s overall taste and texture.
  • Not Tasting: Always taste your dressing before adding it to the salad. Adjust seasoning if necessary!

Delicious Variations to Try

Feeling adventurous? Here are some exciting variations of the Thai Crunch Salad to keep things fresh!

  • Thai Crunch Quinoa Salad: Substitute quinoa for chicken for a hearty, plant-based option.
  • Spicy Thai Crunch Salad: Add sliced jalapeños or a dash of sriracha to the dressing for an extra kick!
  • Fruit-Infused Salad: Toss in some sliced mango or pineapple for a sweet and tangy twist.
  • Grilled Thai Crunch Salad: Grill your chicken for added smoky flavor and charred goodness.

Storage and Make-Ahead Instructions

This salad is incredibly versatile when it comes to storage and meal prep. Here’s how to keep it fresh:

  • Refrigerate: Store the salad in an airtight container in the fridge for up to 3 days.
  • Keep Dressing Separate: Store your dressing in a separate container to maintain freshness and crunch.
  • Make Ahead: You can prep ingredients 1-2 days in advance; just mix when ready to serve!

Comprehensive FAQ

Got questions? We’ve got answers! Here’s a roundup of frequently asked questions about Thai Crunch Salad:

  • Can I make this salad vegan? Absolutely! Substitute chicken with tofu and use maple syrup instead of honey.
  • How can I make this salad gluten-free? Use tamari instead of soy sauce and ensure your wonton strips are gluten-free.
  • What can I use instead of peanut butter? Try sunflower seed butter for a nut-free alternative!
  • Can I add more protein? Definitely! Chickpeas, beans, or grilled shrimp are fantastic additions.
  • Is this salad good for meal prep? Yes! It holds up well in the fridge; just keep the dressing separate.
  • How long does it take to prepare? You can whip this up in about 20-30 minutes!
  • Can I use frozen edamame? Yes! Just thaw and rinse before adding to the salad.
  • What other dressings work with this salad? A sesame ginger dressing or tahini dressing would be delicious alternatives!

Nutritional Insights and Dietary Adaptations

This salad isn’t just tasty; it’s packed with nutrients! Here’s a breakdown of its health benefits:

  • High in Protein: With chicken and edamame, this salad offers a hefty protein boost for muscle repair and energy.
  • Rich in Fiber: The variety of veggies provides a good source of dietary fiber, aiding digestion and keeping you full.
  • Low Calorie: A hearty serving is under 500 calories, making it perfect for weight management.
  • Healthy Fats: The dressing contains healthy fats from peanut butter, promoting satiety and flavor.

Essential Kitchen Equipment

To create your Thai Crunch Salad like a pro, here’s a list of kitchen tools you’ll need:

  • Sharp Chef’s Knife: A good knife is crucial for slicing vegetables uniformly and efficiently.
  • Cutting Board: A sturdy board to protect your counters and provide a safe cutting surface.
  • Mixing Bowls: Multiple sizes for mixing salad ingredients and dressing separately.
  • Whisk: Perfect for blending your peanut ginger dressing smoothly.
  • Salad Tongs: Great for tossing the salad without bruising the ingredients.

Serving Suggestions

How you serve your Thai Crunch Salad can elevate the meal experience. Here are some fun ideas:

  • Family Style: Serve the salad in a large bowl for a shared dining experience.
  • Individual Bowls: Portion out the salad into individual bowls for a personal touch.
  • Side Dish: Pair it with grilled chicken, fish, or tofu for a complete meal.
  • Wrap It Up: Use the salad as a filling for lettuce wraps or rice paper rolls for a fun twist!

So there you have it! Everything you need to create a show-stopping Thai Crunch Salad that’s bursting with flavor and packed with nutrition. This salad is not just a meal; it’s an experience. Now grab your ingredients, unleash your inner chef, and let the crunch commence!

Thai Crunch Salad Cpk Copycat with Peanut Ginger Sauce

Prep Time 20 minutes
Cook Time 10 minutes
Total Time 30 minutes
Servings 4 servings
Calories 550
A vibrant and crunchy Thai-inspired salad featuring fresh vegetables, tender chicken, and a flavorful peanut ginger dressing.

Ingredients

Vegetables

  • 450 g Napa Cabbage, thinly sliced
  • 200 g Red Cabbage, shredded
  • 125 g Carrots, julienned
  • 75 g Edamame, shelled and steamed
  • 15 g Fresh Cilantro, chopped
  • 25 g Green Onions, sliced
  • 150 g Cucumber, diced
  • 280 g Cooked Chicken Breast, sliced (cold)

Dressing

  • 125 g Creamy Peanut Butter, natural and unsweetened
  • 45 ml Rice Vinegar, unseasoned
  • 30 ml Low-Sodium Soy Sauce or Tamari
  • 15 g Fresh Ginger, grated into a paste
  • 20 g Honey or Maple Syrup
  • 5 ml Toasted Sesame Oil
  • 30 g Crispy Wonton Strips

Garnishes

  • 35 g Peanuts, toasted and crushed

Instructions 

  • Slice the cabbages into thin ribbons and julienne the carrots; dice the cucumber.
  • Steam the edamame until vibrant green, then chill.
  • Whisk peanut butter, rice vinegar, soy sauce, ginger, honey, and sesame oil; whisk in warm water until smooth.
  • Combine vegetables, chicken, and half of the cilantro in a large bowl; toss with half of the dressing.
  • Garnish with remaining cilantro, green onions, crushed peanuts, and wonton strips before serving.

Notes

Prepare the dressing ahead of time for better flavor.
Calories: 550kcal
Cost: $15
Course: Salad
Cuisine: Thai
Keyword: Chicken, Peanut Sauce, Vegetables

Welcome to the world of Cold Spicy Peanut Sesame Noodles, where flavor meets simplicity! This dish is not just a meal; it’s a celebration of vibrant flavors and textures that will leave your taste buds dancing. Bursting with the nutty richness of peanut butter, the zing of chili garlic sauce, and a medley of fresh ingredients, this recipe is perfect for any occasion—be it a quick weeknight dinner or a laid-back lunch with friends. Let’s dive into this deliciously simple dish!

Why You’ll Love This Recipe

Here are a few reasons why this recipe will become a staple in your kitchen:

  • Quick and Easy: Ready in under 30 minutes, it’s perfect for busy weekdays or spontaneous gatherings.
  • Bold Flavors: The spicy peanut sauce combines creamy, spicy, and savory notes that excite your taste buds.
  • Versatile: Enjoy it cold as a refreshing meal or warm for those cozy nights. You can even customize it with your favorite proteins or veggies!
  • Meal Prep Friendly: Make it ahead of time and let the flavors deepen in the fridge for a meal that’s even better the next day.
  • Nutritious: Packed with wholesome ingredients, this dish brings together plant-based goodness and satisfying flavors.

Ingredients You’ll Need

Gather these ingredients for the ultimate Cold Spicy Peanut Sesame Noodles:

  • 3/4 pound dried spaghetti noodles (or Asian rice noodles for a gluten-free option)
  • 2/3 cup water
  • 1/3 cup smooth peanut butter (feel free to substitute with almond butter if you prefer)
  • 1/4 cup low sodium soy sauce
  • 1/4 cup seasoned rice vinegar
  • 3 tablespoons dark brown sugar (packed)
  • 1/4 cup roasted peanut oil
  • 2 tablespoons toasted sesame seeds (plus more for topping)
  • 3 teaspoons chili garlic sauce (adjust for spice level)
  • 1 teaspoon sesame oil
  • 1 inch piece of ginger (peeled)
  • 1 clove small of garlic
  • Fresh scallions (chopped, for topping)

How to Make Cold Spicy Peanut Sesame Noodles

Follow these simple steps to create your Cold Spicy Peanut Sesame Noodles:

Step 1: Cook the Noodles

In a large stockpot, bring water to a boil, then add spaghetti noodles. Cook according to the package instructions until al dente. Drain well and set aside.

Step 2: Prepare the Spicy Peanut Sauce

In a blender jar, combine water, peanut butter, soy sauce, rice vinegar, brown sugar, peanut oil, sesame seeds, chili garlic sauce, sesame oil, ginger, and garlic. Process until smooth and creamy. This sauce is where the magic happens!

Step 3: Toss Noodles with Sauce

In a large glass bowl, add the drained noodles. Pour the peanut sesame sauce over the noodles and toss to coat evenly. Don’t worry if it looks like too much sauce—it will thicken in the fridge!

Step 4: Chill and Serve

Cover and refrigerate for at least one hour—three is even better for maximum flavor. Toss the noodles again before serving and top with fresh scallions and extra sesame seeds for a fun crunch!

Pro Tips for Making Cold Sesame Noodles

Delicious Cold Spicy Peanut Sesame Noodles in a bowl, featuring a creamy peanut sauce and colorful toppings.

Here are some expert insights to elevate your noodle game:

  • Use high-quality peanut butter: Opt for natural, creamy peanut butter for the best flavor.
  • Adjust the spice: If you’re not a fan of heat, reduce the amount of chili garlic sauce, or add more to turn up the heat!
  • Don’t skip the chilling: Allowing the noodles to chill helps all the flavors meld together beautifully.
  • Experiment with toppings: Try adding sliced cucumbers, shredded carrots, or even grilled chicken for added texture and flavor.
  • Make it a meal: Pair your noodles with proteins like tofu, shrimp, or chicken to turn this side dish into a main course.
  • Save time: Make the sauce ahead of time and store it in the fridge for up to a week.
  • Use the right noodles: Asian rice noodles offer a gluten-free option and work beautifully with this dish.
  • Garnish generously: Fresh herbs like cilantro or basil can take your dish to the next level!

Common Mistakes and Troubleshooting

Here are some potential pitfalls and how to avoid them:

  • Noodles sticking together: Rinse the noodles under cold water after cooking to prevent sticking.
  • Too thick sauce: If your sauce is too thick, gradually add a splash of water and blend until you reach your desired consistency.
  • Overcooked noodles: Follow the package instructions closely and taste-test to ensure they’re al dente.
  • Not enough flavor: Adjust the soy sauce and vinegar to your taste—don’t be afraid to play around!

Variations to Try

Get creative with these alternative takes on Cold Spicy Peanut Sesame Noodles:

  • Vegan Delight: Use tofu or chickpeas as a protein source and keep it plant-based!
  • Crunchy Veggie Medley: Add bell peppers, snap peas, or shredded cabbage for extra crunch and nutrition.
  • Fruit Infusion: Toss in some diced mango or pineapple for a sweet twist that pairs perfectly with the spicy sauce.
  • Asian Fusion: Swap out the peanut butter for tahini for a unique flavor profile.

Storage and Make-Ahead Instructions

This dish is perfect for meal prep! Here’s how to store and enjoy it later:

  • Refrigerate: Store leftovers in an airtight container in the fridge for up to 4 days.
  • Freezing: While it’s best enjoyed fresh, you can freeze the sauce separately for up to a month. Thaw in the fridge before serving.
  • Make ahead: Prepare the sauce and noodles separately, then combine just before serving for the freshest taste.

Frequently Asked Questions

Got questions? I’ve got answers!

  • Can I use another nut butter? Absolutely! Almond butter or cashew butter can work as delicious substitutes.
  • Is it okay to eat these noodles warm? Yes, while they’re traditionally served cold, you can enjoy them warm as well!
  • How long can this stay out of the fridge? It’s best enjoyed chilled, but if left out, it should not exceed two hours for food safety.
  • Can I use another type of pasta shape? Yes! Feel free to experiment with your favorite pasta shapes, like penne or fusilli.
  • How spicy is this dish? The heat level can be adjusted based on the amount of chili garlic sauce you use—make it your own!
  • What are good toppings? Fresh scallions, crushed peanuts, and sesame seeds are all excellent choices!
  • Can I add protein? Definitely! Grilled chicken, shrimp, or tofu can make this dish heartier.
  • Is this dish gluten-free? Yes, if you use rice noodles or a gluten-free soy sauce!

Nutrition Tips and Dietary Adaptations

Looking to make your meal even healthier? Here are some tips:

  • Increase fiber: Add more vegetables to boost the fiber content.
  • Lower sugar: Reduce the amount of brown sugar in the sauce if you prefer less sweetness.
  • Boost protein: Adding grilled chicken, shrimp, or edamame can increase protein content significantly.

Equipment Recommendations

Here’s what you’ll need to whip up these delicious noodles:

  • Large stockpot: For boiling your noodles.
  • Blender: For creating the creamy peanut sauce.
  • Large glass bowl: To toss your noodles and sauce together.
  • Measuring cups and spoons: To ensure precise ingredient amounts.

Serving Suggestions

Make your meal complete with these serving ideas:

  • Pair with a fresh salad: A simple green salad with a tangy dressing complements the richness of the noodles.
  • Serve with grilled proteins: Chicken, shrimp, or tofu will add a satisfying protein boost.
  • Enjoy with a side of spring rolls: These add a fun crunch and additional flavors to your meal.

Now that you have everything you need, it’s time to get cooking! Embrace the vibrant flavors of Cold Spicy Peanut Sesame Noodles and let your culinary adventure begin. Remember, the kitchen is your playground—have fun experimenting, and let your creativity shine through!

Cold Spicy Peanut Sesame Noodles

Prep Time 10 minutes
Cook Time 10 minutes
Total Time 20 minutes
Servings 4 servings
Calories 450
A quick and flavorful cold noodle dish with a spicy peanut sesame sauce, perfect for a refreshing meal.

Ingredients

Noodles

  • 3/4 pound dried spaghetti noodles (or Asian rice noodles)
  • 2/3 cup water
  • 1/3 cup smooth peanut butter
  • 1/4 cup low sodium soy sauce
  • 1/4 cup seasoned rice vinegar
  • 3 tablespoon dark brown sugar (packed)
  • 1/4 cup roasted peanut oil
  • 2 tablespoon toasted sesame seeds (plus more for topping)
  • 3 teaspoon chili garlic sauce
  • 1 teaspoon sesame oil
  • 1 inch piece of ginger (peeled)
  • 1 clove small garlic

Fresh scallions (chopped, for topping)

Instructions 

  • Cook noodles in boiling water until al dente, then drain.
  • Blend water, peanut butter, soy sauce, rice vinegar, sugar, oils, sesame seeds, chili sauce, ginger, and garlic until smooth.
  • Mix sauce with cooked noodles, then refrigerate for at least 1 hour.
  • Before serving, toss noodles again and top with scallions and sesame seeds.

Notes

Chill the noodles thoroughly for the best flavor and texture.
Calories: 450kcal
Cost: $15
Course: Main Course
Cuisine: Asian
Keyword: Noodles

Discover the Joy of Roasted Eggplant with Chickpeas

Welcome to a flavorful journey where we celebrate the vibrant, nutritious world of roasted eggplant with chickpeas and a zesty lemon tahini sauce. This delightful dish is not only packed with flavor but also offers a plethora of health benefits, making it the perfect addition to your culinary repertoire. Whether you’re a seasoned chef or just starting out, you’ll find this eggplant recipe fun and accessible. Let’s dive into why you’ll absolutely love this dish and how it can transform your meals!

Why You’ll Love This Recipe

  • Flavor Explosion: The combination of roasted eggplant, tomatoes, and chickpeas brings together a medley of flavors that dance on your palate.
  • Nutritious Powerhouse: This dish is rich in fiber, protein, and essential vitamins, making it a wholesome choice for any meal.
  • Easy to Prepare: With just a handful of ingredients and simple steps, this recipe is perfect for busy weeknights.
  • Versatile Dish: Enjoy it warm as a main course or chilled as a refreshing salad. You can pair it with grains, greens, or pita for a complete meal.
  • Plant-Based Goodness: This recipe is entirely plant-based, making it suitable for vegans and vegetarians alike.

Ingredient Breakdown

Here’s what you’ll need to make this amazing roasted eggplant dish:

  • 1-1/2 pounds eggplant: (about 2 medium), cut into 1/2-inch dice. Choose firm, shiny eggplants for the best flavor.
  • 1 pint cherry tomatoes: Halved for sweetness. You can substitute with grape tomatoes if preferred.
  • 15 oz can of chickpeas: Drained and rinsed. For a homemade version, cook dried chickpeas until tender.
  • 2 tablespoons olive oil: Adds richness; feel free to use avocado oil for a different flavor.
  • 1 teaspoon kosher salt: To enhance the flavor of the vegetables.
  • 1/2 teaspoon black pepper: Freshly ground for the best taste.
  • 1-2 cups baby arugula: For a fresh, peppery finish.
  • 2 tablespoons chopped parsley: Adds color and a fresh taste.
  • 1/3 cup tahini: The star of our creamy sauce.
  • 1 garlic clove: Minced for a punch of flavor.
  • Juice of 1/2 lemon: Brightens up the dish.
  • Pinch of kosher salt: For the tahini sauce.
  • 3-4 tablespoons water: To achieve the desired sauce consistency.

How to Make Roasted Eggplant with Chickpeas

Colorful dish featuring diced roasted eggplant, halved cherry tomatoes, and chickpeas.

Creating this delicious dish is as easy as one, two, three! Here’s a step-by-step guide:

  1. Preheat your oven to 400 degrees F.
  2. Prepare the vegetables: On a sheet pan, toss the eggplant, cherry tomatoes, and chickpeas with olive oil, salt, and pepper. Spread them out in a single layer with the tomatoes cut side up.
  3. Roast: Place the sheet pan in the oven and roast for 25-30 minutes. You want the eggplant to be browned on the edges and tender, the tomatoes to be juicy but slightly wrinkled, and the chickpeas to be golden brown.
  4. Make the tahini sauce: In a small bowl, stir together tahini, minced garlic, lemon juice, a pinch of salt, and water. Adjust the water to get a thick yet pourable consistency.
  5. Toss it all together: Once the veggies are roasted, toss them with baby arugula and chopped parsley.
  6. Drizzle with sauce: Finish by drizzling the tahini lemon sauce over the roasted vegetables.

Pro Tips for Perfecting Your Dish

  • Use fresh ingredients: The fresher your produce, the better the flavor. Look for vibrant eggplants and ripe tomatoes.
  • Don’t overcrowd the pan: Ensure there’s enough space for air to circulate around the veggies while roasting.
  • Adjust seasonings: Feel free to experiment with spices like cumin or smoked paprika for an extra flavor kick.
  • Choose the right tahini: For the best sauce, use high-quality tahini that’s smooth and creamy.
  • Experiment with toppings: Add toasted nuts or seeds for a delightful crunch.
  • Serve warm or cold: This dish is delicious both ways, making it great for meal prep!
  • Make it gluten-free: Simply serve it on a bed of quinoa or brown rice instead of pita.
  • Prep ahead: Chop the vegetables in advance to save time on busy days.

Common Mistakes and Troubleshooting

Even the best chefs make mistakes, so here are some common pitfalls and how to avoid them:

  • Eggplant bitterness: If your eggplant tastes bitter, try salting it before cooking. Let it sit for 30 minutes, then rinse and pat dry.
  • Undercooked chickpeas: Always ensure chickpeas are drained and rinsed; if using dried, they should be fully cooked.
  • Sauce too thick: If your tahini sauce is too thick, gradually add more water until you achieve the desired consistency.
  • Overcooked vegetables: Keep an eye on your veggies and adjust cooking time as needed, especially if your oven runs hot.

Flavor Variations

Looking to change things up? Here are some fun variations to try:

  • Spicy Kick: Add a pinch of red pepper flakes or cayenne to the tahini sauce for heat.
  • Herb Infusion: Mix in fresh herbs like cilantro or basil for a different flavor profile.
  • Cheesy Twist: Sprinkle nutritional yeast or feta on top before serving for a cheesy flavor.
  • Roasted Veggie Medley: Include bell peppers or zucchini for added texture and flavor.

Storage and Make-Ahead Instructions

This dish is perfect for meal prep! Here’s how to store and reheat:

  • Storage: Keep leftovers in an airtight container in the fridge for up to 3 days.
  • Reheating: Gently reheat in the oven at 350 degrees F until warmed through, or in the microwave in short intervals.
  • Make-ahead: You can roast the vegetables and prepare the tahini sauce in advance. Just combine before serving.

Comprehensive FAQ

Here are some frequently asked questions about this recipe:

  • Can I use frozen eggplant? Yes, but fresh is recommended for the best texture.
  • Is this dish gluten-free? Absolutely! It’s naturally gluten-free as it stands.
  • Can I substitute tahini? Sunflower seed butter or Greek yogurt can be used in place of tahini.
  • How can I make this dish spicier? Add jalapeños or a dash of hot sauce to the veggies before roasting.
  • What can I serve with this dish? It pairs beautifully with quinoa, bulgur, or a fresh salad.
  • How long does it take to prepare? The total time is about 40 minutes, including prep and roasting time.
  • Can I freeze leftovers? Yes, but the texture may change after freezing and thawing.
  • What’s the best way to cut eggplant? Cut it into even, 1/2-inch cubes for uniform cooking.

Nutritional Benefits and Dietary Adaptations

This roasted eggplant dish isn’t just delicious; it’s also packed with nutrients:

  • Rich in Fiber: Both eggplant and chickpeas are excellent sources of dietary fiber, which helps with digestion.
  • High in Protein: Chickpeas provide a hearty dose of protein, making this dish satisfying and filling.
  • Low-calorie: This dish is low in calories, making it perfect for weight management.
  • Vitamins and Minerals: You’ll benefit from vitamins A, C, and K, as well as minerals like magnesium and potassium.

Essential Equipment

To make this dish, you will need:

  • Sheet Pan: For roasting the vegetables.
  • Mixing Bowl: To combine the tahini sauce ingredients.
  • Knife and Cutting Board: For chopping your veggies efficiently.

Serving Suggestions

For a complete meal, consider pairing this dish with:

  • Couscous: Fluffy and light, it complements the richness of the roasted veggies.
  • Grilled Pita: Perfect for scooping up the chickpeas and tahini sauce.
  • Fresh Salad: A simple arugula or spinach salad adds a refreshing crunch.
  • Yogurt Sauce: A dollop of Greek yogurt or a dairy-free yogurt alternative can add creaminess.

Conclusion

Transform your meals with this vibrant and nutritious roasted eggplant with chickpeas and zesty lemon tahini twist. It’s a dish that not only delights the taste buds but also nourishes the body. So roll up your sleeves, grab those ingredients, and get ready to savor the delightful flavors that await you in your kitchen. Enjoy your culinary adventure!

Roasted Eggplant with Tomatoes, Chickpeas and Lemon Tahini

Prep Time 10 minutes
Cook Time 30 minutes
Total Time 40 minutes
Servings 4 servings
Calories 350
A flavorful and healthy roasted vegetable dish topped with a creamy lemon tahini sauce, perfect for a quick vegetarian meal.

Ingredients

Vegetables

  • 1.5 pounds eggplant (about 2 medium, diced)
  • 1 pint cherry tomatoes (halved)
  • 15 ounce can chickpeas (drained and rinsed)

Sauce

  • 2 tablespoons olive oil
  • 1 teaspoon kosher salt
  • 0.5 teaspoon black pepper
  • 1/3 cup tahini
  • 1 garlic clove minced garlic
  • 0.5 lemon juice of lemon
  • 3-4 tablespoons water (to thin sauce)

Additional

  • 1-2 cups baby arugula
  • 2 tablespoons chopped parsley

Instructions 

  • Preheat oven to 400°F (200°C). Toss eggplant, tomatoes, and chickpeas with olive oil, salt, and pepper; spread on a sheet pan.
  • Roast for 25-30 minutes until vegetables are tender and browned.
  • Mix tahini, garlic, lemon juice, salt, and water to make the sauce.
  • Toss roasted vegetables with arugula and parsley, then drizzle with tahini sauce.

Notes

For a creamier sauce, blend tahini with a bit more water.
Calories: 350kcal
Cost: $15
Course: Main Course
Cuisine: Mediterranean
Keyword: Eggplant

Discover the Joy of Roasted Tomato Caprese Salad

Welcome to a flavor-packed adventure! If you’re ready to dive into the vibrant world of summer cuisine, you’ve come to the right place. This Roasted Tomato Caprese Salad is not just a dish; it’s an experience that celebrates the essence of fresh ingredients. The combination of juicy roasted tomatoes, creamy mozzarella, and fragrant basil creates a symphony of flavors that dances on your palate. So, roll up your sleeves and let’s embark on this delicious journey together!

Why You’ll Love This Recipe

This roasted tomato caprese salad isn’t just visually appealing; it’s bursting with goodness! Here are five reasons to savor every bite:

  • Flavor Explosion: The roasting process intensifies the sweetness of the tomatoes, delivering a depth of flavor that is simply irresistible.
  • Health Benefits: Packed with vitamins, antioxidants, and healthy fats, this salad is a powerhouse of nutrition that supports your wellness goals.
  • Quick & Easy: With minimal prep time and just a few simple steps, you can whip up this dish in under an hour!
  • Versatile Dish: Perfect as a side, a light lunch, or even an elegant starter at dinner parties—this salad fits any occasion.
  • Fresh Ingredients: Utilizing seasonal produce means you’re not only eating well, but you’re also supporting local farmers and enjoying peak flavor.

Ingredient Breakdown

Let’s gather the stars of our show! Here’s what you’ll need for the Roasted Tomato Caprese Salad:

  • 2 pounds ripe Roma tomatoes: Halved lengthwise for optimal roasting.
  • 4 cloves garlic: Minced to infuse the salad with aromatic flavor.
  • 1/4 cup extra virgin olive oil: A drizzle of this liquid gold enhances taste and health benefits.
  • 1 tablespoon balsamic vinegar: Adds a sweet tang that complements the tomatoes beautifully.
  • 1 teaspoon dried oregano: For an earthy undertone that balances the dish.
  • 1/2 teaspoon dried basil: A hint of this herb brings out that classic caprese flavor.
  • 1/4 teaspoon red pepper flakes (optional): Add a touch of heat to excite your taste buds.
  • Salt and freshly ground black pepper: Essential for enhancing all the flavors.
  • 1 pound fresh mozzarella cheese: Sliced into thick rounds for creamy goodness.
  • 1 cup fresh basil leaves: The fragrant herb that ties everything together.
  • 1/4 cup balsamic glaze (optional): For an elegant drizzle that elevates the dish.
  • Extra virgin olive oil (for drizzling): A finishing touch for richness.

Feel free to make substitutions based on your preferences! For instance, if you can’t find Roma tomatoes, any ripe tomato variety will do. You can also use burrata cheese for an even creamier experience!

Pro Tips for a Perfect Salad

A detailed view of roasted tomatoes and mozzarella layered with basil leaves in a salad.

To ensure your roasted tomato caprese salad is a hit, check out these pro tips:

  • Preheat the oven: Ensure your oven is hot enough to roast the tomatoes properly, achieving that slightly caramelized exterior.
  • Season generously: Don’t be shy with the salt and pepper! Proper seasoning is key to enhancing the natural flavors of the ingredients.
  • Let it rest: Allow the roasted tomatoes to cool slightly before assembling the salad; this helps retain their juiciness.
  • Mix and match: Feel free to experiment with different herbs like thyme or parsley to create your unique version.
  • Layer thoughtfully: Arrange your tomatoes and mozzarella in an alternating pattern for a beautiful presentation.
  • Drizzle wisely: Use high-quality balsamic glaze for the best flavor impact.
  • Serve fresh: This salad is best enjoyed immediately, but it can be stored in the fridge for up to a day.

Avoid Common Mistakes

Here are some common pitfalls to avoid while preparing your roasted tomato caprese salad:

  • Overcrowding the baking sheet: Give your tomatoes space to roast evenly rather than steam.
  • Using bland tomatoes: Select ripe, in-season tomatoes for maximum flavor impact.
  • Skipping the cooling step: This allows the tomatoes to retain their juices, preventing a soggy salad.
  • Not tasting before serving: Always taste and adjust seasonings right before serving to ensure optimal flavor.

Delicious Variations

Ready to mix things up? Here are four flavorful variations of the classic roasted tomato caprese salad:

  • Grilled Vegetable Caprese: Add grilled zucchini and bell peppers for an extra layer of flavor.
  • Caprese Pasta Salad: Toss the roasted ingredients with cooked pasta for a hearty twist.
  • Avocado Caprese: Incorporate ripe avocado slices for added creaminess and healthy fats.
  • Spicy Caprese: Include jalapeños or a sprinkle of chili powder for a spicy kick!

Storage and Make-Ahead Instructions

If you want to prepare this salad ahead of time, follow these guidelines:

  • Roast the tomatoes: You can roast them a day in advance and store them in an airtight container in the fridge.
  • Assemble just before serving: For the best texture and flavor, wait to assemble your salad until right before you’re ready to eat.
  • Store leftovers: If you have any leftovers, keep them in the fridge for up to 24 hours. Note that the tomatoes may lose some texture, but the flavors will still be delicious!

Frequently Asked Questions

Let’s tackle some common questions about this delightful dish:

  • Can I use other types of cheese? Yes! Burrata or feta can be great alternatives for a unique twist.
  • How can I make this salad vegan? Replace mozzarella with vegan cheese or simply omit it altogether; the salad will still be delicious!
  • What can I serve with this salad? It pairs wonderfully with grilled chicken, crusty bread, or as part of a larger antipasto platter.
  • Can I use dried herbs instead of fresh? While fresh herbs are best, you can use dried herbs—just reduce the quantity by half.
  • How do I choose the best tomatoes for roasting? Look for ripe, firm tomatoes that are slightly soft to the touch and have a rich aroma.
  • Can this salad be made in advance? Yes, you can roast the tomatoes ahead of time but assemble the salad right before serving.
  • Is this salad gluten-free? Absolutely! All ingredients are gluten-free, making it a perfect dish for those with dietary restrictions.
  • What if I don’t have balsamic glaze? You can easily make your own by reducing balsamic vinegar on the stove until it thickens, or simply use balsamic vinegar instead!

Nutritional Tips and Dietary Adaptations

This salad is not just delicious; it’s also nutrient-dense! Here are some tips to maximize its health benefits:

  • Focus on quality: Use organic tomatoes and fresh mozzarella for optimal flavor and nutrition.
  • Pair with protein: Add grilled chicken or chickpeas for a balanced meal packed with protein.
  • Mindful drizzling: While olive oil is healthy, be mindful of portion sizes to keep calories in check.
  • Explore ingredient swaps: For a low-carb version, substitute tomatoes with roasted cauliflower or zucchini.

Essential Equipment Recommendations

To make your cooking experience smooth and enjoyable, here are some essential tools:

  • Sharp knife: For easy and precise slicing of tomatoes and mozzarella.
  • Baking sheet: A sturdy sheet for roasting the tomatoes evenly.
  • Parchment paper: To prevent sticking and make cleanup a breeze.
  • Mixing bowl: A large bowl to toss the ingredients together before roasting.

Serving Suggestions

Now that your roasted tomato caprese salad is ready, let’s talk about how to serve it:

  • Chic Platter: Arrange the salad beautifully on a large platter for a stunning centerpiece.
  • Individual Plates: Serve in individual portions for an elegant touch at dinner parties.
  • Grilled Accompaniments: Pair with grilled meats or fish for a complete meal.
  • Rustic Bread: Serve with crusty bread for scooping up the delicious juices.

Conclusion: Celebrate Flavor with Every Bite!

Your journey to enjoying the perfect Roasted Tomato Caprese Salad doesn’t have to end here. This dish embodies everything that healthy cooking should be—exciting, vibrant, and full of life! Whether it’s a summer BBQ or a cozy dinner at home, this salad is sure to impress. So grab your ingredients, unleash your culinary creativity, and celebrate the joy of cooking with this delightful recipe. Happy cooking!

Roasted Tomato Caprese Salad: A Delicious & Easy Recipe

Prep Time 15 minutes
Cook Time 50 minutes
Total Time 1 hour 5 minutes
Servings 4 servings
Calories 250
This vibrant salad combines roasted tomatoes, fresh mozzarella, and basil for a flavorful, easy-to-make dish perfect for any occasion.

Ingredients

Vegetables and Herbs

  • 2 pounds ripe Roma tomatoes (halved lengthwise)
  • 4 cloves garlic (minced)
  • 1/4 cup extra virgin olive oil
  • 1 tablespoon balsamic vinegar
  • 1 teaspoon dried oregano
  • 1/2 teaspoon dried basil
  • 1/4 teaspoon red pepper flakes (optional)
  • to taste Salt and freshly ground black pepper
  • 1 pound fresh mozzarella cheese (sliced into 1/4-inch thick rounds)
  • 1 cup fresh basil leaves
  • 1/4 cup balsamic glaze (optional, for drizzling)
  • for drizzling Extra virgin olive oil (for drizzling)
  • to taste Salt and freshly ground black pepper

Instructions 

  • Preheat oven to 400°F (200°C). Halve the tomatoes and toss with garlic, olive oil, balsamic vinegar, oregano, basil, red pepper flakes, salt, and pepper.
  • Spread tomatoes on a parchment-lined baking sheet and roast for 45-60 minutes until caramelized.
  • Let cool slightly, then arrange roasted tomatoes, mozzarella slices, and basil on a platter.
  • Drizzle with olive oil and balsamic glaze (if using). Season with salt and pepper to taste. Serve immediately.

Notes

For extra flavor, let the roasted tomatoes sit for 10 minutes before assembling.
Calories: 250kcal
Cost: $15
Course: Salad
Cuisine: Italian
Keyword: Basil, Mozzarella, tomato

Discover the Creamy Garlic Roasted Potato Salad That Will Rock Your Taste Buds!

Welcome to a flavor-packed journey with our Creamy Garlic Roasted Potato Salad! This dish is not just another potato salad; it’s an explosion of taste that will keep your guests coming back for more. Perfect for summer picnics, holiday gatherings, or just a cozy dinner at home, this recipe combines roasted potatoes, zesty garlic, and a creamy mayo twist. Get ready to elevate your salad game and make healthy eating exciting!

Why You’ll Love This Recipe

  • Flavor Explosion: The blend of roasted garlic and creamy mayo creates a delightful taste that surprises and satisfies.
  • Versatile Dish: Perfect as a side for barbecues, picnics, or even as a main dish for a light lunch.
  • Healthy Ingredients: Made with wholesome potatoes, fresh herbs, and healthy fats without compromising on taste.
  • Make-Ahead Friendly: Prepare it in advance and let the flavors meld together in the fridge, making it a stress-free option.
  • Kid-Approved: Even the picky eaters will love this dish—it’s a hit with kids and adults alike!

Ingredient Breakdown

Let’s dive into what you need to create this creamy masterpiece:

  • Potatoes: Use 1 bag (approximately 2 pounds) of assorted small-medium potatoes for the best texture. You can opt for a mix of white and purple potatoes for a vibrant look.
  • Olive Oil: About 2-3 tablespoons of extra virgin olive oil adds richness, but feel free to use avocado oil if you prefer—it’s a great substitute.
  • Garlic: You’ll need 2 cloves, minced and mashed. Roasting the garlic infuses the salad with a wonderful flavor.
  • Seasonings: Black pepper, sea salt, and 1-2 teaspoons of sumac will enhance the dish’s profile.
  • Mayo: 3-4 tablespoons of avocado oil mayo or full-fat REAL mayo gives the salad its creaminess. Choose according to your dietary preference.
  • Herbs: Fresh chopped chives (about 1/3 cup) add a refreshing bite; you can also use dill for a twist.

Step-by-Step Instructions

Side view of a bowl filled with creamy potato salad featuring fresh chives.

Ready to get cooking? Here’s how to whip up this delicious salad:

  1. Preheat your oven to 400°F (200°C) and line two baking trays with parchment paper.
  2. Cut the mini potatoes into halves and then quarters (like a cross) to ensure even roasting.
  3. In a mixing bowl, toss the diced potatoes with olive oil, sumac, sea salt, and black pepper until well coated.
  4. Spread the potatoes in a single layer on the prepared baking sheets and roast for about 25-35 minutes or until golden brown and crispy.
  5. Once roasted, allow the potatoes to cool slightly. Taste one and adjust seasonings as needed.
  6. In a separate bowl, mix the mayo with the minced garlic until smooth, then fold into the potatoes gently.
  7. Top with fresh chives or dill for a burst of flavor.
  8. Chill in the refrigerator for at least 30 minutes before serving—this salad gets even better when cold!

Pro Tips for Perfection

  • Choose the Right Potatoes: Baby potatoes are ideal for their creamy texture. Avoid starchy varieties like Russets.
  • Don’t Rush the Roasting: Give your potatoes enough time to develop a crispy exterior. Keep an eye on them to prevent burning.
  • Fresh Herbs Matter: For the best flavor, use fresh herbs instead of dried. They brighten up the dish!
  • Adjust the Creaminess: If you prefer a lighter salad, reduce the mayo or substitute with Greek yogurt.
  • Mix and Match: Feel free to add in other ingredients like diced bell peppers or crispy bacon bits for extra flavor.
  • Season with Care: Always taste before serving. Adjust salt and pepper according to your preference.
  • Store Properly: Keep leftovers in an airtight container in the fridge for up to 3-4 days.

Common Mistakes and Troubleshooting

Even the best chefs encounter hiccups! Here’s how to avoid common pitfalls:

  • Overcrowding the Pan: Make sure to spread potatoes out on the baking sheet. Overcrowding can lead to steaming rather than roasting.
  • Burnt Garlic: If your garlic turns bitter, cook it at a lower temperature or add it later in the roasting process.
  • Too Much Mayo: If your salad feels too heavy, balance it with a splash of lemon juice or vinegar for acidity.

Delicious Variations

Spice up your salad experience with these creative twists:

  • Herbed Garlic Potato Salad: Add a mix of fresh herbs like parsley, basil, and dill for a Mediterranean flair.
  • Spicy Roasted Potato Salad: Incorporate diced jalapeños or a pinch of cayenne pepper for a kick.
  • Cheesy Garlic Potato Salad: Mix in crumbled feta or shredded cheddar for an indulgent touch.
  • Vegan Delight: Use vegan mayo and toss in some roasted chickpeas for added protein.

Storage and Make-Ahead Instructions

Planning ahead? Here’s how to store and prepare:

  • Make Ahead: Prepare the salad a day in advance. The flavors will deepen, making it even tastier!
  • Storage: Store in an airtight container in the refrigerator for 2-4 days. This dish is perfect for meal prep!

Frequently Asked Questions

  • Can I make this roasted garlic potato salad ahead of time? Absolutely! It tastes even better the next day as the flavors meld.
  • How long does this garlic potato salad keep? It will stay fresh for about 2-4 days in the refrigerator.
  • Can I use different types of potatoes? Yes! Feel free to mix and match. Just ensure they are similar in size for even cooking.
  • What if my garlic burns? If the garlic burns, it can ruin the dish. Try roasting at a lower temperature or add it later.
  • Is this salad gluten-free? Yes, all the ingredients are naturally gluten-free!
  • What can I serve this salad with? It’s fantastic with grilled meats, sandwiches, or as part of a buffet spread.
  • Can I make it dairy-free? Yes! Use vegan mayo and omit any cheese for a dairy-free option.
  • How do I make this salad spicier? Add diced jalapeños or a dash of hot sauce to kick up the heat!

Nutritional Tips and Dietary Adaptations

Looking to make this salad fit your dietary needs? Here are some tips:

  • Low-Calorie Option: Substitute mayo with Greek yogurt or increase the amount of veggies.
  • Low-Carb Version: Try using cauliflower in place of potatoes for a lighter version.
  • High-Protein Addition: Toss in some cooked quinoa or chickpeas to boost protein levels.

Equipment Recommendations

Here are the tools you’ll need for this recipe:

  • Baking Sheets: For roasting the potatoes evenly.
  • Parchment Paper: To prevent sticking and make cleanup a breeze.
  • Mixing Bowls: For tossing the potatoes and mixing the dressing.
  • Spatula: To help with tossing and serving.

Serving Suggestions

Make your meal complete with these pairing ideas:

  • Grilled Chicken or Fish: The richness of the salad complements grilled meats beautifully.
  • Sandwiches: Serve alongside your favorite deli sandwiches for a delightful lunch.
  • Picnic Platters: This salad is a must-have for any outdoor gathering or picnic.

In conclusion, our Creamy Garlic Roasted Potato Salad is not just a dish; it’s a celebration of flavors that makes healthy eating enjoyable! With its creamy texture, zesty garlic notes, and endless adaptability, it’s bound to become a staple in your kitchen. So gather your ingredients, gather your friends, and let’s make some magic happen in the kitchen!

Creamy Garlic Roasted Potato Salad

Prep Time 10 minutes
Cook Time 30 minutes
Total Time 40 minutes
Servings 4 servings
Calories 250
A flavorful and creamy potato salad featuring roasted little potatoes, garlic, and fresh chives, perfect served cold.

Ingredients

Potatoes

  • 2 pounds assorted little potatoes or white and purple potatoes (roughly 2 pounds)
  • 2-3 tablespoons extra virgin olive oil
  • 2 cloves garlic cloves (minced and mashed)
  • to taste black pepper & sea salt
  • 1-2 teaspoons sumac
  • 3-4 tablespoons avocado oil mayo or full-fat mayo
  • 1/3 cup fresh chopped chives

Instructions 

  • Preheat oven to 400°F (200°C). Line baking trays with parchment.
  • Cut potatoes into halves and quarters, toss with olive oil, sumac, salt, and pepper.
  • Roast for 25-35 minutes until golden and tender. Cool slightly.
  • Mix mayo with minced garlic, then toss with cooled potatoes.
  • Top with chopped chives and refrigerate before serving.

Notes

This salad tastes best when served cold and can be stored in the refrigerator for 2-4 days.
Calories: 250kcal
Cost: $15
Course: Side Dish
Keyword: Potatoes