Author

Ryan

Browsing

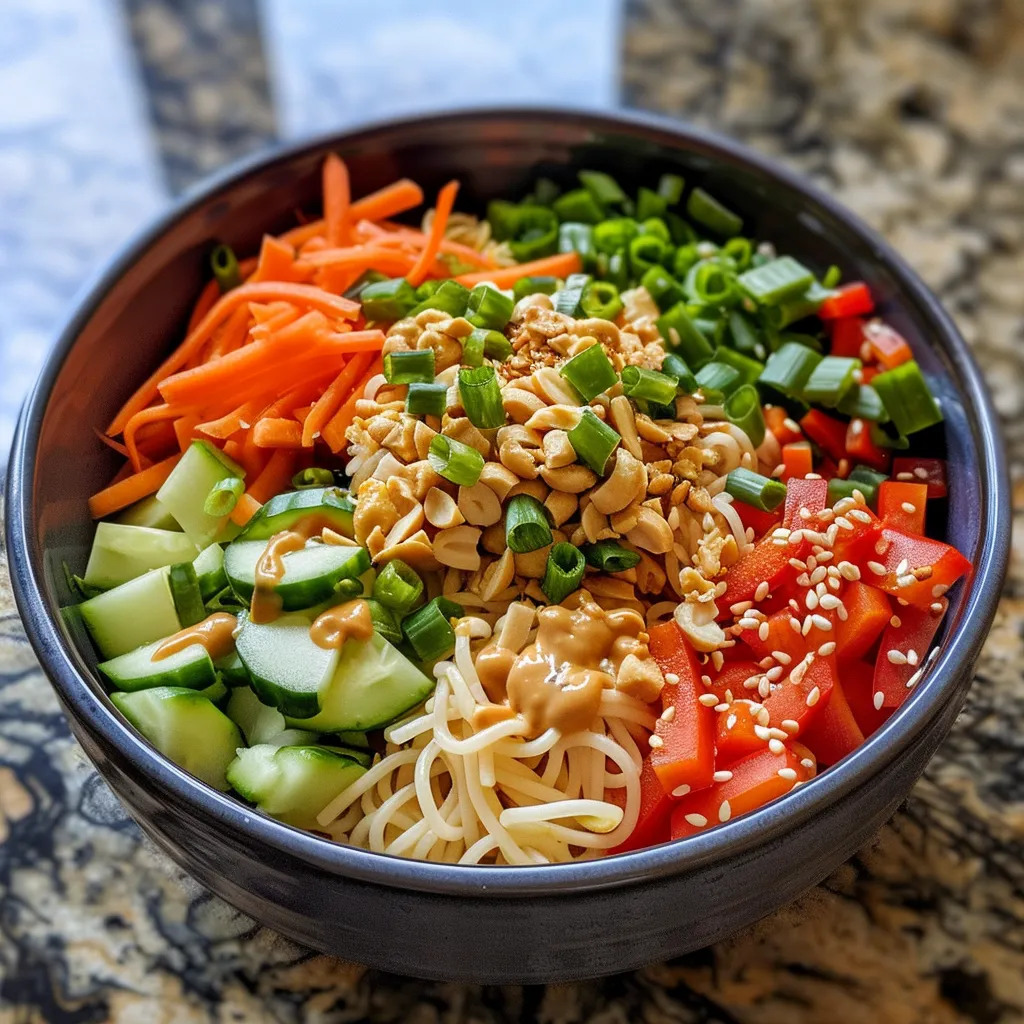
Get Ready to Dive into Flavor: Your Ultimate Guide to Peanut Noodle Pasta Salad!

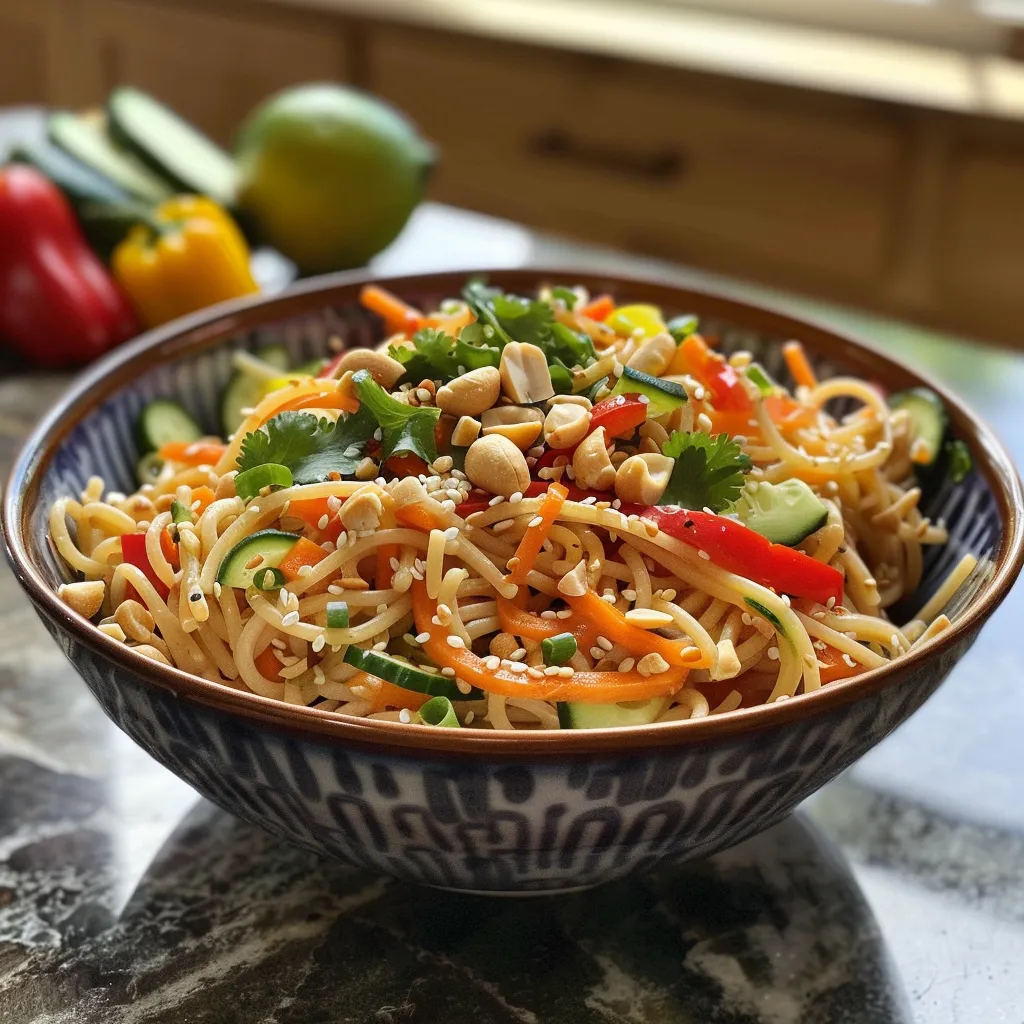
Welcome to a whirlwind of flavor with this Peanut Noodle Pasta Salad! This dish is not just a meal; it’s an adventure in every bite. With creamy peanut butter, vibrant veggies, and a zesty sauce, this recipe transforms simple ingredients into a culinary masterpiece. It’s perfect for meal prep, quick lunches, or a delightful dinner that will impress your guests. Let’s embark on this tasty journey together as we explore why this pasta salad deserves a spot in your kitchen!

Why You’ll Love This Recipe

Here are five delicious reasons to whip up this Peanut Noodle Pasta Salad:

  • Quick and Easy: This recipe comes together in under 30 minutes, making it a fantastic option for busy weeknights or last-minute gatherings.
  • Nutritious and Filling: Packed with fresh veggies and whole grains, this salad is not only satisfying but also loaded with essential nutrients.
  • Customizable: Feel free to adapt this recipe with your favorite vegetables or proteins, ensuring it suits your taste and dietary needs.
  • Meal Prep Friendly: This salad keeps well in the fridge, making it a perfect candidate for make-ahead meals that are ready when you are!
  • Flavor Explosion: The combination of creamy peanut sauce, crunchy veggies, and fresh herbs creates a delightful medley of flavors that will excite your palate.

Ingredient Breakdown

Let’s dive into the ingredients that make this Peanut Noodle Pasta Salad a standout dish:

  • Creamy Peanut Butter: This is the star of our sauce! Opt for natural peanut butter for a healthier choice.
  • Soy Sauce: Adds umami and depth to the dressing. Use low-sodium soy sauce for a healthier twist.
  • Rice Vinegar: This gives a tangy kick to the sauce. You can substitute it with apple cider vinegar in a pinch.
  • Sesame Oil: A little goes a long way in enhancing the flavor. If you’re allergic, try olive oil instead.
  • Sriracha: For a spicy kick! Adjust the amount based on your heat preference.
  • Fresh Ginger and Garlic: These aromatics bring freshness and zest to the dish.
  • Whole Grain Linguine: A nutritious base that holds the sauce beautifully. Feel free to use gluten-free pasta if needed.
  • Shredded Veggies: Carrots, cucumbers, and bell peppers add crunch and color. Mix and match according to your preference!
  • Fresh Herbs: Cilantro adds a burst of flavor and freshness. If you’re not a fan, swap it with parsley.
  • Chopped Peanuts: For garnish and extra crunch! You can also use cashews or sunflower seeds as alternatives.

Pro Tips for the Perfect Peanut Noodle Pasta Salad

Juicy peanut noodle pasta salad with shredded carrots, cucumbers, and bell peppers.

To ensure your salad turns out deliciously every time, here are some expert insights:

  • Perfect Texture: Rinse your cooked pasta under cold water to cool it down and prevent it from clumping together.
  • Balanced Sauce: Adjust the peanut sauce to your taste—add more vinegar for tang or more peanut butter for creaminess.
  • Chill Time: Allow the salad to chill in the fridge for at least an hour before serving to let the flavors meld beautifully.
  • Fresh Veggies: Use the freshest produce you can find for maximum flavor and crunch.
  • Batch Cooking: Make a larger batch for easy leftovers. It makes for a great quick lunch option!
  • Garnishing: Add the peanuts and cilantro just before serving to keep them crunchy and fresh.
  • Vegetarian Protein: Consider adding edamame or tofu for an extra protein boost if you want to make it heartier.
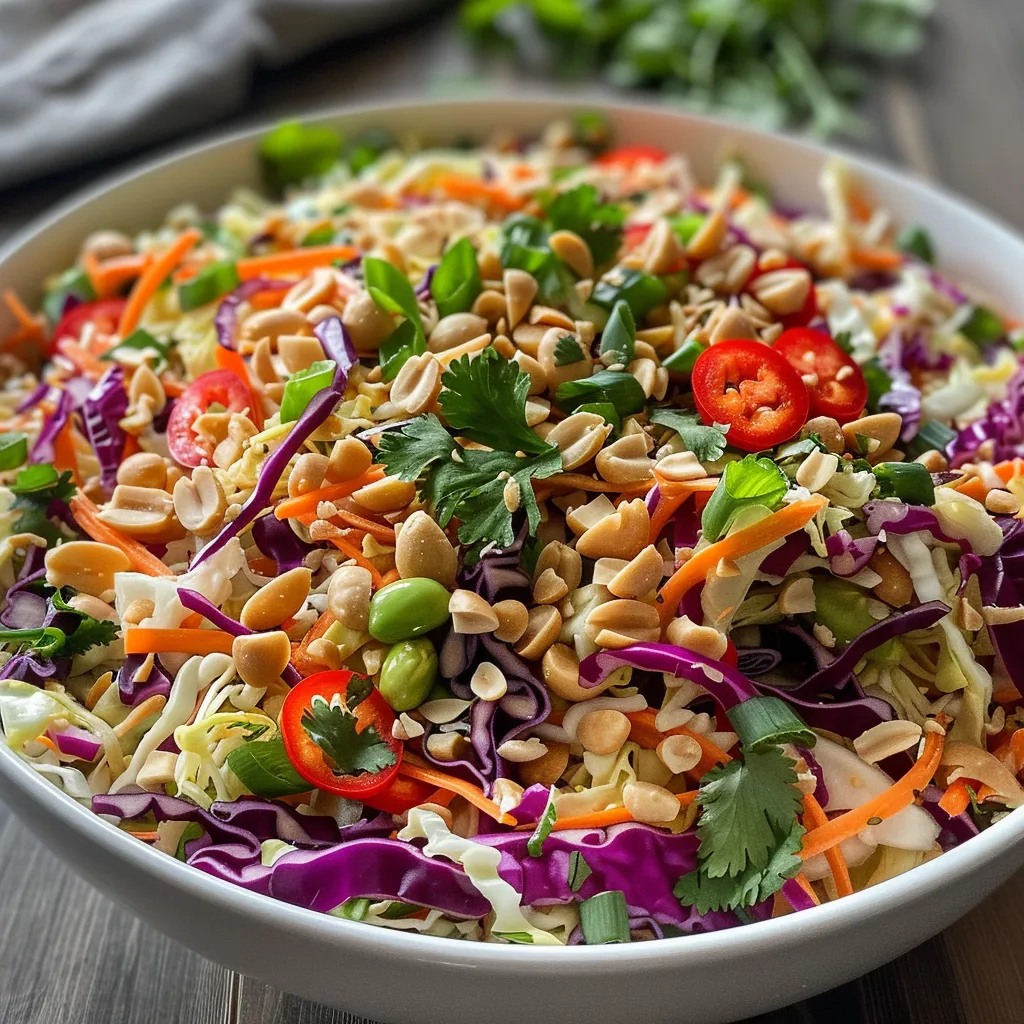
  • Mix It Up: Experiment with different veggies like shredded cabbage or snap peas for added texture and nutrients.

Common Mistakes and Troubleshooting

Even the best chefs make mistakes! Here’s how to avoid common pitfalls:

  • Overcooking Pasta: Keep an eye on the cooking time. You want it al dente, so it holds up well in the salad.
  • Too Thick Sauce: If your peanut sauce is too thick, thin it out with a bit of water or vegetable broth until it reaches your desired consistency.
  • Not Enough Flavor: Taste as you go! Adjust seasoning with extra soy sauce or a splash of vinegar to suit your palate.
  • Skipping the Chill: Don’t skip the chilling step! It’s crucial for developing flavor.

Delicious Variations

Mix things up with these creative twists on the classic recipe:

  • Thai Peanut Chicken Noodle Salad: Add grilled chicken for a protein-packed version that’s both filling and flavorful.
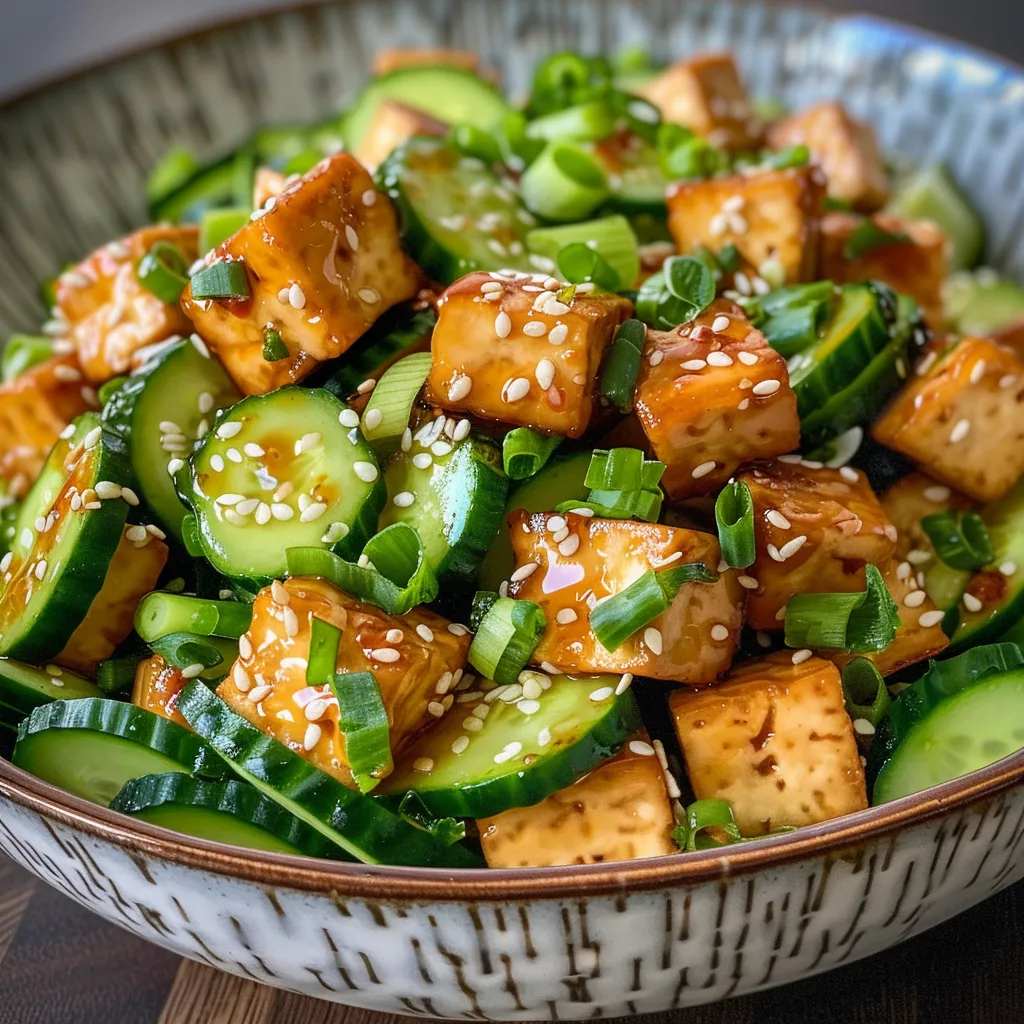
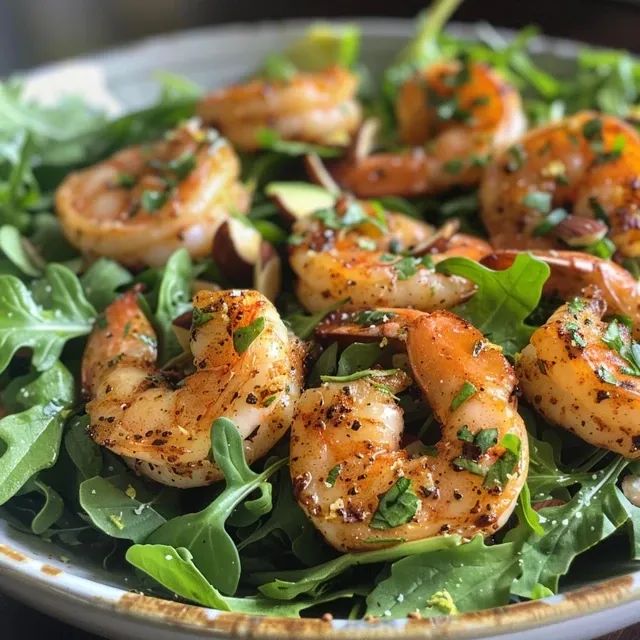
  • Spicy Shrimp Peanut Noodles: Toss in sautéed shrimp for a seafood twist that complements the creamy sauce.
  • Vegetable-Only Delight: Make it fully plant-based by loading it up with extra veggies like bell peppers, carrots, and broccoli.
  • Asian Zucchini Noodles: Swap traditional noodles for spiralized zucchini for a low-carb, fresh alternative.

Storage and Make-Ahead Instructions

Planning to enjoy this salad later? Here’s how to store it:

  • Refrigeration: Store leftovers in an airtight container in the fridge for up to 4 days.
  • Make-Ahead: Prepare the salad up to one day in advance. Just hold off on adding the peanuts and herbs until you’re ready to serve!

Comprehensive FAQ

Got questions? We’ve got answers!

  • Can I use a different type of pasta? Absolutely! Feel free to use any pasta shape you love, including gluten-free options.
  • How can I make this dish spicier? Add more Sriracha or a pinch of red pepper flakes to amp up the heat!
  • What if I have nut allergies? Substitute the peanut butter with sunflower seed butter or tahini for a nut-free option.
  • Is this salad vegan? Yes, as long as you use a vegan-friendly soy sauce and ensure other ingredients are plant-based.
  • Can I freeze this salad? It’s best enjoyed fresh, but you can freeze the peanut sauce separately for later use.
  • How do I make it gluten-free? Use gluten-free pasta and ensure your soy sauce is gluten-free.
  • What vegetables can I add? Get creative! Snow peas, broccoli, or even snap peas would make great additions.
  • How long does it take to prepare? From start to finish, you can have this salad ready in about 30 minutes!

Nutrition Tips and Dietary Adaptations

This salad isn’t just delicious; it’s a nutritious powerhouse! Here are some tips to enhance its health benefits:

  • Whole Grains: Using whole grain pasta boosts fiber content, making it a heart-healthy choice.
  • Fresh Produce: Load it with colorful veggies to maximize vitamins, minerals, and antioxidants.
  • Protein Options: Incorporate lean proteins like chicken, shrimp, or tofu for a balanced meal.
  • Healthy Fats: The peanut butter provides healthy fats that are essential for a well-rounded diet.

Equipment Recommendations

To create this Peanut Noodle Pasta Salad, you’ll need a few essential kitchen tools:

  • Large Pot: For boiling pasta. A heavy-bottomed pot works best to maintain even heat.
  • Medium Mixing Bowl: Ideal for whisking together your peanut sauce ingredients.
  • Whisk: For blending the sauce until smooth and creamy.
  • Cutting Board and Knife: Essential for chopping veggies and herbs to your desired size.
  • Colander: For draining and rinsing your cooked pasta.

Serving Suggestions

Ready to serve? Here are some ideas to elevate your meal:

  • Garnish: Top with extra peanuts and fresh cilantro for a beautiful presentation.
  • Pair with Protein: Serve alongside grilled chicken or shrimp for a complete meal.
  • Enjoy as a Side Dish: This salad pairs wonderfully with grilled meats or as part of a potluck spread.
  • Serve Cold or Room Temperature: It’s delicious either way, making it perfect for picnics or BBQs!

Now you’ve got everything you need to create an unforgettable Peanut Noodle Pasta Salad that’s bursting with flavor and nutrition. So grab your ingredients and let’s get cooking! You’ll impress yourself and anyone lucky enough to share this vibrant dish with you!

Peanut Noodle Pasta Salad Recipe by Tasty

Prep Time 15 minutes
Cook Time 10 minutes
Total Time 25 minutes
Servings 4 servings
Calories 450
A vibrant and flavorful cold noodle salad packed with fresh vegetables and a creamy peanut sauce, perfect for a quick lunch or picnic.

Ingredients

Sauce

  • ½ cup creamy peanut butter
  • ¼ cup soy sauce
  • ¼ cup rice vinegar
  • 1 tablespoon sesame oil
  • 2 tablespoons Sriracha
  • ¼ cup water
  • 1 tablespoon minced fresh ginger
  • 3 cloves garlic, minced
  • 2 tablespoons brown sugar

Pasta and Vegetables

  • 1 box whole grain linguine, or pasta of choice
  • 1 cup shredded carrots
  • 2 cucumbers shaved into ribbons with a vegetable peeler
  • 1 red bell pepper seeded and thinly sliced into strips
  • 1 yellow bell pepper seeded and thinly sliced into strips
  • 3 green onions sliced
  • ¼ cup chopped fresh cilantro
  • ¼ cup chopped peanuts

Instructions 

  • Whisk together all sauce ingredients in a bowl.
  • Cook pasta in salted boiling water until al dente, then drain and rinse with cold water.
  • Combine cooked pasta with vegetables, pour sauce over, and toss to coat. Chill for at least 1 hour.
  • Before serving, garnish with cilantro and chopped peanuts.

Notes

For best flavor, let the salad chill for at least 1 hour before serving.
Calories: 450kcal
Cost: $15
Course: Salad
Cuisine: Asian
Keyword: pasta, peanut, Salad

Welcome to a Flavor-Packed Adventure!

Dive into a vibrant world of flavors with our Roasted Veggie Chickpea Pesto Quinoa Salad! This recipe combines hearty roasted vegetables, protein-rich chickpeas, and a zesty homemade pesto for a nourishing meal that’s as fun to make as it is to eat. Perfect for meal prep or a quick dinner, it’s a colorful dish that will energize your day! With a delightful mix of textures and flavors, you’re about to discover why this quinoa salad is a must-try!

Why You’ll Love This Recipe

  • Quick and Easy: This salad can be prepared in just 45 minutes, making it perfect for busy weekdays.
  • Nutritious Powerhouse: Packed with protein from chickpeas and vitamins from colorful veggies, it supports a healthy lifestyle.
  • Meal Prep Friendly: The quinoa salad keeps well in the fridge, making it an ideal option for meal prep.
  • Customizable: You can easily swap out the veggies or make it nut-free, depending on your dietary needs!
  • Delicious Flavor Combination: The mix of roasted veggies and homemade pesto creates a flavor explosion that will keep you coming back for more.

Ingredient Breakdown

Let’s break down what you’ll need for this colorful quinoa salad:

  • For the roasted veggies & chickpeas:
    • 1 red onion, cut into chunks
    • 1 red bell pepper, cut into chunks
    • 1 medium sweet potato, cut into 1/2 inch cubes
    • 8 ounces baby bella mushrooms, sliced
    • 1 (15 ounce) can chickpeas, drained and rinsed
    • 2 tablespoons olive oil
    • 1 teaspoon garlic powder
    • ½ teaspoon dried oregano
    • ½ teaspoon salt
    • Freshly ground black pepper
  • For the quinoa:
    • ½ cup uncooked quinoa
    • 1 cup water
  • For the pesto:
    • 1 cup fresh basil leaves
    • ⅓ cup roasted or raw cashews (or substitute with roasted sunflower seeds or pumpkin seeds for nut-free)
    • 2 tablespoons olive oil or avocado oil
    • ½ lemon, juiced
    • 1 clove garlic
    • ¼ teaspoon salt, plus more to taste
    • 1-2 tablespoons water, to thin pesto as necessary

Step-by-Step Instructions

Close-up view of a healthy quinoa salad featuring roasted vegetables and a creamy green pesto.

Ready to get cooking? Let’s walk through the process together!

  • Preheat your oven: Set it to 400°F (200°C) and line a large baking sheet with parchment paper.
  • Prepare the veggies: Place the chopped veggies and chickpeas on the parchment paper, drizzle with 2 tablespoons of olive oil, and sprinkle on garlic powder, dried oregano, salt, and pepper. Toss gently and spread evenly.
  • Roast the veggies: Bake for 20-25 minutes, flipping halfway through until tender and caramelized.
  • Cook the quinoa: In a medium pot, combine quinoa and water. Bring to a boil, cover, reduce heat, and simmer for 15 minutes. Remove from heat and fluff with a fork.
  • Make the pesto: In a food processor, blend basil, cashews, oil, lemon juice, garlic, and salt until smooth. Adjust with water if needed.
  • Combine: Once the veggies are done, add them to the quinoa bowl and fold in the pesto. Enjoy warm or cold!

Pro Tips for Perfecting Your Salad

  • Perfectly Fluffy Quinoa: Rinse quinoa under cold water before cooking to remove bitterness. This ensures a light and fluffy texture.
  • Even Roasting: Cut all vegetables into uniform pieces to promote even cooking and browning.
  • Crispy Chickpeas: Pat chickpeas dry before roasting to enhance their crispiness.
  • Freshness Matters: Use fresh basil for the pesto to achieve a vibrant flavor that enhances the entire dish.
  • Make Ahead: Prepare the salad in advance and store in an airtight container for up to 4 days.
  • Heat It Up: For a warm salad, serve immediately after mixing in the pesto.
  • Visual Appeal: Use a variety of colorful veggies for a salad that’s as beautiful as it is delicious!
  • Adjust the Flavor: Taste and adjust the pesto seasoning with more lemon juice or salt to suit your palate.

Common Mistakes and Troubleshooting

Even the best chefs make mistakes! Here are some common pitfalls and how to avoid them:

  • Overcooked Quinoa: If your quinoa is mushy, ensure you’re measuring water accurately and avoid overcooking.
  • Veggies Too Soft: If your veggies are soggy, try a higher oven temperature or roasting them for less time.
  • Pesto Too Thick: If your pesto is thick, gradually add water until you reach the desired consistency.
  • Flavorless Salad: Always taste as you go! Adjust seasoning in both the quinoa and the pesto to keep flavors vibrant.

Delicious Variations

Feel free to get creative! Here are some fun variations:

  • Switch Up the Greens: Try arugula or spinach instead of basil for a different pesto flavor.
  • Alternate Proteins: Add grilled chicken or tofu for an extra protein boost.
  • Seasonal Veggies: Incorporate seasonal vegetables like zucchini in summer or roasted Brussels sprouts in winter.
  • Spicy Kick: Add red pepper flakes or jalapeños to the pesto for a spicy twist!

Storage and Make-Ahead Instructions

This quinoa salad is perfect for make-ahead meals. Here’s how to store it:

  • Refrigerate: Store in an airtight container for up to 4 days in the fridge.
  • Freezing: While the pesto can be frozen, it’s best to keep the quinoa and veggies fresh for the best texture.
  • Reheating: If desired, reheat in the microwave for 1-2 minutes, just until warmed through.

Frequently Asked Questions

  • Can I use store-bought pesto? Absolutely! For a quicker option, store-bought pesto works just fine.
  • What can I substitute for chickpeas? White beans or lentils make great alternatives!
  • Is this salad gluten-free? Yes, quinoa is naturally gluten-free, making this salad a safe choice for those with gluten sensitivities.
  • How can I make this salad vegan? This recipe is already vegan-friendly as it contains no animal products.
  • Can I add cheese? For a non-vegan option, crumbled feta or goat cheese would add a creamy texture.
  • How do I make it nut-free? Substitute cashews with sunflower or pumpkin seeds in the pesto.
  • What’s the best way to serve this salad? Serve it as a main dish, side dish, or even a potluck contribution!
  • Can I eat it cold? Yes! This salad tastes great chilled, making it perfect for meal prep.

Nutritional Tips and Dietary Adaptations

This Roasted Veggie Chickpea Pesto Quinoa Salad is not only delicious but also nutritionally balanced. Here are some tips:

  • Protein Boost: Adding nuts or seeds can enhance the protein content.
  • Fresh Herbs: Adding fresh herbs to the salad increases nutrient density and flavor.
  • Fiber-Rich: The combination of quinoa, veggies, and chickpeas provides a hearty dose of fiber, promoting digestive health.

Equipment Recommendations

To whip up this delicious salad, you’ll need:

  • Medium Pot: For cooking quinoa.
  • Large Baking Sheet: For roasting vegetables and chickpeas.
  • Food Processor: Essential for blending the pesto smoothly.
  • Mixing Bowl: To combine all salad components.

Serving Suggestions

This salad can be served in various ways:

  • As a Main Dish: Perfect for lunch or dinner, this salad can stand alone as a filling meal.
  • As a Side Dish: Pair it with grilled meats or fish for a well-rounded meal.
  • In Wraps: Use the salad as a filling for wraps or sandwiches!

Conclusion

Making this Roasted Veggie Chickpea Pesto Quinoa Salad not only brings a burst of flavor to your table but also supports a healthy, balanced lifestyle. Whether you’re cooking for yourself or entertaining guests, this dish is sure to impress. So roll up your sleeves, embrace the joy of cooking, and let your kitchen be your playground!

Roasted Veggie, Chickpea & Pesto Quinoa Salad

Prep Time 15 minutes
Cook Time 25 minutes
Total Time 40 minutes
Servings 4 servings
Calories 450
A vibrant and nutritious salad combining roasted vegetables, chickpeas, fluffy quinoa, and fresh basil pesto for a delicious and healthy meal.

Ingredients

For the roasted veggies & chickpeas

  • 1 piece red onion, cut into chunks
  • 1 piece red bell pepper, cut into chunks
  • 1 medium sweet potato, cut into 1/2 inch cubes
  • 8 ounces baby bella mushrooms, sliced
  • 1 15 ounce can chickpeas, drained and rinsed
  • 2 tablespoons olive oil
  • 1 teaspoon garlic powder
  • ½ teaspoon dried oregano
  • ½ teaspoon salt
  • to taste Freshly ground black pepper

For the quinoa

  • ½ cup uncooked quinoa
  • 1 cup water

For the pesto

  • 1 cup fresh basil leaves
  • cup roasted or raw cashews (or sunflower/pumpkin seeds for nut free)
  • 2 tablespoons olive oil or avocado oil
  • ½ lemon juiced
  • 1 clove garlic
  • ¼ teaspoon salt
  • 1-2 tablespoons water, to thin pesto

Instructions 

  • Preheat oven to 400°F (200°C). Line a baking sheet with parchment and arrange chopped veggies and chickpeas.
  • Toss veggies with 2 tbsp olive oil, garlic powder, oregano, salt, and pepper. Roast for 20-25 minutes, flipping halfway.
  • Cook quinoa: combine with water, bring to boil, cover, and simmer for 15 minutes. Fluff and transfer to a bowl.
  • Make pesto: blend basil, cashews, oil, lemon juice, garlic, and salt until smooth, adding water to thin if needed.
  • Combine roasted veggies with quinoa, fold in pesto, and serve warm or cold.

Notes

You can store leftovers in an airtight container for up to 2 days. For a nut-free version, substitute seeds in the pesto.
Calories: 450kcal
Cost: $15
Course: Salad
Cuisine: international
Keyword: Pesto, Quinoa, Vegetables

Welcome to a world where healthy meets delicious! Today, we’re diving into a vibrant and refreshing dish that’s not just a salad but a celebration of flavors: the Bright and Crunchy Crispy Tofu Salad. Bursting with fresh ingredients and packed with nutrients, this crispy tofu salad will become your go-to for quick meals that don’t compromise on taste. Whether you’re a meal-prepping pro or just looking for a quick, satisfying lunch, this recipe has got you covered!

As we explore this delightful dish, you’ll learn why crispy tofu is the showstopper of this salad, how to perfectly balance flavors, and tips for making this recipe your own. So put on your chef’s hat and let’s get cooking!

Why You’ll Love This Recipe

  • Quick and Easy: With minimal prep and cooking time, you can whip up this salad in under 30 minutes!
  • Flavor Explosion: The combination of crispy tofu, fresh cucumbers, and a zesty dressing will tantalize your taste buds.
  • Nutritious and Filling: Packed with protein from the tofu and vitamins from the cucumbers, this salad is both satisfying and nourishing.
  • Customizable: Easily adjust the ingredients to suit your dietary preferences or whatever you have on hand.
  • Perfect for Meal Prep: This salad stores well, making it ideal for lunches throughout the week.

Ingredients Breakdown

Here’s what you’ll need to create this delightful crispy tofu salad:

  • 2 large English cucumbers: Thinly sliced for that refreshing crunch.
  • 14 oz Firm tofu: Diced into cubes for the crispy texture that takes center stage.
  • 2 tbsp Sesame oil: Adds a rich, nutty flavor to the dressing.
  • 2 tbsp Rice vinegar: Balances the richness of the oil with a bright, tangy note.
  • 2 tbsp Low-sodium soy sauce: Provides umami and saltiness without overwhelming the dish.
  • 1 tbsp Honey: A touch of sweetness to round out the flavors (can substitute with maple syrup for a vegan option).
  • 1 tbsp Toasted sesame seeds: For that crunchy topping and nutty flavor.
  • 1/2 tsp Red pepper flakes: Optional, for those who like a little heat!
  • 2 stalks Green onions: Thinly sliced, adding freshness and a mild onion flavor.
  • 2 cloves Garlic: Minced, for an aromatic kick.
  • Salt and freshly ground black pepper: To taste, enhancing all the delicious flavors.

How to Make Your Crispy Tofu Salad

Now that we have our ingredients, let’s dive into the preparation! Follow these simple steps to create a crispy tofu salad that’s bursting with flavor.

  • Prep the Tofu: Start by pressing the tofu to remove excess moisture. Wrap it in a clean kitchen towel and place a heavy pan on top for about 15-20 minutes. This will help achieve that coveted crispy texture!
  • Cook the Tofu: After pressing, cut the tofu into cubes and toss them in a bowl with a bit of cornstarch (optional, but it enhances crispiness). Heat a skillet over medium-high heat, add a splash of sesame oil, and cook the tofu until golden brown, about 3-4 minutes on each side.
  • Make the Dressing: In a small bowl, whisk together sesame oil, rice vinegar, soy sauce, honey, minced garlic, and red pepper flakes. Taste and adjust seasoning as needed.
  • Assemble the Salad: In a large bowl, combine the sliced cucumbers, crispy tofu, and green onions. Pour the dressing over the top and toss gently to coat.
  • Serve: Top with toasted sesame seeds and enjoy your fresh, crunchy salad!

Expert Pro Tips for Perfecting Your Salad

Side view of a vibrant tofu salad with cucumbers, green onions, and sesame seeds.

Want to elevate your crispy tofu salad game? Check out these pro tips!

  • Pressing Matters: Ensure you press the tofu adequately; this is key for achieving maximum crispiness.
  • Experiment with Flavors: Feel free to add other veggies like bell peppers or shredded carrots for extra crunch and color.
  • Chill Time: Let your salad sit for 10 minutes after tossing to allow the flavors to meld beautifully.
  • Storage Savvy: Store the salad and dressing separately if you plan to keep leftovers, ensuring the tofu remains crispy.
  • Dress It Up: Try adding different dressings like peanut sauce or a ginger-soy dressing for variety.
  • Herb It Up: Fresh herbs like cilantro or mint can elevate the freshness of your salad.
  • Vegan-Friendly: Substitute honey with maple syrup to keep this dish entirely plant-based!
  • Texture Play: For an extra crunch, add nuts like cashews or peanuts right before serving.

Common Mistakes and Troubleshooting

Even the best cooks make mistakes, but don’t worry! Here’s how to avoid common pitfalls:

  • Too Soft Tofu: If your tofu isn’t crispy, ensure it’s pressed well and cooked on high heat.
  • Overdressed Salad: Start with a small amount of dressing and add more as needed to avoid sogginess.
  • Flavorless Tofu: Marinate the tofu in soy sauce or your favorite seasoning before cooking for an extra flavor boost.
  • Too Many Veggies: Balance is key; don’t overwhelm the salad with too many types of veggies that can clash.

Variations to Try

Make this crispy tofu salad uniquely yours with these fun variations:

  • Spicy Tofu Salad: Add jalapeños or sriracha to the dressing for a fiery twist.
  • Thai-Inspired: Incorporate shredded carrots, red cabbage, and a peanut dressing for a Thai flair.
  • Asian Noodle Salad: Toss in some cooked rice noodles for a heartier version.
  • Grilled Veggie Salad: Mix in some grilled bell peppers and zucchini for smoky flavors.

Storage and Make-Ahead Instructions

This salad is perfect for meal prep! Here’s how to store it:

  • Keep It Fresh: Store the salad in an airtight container in the refrigerator for up to 3 days. To maintain crispiness, keep the dressing separate until ready to serve.
  • Make Ahead: You can prepare the tofu and chop the vegetables ahead of time. Just combine them with the dressing when you’re ready to eat!

Frequently Asked Questions (FAQ)

Got questions? We’ve got answers! Here are some common inquiries about this crispy tofu salad:

  • Can I use soft tofu instead of firm? While firm tofu works best for crispiness, you can use soft tofu for a different texture, just know it won’t get as crispy.
  • Is this salad gluten-free? Yes! Just ensure you use gluten-free soy sauce or tamari.
  • How can I make this dish spicier? Add more red pepper flakes or sriracha to the dressing for a kick!
  • Can I add different vegetables? Absolutely! Feel free to mix in your favorite crunchy veggies.
  • What can I serve with this salad? This salad pairs well with grilled chicken, shrimp, or can be served as a main dish on its own.
  • How long will the salad last? It’s best enjoyed within 3 days when stored in the fridge.
  • Can I freeze the salad? It’s not recommended to freeze the salad, as the texture of the cucumbers will change.
  • What’s the best way to reheat the tofu? To maintain crispiness, reheat in a skillet over medium heat until warmed through.

Nutrition Tips and Dietary Adaptations

This salad isn’t just delicious; it’s also a nutritional powerhouse! Here are some tips to further enhance its health benefits:

  • Protein Boost: Add edamame or chickpeas for an extra protein punch!
  • Healthy Fats: Include avocado slices for creamy texture and healthy fats.
  • Fiber-Rich: Incorporate more veggies like bell peppers and carrots for added fiber.
  • Low-Carb Option: Skip the honey or use a sugar substitute to lower carbs.

Equipment Recommendations

To whip up this crispy tofu salad, you’ll want to have these kitchen tools handy:

  • Heavy Pan: For pressing tofu effectively.
  • Non-stick Skillet: To achieve golden and crispy tofu without sticking.
  • Mixing Bowls: For combining ingredients and making the dressing.
  • Whisk: Essential for mixing the dressing smoothly.

Serving Suggestions

Ready to dig in? Here are some fun serving ideas to elevate your salad experience:

  • With a Side: Pair your salad with a side of steamed edamame or a warm bowl of miso soup.
  • On a Wrap: Use this salad as a filling in a whole wheat wrap for a portable meal.
  • As a Topping: Serve over a bed of quinoa or rice for a hearty dinner option.

In conclusion, the Bright and Crunchy Crispy Tofu Salad is not just a meal; it’s an adventure in flavor and nutrition. Whether you’re enjoying it for lunch, dinner, or as a meal prep option, this salad promises to deliver excitement and satisfaction. So grab your ingredients, unleash your inner chef, and let’s celebrate healthy eating together!

Crispy Tofu and Asian Cucumber Salad That's Super Fresh

Prep Time 15 minutes
Cook Time 10 minutes
Total Time 25 minutes
Servings 4 servings
Calories 250
A vibrant and refreshing salad combining crispy tofu with crisp cucumbers and a tangy Asian-inspired dressing.

Ingredients

Vegetables

  • 2 large English cucumbers (Thinly sliced)
  • 14 oz Firm tofu (Diced into cubes)
  • 2 tbsp Sesame oil
  • 2 tbsp Rice vinegar
  • 2 tbsp Low-sodium soy sauce
  • 1 tbsp Honey
  • 1 tbsp Toasted sesame seeds (For topping)
  • 1/2 tsp Red pepper flakes (Optional)
  • 2 stalks Green onions (Thinly sliced)
  • 2 cloves Garlic (Minced)

Salt and freshly ground black pepper

Instructions 

  • In a bowl, whisk together sesame oil, rice vinegar, soy sauce, honey, garlic, red pepper flakes, salt, and pepper to make the dressing.
  • Heat a non-stick pan and cook the tofu until crispy, about 8-10 minutes.
  • In a large bowl, combine sliced cucumbers, cooked tofu, and green onions.
  • Pour the dressing over the salad and toss gently to combine.
  • Sprinkle toasted sesame seeds on top before serving.

Notes

For extra crunch, add chopped peanuts or cashews.
Calories: 250kcal
Cost: $12
Course: Salad
Cuisine: Asian
Keyword: Tofu

Welcome to a Burst of Flavor: Zesty Citrus Shrimp & Avocado Salad

Are you ready to elevate your salad game? This Citrus Shrimp and Avocado Salad isn’t just a meal; it’s a vibrant explosion of flavors that will make your taste buds dance! Packed with nutrients and bursting with zest, this salad is your go-to for a quick yet indulgent dish. Whether you’re prepping for a busy week or entertaining guests, this recipe proves that healthy eating can be absolutely delicious. Let’s dive into the details!

Why You’ll Love This Recipe

  • Flavor Explosion: The combination of citrus and shrimp creates a lively, refreshing taste that’s hard to resist.
  • Quick to Prepare: With just a few simple steps, you can whip up this salad in 20 minutes or less!
  • Nutritious Ingredients: Packed with healthy fats from avocado and protein from shrimp, this salad fuels your body right.
  • Versatile and Customizable: Add your favorite greens or additional toppings for a personal twist.
  • Perfect for Any Occasion: Whether it’s a casual lunch or a festive dinner, this salad fits the bill!

Ingredient Breakdown

Let’s take a closer look at the ingredients in this zesty salad and explore some tasty substitutions!

  • 1 pound medium Pan-Seared Citrus Shrimp: For the best flavor, opt for fresh shrimp. If unavailable, frozen shrimp works too—just ensure it’s thawed before cooking.
  • 8 cups greens: Varieties such as arugula, spinach, or spring mix add freshness. Feel free to use what you have on hand!
  • Extra virgin olive oil: A fruity or lemon-flavored oil enhances the dish’s brightness.
  • Juice of 1/2 lemon or 1/2 orange: Fresh juice is key to that zesty kick. You can mix it up with lime for a different flavor.
  • 1 avocado: Adds creaminess and healthy fats. Use a ripe avocado for the best texture.
  • 1 shallot: Minced for a subtle sweetness and crunch. Onions can be a great substitute if needed.
  • 4 ounces sliced almonds: Toasted almonds provide a satisfying crunch. Swap with walnuts or pecans if desired.
  • Kosher salt and freshly ground black pepper: Essential for seasoning. Adjust to your taste!

Step-by-Step Instructions

Close-up of a Citrus Shrimp and Avocado Salad, showcasing colorful ingredients like shrimp and avocado slices.

Ready to create your masterpiece? Follow these simple steps:

  1. Prepare the shrimp: Cook the shrimp in a hot skillet with a drizzle of olive oil until they turn pink and opaque (about 2-3 minutes per side). Toss with lemon or orange juice for that citrus zing.
  2. Assemble the salad: In a large bowl, toss the cooked shrimp with the greens. Add a splash of olive oil and a squeeze of citrus juice to coat.
  3. Add the toppings: Gently fold in the avocado, shallots, and sliced almonds. Season with salt and pepper to taste.
  4. Serve and enjoy!: This salad is best enjoyed fresh, but if you have leftovers, store them separately to keep the greens crisp.

Pro Tips for Success

  • Don’t overcook the shrimp: They cook quickly; remove them from the heat as soon as they’re pink to avoid rubbery texture.
  • Use fresh ingredients: The quality of your ingredients greatly affects the salad’s taste. Fresh herbs and produce make a world of difference.
  • Experiment with dressings: If you’re feeling adventurous, try a citrus vinaigrette or a tangy yogurt dressing for a refreshing twist.
  • Let it chill: If you prefer a cold salad, let it chill in the fridge for about 30 minutes before serving.
  • Customize your greens: Mix different types of greens for varied textures and flavors.
  • Add extra protein: For a heartier meal, consider adding grilled chicken or chickpeas.
  • Mind the seasoning: Always taste and adjust seasoning before serving. A little extra salt or acidity can enhance flavors.
  • Save leftovers wisely: Store shrimp and salad components separately to maintain freshness.

Common Mistakes to Avoid

Even the best chefs can make a few missteps. Here are some common pitfalls to watch out for:

  • Overcooking shrimp: Keep an eye on them; they can go from perfect to overdone in seconds!
  • Using stale ingredients: Always check the freshness of your greens and shrimp before cooking.
  • Skipping the seasoning: Don’t forget to season your salad to bring out all those delicious flavors!
  • Not letting the flavors meld: If you have time, letting the salad sit for a few minutes allows the flavors to blend beautifully.

Variations to Try

Feeling creative? Here are some delicious variations you can try:

  • Mango Citrus Shrimp Salad: Add diced mango for a tropical twist.
  • Spicy Shrimp Avocado Salad: Toss in some diced jalapeños or a splash of hot sauce for heat!
  • Quinoa Citrus Salad: Add cooked quinoa for a filling grain option.
  • Vegan Option: Substitute shrimp with grilled tofu or chickpeas for a plant-based delight.

Storage and Make-Ahead Instructions

Planning ahead? Here’s how to store your salad properly:

  • Refrigerate leftovers: Store the shrimp and salad separately in airtight containers. They will stay fresh for 1-2 days.
  • Make ahead: You can prepare the shrimp a day in advance. Just wait to add the avocado until you’re ready to serve to prevent browning.

Frequently Asked Questions

Got questions? I’ve got answers! Here are some common queries about the Citrus Shrimp and Avocado Salad.

  • Can I use frozen shrimp? Yes! Just ensure they are fully thawed before cooking.
  • What greens work best? Arugula, spinach, or romaine are fantastic, but feel free to mix it up!
  • How do I make it spicy? Add sliced jalapeños or a dash of hot sauce to the shrimp.
  • Can I make this salad vegan? Absolutely! Substitute shrimp with grilled tofu or chickpeas.
  • How long can I store leftovers? They can be stored in the fridge for 1-2 days, but the greens will wilt faster.
  • What’s the best way to serve this salad? It’s best served fresh, but you can chill it for a refreshing twist!
  • Can I add cheese? Crumbled feta or goat cheese can add a lovely creaminess!
  • How do I prevent the avocado from browning? Squeeze lemon or lime juice over the cut avocado to keep it vibrant.

Nutritional Tips and Dietary Adaptations

This salad is not just tasty; it’s also incredibly nutritious! Here’s how to keep it healthy:

  • Boost protein: Add more shrimp or sprinkle in some nuts for extra protein.
  • Go low-carb: Omit the almonds or use fewer ingredients to suit your dietary needs.
  • Increase fiber: Add beans or additional veggies like bell peppers for a fiber boost.

Essential Equipment Recommendations

To create this culinary delight, you’ll need the following essentials:

  • Non-stick skillet: Perfect for searing shrimp without sticking.
  • Sharp knife: Essential for slicing vegetables and avocado smoothly.
  • Cutting board: A sturdy board is key for preparing your ingredients.
  • Mixing bowl: Use a large bowl to toss your salad easily.

Serving Suggestions

Pair your salad with these delicious options:

  • Crusty bread: A slice of bread complements the salad perfectly.
  • Chilled white wine: A glass of crisp white wine enhances the citrusy flavors.
  • Fruit salad: Fresh fruit on the side can make for a refreshing dessert!

Conclusion: A Salad to Celebrate

And there you have it! This Zesty Citrus Shrimp & Avocado Salad is not just a dish; it’s a celebration of flavors and health. It’s easy to prepare, packed with nutrients, and bursting with sunshine in every bite. So grab your ingredients and get cooking—you’ll be amazed at how simple it is to create something so deliciously vibrant. Enjoy!

Citrus Shrimp and Avocado Salad Recipe

Prep Time 10 minutes
Cook Time 10 minutes
Total Time 20 minutes
Servings 4 servings
Calories 350
A fresh and vibrant salad combining citrus-infused shrimp with creamy avocado and crunchy almonds for a delightful meal.

Ingredients

Protein

  • 1 pound medium Pan-Seared Citrus Shrimp

Greens

  • 8 cups greens (such as arugula, spinach, lettuce, or spring mix)

Dressing

  • Extra virgin olive oil Extra virgin olive oil (fruity or lemon-flavored preferred)
  • 1/2 lemon or orange Juice of 1/2 lemon or 1/2 orange
  • 1 avocado avocado (sliced or diced)
  • 1 shallot shallot (minced)
  • 4 ounces sliced almonds (toasted)
  • Kosher salt and freshly ground black pepper Kosher salt and freshly ground black pepper

Instructions 

  • Prepare the citrus shrimp, warming gently or serving chilled.
  • Assemble the salad by tossing shrimp with greens, then drizzle with olive oil and citrus juice.
  • Add avocado, shallots, and almonds; season with salt and pepper, then serve.

Notes

Use fresh, high-quality ingredients for best flavor.
Calories: 350kcal
Cost: $15
Course: Salad
Cuisine: American
Keyword: avocado, Citrus, shrimp

Unleash the Flavor: Your Guide to the Ultimate Cold Peanut Noodle Bowl

Welcome to the vibrant world of the Cold Peanut Noodle Bowl, where flavor meets nutrition in the most delicious way! This recipe is not just about food; it’s about experiencing a delightful adventure with every bite. In this article, you’ll discover why this dish is a must-try, how to make it perfectly, and how to customize it to suit your taste buds. Whether you’re looking for a quick lunch or a delightful dinner, this dish is your new go-to!

Let’s dive into the exciting details of this Cold Peanut Noodle Bowl, packed with colorful veggies and a creamy peanut sauce that will leave your taste buds dancing! Ready to make something amazing? Let’s go!

Why You’ll Love This Recipe

This Cold Peanut Noodle Bowl isn’t just another meal; it’s a celebration of flavors and health. Here are five reasons why you’ll fall in love with this recipe:

  • Quick and Easy: With just 15 minutes of prep time, you can whip up a nutritious and delicious meal in no time!
  • Nutritious Ingredients: Packed with fresh veggies like bell peppers, carrots, and cucumbers, this dish is a powerhouse of vitamins and minerals.
  • Versatile Base: You can easily customize the ingredients to suit your dietary preferences or what you have on hand.
  • Flavor Explosion: The creamy peanut sauce brings a rich flavor that complements the crunchy veggies beautifully.
  • Perfect for Meal Prep: This dish stores well, making it an excellent option for meal prep or leftovers!

Ingredient Breakdown

Let’s explore the essential ingredients that make this Cold Peanut Noodle Bowl so special, along with some handy substitutions:

  • 8 oz of rice noodles: The base of our bowl, these noodles provide a gluten-free option. If you prefer, you can substitute with whole wheat noodles or zucchini noodles for a low-carb alternative.
  • 1 cup of bell peppers: Choose vibrant bell peppers for a splash of color and crunch. You can use red, yellow, or orange peppers, or even swap for snap peas.
  • 1 cup shredded carrots: For sweetness and crunch, shredded carrots are ideal. You could easily replace them with grated zucchini or chopped radishes.
  • 1 cup of cucumber: Fresh and cool, cucumbers add a refreshing element. If you’re in the mood for something different, try using jicama or daikon radish.
  • ½ cup of green onions: These add a mild onion flavor. If you don’t have green onions, chives or shallots can work well.
  • ½ cup of creamy peanut butter: The heart of our sauce! For a nut-free version, you can substitute with sunflower seed butter or tahini.
  • ¼ cup of soy sauce: This adds umami flavor. For a gluten-free option, use tamari or coconut aminos.
  • 2 tablespoons of honey: This gives a touch of sweetness; maple syrup can be a great vegan alternative.
  • 1 tablespoon of sesame oil: For a nutty flavor, you can swap this for olive oil if you prefer.
  • 1 teaspoon of crushed red pepper flakes: For a spicy kick, adjust according to your heat preference!

Step-by-Step Cooking Instructions

Side view of a vibrant Cold Peanut Noodle Bowl filled with noodles and toppings.

Now that you have your ingredients ready, let’s get cooking! Follow these simple steps to create your delicious Cold Peanut Noodle Bowl:

  1. Begin by cooking the rice noodles according to the package instructions, typically boiling them for about 4-5 minutes until tender yet firm.
  2. Once cooked, drain the noodles and rinse them under cold water to stop the cooking process.
  3. While the noodles are cooking, prepare your peanut sauce by mixing together the creamy peanut butter, soy sauce, honey, sesame oil, and crushed red pepper flakes in a medium bowl. Whisk until smooth and creamy.
  4. In a large mixing bowl, combine the drained noodles with the sliced bell peppers, shredded carrots, julienned cucumber, and sliced green onions. Toss gently to incorporate all the vegetables evenly.
  5. Pour the peanut sauce over the noodle and vegetable mixture and gently toss everything together until well-coated.
  6. Taste and adjust seasonings as necessary, adding a squeeze of lime or additional soy sauce if desired.
  7. Serve the Cold Peanut Noodle Bowl in individual dishes, garnishing with more sliced green onions or crushed peanuts if desired.

Pro Tips for Perfecting Your Cold Noodle Bowl

Want to elevate your dish even further? Here are some expert insights to ensure your Cold Peanut Noodle Bowl is a hit:

  • Prep Ahead: Chop your vegetables in advance and store them in the fridge for a quick assembly on busy days.
  • Customize the Sauce: Feel free to add a splash of lime juice or a dash of sriracha to the sauce for an extra kick!
  • Mix It Up: Experiment with different vegetables like shredded cabbage or broccoli sprouts for added texture and flavor.
  • Heat the Sauce: If you prefer a warm peanut sauce, gently heat it in a saucepan before tossing with the noodles.
  • Serving Size: This recipe serves 4, but you can easily double or halve it to fit your needs.
  • Garnish: Top with fresh cilantro or sesame seeds for an added layer of flavor and visual appeal.
  • Make It a Meal: Add grilled chicken, shrimp, or tofu for a protein boost!
  • Chill Out: Let the assembled noodle bowl chill in the fridge for 30 minutes before serving for a refreshing taste!

Common Mistakes & Troubleshooting

Even the best chefs make mistakes! Here’s how to avoid common pitfalls:

  • Overcooking the Noodles: Ensure you follow the package instructions closely to maintain the right texture. Al dente is key!
  • Too Thick Sauce: If your sauce is too thick, add a splash of water or more soy sauce to reach your desired consistency.
  • Balancing Flavors: Always taste your dish before serving. Adjust the sweetness or saltiness as needed.
  • Storing Leftovers: Keep the sauce and noodles separate if storing for later to maintain freshness and texture.

Exciting Variations to Try

Feeling adventurous? Here are some variations to spice things up!

  • Spicy Sriracha Noodles: Add a generous swirl of sriracha to your peanut sauce for a fiery twist!
  • Fresh Asian Salad Bowl: Swap out the noodles for a mix of leafy greens, making it a refreshing salad!
  • Protein-Packed Delight: Add grilled chicken, shrimp, or tofu for an extra protein boost that keeps you full longer.
  • Crunchy Nut Lover: Toss in a handful of chopped peanuts or cashews for an irresistible crunch!

Storage & Make-Ahead Instructions

Planning ahead? Here’s how to store and prepare your Cold Peanut Noodle Bowl:

  • Refrigeration: The assembled bowl can be stored in an airtight container in the fridge for up to 3 days.
  • Make-Ahead Components: Store the peanut sauce separately and keep the noodles and veggies in separate containers for optimal texture.
  • Freezing: While it’s best enjoyed fresh, you can freeze the peanut sauce for up to a month. Just thaw before using!

Frequently Asked Questions

Got questions? We’ve got answers! Here are some frequently asked questions about the Cold Peanut Noodle Bowl:

  • Can I make this dish vegan? Absolutely! Just use maple syrup instead of honey and ensure your soy sauce is vegan-friendly.
  • What if I’m allergic to peanuts? Use sunflower seed butter or tahini as a safe and delicious alternative.
  • How can I adjust the spice level? You can control the heat by adding less crushed red pepper flakes or omitting them entirely.
  • Can I use a different type of noodle? Yes! Feel free to experiment with soba, udon, or even zucchini noodles!
  • Is this recipe gluten-free? Use gluten-free soy sauce and rice noodles to make it entirely gluten-free!
  • How do I serve leftovers? Simply toss with any extra sauce before serving, or enjoy cold straight from the fridge!
  • Can I add more veggies? Absolutely! Feel free to add any seasonal veggies you enjoy.
  • How long does the sauce last? The peanut sauce can last in the fridge for up to a week when stored properly!

Nutrition Tips & Dietary Adaptations

Eating healthy doesn’t mean sacrificing flavor! Here are some nutrition tips and adaptations for your Cold Peanut Noodle Bowl:

  • Boost Fiber: Incorporate additional veggies like broccoli or snap peas for extra fiber and nutrients.
  • Lower Calorie Option: Use less peanut butter or swap it for a lighter nut butter.
  • Protein Options: Add tofu, edamame, or grilled chicken to amp up the protein content.
  • Gluten-Free Version: Ensure all ingredients, including sauces, are labeled gluten-free.

Equipment Recommendations

Here’s what you’ll need to make this delicious dish:

  • Large Pot: For boiling the noodles.
  • Mixing Bowls: To prepare your sauce and mix ingredients.
  • Whisk: Essential for blending your peanut sauce smoothly.
  • Measuring Cups and Spoons: Accurate measurements help create the perfect balance of flavors!

Serving Suggestions

Finally, here are some great ideas for serving your Cold Peanut Noodle Bowl:

  • Garnish with Fresh Herbs: Top with cilantro or basil for an aromatic finish.
  • Serve with Lime Wedges: A squeeze of lime adds a zesty brightness!
  • Pair with Protein: Serve alongside grilled chicken or shrimp for a complete meal.
  • Enjoy with Crunchy Snacks: Serve with rice crackers or spring rolls for a fun appetizer!

Ready to dig in? This Cold Peanut Noodle Bowl is not just a meal; it’s an exciting experience that showcases how simple ingredients can come together to create something extraordinary. So grab your ingredients and get cooking—your taste buds will thank you!

Remember, healthy cooking is all about having fun and experimenting. Embrace the joy of creating, and enjoy every bite of your flavorful journey!

Cold Peanut Noodle Bowl

Prep Time 10 minutes
Cook Time 5 minutes
Total Time 15 minutes
Servings 4 servings
Calories 450
A quick and refreshing dish combining tender rice noodles with crunchy vegetables and a creamy peanut sauce.

Ingredients

Noodles

  • 8 oz rice noodles

Vegetables

  • 1 cup bell peppers
  • 1 cup shredded carrots
  • 1 cup cucumber
  • ½ cup green onions

Sauce

  • ½ cup creamy peanut butter
  • ¼ cup soy sauce
  • 2 tablespoons honey
  • 1 tablespoon sesame oil
  • 1 teaspoon crushed red pepper flakes

Instructions 

  • Cook rice noodles according to package instructions, then rinse with cold water.
  • Mix peanut butter, soy sauce, honey, sesame oil, and red pepper flakes to make the sauce.
  • Combine cooked noodles with sliced vegetables and toss gently.
  • Pour sauce over the noodles and vegetables, then toss to coat evenly.
  • Serve immediately, garnished with green onions if desired.

Notes

Feel free to add chopped peanuts or lime for extra flavor.
Calories: 450kcal
Cost: $12
Course: Main Course
Cuisine: Asian
Keyword: peanut

Why This Thai Crunch Salad Will Transform Your Lunch Game!

Are you ready to elevate your lunch experience? This Thai Crunch Salad is not just any salad; it’s a flavor-packed explosion that combines fresh, vibrant ingredients with a creamy peanut ginger dressing. Whether you’re meal prepping for the week or looking for a quick, healthy meal, this recipe checks all the boxes. You’ll love how this salad not only satisfies your cravings but also energizes you for the day ahead!

Let’s dive into why you’ll adore this recipe!

Why You’ll Love This Recipe!

  • Quick and Easy: This salad comes together in just 30 minutes, making it perfect for busy weekdays or spontaneous gatherings!
  • Packed with Nutrients: Bursting with colorful veggies, this crunch salad is rich in vitamins, minerals, and fiber, ensuring you get a nutritious boost.
  • Customizable: The ingredients are flexible! Feel free to swap in your favorite veggies or proteins to suit your taste or dietary needs.
  • Flavorful Dressing: The creamy peanut ginger dressing is a game-changer, adding a delightful zing that enhances the overall dish.
  • Meal Prep Friendly: This salad holds up well in the fridge, making it a fantastic option for make-ahead meals!

Ingredient Breakdown and Substitutions

Let’s talk about the star players in our Thai Crunch Salad and some fab substitutions!

  • Shredded Cabbage: Use either green cabbage or a coleslaw mix for a crunchy base. Substitution: Try kale for a nutrient boost!
  • Edamame: A great source of plant-based protein. Substitution: Use chickpeas or cooked quinoa for a different flavor.
  • Peanut Butter: The creamy base for our dressing. Substitution: Almond butter or sunflower seed butter for a nut-free version!
  • Sriracha: For a spicy kick! Substitution: Red pepper flakes or omit for a milder taste.
  • Ramen Noodles: Crunchy texture is key! Substitution: Use toasted rice noodles or omit entirely for a low-carb option.

How to Make This Flavor-Packed Thai Crunch Salad

Side view of a fresh Thai Crunch Salad featuring shredded cabbage, carrots, and garnishes, focusing on its crunchy texture.

Ready to bring this salad to life? Follow these simple steps!

  1. In a large bowl, combine shredded cabbage, carrots, cucumbers, red pepper, green onions, edamame, bean sprouts, and red serrano pepper.
  2. In a blender or food processor, blend together peanut butter, rice vinegar, lime juice, maple syrup, sesame oil, sriracha, soy sauce, ginger, garlic, and water until smooth.
  3. Pour the dressing over the salad ingredients and toss gently to combine, ensuring everything is coated.
  4. Top with chopped herbs and toasted ramen noodles, then sprinkle with roasted peanuts or sunflower seeds.
  5. Serve immediately or chill for about 30 minutes to let the flavors meld!

Pro Tips for Salad Success

Want to take your salad to the next level? Check out these expert tips!

  • Chill Your Ingredients: For an even fresher taste, chill your veggies before assembling the salad.
  • Make it a Meal: Add grilled chicken, tofu, or shrimp for an extra protein punch!
  • Adjust the Dressing: Feel free to adjust the sweetness or spice level of the dressing to suit your palate.
  • Mind the Crunch: If making ahead, add the ramen noodles just before serving to keep them crunchy!
  • Experiment with Herbs: Fresh mint, cilantro, or Thai basil can elevate the flavor profile!
  • Batch Prep: Make a big batch and enjoy it throughout the week—just keep the dressing separate until serving!

Common Mistakes to Avoid

To ensure your Thai Crunch Salad is a hit, steer clear of these common pitfalls:

  • Overdressing: Too much dressing can make your salad soggy. Start with a small amount and add more as needed.
  • Undercutting the Crunch: Avoid soft veggies; opt for firm, fresh options to maintain that crunch!
  • Skipping the Herbs: Don’t skip the fresh herbs—they add a burst of flavor that’s essential to this dish!

Variations to Spice Things Up!

Looking to switch things up? Here are some fun variations to try:

  • Spicy Thai Chicken Salad: Add grilled chicken marinated in a spicy Thai sauce for a protein-packed meal.
  • Quinoa Crunch Salad: Swap out ramen noodles for cooked quinoa for a hearty, gluten-free option.
  • Fruit Twist: Toss in some diced mango or pineapple for a sweet contrast to the savory flavors.
  • Nut-Free Version: Replace peanut butter with tahini for a similar creamy texture without the nuts.

Storage and Make-Ahead Instructions

This salad is perfect for meal prepping! Here’s how to store it:

  • Store the salad in an airtight container in the refrigerator for up to 3 days.
  • Keep the dressing in a separate container until you’re ready to serve to maintain freshness.
  • If you’re making it ahead of time, add the crunchy toppings just before eating!

Frequently Asked Questions

Got questions? We’ve got answers!

  • Can I make this salad vegan? Yes! Just ensure your peanut butter and soy sauce are vegan-friendly.
  • What can I use instead of ramen noodles? Try toasted rice noodles or omit for a low-carb version!
  • How long does the dressing last? The dressing can be stored in the fridge for up to a week.
  • Is this salad gluten-free? Yes, but make sure to use gluten-free soy sauce!
  • Can I add protein? Absolutely! Grilled chicken, shrimp, or tofu are excellent additions.
  • What if I don’t like spicy food? Omit the sriracha or use a milder sauce instead.
  • Can I use frozen edamame? Yes, just ensure it’s thawed and warmed before adding!
  • How do I make it more filling? Add grains like quinoa or brown rice for extra substance!

Nutritional Benefits and Dietary Adaptations

This salad not only delights your taste buds but also offers tons of nutritional benefits:

  • High Fiber: The veggies and edamame provide a hearty dose of fiber, supporting digestion and fullness.
  • Rich in Antioxidants: Colorful vegetables are packed with antioxidants that combat oxidative stress.
  • Healthy Fats: The peanut butter and nuts offer healthy fats that are essential for heart health.

Essential Equipment for Success

Before you get started, here’s what you’ll need:

  • Large Mixing Bowl: For combining all those beautiful ingredients.
  • Blender or Food Processor: To whip up the creamy dressing.
  • Sharp Knife: For chopping and slicing your veggies with ease.
  • Measuring Cups and Spoons: To ensure you get the right amounts for all ingredients.

Serving Suggestions to Wow Your Guests

This salad is a show-stopper and can be served in various ways:

  • As a vibrant side dish at your next BBQ or picnic!
  • In a wrap with grilled chicken or tofu for a filling lunch.
  • As a refreshing main course that’s perfect for warm days!

Conclusion

And there you have it! This Thai Crunch Salad is not just a meal; it’s an experience of fresh flavors, textures, and colors that will keep you coming back for more. So, grab your ingredients, channel your inner chef, and let’s create a salad that’s as exciting as it is nutritious. Happy cooking!

Thai Crunch Salad CPK Copycat (with peanut ginger sauce)

Prep Time 15 minutes
Cook Time 10 minutes
Total Time 25 minutes
Servings 4 servings
Calories 450
A vibrant and crunchy Thai-inspired salad featuring fresh vegetables, herbs, toasted noodles, and a flavorful peanut ginger sauce.

Ingredients

Vegetables

  • 4 cups shredded cabbage or coleslaw mix
  • 1 cup red cabbage or napa cabbage, shredded
  • 1.5 cups carrots, shredded
  • 1 cup cucumbers, large diced
  • 1 cup red pepper, large dice or thinly sliced
  • 3-4 green onions sliced
  • 1 cup edamame, steamed
  • 1.5 cups bean sprouts
  • 1 red serrano pepper finely chopped
  • 0.5 cup peanut butter (natural)
  • 3 tablespoons rice vinegar
  • 2 tablespoons lime juice, fresh
  • 2 tablespoons maple syrup
  • 2 teaspoons sesame oil (optional)
  • 1-2 tablespoons sriracha or sambal
  • 2-3 tablespoons soy sauce (tamari)
  • 1 inch piece fresh ginger (more to taste)
  • 1 clove garlic
  • 2-4 tablespoons water
  • 1 cup cilantro, Thai basil, mint chopped
  • 0.5 cup roasted peanuts and/or sunflower seeds
  • 1 package ramen noodles, roughly broken and toasted

Instructions 

  • Combine all vegetables, herbs, and toasted noodles in a large bowl.
  • In a blender, blend peanut butter, rice vinegar, lime juice, maple syrup, sesame oil, sriracha, soy sauce, ginger, garlic, and water until smooth.
  • Pour the sauce over the salad and toss to combine.
  • Garnish with chopped peanuts and additional herbs if desired.

Notes

Adjust the spice level with sriracha or sambal to taste.
Calories: 450kcal
Cost: $15
Course: Salad
Cuisine: Thai
Keyword: crunchy, peanut, Vegetables

Welcome to the world of delicious, wholesome meals that are both quick to prepare and bursting with flavor! If you’re looking to spice up your weeknight dinners, these teriyaki salmon rice bowls are your new go-to. Packed with nutrients and vibrant veggies, this recipe marries rich flavors with a healthful twist, proving that eating well can be an exciting adventure. In this guide, you’ll discover everything you need to know about making these delightful bowls, from the ingredients to expert tips, variations, and storage guidelines. Let’s dive in!

Why You’ll Love This Recipe

  • Quick Preparation: Whip up this meal in just 30 minutes, perfect for those busy weeknights when you want something delicious without the wait.
  • Balanced Nutrition: Each bowl is a complete meal, combining protein-packed salmon, colorful vegetables, and satisfying rice for a well-rounded dish.
  • Customizable: Tailor the ingredients to your taste! Swap out veggies, adjust the sauce, or add your favorite toppings to make it uniquely yours.
  • Meal Prep Friendly: Ideal for meal prep, these bowls can be prepped ahead of time and stored in the refrigerator for quick lunches or dinners.
  • Flavor Explosion: The homemade teriyaki sauce gives these salmon rice bowls a sweet and savory kick that will have your taste buds dancing!

Ingredient Breakdown

Here’s a list of what you’ll need to create these amazing teriyaki salmon rice bowls:

  • Salmon Fillets: 6-8 ounces each, skin-on for the best flavor and texture.
  • Teriyaki Sauce: Use store-bought or make your own for a fresher taste. See below for a simple recipe.
  • Short-Grain White Rice: 1 cup, perfect for absorbing flavors and creating that authentic rice bowl texture.
  • Cold Water: 1 ¼ cups, for cooking the rice.
  • Assorted Vegetables: Broccoli florets, snap peas, shredded carrots, bell peppers, edamame, and sliced avocado are all fabulous choices.
  • Toasted Sesame Seeds: For garnish, adds a nice crunch and nutty flavor.
  • Sliced Green Onions: Brightens up the dish with a pop of color and flavor.
  • Optional Garnishes: Consider sriracha mayo, furikake, or nori for an extra kick.
  • Cooking Oil: 1-2 tablespoons, choose a high-smoke-point oil like avocado or canola.
  • Salt and Black Pepper: For seasoning the salmon.
  • Brown Sugar: 2 tablespoons, to balance the sauce.
  • Grated Fresh Ginger: 1 tablespoon, adds warmth and depth to the teriyaki sauce.
  • Minced Garlic: 1 teaspoon, enhances the flavor of the sauce.
  • Soy Sauce or Tamari: ½ cup, forms the base of your teriyaki sauce.
  • Non-Alcoholic Mirin Substitute: ¼ cup, a touch of sweetness without the alcohol.
  • Non-Alcoholic Sake Substitute or Vegetable Broth: ¼ cup, for added flavor in the sauce.

Step-By-Step Instructions

Ready to bring your teriyaki salmon rice bowls to life? Follow these simple steps:

  1. Rinse 1 cup of short-grain white rice under cold running water until the water runs clear.
  2. Combine the rinsed rice with 1 ¼ cups of cold water in a medium saucepan. Bring to a boil, then reduce heat to low, cover tightly, and simmer for 15 minutes.
  3. Remove from heat and let it steam for another 10 minutes. Fluff with a fork before serving.
  4. In a small saucepan, whisk together ½ cup soy sauce (or tamari), ¼ cup non-alcoholic mirin substitute, ¼ cup non-alcoholic sake substitute (or vegetable broth), 2 tablespoons brown sugar, 1 tablespoon grated fresh ginger, and 1 teaspoon minced garlic.
  5. Bring to a gentle simmer over medium heat, stirring until the sugar dissolves. Let it simmer for 5-7 minutes, or until the sauce thickens slightly. Remove from heat and set aside.
  6. Chop your chosen vegetables. Steam or blanch broccoli lightly for tenderness.
  7. Heat 1 tablespoon of cooking oil in a large skillet or wok over medium-high heat. Add harder vegetables (carrots, bell peppers) and stir-fry for 2-3 minutes, then add softer ones (snap peas, edamame) for another 1-2 minutes until tender-crisp.
  8. Pat the salmon fillets dry with paper towels and season generously with salt and black pepper.
  9. Heat 1-2 tablespoons of high-smoke-point oil in a large non-stick or cast-iron skillet over medium-high heat.
  10. Place the salmon fillets skin-side down in the hot skillet and press down gently with a spatula for 30 seconds.
  11. Cook undisturbed for 4-6 minutes, or until the skin is golden brown and crispy.
  12. Flip the salmon carefully and brush the cooked side with some teriyaki sauce.
  13. Cook for another 2-4 minutes, brushing with more teriyaki sauce until the salmon is cooked through.
  14. Divide the fluffy cooked rice among serving bowls.
  15. Place a cooked teriyaki salmon fillet on top of the rice in each bowl.
  16. Arrange your cooked vegetables around the salmon. If using fresh avocado, slice and add it now.
  17. Drizzle any remaining teriyaki sauce over the salmon and vegetables.
  18. Garnish with toasted sesame seeds and sliced green onions. Add sriracha mayo or furikake if desired.
  19. Serve immediately and enjoy your Teriyaki Salmon Rice Bowl!

Pro Tips for Perfect Bowls

A close-up of a rice bowl featuring Teriyaki salmon, assorted vegetables, and sesame seeds.
  • Use Fresh Ingredients: Fresh salmon and seasonal vegetables will elevate the flavor of your dish.
  • Don’t Overcook the Salmon: Keep an eye on the salmon as it cooks to avoid dryness; it should flake easily yet remain moist.
  • Customize Your Sauce: Feel free to experiment with the spices in your teriyaki sauce; add chili flakes for heat or pineapple juice for sweetness.
  • Mix Up the Veggies: Try adding bell peppers, zucchini, or even sautéed mushrooms for a different twist.
  • Let the Rice Rest: Allowing the rice to steam off heat makes it fluffier and more delicious.
  • Perfect Heat Control: Maintain medium-high heat while cooking to achieve the perfect sear on your salmon.
  • Store in Airtight Containers: For meal prep, store bowls in separate containers to keep ingredients fresh.
  • Experiment with Toppings: Toppings like pickled ginger or kimchi can add an exciting flavor contrast.

Variations on Your Teriyaki Salmon Rice Bowl

Mix it up! Here are some delicious variations to keep your meals exciting:

  • Spicy Teriyaki Salmon: Add sriracha or chili garlic sauce to the teriyaki sauce for a spicy kick!
  • Teriyaki Chicken Bowl: Substitute salmon with grilled or baked chicken breast for a different protein option.
  • Vegetarian Teriyaki Bowl: Replace salmon with tofu or tempeh, marinated in teriyaki sauce, for a plant-based delight.
  • Quinoa Rice Bowl: Swap out rice for quinoa to give your bowl a nutritional boost with added fiber and protein.

Storage and Make-Ahead Instructions

Planning to make these bowls ahead of time? Here’s how to store and prepare:

  • Refrigerate: Store assembled bowls in airtight containers in the refrigerator for up to 4 days.
  • Reheat: Reheat the rice and salmon in the microwave or on the stove until warmed through.
  • Make Ahead: Prepare the teriyaki sauce and chop vegetables a day in advance for quick assembly.
  • Freezing: For longer storage, freeze the salmon and sauce separately. Thaw in the refrigerator overnight before reheating.

Frequently Asked Questions

  • Can I use frozen salmon? Yes! Just ensure it’s fully thawed and patted dry before cooking.
  • What can I substitute for short-grain rice? Jasmine or brown rice are great alternatives.
  • How do I make homemade teriyaki sauce? Combine soy sauce, mirin, brown sugar, ginger, and garlic in a saucepan, simmer until thickened.
  • Can I add more vegetables? Absolutely! Feel free to include any of your favorites.
  • Is this recipe gluten-free? Use tamari instead of soy sauce to make it gluten-free.
  • How do I prevent the salmon from sticking? Use a non-stick pan and ensure it’s adequately heated before adding the salmon.
  • What’s the best way to serve these bowls? Serve immediately for the best flavor and texture, garnished with sesame seeds and green onions.
  • Can I meal prep this recipe? Yes! It’s perfect for meal prep; store in separate containers for easy grab-and-go meals.

Nutritional Tips and Dietary Adaptations

For a balanced meal that fits your dietary needs, consider the following:

  • Low-Carb Option: Substitute rice with cauliflower rice for a lower-carb version.
  • High-Protein Boost: Add edamame or chickpeas to increase protein content.
  • Vegan Adaptation: Use tofu or tempeh instead of salmon and ensure your teriyaki sauce is plant-based.
  • Low-Sodium Version: Opt for low-sodium soy sauce or tamari to reduce sodium intake.

Equipment Recommendations

Having the right tools can make your cooking experience smoother:

  • Medium Saucepan: For cooking the rice perfectly.
  • Non-Stick Skillet: Ideal for searing salmon without sticking.
  • Whisk: Useful for mixing your teriyaki sauce ingredients.
  • Cutting Board and Knife: Essential for chopping vegetables and prepping ingredients.

Serving Suggestions

To elevate your teriyaki salmon rice bowls, consider pairing with:

  • Side Salad: A fresh green salad with a sesame dressing complements the richness of the salmon.
  • Soup: A light miso soup or clear broth can be a comforting addition.
  • Pickled Vegetables: Adds a tangy contrast that enhances the meal.
  • Fresh Fruit: A sweet fruit salad can provide a refreshing end to your meal.

In conclusion, these teriyaki salmon rice bowls are not just a meal; they’re an experience! With vibrant colors, bold flavors, and a perfect balance of nutrients, they can transform your dinner table into a celebration of health and happiness. So, roll up your sleeves and get ready to impress your taste buds and your loved ones with this delightful dish. Happy cooking!

Delicious Teriyaki Salmon Rice Bowls - Quick & Healthy Dinner

Prep Time 15 minutes
Cook Time 30 minutes
Total Time 45 minutes
Servings 4 servings
Calories 650
Enjoy a flavorful and nutritious bowl featuring perfectly cooked salmon, fluffy rice, and vibrant vegetables, all topped with a savory teriyaki glaze.

Ingredients

Protein

  • 4 pieces Salmon Fillets (6-8 ounces each)

Sauces & Condiments

  • ½ cup Teriyaki Sauce (store-bought or homemade)
  • ½ cup Soy sauce or tamari
  • ¼ cup Non-alcoholic mirin substitute
  • ¼ cup Non-alcoholic sake substitute or vegetable broth
  • 2 tablespoons Brown sugar
  • 1 tablespoon Grated fresh ginger
  • 1 teaspoon Minced garlic

Grains

  • 1 cup Short-Grain White Rice

Vegetables

  • Varied Assorted Vegetables (Broccoli, Snap peas, Carrots, Bell peppers, Edamame, Avocado) (chopped and prepared as needed)

Oils & Seasonings

  • 1-2 tablespoons Cooking oil (high-smoke-point) (avocado or canola oil preferred)
  • to taste Salt and black pepper

Garnishes

  • as desired Toasted sesame seeds, sliced green onions, optional garnishes (sriracha mayo, furikake, nori)

Instructions 

  • Cook rice: rinse and simmer rice in water for 15 minutes, then steam for 10 minutes and fluff.
  • Prepare sauce: whisk soy, mirin, sake, sugar, ginger, and garlic; simmer until thickened.
  • Cook vegetables: stir-fry harder vegetables 2-3 min, add softer ones 1-2 min.
  • Cook salmon: season, sear skin-side down 4-6 min, flip, brush with teriyaki, cook 2-4 min.
  • Assemble bowls: divide rice, top with salmon, vegetables, drizzle sauce, garnish, and serve.

Notes

For best flavor, use fresh ingredients and adjust seasoning to taste.
Calories: 650kcal
Cost: $15
Course: Main Course
Cuisine: Japanese
Keyword: Salmon

Experience the Vibrant Flavors of Avocado Chickpea Tomato Salad!

Are you ready to take your taste buds on a fiesta of flavors? This Avocado Chickpea Tomato Salad is not just a meal; it’s a celebration! Packed with protein, healthy fats, and vibrant colors, this salad is perfect for those busy days when you want something nutritious without sacrificing flavor. Let’s dive into why this salad is your new go-to dish!

Why You’ll Love This Avocado Chickpea Tomato Salad

What makes this salad stand out? Here are a few reasons why this recipe will become a staple in your kitchen:

  • Quick and Easy: This salad can be whipped up in under 15 minutes, making it perfect for a last-minute meal or a quick lunch.
  • Nutritious and Satisfying: Packed with plant-based protein from chickpeas and healthy fats from avocados, it keeps you full and energized.
  • Vibrant Flavors: The combination of creamy avocados, juicy tomatoes, and zesty lime creates a taste sensation that dances on your palate.
  • Versatile Dish: Serve it as a main dish, a side salad, or even a filling for wraps. The options are endless!
  • Fresh Ingredients: Using fresh, whole ingredients means you’re nourishing your body with the best nature has to offer.

Ingredients You’ll Need

Here’s what you’ll need to create this delicious avocado chickpea tomato salad:

  • 400g / 1 1/2 cups chickpeas: Drain and rinse for protein-packed goodness.
  • 2 medium avocados: Diced, these beauties add creaminess and healthy fats.
  • 250g / 1 pint cherry tomatoes: Halved, they bring a burst of sweetness.
  • 1/4 medium red onion: Finely diced for a bit of crunch and flavor.
  • 1/4 cup fresh cilantro: Chopped, it adds a fresh herbal note.
  • 2 tablespoons fresh lime juice: For that zesty kick.
  • 2 tablespoons olive oil: A heart-healthy fat to tie everything together.
  • 1/2 teaspoon cumin powder: A pinch of spice for depth of flavor.
  • Salt and black pepper: To taste, enhancing all the flavors.

Step-by-Step Instructions

Side view of a fresh salad featuring chickpeas, diced avocados, and bright cherry tomatoes in a bowl.

Creating this salad is as easy as 1-2-3! Follow these simple steps:

  1. In a large bowl, combine the chickpeas, cherry tomatoes, red onion, and cilantro.
  2. In a separate small bowl, whisk together the lime juice, olive oil, cumin powder, salt, and black pepper.
  3. Pour the dressing over the chickpea and tomato mixture. Gently toss to combine.
  4. Gently fold in the diced avocado.
  5. Serve immediately or chill for later. Enjoy!

Pro Tips for Success

Want to elevate your salad game? Check out these expert tips:

  • Choose Ripe Avocados: Look for avocados that yield slightly to pressure for the best texture.
  • Prevent Avocado Browning: Toss diced avocado with lime juice right after cutting to keep it vibrant.
  • Customize Your Dressing: Feel free to experiment with additional spices, like paprika or chili powder, for a kick.
  • Make it Ahead: Prepare all ingredients and keep the dressing separate until serving to maintain freshness.
  • Storage Tips: Store leftovers in an airtight container in the fridge for up to 2 days.
  • Perfect Pairings: This salad pairs beautifully with grilled chicken, fish, or a hearty quinoa dish.
  • Add More Veggies: Feel free to add bell peppers, cucumbers, or any of your favorite veggies for extra crunch.
  • Enjoy it Cold: This salad is refreshing straight from the fridge, making it ideal for hot summer days!

Common Mistakes and Troubleshooting

Even the best chefs make mistakes! Here are some common pitfalls to avoid:

  • Overmixing: Gently fold the avocado to prevent it from mashing into the salad.
  • Using Overripe Tomatoes: Choose firm, juicy tomatoes to avoid a soggy salad.
  • Skipping Salt: A little salt enhances all the flavors; don’t skip it!

Variations to Try

Feel like mixing things up? Here are some delicious variations to consider:

  • Spicy Avocado Chickpea Tomato Salad: Add diced jalapeños or a sprinkle of cayenne for heat.
  • Greek Twist: Incorporate feta cheese and Kalamata olives for a Mediterranean flair.
  • Quinoa & Chickpea Salad: Mix in cooked quinoa for an extra boost of protein and fiber.
  • Creamy Avocado Dressing: Blend avocado with yogurt and lime juice for a creamy dressing instead of olive oil.

Storage and Make-Ahead Instructions

This salad is not only quick to prepare, but it also stores well:

  • Storage: Keep the salad in an airtight container in the refrigerator. It’s best enjoyed within 2 days.
  • Make-Ahead: You can prepare all ingredients ahead of time but mix the avocado in right before serving to keep it fresh.

Comprehensive FAQ

Got questions? We’ve got answers!

  • Is this salad vegan? Yes! This avocado chickpea tomato salad is entirely plant-based.
  • Can I substitute chickpeas? Absolutely! You can use black beans or kidney beans instead.
  • How many servings does this recipe make? This recipe serves 4-6 people, depending on portion sizes.
  • Can I make this salad ahead of time? Yes, but keep the dressing separate until you’re ready to serve for the freshest taste.
  • What should I serve this salad with? It’s great on its own or as a side dish to grilled meats or fish.
  • Is this salad gluten-free? Yes! All the ingredients are naturally gluten-free.
  • How can I add more protein? Consider adding grilled chicken, shrimp, or even tofu for a protein boost.
  • Can I use frozen chickpeas? Yes, just thaw and rinse them before using!

Nutrition Tips and Dietary Adaptations

This salad is not only delicious but also nutritious! Here are some dietary adaptations you can consider:

  • Low-Carb Version: Swap chickpeas for diced zucchini or cucumber to lower the carb count.
  • High-Protein Additions: Add hard-boiled eggs or grilled chicken for extra protein.
  • Heart-Healthy Options: Use avocado oil instead of olive oil for a different flavor and health benefits.

Essential Equipment Recommendations

You don’t need much to make this salad, but here are a few essentials:

  • Mixing Bowl: A large bowl for combining all ingredients.
  • Whisk: For mixing the dressing smoothly.
  • Cutting Board and Knife: To prepare your fresh ingredients.

Serving Suggestions

This avocado chickpea tomato salad is incredibly versatile. Here’s how you can enjoy it:

  • As a Standalone Meal: Serve it chilled on its own for a refreshing dish.
  • Wrap It Up: Use it as a filling for a whole grain wrap for a satisfying lunch.
  • With Grains: Pair it with quinoa or brown rice for a balanced meal.
  • On Toast: Spread it on whole grain toast for a delicious open-faced sandwich.

In conclusion, this Avocado Chickpea Tomato Salad is more than just a dish; it’s a celebration of flavors and nutrition that can brighten up any meal. So, roll up your sleeves, gather your ingredients, and let’s make healthy eating the highlight of your day! Enjoy every vibrant bite and remember, the kitchen is your playground—get creative!

Avocado Chickpea Tomato Salad with Lime

Prep Time 10 minutes
Total Time 10 minutes
Servings 4 servings
Calories 350
A fresh and vibrant salad combining chickpeas, ripe avocados, cherry tomatoes, and a zesty lime dressing. Perfect for a quick, healthy meal or side dish.

Ingredients

Main ingredients

  • 400 g chickpeas, drained and rinsed
  • 2 medium avocados, diced
  • 250 g cherry tomatoes, halved
  • 1/4 medium red onion, finely diced
  • 1/4 cup fresh cilantro, chopped
  • 2 tablespoons fresh lime juice
  • 2 tablespoons olive oil
  • 1/2 teaspoon cumin powder
  • to taste Salt and black pepper

Instructions 

  • Combine chickpeas, cherry tomatoes, red onion, and cilantro in a large bowl.
  • Whisk lime juice, olive oil, cumin, salt, and pepper in a small bowl.
  • Pour dressing over the salad and toss gently.
  • Gently fold in diced avocados.
  • Serve immediately or chill for later.

Notes

For extra flavor, add a pinch of chili flakes or a dash of hot sauce.
Calories: 350kcal
Cost: $10
Course: Salad
Cuisine: international
Keyword: avocado

Discover the Tangy Delight of Dill Pickle Pasta Salad!

Welcome to your new favorite recipe: Dill Pickle Pasta Salad! This dish is more than just a side; it’s a flavor-packed experience that combines the creaminess of cheese, the crunch of dill pickles, and the zest of a rich dressing. Perfect for summer barbecues, family gatherings, or as a hearty lunch, this pasta salad will have everyone asking for seconds! In this comprehensive guide, we’ll walk you through everything from ingredients to serving suggestions, ensuring your Dill Pickle Pasta Salad is a hit every time.

Why You’ll Love This Recipe

  • Quick and Easy: With minimal prep and no cooking beyond boiling pasta, this salad is ready in just 20 minutes!
  • Flavor Explosion: The combination of creamy dressing, crunchy dill pickles, and savory cheese creates a truly irresistible dish.
  • Perfect for Meal Prep: Make it ahead of time and store it in the fridge for a quick, nutritious meal option all week long.
  • Flexible Ingredients: Easily customize with your favorite add-ins or substitutes to match your taste preferences.
  • Kid-Friendly: Even the pickiest eaters love the tangy flavors and satisfying textures of this pasta salad!

Ingredients Breakdown

Here’s what you’ll need to whip up this delightful Dill Pickle Pasta Salad:

  • 16 oz rotini noodles: Cook according to package instructions. Other pasta shapes like shells or elbows work well too!
  • 2 cups chopped small dill pickles: For the best flavor, use crunchy, tangy dill pickles.
  • 8 oz colby jack cheese: Diced for a creamy texture; feel free to substitute with cheddar or pepper jack for an extra kick.
  • 1 small white onion: Minced to add a slight crunch and sweetness.
  • 1/3 cup brine from dill pickles: This is key for enhancing the dressing’s flavor!
  • 1 cup mayonnaise: For a creamy base; Greek yogurt can be used for a lighter version.
  • 1/2 cup sour cream: Adds tang and richness; you can substitute with a dairy-free alternative if needed.
  • 1/3 cup dill pickle liquid: Use this for an extra burst of flavor.
  • 2 tbsp fresh dill: Chopped, or 1 tbsp dried dill if you don’t have fresh.
  • 1/4 tsp salt: Adjust according to taste.
  • 1/4 tsp ground black pepper: For that perfect seasoning balance.

Pro Tips for the Perfect Dill Pickle Pasta Salad

Side angle of a colorful Dill Pickle Pasta Salad with ingredients like pickles, cheese, and onions arranged in a bowl.
  • Choose the Right Pasta: Opt for pasta shapes with ridges or holes, like rotini or shells, to capture the dressing and flavors.
  • Chill Before Serving: Allow the salad to chill for at least an hour before serving to let the flavors meld beautifully.
  • Add Crunch: Toss in some diced bell peppers or celery for an extra crunch!
  • Customize Your Cheese: Experiment with different cheese types like feta or mozzarella for varied flavors.
  • Use Pickle Juice Wisely: Save some pickle juice from the jar to add to your dressing for an extra zing.
  • Fresh Herbs: Besides dill, consider adding parsley or chives for an herbaceous twist.
  • Don’t Skip the Brine: The brine is essential—don’t skip it! It’s what gives the salad that signature tang.
  • Leftover Love: This salad stays fresh in the fridge for up to 3 days, making it a great meal prep option.

Avoid Common Mistakes

  • Overcooking Pasta: Follow the package instructions closely to avoid mushy noodles.
  • Skipping the Chill: Skipping the chilling time means missing out on the best flavor experience!
  • Ignoring Seasoning: Taste as you go! Adjust salt and pepper to fit your palate.

Delicious Variations

Feel free to get creative! Here are some fun variations to try:

  • Spicy Dill Pickle Pasta Salad: Add diced jalapeños or a dash of hot sauce for a spicy kick.
  • Italian Twist: Incorporate sun-dried tomatoes and olives for a Mediterranean flair.
  • Protein-Packed: Mix in cooked chicken, bacon, or chickpeas for a heartier meal.
  • Vegan Version: Substitute the mayo and sour cream with vegan alternatives and omit cheese.

Storage and Make-Ahead Instructions

This Dill Pickle Pasta Salad is a fantastic make-ahead dish! Here’s how to store it:

  • Keep it in an airtight container in the fridge for up to 3 days.
  • If making ahead, consider storing the dressing separately and mixing just before serving to maintain freshness.
  • For longer storage, freeze individual portions in freezer-safe containers. Thaw in the fridge overnight before serving.

Frequently Asked Questions

Here are some questions you might have about this recipe:

  • How long does Dill Pickle Pasta Salad last in the fridge? Up to 3 days when stored properly in an airtight container.
  • Can I make this salad ahead of time? Absolutely! It’s best when allowed to chill for a bit before serving.
  • What type of pasta works best? Short pasta with ridges or shapes like rotini, shells, or elbows are ideal.
  • Can I use other types of pickles? Yes! Bread-and-butter pickles can add a sweeter flavor if you prefer.
  • Is this recipe gluten-free? Use gluten-free pasta to make this salad gluten-free!
  • Can I add meat to this salad? Definitely! Chicken or bacon can make it more filling.
  • What if I don’t have fresh dill? Dried dill works as a substitute—just use about 1/3 of the amount.
  • Can I use Greek yogurt instead of mayonnaise? Yes, Greek yogurt is a great alternative and adds extra protein!

Nutrition Tips and Dietary Adaptations

This Dill Pickle Pasta Salad can be tailored to fit various dietary needs:

  • Low-Calorie: Use Greek yogurt instead of mayonnaise and reduce the cheese.
  • Dairy-Free: Opt for vegan mayonnaise and skip the cheese.
  • High-Protein: Add chickpeas or shredded chicken to boost protein content.

Essential Equipment for Your Kitchen

Before you start cooking, make sure you have the following kitchen essentials:

  • Large pot: For boiling pasta.
  • Colander: To drain the pasta once cooked.
  • Mixing bowl: A large bowl for combining all the ingredients.
  • Measuring cups and spoons: For accurate ingredient measurements.

Serving Suggestions

Serve your Dill Pickle Pasta Salad chilled or at room temperature. Here are some ideas:

  • Pair it with grilled chicken or steak for a complete meal.
  • Serve as a side dish at barbecues or picnics.
  • Top with additional fresh dill for a pop of color and flavor!

This Dill Pickle Pasta Salad is not just a recipe; it’s a celebration of flavors that transforms simple ingredients into a delightful dish. Whether you’re hosting a gathering or just want a quick meal, this pasta salad offers a burst of tangy deliciousness that everyone will love. So grab your ingredients, unleash your inner chef, and enjoy the process—it’s about to become your go-to summer recipe!

Simple Dill Pickle Pasta Salad

Prep Time 15 minutes
Cook Time 10 minutes
Total Time 25 minutes
Servings 6 servings
Calories 450
A tangy and creamy pasta salad packed with dill pickles and fresh herbs, perfect for picnics and gatherings.

Ingredients

Pasta

  • 16 oz rotini noodles (Cook according to package instructions.)

Dill pickles

  • 2 cups chopped small dill pickles

Cheese

  • 8 oz colby jack cheese, diced (Feel free to substitute with another cheese.)

White onion

  • 1 small white onion, minced

Brine from dill pickles

  • 1/3 cup brine from dill pickles

Mayonnaise

  • 1 cup mayonnaise

Sour cream

  • 1/2 cup sour cream

Dill

  • 2 tbsp fresh dill, chopped (Or use 1 tbsp dried dill.)

Salt

  • 1/4 tsp salt (Adjust according to taste.)

Black pepper

  • 1/4 tsp ground black pepper (Adjust according to taste.)

Instructions 

  • Cook the rotini noodles according to package instructions, then drain and let cool.
  • In a large bowl, combine cooked noodles, chopped pickles, diced cheese, minced onion, and chopped dill.
  • Mix in mayonnaise, sour cream, pickle brine, and dill. Season with salt and pepper.
  • Stir until well combined and refrigerate for at least 30 minutes before serving.

Notes

For extra flavor, let the salad sit in the fridge for a few hours before serving.
Calories: 450kcal
Cost: $12
Course: Salad
Cuisine: American
Keyword: pasta, Pickles

Experience the Ultimate Watermelon Salad Like Never Before!

Welcome to a vibrant culinary adventure where freshness meets flavor! This Zesty Watermelon Salad with Arugula and Feta is more than just a dish; it’s a celebration of summer in every bite. Bursting with juicy watermelon, peppery arugula, creamy feta, and a medley of fresh herbs, this salad is perfect for those sunny days or any occasion where you want to impress your guests with something nutritious and delicious. Let’s dive into why you’ll absolutely love this recipe!

Why You’ll Love This Recipe

  • Refreshing and Hydrating: Watermelon is over 90% water, making this salad a perfect choice for staying hydrated during hot summer days.
  • Flavor Explosion: The combination of sweet watermelon, tangy feta, and zesty lemon dressing creates a delightful contrast that will tantalize your taste buds.
  • Quick and Easy: Ready in just 15 minutes, this salad is the ultimate quick meal or side dish for any busy lifestyle.
  • Versatile Ingredients: With simple ingredients that are easily customizable, you can make it your own by adding your favorite herbs or swapping out the feta for another cheese.
  • Perfect for Any Occasion: Whether you’re hosting a summer BBQ, picnic, or just prepping a quick lunch, this salad is sure to be a hit!

Ingredient Breakdown

Let’s get into the details of what you’ll need to create this refreshing watermelon salad. Here’s what you’ll gather:

  • Watermelon: About 4 cups of watermelon cubes (roughly one medium seedless watermelon), cut into 1-inch pieces. This is the star of the show!
  • Olive Oil: 3 tablespoons for a rich, smooth dressing that enhances the flavors.
  • Lemon: Zest from 1 medium lemon and 1 tablespoon of fresh lemon juice to add a bright zing.
  • Fresh Herbs: 1/4 cup mixture of mint, oregano, basil, parsley, or dill, finely chopped. Feel free to mix and match based on your preference!
  • Feta Cheese: 4 ounces, crumbled. This brings a creamy, salty element that pairs perfectly with the sweetness of the watermelon.
  • Arugula: 3 cups (approximately 4 oz or 113g) for a peppery bite and vibrant color.
  • Seasoning: Freshly ground black pepper and kosher salt to taste, optional.

How to Make It

A vibrant salad featuring cubes of watermelon, arugula leaves, and crumbled feta, garnished with herbs.

Creating this watermelon salad is as easy as 1-2-3! Follow these simple steps to whip up a dish that will wow your friends and family:

  1. In a large bowl, combine the olive oil, lemon zest, lemon juice, and your choice of fresh herbs. Stir to mix well.
  2. Add the watermelon cubes and gently toss to coat them in the dressing.
  3. Finally, fold in the crumbled feta cheese and arugula. Toss gently to combine all ingredients. Taste and adjust seasoning with salt and pepper as needed. Serve chilled.

Pro Tips for Perfecting Your Salad

  • Choose Ripe Watermelon: Look for watermelons that feel heavy for their size and have a uniform shape. A yellow spot indicates ripeness.
  • Chill the Ingredients: For an extra refreshing salad, chill your ingredients beforehand.
  • Mix Your Herbs: Experiment with different combinations of herbs to find your favorite flavor profile.
  • Use Quality Feta: Opt for a good quality feta cheese for the best flavor. Crumbled feta is often more flavorful than block feta.
  • Adjust the Dressing: Feel free to add a splash of balsamic vinegar for a tangy twist or a drizzle of honey for added sweetness.
  • Serve Immediately: For the best texture and flavor, serve the salad right after preparing it.
  • Meal Prep: If making ahead, store the watermelon and arugula separately from the dressing and feta to keep everything fresh.
  • Garnish Creatively: Top with additional herbs or a sprinkle of chili flakes for an extra kick!

Avoid Common Mistakes

Follow these tips to ensure your watermelon salad is always a success:

  • Overdressing: Avoid sogginess by not overdoing the dressing. Start with less, and add more to taste.
  • Using Unripe Watermelon: This can lead to a bland salad. Always opt for ripe, sweet watermelon.
  • Skipping the Seasoning: Don’t forget to season to enhance the flavors! A pinch of salt can elevate the dish significantly.

Delicious Variations of This Watermelon Salad

Mix things up with these fun variations:

  • Watermelon and Avocado Salad: Add cubed avocado for a creamy texture and healthy fats.
  • Spicy Watermelon Salad: Incorporate jalapeños or chili flakes for a spicy kick!
  • Nutty Delight: Toss in some toasted pecans or walnuts for crunch and added nutrition.
  • Grilled Watermelon Salad: For a smoky flavor, grill the watermelon slices before adding them to the salad.

Storage and Make-Ahead Instructions

This salad is best enjoyed fresh, but if you need to prep ahead:

  • Store the dressing separately in the fridge for up to 3 days.
  • Keep watermelon and arugula in airtight containers, and combine them with the dressing just before serving.

Frequently Asked Questions

  • Can I use different fruits? Absolutely! Try using peaches or strawberries for a fruity twist.
  • Is this salad suitable for meal prep? Yes, just keep the dressing separate until serving.
  • What can I substitute for feta? Goat cheese or a dairy-free cheese alternative works great!
  • How long does this salad last? Best consumed within a day for optimal freshness.
  • Can I make this vegan? Yes! Skip the feta or use a plant-based alternative.
  • What herbs work best? Mint, basil, and dill all pair beautifully with watermelon.
  • Can I add protein? Yes, grilled chicken or chickpeas can make this salad a complete meal!
  • Is this salad kid-friendly? Definitely! The sweet watermelon and creamy feta are usually a hit with kids.

Nutritional Tips and Dietary Adaptations

This salad is not just delicious; it’s packed with health benefits:

  • Low in Calories: A great low-calorie option for those watching their weight.
  • High in Vitamins: Watermelon is rich in vitamins A and C, promoting skin health and boosting immunity.
  • Gluten-Free: Naturally gluten-free, making it suitable for various dietary needs.
  • Customize for Your Diet: Easily adapt this salad for keto, paleo, or vegan diets by swapping in appropriate ingredients.

Essential Equipment

To make this watermelon salad, you’ll need:

  • Sharp Knife: For cutting the watermelon and herbs efficiently.
  • Large Mixing Bowl: To combine all ingredients without making a mess.
  • Measuring Cups and Spoons: For accurate ingredient measurements.
  • Serving Bowl: Present your beautiful salad in a visually appealing bowl.

Serving Suggestions

Pair this salad with:

  • Grilled Meats: Perfect alongside grilled chicken or steak for a complete meal.
  • Sandwiches: A refreshing side for any sandwich or wrap.
  • Picnics: Pack this salad for any outdoor gathering or picnic—it’s always a crowd-pleaser!

Conclusion

This Zesty Watermelon Salad with Arugula and Feta is not just a recipe; it’s an experience that brings joy to your table. With its vibrant flavors, refreshing ingredients, and endless variations, it’s destined to become a staple in your summer cooking repertoire. So grab your ingredients, get creative, and enjoy every delicious bite! Remember, cooking healthy can be exciting and fun—dive in and let your culinary creativity shine!

Watermelon Salad with Arugula, Feta, & Fresh Herbs

Prep Time 10 minutes
Total Time 10 minutes
Servings 4 servings
Calories 150
A refreshing summer salad combining sweet watermelon, peppery arugula, tangy feta, and fresh herbs for a light, flavorful dish.

Ingredients

Watermelon

  • 4 cups watermelon cubes (about 1 inch cubes)
  • 3 tablespoons olive oil
  • zest 1 medium lemon lemon zest
  • 1 tablespoon lemon juice
  • 1/4 cup fresh mint, oregano, basil leaves, parsley or dill, chopped (reserve a few whole leaves for garnish)
  • 4 ounces feta cheese (approximately)
  • 3 cups fresh arugula (about 4oz-113g or 720ml)
  • to taste black pepper (freshly ground)
  • to taste kosher salt

Instructions 

  • Combine olive oil, lemon zest, lemon juice, and herbs in a large bowl.
  • Add watermelon cubes and toss gently to coat.
  • Add feta, arugula, black pepper, and toss gently. Season with salt if needed. Serve chilled.

Notes

Use fresh herbs for the best flavor and adjust seasoning to taste.
Calories: 150kcal
Cost: $15
Course: Salad
Cuisine: American
Keyword: watermelon