Author

Ryan

Browsing

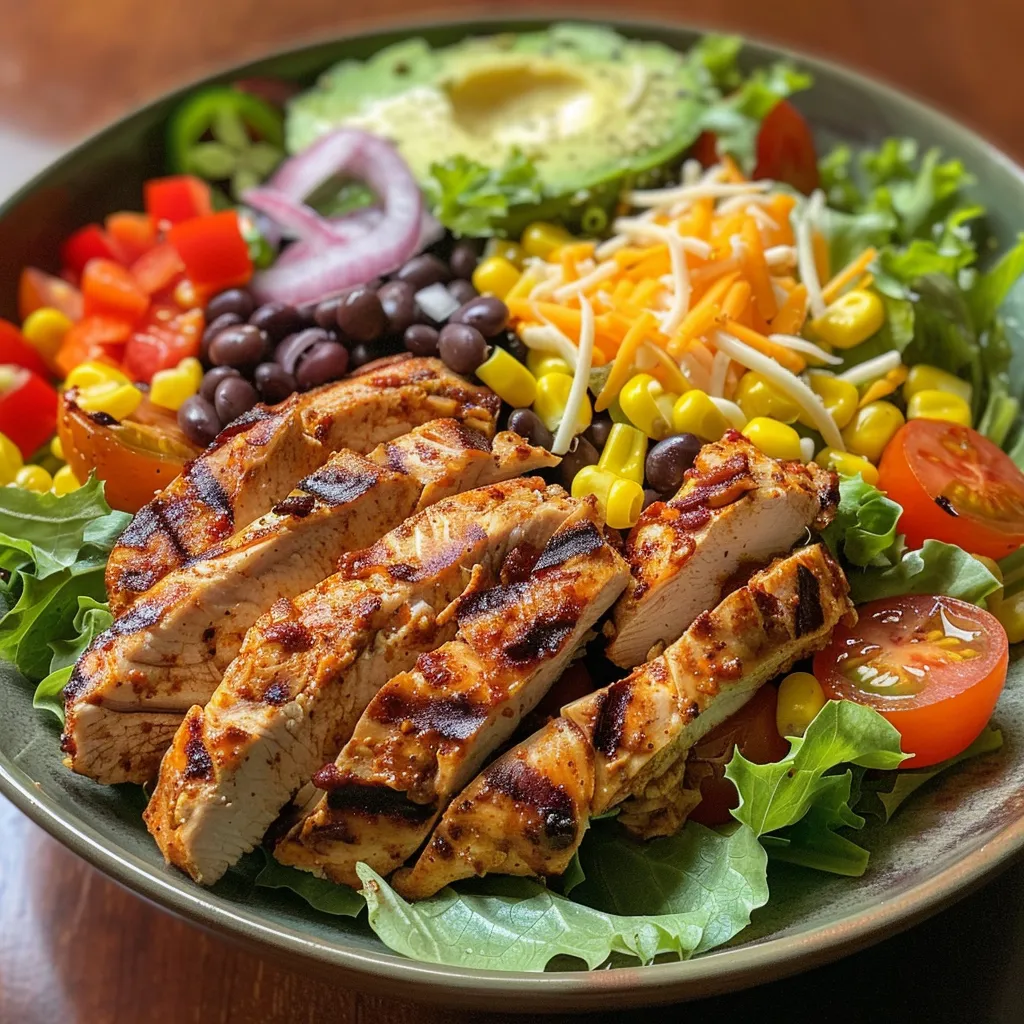
If you’re looking to add some zing to your meal prep, you’ve landed in the right spot. This Spicy Southwest Chicken Salad is a vibrant explosion of flavors and textures, perfect for anyone who wants a nutritious meal that feels like a fiesta! Packed with grilled chicken, zesty veggies, and a creamy dressing, this dish is a celebration for your taste buds. It’s not just healthy; it’s downright delicious!

This recipe is designed for everyone—from busy professionals looking for a quick meal to families wanting to add a bit of spice to their dinner table. Let’s dive into why you’ll love this recipe, how to make it, and tips to elevate your salad game!

Why You’ll Love This Recipe

  • Flavor-packed goodness: Each bite is a perfect blend of bold flavors, from the spiced chicken to the creamy dressing.
  • Nutritious ingredients: Loaded with protein, fiber, and healthy fats, this salad is a balanced meal that will fuel your day.
  • Quick & easy: Ready in under 30 minutes, it’s perfect for weeknight dinners or meal prepping for the week.
  • Customizable: You can easily tweak the ingredients based on what you have on hand or your dietary preferences.
  • Meal-prep friendly: This dish stores well, making it a great option for lunches or dinners throughout the week.

Ingredients You’ll Need

Here’s the lineup for this colorful salad:

  • 2 grilled chicken breasts (or pan-seared for a quicker option)
  • 4 cups romaine or mixed greens (feel free to swap in kale or spinach!)
  • 1 cup black beans (drained and rinsed; use canned for convenience)
  • 1 cup corn (can be fresh, canned, or roasted for extra flavor)
  • 1 red bell pepper, diced (adds crunch and sweetness)
  • ½ cup cherry tomatoes, halved (for a burst of juiciness)
  • 1 avocado, sliced (for creamy goodness)
  • ¼ cup red onion, finely sliced (adds a sharp flavor)
  • Shredded cheese (optional – cheddar or pepper jack for extra richness)
  • ½ cup Greek yogurt (or light mayo for a creamier dressing)
  • 2 tbsp lime juice (freshly squeezed gives the best flavor)
  • 1 tbsp olive oil (for a healthy fat boost)
  • 1 tsp chili powder (for that spicy kick)
  • ½ tsp cumin (adds warmth)
  • ½ tsp paprika (for color and flavor)
  • Salt & pepper to taste

Steps to Make the Best Spicy Southwest Chicken Salad

Let’s get cooking! Here’s how to whip up this salad:

  • Step 1: Cook the Chicken – Start by seasoning your chicken breasts with chili powder, cumin, salt, and a pinch of paprika. Grill or pan-sear until golden and juicy (about 6-7 minutes per side). Let it rest, then slice thinly.
  • Step 2: Prepare the Dressing – In a small bowl, whisk together Greek yogurt, lime juice, olive oil, and spices. Adjust the seasoning to your liking—add extra chili for more heat!
  • Step 3: Assemble the Salad – Layer the greens in a large bowl. Add black beans, corn, bell peppers, tomatoes, avocado, and cheese. Top with the sliced chicken and drizzle the spicy dressing over. Toss gently to combine.

Pro Tips for Success

Close-up view of a fresh Spicy Southwest Chicken Salad with sliced avocado, diced bell pepper, and cherry tomatoes.
  • Marinate for extra flavor: If you have time, marinate the chicken for at least 30 minutes before cooking. The flavors will penetrate deeper, making the chicken even tastier!
  • Use fresh ingredients: Fresh vegetables not only taste better but also provide better texture and nutrition.
  • Chill the salad: For an even more refreshing experience, chill the salad in the fridge for about 30 minutes before serving.
  • Customize your toppings: Add nuts, seeds, or your favorite dressing for a unique twist!
  • Batch cooking: Grill multiple chicken breasts at once and store them in the fridge for quick salads all week.
  • Keep it colorful: The more colors on your plate, the more nutrients you’ll get! Mix and match veggies as you like.
  • Don’t skip the lime: The acidity helps brighten the dish and balance out the flavors.
  • Meal-prep the components: Store the ingredients separately to keep everything fresh throughout the week.

Common Mistakes and Troubleshooting

  • Overcooking the chicken: Ensure you don’t overcook your chicken. Aim for an internal temperature of 165°F (75°C) for juicy meat.
  • Too much dressing: Start with a small amount of dressing and add more as needed to avoid sogginess.
  • Unbalanced flavors: Taste as you go! Adjust the seasoning and acidity to suit your preference.
  • Skipping the rest period: Letting the chicken rest after cooking allows juices to redistribute, ensuring it stays tender.

Variations to Spice Things Up

Feeling adventurous? Here are some delicious variations to try:

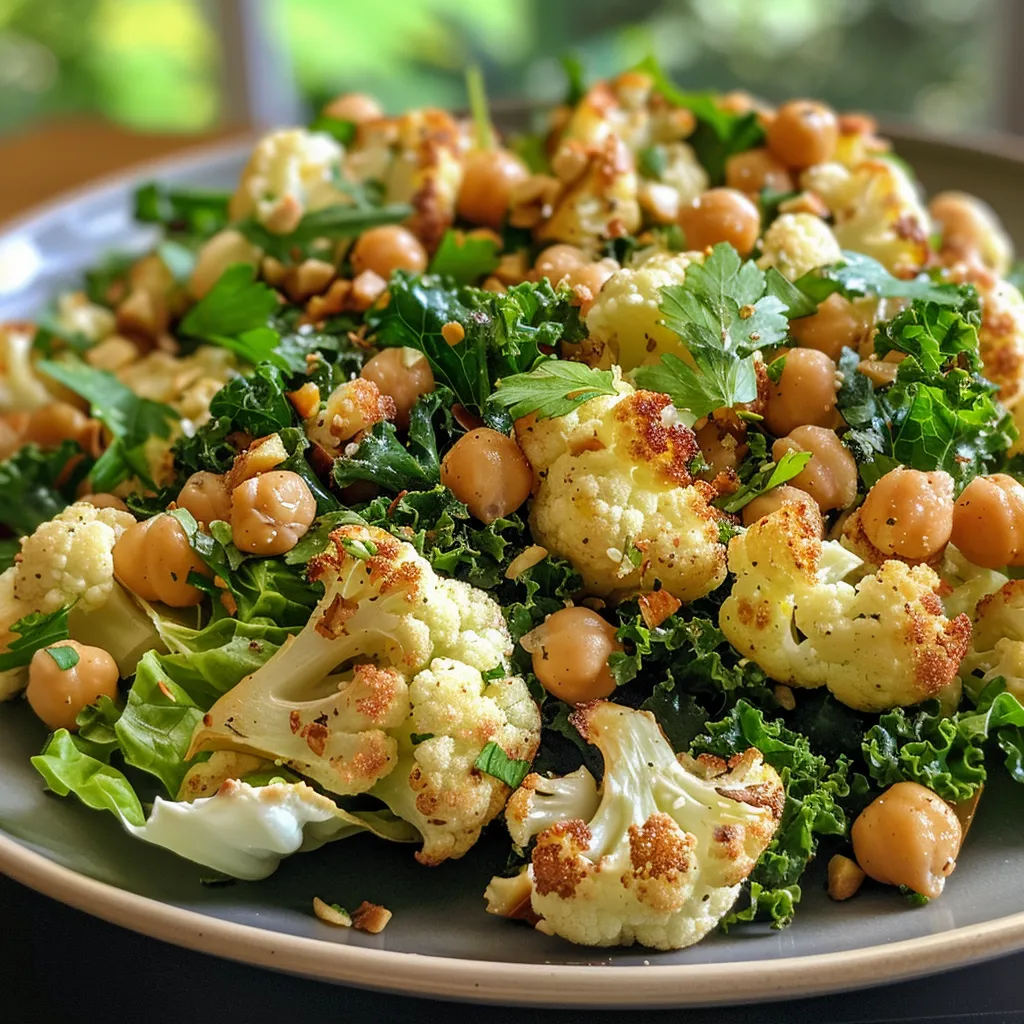
  • Southwest Veggie Delight: Skip the chicken and double up on beans and avocados for a satisfying vegetarian option.
  • Quinoa Southwest Salad: Add cooked quinoa for an extra protein boost and a nutty flavor.
  • Fiesta Taco Salad: Crumble tortilla chips on top for a crunchy texture and a fun twist!
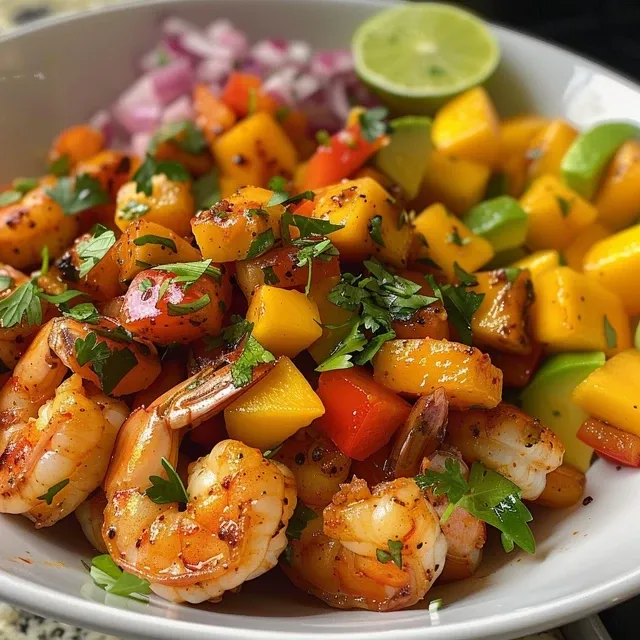
  • Spicy Shrimp Salad: Swap chicken for seasoned shrimp for a seafood twist that’s equally delicious.

Storage and Make-Ahead Instructions

This salad is perfect for meal prep!

  • Refrigeration: Store leftovers in an airtight container in the fridge for up to 3 days.
  • Make-ahead tips: Prepare the ingredients separately and assemble just before serving to keep everything fresh.
  • Freezing: While the salad itself doesn’t freeze well, cooked chicken can be frozen for up to 3 months. Thaw before adding to your salad.

Nutrition Tips and Dietary Adaptations

This salad is not only tasty but also packed with nutrition:

  • Protein boost: The chicken and beans provide a solid source of protein, essential for muscle repair and growth.
  • Healthy fats: Avocado and olive oil offer heart-healthy fats that keep you satisfied.
  • Fiber-rich: With beans and veggies, this salad is high in fiber, promoting digestive health.
  • Gluten-free: Naturally gluten-free, making it accessible for those with gluten intolerance.

Equipment Recommendations

To make your cooking experience smoother, here are some handy tools:

  • Grill or grill pan: For perfectly seared chicken with those delicious grill marks.
  • Mixing bowls: Essential for prepping and mixing your ingredients.
  • Whisk: For a quick and easy dressing mix.
  • Sharp knife: For slicing your chicken and veggies with ease.

Serving Suggestions

This salad is versatile and pairs well with various side dishes:

  • Whole grain bread: A slice of whole grain bread or pita on the side makes it a complete meal.
  • Rice or quinoa: Serve alongside a small portion of brown rice or quinoa for added carbs.
  • Fresh fruit: A side of fresh fruit complements the salad beautifully and adds a sweet touch.

Frequently Asked Questions

  • Can I use frozen chicken? Yes! Just ensure it’s fully thawed before cooking for best results.
  • Is this salad suitable for meal prep? Absolutely! Just store the dressing separately to keep everything fresh.
  • What if I don’t like beans? You can substitute them with additional veggies or even lentils!
  • How spicy is this salad? The spice level can be adjusted by modifying the amount of chili powder used in the dressing.
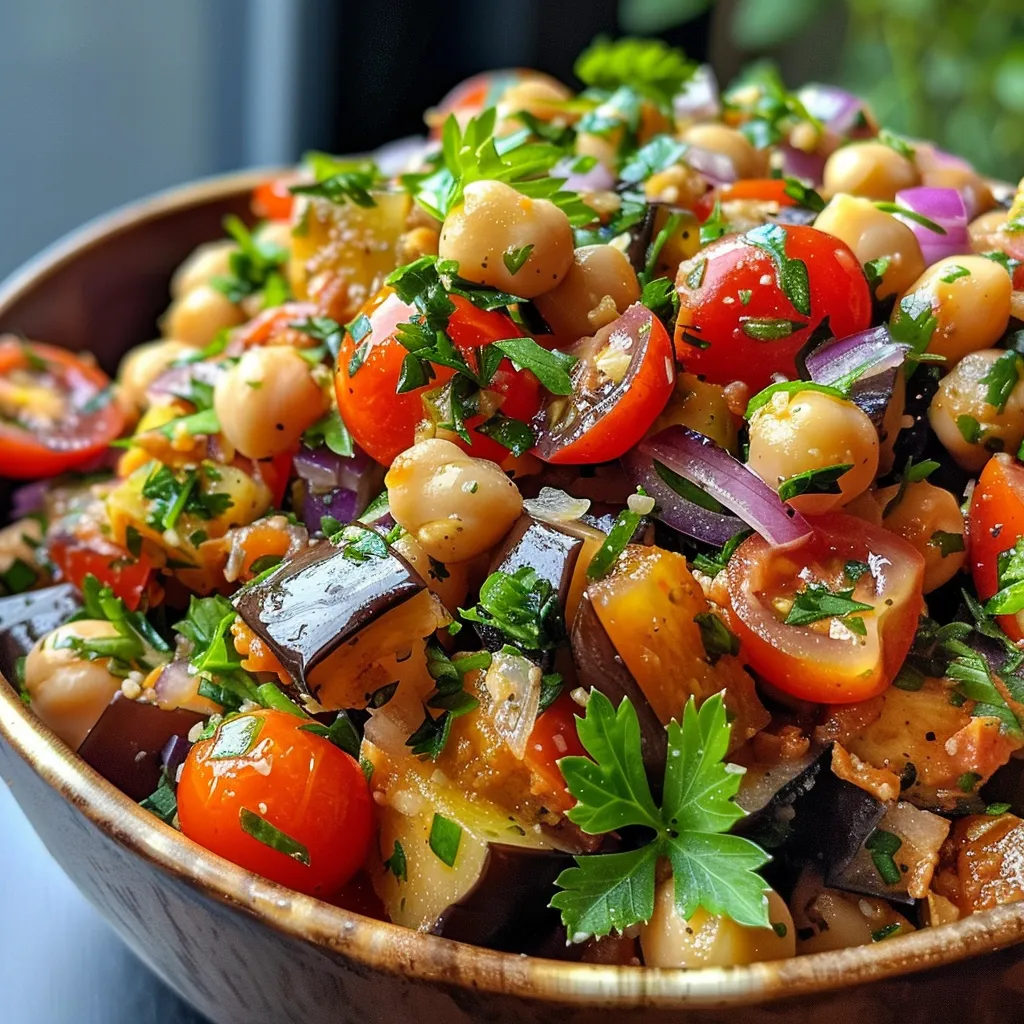
  • Can I make it vegan? Yes! Substitute the chicken with chickpeas and use a vegan yogurt alternative for the dressing.
  • How long does it last in the fridge? The salad is best enjoyed within 3 days for optimal freshness.
  • Can I add fruits? Definitely! Diced mango or pineapple would add a delightful sweetness.
  • How can I make it low-carb? Skip the corn and beans, and load up on more veggies instead!

In conclusion, the Spicy Southwest Chicken Salad is not just a meal; it’s a vibrant experience that combines nutrition with exciting flavors. Whether you’re looking for a quick dinner, a satisfying lunch, or a make-ahead meal, this salad has got you covered. So, gather your ingredients, unleash your inner chef, and let this salad bring joy to your table!

Spicy Southwest Chicken Salad

Prep Time 15 minutes
Cook Time 15 minutes
Total Time 30 minutes
Servings 4 servings
Calories 450
A vibrant and flavorful salad combining grilled chicken with fresh vegetables and a spicy dressing, perfect for a quick and healthy meal.

Ingredients

Protein

  • 2 pieces grilled chicken breasts (or pan-seared)

Vegetables & Greens

  • 4 cups romaine or mixed greens
  • 1 cup black beans (drained and rinsed)
  • 1 cup corn (fresh, canned, or roasted)
  • 1 piece red bell pepper, diced
  • ½ cup cherry tomatoes, halved
  • 1 piece avocado, sliced
  • ¼ cup red onion, finely sliced

Dairy & Condiments

  • ½ cup Greek yogurt or light mayo
  • 2 tbsp lime juice
  • 1 tbsp olive oil

Spices & Seasonings

  • 1 tsp chili powder
  • ½ tsp cumin
  • ½ tsp paprika
  • to taste Salt & pepper

Instructions 

  • Season chicken with spices, grill or pan-sear until cooked, then slice thinly.
  • Whisk Greek yogurt, lime juice, olive oil, and spices to make the dressing.
  • Layer greens, beans, corn, peppers, tomatoes, avocado, cheese, and sliced chicken in a bowl. Drizzle with dressing and toss gently.

Notes

Adjust spice levels by adding more chili powder or hot sauce.
Calories: 450kcal
Cost: $15
Course: Salad
Cuisine: Southwest
Keyword: Chicken

Welcome to the Zesty Avocado Couscous Salad Adventure!

Dive into a bowl of sunshine with this Refreshing Avocado Couscous Salad! Bursting with vibrant flavors and colorful ingredients, this dish is not just healthy; it’s an adventure on your plate. Perfect for any occasion, it’s quick to whip up and absolutely delightful! Let’s explore how to make this delicious salad that combines the fluffy texture of couscous with the creamy goodness of avocado.

Why You’ll Love This Recipe

Here are five reasons that will make you fall head over heels for this avocado couscous salad:

  • Quick and Easy: With just a handful of steps, this salad is a breeze to prepare in under 30 minutes!
  • Flavor-Packed: Each ingredient shines, from the zesty lime vinaigrette to the fresh veggies, creating a kaleidoscope of taste.
  • Nutritious and Filling: Packed with healthy fats from avocados and fiber from couscous, this salad keeps you satisfied.
  • Versatile: Perfect as a side dish, light lunch, or even a main course, making it a go-to for any meal!
  • Perfect for Meal Prep: Make it ahead of time, and it stays fresh in the fridge, making your weeknight dinners a snap!

Ingredients You’ll Need

Gather your ingredients for this colorful salad:

  • 1 cup couscous: The fluffy base that soaks up all the flavors.
  • 2 ripe avocados, diced: For that creamy texture and healthy fats.
  • 1 red bell pepper, chopped: Adds a sweet crunch and vibrant color.
  • 1 small cucumber, diced: Fresh and crisp, perfect for hydration.
  • 1/4 cup red onion, finely chopped: A zing of flavor that elevates the dish.
  • 1/4 cup fresh cilantro, chopped: Brightens up the salad with its fresh taste.
  • 1/4 cup olive oil: For a rich, smooth dressing.
  • Juice of 2 limes: The star of the show, adding zest and brightness.
  • Salt and pepper to taste: Essential for enhancing flavors!

Step-by-Step Instructions

A side angle of a fresh couscous salad featuring diced avocado and vibrant vegetables.

Ready to whip up your avocado couscous salad? Follow these simple steps:

  • Prepare the couscous: In a saucepan, bring 1 1/4 cups of water to a boil. Stir in the couscous, cover, and remove from heat. Let it sit for about 5 minutes.
  • Fluff the couscous: After 5 minutes, use a fork to fluff the couscous, separating the grains.
  • Dice the vegetables and avocado: While the couscous cools, chop the red bell pepper, cucumber, and red onion. Dice the ripe avocados last to keep them from browning.
  • Make the lime vinaigrette: In a small bowl, whisk together olive oil, lime juice, salt, and pepper until well combined.
  • Combine ingredients: In a large bowl, mix the cooled couscous, diced vegetables, and chopped cilantro.
  • Taste and adjust seasoning: Drizzle the lime vinaigrette over the salad, toss gently, and taste. Adjust seasoning as needed!
  • Chill before serving: For the best flavor, let the salad chill in the fridge for at least 30 minutes before serving.

Pro Tips for the Best Salad

Here are some expert insights to elevate your salad game:

  • Use fresh ingredients: Opt for fresh herbs and ripe vegetables to ensure maximum flavor.
  • Experiment with grains: Swap couscous with quinoa or farro for different textures and flavors.
  • Customize your dressing: Add garlic or a pinch of chili flakes for a kick in the vinaigrette.
  • Chill before serving: Allow the salad to rest; flavors meld beautifully with time.
  • Perfect avocado selection: Choose avocados that yield slightly to pressure for ideal creaminess.
  • Meal prep like a pro: Store ingredients separately and mix them just before serving for maximum freshness.
  • Serving suggestions: Pair with grilled chicken or shrimp for a protein boost!
  • Mix it up: Add nuts or seeds for crunch and extra nutrients!

Common Mistakes and Troubleshooting

Even seasoned cooks can make mistakes! Here’s how to avoid them:

  • Overcooked couscous: Keep an eye on the cooking time; overcooked couscous can become mushy.
  • Browned avocado: Squeeze lime juice over diced avocado immediately to prevent browning.
  • Too oily dressing: If your dressing is too oily, add more lime juice to balance it out.
  • Underseasoned salad: Don’t forget to taste and adjust seasoning before serving.

Delicious Variations

Feel free to get creative with your couscous salad! Here are some delightful variations:

  • Greek Twist: Add feta cheese and Kalamata olives for a Mediterranean flair.
  • Protein-Packed: Toss in grilled chicken or chickpeas for a heartier meal.
  • Spicy Kick: Incorporate diced jalapeños or a dash of hot sauce for some heat.
  • Seasonal Favorites: Mix in seasonal veggies like corn in summer or roasted butternut squash in fall.

Storage and Make-Ahead Instructions

This salad is fantastic for leftovers! Here’s how to store it:

  • Fridge: Store in an airtight container for up to 4 days. The flavors improve as they mingle!
  • Make Ahead: Prepare the components in advance and combine them on the day of serving for optimal freshness.

Nutrition Tips and Dietary Adaptations

Whether you’re vegan, vegetarian, or just looking for a nutritious meal, this salad adapts beautifully:

  • Vegan-Friendly: This recipe is naturally vegan; enjoy it guilt-free!
  • Gluten-Free: Use gluten-free couscous or quinoa to maintain a gluten-free diet.
  • Low-Carb Option: Substitute couscous with cauliflower rice for a lower-carb version.

Equipment Recommendations

Here’s what you’ll need to create this salad:

  • Medium saucepan: For cooking the couscous.
  • Mixing bowl: A large bowl for combining all ingredients.
  • Whisk: Essential for mixing the vinaigrette.
  • Knife and cutting board: For chopping your fresh veggies.

Frequently Asked Questions

Here are some common queries about this avocado couscous salad:

  • Can I use frozen couscous? Yes, just cook according to package instructions. Fresh is best, but frozen works in a pinch!
  • How long does this salad last? It can be stored in the fridge for up to 4 days.
  • Can I add other vegetables? Absolutely! Feel free to include your favorites.
  • Is this salad spicy? Not unless you add spicy elements like jalapeños—it’s quite mild as-is!
  • Can I make this salad ahead of time? Yes! It even tastes better after the flavors meld for a few hours.
  • What’s a good pairing for this salad? Grilled proteins or a hearty soup would complement it perfectly.
  • Can I substitute lime juice? Lemon juice works well; it will give a slightly different flavor but is equally delicious!
  • Is this salad kid-friendly? Yes! Most kids enjoy the creamy avocado and sweet bell peppers.

Serving Suggestions

Ready to serve your colorful creation? Here are a few ideas:

  • Garnish: Top with extra cilantro or a sprinkle of lime zest for an added pop!
  • As a Side: Serve alongside grilled meats or fish for a balanced meal.
  • For Lunch: Pack it in a mason jar for an easy, portable lunch option!

Conclusion: Your Salad Journey Awaits!

This Zesty Avocado Couscous Salad is not just a meal; it’s a celebration of freshness, flavor, and fun in the kitchen. With its vibrant colors and nutritious ingredients, it proves that healthy eating can be both exciting and satisfying. So grab your ingredients and let this salad bring joy to your plate!

Refreshing Avocado Couscous Salad with Lime Vinaigrette

Prep Time 10 minutes
Cook Time 10 minutes
Total Time 20 minutes
Servings 4 servings
Calories 250
A vibrant and healthy salad combining creamy avocados, crunchy vegetables, and zesty lime dressing, perfect for a light meal or side dish.

Ingredients

Grains

  • 1 cup couscous

Vegetables and herbs

  • 2 ripe avocados avocados (diced)
  • 1 red bell pepper red bell pepper (chopped)
  • 1 small cucumber cucumber (diced)
  • 1/4 cup red onion (finely chopped)
  • 1/4 cup fresh cilantro (chopped)

Dressing

  • 1/4 cup olive oil
  • Juice of 2 limes lime juice
  • to taste salt and pepper

Instructions 

  • Cook the couscous according to package instructions.
  • Fluff the cooked couscous and let it cool slightly.
  • Dice the avocados and vegetables, then combine in a bowl.
  • Whisk together lime juice, olive oil, salt, and pepper to make the vinaigrette.
  • Pour the dressing over the salad, toss gently, and chill before serving.

Notes

For extra flavor, add a pinch of chili flakes or a sprinkle of feta cheese.
Calories: 250kcal
Cost: $12
Course: Salad
Cuisine: Mediterranean
Keyword: avocado

Welcome to your new favorite dish! Our Cold Soba Noodle Salad is a vibrant, delicious way to enjoy a nutritious meal that’s as easy to prepare as it is fun to eat. With the perfect balance of flavors and textures, this dish is ideal for weeknight dinners, lunch boxes, or even a light picnic. Get ready to dive into a bowl of crunchy cucumbers, zesty scallions, and a creamy peanut dressing that will make your taste buds dance!

Why You’ll Love This Recipe

  • Quick and Easy: This salad takes less than 30 minutes to prepare, making it perfect for busy weeknights.
  • Nutritious Ingredients: Packed with fresh vegetables and whole grains, this dish is a powerhouse of vitamins and minerals.
  • Customizable: Feel free to add or swap ingredients based on what you have on hand or your dietary preferences.
  • Perfect for Meal Prep: Make a big batch and store it in the fridge for quick lunches or dinners throughout the week.
  • Deliciously Satisfying: The combination of textures and flavors will keep you coming back for more!

Ingredient Breakdown

Let’s get into the details! Here’s what you’ll need for this incredible Cold Soba Noodle Salad:

  • Soba Noodles: 8 ounces of soba noodles (look for 100% buckwheat for a nutty flavor). Many brands mix buckwheat and wheat, so check the label!
  • Kosher Salt: 1 teaspoon for salting the noodle water, enhancing the flavor of the noodles.
  • Cucumber: 1 English cucumber, peeled and cut into ribbons. You can also use 2 small Persian cucumbers for a similar effect.
  • Scallions: 4 thinly sliced, using both the white and green parts for a burst of flavor.
  • Shredded Carrot: 1 cup, store-bought or julienned, to add sweetness and crunch.
  • Cilantro Leaves: ½ cup, optional but bright; feel free to substitute with mint or Thai basil.
  • Toasted Sesame Seeds: 1 tablespoon for crunch and aroma; toast raw sesame seeds in a dry pan for extra flavor.
  • Creamy Peanut Butter: ⅓ cup, either natural or conventional; if unsalted, add a pinch of salt later.
  • Soy Sauce: 2 tablespoons (use tamari for gluten-free; coconut aminos work but taste sweeter).
  • Rice Vinegar: 1 tablespoon, unseasoned is best; using seasoned rice vinegar is fine but reduce honey slightly.
  • Lime Juice: 1 tablespoon for freshness; fresh is best, but you can substitute more rice vinegar if needed.
  • Toasted Sesame Oil: 1 tablespoon, don’t substitute regular sesame oil here—it’s essential for the flavor!
  • Honey: 1 tablespoon (or maple syrup for a vegan option) to balance the flavors.
  • White Miso: 2 teaspoons, optional but adds savory depth; substitute with 1 teaspoon extra soy sauce.
  • Fresh Ginger: 1 teaspoon, finely grated; adjust to your taste if you love ginger heat.
  • Garlic: 1 teaspoon, finely grated or minced; reduce to ½ teaspoon for a milder flavor.
  • Sriracha: ½ teaspoon (or chili garlic sauce); increase if you want it spicy!
  • Warm Water: ¼ cup to thin the dressing; add more by tablespoon until it pours easily.
  • Shelled Edamame: 1 cup, thawed if frozen, for a quick protein boost.
  • Roasted Peanuts: 2 tablespoons, roughly chopped; substitute with cashews or almonds if you prefer.
  • Pickled Ginger: 2 tablespoons, optional for extra zing and that sushi-bar vibe.

Pro Tips for Success

  • Don’t Overcook the Noodles: Soba noodles should be cooked until al dente to maintain their texture.
  • Chill the Salad: For the best flavor, let the salad sit in the fridge for at least 30 minutes before serving.
  • Adjust the Dressing: Feel free to tweak the dressing ingredients to match your taste preferences, such as adding more lime juice for extra zing.
  • Prep Ahead: Make the dressing and chop your veggies in advance to save time on busy days.
  • Store Separately: If meal prepping, keep the dressing separate from the salad to prevent sogginess.
  • Experiment with Add-Ins: Think about including grilled chicken, tofu, or other veggies to make it more filling.
  • Use Fresh Ingredients: The fresher your ingredients, the better your salad will taste!
  • Garnish for Presentation: A sprinkle of additional cilantro or sesame seeds on top makes for a beautiful presentation.

Common Mistakes and Troubleshooting

A side view of a colorful cold soba noodle salad, highlighting the noodles, cucumbers, and dressing.
  • Noodles Sticking Together: Make sure to rinse the noodles thoroughly under cold water after cooking to remove excess starch.
  • Too Salty?: If your salad turns out too salty, try adding more veggies or a squeeze of lime juice to balance the flavors.
  • Dressing Too Thick?: Add a bit more warm water to thin it out until you reach your desired consistency.
  • Not Enough Flavor?: Adjust your seasonings gradually; remember, you can always add more, but you can’t take it out!

Variations to Try

  • Spicy Soba Salad: Add extra sriracha or chili flakes to the dressing for a kick.
  • Protein-Packed: Include grilled chicken, shrimp, or marinated tofu for a heartier meal.
  • Vegetable Medley: Swap in seasonal veggies like bell peppers, snap peas, or radishes for added crunch and color.
  • Nut-Free Version: Replace peanut butter with sunflower seed butter and omit the peanuts for a nut-free option.

Storage and Make-Ahead Instructions

This Cold Soba Noodle Salad is perfect for meal prep! You can store it in an airtight container in the fridge for up to 4 days. Just remember to keep the dressing separate if you want to maintain the salad’s crispness. To make ahead, prepare the noodles and vegetables a day in advance, and mix everything together just before serving.

Frequently Asked Questions

  • Can I use pasta instead of soba noodles? Absolutely! Any noodle will work, but the flavor profile will change slightly.
  • Is this salad gluten-free? If you use gluten-free tamari and 100% buckwheat soba noodles, yes!
  • How do I make this vegan? Simply swap honey for maple syrup and ensure your soy sauce is gluten-free.
  • Can I freeze this salad? It’s best enjoyed fresh, but the dressing can be frozen. Just thaw and mix it in when ready to serve.
  • What can I serve with this salad? It pairs well with grilled proteins, spring rolls, or a light soup.
  • How do I adjust the spice level? Start with less sriracha and gradually add more until it reaches your desired heat.
  • Can I make this ahead of time? Yes! It holds up well in the fridge, and the flavors develop beautifully overnight.
  • What’s the best way to store leftovers? Keep any leftovers in an airtight container in the fridge for up to 4 days.

Nutrition Tips and Dietary Adaptations

This Cold Soba Noodle Salad is not only delicious but also offers a balance of macronutrients. To boost the nutritional profile, consider adding:

  • Leafy Greens: Incorporate spinach or kale for added vitamins and minerals.
  • Quinoa or Brown Rice: Mix in for additional fiber and protein.
  • Chia or Flaxseeds: Sprinkle on top for a healthy dose of omega-3 fatty acids.

Equipment Recommendations

  • Large Pot: Essential for boiling the soba noodles—choose one that holds at least 5 quarts.
  • Fine Mesh Strainer: Perfect for rinsing the noodles without losing any down the drain.
  • Mixing Bowl: A large bowl is key for tossing all your salad ingredients together.
  • Whisk: Use for combining the dressing ingredients smoothly.

Serving Suggestions

Serve this tantalizing Cold Soba Noodle Salad in vibrant bowls and garnish with extra cilantro and sesame seeds for a pop of color. Pair with fresh lime wedges for a zesty finish, and enjoy it alongside grilled shrimp or chicken for a complete meal. Whether it’s a casual weeknight dinner or a gathering with friends, this dish is sure to impress!

So there you have it! A comprehensive, fun, and flavorful approach to making the most of your Cold Soba Noodle Salad. Enjoy the creativity of the kitchen as you whip up this dish that’s equally exciting to make and eat. Happy cooking!

Cold Soba Noodle Salad with Cucumber and Creamy Peanut Dressing (Weeknight-Level Easy, Lunch-Box Perfect)

Prep Time 15 minutes
Cook Time 10 minutes
Total Time 25 minutes
Servings 4 servings
Calories 520
A quick and flavorful cold soba noodle salad featuring fresh cucumber, crunchy edamame, and a creamy peanut dressing, perfect for weeknights or lunchboxes.

Ingredients

Noodles

  • 8 ounces soba noodles (look for 100% buckwheat for the nutty flavor)
  • 1 teaspoon kosher salt (for salting the noodle water)

Vegetables

  • 1 english cucumber english cucumber (peeled into ribbons; substitute 2 small Persian cucumber)
  • 4 scallion scallions (thinly sliced; use both white and green parts)
  • 1 cup shredded carrot (store-bought or julienne 1 medium carrot)
  • 0.5 cup cilantro leaves (optional but bright; substitute mint or Thai basil)

Dressing

  • 1 tablespoon toasted sesame seed (for crunch and aroma; toast raw sesame in a dry pan if needed)
  • 0.33 cup creamy peanut butter (natural or conventional; if unsalted, add extra salt later)
  • 2 tablespoon soy sauce (use tamari if gluten-free; coconut aminos taste sweeter)
  • 1 tablespoon rice vinegar (unseasoned is best; seasoned is fine but reduce honey slightly)
  • 1 tablespoon lime juice (fresh gives the cleanest zing; substitute more rice vinegar if needed)
  • 1 tablespoon toasted sesame oil (a little goes a long way; don't substitute regular sesame oil)
  • 1 tablespoon honey (or maple syrup for vegan)
  • 2 teaspoon white miso (optional but adds savory depth; substitute 1 teaspoon extra soy sauce)
  • 1 teaspoon fresh ginger (finely grated; adjust up if you love ginger heat)
  • 1 teaspoon garlic (finely grated or minced; reduce to 1/2 teaspoon for milder flavor)
  • 0.5 teaspoon sriracha (or chili garlic sauce; increase if you want it spicy)
  • 0.25 cup warm water (to thin the dressing; add more by tablespoon until it pours easily)

Protein & Garnish

  • 1 cup shelled edamame (thawed if frozen; a quick protein boost that stays snacky and fresh)
  • 2 tablespoon roasted peanut (roughly chopped; substitute cashew or almond)
  • 2 tablespoon pickled ginger (optional, for extra zing and sushi-bar vibe)

Instructions 

  • Cook soba noodles in salted boiling water until al dente, then drain and rinse with cold water.
  • Prepare the dressing by whisking together peanut butter, soy sauce, rice vinegar, lime juice, sesame oil, honey, miso, ginger, garlic, sriracha, and warm water until smooth.
  • In a large bowl, toss cooked noodles with cucumber ribbons, scallions, shredded carrot, cilantro, edamame, chopped peanuts, and pickled ginger.
  • Pour the dressing over the salad and toss to combine evenly.
  • Serve immediately or chill for 30 minutes for extra flavor.

Notes

For a vegan version, substitute honey with maple syrup and check for gluten-free soba noodles if needed.
Calories: 520kcal
Cost: $15
Course: Main Course, Salad
Cuisine: Japanese
Keyword: Peanut Dressing, Soba Noodles

Discover the Joy of Eating Well with Zesty Mango Shrimp Salad

If you’re looking for a dish that dances on your taste buds while packing a nutritional punch, look no further than this vibrant Mango Shrimp Salad. Bursting with juicy mangoes, creamy avocados, and perfectly seasoned shrimp, this recipe is a summer celebration in a bowl! It’s quick to prepare, making it perfect for busy weeknights or as a delightful dish for gatherings. Let’s dive into why this salad is not just a meal, but an experience waiting to happen!

Why You’ll Love This Recipe

  • Flavor Explosion: The combination of sweet mangoes and savory shrimp creates a symphony of flavors that will leave you craving more.
  • Nutritious & Balanced: Packed with healthy fats, protein, and vitamins, this salad is as wholesome as it is delicious.
  • Quick & Easy: In under 30 minutes, you can whip up this refreshing dish, making it ideal for a fast lunch or dinner.
  • Versatile Serving Options: Enjoy it as a main course, a side dish, or even as a topping on tacos or wraps.
  • Perfect for Meal Prep: This salad stays fresh and tasty, making it a great option for meal prep enthusiasts.

Ingredients Breakdown

Here’s what you’ll need to create this scrumptious Mango Shrimp Salad:

  • 1 pound jumbo or extra large shrimp: Peeled and deveined, fully thawed for best results.
  • 3 tablespoons olive oil: Plus more for the pan, enhances the shrimp’s flavor.
  • ¾ teaspoon garlic powder: Adds a savory depth to the shrimp.
  • ¾ teaspoon chili powder: Gives a mild kick without overwhelming the delicate flavors.
  • ¾ teaspoon smoked paprika: Infuses a smoky note that complements the sweetness of the mangoes.
  • Salt and pepper (to taste): Essential for enhancing all the flavors.
  • 2 ripe mangoes: Peeled and diced, they bring sweetness and juiciness.
  • 2 medium ripe avocados: Diced, adding creaminess and healthy fats.
  • ½ a red bell pepper: Chopped for a crunchy texture and vibrant color.
  • ¼ cup thinly sliced red onions: Adds a sharpness that balances the sweetness.
  • 3 tablespoons chopped cilantro (or Italian parsley): For a fresh herbal note.
  • Juice of 1 orange, plus its zest: Brightens the salad with citrusy goodness.
  • Juice of 1 lime, plus its zest: Adds a tangy kick that enhances all ingredients.
  • ¼ cup extra virgin olive oil: A key component of the dressing for richness.
  • 1 teaspoon dijon mustard: For a hint of sharpness in the dressing.
  • 1 clove fresh garlic, minced or grated: Fresh garlic elevates the dressing’s flavor.

Pro Tips for Success

Close-up view of a Mango Shrimp Salad with shrimp, mango, avocado, and bell pepper.
  • Marinate the shrimp: Let the shrimp soak in the marinade for at least 15-20 minutes to enhance their flavor.
  • Watch the cooking time: Cook the shrimp for about 3-4 minutes per side; they should be opaque and pink for the best texture.
  • Chill your salad: For the best taste, allow the salad to chill for a bit before serving.
  • Use ripe mangoes: Look for mangoes that are slightly soft to the touch for the best sweetness and juiciness.
  • Keep the dressing separate: If meal prepping, store the dressing separately to keep the salad fresh.
  • Experiment with herbs: Feel free to switch cilantro for basil or mint based on your flavor preferences.
  • Adjust seasoning: Always taste and adjust salt and pepper before serving to ensure maximum flavor.
  • Use a non-stick pan: This will help achieve that perfect sear on the shrimp without sticking.
  • Include a variety of colors: The more colorful your salad, the more nutrients it provides!
  • Garnish generously: A sprinkle of extra herbs before serving can add a fresh finish.

Common Mistakes to Avoid

  • Overcooking shrimp: This can lead to rubbery texture. Keep an eye on them!
  • Skipping the marination: Don’t skip marinating; it’s crucial for flavor!
  • Choosing unripe mangoes: They won’t provide the sweet burst expected in this salad.
  • Using too much dressing: A little goes a long way; start with less and add as needed.
  • Neglecting seasoning: Always taste as you go—seasoning is key to great flavor.

Variations to Try

Looking to mix things up? Here are some fun variations of this Mango Shrimp Salad:

  • Spicy Mango Shrimp Salad: Add diced jalapeños or a splash of hot sauce for an extra kick.
  • Quinoa Mango Shrimp Salad: Toss in cooked quinoa for added texture and protein.
  • Grilled Chicken Mango Salad: Swap shrimp for grilled chicken for a twist on the protein.
  • Vegan Mango Salad: Replace shrimp with chickpeas or tofu for a plant-based version.

Storage and Make-Ahead Instructions

This Mango Shrimp Salad is perfect for meal prep! Here’s how to store it:

  • Refrigeration: Store the salad in an airtight container for up to 3 days.
  • Freezing: Not recommended as the texture of the shrimp and avocado will change.
  • Make-Ahead Tips: Prepare the salad ingredients and dressing separately, combining them just before serving to keep everything fresh.

Frequently Asked Questions

  • Can I use frozen shrimp? Yes, just make sure to fully thaw them and pat dry before cooking.
  • How do I make this salad spicier? Add fresh diced jalapeños or a splash of your favorite hot sauce.
  • What can I substitute for avocados? Try using diced cucumbers for a crunchy texture.
  • Is this salad gluten-free? Yes, this recipe is naturally gluten-free!
  • Can I make this salad vegan? Absolutely! Just substitute the shrimp with chickpeas or marinated tofu.
  • How long does this salad last in the fridge? It will stay fresh for about 3 days when stored in an airtight container.
  • What can I serve with this salad? It pairs well with grilled fish, chicken, or as a side with tacos.
  • Can I add other fruits? Yes! Pineapple or kiwi would be delicious additions.

Nutritional Tips and Dietary Adaptations

This Mango Shrimp Salad is not only delicious but also nutritious! Here are some dietary adaptations and tips:

  • Protein Source: Shrimp is a lean protein that supports muscle growth and recovery.
  • Healthy Fats: Avocados provide heart-healthy fats that can help you feel full longer.
  • Fiber-Rich: The veggies and fruits contribute fiber, aiding in digestion.
  • Low-Carb Option: This salad is naturally low in carbs, making it suitable for keto diets.
  • Boost Vitamins: The variety of colorful fruits and veggies ensures a wide range of vitamins and minerals in every bite.

Equipment Recommendations

For the best results, equip your kitchen with these essentials:

  • Non-Stick Skillet: Perfect for searing shrimp without sticking.
  • Mason Jar: Ideal for shaking up your dressing evenly.
  • Sharp Knife: For easy slicing of mangoes and avocados.
  • Cutting Board: A sturdy surface for all your chopping needs.

Serving Suggestions

Now that you’ve got your Mango Shrimp Salad ready, here are some serving ideas:

  • As a Standalone Meal: Enjoy it chilled on its own for a light lunch or dinner.
  • With Tortilla Chips: Serve with crispy tortilla chips for a fun appetizer.
  • On a Bed of Greens: Serve over a bed of mixed greens for added crunch.
  • As a Taco Filling: Use it as a filling for soft tacos for a delightful twist.

In conclusion, this Zesty Mango Shrimp Salad is not just a meal; it’s a celebration of flavors and nutrition. Whether you’re preparing it for a casual lunch or a festive gathering, it’s sure to impress. So get cooking, and enjoy the delightful dance of flavors!

Mango Shrimp Salad

Prep Time 15 minutes
Cook Time 8 minutes
Total Time 23 minutes
Servings 4 servings
Calories 350
A vibrant and refreshing salad combining juicy mangoes, tender shrimp, and creamy avocados, dressed in a zesty citrus vinaigrette.

Ingredients

Shrimp

  • 1 pound jumbo or extra large shrimp (peeled and deveined, thawed)

Marinade ingredients

  • 3 tablespoons olive oil (plus more for the pan)
  • 0.75 teaspoon garlic powder
  • 0.75 teaspoon chili powder
  • 0.75 teaspoon smoked paprika

Salt and pepper

  • to taste Salt and pepper

Fruits and vegetables

  • 2 ripe mangoes peeled and diced mangoes
  • 2 medium ripe avocados diced avocados
  • 0.5 red bell pepper chopped red bell pepper
  • 0.25 cup thinly sliced red onions
  • 3 tablespoons chopped cilantro (or Italian parsley)
  • 1 orange juice of 1 orange (plus zest)
  • 1 lime juice of 1 lime (plus zest)
  • 0.25 cup extra virgin olive oil
  • 1 teaspoon dijon mustard
  • 1 clove fresh garlic (minced or grated)

Dressing

  • ¼ cup extra virgin olive oil
  • 1 teaspoon dijon mustard
  • 1 clove fresh garlic (minced or grated)

Instructions 

  • Toss shrimp with marinade ingredients; marinate 15-20 minutes.
  • Cook shrimp in a skillet over medium-high heat for 3-4 minutes per side until seared and cooked through.
  • Combine dressing ingredients in a jar; shake well.
  • Mix all salad ingredients with dressing; serve at room temperature or chilled.

Notes

For best flavor, marinate shrimp briefly and pat dry before cooking.
Calories: 350kcal
Cost: $15
Course: Salad
Cuisine: fusion
Keyword: Healthy, Mango, Seafood

Discover the Vibrant World of Thai Glass Noodle Salad

Welcome to a culinary adventure that will tantalize your taste buds and ignite your passion for healthy eating! This Thai Glass Noodle Salad is not just another salad—it’s a refreshing blend of textures and flavors that brings the essence of Thailand right to your kitchen. Bursting with fresh ingredients, this dish is as simple to prepare as it is delicious. Whether you’re looking for a quick meal or a stunning side dish for your next gathering, this salad is your go-to recipe!

In this guide, we’ll dive deep into the world of glass noodles, explore the benefits of this dish, and provide you with all the tips and tricks to make it perfectly every time. Get ready to discover why this salad is a must-try!

Why You’ll Love This Recipe

  • Explosive Flavor: The combination of zesty lime, savory soy sauce, and aromatic herbs creates a symphony of flavors that dance on your palate.
  • Quick and Easy: With minimal prep time, this salad comes together in under 30 minutes, making it perfect for busy weeknights.
  • Nutritious and Wholesome: Packed with protein from shrimp or chicken, and loaded with fresh veggies, this salad is as nourishing as it is delicious.
  • Customizable: Tailor the ingredients to your taste or dietary restrictions—swap shrimp for tofu, or add your favorite vegetables!
  • Perfect for Meal Prep: This salad stores well and can be made ahead of time, making it an ideal choice for lunches or gatherings.

Thai Glass Noodle Salad Ingredients

This salad shines with fresh, high-quality ingredients. Here’s what you’ll need:

  • 200 grams Glass Noodles: Rinse with cold water to prevent sticking. These translucent noodles are the star of the dish, soaking up all the delicious dressing flavors.
  • 200 grams Cooked Shrimp or Chicken: Adds protein and richness; substitute with tofu for a vegetarian option.
  • 1 medium Cucumber: Opt for English cucumbers for a milder taste and crisp texture.
  • 1 medium Red Bell Pepper: Adds sweetness and vibrant color; you can also swap it for yellow or green peppers.
  • 1 medium Carrot: Shredded for that extra crunch and natural sweetness.
  • 50 grams Chopped Peanuts: Great for adding crunch; can be replaced with sunflower seeds for a nut-free alternative.
  • 0.5 bunch Fresh Cilantro: A classic herb in Thai cuisine; feel free to leave it out if you prefer other herbs.
  • 3 tablespoons Fresh Lime Juice: Provides a zesty kick; lemon juice is a suitable substitute.
  • 2 tablespoons Soy Sauce: Use low-sodium for a healthier option without sacrificing flavor.
  • 1 tablespoon Fish Sauce: Omit for vegetarian versions; adds a depth of flavor.
  • 1 teaspoon Sugar: Adjust sweetness to taste; balances the acidity of lime.
  • 2 tablespoons Sesame Oil: Drizzle for a nutty flavor; olive oil works as a great replacement.

How to Make Thai Glass Noodle Salad

Colorful Thai Glass Noodle Salad displayed with fresh ingredients and garnishes.

Ready to whip up this mouthwatering salad? Let’s break it down step-by-step.

Step 1: Prepare the Glass Noodles

Soak the glass noodles in warm water for about 10-15 minutes until they’re soft. Drain and rinse them with cold water to stop the cooking process and prevent sticking.

Step 2: Prepare the Vegetables

While the noodles soak, chop your cucumber, bell pepper, and shred the carrot. Set aside.

Step 3: Mix the Dressing

In a small bowl, whisk together the lime juice, soy sauce, fish sauce, sugar, and sesame oil until well combined.

Step 4: Combine Everything

In a large mixing bowl, combine the glass noodles, shrimp or chicken, chopped veggies, chopped peanuts, and cilantro. Pour the dressing over the top and toss gently to coat.

Step 5: Serve and Enjoy

Serve immediately for the freshest taste or chill in the fridge for 30 minutes to let the flavors meld. Enjoy your delicious Thai Glass Noodle Salad!

Pro Tips for Perfecting Your Salad

  • Rinse thoroughly: Always rinse your glass noodles well to prevent them from sticking together.
  • Balance flavors: Taste the dressing before adding it all; adjust lime juice, soy sauce, or sugar to suit your preference.
  • Fresh herbs: Use fresh herbs like mint or basil to elevate the dish with additional flavor.
  • Prep ahead: Make the salad a few hours in advance—just hold off on adding the peanuts until right before serving to keep them crunchy.
  • Experiment with textures: Consider adding sliced radishes or snap peas for extra crunch.
  • Vegan options: Substitute shrimp with tofu or tempeh for a delicious plant-based version.
  • Spice it up: Add sliced chili peppers for a kick of heat if you enjoy spice!
  • Storage tips: Store leftovers in an airtight container in the fridge for up to 2 days.

Common Mistakes and Troubleshooting

Even the best chefs make mistakes! Here are some common pitfalls and how to avoid them:

  • Overcooked noodles: Keep an eye on the soaking time to ensure the noodles maintain their chewiness.
  • Too salty: If the salad ends up too salty, add more lime juice or a touch of sugar to balance it out.
  • Not enough dressing: If the salad seems dry, drizzle more dressing before serving and toss gently.

Variations to Try

Feel free to get creative with your Thai Glass Noodle Salad! Here are some variations:

  • Vegetarian Delight: Replace shrimp with grilled tofu and add extra veggies like bell peppers and edamame.
  • Spicy Shrimp Salad: Toss in some diced jalapeños or Thai bird chilies for an extra kick of heat.
  • Crunchy Veggie Salad: Incorporate a variety of colorful veggies such as radishes, snap peas, or zucchini for added texture.
  • Peanut Butter Dressing: Add a tablespoon of peanut butter to the dressing for a creamier, nutty flavor.

Storage and Make-Ahead Instructions

This salad is perfect for meal prep! Here’s how to store it:

  • Refrigeration: Store in an airtight container in the fridge for up to 2 days. The flavors will meld beautifully over time!
  • Keep it fresh: To maintain crunchiness, store the peanuts separately and add them just before serving.

Frequently Asked Questions

  • Can I use other noodles? Yes! While glass noodles are traditional, you can use rice noodles or even whole wheat spaghetti in a pinch.
  • Is this salad gluten-free? If you use gluten-free soy sauce, this salad can easily be made gluten-free.
  • How spicy is Yum Woon Sen? The spice level depends on your preference! Adjust the amount of chili or omit it entirely for a milder taste.
  • Can I make this salad vegan? Absolutely! Simply omit the fish sauce and use tofu instead of shrimp or chicken.
  • What’s the best way to serve this salad? This salad is best served cold or at room temperature, making it a perfect dish for summer picnics or barbecues.
  • Can I freeze the salad? It’s not recommended to freeze, as the texture of the noodles and vegetables will change upon thawing.
  • What can I pair with this salad? Serve it as a side dish with grilled meats, or enjoy it as a light lunch on its own!
  • How can I adjust the sweetness of the dressing? Simply add more sugar if you prefer a sweeter taste or reduce it for a tangier flavor.

Nutritional Tips and Dietary Adaptations

This Thai Glass Noodle Salad is not only delicious but also nutritious! Here are some tips to enhance its health benefits:

  • Add more greens: Enhance the salad’s nutritional profile by adding leafy greens like spinach or kale.
  • Protein boost: Incorporate more protein-rich ingredients such as chickpeas or edamame for a heartier meal.
  • Healthy fats: Include avocado slices for a creamy texture and healthy fats.

Essential Equipment Recommendations

To make your cooking experience smooth and enjoyable, here’s a list of essential tools:

  • Large mixing bowl: For combining all your ingredients.
  • Small whisk or fork: To mix the dressing thoroughly.
  • Cutting board and knife: For prepping your vegetables.
  • Measuring cups and spoons: For accurate ingredient measurements.

Serving Suggestions

Looking for the perfect meal to accompany your Thai Glass Noodle Salad? Here are some delicious ideas:

  • Grilled Chicken or Fish: A light protein that pairs beautifully with the freshness of the salad.
  • Spring Rolls: Crunchy and filled with fresh vegetables, they complement the salad’s flavors.
  • Thai Curry: A rich, creamy curry contrasts wonderfully with the zesty salad.

Now that you have all the tools and tips to create the ultimate Thai Glass Noodle Salad, it’s time to get cooking! Enjoy the vibrant flavors and the joy of healthy eating. Remember, the kitchen is your creative playground—so have fun experimenting with all the delicious possibilities!

Thai Glass Noodle Salad: Fresh, Flavorful, and So Easy to Make

Prep Time 15 minutes
Total Time 15 minutes
Servings 4 servings
Calories 350
This vibrant Thai glass noodle salad combines fresh vegetables, herbs, and a tangy dressing for a quick and delicious meal.

Ingredients

Noodles

  • 200 grams Glass Noodles (Rinse with cold water to prevent sticking.)
  • 200 grams Cooked Shrimp or Chicken (Substitute with tofu for vegetarian option.)
  • 1 medium Cucumber (Opt for English cucumbers for a milder taste.)
  • 1 medium Red Bell Pepper (You can swap it for yellow or green peppers.)
  • 1 medium Carrot (Shredded for texture and sweetness.)
  • 50 grams Chopped Peanuts (Can be replaced with sunflower seeds for nut-free alternatives.)
  • 0.5 bunch Fresh Cilantro (Leave it out if you prefer other herbs.)
  • 3 tablespoons Fresh Lime Juice (Lemon juice is a suitable substitute.)
  • 2 tablespoons Soy Sauce (Use a low-sodium version if desired.)
  • 1 tablespoon Fish Sauce (Omit for vegetarian versions.)
  • 1 teaspoon Sugar (Adjust sweetness to taste.)
  • 2 tablespoons Sesame Oil (Olive oil works as a great replacement.)

Instructions 

  • Cook and rinse the glass noodles, then set aside.
  • Chop and prepare the vegetables and herbs.
  • Combine noodles, shrimp or chicken, vegetables, and herbs in a large bowl.
  • Mix lime juice, soy sauce, fish sauce, sugar, and sesame oil to make the dressing.
  • Pour the dressing over the salad and toss to combine.

Notes

Adjust the amount of fish sauce and sugar to suit your taste preferences.
Calories: 350kcal
Cost: $12
Course: Salad
Cuisine: Thai
Keyword: Glass Noodles

Discover the Vibrant Flavors of Chickpea and Eggplant Salad

Are you ready to dive into a culinary adventure that’s bursting with flavor and nutrition? Our Chickpea and Eggplant Salad is just the ticket! Combining the hearty goodness of chickpeas with the smoky richness of roasted eggplant, this salad is a delightful nod to the Mediterranean diet. Not only is it simple to prepare, but it’s also a stunning centerpiece for any meal. Let’s explore why this salad will become your new favorite!

Why You’ll Love This Recipe

This isn’t just any salad; it’s a vibrant celebration of taste and health! Here are five reasons to get excited:

  • Flavor Explosion: The combination of roasted eggplant, fresh veggies, and zesty tahini dressing creates a taste sensation that will dance on your taste buds.
  • Nutrient-Dense: Packed with proteins, fiber, and essential vitamins, this dish supports your health goals while keeping you satisfied.
  • Versatile Delight: Enjoy it as a side dish, a light lunch, or even as a meal prep option for those busy weekdays.
  • Quick and Easy: With simple ingredients and straightforward steps, you can whip this up in no time!
  • Customizable: Feel free to mix and match with seasonal veggies or add your favorite protein for a unique twist!

Ingredient Breakdown

Let’s take a closer look at the star ingredients of this salad:

  • Eggplant: This versatile vegetable adds a rich, smoky flavor when roasted. Look for firm, shiny eggplants with smooth skin. If you prefer, zucchini can be a great substitute!
  • Chickpeas: A fantastic source of plant-based protein and fiber. Canned or cooked chickpeas work well; just be sure to rinse them if using canned. If you’re feeling adventurous, try black beans for a different flavor profile.
  • Cucumber: Adds a refreshing crunch. Opt for English cucumbers for fewer seeds, or swap in bell peppers for extra color and sweetness.
  • Cherry Tomatoes: These sweet gems offer a burst of juiciness. You can use any variety of tomatoes, but roasting them alongside the eggplant will intensify their sweetness.
  • Red Onion: Provides a sharp bite that balances the dish. For a milder flavor, soak them in cold water for 10 minutes before adding to the salad.
  • Fresh Herbs: Parsley and mint elevate the salad with freshness. Feel free to use basil or cilantro for a different flavor twist!
  • Olive Oil: Use high-quality extra virgin olive oil for dressing; it enhances the flavors beautifully. Avocado oil is a great alternative.
  • Lemon Juice: Brightens the dish and adds a tangy kick. Lime juice can be used for a zesty variation.
  • Tahini: This sesame paste gives a creamy texture and nutty flavor. If you’re not a tahini fan, try using Greek yogurt or avocado instead.
  • Garlic: Adds depth and aroma. For a milder taste, roast the garlic with the eggplant.
  • Ground Cumin: This spice enhances the Mediterranean flavors. Coriander or smoked paprika can be used as substitutes.
  • Salt and Pepper: Essential for seasoning. Experiment with sea salt or smoked salt for added flavor.

Pro Tips for a Perfect Salad

Close-up of a colorful chickpea and eggplant salad with cucumbers, tomatoes, and herbs.

Ready to take your salad to the next level? Check out these expert insights:

  • Roasting Technique: Ensure the eggplant is cut into uniform cubes for even roasting. Toss with olive oil, salt, and pepper for the best flavor.
  • Flavor Infusion: Let the salad rest for at least 10-15 minutes after tossing with dressing. This allows the flavors to meld beautifully.
  • Make Ahead: This salad can be prepared a day in advance. Just keep the dressing separate until ready to serve to maintain freshness.
  • Serving Temperature: While delicious at room temperature, serving chilled can enhance the refreshing qualities of the veggies.
  • Texture Balance: Combine roasted and fresh ingredients for a delightful mix of textures. The creaminess of tahini pairs wonderfully with crunchy cucumbers and juicy tomatoes.
  • Adjusting Seasoning: Always taste before serving! Adjust salt, pepper, and acidity to fit your palate.
  • Creative Additions: Toss in roasted nuts or seeds for added crunch and nutrition. Almonds or pumpkin seeds work great!
  • Keep It Colorful: Use a variety of colorful veggies for a visually appealing dish that’s also packed with nutrients.

Common Mistakes and Troubleshooting

Even the best chefs make mistakes! Here are some common pitfalls and how to avoid them:

  • Overcrowding the Pan: When roasting eggplant, make sure the pieces are spaced out. Overcrowding can lead to steaming instead of roasting.
  • Underseasoning: Don’t skimp on seasoning! Eggplant absorbs flavors, so be generous with salt and spices.
  • Too Soggy: If the salad gets soggy, consider reducing the amount of dressing or adding fresh greens right before serving.
  • Skipped Resting Time: Allow the salad to rest after mixing. This step is crucial for flavor enhancement!

Variations to Try

Don’t hesitate to mix things up! Here are four delicious variations:

  • Grain Bowl: Add cooked quinoa or farro for a heartier meal. This adds a chewy texture and additional fiber.
  • Protein Boost: Mix in grilled chicken or feta cheese for an extra protein punch.
  • Spicy Kick: Sprinkle red pepper flakes or diced jalapeños for a spicy twist!
  • Seasonal Veggies: Swap in roasted bell peppers or zucchini, depending on what’s in season.

Storage and Make-Ahead Instructions

Want to prep this salad for the week? Here’s how:

  • Refrigeration: Store in an airtight container in the fridge for up to 4 days. Keep the dressing separate until ready to eat for optimal freshness!
  • Freezing: Not recommended, as the texture of the veggies will change. However, you can freeze the roasted eggplant and chickpeas separately.

Frequently Asked Questions

Got questions? We’ve got answers!

  • Can I use frozen eggplant? Yes, but fresh is preferred for the best texture. If using frozen, ensure it’s thawed and well-drained.
  • How do I make this salad vegan? It’s already vegan! Just ensure that any additional toppings, like cheese, are vegan-friendly.
  • Can I use dried chickpeas? Absolutely! Just soak and cook them beforehand for the best results.
  • What if I don’t have tahini? You can replace it with almond butter or omit it entirely for a lighter dressing.
  • How spicy is this salad? It’s not spicy unless you add spicy ingredients. Adjust to your taste!
  • Can I add other veggies? Definitely! This salad is versatile, so feel free to add your favorite vegetables.
  • What’s the best way to serve this salad? It can be served chilled or at room temperature. Great as a side or a main dish!
  • Can I double the recipe? Yes! This recipe scales up easily, perfect for gatherings or meal prep!

Nutrition Tips and Dietary Adaptations

This Chickpea and Eggplant Salad is not only delicious but also nutritious! Here are some quick tips:

  • High in Fiber: Chickpeas and veggies provide an excellent source of dietary fiber, promoting digestive health.
  • Rich in Antioxidants: Eggplants and tomatoes are loaded with antioxidants, supporting overall health and wellness.
  • Heart-Healthy Fats: Olive oil and tahini contribute healthy fats that are beneficial for heart health.
  • Gluten-Free Option: Naturally gluten-free, this salad is perfect for those with gluten sensitivities.

Equipment Recommendations

Having the right tools can make cooking easier and more enjoyable:

  • Cutting Board and Knife: A sharp knife and sturdy cutting board are essential for prepping your ingredients.
  • Baking Sheet: For roasting the eggplant, use a large baking sheet to allow for proper airflow.
  • Mixing Bowl: A large bowl is necessary for combining all the ingredients without making a mess.
  • Whisk: A simple whisk is perfect for blending the dressing smoothly.

Serving Suggestions

Looking for pairing ideas? Here are some ways to enjoy your salad:

  • As a Side Dish: Pair it with grilled meats or fish for a balanced meal.
  • With Whole Grains: Serve over a bed of quinoa or brown rice for a filling lunch.
  • In a Wrap: Use it as a filling for pita bread or lettuce wraps for a light meal option.

In conclusion, this Chickpea and Eggplant Salad is more than just a meal; it’s an experience. Packed with flavors, nutrients, and endless possibilities, it’s bound to make your kitchen a vibrant place of culinary creativity. So grab those ingredients, and let’s get cooking! Enjoy the journey of healthy eating!

Chickpea and Eggplant Salad

Prep Time 15 minutes
Cook Time 30 minutes
Total Time 45 minutes
Servings 4 people
Calories 250
A vibrant and healthy salad combining roasted eggplant, chickpeas, fresh vegetables, and herbs, dressed with a tangy lemon-tahini dressing.

Ingredients

Vegetables

  • 1 large Eggplant (diced into 1-inch cubes)
  • 1 can cans Chickpeas (drained and rinsed)
  • 1 medium Cucumber (diced)
  • 1 cup cherry tomatoes Cherry Tomatoes (halved)
  • 0.5 medium Red Onion (thinly sliced)

Herbs

  • 0.25 cup Fresh Parsley (chopped)
  • 2 tbsp tablespoons Fresh Mint (optional, chopped)

Dressing

  • 3 tbsp Olive Oil
  • 2 tbsp Lemon Juice
  • 1 tbsp Tahini
  • 1 clove Garlic (minced)
  • 0.5 tsp Ground Cumin

Seasoning

  • to taste Salt and Pepper

Instructions 

  • Preheat oven to 400°F (200°C). Toss eggplant with olive oil, salt, and pepper; roast for 25-30 minutes.
  • Whisk together olive oil, lemon juice, tahini, garlic, and cumin to make the dressing.
  • Combine roasted eggplant, chickpeas, cucumber, cherry tomatoes, red onion, parsley, and mint in a large bowl.
  • Pour dressing over the salad and toss gently to coat.
  • Let sit for 10-15 minutes before serving. Serve at room temperature or chilled.

Notes

This salad is perfect for a light lunch or as a side dish. Feel free to add more herbs for extra flavor.
Calories: 250kcal
Cost: $12
Course: Salad
Cuisine: Mediterranean
Keyword: Chickpeas

Welcome to Flavor Paradise!

Dive into a bowl of sunshine with this Amazing Mexican Street Corn Salad! This vibrant dish is a delightful twist on a classic street food favorite, perfect for summer barbecues, picnics, or a refreshing side at any meal. Packed with fresh corn, zesty lime, and creamy cheese, this Mexican Street Corn Salad will leave your taste buds dancing. Let’s embark on a flavorful journey that proves healthy eating doesn’t have to be boring!

Why You’ll Love This Recipe

  • Flavor Explosion: The combination of sweet grilled corn, tangy lime, and creamy cotija cheese creates a symphony of flavors that’s irresistible!
  • Quick and Easy: With minimal prep and cooking time, you can whip up this salad in under 30 minutes, making it a go-to for busy weekdays or last-minute gatherings.
  • Customizable: Whether you prefer it spicy, tangy, or extra cheesy, this salad can be easily adapted to suit your taste preferences.
  • Health Benefits: Packed with nutritious ingredients, this salad is not only delicious but also provides a good source of vitamins and fiber.
  • Perfect for Any Occasion: Whether it’s a casual barbecue or a fancy dinner party, this salad is sure to impress your guests!

Ingredients Breakdown

Here’s what you need to create this delightful Mexican Street Corn Salad along with some substitution options:

  • 4 cups fresh corn (grilled, charred, or frozen): Grilled corn adds flavor magic, while frozen corn is a convenient alternative if fresh isn’t available.
  • 1/2 cup red onion, finely diced: Adds a crunchy texture and a mild sharpness; you can substitute with green onions for a milder flavor.
  • 1/2 cup cherry tomatoes, halved: These sweet gems add color and freshness; swap with regular tomatoes if needed.
  • 1/2 cup cilantro, chopped: This herb brings a burst of freshness; if you’re not a fan, parsley can be a great alternative.
  • 1 cup cotija cheese (or feta cheese): Cotija provides a crumbly texture and salty flavor; feta can be used for a similar taste.
  • 1/4 cup mayonnaise: This creamy base binds the salad together; Greek yogurt can be used for a lighter option.
  • 1 tablespoon lime juice (freshly squeezed): Don’t skip the lime! It brightens the flavors immensely.
  • 1 teaspoon chili powder: Adds a hint of spice; feel free to increase the quantity for more heat!
  • Salt and pepper: To taste, enhancing all the flavors in the salad.

Pro Tips for the Perfect Salad

Vibrant Mexican street corn salad with grilled corn and fresh ingredients, displayed from a side angle.

Here are some expert insights to take your Mexican Street Corn Salad to the next level:

  • Grill the Corn: For an authentic flavor, grill your corn on high heat until it’s charred. This caramelization brings out the natural sweetness!
  • Chill Before Serving: Letting the salad sit in the fridge for at least 30 minutes allows the flavors to meld beautifully.
  • Garnish Creatively: Top with extra cheese, cilantro, or a sprinkle of chili powder for an appealing presentation.
  • Experiment with Flavors: Try adding avocado for creaminess or jalapeños for heat!
  • Use Fresh Ingredients: Fresh vegetables make a significant difference in taste and texture. The fresher, the better!
  • Mix and Match: Feel free to add black beans, corn salsa, or diced bell peppers for extra texture and flavor.
  • Be Mindful of Leftovers: If you have leftovers, consume them within 2-3 days for optimal freshness.
  • Stay Seasoned: Adjust the seasoning to your taste! A pinch of salt can elevate the flavors significantly.

Avoiding Common Mistakes

Even seasoned chefs can make mistakes. Here’s how to avoid them:

  • Overcooking the Corn: Don’t let it get mushy! Just a few minutes on the grill or stovetop is enough.
  • Skipping the Lime Juice: This step is crucial for balancing the flavors. Always include it!
  • Ignoring Texture: Aim for a mix of crunchy and creamy elements to keep every bite interesting.
  • Too Much Dressing: Start with less mayonnaise and add more as needed to avoid a soggy salad.

Variations to Explore

Want to change it up? Here are four tasty variations of the Mexican Street Corn Salad:

  • Spicy Street Corn Salad: Add diced jalapeños or a splash of hot sauce for a zesty kick!
  • Avocado-Lime Street Corn Salad: Incorporate diced avocado for a creamy texture and rich flavor.
  • Southwestern Street Corn Salad: Mix in black beans, corn salsa, and diced bell peppers for a heartier salad.
  • Vegan Street Corn Salad: Replace mayonnaise with cashew cream and use a dairy-free cheese substitute to make it plant-based!

Storage and Make-Ahead Instructions

This salad is great for meal prep or making ahead of time:

  • Storage: Keep leftovers in an airtight container in the refrigerator for up to 3 days.
  • Make-Ahead: Prepare the salad up to a day in advance; however, add avocado or any delicate ingredients right before serving to prevent browning.

Comprehensive FAQ

Here are some frequently asked questions about this Mexican Street Corn Salad:

  • Can I use canned corn? Yes, but fresh or frozen corn provides a better texture and flavor.
  • How spicy is this salad? The level of spice can be adjusted by varying the amount of chili powder or adding hot peppers.
  • Can I make this salad vegan? Absolutely! Substitute mayonnaise with vegan mayo and cotija with a dairy-free cheese.
  • What’s the best way to grill corn? Preheat your grill to high, husk the corn, and grill for about 10-15 minutes, turning occasionally.
  • How do I store leftovers? Place in an airtight container and refrigerate for up to 3 days.
  • Can I add protein to this salad? Definitely! Grilled chicken or shrimp can make it a complete meal.
  • Is this salad good for meal prep? Yes, it holds up well in the fridge, making it perfect for meal prep!
  • What can I serve with this salad? It pairs well with tacos, grilled meats, or as a side for any summer dish!

Nutrition Tips and Dietary Adaptations

This salad is not only delicious but also nutritious! Here are some tips to boost its health benefits:

  • Increase Fiber: Add more beans or whole grains to enhance fiber content.
  • Choose Low-Fat Options: Use low-fat mayonnaise or Greek yogurt to lower calories and fat.
  • Stay Hydrated: Pair this salad with refreshing drinks like agua fresca or lemonade for a complete summer meal.

Equipment Recommendations

Here’s what you’ll need to make this salad a breeze:

  • Grill or Grill Pan: For that perfect char on the corn.
  • Mixing Bowl: A large bowl for tossing all the ingredients together.
  • Knife and Cutting Board: Essential for chopping vegetables efficiently.
  • Measuring Cups and Spoons: To ensure perfect ingredient ratios.

Serving Suggestions

This salad shines on its own, but here are some ideas to elevate your meal:

  • With Tacos: Serve alongside grilled chicken or fish tacos for a colorful platter.
  • As a Side Dish: It complements barbecued meats beautifully, adding a fresh twist to the meal.
  • At Picnics: Pack it for backyard gatherings or outdoor adventures; it travels well!

Enjoy this Amazing Mexican Street Corn Salad as a vibrant addition to your meals! It’s not just food; it’s a celebration of flavors, colors, and joy in every bite. Happy cooking!

Amazing Mexican Street Corn Salad

Prep Time 10 minutes
Cook Time 10 minutes
Total Time 20 minutes
Servings 4 servings
Calories 250
A vibrant and flavorful salad combining grilled corn, fresh vegetables, and tangy cheese, perfect for any occasion.

Ingredients

Corn

  • 4 cups fresh corn (grilled, charred, or frozen) (Grilled corn adds flavor magic!)
  • 0.5 cup red onion, finely diced
  • 0.5 cup cherry tomatoes, halved
  • 0.5 cup cilantro, chopped
  • 1 cup cotija cheese (or feta cheese) (Feta can be used as a substitute.)
  • 0.25 cup mayonnaise
  • 1 tablespoon lime juice (freshly squeezed) (Don't skip the lime!)
  • 1 teaspoon chili powder
  • to taste Salt and pepper

Instructions 

  • Grill or cook the corn until charred, then cut kernels off the cob.
  • In a large bowl, combine corn, red onion, cherry tomatoes, cilantro, and cotija cheese.
  • Mix in mayonnaise, lime juice, chili powder, salt, and pepper until well combined.
  • Adjust seasoning to taste and serve immediately.

Notes

For extra flavor, add a pinch of smoked paprika or a squeeze of lime before serving.
Calories: 250kcal
Cost: $12
Course: Salad
Cuisine: Mexican
Keyword: corn

Unleash the Flavor: The Ultimate Roasted Cauliflower Salad

Welcome to the vibrant world of healthy eating! If you’re looking to elevate your greens with a Roasted Cauliflower Salad that dances with flavor, you’re in the right place. This delightful dish is not just a salad; it’s a celebration of textures and tastes that will transform your healthy eating routine. Packed with nutritious ingredients like roasted cauliflower, crunchy chickpeas, and a zesty tahini dressing, this salad is your new go-to for busy days. Let’s dive into what makes this salad not only delicious but also a powerhouse of nutrients!

Why You’ll Love This Recipe

This roasted cauliflower salad isn’t just another dish; it’s a game-changer for your culinary repertoire. Here are five reasons why you’ll absolutely adore this recipe:

  • Flavor Explosion: The combination of roasted cauliflower and crispy chickpeas creates a flavor sensation that’s both satisfying and exciting.
  • Nutrient-Packed: With high fiber, protein from chickpeas, and vitamins from greens, this salad fuels your body with essentials.
  • Quick & Easy: Perfect for those busy weeknights, this salad can be prepared in under an hour, making it a fantastic choice for meal prep!
  • Customizable: Feel free to play around with the ingredients—add your favorite greens, nuts, or seeds to make it truly yours.
  • Vegan & Gluten-Free: This salad is naturally vegan and gluten-free, making it suitable for various dietary needs.

Ingredients Breakdown

Let’s gather our ingredients and break them down for the perfect Cauliflower Salad:

  • 1 medium cauliflower: Chopped into florets, it’s the star of the show! You can also use frozen cauliflower if you’re in a pinch.
  • 400g (1 can) chickpeas: Drained and rinsed, these add protein and crunch.
  • 3 tablespoons olive oil: A must for roasting, it enhances flavor and texture.
  • 4 cups butter lettuce leaves: For a fresh, crisp base.
  • 2 cups kale: Roughly chopped, it adds nutrients and a hearty bite.
  • 1 teaspoon salt: To bring all the flavors together.
  • 1 teaspoon pepper: For a touch of spice.
  • 2 tablespoons fresh Italian parsley: Finely chopped for a pop of freshness.
  • 1 tablespoon fresh mint: Adds a refreshing hint.
  • ⅓ cup tahini: The creamy dressing that ties everything together.
  • ⅓ cup water: To adjust the tahini dressing’s consistency.
  • 3 tablespoons lemon juice: Brightens up the dish!

Making the Salad: Step-by-Step Instructions

Close-up view of a luscious roasted cauliflower salad featuring colorful vegetables and tahini dressing.

Ready to get cooking? Here’s how to prepare your Roasted Cauliflower Salad:

  • Preheat the oven: First, set your oven to 180°C (350°F) so it’s hot and ready for roasting.
  • Prepare the cauliflower: In a large mixing bowl, toss the cauliflower florets and chickpeas with olive oil, salt, and pepper until well coated.
  • Roast the cauliflower and chickpeas: Spread them evenly on a baking sheet lined with aluminum foil. Roast for 30 minutes, or until the cauliflower is tender and lightly browned, stirring halfway through.
  • Make the tahini dressing: While the cauliflower and chickpeas are roasting, whisk together tahini, lemon juice, and hot water until smooth. Adjust the consistency with more water if needed.
  • Assemble the salad: In a large salad bowl, layer the butter lettuce and kale. Top with the roasted cauliflower and chickpeas, then sprinkle with fresh parsley and mint.
  • Toss and serve: Drizzle the tahini dressing over the salad and toss gently to coat. Serve immediately and enjoy!

Pro Tips for Perfecting Your Salad

To make your experience even better, here are some pro tips:

  • Roasting Time: Keep an eye on the cauliflower; every oven varies! It should be golden and tender.
  • Chickpea Crunch: For extra crunch, roast the chickpeas separately for the last 10-15 minutes.
  • Fresh Herbs: Use fresh herbs like dill or cilantro for a unique twist!
  • Make-Ahead: You can prepare the roasted ingredients and dressing in advance, just combine before serving.
  • Adjust Dressing: If you love a creamier dressing, add more tahini or a touch of yogurt.
  • Storage: Store leftovers in an airtight container in the fridge for up to 3 days.
  • Flavor Infusion: Let the salad sit for about 10 minutes before serving for the flavors to meld together.
  • Spice it Up: Add a pinch of cayenne or smoked paprika to the chickpeas for a kick!

Common Mistakes & Troubleshooting

Even the best chefs make mistakes! Here’s how to avoid common pitfalls:

  • Overcooked Cauliflower: If it’s mushy, reduce the roasting time next time.
  • Too Dry Dressing: If your tahini dressing is too thick, add more water or lemon juice to loosen it.
  • Unbalanced Flavors: Taste as you go! Adjust salt and acidity to your preference.
  • Chickpeas Not Crispy: Ensure they are well-drained and patted dry before roasting.

Delicious Variations to Try

Feeling adventurous? Here are some variations to keep things fresh and exciting:

  • Spicy Roasted Veggies: Add bell peppers and zucchini to the roasting mix for added flavor and color.
  • Quinoa Power: Serve the salad over a bed of quinoa for extra protein and texture.
  • Nutty Delight: Toss in toasted almonds or walnuts for a satisfying crunch.
  • Fruity Twist: Add sliced apples or pomegranate seeds for a sweet contrast.

Storage & Make-Ahead Instructions

This salad is perfect for meal prep! Here’s how to store it:

  • Refrigeration: Store in an airtight container in the fridge for up to 3 days.
  • Make-Ahead: Prep the roasted cauliflower and chickpeas, and keep the dressing separate until you’re ready to serve.
  • Freezing: It’s best enjoyed fresh, but you can freeze the cauliflower and chickpeas for up to 1 month. Thaw and reheat before serving.

Frequently Asked Questions (FAQ)

Got questions? We’ve got answers! Here are some FAQs about the Roasted Cauliflower Salad:

  • Can I use frozen cauliflower for this recipe? Yes, just make sure to thaw and drain it well before roasting.
  • Can I prepare this salad in advance? Absolutely! Just keep the dressing separate until serving.
  • Can I make the tahini dressing ahead of time? Yes, it stores well in the fridge for up to a week.
  • Can I use a different leafy green instead of kale and butter lettuce? Definitely! Spinach or arugula would work beautifully.
  • How can I make the dressing thicker? Add more tahini until you reach your desired consistency.
  • What if I don’t have tahini? You can substitute with almond butter or a yogurt-based dressing.
  • Can I add protein to this salad? Yes! Grilled chicken or tofu would be fantastic additions.
  • Is this salad suitable for meal prep? Yes, it’s perfect for meal prep and can be stored in the fridge for a few days.

Nutritional Benefits & Dietary Adaptations

This Roasted Cauliflower Salad is not only delicious but also nutritious! Here are some dietary adaptations:

  • Vegan: Naturally vegan, perfect for plant-based eaters.
  • Gluten-Free: Made without gluten, suitable for those with gluten sensitivities.
  • Low-Calorie: Packed with low-calorie veggies, it’s a great choice for weight management.
  • High-Protein: Chickpeas provide a satisfying protein boost for a filling meal.

Essential Equipment Recommendations

To make your cooking experience seamless, here are some must-have kitchen tools:

  • Baking Sheet: A good quality, non-stick baking sheet is essential for roasting.
  • Mixing Bowls: Large bowls for tossing ingredients are a must.
  • Whisk: For mixing the tahini dressing smoothly.
  • Salad Spinner: To wash and dry your greens quickly.

Serving Suggestions

Wondering how to serve this vibrant salad? Here are some ideas:

  • As a Main Dish: Serve it as a main course for a light lunch or dinner.
  • Side Dish: Pair with grilled chicken, fish, or your favorite protein.
  • Wrap it Up: Use it as a filling for wraps or pita pockets for a delicious lunch.

In conclusion, this Roasted Cauliflower Salad is not just a meal; it’s an experience bursting with flavor, nutrition, and creativity. Whether you’re looking for a quick lunch, a stunning side dish, or a hearty main course, this recipe has you covered. So grab your ingredients and let’s make healthy eating fun and exciting. Enjoy every bite!

Roasted Cauliflower Salad

Prep Time 10 minutes
Cook Time 30 minutes
Total Time 40 minutes
Servings 4 servings
Calories 350
A vibrant and healthy salad featuring roasted cauliflower and chickpeas, topped with fresh herbs and a creamy tahini dressing.

Ingredients

Vegetables

  • 1 medium cauliflower, chopped into florets
  • 400 g chickpeas, drained and rinsed
  • 3 tablespoons olive oil
  • 4 cups butter lettuce leaves
  • 2 cups kale, roughly chopped
  • 1 teaspoon salt
  • 1 teaspoon pepper
  • 2 tablespoons fresh Italian parsley, finely chopped
  • 1 tablespoon fresh mint, finely chopped
  • cup tahini
  • cup water
  • 3 tablespoons lemon juice

Instructions 

  • Preheat oven to 180°C (350°F). Toss cauliflower and chickpeas with olive oil, salt, and pepper.
  • Spread on a baking sheet and roast for 30 minutes, stirring halfway.
  • Whisk tahini, lemon juice, and water until smooth.
  • Layer lettuce and kale in a bowl, add roasted cauliflower and chickpeas, then sprinkle herbs.
  • Drizzle with tahini dressing, toss gently, and serve immediately.

Notes

For extra flavor, add a squeeze of lemon before serving.
Calories: 350kcal
Cost: $15
Course: Salad
Cuisine: Mediterranean
Keyword: Cauliflower

Discover the Vibrant World of Asian Sesame Cucumber Salad

If you’re craving a dish that bursts with flavor while being refreshingly light, look no further than this Asian Sesame Cucumber Salad! Bursting with the crunch of fresh cucumbers, the sweetness of carrots, and a dressing that’s both tangy and savory, this salad is the perfect companion for any meal or a standalone dish that’s sure to delight your taste buds. Let’s dive into the deliciousness of this quick recipe that proves healthy eating can be fun and gratifying!

Why You’ll Love This Recipe

  • Simple Ingredients: Made with basic pantry staples, this salad requires minimal prep and can be whipped up in under 30 minutes!
  • Health Boost: Packed with vitamins and low in calories, this salad supports your health goals while satisfying your hunger.
  • Versatile Dish: Enjoy it as a side dish, a light lunch, or add protein for a hearty main course. The possibilities are endless!
  • Make-Ahead Friendly: Perfect for meal prep, this salad can be made ahead of time and stored in the fridge for quick meals throughout the week.
  • Flavor Explosion: The combination of sesame oil, rice vinegar, and fresh herbs creates a taste sensation that will elevate your dining experience.

Ingredient Breakdown

Getting the right ingredients is key to making this salad sing! Here’s what you’ll need:

  • 2 English or hothouse cucumbers: These varieties are perfect for salads because they have fewer seeds and a thinner skin. If unavailable, you can substitute with regular cucumbers but be sure to peel them for a smoother texture.
  • 2 large carrots: Carrots add crunch and sweetness. Feel free to use pre-shredded carrots if you’re short on time.
  • 1 tsp. Kosher salt: This helps draw out moisture from the cucumbers, enhancing their crispness.
  • 2 TBSP rice vinegar: Adds a tangy flavor that balances the sweetness of the honey.
  • 1 TBSP fresh lime juice: Use fresh lime for the best flavor; it brightens the dish beautifully.
  • 2-3 TBSP honey: Adjust this to taste; maple syrup or agave can be used for a vegan option.
  • 1 tsp. toasted sesame oil: This is crucial for that authentic Asian flavor. Don’t skip it!
  • Pinch of red pepper flakes: For a bit of heat, adjust according to your spice preference.
  • ½-1 TBSP toasted sesame seeds: These add a delightful crunch and nutty flavor.
  • 1 scallion, sliced: For a fresh, oniony bite that complements the salad.
  • 2 TBSP fresh cilantro (optional): This herb adds a fresh pop of flavor; if you’re not a fan, feel free to omit.

How to Make Asian Sesame Cucumber Salad

Juicy Asian Sesame Cucumber Salad showcasing fresh cucumbers, carrots, and sesame seeds.

Ready to toss together this vibrant salad? Follow these simple steps:

  1. If you have a spiralizer, use it to cut the cucumbers and carrots into long noodles. If not, no worries! A sharp knife will do just fine.
  2. Place the spiralized cucumber into a strainer and toss with 1 tsp. kosher salt. Let it drain for 15-20 minutes to remove excess water.
  3. While the cucumbers are draining, whisk together the rice vinegar, lime juice, honey, sesame oil, red pepper flakes, and sesame seeds in a small bowl.
  4. Once the cucumbers have drained, spread them onto a layer of paper towels or a clean dish towel, and gently pat out as much moisture as possible.
  5. In a large bowl, combine the ‘noodles’ with 2-3 TBSP of the dressing to coat. Toss to combine, then garnish with additional sesame seeds, sliced scallions, and fresh cilantro if using.
  6. Serve immediately! Leftover salad can be stored in an airtight container in the fridge for up to a day.

Pro Tips for the Perfect Salad

  • Choose the right cucumbers: Opt for firm, fresh cucumbers to ensure crunchiness in your salad.
  • Adjust the sweetness: Depending on your preference, you can increase or decrease the amount of honey or use a different sweetener.
  • Don’t skip the salting: This step is essential for drawing out moisture; it prevents the salad from becoming soggy.
  • Mix in protein: For a more filling meal, toss in grilled chicken, shrimp, or tofu.
  • Experiment with flavors: Feel free to add other veggies like bell peppers or radishes for extra crunch and color.
  • Use a whisk: Whisking the dressing ensures that all ingredients blend together seamlessly, creating a balanced flavor.
  • Chill before serving: Let the salad sit in the fridge for at least 30 minutes before serving to enhance the flavors.
  • Customize with nuts: Adding a sprinkle of chopped peanuts or cashews can give your salad an exciting crunch.

Common Mistakes and Troubleshooting

Even the best chefs make mistakes! Here are some common pitfalls and how to avoid them:

  • Soggy salad: If your salad is too watery, ensure you’ve properly salted and drained the cucumbers.
  • Overly sweet dressing: Start with less honey, and adjust to taste to find the perfect balance.
  • Too much dressing: It’s better to start with less dressing and add more as needed to avoid overwhelming the ingredients.
  • Inconsistent cuts: For the best texture, aim for uniform cuts to ensure even distribution of flavors and a pleasing presentation.

Variations to Elevate Your Salad

Want to switch things up? Here are some variations to try:

  • Spicy Twist: Add thinly sliced jalapeños or drizzle with sriracha for an extra kick!
  • Creamy Dressing: Swap the sesame oil with a dollop of tahini or Greek yogurt for a creamy version.
  • Fruit Fusion: Toss in diced mango or pineapple for a tropical twist that complements the savory flavors.
  • Asian Noodle Salad: Incorporate cooked soba noodles for a heartier dish that’s perfect for a main course.

Storage and Make-Ahead Instructions

This salad is perfect for meal prep! Here’s how to store it:

  • Refrigerate: Store in an airtight container in the fridge for up to 1 day. The cucumbers will release moisture over time, so it’s best enjoyed fresh.
  • Make-Ahead: You can prepare the cucumbers and carrots ahead of time and mix them with the dressing just before serving to keep everything crisp.

Comprehensive FAQ

Here are answers to some of the most common questions about this salad:

  • Can I use different types of cucumbers? Absolutely! Any cucumber variety will work, but English cucumbers are preferred for their texture.
  • Is this salad vegan? Yes, simply substitute honey with maple syrup or agave for a vegan-friendly option.
  • How long does the salad last? For the best taste and texture, consume within a day. After that, the cucumbers may become too soft.
  • Can I add protein to this salad? Yes! Grilled chicken, shrimp, or tofu make great additions.
  • What can I serve with this salad? It pairs wonderfully with grilled meats, rice dishes, or as part of a larger spread.
  • Can I prepare the dressing in advance? Yes, the dressing can be made ahead and stored in the refrigerator for about a week.
  • Is there a gluten-free version? Yes, ensure your soy sauce is gluten-free, or replace it with tamari.
  • Can I use frozen vegetables? While fresh is best, thawed frozen cucumbers may work in a pinch if drained well.

Nutrition Tips and Dietary Adaptations

This Asian Sesame Cucumber Salad is not just delicious; it can also fit into various dietary needs:

  • Low-Calorie Option: Naturally low in calories, this salad is perfect for weight management.
  • Gluten-Free: Ensure to use gluten-free soy sauce or tamari for those with gluten sensitivities.
  • Low-Carb Alternative: This salad is low in carbs, making it suitable for low-carb or keto diets.
  • High Fiber: The vegetables provide a good source of dietary fiber, promoting digestive health.

Equipment Recommendations

To make your cooking experience smoother, consider these tools:

  • Spiralizer: For creating beautiful veggie noodles that add flair to your salad.
  • Whisk: Essential for mixing your dressing until smooth and well combined.
  • Sharp Knife: A good knife is key for cutting vegetables evenly and efficiently.
  • Strainer: Helps drain excess moisture from cucumbers, ensuring a crisp salad.

Serving Suggestions

Here are some delicious ways to enjoy your salad:

  • As a Side Dish: Serve alongside grilled chicken or fish for a balanced meal.
  • In a Wrap: Use a large lettuce leaf to wrap the salad for a fresh and crunchy lunch option.
  • With Rice: Serve over a bed of steamed rice for a filling and nutritious dinner.
  • In a Bento Box: Pack it in a bento box for a healthy on-the-go lunch.

In conclusion, the Asian Sesame Cucumber Salad is not just a dish; it’s an experience that brings joy and flavor to your table. With its vibrant colors, delightful crunch, and versatile nature, this salad is sure to become a favorite in your kitchen. So gather your ingredients, get creative, and enjoy the delicious journey of healthy eating!

Asian Sesame Cucumber Salad

Prep Time 15 minutes
Total Time 15 minutes
Servings 4 servings
Calories 120
A fresh and crunchy salad combining crisp cucumbers and carrots with a tangy sesame dressing, perfect for a light side dish.

Ingredients

Vegetables

  • 2 pieces English or hothouse cucumbers, chilled
  • 2 pieces large carrots
  • 1 tsp Kosher salt
  • 2 TBSP rice vinegar
  • 1 TBSP fresh lime juice (about half a lime)
  • 2-3 TBSP honey, to taste
  • 1 tsp Toasted sesame oil
  • pinch red pepper flakes, to taste
  • ½-1 TBSP toasted sesame seeds (white and black)
  • 1 piece scallion, sliced
  • 2 TBSP fresh cilantro, chopped (optional)

Instructions 

  • If available, spiralize cucumbers and carrots into noodles; otherwise, thinly slice.
  • Sprinkle cucumbers with salt, drain for 15 minutes, then pat dry.
  • Whisk together vinegar, lime juice, honey, sesame oil, red pepper flakes, and sesame seeds.
  • Toss noodles with dressing, garnish with scallions, cilantro, and sesame seeds. Serve immediately.

Notes

This salad is best enjoyed fresh but can be stored in the fridge for up to a day.
Calories: 120kcal
Cost: $10
Course: Side Dish
Cuisine: Asian
Keyword: Carrot, cucumber, Sesame

Welcome to Your New Favorite Salad!

Are you ready to dive into a world of vibrant flavors and textures? This Zesty Orange-Beet Salad with Crunchy Chickpeas is more than just a dish; it’s a celebration of fresh ingredients and bold tastes! Imagine juicy oranges, earthy beets, and crispy chickpeas coming together in a colorful bowl that’s as delightful to eat as it is to look at. Whether you’re meal prepping for the week or looking to impress at your next gathering, this salad will be the star of the show!

In this article, we’ll explore why you’ll love this salad, break down the ingredients, share expert tips, and so much more, ensuring you have all the tools you need to create a dish that not only satisfies your taste buds but also fuels your body with nutrition. Let’s get started!

Why You’ll Love This Recipe

  • Flavor Explosion: The combination of sweet oranges and earthy beets creates a delicious balance that dances on your palate.
  • Nutritious Powerhouse: Packed with vitamins, minerals, and fiber, this salad is a wholesome choice for any meal.
  • Quick and Easy: With minimal prep time, you can whip this salad up in under 30 minutes, making it perfect for busy weeknights.
  • Versatile Ingredients: Use seasonal veggies and swap ingredients based on what you have at home for endless variations.
  • Meal Prep Friendly: This salad stores well, allowing you to prepare it in advance for a grab-and-go option throughout the week.

Ingredient Breakdown

Let’s take a closer look at what goes into this vibrant salad:

  • Chickpeas: 1 x 400g tin, rinsed and drained – a fantastic source of protein and fiber. You can substitute with black beans if desired.
  • Olive Oil: 1 tbsp for roasting chickpeas, plus 2 tbsp for the dressing – rich in healthy fats, it boosts the flavor and nutrition of the dish.
  • Spices: Hot smoked paprika, garlic granules, and ground cumin add depth and warmth to the salad.
  • Oranges: 2 juicy oranges, peeled and chopped – they bring a bright sweetness that complements the beets.
  • Cucumber: 1/2 cucumber, diced – adds a refreshing crunch.
  • Beetroot: 150g cooked natural beetroot, drained – earthy and vibrant, it’s the star of this dish!
  • Rocket: 1 x 60g bag – for a peppery bite that elevates the salad’s flavor.
  • Goat’s Cheese: 75g, crumbled – optional, but it adds creaminess and a tangy note (ensure it’s vegetarian if needed).
  • Honey: 1 tsp for a touch of sweetness in the dressing.

Pro Tips for the Perfect Salad

Side view of a colorful salad featuring juicy oranges, beets, cucumber, and crunchy chickpeas.
  • Roast the Chickpeas: Roast them until crispy for a delightful crunch; it takes the salad to another level!
  • Choose Fresh Ingredients: Opt for ripe, seasonal produce for the best flavor and nutritional value.
  • Dress it Right: Dress the salad just before serving to keep the ingredients fresh and crunchy.
  • Make it Ahead: Prepare the components in advance, but mix them together right before eating for optimal freshness.
  • Experiment with Flavors: Don’t hesitate to add nuts, seeds, or other herbs to customize the flavor profile!
  • Adjust the Seasoning: Taste as you go; add more spices or sweetener according to your preference.
  • Storage Tips: Keep leftovers in an airtight container in the fridge for up to 3 days.
  • Pair with Protein: This salad can be a meal on its own, but it pairs well with grilled chicken or fish for added protein.
  • Chill the Ingredients: For a refreshing experience, chill your salad components before assembling.
  • Presentation Matters: Layer your ingredients for a stunning look—after all, we eat with our eyes first!

Avoid These Common Mistakes

  • Overcooking Chickpeas: Ensure they’re crispy but not burnt; keep an eye on them in the oven!
  • Using Old Spices: Fresh spices enhance flavor—check the freshness of your pantry staples.
  • Skipping Seasoning: Don’t forget to season your salad generously; it makes a world of difference!
  • Not Tasting as You Go: Always taste and adjust flavors as you prepare to achieve the perfect balance.
  • Mixing Too Early: Combine ingredients too early and they may wilt or become soggy.

Variations to Try

  • Quinoa Boost: Add cooked quinoa for a protein-packed version that adds additional texture.
  • Vegan Delight: Omit goat cheese and honey for a fully plant-based dish without sacrificing flavor.
  • Spicy Kick: Add sliced jalapeños or a dash of cayenne pepper for heat.
  • Fruit Swap: Experiment with different fruits like pomegranate seeds or apples for a unique twist.

Storage and Make-Ahead Instructions

This salad is great for meal prep! Store the components separately in airtight containers:

  • **Chickpeas**: Can be stored for up to a week in the fridge.
  • **Dressing**: Whisk together and keep in a jar for up to two weeks.
  • **Salad Ingredients**: Assemble right before serving for the freshest taste, or keep the beets, oranges, and cucumber mixed together for a day.

Frequently Asked Questions

  • Can I use canned beets instead of fresh? Yes, canned beets are a convenient option and work well in this salad.
  • What can I substitute for goat cheese? Feta cheese or a dairy-free cream cheese can be great alternatives.
  • How can I make this salad more filling? Add protein like grilled chicken, tofu, or beans to make it a complete meal.
  • Is this salad gluten-free? Absolutely! All the ingredients are naturally gluten-free.
  • Can I prepare this salad in advance? Yes, just keep the dressing separate until you’re ready to eat to ensure everything stays fresh.
  • What other veggies can I add? Try adding bell peppers, radishes, or avocado for extra color and nutrition.
  • How long does this salad keep in the fridge? It’s best eaten within 3 days for optimal freshness.
  • Can I use frozen chickpeas? Yes, just make sure they’re fully thawed and dried before roasting.

Nutritional Insights and Dietary Adaptations

This salad is not only delicious but also loaded with nutrients:

  • High in Fiber: Chickpeas and veggies provide a hearty dose of fiber, promoting digestive health.
  • Rich in Antioxidants: Beets and oranges are packed with antioxidants, supporting overall health.
  • Low in Calories: Great for weight management, this salad is filling without being calorie-dense.
  • Customizable for Diets: Easily adapted for vegan, vegetarian, gluten-free, and low-carb diets.

Essential Equipment for Success

To whip up this vibrant salad, you’ll need:

  • Oven: For roasting chickpeas to crunchy perfection.
  • Mixing Bowls: To combine and toss your ingredients.
  • Whisk or Jar: For mixing the dressing efficiently.
  • Sharp Knife: For slicing and dicing your ingredients with ease.

Serving Suggestions

Serve this salad on its own or pair it with:

  • Grilled Chicken: For added protein and flavor.
  • Fish Tacos: A refreshing side that complements seafood dishes beautifully.
  • Quinoa Bowl: Layer it with cooked quinoa for a wholesome, filling meal.
  • Crispy Flatbreads: Perfect for scooping up every last bite of this delicious salad.

Conclusion

This Zesty Orange-Beet Salad with Crunchy Chickpeas is a testament to how simple ingredients can create extraordinary flavors. With its vibrant colors, delightful textures, and a perfect balance of sweet and savory, this salad is sure to become a staple in your kitchen. Remember, healthy eating is all about joy, balance, and creativity, so don’t hesitate to make this recipe your own! Happy cooking!

Reader recipe: Orange-beet salad with crispy chickpeas

Prep Time 15 minutes
Cook Time 10 minutes
Total Time 25 minutes
Servings 2 people
Calories 350
A vibrant and nutritious salad combining sweet oranges, earthy beets, and crispy chickpeas, topped with creamy goat's cheese.

Ingredients

Canned Goods

  • 1 piece 400g tin chickpeas, rinsed and drained
  • 1 tbsp olive oil
  • 1 tsp hot smoked paprika
  • 1 tbsp garlic granules
  • 1 tsp ground cumin
  • 2 pieces oranges
  • 0.5 cucumber cucumber
  • 150 g cooked natural beetroot, drained
  • 1 bag 60g rocket
  • 75 g soft goat’s cheese (Check if vegetarian if required)
  • 2 tbsp olive oil
  • pinch garlic granules garlic granules
  • 1 tsp clear honey

Instructions 

  • Preheat oven to 200°C (390°F). Toss chickpeas with 1 tbsp olive oil, paprika, garlic granules, and cumin. Roast for 10 minutes until crispy.
  • Segment the oranges and slice the cucumber thinly.
  • Dice the beetroot and combine with oranges, cucumber, and rocket in a bowl.
  • Whisk together 2 tbsp olive oil, honey, and a pinch of garlic granules to make the dressing. Drizzle over the salad.
  • Top the salad with roasted chickpeas and crumbled goat's cheese. Serve immediately.

Notes

For extra crunch, add some toasted nuts or seeds.
Calories: 350kcal
Cost: $12
Course: Salad
Cuisine: fusion
Keyword: Beetroot