Unlock the Flavors: Your Ultimate Guide to Beef and Broccoli Stir Fry
If you’re searching for a meal that’s not only delicious but also quick to whip up on busy weeknights, look no further! This Beef and Broccoli Stir Fry is the perfect dish to satisfy your cravings while keeping your healthy eating goals on track. Packed with vibrant vegetables and tender beef, this stir fry is a flavor explosion that’s as nutritious as it is easy to prepare. In under 30 minutes, you can have a satisfying meal that’s ready to impress!
Why You’ll Love This Recipe
- Quick and Easy: Ready in just 30 minutes, making it ideal for weeknight dinners.
- Nutrient-Packed: The combination of beef and broccoli provides a wealth of vitamins, minerals, and protein.
- Customizable: Feel free to swap in your favorite vegetables or adjust spice levels to fit your taste.
- Flavorful: A perfect balance of savory soy sauce, garlic, and ginger brings every bite to life.
- Meal Prep Friendly: Great for batch cooking and storing leftovers for lunches or dinners!
Ingredients Breakdown
Let’s dive into the ingredients you’ll need to create this delicious Beef and Broccoli Stir Fry:
- 1 lb US Wellness Meats Stir Fry Beef: Choose tender cuts like flank or sirloin for the best texture.
- 1 red pepper (sliced): Adds a pop of color and sweetness.
- 3 cups fresh or frozen broccoli: Crisp-tender broccoli is essential for that classic stir fry flavor.
- 1 cup of water: Helps steam the broccoli to the perfect tenderness.
- 1 tsp ground ginger: A dash of spice and warmth.
- 1 tbsp packed brown sugar: Balances the saltiness of the soy sauce.
- ½ tsp kosher salt: Enhances all the flavors.
- ¼ tsp black pepper: For a bit of heat.
- ½ tsp garlic powder: Adds depth to the dish.
- ½ tsp onion powder: Complements the garlic well.
- ½ cup soy sauce: The star of the dish that ties all the flavors together.
- 3 tbsp vegetable oil: For cooking and achieving that perfect sear on the beef.
- 2 tbsp cornstarch: To thicken the sauce for a delightful coating on the beef and broccoli.
Pro Tips for a Stellar Stir Fry

Here are some expert insights to help you nail this Beef and Broccoli Stir Fry:
- Prep Everything First: Have all your ingredients chopped and ready to go. Stir frying is a fast process!
- High Heat is Key: Use a wok or large skillet over high heat to achieve that delicious char.
- Don’t Overcrowd the Pan: Cook in batches if necessary to ensure even cooking.
- Marinate the Beef: A quick marinade in soy sauce, ginger, and garlic can elevate the flavors.
- Use Fresh Ingredients: Fresh broccoli and beef will provide the best flavor and texture.
- Adjust Sauce to Taste: Feel free to modify the soy sauce or sugar based on your preferences.
- Thicken the Sauce: Dissolve cornstarch in cold water before adding to the pan to avoid lumps.
- Finish with Sesame Oil: A drizzle of sesame oil right before serving adds an incredible depth of flavor.
Common Mistakes to Avoid
Even the best chefs can make mistakes! Here are some pitfalls to watch out for:
- Overcooking the Broccoli: Aim for crisp-tender broccoli; overcooked broccoli can become mushy.
- Not Using Enough Oil: A well-oiled pan prevents sticking and promotes even cooking.
- Skipping the Marinade: Marinating your beef enhances flavor and tenderness.
- Not Adjusting Seasonings: Taste your dish before serving; every palate is different!
- Using Old Ingredients: Freshness matters for the best flavor; check the expiration dates.
Variations to Experiment With
Get creative with these variations to make this dish your own:
- Protein Swap: Try chicken or tofu for a different protein option.
- Veggie Boost: Add carrots, snap peas, or bell peppers for extra color and nutrition.
- Spicy Kick: Toss in some red pepper flakes or Sriracha for added heat.
- Gluten-Free Option: Substitute tamari for soy sauce to keep it gluten-free.
Storage and Make-Ahead Instructions
This dish is perfect for meal prep! Here’s how to store and reheat:
- Refrigerator: Store leftovers in an airtight container for up to 3-4 days.
- Freezing: This stir fry can be frozen for up to 2 months. Reheat thoroughly before serving.
- Make-Ahead: You can prepare the beef and chop the veggies a day in advance for quicker cooking.
Comprehensive FAQ
Got questions? We’ve got answers!
- Can I use frozen broccoli? Absolutely! Just add it right into the pan without thawing.
- What’s the best cut of beef for stir fry? Flank or sirloin are both excellent choices for tenderness.
- How do I make it spicier? Add more ginger, garlic, or a splash of chili sauce.
- Can I omit the sugar? Yes, but it adds balance; consider using a sugar substitute if desired.
- What should I serve with this stir fry? Brown rice or quinoa make fantastic sides to soak up the sauce.
- Is this recipe suitable for meal prep? Absolutely! It stores well and reheats nicely.
- Can I use different vegetables? Yes! Feel free to mix and match based on your preferences.
- Is it possible to make this vegan? Yes! Substitute beef with tofu and adjust the sauce accordingly.
Nutrition Tips and Dietary Adaptations
This dish can cater to various dietary needs:
- Low-Carb: Serve over cauliflower rice instead of traditional grains.
- High-Protein: Add edamame or chickpeas for an extra protein boost.
- Low-Sodium: Use low-sodium soy sauce to reduce salt intake.
Essential Equipment Recommendations
To make your cooking experience smoother, here’s what you’ll need:
- Wok or Large Skillet: Essential for even cooking at high heat.
- Sharp Knife: For slicing beef and vegetables with ease.
- Cutting Board: A sturdy board to prepare your ingredients.
- Measuring Cups and Spoons: Precise measurements ensure perfect flavor every time.
Serving Suggestions
Finish off your Beef and Broccoli Stir Fry with these delightful pairings:
- Serve Over Rice: Brown rice, jasmine rice, or cauliflower rice are all great options.
- Garnish with Green Onions: A sprinkle of fresh green onions adds color and flavor.
- Top with Sesame Seeds: Toasted sesame seeds provide a nutty crunch.
Conclusion
Now you’re ready to take on the kitchen with this Beef and Broccoli Stir Fry recipe! With its vibrant flavors, nutritional benefits, and flexibility, this dish is sure to become a weeknight favorite. So grab your ingredients, and let’s get cooking! Remember, healthy eating can be fun, exciting, and absolutely delicious—just like this stir fry!
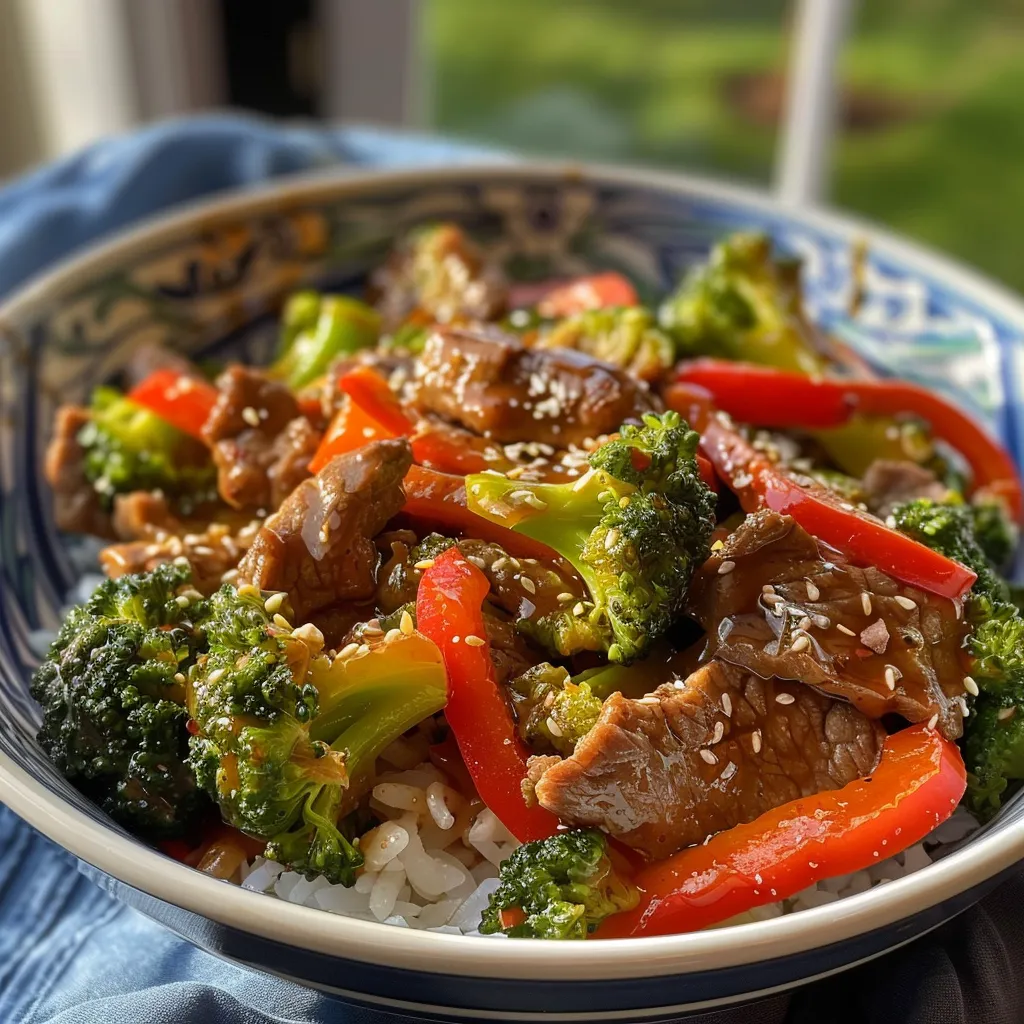
Beef and Broccoli Stir Fry
Ingredients
Main Ingredients
- 1 lb US Wellness Meats Stir Fry Beef
- 1 red pepper red pepper (sliced)
- 3 cups fresh or frozen broccoli
- 1 cup water
- 1 tsp ground ginger
- 1 tbsp packed brown sugar
- ½ tsp kosher salt
- ¼ tsp black pepper
- ½ tsp garlic powder
- ½ tsp onion powder
- ½ cup soy sauce
- 3 tbsp vegetable oil
- 2 tbsp cornstarch
Instructions
- Slice the beef and prepare the vegetables.
- Mix soy sauce, water, ginger, sugar, and spices to make the sauce.
- Heat oil in a wok or skillet and cook beef until browned.
- Add broccoli and red pepper, stir-fry until tender-crisp.
- Stir in the sauce and cornstarch mixture, cook until thickened. Serve hot.