Author

Ryan

Browsing

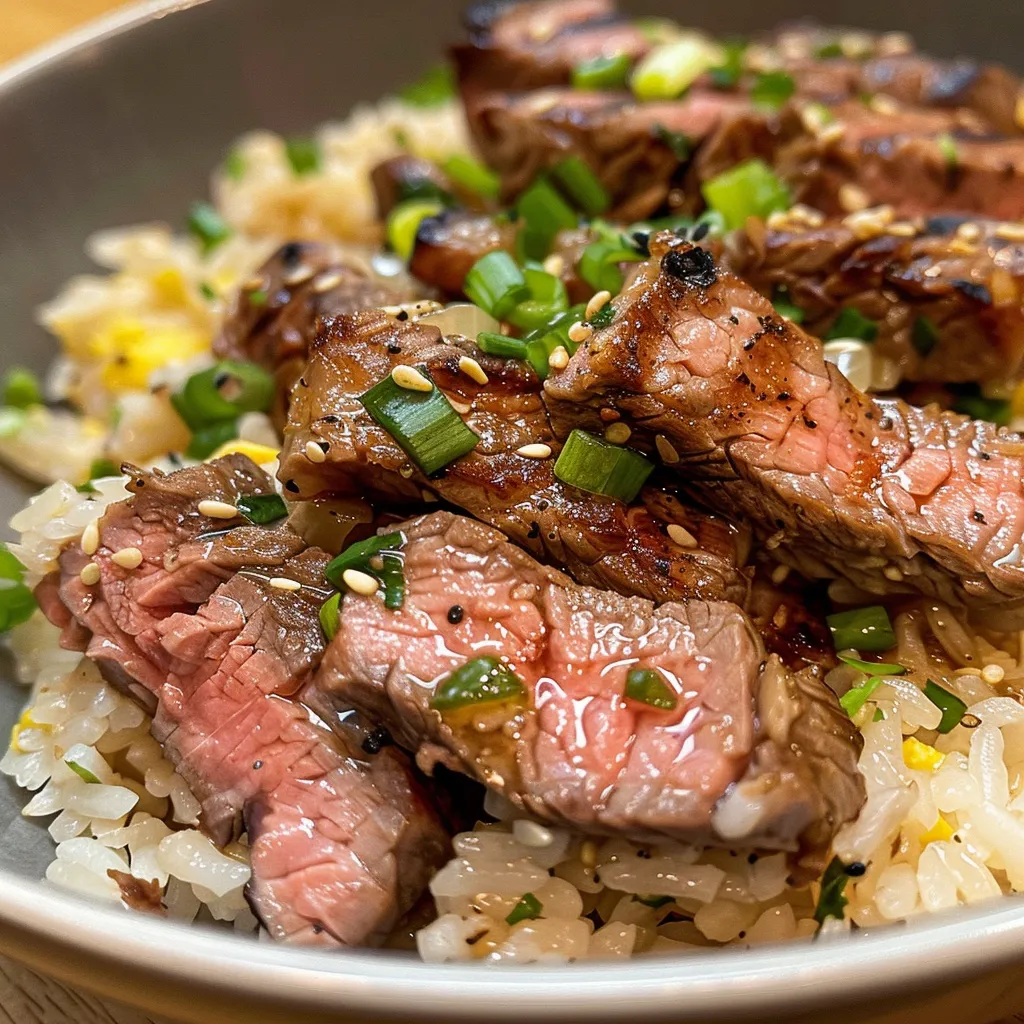
Elevate Your Dinner with Garlic Butter Steak Fried Rice

Are you ready to embark on a culinary adventure that transforms ordinary ingredients into a mouthwatering masterpiece? Welcome to the world of Garlic Butter Steak Fried Rice, where succulent steak meets vibrant veggies and a buttery garlic flair! This dish is not just a meal; it’s an experience that promises bold flavors, quick preparation, and endless satisfaction. Dive into this recipe that is all about flavor, fun, and fantastic nutrition!

Why You’ll Love This Garlic Butter Steak Fried Rice

This isn’t just another fried rice recipe; it’s a celebration of flavors and textures. Here’s why this dish will capture your heart (and stomach):

  • Quick and Easy: Perfect for busy weeknights, this dish comes together in just 20 minutes!
  • Versatile Ingredients: Use leftover steak or swap in your favorite protein—chicken, shrimp, or even tofu!
  • Flavor Explosion: The combination of garlic, butter, and savory sauces creates a taste sensation that will have your taste buds dancing.
  • One-Pan Wonder: Enjoy fewer dishes and less cleanup with this complete meal cooked in one pan.
  • Customizable: Tailor this recipe to fit your dietary needs with easy substitutions and additions.

Ingredient Breakdown

Let’s get into the nitty-gritty of what makes this dish tick. Here’s everything you need:

  • 2 cups cooked rice: Preferably day-old for the best texture; fresh rice can be too sticky.
  • 8 oz steak: Ribeye, sirloin, or flank steak works wonderfully—diced into bite-sized pieces.
  • 2 tbsp butter: The star of our dish—adds richness and flavor.
  • 1 tbsp olive oil: For sautéing and preventing sticking.
  • 4 cloves garlic, minced: Fresh garlic is key for that aromatic kick!
  • 2 eggs, beaten: Adds protein and makes the dish even heartier.
  • ½ cup frozen peas and carrots: For a pop of color and nutrients.
  • 2 tbsp soy sauce: Essential for that umami flavor.
  • 1 tbsp oyster sauce: Enhances richness and depth.
  • 1 tsp sesame oil: For a nutty finish.
  • 2 green onions, chopped: Freshness and crunch to garnish.
  • Salt and pepper: To taste.

How to Make Garlic Butter Steak Fried Rice

Juicy diced steak mixed with fried rice and vibrant peas and carrots.

Ready to cook? Let’s sizzle! Follow these simple steps:

  1. Heat 1 tablespoon of butter and olive oil in a large pan over medium-high heat.
  2. Add the diced steak, season with salt and pepper, and sear for 2-3 minutes until browned. Remove and set aside.
  3. In the same pan, add minced garlic and cook until fragrant, about 30 seconds. Push to the side and pour in the beaten eggs, scrambling them until just set.
  4. Add another tablespoon of butter, then stir in the cooked rice, breaking up any clumps.
  5. Stir in soy sauce, oyster sauce, and sesame oil. Mix well to combine all the flavors.
  6. Add the peas and carrots, cooking for another 2 minutes until heated through.
  7. Return the steak to the pan, stir well, and cook for another minute to warm everything through.
  8. Garnish with chopped green onions and serve hot. Enjoy your delicious creation!

Pro Tips for the Perfect Garlic Butter Steak Fried Rice

Want to elevate your cooking game? Here are some expert insights:

  • Use Day-Old Rice: It’s crucial for achieving that perfect fried rice texture—fluffy and not mushy.
  • Don’t Overcrowd the Pan: Cook in batches if necessary to ensure your steak gets a good sear.
  • Customize Your Veggies: Feel free to add bell peppers, broccoli, or snap peas for extra color and nutrients.
  • Marinate Your Steak: For added flavor, consider marinating your steak for at least 30 minutes before cooking.
  • Watch Your Heat: Keep the heat high enough to fry but not so high that it burns the garlic.
  • Experiment with Sauces: Try adding teriyaki or hoisin sauce for a different flavor profile.
  • Use Fresh Herbs: Toss in some cilantro or basil at the end for a fresh twist.
  • Save Time: Pre-chop your veggies and steak ahead of time for a quick weeknight meal.

Common Mistakes and Troubleshooting

Even the best chefs make mistakes! Here are some common pitfalls to avoid:

  • Wet Rice: If your rice is too wet, it will clump together. Make sure to use day-old rice!
  • Overcooked Steak: Avoid chewy steak by searing just until brown and returning it to the heat briefly.
  • Too Much Sauce: Start with less soy sauce and oyster sauce; you can always add more to taste.
  • Burnt Garlic: Keep an eye on the garlic; it can burn quickly and turn bitter.

Variations and Substitutions

Get creative! Here are some delicious variations you can try:

  • Vegetarian Delight: Replace steak with tofu or tempeh and add more veggies like bell peppers and zucchini.
  • Spicy Kick: Add a dash of sriracha or red pepper flakes for some heat.
  • Seafood Twist: Substitute steak with shrimp or scallops for a delightful seafood fried rice.
  • Breakfast Style: Add in some diced breakfast sausage and serve with a sunny-side-up egg on top!

Storage and Make-Ahead Instructions

Want to enjoy this dish later? Here’s how to store it:

  • Refrigerate: Store leftovers in an airtight container in the fridge for up to 3 days.
  • Freeze: For longer storage, freeze in a freezer-safe container for up to 2 months. Reheat in a pan or microwave.
  • Make-Ahead: You can pre-cook the rice and chop the vegetables a day ahead for quick cooking!

FAQs about Garlic Butter Steak Fried Rice

Got questions? We’ve got answers!

  • Can I use fresh rice? It’s best to use day-old rice for the right texture, but you can use fresh rice if you cool it quickly.
  • What kind of steak is best? Ribeye, sirloin, or flank steak are excellent choices due to their flavor and tenderness.
  • Can I make this dish vegan? Absolutely! Just swap the steak for tofu and use plant-based butter.
  • How do I reheat leftovers? Reheat in a skillet over medium heat, adding a splash of water or broth to keep it moist.
  • What’s the best way to chop steak? Slice against the grain for maximum tenderness.
  • Can I add more vegetables? Yes! Feel free to add any veggies you love—just adjust cooking times accordingly.
  • Is this dish gluten-free? Use gluten-free soy sauce to make it gluten-free.
  • How can I make it spicier? Add sriracha, chili oil, or fresh jalapeños for a spicy kick!

Nutrition Tips and Dietary Adaptations

Want to make this dish fit your dietary needs? Here are some tips:

  • Lower Carb: Substitute rice with cauliflower rice for a low-carb option.
  • Increase Fiber: Add more veggies like spinach or broccoli for extra fiber and nutrients.
  • Boost Protein: Add extra eggs or use a leaner cut of steak.
  • Dairy-Free: Use vegan butter or coconut oil instead of regular butter.

Equipment Recommendations

Here’s what you’ll need to whip up this delightful dish:

  • Large Skillet or Wok: Essential for cooking everything evenly.
  • Spatula: For stirring and flipping ingredients with ease.
  • Measuring Cups and Spoons: To ensure accurate ingredient amounts.
  • Chopping Board and Knife: For prepping your veggies and steak.

Serving Suggestions

How to enjoy your Garlic Butter Steak Fried Rice:

  • Pair with a Side Salad: A fresh green salad balances the richness of the fried rice.
  • Serve with Soy Sauce: A small bowl of soy sauce on the side for those who love extra flavor.
  • Top with Fried Egg: A sunny-side-up egg on top adds creaminess to each bite.

In conclusion, this Garlic Butter Steak Fried Rice is more than just a meal—it’s a delightful experience that combines rich flavors, vibrant colors, and satisfying textures. So grab your ingredients, heat up that pan, and get ready to impress your taste buds with this vibrant dish! Remember, cooking should be fun, adventurous, and filled with flavor—let’s make it happen!

Garlic Butter Steak Fried Rice Recipe

Prep Time 10 minutes
Cook Time 15 minutes
Total Time 25 minutes
Servings 4 servings
Calories 550
A quick and flavorful fried rice dish featuring tender steak, garlic, and savory sauces, perfect for a satisfying meal.

Ingredients

Main

  • 2 cups cooked rice (preferably day-old)
  • 8 oz steak (ribeye, sirloin, or flank), diced
  • 2 tbsp butter
  • 1 tbsp olive oil
  • 4 cloves garlic, minced
  • 2 eggs beaten eggs
  • ½ cup frozen peas and carrots
  • 2 tbsp soy sauce
  • 1 tbsp oyster sauce
  • 1 tsp sesame oil
  • 2 green onions chopped green onions
  • to taste Salt and pepper

Instructions 

  • Heat 1 tbsp butter and olive oil in a large pan over medium-high heat.
  • Add diced steak, season with salt and pepper, sear for 2-3 minutes, then remove and set aside.
  • Add garlic to the same pan, cook until fragrant, push aside, pour in beaten eggs, scramble.
  • Add another tbsp of butter, stir in rice, then mix in soy sauce, oyster sauce, and sesame oil.
  • Add peas and carrots, cook for 2 minutes, return steak, stir well, cook 1 more minute.
  • Garnish with chopped green onions and serve hot.

Notes

Use day-old rice for best texture and flavor.
Calories: 550kcal
Cost: $15
Course: Main Course
Cuisine: Asian
Keyword: Fried Rice, Steak

Are you ready to transform your evenings into a soothing ritual? Look no further than this Detox Cucumber Ginger Drink. Infused with the refreshing flavors of cucumbers, zesty ginger, and vibrant lemon, this drink not only quenches your thirst but also nourishes your body, setting you up for a restful night’s sleep. Let’s dive into the delicious details of how this drink can revitalize your nights!

Why You’ll Love This Recipe

Prepare to fall in love with this invigorating concoction! Here’s why you should whip up this delightful bedtime drink:

  • Hydration Hero: This drink helps keep you hydrated, which is essential for optimal health and wellness. Staying hydrated before bedtime can improve your sleep quality!
  • Digestive Delight: Ginger is known for its digestive benefits. It can help soothe your stomach and prepare your digestive system for a restful night.
  • Detox Power: The combination of cucumbers and lemon supports your body’s natural detoxification processes, flushing out toxins and refreshing your skin.
  • Metabolism Boost: Both ginger and lemon are known to help kickstart your metabolism, perfect for those looking to maintain a healthy weight.
  • Flavorful Freshness: The crisp taste of cucumber and the zing of ginger create a refreshingly delicious drink that makes healthy habits feel exciting!

Ingredient Breakdown

Let’s get into the star players of this detox drink and their benefits:

  • Warm Water (500ml / 2 cups): A gentle base that helps dissolve ingredients and enhances hydration.
  • Sodium Bicarbonate (2 tablespoons): Helps remove pesticide residues from the cucumbers and balances the drink’s acidity.
  • Cucumbers (2-3 medium, approx. 400g / 14 oz): Hydrating and low-calorie, cucumbers are packed with vitamins and minerals.
  • Fresh Ginger Root (2-3cm / 1 inch): Known for its digestive and anti-inflammatory properties, ginger adds a spicy kick!
  • Lemon Juice (Juice of 1 large lemon, approx. 60ml / 4 tablespoons): A great source of vitamin C that boosts immunity and adds zest.
  • Fresh Mint Leaves (1 tablespoon) or Dried Mint (1 teaspoon): Adds a refreshing flavor and aids in digestion.
  • Filtered Water (500ml / 2 cups): Essential for dilution and hydration.
  • Ice Cubes (optional): Perfect for a refreshing, chilled drink.
  • Honey or Stevia (1 teaspoon, optional): Sweeten to taste for an extra layer of flavor.
  • Sea Salt (pinch, optional): Enhances flavor and helps balance electrolytes.

Step-by-Step Instructions

Ready to whip up your detox drink? Follow these simple steps:

  1. Fill a large bowl with warm water and dissolve the sodium bicarbonate completely.
  2. Wash the cucumbers thoroughly under running water, then place them in the baking soda solution. Allow them to soak for exactly 15 minutes.
  3. After 15 minutes, remove the cucumbers and rinse them thoroughly under cold running water.
  4. Cut the cleaned cucumbers into large chunks, leaving the skin on for maximum nutrients.
  5. Peel the fresh ginger root using a spoon or vegetable peeler.
  6. Roll the lemon on a hard surface while applying pressure to release more juice, then cut and squeeze to extract all the juice.
  7. In a high-powered blender, combine the cucumber chunks, peeled ginger, fresh lemon juice, and mint leaves.
  8. Add 250ml (1 cup) of filtered water to the blender and blend on high speed for 60-90 seconds until smooth.
  9. Add the remaining 250ml (1 cup) of water and blend briefly to incorporate.
  10. Pour the blended mixture through a fine-mesh sieve or cheesecloth into a pitcher.
  11. For an ultra-smooth drink, strain the mixture a second time through an even finer sieve or coffee filter.
  12. Taste the strained drink and adjust flavors as needed.
  13. Chill the drink in the refrigerator for at least 30 minutes before serving, or serve immediately over ice cubes.
  14. Stir well before serving, and garnish with fresh mint leaves or cucumber slices if desired.

Pro Tips for the Perfect Detox Drink

Want to elevate your drink? Check out these expert insights:

  • Use Organic Ingredients: Opt for organic cucumbers and lemons to avoid pesticides and waxy coatings.
  • Experiment with Sweetness: Adjust the sweetness to your preference—honey or stevia works wonders!
  • Pre-Prep Your Ingredients: Chop cucumbers and ginger ahead of time to make the blending process quicker!
  • Chill Time is Key: Allowing the drink to chill enhances the flavors and makes it even more refreshing.
  • Strain Twice: For a smoother texture, don’t skip the double straining step!
  • Storage Tips: Store in an airtight container in the fridge for up to 3 days. Always strain before storing.
  • Adjust for Digestive Needs: If you’re sensitive to ginger, reduce the amount to suit your taste.
  • Garnish for Style: A few mint leaves or cucumber slices can make your drink look fabulous!

Common Mistakes and Troubleshooting

Even the best chefs make mistakes! Here’s how to avoid common pitfalls:

  • Over-soaking Cucumbers: Don’t leave cucumbers in the baking soda solution for too long; 15 minutes is just right!
  • Too Much Ginger: Start with less ginger if you’re unsure—its flavor can be quite strong!
  • Straining Issues: If using a cheesecloth, ensure it’s fine enough to catch all solids. Consider a coffee filter for ultra-smooth results!
  • Bitterness from Lemon: If the lemon juice is too bitter, balance with a bit more honey!

Variations for Your Detox Drink

Feeling adventurous? Here are some fun variations to try:

  • Berry Bliss: Add a handful of fresh berries (like strawberries or blueberries) for a fruity twist!
  • Spicy Citrus: Incorporate a pinch of cayenne pepper for a spicy kick that can help boost metabolism.
  • Herbal Infusion: Swap mint for basil or cilantro for a unique flavor experience!
  • Coconut Dream: Use coconut water instead of regular water for added electrolytes and a tropical vibe.

Storage and Make-Ahead Instructions

This detox drink is best enjoyed fresh, but if you want to prep ahead:

  • Make the drink and store it in an airtight container in the refrigerator for up to 3 days.
  • Always strain before serving to maintain flavor and texture.
  • Consider making a larger batch to enjoy throughout the week!

Comprehensive FAQ

Got questions? We’ve got answers!

  • How long can I store this drink? Store in the refrigerator for up to 3 days, but best enjoyed fresh!
  • Can I use bottled lemon juice? Fresh lemon juice is recommended for the best flavor and health benefits.
  • Is this drink suitable for kids? Absolutely! Adjust the sweetness to taste and enjoy as a family.
  • Can I make this drink without ginger? Yes, simply omit ginger for a milder flavor.
  • How does this drink help with detoxification? The ingredients work together to flush out toxins and support digestive health.
  • Can I drink this every night? Yes! It’s a healthy habit to incorporate into your evening routine.
  • What’s the best time to drink this? Enjoy it about an hour before bedtime for optimal benefits.
  • Can I add other fruits? Definitely! Feel free to experiment with other fruits like watermelon or pineapple for added flavor.

Nutrition Tips and Dietary Adaptations

This detox drink not only tastes great but also packs a nutritional punch. Here’s how to make it fit your dietary needs:

  • Low-Calorie Option: Skip the sweetener for a calorie-free drink that still hydrates!
  • Vegan Friendly: This recipe is naturally vegan—just enjoy the plant-based goodness!
  • Gluten-Free: Perfect for those with gluten sensitivities—no grains here!
  • Low Carb: Keep it low-carb by omitting any sweeteners.

Equipment Recommendations

To make your preparation seamless, here’s what you’ll need:

  • High-Powered Blender: Ensures a smooth blend of all ingredients.
  • Fine-Mesh Sieve or Cheesecloth: For straining the drink.
  • Measuring Cups and Spoons: Essential for precision in your ingredients.
  • Pitcher or Airtight Container: Perfect for storing your drink in the fridge.

Serving Suggestions

Make your detox drink even more inviting with these serving tips:

  • Chill and Garnish: Serve chilled and garnish with fresh mint leaves or cucumber slices for an eye-catching presentation.
  • Pair with Snacks: Enjoy with light snacks like nuts or whole-grain crackers for a balanced evening treat.
  • Create a Ritual: Make this drink a part of your evening wind-down routine to signal your body it’s time to relax.

In conclusion, this Detox Cucumber Ginger Drink is not just a beverage; it’s a delightful experience that nourishes your body and mind. Embrace the benefits of hydration, digestion, and detoxification while savoring the refreshing flavors of this easy-to-make drink. Cheers to a revitalizing night ahead!

Detox Cucumber Ginger Bedtime Drink

Prep Time 15 minutes
Total Time 15 minutes
Servings 2 cups
Calories 50
A refreshing and detoxifying bedtime drink combining cucumber, ginger, lemon, and mint for a soothing evening ritual.

Ingredients

Water

  • 500 ml warm water
  • 2 tablespoons sodium bicarbonate (baking soda)
  • 2-3 medium cucumbers (approximately 400g / 14 oz)
  • 2-3 cm fresh ginger root (peeled)
  • 1 large lemon (juice of approximately 60ml / 4 tablespoons)
  • 1 tablespoon fresh mint leaves (or 1 teaspoon dried mint)
  • 250 ml filtered water
  • Ice cubes Ice cubes (optional)
  • 1 teaspoon honey or stevia (for sweetness, optional)
  • Pinch sea salt (for electrolyte balance, optional)

Instructions 

  • Dissolve baking soda in warm water in a large bowl.
  • Wash cucumbers, soak in baking soda solution for 15 minutes, then rinse.
  • Cut cucumbers into chunks, peel ginger, and juice lemon.
  • Blend cucumber, ginger, lemon juice, and mint with 250ml filtered water until smooth.
  • Add remaining water, strain through a fine sieve, and chill or serve immediately over ice.

Notes

Adjust sweetness and flavor as desired. For an extra refreshing touch, garnish with mint or cucumber slices.
Calories: 50kcal
Cost: $15
Course: Beverage
Cuisine: Healthy
Keyword: cucumber, Detox, Ginger

Welcome to the world of Beef Stroganoff, where comfort food meets culinary magic! This classic dish is not only a delight for your taste buds but also incredibly easy to whip up for any occasion. Get ready to dive into a bowl of creamy goodness, loaded with tender beef, savory mushrooms, and a luscious sauce that wraps around every bite. Whether you’re hosting a dinner party or simply want to treat yourself after a long day, Beef Stroganoff is here to deliver warmth and flavor. Let’s explore why this recipe deserves a prime spot in your kitchen!

Why You’ll Love This Recipe

  • Quick and Easy: Ready in about 30-40 minutes, making it a fantastic choice for busy weeknights or a last-minute dinner idea.
  • Rich and Creamy: The sauce is incredibly velvety, thanks to the combination of heavy cream and beef broth, creating a satisfying experience.
  • Flavorful Depth: By sautéing aromatics and building the sauce step-by-step, you create a depth of flavor that will impress everyone.
  • Versatile Serving Options: Enjoy it over egg noodles, rice, or mashed potatoes—this dish adapts to your cravings!
  • Family-Friendly: With its comforting flavors and hearty ingredients, it’s a meal that everyone—kids and adults alike—will love!

Gathering Your Ingredients for Creamy Beef Stroganoff

Before we dive into cooking, let’s gather everything you need for this delicious dish. Here’s what you’ll need:

  • 1 lb beef sirloin or tenderloin, sliced into thin strips
  • 1 tablespoon olive oil
  • 2 tablespoons unsalted butter
  • 1 small onion, finely chopped
  • 2 cloves garlic, minced
  • 8 oz cremini or white mushrooms, sliced
  • 1 teaspoon smoked paprika
  • 1 teaspoon Dijon mustard
  • 1 cup beef broth
  • 1 cup heavy cream
  • 1 teaspoon Worcestershire sauce
  • Salt and black pepper to taste
  • Fresh parsley, chopped (for garnish)
  • Cooked egg noodles, rice, or mashed potatoes (for serving)

**Pro Tip:** Feel free to substitute beef with chicken or even a vegetarian option like mushrooms or tofu for a plant-based version!

Crafting Your Creamy Beef Stroganoff: Step-by-Step

Now that we have our ingredients ready, let’s get cooking! Follow these simple steps to create a Beef Stroganoff that’s bursting with flavor.

  • Step 1: Prepare the Beef
    Start by slicing the beef into thin strips, about ¼-inch thick. This helps it cook quickly and retain tenderness. Season with a pinch of salt and black pepper.
  • Step 2: Sauté the Aromatics
    In a large skillet over medium-high heat, add olive oil. Once hot, add the beef strips in a single layer, working in batches if necessary. Sear for about 1-2 minutes per side until browned but not fully cooked through. Remove from skillet and set aside.
  • Step 3: Cook the Mushrooms
    In the same skillet, reduce heat to medium and melt the butter. Add chopped onions and cook for about 2-3 minutes until soft. Stir in minced garlic and cook for another 30 seconds.
  • Step 4: Build the Sauce
    Add sliced mushrooms to the skillet and cook for about 5 minutes, stirring occasionally, until golden brown. Sprinkle smoked paprika and stir in Dijon mustard, then pour in the beef broth, scraping the bottom of the skillet. Let simmer for 5 minutes.
  • Step 5: Add the Cream and Worcestershire Sauce
    Reduce heat to low. Stir in heavy cream and Worcestershire sauce, and let it simmer gently for another 5 minutes. Adjust seasoning with salt and pepper as needed.
  • Step 6: Return the Beef to the Pan
    Add the seared beef back into the skillet, stirring to coat it in the sauce. Let it simmer for another 2-3 minutes until heated through.
  • Step 7: Serve and Enjoy
    Remove from heat and garnish with freshly chopped parsley. Serve this creamy delight over egg noodles, rice, or mashed potatoes—whatever your heart desires!

Pro Tips for Perfect Beef Stroganoff Every Time

Side view of beef stroganoff garnished with fresh parsley, featuring a rich cream sauce and noodles.

Want to elevate your Beef Stroganoff? Here are some expert insights to ensure your dish shines:

  • Quality Beef: Choose a tender cut like sirloin or tenderloin for the best flavor and texture.
  • Don’t Rush the Sauté: Allow the mushrooms to cook until golden brown; this enhances their flavor significantly.
  • Thickening the Sauce: If you want a thicker sauce, let it simmer longer or stir in a cornstarch slurry.
  • Fresh Herbs: Garnish with fresh herbs like thyme or dill for an aromatic twist.
  • Leftover Magic: Use leftovers in a beef stroganoff pasta bake for a new meal!

Common Mistakes and Troubleshooting

Even the best chefs can make mistakes! Here’s how to avoid common pitfalls:

  • Overcooking the Beef: Take the beef out of the skillet while it’s still slightly undercooked; it will continue to cook in the sauce.
  • Watery Sauce: If your sauce is too thin, simmer it longer to reduce it. You can also add a little cornstarch mixed with water.
  • Too Much Salt: If it ends up too salty, add a splash of cream or broth to balance the flavors.

Variations to Try

Feeling adventurous? Here are some creative variations to switch things up:

  • Mushroom Lovers: Add more varieties of mushrooms like shiitake or portobello for an earthy flavor.
  • Spicy Kick: Stir in some crushed red pepper flakes or a dash of hot sauce for a spicy twist.
  • Herb Infusion: Incorporate fresh herbs like thyme or rosemary for a fragrant finish.
  • Vegetarian Delight: Substitute beef with hearty vegetables like zucchini and bell peppers for a delicious plant-based option.

Storage and Make-Ahead Instructions

Planning ahead? Here’s how to store and prepare your Beef Stroganoff:

  • Storing: Keep leftovers in an airtight container in the fridge for up to 3 days.
  • Freezing: You can freeze the stroganoff for up to 2 months. Thaw in the fridge overnight before reheating.
  • Make-Ahead: Prepare the sauce and mushrooms ahead of time, then just add the beef and cream when ready to serve.

Your Beef Stroganoff Questions Answered (FAQ)

Got questions? We’ve got answers! Here are some frequently asked questions:

  • Can I use a different cut of beef?
    Absolutely! Cuts like flank steak or even ground beef work well.
  • Can I make this recipe gluten-free?
    Yes! Use gluten-free soy sauce or tamari instead of Worcestershire sauce.
  • Can I freeze Beef Stroganoff?
    Yes, it freezes beautifully! Just make sure to cool it completely before freezing.
  • Why is my sauce not thickening?
    Make sure to let it simmer properly; if that doesn’t work, whisk in a cornstarch slurry.
  • Can I add sour cream?
    Definitely! Stir in sour cream at the end for an extra tangy flavor.
  • How do I reheat leftovers?
    Reheat on the stovetop over low heat, adding a splash of broth if it’s too thick.
  • What sides go well with Beef Stroganoff?
    It’s great with egg noodles, mashed potatoes, or a side salad for freshness.
  • How can I make it spicier?
    Add some cayenne pepper or hot sauce during cooking for a kick!

Nutrition Tips and Dietary Adaptations

Want to keep it healthy? Here are some tips:

  • Lean Cuts: Opt for lean beef cuts to reduce fat content.
  • Whole Grains: Serve over whole grain noodles or quinoa for added nutrition.
  • Vegetable Boost: Add spinach or kale for extra vitamins and minerals.

Equipment Recommendations

To make this recipe a breeze, here’s what you’ll need:

  • Heavy-Bottom Skillet: For even heat distribution and perfect searing.
  • Sharp Knife: A good knife for slicing beef and vegetables with ease.
  • Wooden Spoon: Essential for stirring and scraping up those delicious browned bits from the skillet.

Serving Suggestions

Let’s talk about how to plate this beauty:

  • Garnish: Fresh parsley adds a pop of color and flavor.
  • Accompaniments: Consider serving with a side of steamed vegetables or garlic bread for a complete meal.
  • Wine Pairing: A nice red wine, like a Cabernet Sauvignon, pairs wonderfully with the richness of the stroganoff.

Wrapping Up Your Beef Stroganoff Adventure

Congratulations! You’ve mastered the art of making Beef Stroganoff. This dish is not just about feeding your stomach—it’s about feeding your soul. With its rich flavors, comforting textures, and endless variations, it’s sure to become a staple in your cooking repertoire. So grab your skillet, gather your ingredients, and let the magic happen. Remember, cooking is an adventure—enjoy every moment of it!

Comforting and Creamy Beef Stroganoff – A Classic Dish Made Easy

Prep Time 10 minutes
Cook Time 20 minutes
Total Time 30 minutes
Servings 4 servings
Calories 550
A rich and creamy beef stroganoff that's easy to prepare, perfect for a comforting meal.

Ingredients

Meat

  • 1 lb beef sirloin or tenderloin, sliced into thin strips
  • 1 tablespoon olive oil
  • 2 tablespoons unsalted butter
  • 1 small onion, finely chopped
  • 2 cloves garlic, minced
  • 8 oz cremini or white mushrooms, sliced
  • 1 teaspoon smoked paprika
  • 1 teaspoon Dijon mustard
  • 1 cup beef broth
  • 1 cup heavy cream
  • 1 teaspoon Worcestershire sauce
  • to taste Salt and black pepper
  • for garnish Fresh parsley, chopped
  • for serving Cooked egg noodles, rice, or mashed potatoes

Instructions 

  • Slice beef into thin strips, season with salt and pepper.
  • Heat oil in a skillet, sear beef 1-2 minutes per side, then set aside.
  • Melt butter, cook onion 2-3 minutes, add garlic 30 seconds.
  • Add mushrooms, cook 5 minutes until golden. Stir in paprika and mustard, pour broth, simmer 5 minutes.
  • Reduce heat, stir in cream and Worcestershire, simmer 5 minutes. Return beef, cook 2-3 minutes.
  • Garnish with parsley, serve over noodles, rice, or mashed potatoes.

Notes

Use high-quality beef for best flavor and tender results.
Calories: 550kcal
Cost: $15
Course: Main Course
Cuisine: Russian
Keyword: Beef, Comfort, Creamy

Welcome to the world of vibrant flavors and nutritious delights! If you’ve been searching for a quick, delicious way to enjoy the health benefits of avocados, you’re in for a treat. This Creamy Avocado Bliss recipe is not only simple but also packed with nutrients. In just a few minutes, you can whip up a smoothie that’s as delightful as it is healthy! Let’s dive into the wonderful world of avocados and discover why this recipe deserves a spot in your kitchen.

Why You’ll Love This Recipe

Here are five reasons why this Creamy Avocado Bliss will quickly become your go-to recipe:

  • Quick and Easy: With just five ingredients and minimal prep time, you can enjoy this smoothie in a flash!
  • Nutrient-Packed: Avocados are rich in healthy fats, vitamins, and minerals, making this drink a powerhouse of nutrition.
  • Deliciously Versatile: Customize it with your favorite milk or sweetener to make it your own!
  • Perfect for Any Time: Whether it’s breakfast, a snack, or a post-workout boost, this smoothie fits any occasion.
  • Kid-Friendly: Kids love the creamy texture and sweet taste, making it a great option for sneaking in healthy ingredients!

Ingredients Breakdown

Let’s take a closer look at the ingredients that make this Creamy Avocado Bliss so special:

  • Ripe Avocado (1): The star of the show! Choose a perfectly ripe avocado for the best flavor and creaminess.
  • Milk (1 cup): You can use dairy or any dairy-free alternative like almond, soy, or oat milk for a creamy texture.
  • Honey (1 tablespoon): Adds a touch of natural sweetness. Feel free to substitute with maple syrup or agave if you prefer!
  • Lime Juice (1 tablespoon): This brightens up the flavors and adds a refreshing zing to your smoothie.
  • Ice Cubes (optional): For a chilled, refreshing beverage, especially on warm days!

Pro Tips for Perfecting Your Smoothie

Want to elevate your Creamy Avocado Bliss? Here are some expert tips:

  • Blend in stages: Start with the liquids first, then add the avocado and other ingredients for a smoother blend.
  • Adjust sweetness: Taste your smoothie before serving and adjust the honey or sweetener according to your preference.
  • Chill your ingredients: Use cold milk and ice for a refreshing smoothie, especially in summer.
  • Experiment with flavors: Add a pinch of cinnamon or vanilla extract for a flavor twist.
  • Boost the nutrition: Throw in a handful of spinach or a scoop of protein powder for an extra nutrient punch.
  • Use frozen avocado: For a thicker texture, freeze your avocado slices beforehand.
  • Serve immediately: Smoothies are best enjoyed fresh, so serve right after blending for the best taste.
  • Garnish it! Top with sliced fruit, nuts, or seeds for added texture and visual appeal.

Common Mistakes and Troubleshooting

To ensure your Creamy Avocado Bliss turns out perfect every time, watch out for these common mistakes:

  • Overripe avocados: Using an overly ripe avocado can lead to a mushy texture. Look for avocados that yield slightly when gently squeezed.
  • Too much liquid: If your smoothie is too runny, add more avocado or ice to thicken it up.
  • Lack of balance: Ensure you have the right balance of sweet and tangy. Adjust lime and honey to match your taste buds.
  • Not blending enough: A smooth blend is key! Ensure all ingredients are well combined and creamy.

Delicious Variations

Feeling adventurous? Here are four exciting variations of the Creamy Avocado Bliss to try:

  • Chocolate Avocado Bliss: Add 1-2 tablespoons of cocoa powder for a chocolaty treat!
  • Berry Avocado Smoothie: Toss in a handful of mixed berries for a fruity twist.
  • Green Protein Smoothie: Add a scoop of protein powder and a handful of spinach for an energizing boost.
  • Nutty Avocado Delight: Blend in a tablespoon of almond or peanut butter for added creaminess and protein.

Storage and Make-Ahead Instructions

Want to prep ahead? Here’s how to store your Creamy Avocado Bliss:

  • Fridge: Store any leftover smoothie in an airtight container for up to 24 hours. Give it a good shake before enjoying!
  • Freezer: Freeze your smoothie in ice cube trays for easy blending later. Just pop a few cubes into your blender when you’re ready for a quick treat!

Comprehensive FAQ

Got questions? Here are some frequently asked questions about the Creamy Avocado Bliss:

  • Can I use frozen avocados? Absolutely! Frozen avocados can create a thicker, creamier texture.
  • Is this smoothie vegan? Yes, if you use a plant-based milk and a vegan sweetener!
  • How many servings does this recipe make? This recipe typically serves one, but it can easily be doubled or tripled!
  • Can I add greens to my smoothie? Yes! Spinach or kale blends well without altering the taste.
  • What’s the best way to peel an avocado? Cut the avocado in half, remove the pit, and use a spoon to scoop the flesh out easily.
  • How can I make it lower in calories? Use less honey or a sugar alternative to decrease calories.
  • Is it safe to eat avocado pits? No, avocado pits should not be eaten; stick to the creamy flesh!
  • Can I use other fruits? Yes! Feel free to add other fruits like banana or mango for a different flavor profile.

Nutritional Tips and Dietary Adaptations

This Creamy Avocado Bliss is not just delicious but also adaptable to various dietary needs:

  • Keto-Friendly: Opt for unsweetened almond milk and skip the sweetener for a low-carb option.
  • Gluten-Free: All ingredients are naturally gluten-free, making this smoothie a safe choice for gluten-sensitive individuals.
  • High-Protein Option: Add Greek yogurt or a protein powder to amp up the protein content.

Equipment Recommendations

To make your Creamy Avocado Bliss a breeze, here are a few kitchen essentials:

  • High-Powered Blender: A good blender ensures smooth blending, especially with creamy ingredients.
  • Measuring Cups: Accurate measurements help in achieving the perfect taste.
  • Spatula: Use a spatula to scrape down the sides of your blender for thorough mixing.

Serving Suggestions

Pair your Creamy Avocado Bliss with these tasty options for a complete experience:

  • Tortilla Chips: Dip these crunchy chips in the smoothie for a fun twist!
  • Granola: Top with granola for added crunch and texture.
  • Fresh Fruit: Serve alongside fresh fruit slices for a colorful, nutritious plate.

In conclusion, the Creamy Avocado Bliss smoothie is your ticket to a deliciously healthy and energizing day. With its rich flavors and easy preparation, it’s time to add this recipe to your culinary repertoire! Whether you enjoy it as a breakfast treat or a midday snack, this smoothie will leave you feeling nourished and satisfied. So grab your ingredients, and let’s blend some bliss!

Creamy Avocado Bliss

Prep Time 5 minutes
Total Time 5 minutes
Servings 2 cups
Calories 250
A smooth and refreshing avocado-based drink that's perfect for a quick snack or breakfast.

Ingredients

Main

  • 1 piece ripe avocado
  • 1 cup milk (or dairy-free alternative)
  • 1 tablespoon honey
  • 1 tablespoon lime juice
  • to taste Ice cubes (optional)

Instructions 

  • Combine avocado, milk, honey, and lime juice in a blender.
  • Blend until smooth and creamy.
  • Add ice cubes if desired and blend again.
  • Pour into glasses and serve immediately.

Notes

For a creamier texture, add more avocado or ice cubes.
Calories: 250kcal
Cost: $5
Course: Beverage
Cuisine: fusion
Keyword: avocado

Welcome to Your New Weeknight Hero!

Cooking can sometimes feel like a chore, but with the right recipe, it transforms into an adventure! Meet the Creamy Crockpot Chicken and Veggie Casserole—your new go-to for busy weeknights. Packed with flavor, nutrients, and a comforting blend of ingredients, this dish is not just a meal; it’s a celebration of wholesome cooking! In this article, we’ll dive deep into why this recipe is a game-changer, how to make it your own, and tips to ensure it turns out perfectly every time.

Why You’ll Love This Recipe

  • Effortless Cooking: Just toss everything in your slow cooker, set it, and forget it! Ideal for those hectic days when time is tight.
  • Healthy and Delicious: With lean chicken and a rainbow of veggies, you get all the essential nutrients without sacrificing taste.
  • Customizable: Swap out ingredients based on what you have on hand. Love mushrooms? Toss them in! Prefer different veggies? Go wild!
  • Perfect for Leftovers: This casserole stores beautifully, making it a fantastic choice for meal prep or next-day lunches.
  • Kid-Friendly: The creamy texture and cheesy goodness make it a hit with kids, ensuring the whole family is satisfied!

Ingredient Breakdown

Let’s take a closer look at the ingredients that bring this delightful casserole to life. Each element plays a crucial role in flavor, texture, and nutrition.

  • 1.5 lbs boneless, skinless chicken breasts: About 3 medium breasts provide lean protein. You can substitute with chicken thighs for a juicier option.
  • 4 cups mixed vegetables: A colorful mix like broccoli, carrots, and bell peppers adds essential vitamins. Feel free to use frozen veggies for convenience!
  • 8 oz cream cheese: This ingredient creates a rich, creamy base. For a lighter version, opt for low-fat cream cheese or Greek yogurt.
  • 1 cup chicken broth: Low-sodium broth enhances the flavor without excessive salt. You can also use vegetable broth for a vegetarian twist.
  • 2 cups shredded cheddar cheese: The star of the show! Use sharp cheddar for a more intense flavor or swap in mozzarella for a milder taste.
  • Spices: Garlic powder, onion powder, Italian seasoning, salt, and black pepper elevate the dish with aromatic flavors.

How to Make Your Casserole

Juicy Crockpot chicken and mixed vegetables in a creamy sauce, viewed from a side angle.

Ready to get cooking? Here’s a simple step-by-step guide to making your creamy casserole. Remember, the slow cooker does all the heavy lifting!

  1. Prep the Chicken: Cut the chicken into bite-sized pieces for even cooking. Season with salt and pepper for added flavor.
  2. Layer the Ingredients: In your slow cooker, start with the chicken, followed by the mixed vegetables. Spread the softened cream cheese on top.
  3. Pour in the Broth: Add the chicken broth, and sprinkle the spices over everything. This layering ensures even flavor distribution.
  4. Cook: Set your slow cooker on low for 6-8 hours or high for 3-4 hours. The chicken should be tender and fully cooked.
  5. Add Cheese: About 30 minutes before serving, stir in 1 cup of shredded cheddar cheese. Allow it to melt and meld into the casserole.
  6. Serve and Enjoy!: Dish it out and garnish with fresh herbs if desired. Enjoy the delightful flavors!

Pro Tips for Success

  • Don’t Overcrowd: Ensure your slow cooker isn’t overcrowded. If it’s too full, cooking times may vary.
  • Adjust Cooking Time: If you’re using frozen chicken, be prepared to increase cooking time by about an hour.
  • Check for Doneness: Always use a meat thermometer to ensure your chicken reaches 165°F (75°C).
  • Make-Ahead Magic: Assemble the casserole the night before, refrigerate, and then cook in the morning for a delicious dinner upon your return.
  • Add Crunch: For a textural contrast, top the casserole with breadcrumbs or crushed crackers before the last 30 minutes of cooking.
  • Herb Boost: Fresh herbs like parsley or thyme can enhance the flavor profile. Add them in the last 10 minutes of cooking.
  • Spice It Up: If you love heat, add crushed red pepper flakes to the mix for an extra kick!
  • Serve with Sides: Pair with a simple salad or crusty bread for a complete meal.

Common Mistakes and Troubleshooting

Even the best cooks make mistakes! Here’s how to troubleshoot common issues:

  • Too Dry: If your casserole turns out dry, it may have cooked too long. Always check for doneness and adjust cooking times accordingly.
  • Not Creamy Enough: Ensure your cream cheese is sufficiently softened before adding it to the slow cooker. Mixing it well into the other ingredients will also help.
  • Flavor Lacking: Taste before serving and adjust seasonings as needed. A little extra salt or pepper can make a huge difference!

Variations to Try

Feeling adventurous? Here are some fun variations to switch things up:

  • Mexican Fiesta: Add black beans, corn, and taco seasoning for a zesty twist!
  • Italian Delight: Stir in marinara sauce and Italian sausage for a hearty Italian-style casserole.
  • Vegetarian Version: Replace chicken with chickpeas or lentils and use vegetable broth for a satisfying meat-free meal!
  • Cheesy Broccoli: Add more broccoli and double the cheese for an extra-cheesy veggie delight.

Storage and Make-Ahead Instructions

This casserole is not only great for dinner but also perfect for meal prep!

  • Storing Leftovers: Store any leftovers in an airtight container in the refrigerator for up to 4 days.
  • Freezing: You can freeze the casserole before cooking. Just assemble, cover tightly, and freeze for up to 3 months. Thaw in the fridge before cooking.
  • Reheating: Reheat in the microwave or on the stovetop. Add a splash of chicken broth or water to restore creaminess.

Frequently Asked Questions

  • Can I use frozen chicken? Yes! Just be sure to increase the cooking time.
  • What veggies can I add? Feel free to experiment with any vegetables you enjoy or have on hand!
  • Is this recipe gluten-free? Yes, it is naturally gluten-free, but always check your ingredients to be sure.
  • Can I make this ahead of time? Absolutely! Assemble the night before and cook it the next day.
  • How do I store leftovers? Store in an airtight container in the fridge for up to 4 days.
  • Can I freeze this casserole? Yes! Just freeze before cooking, and thaw in the fridge before use.
  • How do I reheat? Reheat in the microwave or on the stovetop, adding a splash of broth if needed.
  • Is this suitable for a crowd? Yes! This recipe is easily scalable for larger gatherings.

Nutritional Tips and Dietary Adaptations

Whether you’re health-conscious or have dietary restrictions, this casserole can be tailored to fit your needs:

  • Low-Calorie Option: Use lean chicken breast and reduce the cheese or opt for low-fat alternatives.
  • Vegetarian Adaptation: Replace chicken with plant-based protein options like tofu or lentils.
  • Low-Carb Version: Swap out the cream cheese for a cauliflower puree and use zucchini noodles instead of pasta.

Equipment Recommendations

To make your cooking experience as smooth as possible, here’s what you’ll need:

  • Slow Cooker: A 6-quart slow cooker is ideal for this recipe.
  • Cutting Board and Knives: Sharp knives will help you prep your veggies and chicken with ease.
  • Measuring Cups and Spoons: For accuracy in your ingredients.
  • Spatula: A silicone spatula is perfect for stirring and scraping the sides of your slow cooker.

Serving Suggestions

This casserole is a complete meal on its own, but if you’d like to elevate your dinner, consider these sides:

  • Simple Green Salad: A fresh salad with a light vinaigrette complements the richness of the casserole.
  • Crusty Bread: Serve with crusty bread for dipping in the creamy sauce.
  • Garlic Bread: A warm slice of garlic bread adds a comforting touch!

Final Thoughts

Cooking doesn’t have to be a hassle. With this Creamy Crockpot Chicken and Veggie Casserole, you’re set for an easy, delicious meal that brings the family together. So get in your kitchen, grab those ingredients, and let your crockpot work its magic. Happy cooking!

Crockpot Chicken and Veggie Casserole (Easy & Creamy!)

Prep Time 10 minutes
Cook Time 4 hours
Total Time 4 hours 10 minutes
Servings 4 servings
Calories 550
A creamy and hearty crockpot dish combining tender chicken with mixed vegetables and cheesy goodness, perfect for a comforting meal.

Ingredients

Protein

  • 1.5 lbs boneless, skinless chicken breasts (about 3 medium breasts)

Vegetables

  • 4 cups mixed vegetables (e.g., broccoli florets, sliced carrots, diced bell peppers)

Dairy

  • 8 oz cream cheese (softened)
  • 1 cup chicken broth (low-sodium)
  • 2 cups shredded cheddar cheese (divided)

Spices & Seasonings

  • 1 tsp garlic powder
  • 1 tsp onion powder
  • 1 tsp Italian seasoning
  • 0.5 tsp salt (or to taste)
  • 0.25 tsp black pepper (or to taste)

Instructions 

  • Place chicken breasts in the crockpot and season with garlic powder, onion powder, Italian seasoning, salt, and pepper.
  • Add mixed vegetables, cream cheese, chicken broth, and 1 cup of shredded cheddar cheese to the crockpot.
  • Cover and cook on low for 4 hours or until chicken is cooked through and vegetables are tender.
  • Shred the chicken in the crockpot and stir in the remaining cheese until melted and creamy.
  • Serve hot, garnished with additional cheese if desired.

Notes

For a thicker sauce, cook uncovered for the last 30 minutes.
Calories: 550kcal
Cost: $15
Course: Main Course
Cuisine: American
Keyword: Chicken

Welcome to Your New Favorite Comfort Food: Cheesy Baked Ziti!

Nothing warms the heart quite like a hearty dish of baked ziti. This classic Italian-American casserole is a tantalizing blend of flavors, featuring tender pasta, zesty Italian sausage, and gooey cheese that creates a symphony of comfort in every bite. If you’re looking for a weeknight dinner that’s not only delicious but also easy to prepare, you’ve come to the right place! Today, we’re diving into how to make this mouthwatering baked ziti recipe that everyone will love!

Why You’ll Love This Recipe

There’s a reason baked ziti is a family favorite! Here are five specific benefits of making this recipe:

  • Quick and Easy Preparation: With simple ingredients and straightforward steps, you can whip up this dish in under an hour — perfect for busy weeknights!
  • Hearty and Satisfying: Packed with protein from the Italian sausage and rich cheeses, this dish is sure to fill you up and keep you satisfied.
  • Make-Ahead Friendly: You can prepare this dish in advance and pop it in the oven when you’re ready to eat!
  • Customizable: Feel free to switch up the ingredients! Use different meats, add veggies, or even make it vegetarian.
  • Leftover Magic: This baked ziti stores well and tastes even better the next day — if there are any leftovers, that is!

Ingredients Breakdown

Before we jump into the cooking process, let’s take a closer look at what you’ll need to create this cheesy masterpiece:

  • 1 pound uncooked ziti or penne pasta: If you don’t have ziti on hand, feel free to substitute with penne or any other tubular pasta for that perfect sauce-hugging texture.
  • 1 pound Italian sausage: You can use either mild or spicy sausage depending on your heat preference. Alternatively, ground turkey or chicken works well for a lighter version.
  • 1 medium onion (chopped): Adds sweetness and flavor. Yellow or white onions are best for this dish.
  • 4-5 cloves garlic (minced): Fresh garlic elevates the dish with aromatic goodness.
  • 1/2 teaspoon Italian seasoning: A blend of herbs that adds authentic Italian flavor.
  • 1/4 teaspoon crushed red pepper flakes (optional): For those who like a kick!
  • 1 (28 ounce) can crushed tomatoes: This serves as the base of your sauce, giving it richness and body.
  • 1 cup heavy/whipping cream: This adds creaminess to the sauce, making it indulgent.
  • 1/2 teaspoon salt: Essential for flavoring, but feel free to adjust to taste.
  • Pepper (to taste): Freshly cracked black pepper is best.
  • 1 teaspoon white sugar: Balances the acidity of the tomatoes.
  • 8 ounces ricotta cheese: This is what gives baked ziti its signature creaminess!
  • 1 cup freshly grated parmesan cheese: Adds a nutty flavor; freshly grated is always better!
  • 2 cups shredded mozzarella: The gooey, melty cheese that ties everything together.
  • For serving: Chopped fresh parsley and/or basil (optional) to brighten up the dish.

How to Make Baked Ziti

Side view of a bubbling dish of baked ziti, featuring layers of pasta and sauce.

Ready to dive into the cooking process? Follow these steps to create your cheesy baked ziti:

  1. Preheat the oven to 375°F and move the rack to the top third of the oven.
  2. Boil a salted pot of water and cook the ziti for 2-3 minutes less than the package directions indicate. Drain and set aside.
  3. In a large pot, add the sausage and chopped onion. Cook until browned, about 7-10 minutes, stirring occasionally.
  4. Add the minced garlic, Italian seasoning, and crushed red pepper flakes to the pot. Cook for about a minute until fragrant.
  5. Stir in the crushed tomatoes, cream, salt, pepper, and sugar. Let it heat through for about 5 minutes.
  6. Drain the pasta, add it to the pot with the sauce, and toss to combine.
  7. Layer the pasta mixture in a 9×13 casserole dish, spreading half of it evenly to create your bottom layer.
  8. Spoon dollops of ricotta cheese over the pasta for the cheesy middle layer.
  9. Add the remaining pasta mixture on top of the ricotta without stirring it in.
  10. Sprinkle the parmesan and mozzarella over the top.
  11. Bake uncovered for 20 minutes or until hot and bubbly. Then, broil for a few minutes to brown the cheese, watching closely to avoid burning.
  12. Serve hot, garnished with fresh basil or parsley if desired.

Expert Tips for Perfect Baked Ziti

Want to take your baked ziti to the next level? Here are some pro tips to ensure your dish shines:

  • Don’t overcook the pasta: Since the pasta will continue to cook in the oven, undercook it slightly to avoid mushiness.
  • Layer it right: Ensure even distribution of ingredients by layering properly. This helps with texture and flavor in every bite.
  • Try different cheeses: Mix in provolone or gouda for a flavor twist!
  • Use homemade sauce: If you have the time, making a homemade marinara sauce can elevate the dish even more.
  • Double the recipe: This is a crowd-pleaser, so consider making extra for leftovers or gatherings!
  • Let it rest: Allow the baked ziti to sit for about 10 minutes before serving. This helps it set and makes serving easier.

Common Mistakes and Troubleshooting

Cooking can sometimes be trial and error! Here are some common mistakes to avoid when making baked ziti:

  • Overbaking: Keep an eye on the baking time; you want it bubbly but not burnt!
  • Too much sauce: Balance is key! Aim for a harmonious mixture of sauce and cheese.
  • Using pre-shredded cheese: It may contain anti-caking agents that prevent melting. Grate your own for the best results!

Delicious Variations of Baked Ziti

Feel free to get creative with your baked ziti! Here are some fun twists to consider:

  • Vegetarian Baked Ziti: Swap the sausage for sautéed vegetables like spinach, mushrooms, and zucchini.
  • Meat Lovers Baked Ziti: Add ground beef, pepperoni, or even bacon for an extra meaty dish.
  • Spicy Baked Ziti: Mix in jalapeños or use spicy sausage for a fiery kick!
  • Cheesy Pesto Baked Ziti: Incorporate pesto sauce for a flavorful twist that elevates the dish.

Storage and Make-Ahead Instructions

Planning ahead? Here’s how to store and prepare your baked ziti in advance:

  • Make-Ahead: Prepare the dish up to the point of baking, cover tightly with foil, and refrigerate for up to 24 hours. When ready, bake as directed.
  • Freezing: You can freeze baked ziti before or after baking. Wrap tightly in plastic wrap and then foil to prevent freezer burn. It can last for up to 3 months.
  • Reheating: To reheat, allow it to thaw in the refrigerator overnight. Bake at 350°F until warmed through or microwave individual portions.

Frequently Asked Questions

Got questions? We’ve got answers! Here are some common inquiries about baked ziti:

  • Can I use other types of pasta? Yes, penne, rigatoni, or even fusilli work well in this recipe!
  • Is baked ziti gluten-free? You can use gluten-free pasta to make this dish gluten-free.
  • Can I add vegetables? Absolutely! Bell peppers, spinach, and mushrooms are great additions.
  • How long does baked ziti last in the fridge? It can last 3-5 days when stored in an airtight container in the fridge.
  • Can I make it dairy-free? Yes! Use dairy-free cheese alternatives and substitute coconut cream for heavy cream.
  • What’s the best way to reheat baked ziti? Reheat it in the oven for even heating, or in the microwave for quick servings.
  • Can I make baked ziti without meat? Definitely! This dish is just as delicious without meat.
  • What do I serve with baked ziti? Garlic bread, salad, or steamed vegetables make great sides!

Nutrition Tips and Dietary Adaptations

When you’re enjoying baked ziti, it’s essential to consider nutrition. Here are some tips:

  • Portion Control: Keep an eye on your serving size to balance indulgence and health.
  • Add Veggies: Incorporate more vegetables to increase fiber and nutrients.
  • Low-Fat Alternatives: Use low-fat cheese and ground turkey for a lighter version.

Equipment Recommendations

To make your cooking experience smoother, here are some essential tools you’ll want on hand:

  • Large pot: For boiling pasta and making the sauce.
  • 9×13 casserole dish: Perfect for baking your ziti.
  • Wooden spoon: Great for stirring ingredients without scratching your pots.
  • Cheese grater: Freshly grated cheese makes all the difference!

Serving Suggestions

Finally, let’s talk about how to serve your baked ziti:

  • Fresh Herbs: Garnish with chopped parsley or basil for a pop of color and flavor.
  • Pair with a Salad: A crisp green salad with vinaigrette complements the richness of the dish.
  • Garlic Bread: Serve alongside warm garlic bread for the ultimate comfort meal!

Conclusion

And there you have it! A rich, cheesy, and utterly delicious baked ziti recipe that’s bound to become a staple in your home. With its incredible flavor and customizable options, it’s the perfect dish for any occasion—whether it’s a cozy family dinner or a gathering with friends. So roll up your sleeves, gather your ingredients, and let’s make some magic in the kitchen!

Baked Ziti

Prep Time 15 minutes
Cook Time 25 minutes
Total Time 40 minutes
Servings 6 servings
Calories 650
A comforting baked pasta dish with sausage, cheese, and a flavorful tomato sauce, perfect for family dinners.

Ingredients

Pasta

  • 1 pound uncooked ziti or penne pasta

Meat & Vegetables

  • 1 pound Italian sausage
  • 1 medium onion (chopped)
  • 4-5 cloves garlic (minced)

Seasonings & Sauces

  • 1/2 teaspoon Italian seasoning
  • 1/4 teaspoon crushed red pepper flakes (optional)
  • 1 28 ounce can crushed tomatoes
  • 1 cup heavy/whipping cream
  • 1/2 teaspoon salt
  • Pepper to taste
  • 1 teaspoon white sugar (see note)

Cheese

  • 8 ounces ricotta cheese
  • 1 cup freshly grated parmesan cheese
  • 2 cups shredded mozzarella

For serving

  • to taste chopped fresh parsley and/or basil (optional)

Instructions 

  • Preheat oven to 375F. Cook pasta 2-3 minutes less than package instructions, then drain.
  • Cook sausage and onion until browned, then add garlic, seasonings, and red pepper flakes; cook for 1 minute.
  • Add crushed tomatoes, cream, salt, pepper, and sugar; heat for 5 minutes.
  • Combine pasta with sauce, layer half in a casserole, dollop ricotta, then top with remaining pasta and sprinkle cheeses. Bake for 20 minutes and broil until bubbly and browned.

Notes

Use fresh herbs for best flavor and keep an eye on the cheese during broiling to prevent burning.
Calories: 650kcal
Cost: $15
Course: Main Course
Cuisine: Italian
Keyword: pasta

Welcome to Flavor Town: Your Guide to Creamy Herb Chicken

Are you ready to embark on a culinary adventure that transforms a simple dinner into a flavor-packed feast? Dive into this guide for Creamy Herb Chicken with Crunchy Green Beans and Fluffy Rice! This recipe combines succulent chicken breasts, vibrant green beans, and creamy herb sauce to create a dish that’s not just healthy, but also a delight for your taste buds. Perfect for busy weeknights or impressing guests, it’s the kind of meal that says, “Eating well doesn’t have to be boring!” Let’s get cooking!

Why You’ll Love This Recipe

  • Quick & Easy: With just 30 minutes from prep to plate, this dish is a lifesaver for busy evenings.
  • Flavor Explosion: The creamy herb sauce, crafted with garlic, thyme, and Parmesan, elevates the chicken to new heights.
  • Wholesome Ingredients: Packed with lean protein and fresh vegetables, this recipe is a nutrition powerhouse.
  • Customizable: With suggestions for substitutions and variations, you can make this dish your own.
  • Meal Prep Friendly: Make it ahead of time and enjoy delicious leftovers that taste just as good the next day!

Ingredients for Creamy Herb Chicken

Here’s what you need to create this delicious meal:

  • 2 large boneless, skinless chicken breasts (or 4 small cutlets)
  • 1 tsp garlic powder
  • 1/2 tsp dried thyme
  • 1/2 tsp dried basil
  • 1/2 tsp paprika
  • Salt and pepper to taste
  • 1 tbsp olive oil
  • 1 tbsp butter
  • 3 cloves garlic, minced
  • 1/2 cup chicken broth
  • 1/2 cup heavy cream (or half & half for a lighter version)
  • 1/3 cup grated Parmesan cheese
  • 1 tsp Dijon mustard (optional for added depth)
  • 1 tsp Italian seasoning
  • 1/2 tsp lemon juice (optional for brightness)
  • 2 cups green beans, trimmed
  • 1 cup jasmine or basmati rice
  • Salt, pepper, olive oil for cooking and steaming

Step-by-Step Instructions for Perfect Creamy Herb Chicken

Juicy creamy herb chicken with vibrant green beans and fluffy rice in a plate, captured from the side.

Let’s break down the process to ensure your chicken comes out perfectly every time:

  1. Seasoning: Start by seasoning your chicken with garlic powder, thyme, basil, paprika, salt, and pepper. If the breasts are thick, pound them to an even thickness for uniform cooking.
  2. Cooking the Rice: Rinse the rice until the water runs clear, then cook according to package directions (about 15–18 minutes).
  3. Searing the Chicken: Heat olive oil and butter in a large skillet over medium-high heat. Add the chicken and sear for 6–7 minutes on each side until golden and cooked through. Remove from the skillet and tent with foil to keep warm.
  4. Cooking the Green Beans: In the same skillet, add the green beans with a pinch of salt. Cook for 4–5 minutes until crisp-tender, then remove them from the pan.
  5. Making the Sauce: Lower the heat to medium, add minced garlic, and sauté for 30 seconds until fragrant. Deglaze the pan with chicken broth, scraping up any flavorful browned bits. Stir in the cream, Parmesan, Italian seasoning, and Dijon mustard. Simmer for 2–3 minutes until thickened.
  6. Bringing It All Together: Return the chicken to the pan, spooning the creamy sauce over the top. Add lemon juice for an extra zing, if desired.
  7. Serving: Serve sliced chicken over fluffy steamed rice with green beans on the side, generously drizzled with the creamy herb sauce.

Pro Tips for the Best Creamy Herb Chicken

  • Uniform Thickness: Ensuring your chicken breasts are of uniform thickness helps them cook evenly and prevents dryness.
  • Don’t Rush the Searing: Allow the chicken to develop a nice golden crust by not moving it around too much in the pan.
  • Use Fresh Herbs: If you have them on hand, fresh herbs can elevate the flavor even further compared to dried ones.
  • Adjust Creaminess: If you prefer a lighter sauce, substitute heavy cream with half & half or use Greek yogurt for a tangy twist.
  • Experiment with Spices: Feel free to add a pinch of red pepper flakes for heat or smoked paprika for a deeper flavor.
  • Make It Ahead: This dish can be made in advance and stored in the fridge for up to three days, enhancing the flavors.
  • Perfect Pairings: Serve this chicken with a fresh salad or roasted vegetables to make a complete meal.

Common Mistakes to Avoid

Even the best chefs make mistakes, so here are a few to watch out for:

  • Overcrowding the Pan: Cooking too many chicken pieces at once can lead to steaming rather than searing. Work in batches if necessary.
  • Not Letting the Chicken Rest: Allowing the chicken to rest after cooking helps keep it juicy. Tent it with foil to maintain warmth.
  • Not Tasting the Sauce: Always taste your sauce before serving! Adjust salt, pepper, and acidity to your preference.
  • Skipping the Deglazing: Don’t miss out on the flavorful bits stuck to the pan! Deglazing adds depth to your sauce.

Variations to Explore

Here are some fun ways to switch things up:

  • Herb Chicken with Lemon: Add more lemon juice and zest for a refreshing citrus twist.
  • Mushroom Cream Sauce: Stir in sautéed mushrooms for an earthy flavor profile.
  • Spicy Herb Chicken: Incorporate jalapeños or chili flakes for a spicy kick.
  • Vegetarian Option: Substitute chicken with hearty portobello mushrooms or tofu for a delicious plant-based meal.

Storing and Make-Ahead Instructions

Want to make this dish in advance? Here’s how to store it:

  • Refrigeration: Store leftovers in an airtight container in the fridge for up to 3 days. Reheat gently to prevent the sauce from separating.
  • Freezing: You can freeze cooked chicken and sauce together for up to 2 months. Thaw overnight in the fridge before reheating.
  • Make-Ahead: Prepare the chicken and sauce a day in advance. Simply reheat and serve fresh green beans and rice when you’re ready to eat.

Comprehensive FAQ

  • Can I use chicken thighs instead of chicken breasts? Yes! Thighs are juicier and can add a different flavor profile.
  • What can I substitute for heavy cream? Half & half, Greek yogurt, or coconut milk can be great alternatives.
  • How can I make this dish gluten-free? Use cornstarch or a gluten-free flour blend for thickening instead of regular flour.
  • Can I add other vegetables? Absolutely! Bell peppers, broccoli, or zucchini can be delicious additions.
  • What should I serve with this dish? Consider a fresh garden salad or roasted sweet potatoes for a complete meal.
  • How long does this dish last? It can last in the fridge for up to 3 days and can be frozen for up to 2 months.
  • Can I make this dish dairy-free? Yes, substitute cream with cashew cream or a dairy-free yogurt alternative.
  • Is this recipe good for meal prep? Yes! It’s perfect for meal prep, and the flavors deepen after sitting.

Nutritional Tips and Dietary Adaptations

Here are some ways to adapt this recipe to your nutritional needs:

  • Lower Calorie Option: Use skinless chicken breasts and substitute heavy cream with Greek yogurt.
  • High Protein Variation: Add chickpeas or lentils alongside the chicken for extra protein.
  • Vegan Adaptation: Use tofu or tempeh in place of chicken, and replace cream with coconut milk.
  • Low-Carb Version: Serve with cauliflower rice instead of traditional rice for a lower-carb meal.

Equipment Recommendations

To make your cooking experience seamless, here’s what you’ll need:

  • Large Skillet: A non-stick or cast-iron skillet works best for searing and sauce-making.
  • Meat Mallet: For even chicken thickness, a meat mallet is incredibly handy.
  • Cooking Thermometer: Ensure your chicken is cooked perfectly to an internal temperature of 165°F.
  • Rice Cooker: Optional, but a rice cooker can simplify your rice prep!

Serving Suggestions

To round out your meal, consider these delicious pairings:

  • Fresh Salad: A crisp, green salad dressed with lemon vinaigrette complements the creamy chicken beautifully.
  • Garlic Bread: Serve with warm, toasted garlic bread for a comforting combination.
  • Roasted Veggies: Seasonal roasted vegetables add color and nutrition to your plate.
  • Wine Pairing: A glass of Chardonnay or a light red pairs well with the herb-infused flavors of this dish.

Conclusion

And there you have it, a comprehensive guide to creating a mouthwatering Creamy Herb Chicken with Crunchy Green Beans and Fluffy Rice! This dish is not just a meal; it’s a celebration of fresh ingredients and bold flavors. Whether you’re whipping it up for family dinner or impressing friends at a gathering, this recipe is sure to be a hit. Remember, the kitchen is your playground—so get creative and make it your own! Happy cooking!

Creamy Herb Chicken with Green Beans and Steamed Rice

Prep Time 10 minutes
Cook Time 25 minutes
Total Time 35 minutes
Servings 4 servings
Calories 550
A flavorful and creamy chicken dish served with tender green beans and fluffy steamed rice, perfect for a satisfying meal.

Ingredients

Protein

  • 2 large boneless, skinless chicken breasts (or 4 small cutlets)
  • 1 tsp garlic powder
  • 1/2 tsp dried thyme
  • 1/2 tsp dried basil
  • 1/2 tsp paprika
  • Salt and pepper to taste Salt and pepper (for seasoning)
  • 1 tbsp olive oil
  • 1 tbsp butter
  • 3 cloves garlic, minced
  • 1/2 cup chicken broth
  • 1/2 cup heavy cream (or half & half)
  • 1/3 cup grated Parmesan cheese
  • 1 tsp Dijon mustard (optional)
  • 1 tsp Italian seasoning
  • 1/2 tsp lemon juice (optional)

Green Beans

  • 2 cups green beans, trimmed

Rice

  • 1 cup jasmine or basmati rice
  • Salt, pepper, olive oil for cooking and steaming Salt, pepper, olive oil (for cooking and steaming)

Instructions 

  • Season chicken with spices and pound to even thickness if needed.
  • Cook rice according to package instructions (15–18 minutes).
  • Sear chicken in olive oil and butter until golden and cooked through, then set aside.
  • Cook green beans in the same pan until crisp-tender, then remove.
  • Sauté garlic, deglaze with chicken broth, add cream, Parmesan, seasonings, and simmer until thickened. Return chicken and spoon sauce over.

Notes

For extra flavor, add fresh herbs or a squeeze of lemon before serving.
Calories: 550kcal
Cost: $15
Course: Main Course
Cuisine: American
Keyword: Chicken, Creamy, Herb

Unleash the Flavor with Creamy Tomato Chicken Pasta

Welcome to your new favorite dish: Creamy Tomato Chicken Pasta! Bursting with flavor, this recipe effortlessly combines succulent chicken, rich cream, and zesty tomatoes into a stunning meal that’s sure to impress. Whether you’re looking to whip up a quick weeknight dinner or a delightful dish for a special occasion, this recipe has got you covered. Ready in under 30 minutes, it’s perfect for busy lives yet indulgent enough to feel like a treat. Dive into a bowl of deliciousness and discover why this creamy tomato sauce is the ultimate comfort food!

Why You’ll Love This Recipe

  • Quick & Convenient: In just 30 minutes, you can have a delicious meal on the table, making it ideal for weeknight dinners.
  • Flavor Explosion: The combination of fresh garlic, juicy tomatoes, and creamy goodness creates a flavor profile that’s both comforting and exciting.
  • Customizable: You can easily adapt this recipe by adding your favorite veggies or protein, making it versatile for all tastes.
  • Kid-Friendly: The creamy tomato sauce is a hit with kids, ensuring that mealtime is enjoyable for the whole family.
  • Great for Meal Prep: This dish can be made ahead and stored, making it a fantastic option for meal prepping.

Ingredients for Creamy Tomato Chicken Pasta

Here’s what you’ll need to create this delightful dish:

  • 3-4 boneless, skinless chicken breasts
  • 8 oz pasta (penne or fettuccine work beautifully)
  • 2 cloves fresh garlic, minced
  • 1 can (14.5 oz) diced tomatoes
  • 1 cup heavy cream
  • Dried Italian herbs (basil, oregano, thyme)
  • Salt and pepper to taste

Ingredient Breakdown and Substitutions

Side view of a bowl of chicken pasta in rich tomato sauce.

Let’s explore the ingredients a bit deeper:

  • Chicken: Boneless, skinless chicken breasts are perfect, but feel free to substitute with thighs or even shrimp for a different protein option.
  • Pasta: While penne and fettuccine are recommended, any pasta shape will work. Try whole wheat for a healthier option!
  • Heavy Cream: For a lighter version, substitute half-and-half or coconut milk for a dairy-free option.
  • Diced Tomatoes: Use fire-roasted tomatoes for an added depth of flavor, or fresh tomatoes when in season.
  • Herbs: Fresh herbs can elevate the dish; consider using fresh basil or parsley for garnish.
  • Garlic: Fresh garlic is key for that robust flavor, but garlic powder can be used in a pinch (1/4 tsp per clove).

How to Make Creamy Tomato Chicken Pasta

Let’s get cooking! Follow these straightforward steps to create your own creamy masterpiece:

  1. Chop chicken into bite-sized pieces and mince the garlic.
  2. Cook pasta according to package instructions until al dente. Reserve 1/2 cup of pasta water.
  3. In a skillet over medium heat, add olive oil and cook chicken until browned (about 5-7 minutes). Season with salt and pepper.
  4. Stir in minced garlic and canned tomatoes; cook for an additional minute to let the flavors meld.
  5. Reduce heat, add heavy cream and dried herbs; simmer for 5 minutes until the sauce thickens.
  6. Combine cooked pasta with sauce in the skillet; toss until well-coated. If the sauce is too thick, add reserved pasta water a little at a time until you reach your desired consistency.
  7. Serve immediately, garnished with parmesan cheese or fresh basil if desired.

Pro Tips for Perfect Creamy Tomato Chicken Pasta

  • Don’t Overcook the Chicken: Ensure your chicken is cooked just until golden brown to keep it juicy and tender.
  • Fresh Ingredients Matter: Using fresh garlic and herbs elevates the dish’s flavor and aroma.
  • Season Generously: Don’t be shy with seasoning! Salt and pepper are essential to bring out the dish’s full potential.
  • Perfect Pasta: Always cook your pasta al dente for that ideal texture that holds up well in the creamy sauce.
  • Let It Rest: Allow the dish to sit for a couple of minutes after cooking to let the flavors develop even further.
  • Garnish Smartly: Fresh basil and a sprinkle of parmesan cheese can make a big difference in presentation and flavor.
  • Experiment with Spice: Adding a pinch of red pepper flakes can give your dish a delightful kick!
  • Make It Ahead: Prepare the sauce in advance and just combine with pasta for a quick meal later.

Common Mistakes and Troubleshooting

Even the best of us can make a few missteps in the kitchen. Here’s how to avoid common issues:

  • Overcooked Pasta: Always set a timer! Overcooked pasta can ruin the dish’s texture.
  • Too Thin Sauce: If your sauce is too thin, simmer it longer to thicken or add a bit of cornstarch mixed with water.
  • Flavorless Chicken: Marinate your chicken in Italian dressing beforehand for added flavor.
  • Unbalanced Sauce: Taste and adjust seasoning as you go; a splash of vinegar can brighten up flavors!

Variations to Try

Add a twist to your creamy tomato chicken pasta with these fun variations:

  • Vegetable Medley: Toss in spinach, bell peppers, or mushrooms for an added nutrient boost.
  • Cheesy Delight: Stir in mozzarella or goat cheese for a creamier texture and more flavor.
  • Spicy Arrabbiata: Use spicy diced tomatoes or add red chili flakes for a fiery kick!
  • One-Pot Wonder: Combine all ingredients in a single pot for easy cleanup—just add the pasta and sauce directly!

Make-Ahead and Storage Instructions

This creamy tomato chicken pasta is perfect for meal prep! Here’s what you need to know:

  • Make Ahead: Prepare the sauce and store it in the fridge for up to 3 days. Cook pasta fresh when ready to serve.
  • Freezing: You can freeze the sauce in airtight containers for up to 3 months. Thaw in the fridge before reheating.
  • Reheating: Reheat on the stovetop over low heat, adding a splash of cream or pasta water to restore creaminess.

FAQs about Creamy Tomato Chicken Pasta

  • Can I use fresh tomatoes instead of canned? Yes! Use about 2-3 medium-sized tomatoes, diced.
  • Is this recipe gluten-free? Substitute regular pasta with gluten-free pasta to make it gluten-free.
  • Can I add other proteins? Absolutely! Shrimp or cooked sausage can be great additions.
  • How can I make this dish vegetarian? Omit the chicken and add more vegetables, like zucchini or bell peppers, for a hearty meal.
  • What can I serve with this dish? Pair with a fresh side salad or garlic bread for a complete meal.
  • How long does this dish last in the fridge? It’s best enjoyed within 3 days, but you can stretch it to 5 days if stored properly.
  • Can I use low-fat cream? Yes, but it may alter the richness of the sauce.
  • What’s the best way to store leftovers? Store in an airtight container in the fridge and reheat on low heat when ready to eat.

Nutrition Tips and Dietary Adaptations

This dish can easily be adapted to fit various dietary needs:

  • Low-Carb: Use zucchini noodles or spaghetti squash instead of pasta for a lower-carb option.
  • Dairy-Free: Replace heavy cream with coconut cream or cashew cream for a delicious alternative.
  • High-Protein: Add chickpeas or lentils for a protein boost without compromising flavor.

Essential Equipment

Don’t forget to equip your kitchen with these essentials for making creamy tomato chicken pasta:

  • Skillet: A good quality skillet is key for cooking your chicken and sauce evenly.
  • Pasta Pot: Invest in a pot with a strainer for cooking and draining pasta with ease.
  • Wooden Spoon: Perfect for stirring and preventing scratches on your non-stick cookware.

Serving Suggestions

Make your creamy tomato chicken pasta meal even more delightful with these serving ideas:

  • Fresh Herbs: Top with chopped basil or parsley for a pop of color and freshness.
  • Cheese: Sprinkle with freshly grated parmesan or crumbled feta for an extra touch of flavor.
  • Crusty Bread: Serve with garlic bread or a warm baguette for dipping into the creamy sauce.

Conclusion

There you have it! Creamy Tomato Chicken Pasta is a winning recipe that brings joy and flavor to your table. Whether you’re a seasoned chef or a kitchen newbie, this dish is easy to make and sure to impress. With its comforting flavors and versatile ingredients, it’s bound to become a household favorite. So grab your ingredients, put on your apron, and let the cooking adventure begin! Remember, healthy food doesn’t have to be boring—let’s make it exciting, colorful, and oh-so-delicious together!

Chicken Pasta in Creamy Tomato Sauce

Prep Time 10 minutes
Cook Time 20 minutes
Total Time 30 minutes
Servings 4 servings
Calories 650
A delicious and creamy pasta dish featuring tender chicken and a rich tomato sauce, perfect for a comforting meal.

Ingredients

Protein

  • 3-4 pieces boneless, skinless chicken breasts
  • 8 oz pasta (penne or fettuccine)
  • 2 cloves fresh garlic
  • 1 can (14.5 oz) diced tomatoes
  • 1 cup heavy cream
  • Dried Italian herbs (basil, oregano, thyme) Dried Italian herbs (to taste)
  • Salt and pepper Salt and pepper (to taste)

Instructions 

  • Cook pasta according to package instructions until al dente.
  • Cook chicken in a skillet with olive oil until browned (5-7 minutes). Season with salt and pepper.
  • Add minced garlic and diced tomatoes; cook for 1 minute.
  • Reduce heat, stir in heavy cream and herbs; simmer for 5 minutes until thickened.
  • Combine cooked pasta with sauce; toss to coat and serve hot.

Notes

For extra flavor, garnish with parmesan cheese or fresh basil.
Calories: 650kcal
Cost: $15
Course: Main Course
Cuisine: Italian
Keyword: Chicken, creamy tomato, pasta

Unleash Flavor with Instant Pot Coconut Chicken Curry

Are you ready to transform your dinner routine with a dish that’s as exciting to make as it is to eat? Enter the Instant Pot Coconut Chicken Curry! Packed with rich spices and creamy coconut milk, this recipe offers a vibrant explosion of flavors that will delight your taste buds and impress your dinner guests. Whether you’re a seasoned chef or a kitchen newbie, this easy-to-follow recipe will have you whipping up a restaurant-quality meal in no time. Let’s dive into the deliciousness!

Why You’ll Love This Recipe

This Instant Pot Coconut Chicken Curry isn’t just tasty; it’s a culinary adventure! Here are some specific benefits you can expect:

  • Time-Saving: The Instant Pot cooks your curry in just 15 minutes, making it a perfect choice for busy weeknights.
  • One-Pot Wonder: Enjoy easy cleanup since everything cooks in one pot, reducing the number of dishes to wash.
  • Flavor Explosion: The combination of spices and coconut milk creates a rich, aromatic sauce that makes every bite irresistible.
  • Customizable: You can easily adjust the heat level and ingredients based on your preferences or dietary needs.
  • Meal Prep Friendly: This curry is perfect for meal prep; it tastes even better the next day and freezes beautifully!

Ingredients You’ll Need

To create your mouthwatering Instant Pot Coconut Chicken Curry, gather the following ingredients:

  • 1 tablespoon Ghee or Oil: For sautéing and adding rich flavor.
  • 1 teaspoon Cumin seeds (Jeera): Optional, but they add a warm, earthy flavor.
  • 1 cup Onions (yellow, diced): The base of your curry for sweetness and depth.
  • 1/2 tablespoon Ginger: Fresh or paste for a zesty kick.
  • 1/2 tablespoon Garlic: Fresh or paste, it’s a must for that aromatic flavor.
  • 1 cup Tomato puree: Use canned or blend fresh tomatoes for a tangy base.
  • 1 pound Chicken thighs: Skinless and boneless, cut into 1-1.5 inch pieces for tender bites.
  • 1/4 cup Water: Just enough to help build your curry’s sauce.
  • 1 cup Coconut Milk: Full-fat and unsweetened for creaminess.
  • 1 teaspoon Garam Masala: A spice blend that adds warmth and complexity.
  • 1 tablespoon Lime juice: For a zesty brightness that balances the dish.
  • Cilantro: Fresh, for garnish and a pop of color.
  • 1 teaspoon Ground Cumin (Jeera powder): Adds an additional layer of flavor.
  • 1/2 teaspoon Ground Turmeric (Haldi powder): For color and anti-inflammatory benefits.
  • 1 teaspoon Kashmiri red chili powder: Or paprika, adjust to taste for heat.
  • 1 teaspoon Coriander powder: For a hint of sweetness.
  • 1 teaspoon Salt: To taste, enhancing all the flavors.

Pro Tips for Perfect Curry

A vibrant dish of Coconut Chicken Curry featuring chunks of chicken in a creamy sauce.

Want to make sure your curry is a hit? Here are some expert insights:

  • Choose Chicken Thighs: They remain juicier and more flavorful than chicken breasts.
  • Don’t Skip Sautéing: This step builds depth and flavor, so sauté the onions and spices well.
  • Adjust the Spice Level: You can control the heat by adjusting the amount of chili powder.
  • Thicken the Sauce: If you prefer a thicker sauce, let it simmer on sauté mode after pressure cooking.
  • Fresh Ingredients Matter: Use fresh ginger and garlic for the best flavor.
  • Let it Rest: Allow the flavors to meld by letting the curry sit for a few minutes before serving.
  • Serve with Accompaniments: Pair your curry with basmati rice, naan, or roti for a complete meal.
  • Garnish Generously: Fresh cilantro adds a burst of freshness and color.

Common Mistakes and Troubleshooting

Even the best can have hiccups in the kitchen! Here are some common mistakes to watch out for:

  • Overcrowding the Pot: Avoid adding too much chicken at once, as it can affect cooking time.
  • Skipping the Sauté Step: This can lead to a flat flavor profile; it’s essential for depth.
  • Not Using Enough Liquid: Ensure you follow the liquid requirements to prevent burning.
  • Ignoring Natural Release: Allowing the pressure to release naturally enhances tenderness.
  • Using Low-Quality Ingredients: Opt for high-quality spices and fresh produce for the best results.

Delicious Variations

Feeling adventurous? Here are some fun variations to elevate your curry experience:

  • Vegetarian Delight: Substitute chicken with chickpeas or tofu for a plant-based option.
  • Extra Veggies: Add bell peppers, spinach, or peas for added nutrition and flavor.
  • Different Proteins: Swap chicken for shrimp or fish to switch things up.
  • Spicy Kick: Incorporate fresh green chilies or a dash of cayenne for extra heat.

Storage and Make-Ahead Instructions

This curry is perfect for make-ahead meals! Here’s how to store and reheat it:

  • Refrigerate: Store in an airtight container for up to 4 days.
  • Freeze: Curry freezes well for up to 3 months. Thaw overnight in the fridge before reheating.
  • Reheat: Warm it on the stovetop or in the microwave until heated through. Add a splash of water if the sauce thickens too much.

Comprehensive FAQ

Got questions? We’ve got answers! Here are some common queries about this dish:

  • Can I use chicken breasts instead of thighs? Yes, but thighs yield better flavor and moisture.
  • Can I make this curry vegan? Absolutely! Replace chicken with tofu or chickpeas and use coconut oil instead of ghee.
  • What can I serve with this curry? Pair it with basmati rice, naan, or a fresh salad for a balanced meal.
  • Can I add more spices? Yes! Feel free to experiment with your favorite spices to make it your own.
  • How spicy is this recipe? The spice level can be adjusted by varying the amount of chili powder or adding more fresh chilies.
  • How long does it take to cook? The Instant Pot cooks it in about 15 minutes, but include prep time as well.
  • What should I do if it’s too salty? Add a splash of coconut milk or a little sugar to balance the saltiness.
  • Can I make this curry ahead of time? Yes, it stores well in the fridge or freezer for future meals.

Nutrition Tips and Dietary Adaptations

This recipe is not only delicious but also offers nutritional benefits:

  • High in Protein: Chicken thighs provide a good source of protein essential for muscle health.
  • Healthy Fats: Coconut milk offers healthy fats that help with nutrient absorption.
  • Rich in Antioxidants: Spices like turmeric and cumin have anti-inflammatory properties.
  • Gluten-Free: This recipe is naturally gluten-free, making it suitable for those with dietary restrictions.

Equipment Recommendations

Make sure you have the right tools to perfect your dish:

  • Instant Pot: Essential for the quick cooking process.
  • Cutting Board: A sturdy board for prepping your ingredients.
  • Chef’s Knife: A sharp knife makes chopping easy and efficient.
  • Measuring Cups and Spoons: Accurate measurements lead to the best results.

Serving Suggestions

When it comes to serving your Instant Pot Coconut Chicken Curry, consider these delicious options:

  • Basmati Rice: The perfect complement to soak up the flavorful sauce.
  • Naan Bread: Great for dipping and enjoying every last bit of the curry.
  • Fresh Salad: A crisp salad adds freshness and balances the richness of the curry.
  • Yogurt or Raita: A cooling side to balance the spices and add creaminess.

With just one pot and a handful of ingredients, you’ll find yourself creating a dish that not only satisfies but also excites! So grab your Instant Pot and let’s make some delicious memories with this Instant Pot Coconut Chicken Curry. Enjoy every bite of this delightful dish and share it with family and friends to spread the joy of healthy cooking!

Instant Pot Coconut Chicken Curry

Prep Time 10 minutes
Cook Time 10 minutes
Total Time 20 minutes
Servings 4 servings
Calories 350
A flavorful and creamy chicken curry cooked quickly in the Instant Pot, infused with coconut and spices for a comforting meal.

Ingredients

Ghee or Oil

  • 1 tablespoon Ghee or Oil

Cumin seeds (Jeera) (optional)

  • 1 teaspoon Cumin seeds (Jeera) (optional)

Onions (yellow diced)

  • 1 cup Onions (diced)

Ginger (paste or grated)

  • 1/2 tablespoon Ginger (paste or grated)

Garlic (paste or minced)

  • 1/2 tablespoon Garlic (paste or minced)

Tomato puree (canned or blend 2 tomatoes)

  • 1 cup Tomato puree

Chicken thighs (skinless and boneless, cut into 1-1.5 inch pieces)

  • 1 pound Chicken thighs (skinless and boneless, cut into 1-1.5 inch pieces)

Water

  • 1/4 cup Water

Coconut Milk (canned, full-fat, unsweetened)

  • 1 cup Coconut Milk

Garam Masala

  • 1 teaspoon Garam Masala

Lime juice

  • 1 tablespoon Lime juice

Cilantro (to garnish)

  • Cilantro (to garnish)

Ground Cumin (Jeera powder)

  • 1 teaspoon Ground Cumin (Jeera powder)

Ground Turmeric (Haldi powder)

  • 1/2 teaspoon Ground Turmeric (Haldi powder)

Kashmiri red chili powder (or paprika, adjust to taste)

  • 1 teaspoon Kashmiri red chili powder (or paprika, adjust to taste)

Coriander powder (Dhaniya powder)

  • 1 teaspoon Coriander powder

Salt

  • 1 teaspoon Salt

Instructions 

  • Sauté cumin seeds in ghee/oil until sizzled, then add onions, ginger, and garlic. Cook until golden.
  • Add tomato puree and spices; sauté briefly. Add chicken and cook for 3-4 minutes.
  • Pour in water, cancel sauté, and pressure cook on high for 4 minutes. Quick release pressure.
  • Stir in coconut milk and garam masala; simmer for 4-5 minutes until thickened. Add lime juice and garnish with cilantro.

Notes

You can adjust the chili powder to taste for spiciness.
Calories: 350kcal
Cost: $15
Course: Main Course
Cuisine: Indian
Keyword: Chicken, Coconut, Curry

Are you ready to embark on a vibrant journey of health and flavor? Meet your new best friend: the Green Detox Smoothie! This delightful blend of spinach, cucumber, apple, and lemon is not just a feast for the eyes, but it’s also a powerhouse of nutrients that will leave you feeling revitalized and ready to conquer your day. In this guide, we’ll explore everything you need to know about making this smoothie a staple in your healthy lifestyle. Let’s dive into the world of fresh ingredients, delicious flavors, and the joy of nourishing your body!

Why You’ll Love This Recipe

Here’s why this Green Detox Smoothie is going to change your mornings:

  • Quick and Easy: Whip it up in just 5 minutes! Perfect for busy mornings when you need to kickstart your day.
  • Nutrient-Packed: Filled with fiber, vitamins, and antioxidants that support your immune system and digestion.
  • Detoxifying: The combination of leafy greens and citrus aids in natural detoxification, cleansing your body from the inside out.
  • Refreshing Flavor: The crispness of cucumber and the zest of lemon create a bright, refreshing taste that’s sure to wake up your taste buds.
  • Customizable: Adjust the ingredients based on your preferences or what you have on hand—there are endless possibilities!

Ingredient Breakdown

Let’s take a closer look at the star ingredients of this smoothie:

  • Spinach: A nutrient-dense leafy green that’s rich in iron and vitamins A, C, and K. Substitution: Kale or Swiss chard can also be used!
  • Cucumber: Adds hydration and a crisp texture. Substitution: Zucchini can be an excellent alternative.
  • Apple: Provides natural sweetness and fiber. Substitution: Pears or even a splash of pineapple juice can work wonderfully.
  • Lemon: Brightens the flavor and adds vitamin C. Substitution: Lime can be used for a different twist!

Pro Tips for the Perfect Smoothie

Want to take your smoothie game to the next level? Here are some expert insights:

  • Use Frozen Fruits: For a thicker texture, consider using frozen apple slices or even a handful of ice cubes.
  • Blend in Stages: Start with the leafy greens and liquid, then add the remaining ingredients to ensure a smooth blend.
  • Add Protein: Boost your smoothie’s staying power by adding a scoop of protein powder or Greek yogurt.
  • Experiment with Herbs: Fresh mint or basil can add an unexpected and delightful flavor twist.
  • Check Consistency: If your smoothie is too thick, add a little more water or coconut water to achieve your desired texture.
  • Make It Ahead: Prepare your ingredients in advance and store them in the freezer to save time on busy mornings.
  • Balance Your Flavors: Taste as you blend—adjust sweetness with honey or agave syrup if needed.
  • Serve Immediately: Enjoy your smoothie fresh for the best taste and nutrient retention!

Common Mistakes and Troubleshooting

Side angle of a refreshing green smoothie filled with leafy greens and fruits, showcasing its fresh ingredients.

To ensure you create the best smoothie possible, here are some common pitfalls to avoid:

  • Not Enough Liquid: If your smoothie is too thick, it can be hard to blend. Always start with enough liquid!
  • Over-Blending: Blend just until smooth—over-blending can heat up the mixture and affect the taste.
  • Skipping Sweeteners: If you find your smoothie too bitter, a touch of honey or dates can enhance the flavor.
  • Ignoring Texture: If it’s too chunky, you may not have blended enough. Just give it another whirl!

Variations to Keep It Exciting

Feeling adventurous? Here are some fun variations to try:

  • Tropical Twist: Add a handful of pineapple and a splash of coconut milk for a tropical vibe.
  • Berry Blast: Incorporate a mix of strawberries or blueberries for a sweeter, antioxidant-rich smoothie.
  • Protein Power: Add a scoop of your favorite protein powder for an extra boost post-workout.
  • Spicy Kick: Throw in a pinch of cayenne pepper or some fresh ginger for a zesty kick!

Storage and Make-Ahead Instructions

Want to enjoy your Green Detox Smoothie throughout the week? Here’s how:

  • Make-Ahead: Pre-portion ingredients into freezer bags for quick blending in the morning.
  • Storage: If you have leftovers, store them in an airtight container in the fridge for up to 24 hours.
  • Freezing: You can freeze individual servings in ice cube trays for a quick smoothie fix anytime!

Frequently Asked Questions

Got questions? We’ve got answers!

  • Can I use other greens? Absolutely! Kale, Swiss chard, or even collard greens work just fine.
  • Is this smoothie vegan? Yes, all the ingredients are plant-based!
  • Can I add supplements? Feel free to add vitamins or superfood powders like spirulina for added benefits.
  • How can I make it sweeter? Add honey, agave syrup, or even a ripe banana for natural sweetness.
  • Is it okay for meal prep? Yes! Just store it in a sealed container in the fridge and consume within a day.
  • What’s the best time to drink this smoothie? Morning is ideal, but it can be enjoyed any time of day for a refreshing boost.
  • Why is my smoothie bitter? If you find it too bitter, try adding a sweetener or adjusting the apple-to-spinach ratio.
  • Can I use a regular blender? Yes, but a high-speed blender will achieve a smoother texture.

Nutrition Tips and Dietary Adaptations

Maximize your smoothie’s health benefits with these tips:

  • Fiber Focus: Incorporate chia seeds or flaxseeds for additional fiber and omega-3s.
  • Dairy-Free Options: Use almond milk or coconut milk if you prefer a non-dairy base.
  • Low-Calorie Choices: Opt for water or ice instead of juice to keep calories in check.
  • Balanced Diet: Pair your smoothie with a source of healthy fats, like nuts or avocado, for a more balanced meal.

Equipment Recommendations

Here’s what you’ll need to whip up this smoothie:

  • High-Speed Blender: For the best texture and smoothness, invest in a quality blender.
  • Measuring Cups: For accurate ingredient portions that ensure consistent results.
  • Reusable Straw: Go eco-friendly while enjoying your smoothie on the go!

Serving Suggestions

Want to make your smoothie experience even better? Here are some serving ideas:

  • Serve in a Mason Jar: Perfect for a trendy, portable option!
  • Garnish with Fresh Mint: A sprig of mint on top adds a refreshing aroma.
  • Pair with Healthy Snacks: Enjoy with a handful of nuts or whole-grain toast for a balanced meal.

Conclusion

There you have it—the ultimate guide to creating your own Green Detox Smoothie! With its vibrant flavors, delightful textures, and health benefits, this smoothie is more than just a drink; it’s a celebration of healthy living. So why wait? Gather your ingredients, blend your way to a healthier you, and tap below to get your free guide with more delicious smoothie recipes that will elevate your kitchen game. Here’s to a colorful, energetic lifestyle!

Green Detox Smoothie

Prep Time 5 minutes
Total Time 5 minutes
Servings 2 cups
Calories 150
A refreshing and healthy green smoothie packed with nutrients to start your day.

Ingredients

produce

  • 1 cup spinach
  • 1/2 cup cucumber
  • 1 medium apple (cored and sliced)
  • 1 lemon lemon (juiced)

Instructions 

  • Combine spinach, cucumber, apple, and lemon in a blender.
  • Blend until smooth.
  • Serve immediately and enjoy!

Notes

Use fresh ingredients for the best flavor and nutrition.
Calories: 150kcal
Cost: $8
Course: Beverage
Keyword: Healthy