Author

Ryan

Browsing

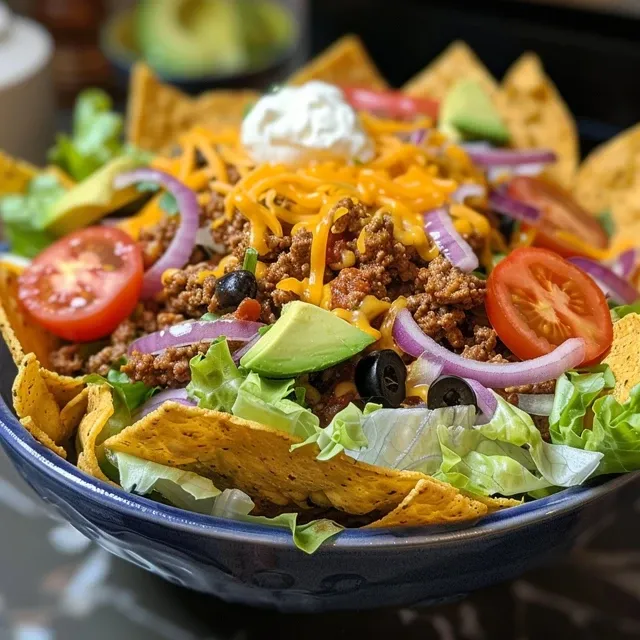
Unlock the Joy of Cooking with Crunchy Tortilla Taco Bowls!

Are you ready to elevate your taco night? Dive into the delicious world of tortilla bowls, where crispy, golden tortillas meet savory fillings and fresh toppings in a vibrant culinary experience! This Crunchy Tortilla Taco Bowl is not just a meal; it’s a celebration of flavors, textures, and colors that transforms everyday ingredients into an extraordinary feast. Perfect for busy weeknights or festive gatherings, this recipe is designed to be fun, easy, and utterly satisfying!

In this article, you’ll discover:

  • Why you’ll love this recipe: Uncover five fantastic benefits that make your taco night even better!
  • Detailed ingredient breakdown: Get insights on substitutions and variations to suit your taste.
  • Expert pro tips: Learn the secrets to achieving the perfect tortilla bowl.
  • Common mistakes: Avoid pitfalls with troubleshooting tips.
  • Make-ahead storage instructions: Prepare in advance for a stress-free meal.
  • Comprehensive FAQ: Answers to all your burning questions about taco bowls.

Why You’ll Love This Recipe

Here’s why this Crunchy Tortilla Taco Bowl is a must-try:

  • Quick & Easy: With simple ingredients and straightforward steps, you’ll have this meal prepared in no time!
  • Customizable: You can personalize your bowl with your favorite toppings and fillings, making it perfect for everyone.
  • Healthy & Nutritious: Packed with fresh veggies and lean proteins, this dish is a wholesome option for any meal.
  • Kid-Friendly: The fun, interactive nature of building your own bowl makes it a hit with kids!
  • Meal Prep Friendly: Make extra bowls for easy lunches or dinners throughout the week.

Ingredients Breakdown

Let’s gather our ingredients for the ultimate taco bowl experience!

  • Ground Beef or Turkey: 1 lb; feel free to use ground chicken or a plant-based alternative for a lighter option.
  • Taco Seasoning: 1 tbsp; use store-bought or homemade for a flavor-packed punch.
  • Iceberg Lettuce: 1 head, chopped; or use romaine hearts for a crunchier texture.
  • Refried Beans: Optional, but they add creaminess and extra protein.
  • Cheese: Mexican blend cheese, sharp cheddar, or pepper jack work beautifully.
  • Tomatoes: 2 diced; choose your favorite variety for freshness.
  • Red Onion: ½ diced; adds a nice crunch and flavor.
  • Avocados: 2 sliced; creamy and rich, don’t skip these!
  • Cilantro: Fresh, chopped; it’s the herb that brings everything together.
  • Black Olives: Optional; for those who enjoy the briny flavor.
  • Flour Tortillas: 4 large (10”); these are your edible bowls! Consider using whole wheat or gluten-free options.
  • Olive Oil or Cooking Spray: 2 tbsp; to crisp up those tortillas perfectly.

How to Make Your Crunchy Tortilla Bowls

A delicious taco bowl showcasing a crispy tortilla shell filled with fresh toppings and ground beef.

Now that we have our ingredients ready, let’s get cooking!

  • Preheat the Oven: Set your oven to 375°F (190°C) to get those tortillas crispy.
  • Prepare Tortilla Bowls: Brush or spray both sides of each tortilla with olive oil and press them into an oven-safe bowl to form the shape.
  • Bake: Place the bowls in the oven for about 10-15 minutes until golden brown and crispy.
  • Cook the Meat: While the bowls are baking, brown the ground beef or turkey in a skillet over medium heat, adding taco seasoning and water as per the instructions on the seasoning packet.
  • Assemble Your Bowl: Layer the refried beans, cooked meat, lettuce, cheese, tomatoes, onion, and any other toppings you desire.
  • Drizzle with Dressing: Add your favorite dressing or a squeeze of lime to enhance the flavors.

Pro Tips for the Perfect Tortilla Bowl

To make sure your tortilla bowls turn out amazing every time, keep these pro tips in mind:

  • Use High-Quality Tortillas: Go for fresh or homemade tortillas for the best flavor and texture.
  • Don’t Overstuff: Keep fillings balanced to prevent sogginess.
  • Experiment with Baking Times: Depending on your oven, you may need to adjust the baking time for the perfect crunch.
  • Prepare Ingredients Ahead: Chop vegetables and cook meat in advance for quicker assembly.
  • Try Different Fillings: Get adventurous with beans, quinoa, or grilled veggies.
  • Keep It Colorful: Use a variety of vegetables to make your dish visually appealing.
  • Consider Vegan Options: Swap the meat for lentils or mushrooms for a plant-based delight.
  • Garnish Generously: Fresh herbs, salsas, and dips elevate the flavor profile of your bowl.

Avoid Common Mistakes

Even the best chefs make mistakes! Here’s how to sidestep common pitfalls:

  • Using Cold Tortillas: Cold tortillas can tear easily. Warm them slightly before shaping.
  • Not Preheating the Oven: Always preheat your oven for even cooking.
  • Skipping the Oil: A light coating of oil is essential for achieving that crispy texture.
  • Overcooking the Meat: Keep an eye on your meat to avoid dryness. Cook until just browned.
  • Storing Leftovers Incorrectly: For best results, store components separately to maintain freshness.

Storage & Make-Ahead Instructions

Want to prep for the week? Here’s how to store and prepare your tortilla bowls:

  • Make-Ahead: Cook the meat and chop your veggies in advance. Store in airtight containers in the fridge for up to 3-4 days.
  • Storing Tortilla Bowls: Store baked tortilla bowls at room temperature in a dry place. They can last for a few days but are best eaten fresh!
  • Reheating: Reheat ingredients in the microwave or on the stovetop before assembling your bowl.

Comprehensive FAQ

Got questions? We’ve got answers!

  • Can I use corn tortillas? Yes, but corn tortillas are more fragile. Consider using them for baked chips instead!
  • How do I make my bowls extra crispy? Make sure to brush them with oil and bake until golden brown.
  • What toppings can I use? The sky’s the limit! Consider guacamole, salsa, jalapeños, or even bacon bits!
  • Can I freeze the tortillas? While it’s best to enjoy them fresh, you can freeze uncooked tortillas and bake them later.
  • Is this recipe gluten-free? Use gluten-free tortillas and ensure all other ingredients are also gluten-free.
  • How can I make a vegetarian version? Substitute the meat with beans, tofu, or grilled vegetables.
  • Can I use store-bought taco seasoning? Absolutely! Just check for added sugars or preservatives.
  • What’s the best way to serve these bowls? Serve them in individual portions for a fun and interactive dining experience!

Nutritional Benefits & Dietary Adaptations

Your taco bowl can be as healthy as you want it to be! Consider these nutritional tips:

  • Protein Power: Choose lean meats or plant-based proteins to keep your bowl nutritious.
  • Load Up on Veggies: The more colorful your bowl, the more nutrients you’ll pack in!
  • Healthy Fats: Avocados and olive oil provide essential fatty acids that are great for your heart.
  • Watch the Sodium: If using packaged products, keep an eye on sodium levels to maintain a balanced diet.

Equipment Recommendations

To make the cooking process smoother, here’s a list of essential tools:

  • Oven-Safe Bowls: These are crucial for shaping your tortilla bowls.
  • Skillet: A non-stick skillet makes browning the meat a breeze.
  • Sharp Knife: For chopping veggies quickly and efficiently.
  • Measuring Cups: Ensure accurate ingredient measurements for perfect flavor.

Serving Suggestions

Make your taco night even more special with these serving ideas:

  • Family Style: Set up a taco bar where everyone can create their own bowl.
  • Pair with Drinks: Serve with refreshing drinks like iced tea or margaritas to enhance the fiesta vibe!
  • Accompany with Sides: Consider serving with chips and guacamole or a simple side salad.

With all these tips, tricks, and variations, your Crunchy Tortilla Taco Bowl is sure to impress! Whether it’s a casual weeknight dinner or a lively gathering with friends, this recipe embodies the joy of cooking. So grab your ingredients, unleash your creativity, and let’s make taco night a memorable one!

Crispy Tortilla Taco Bowl

Prep Time 15 minutes
Cook Time 10 minutes
Total Time 25 minutes
Servings 4 servings
Calories 650
A flavorful and crispy taco bowl recipe featuring seasoned ground meat, fresh vegetables, and creamy toppings, perfect for a quick and satisfying meal.

Ingredients

Meat and Seasonings

  • 1 lb ground beef or turkey
  • 1 tbsp taco seasoning
  • 1 tbsp water

Vegetables and Toppings

  • 1 head iceberg lettuce (chopped)
  • Refried beans (optional) Refried beans (optional)
  • Mexican blend cheese (sharp cheddar, or pepper jack) Mexican blend cheese
  • 2 pcs tomatoes (diced)
  • ½ red onion red onion (diced)
  • 2 pcs avocados (sliced)
  • Fresh cilantro (chopped) Fresh cilantro
  • Black olives (optional) Black olives (optional)
  • 4 large flour tortillas (10") large flour tortillas
  • 2 tbsp olive oil or cooking spray
  • ¼ tsp salt

Dairy and Sauces

  • 1 cup sour cream
  • ¼ cup mayonnaise
  • ¼ cup packed cilantro (chopped)
  • 1-3 chipotle peppers in adobo sauce chipotle peppers in adobo sauce (to taste)
  • 1 tsp adobo sauce
  • 2 cloves cloves garlic (crushed)
  • 1.5 tbsp lime juice
  • ½ tsp onion powder
  • ½ tsp smoked paprika
  • ½ tsp ground cumin

Instructions 

  • Cook ground meat with taco seasoning and water until browned.
  • Warm tortillas and assemble bowls with meat, chopped vegetables, cheese, and toppings.
  • Mix sour cream, mayonnaise, cilantro, chipotle peppers, adobo sauce, garlic, lime juice, and spices for sauce.
  • Top assembled bowls with sauce, sliced avocados, and cilantro.

Notes

For extra crunch, bake the tortillas until crispy before assembling.
Calories: 650kcal
Cost: $15
Course: Main Course
Cuisine: Mexican
Keyword: Beef, Crispy, Tacos

Discover the Zesty Potato and Cucumber Salad: A Creamy Delight for Every Occasion!

Welcome to the vibrant world of our Zesty Potato and Cucumber Salad, where flavors burst and healthy eating becomes an exciting culinary adventure! This delightful dish is not just a salad; it’s a celebration of fresh ingredients, creamy textures, and zesty flavors that will make your taste buds dance. Perfect for picnics, parties, or as a refreshing side dish, this salad is nutritious, delicious, and oh-so-simple to prepare. Let’s dive in!

Why You’ll Love This Recipe

There are countless reasons to fall in love with this Zesty Potato and Cucumber Salad. Here are just a few:

  • Quick Preparation: With just a handful of ingredients and straightforward steps, you can whip up this salad in no time!
  • Nutritious Balance: Packed with vitamins from fresh vegetables and healthy fats from olive oil, this salad supports a wholesome diet.
  • Versatile Serving Options: Serve it chilled, at room temperature, or as a meal prep delight for busy days!
  • Creamy Dill Dressing: The rich and tangy dressing elevates the salad, making each bite a flavorful experience.
  • Perfect for Any Occasion: Whether it’s a summer barbecue or a cozy family dinner, this salad fits right in!

Ingredients Breakdown

Here’s what you’ll need to create this fresh and flavorful salad:

  • 1 kg white baby potatoes: These tender potatoes provide the perfect base. Feel free to swap with red potatoes or even sweet potatoes for a twist!
  • 2 Lebanese cucumbers: Their crisp texture is ideal. If unavailable, English cucumbers are a great substitute.
  • 1 red onion, sliced thin: For a mild onion flavor, consider using green onions.
  • 1 cup parsley leaves, roughly chopped: This adds freshness. You can use cilantro if you prefer.
  • ½ cup fresh dill, finely chopped: Dill is key to our creamy dressing. Don’t have fresh? Use 1 tablespoon dried dill.
  • ½ cup mayonnaise: For a healthier version, substitute with Greek yogurt.
  • 1/3 cup fresh lemon juice: This brings brightness. Lime juice works as well!
  • 3 tablespoons extra virgin olive oil: Use high-quality oil for the best flavor.
  • 1 teaspoon Dijon mustard: This adds a nice zing!
  • ½ teaspoon sea salt and cracked pepper: Season to taste!

Cooking Instructions

Side view of a vibrant salad with baby potatoes, sliced cucumbers, and a creamy dill dressing.

Ready to get cooking? Follow these steps:

  1. Prepare the potatoes: Add the baby potatoes with skins to a pot of salted water and bring to a boil. Cook for about 25 minutes or until fork-tender. Remember to check for doneness before cutting!
  2. Prepare the vegetables: While the potatoes are cooking, thinly slice the Lebanese cucumbers and red onion, and chop the parsley and dill.
  3. Make the dressing: In a bowl, whisk together the dill, mayonnaise, lemon juice, olive oil, Dijon mustard, salt, and pepper until smooth and well combined.
  4. Combine ingredients: In a large mixing bowl, add the cooked potatoes, cucumbers, red onion, and chopped parsley.
  5. Add dressing, toss, and serve: Pour the creamy dill dressing over the salad ingredients. Gently toss to ensure everything is well coated.
  6. Optional to chill: For enhanced flavor, cover the bowl with cling wrap and refrigerate for at least 1 hour, or serve at room temperature.

Expert Tips for Perfection

Want to ensure your salad is the star of the show? Check out these expert tips:

  • Potato Prep: Choose similarly sized baby potatoes for even cooking and don’t overcook them to maintain their shape.
  • Cooling Time: Allow the potatoes to cool slightly before cutting to prevent them from becoming mushy.
  • Freshness is Key: Use fresh herbs and vegetables for the best flavor and nutritional value.
  • Customize Your Dressing: Feel free to adjust the dressing ingredients to suit your taste—add more dill for an extra punch!
  • Seasoning: Don’t forget to taste and adjust the seasoning after combining the salad to ensure it’s just right!
  • Make Ahead: This salad can be made a day in advance; just keep the dressing separate until serving to maintain freshness.
  • Meal Prep Friendly: Divide into portions for easy grab-and-go lunches throughout the week!
  • Experiment with Add-ins: Try adding cherry tomatoes, feta cheese, or avocado for a twist!

Common Mistakes and Troubleshooting

Even the best cooks can make mistakes! Here’s how to avoid common pitfalls:

  • Overcooking Potatoes: Keep an eye on the cooking time; overcooked potatoes can turn mushy.
  • Underseasoning: Always taste your dressing and salad before serving to ensure it’s flavorful.
  • Too Much Dressing: Start with half the dressing, then add more to taste to avoid sogginess.
  • Not Mixing Thoroughly: Make sure to toss the salad well so every bite is deliciously coated!

Variations to Try

Feeling adventurous? Here are some tasty variations you can try:

  • Greek Twist: Add crumbled feta cheese and Kalamata olives for a Mediterranean flair.
  • Spicy Kick: Incorporate diced jalapeños or a splash of hot sauce to spice things up!
  • Protein Boost: Toss in cooked chickpeas or shredded rotisserie chicken for added protein.
  • Nutty Flavor: Sprinkle with toasted sunflower seeds or slivered almonds for extra crunch!

Storage and Make-Ahead Instructions

To keep your salad fresh and delicious:

  • Refrigerate: Store in an airtight container in the fridge for up to 3 days.
  • Make-Ahead: Prepare components (potatoes, dressing, and veggies) separately, then combine just before serving.
  • Freezing: Not recommended as the texture of potatoes and cucumbers may change.

Frequently Asked Questions

Here are some common questions about our Zesty Potato and Cucumber Salad:

  • Can I use regular potatoes instead of baby potatoes? Yes, but cut them into smaller pieces for even cooking.
  • How can I make this salad vegan? Substitute mayonnaise with a vegan mayo or Greek yogurt alternative.
  • Is it necessary to chill the salad before serving? While it’s not necessary, chilling enhances the flavors!
  • Can I substitute the dressing? Absolutely! A vinaigrette or yogurt-based dressing also works well.
  • What should I serve this salad with? It pairs wonderfully with grilled meats, sandwiches, or as a standalone dish!
  • How long does the salad last in the fridge? Enjoy it within 3 days for the best taste and freshness.
  • Can I add other vegetables? Yes! Feel free to experiment with bell peppers, carrots, or celery.
  • Is this salad gluten-free? Yes, all ingredients are gluten-free!

Nutritional Tips and Dietary Adaptations

This salad is naturally gluten-free and can be easily adapted for various dietary needs:

  • Low-Calorie Option: Use Greek yogurt in place of mayonnaise for a lighter dressing.
  • Low-Carb Version: Replace potatoes with cauliflower for a keto-friendly dish.
  • High-Protein Addition: Add grilled chicken or chickpeas to make it a complete meal.

Equipment Recommendations

Here are some handy tools to make your cooking process even smoother:

  • Sharp Knife: A good knife is essential for slicing vegetables with ease.
  • Large Pot: Perfect for boiling the potatoes.
  • Mixing Bowls: Use large bowls to combine your salad and dressing.
  • Whisk: Essential for creating a smooth and creamy dressing.

Serving Suggestions

Ready to serve your zesty creation? Here are some fun ideas:

  • Chilled Bowl: Serve it in a chilled bowl for an extra refreshing experience.
  • Garnish: Top with extra dill or parsley for a pop of color and flavor.
  • Make it a Main: Add grilled chicken or shrimp on top to turn this salad into a main course.

In conclusion, this Zesty Potato and Cucumber Salad is not just a dish; it’s a canvas for your creativity in the kitchen. With its delightful flavors, creamy dressing, and endless customization options, it’s bound to be a hit at any gathering. So grab your ingredients, roll up your sleeves, and let’s make healthy eating fun and exciting! Enjoy every bite!

Potato and Cucumber Salad with a Creamy Dill Dressing

Prep Time 15 minutes
Cook Time 25 minutes
Total Time 40 minutes
Servings 4 people
Calories 250
A fresh and creamy potato salad featuring crisp cucumbers and a flavorful dill dressing, perfect for summer gatherings.

Ingredients

Main

  • 1 kg white baby potatoes (with skins)
  • 2 pieces Lebanese cucumbers (sliced thin)
  • 1 red red onion (sliced thin)
  • 0.5 cup parsley leaves (roughly chopped)
  • 0.5 cup fresh dill (finely chopped)
  • 0.5 cup mayonnaise
  • 0.33 cup fresh lemon juice
  • 3 tablespoons extra virgin olive oil
  • 1 teaspoon Dijon mustard
  • 0.5 teaspoon sea salt
  • 0.5 teaspoon cracked pepper

Instructions 

  • Boil potatoes in salted water for 25 minutes, then cool and cut into quarters.
  • Slice cucumbers and red onion; chop parsley and dill.
  • Whisk together dill, mayonnaise, lemon juice, olive oil, mustard, salt, and pepper to make dressing.
  • Combine potatoes, cucumbers, onion, and parsley in a large bowl.
  • Pour dressing over ingredients and toss to coat. Chill for 1 hour or serve immediately.

Notes

For extra flavor, add a squeeze of lemon before serving.
Calories: 250kcal
Cost: $12
Course: Salad
Cuisine: international
Keyword: cucumber, Dill, Potato

Unleash Your Culinary Creativity with Irresistible Chilli Chicken

Welcome to a vibrant journey of flavors as we dive into the world of Chilli Chicken! This delightful dish is not just your average chicken recipe; it’s a celebration of spices, textures, and colors. Get ready to impress your family and friends with a restaurant-style Chilli Chicken that you can whip up in your own kitchen—without any artificial colorings! Perfect for a quick weeknight dinner or a weekend feast, this recipe proves that healthy and delicious can go hand in hand.

In this comprehensive guide, we’ll explore everything from the ingredients you need to the step-by-step instructions for creating this mouthwatering meal. Plus, I’ll share pro tips, variations, and even storage suggestions to ensure you get the most out of this recipe. So, roll up your sleeves and let’s make some magic happen in the kitchen!

Why You’ll Love This Recipe

  • Quick and Easy: With straightforward steps, you can have a delicious Chilli Chicken ready in no time, perfect for busy weeknights.
  • Flavor Explosion: The combination of spices and sauces creates a rich, savory flavor that will have everyone coming back for seconds.
  • Nutritious Ingredients: This recipe uses fresh vegetables and lean chicken, ensuring you’re enjoying a meal that’s as healthy as it is tasty.
  • Customizable: With various sauce and vegetable options, you can easily adapt this recipe to suit your taste or dietary needs.
  • Impress Your Guests: Serve this dish at your next gathering and watch as your friends marvel at your culinary skills!

Mastering the Ingredients

Before we jump into cooking, let’s break down the ingredients you’ll need for this Restaurant Style Chilli Chicken. Each ingredient plays a crucial role in creating the perfect balance of flavor and texture.

Essential Ingredients

  • 600 grams Chicken: Use a mix of bone-in and boneless chicken for a succulent texture. If you’re looking for a leaner option, boneless skinless chicken thighs work wonderfully.
  • 1 tbsp Ginger Garlic Paste: This aromatic blend is essential for a flavor base that elevates the dish.
  • Peppers: Add a splash of color with 1/2 of a large Capsicum and 3 green Chillies, diced to enhance both taste and presentation.
  • Soy Sauce: 3 tbsp of soy sauce infuses delicious umami notes into the dish.
  • Chili Sauce: A mix of 2 tbsp Ketchup and 1 tbsp green chilli sauce gives a perfect sweet and spicy kick.

Ingredient Substitutions

  • Corn Flour: If you’re looking for a gluten-free option, consider using almond flour or rice flour.
  • Vegetable Oil: Replace with olive oil or sesame oil for a different flavor profile.
  • Chili Flakes: If you prefer a milder dish, reduce the amount or use smoked paprika for a unique twist.

Step-by-Step Instructions

Side view of a plate of Chilli Chicken showcasing its rich colors and textures.

Now that we have our ingredients ready, let’s dive into the cooking process! Follow these steps to create your delicious Chilli Chicken.

  1. Marinate the Chicken: In a bowl, combine the chicken with salt, ginger-garlic paste, crushed black pepper, white pepper powder, and red chili flakes. Mix thoroughly and let it marinate for at least 30 minutes.
  2. Prepare the Batter: Crack in an egg, add all-purpose flour (maida) and corn flour. Mix well and add a couple of tablespoons of vegetable oil if the batter feels too dry.
  3. Fry the Chicken: Heat oil in a deep pan. Test the oil temperature by dropping in a small amount of batter. Once the oil is hot, fry the chicken pieces for about 10 minutes on each side. Cook in batches if needed.
  4. Prep the Gravy: While the chicken is frying, chop garlic, ginger, onion, and capsicum. Set aside.
  5. Make the Sauce: In a bowl, mix soy sauce, ketchup, green chili sauce, Kashmiri red chili powder, and corn flour with half a cup of water.
  6. Combine: In a large wok, use the oil from frying the chicken to sauté ginger-garlic and green chilies until aromatic. Add onions and capsicum, cooking on high heat to maintain their crunch.
  7. Finish the Dish: Pour in the sauce mixture and add in the fried chicken, tossing to coat everything in the sauce. Cook for an additional 2 minutes.
  8. Garnish: Serve hot, garnished with spring onions.

Pro Tips for Perfect Chilli Chicken

  • Don’t Overcrowd the Pan: Fry the chicken in small batches to ensure even cooking and a crispy texture.
  • Adjust Spice Levels: Feel free to modify the amount of chili sauce and flakes to suit your heat preference.
  • Use Fresh Ingredients: Fresh garlic, ginger, and vegetables will enhance the overall flavor of the dish.
  • Let It Rest: Allow the fried chicken to rest on a paper towel for a minute after frying to remove excess oil.
  • Experiment with Sauces: Try adding oyster sauce or hoisin sauce for a different flavor dimension.

Avoid Common Mistakes

Even the best chefs make mistakes, so here are some common pitfalls to avoid when making Chilli Chicken:

  • Too Much Batter: Ensure the chicken pieces are well-coated but not overwhelmingly thick in batter.
  • Skipping the Marinade: Marinating the chicken is crucial for infusing flavor—don’t skip this step!
  • Overcooking: Keep an eye on the frying time to prevent the chicken from becoming dry.

Delicious Variations to Try

Feel like switching things up? Here are some fun variations of Chilli Chicken that cater to different tastes:

  • Chilli Chicken with Vegetables: Add broccoli, carrots, or bell peppers for a colorful twist.
  • Sweet and Sour Chilli Chicken: Incorporate pineapple chunks for a sweet and tangy flavor.
  • Spicy Garlic Chilli Chicken: Increase the garlic and add more chili flakes for a bold kick.
  • Chilli Chicken with Cashews: Toss in roasted cashews for added crunch and flavor.

Storage and Make-Ahead Instructions

This Chilli Chicken can be made ahead and stored for later. Here’s how to keep it fresh:

  • Refrigeration: Store in an airtight container for up to 3 days. Reheat in a pan to retain crispiness.
  • Freezing: Freeze the fried chicken pieces before adding to the sauce. When ready to eat, thaw and sauté in the sauce for a quick meal.

Frequently Asked Questions

  • Can I make this recipe vegetarian? Yes! Substitute chicken with tofu or paneer and follow the same steps.
  • What can I serve with Chilli Chicken? This dish pairs beautifully with fried rice, chapati, or parathas.
  • How can I make the sauce thicker? You can add more corn flour mixed with water to the sauce while cooking.
  • Is this dish spicy? The spice level can be adjusted based on your preference; reduce chili flakes and sauce for a milder version.
  • Can I make this dish ahead of time? Absolutely! Prep the chicken and sauce separately and combine them before serving.
  • What type of chicken is best for this recipe? Boneless chicken thighs or breasts work best for tenderness.
  • Can I use other sauces? Feel free to add teriyaki or hoisin sauce for different flavor profiles.
  • How do I store leftovers? Store in an airtight container in the fridge for up to 3 days.

Nutrition Tips and Dietary Adaptations

This Chilli Chicken recipe is not only flavorful but can also be adapted to fit various dietary needs:

  • Low-Carb Option: Use zucchini noodles instead of rice for a low-carb meal.
  • Gluten-Free: Substitute soy sauce with tamari or coconut aminos.
  • Higher Protein: Add extra chicken or toss in some edamame for a protein boost.

Recommended Equipment

To make your cooking experience smooth and enjoyable, here’s a list of essential equipment you’ll need:

  • Deep Fryer or Heavy Pan: For frying the chicken to perfection.
  • Mixing Bowls: To marinate the chicken and mix sauces.
  • Spatula or Tongs: For flipping the chicken during frying.
  • Measuring Cups and Spoons: To ensure accurate ingredient measurements.

Serving Suggestions

Once your Chilli Chicken is ready, it’s time to serve! Here are some fantastic ideas to complement your dish:

  • Pair with Fried Rice: Fluffy fried rice with veggies and eggs creates a perfect balance.
  • Serve with Indian Breads: Soft chapatis or parathas enhance the dining experience.
  • Add a Side Salad: A light cucumber and tomato salad add freshness to the meal.

With this guide, you’re now equipped to create a show-stopping Chilli Chicken that’s bursting with flavor and nutrition. Remember, the kitchen is a playground for creativity—experiment, have fun, and enjoy every bite!

Thank you for joining me on this culinary adventure. I hope you feel inspired to get cooking and share the joy of this delicious dish with your loved ones. Happy cooking!

Restaurant Style Chilli Chicken without artificial colorings

Prep Time 15 minutes
Cook Time 30 minutes
Total Time 45 minutes
Servings 4 plates
Calories 350
A flavorful and spicy Chinese-style chilli chicken recipe with authentic ingredients and no artificial colorings, perfect for a delicious meal.

Ingredients

Meat

  • 600 gms Chicken with bone and boneless
  • 1 tbsp Ginger Garlic paste
  • 0.5 tsp crushed black pepper powder (optional)
  • 0.5 tsp black pepper powder
  • 0.5 tsp white pepper powder (optional)
  • 0.25 tsp red chilli flakes
  • 1 egg Egg
  • 3 tbsp All-purpose Flour/ Maida
  • 3 tbsp Corn Flour
  • 1-2 tbsp Vegetable oil (optional)
  • 8-10 cloves garlic, chopped/minced
  • 1 inch ginger, chopped/minced
  • 1 large onion, in cubes
  • 0.5 large Capsicum, in cubes
  • 3 green Chillies Green Chillies
  • 3 tbsp Soy sauce
  • 2 tbsp Ketchup
  • 1 tbsp green chilli sauce
  • 2-3 tsp Kashmiri Red Chilli Powder
  • 1 tbsp Corn Flour

Instructions 

  • Marinate chicken with salt, ginger-garlic paste, black pepper, white pepper, and red chili flakes. Mix well.
  • Add egg, maida, and cornflour to the chicken. Mix and add oil if batter is dry. Fry chicken in hot oil until cooked and crispy.
  • Prepare the sauce: mix soy sauce, ketchup, green chilli sauce, Kashmiri red chili powder, and water.
  • Saute garlic, ginger, and green chillies in the same oil used for frying. Add onions and capsicum, cook on high for crunch.
  • Add the sauce mixture to the wok, season with soy sauce and pepper, then add fried chicken. Cook for 2 minutes and garnish with spring onions.

Notes

Serve hot with rice or bread for a complete meal.
Calories: 350kcal
Cost: $12
Course: Main Course
Cuisine: Chinese
Keyword: Chilli Chicken

Discover the Joy of Cooking: Your Ultimate Guide to Low Carb Caesar Salad with Chicken

Welcome to the vibrant world of healthy cooking! Are you ready to transform your meals into a delightful culinary adventure? Today, we’re diving into a recipe that’s not just low in carbs but also high in flavor and excitement: the Low Carb Caesar Salad with Chicken. This dish is a celebration of fresh ingredients, zesty flavors, and satisfying textures, proving that healthy eating can be anything but boring. Whether you’re a seasoned chef or just starting your kitchen journey, this recipe is designed for you!

Imagine crispy romaine lettuce, juicy chicken, and a homemade Caesar dressing that’ll make your taste buds dance. Plus, with the added crunch of parmesan crisps, you’ll relish every bite. Let’s explore why you’ll love this recipe, get into the nitty-gritty of ingredients, and equip you with all the tools you need to make this dish a go-to in your kitchen.

Why You’ll Love This Recipe

This Low Carb Caesar Salad with Chicken is more than just a meal; it’s a powerhouse of flavor and nutrition. Here are five reasons why you’ll adore this recipe:

  • Quick and Easy Preparation: With just a few simple steps, you can whip up this delicious salad in no time—perfect for busy weeknights!
  • Healthy Ingredients: Packed with protein from chicken and healthy fats from olive oil in the dressing, this salad fuels your body without compromising on taste.
  • Customizable: Feel free to personalize your salad with your favorite toppings or dressings, making it your own culinary masterpiece.
  • Low Carb Delight: Ideal for those watching their carb intake, this dish fits seamlessly into low-carb or keto diets without sacrificing satisfaction.
  • Impressive Presentation: Serve this salad at your next gathering, and watch it steal the spotlight—it’s as beautiful as it is delicious!

Ingredient Breakdown

Let’s dive into the essential ingredients for our Low Carb Caesar Salad with Chicken. I’ll also provide some handy substitutions for those hard-to-find items!

  • Chicken Breasts: A pound of boneless, skinless chicken is ideal. You can replace it with grilled shrimp or tofu for a vegetarian twist.
  • Romaine Lettuce: The backbone of this salad! Fresh and crisp, romaine provides the perfect crunch. You can substitute with kale for a different flavor profile.
  • Parmesan Cheese: A generous 1/4 cup of freshly grated parmesan adds creaminess. For a vegan option, try nutritional yeast!
  • Parmesan Crisps: Use 1/2 cup for that satisfying crunch. You can make your own by baking parmesan into crisp rounds or use store-bought.
  • Homemade Caesar Dressing: The highlight of the salad! This includes 3/4 cup mayonnaise, 1/2 cup grated parmesan, 4 cloves of garlic, 2 tablespoons lemon juice, 1 teaspoon Dijon mustard, and anchovies for that umami kick. For a dairy-free version, substitute mayonnaise with cashew cream.

How to Make Low Carb Caesar Salad Dressing

Side view of a vibrant Caesar salad with grilled chicken, garnished with parmesan crisps.

Making your own Caesar dressing is a game-changer! Here’s how:

  1. Combine all dressing ingredients in a blender.
  2. Pulse until well blended and creamy.
  3. Chill in the fridge while you prepare the rest of the salad.

How to Make Low Carb Chicken Caesar Salad

Now that we have our dressing ready, let’s assemble this masterpiece! Follow these steps:

  1. Start by cooking the chicken: Heat a medium pan over medium heat. Slice the chicken breasts into thin cutlets for faster cooking.
  2. Season the chicken with salt and pepper, then cook until golden brown and the internal temperature reaches 165°F (about 6-7 minutes per side).
  3. In a large bowl, combine the chopped romaine lettuce, parmesan cheese, and parmesan crisps.
  4. Pour the homemade dressing over the salad and toss until everything is well coated.
  5. Slice the cooked chicken and arrange it on top of the salad. Serve immediately!

Pro Tips for a Perfect Caesar Salad

Want to elevate your salad game? Here are some expert insights:

  • Fresh Ingredients: Always opt for the freshest romaine and parmesan for maximum flavor and texture.
  • Chill the Dressing: Allow the dressing to chill for at least 30 minutes before serving; it enhances the flavors.
  • Adjust Seasoning: Taste the dressing before serving; add more lemon juice or salt if needed to balance flavors.
  • Customize Your Crunch: Feel free to add avocado slices or toasted nuts for extra texture and nutrition.
  • Try Grilling: For added flavor, grill the chicken instead of pan-searing it.

Common Mistakes and Troubleshooting

Cooking is all about learning! Here are some common pitfalls and how to avoid them:

  • Overcooking the Chicken: Keep an eye on your chicken to avoid dryness. Use a meat thermometer for perfect results.
  • Too Much Dressing: Start with a little dressing and add more as needed. You can always add but can’t take away!
  • Wilted Lettuce: Make sure your lettuce is completely dry before adding dressing to keep it crisp.

Variations to Explore

Feeling adventurous? Here are some delicious variations of this recipe:

  • Bacon Caesar Salad: Add crispy bacon bits for a smoky flavor boost.
  • Vegan Caesar Salad: Replace chicken with chickpeas and use a vegan mayonnaise or cashew dressing.
  • Seafood Caesar Salad: Substitute chicken with grilled shrimp or salmon for a coastal twist.
  • Spicy Caesar Salad: Add a pinch of red pepper flakes to the dressing for a spicy kick!

Storage and Make-Ahead Instructions

This salad is best enjoyed fresh, but you can prepare components in advance:

  • Store the dressing in an airtight container in the fridge for up to a week.
  • Cooked chicken can be refrigerated for up to 4 days. Simply reheat before serving.
  • Assemble the salad just before serving to maintain crispness.

Frequently Asked Questions

Curious minds want to know! Here are some common questions answered:

  • Can I use store-bought Caesar dressing? Yes, but homemade dressing is fresher and healthier!
  • Is this salad gluten-free? Yes, all ingredients used in this recipe are gluten-free!
  • How can I make it dairy-free? Substitute parmesan with nutritional yeast and use dairy-free mayo.
  • Can I freeze the dressing? It’s best used fresh, but you can freeze it for up to a month.
  • How can I make it spicy? Add crushed red pepper or hot sauce to the dressing.
  • What other proteins can I use? Grilled tofu, shrimp, or even steak work great!
  • Can I add other vegetables? Absolutely! Tomatoes, cucumbers, or bell peppers add great flavor.
  • Is it okay to meal prep this salad? Yes, just store ingredients separately and combine when ready to eat.

Nutritional Tips and Dietary Adaptations

This salad is naturally low in carbs and high in protein, making it a great option for weight management. Consider these adaptations:

  • For Low Carb: Keep the dressing as is and stick with the recommended ingredients.
  • For High Protein: Add extra chicken or even a hard-boiled egg on top.
  • For Healthy Fats: Drizzle some extra virgin olive oil over the salad before serving.

Equipment Recommendations

Here’s what you’ll need to create this delicious salad:

  • Blender: For a smooth and creamy dressing.
  • Non-stick Pan: Ideal for cooking chicken without sticking.
  • Salad Bowl: A large bowl to toss all your ingredients together.
  • Meat Thermometer: Ensures your chicken is perfectly cooked.

Serving Suggestions

To elevate your dining experience, consider these serving ideas:

  • Garnish with Fresh Herbs: A sprinkle of parsley or basil adds a fresh touch.
  • Pair with Wine: A crisp Sauvignon Blanc complements the flavors beautifully.
  • Serve with Crusty Bread: Low-carb bread options are great for dipping into the dressing!

In conclusion, the Low Carb Caesar Salad with Chicken is a vibrant, healthy dish that showcases how nutritious meals can be both fun and satisfying. With a little preparation and creativity, you’ll have a show-stopping salad that will impress everyone at your table. Dive in, enjoy the crunch, and let your culinary creativity shine!

Low Carb Caesar Salad with Chicken

Prep Time 15 minutes
Cook Time 15 minutes
Total Time 30 minutes
Servings 4 servings
Calories 550
A delicious low carb Caesar salad topped with grilled chicken, perfect for a healthy and satisfying meal.

Ingredients

Dressing

  • 3/4 cup mayonnaise
  • 1/2 cup grated parmesan cheese
  • 2 tablespoons lemon juice
  • 1 teaspoon Dijon mustard
  • 4 cloves fresh garlic
  • 1 ounce Anchovies in olive oil (4 Anchovy filets)

Chicken

  • 1 pound Chicken Breasts

Vegetables & Toppings

  • 6 cups Romaine Lettuce
  • 1/4 cup parmesan cheese
  • 1/2 cup parmesan crisps
  • 4 cloves fresh garlic

Seasonings

  • salt salt
  • pepper pepper

Instructions 

  • Blend all dressing ingredients until smooth, then refrigerate.
  • Season chicken with salt and pepper, then cook until internal temperature reaches 165°F. Slice thinly.
  • Toss lettuce, parmesan, and crisps in a large bowl. Add dressing and toss to coat.
  • Divide salad into bowls, top with sliced chicken, and serve.

Notes

Use fresh ingredients for best flavor. Adjust seasonings to taste.
Calories: 550kcal
Cost: $15
Course: Salad
Cuisine: American
Keyword: Caesar, Chicken, Low Carb

Welcome to the Flavor Fiesta of Easy Potato Salad!

Are you ready to dive into the vibrant world of Easy Potato Salad? This is not just any potato salad; it’s a whirlwind of flavors that will elevate your picnics, barbecues, and family gatherings. With creamy mayonnaise, crunchy veggies, and a zesty twist of mustard, this salad is simple yet sensational. Perfect for any occasion, this salad recipe proves that healthy eating can be exciting and delicious! Let’s get started!

Why You’ll Love This Recipe

This potato salad doesn’t just taste great; it also brings a host of benefits that make it a must-try:

  • Quick and Easy: This dish comes together in just 30 minutes, making it a perfect last-minute side.
  • Customizable: With a few tweaks, you can make this salad your own—add your favorite veggies or herbs!
  • Make-Ahead Friendly: Ideal for meal prep! You can whip it up a day in advance and let the flavors meld.
  • Versatile: Whether you’re serving it at a picnic or as a side for your family dinner, it fits any occasion.
  • Nutritious: Packed with wholesome ingredients, this recipe is a healthy choice that doesn’t skimp on taste.

Ingredient Breakdown

Let’s take a closer look at the ingredients that make this potato salad a favorite:

  • Potatoes: 3 pounds of Yukon Gold potatoes are perfect for their creamy texture. If unavailable, feel free to use red potatoes or even fingerlings.
  • Mayonnaise: 1 cup of mayonnaise adds creaminess. For a lighter version, consider using Greek yogurt or a vegan mayo alternative.
  • Hard-Boiled Eggs: 3 chopped eggs for added protein and richness. If you prefer a vegan option, you can skip the eggs or use tofu.
  • Celery: 2 stalks of chopped celery introduce a satisfying crunch. You can also try adding bell peppers for extra color!
  • Onion: 1 medium chopped onion gives a mild kick. Green onions or shallots can be great substitutes.
  • Sweet Pickle Relish: 1/2 cup for a touch of sweetness; feel free to use dill pickles or omit it entirely for a different flavor.
  • Seasonings: Salt, mustard, black pepper, and fresh dill enhance the flavor profile. Experiment with spices like paprika or garlic powder for an extra kick!

Pro Tips for Potato Salad Success

Side angle shot of a bowl of easy potato salad, showcasing its rich texture and colorful ingredients.

Want to elevate your potato salad game? Check out these expert insights:

  • Perfect Cooking: Boil your potatoes until fork-tender, about 13-15 minutes. Avoid overcooking to keep them intact.
  • Chill Time: For the best flavor, cover and chill your salad for at least 4 hours before serving.
  • Mix Gently: When combining the potatoes and dressing, mix gently to prevent the potatoes from breaking apart.
  • Fresh Herbs Matter: Always opt for fresh dill or parsley for the best flavor—dried just doesn’t cut it!
  • Serving Temperature: This salad can be served cold or at room temperature, making it versatile for any occasion.
  • Try Different Mustards: Experiment with Dijon or whole-grain mustard for a flavor twist!
  • Eggs for Texture: If using hard-boiled eggs, chop them just before mixing in to maintain their texture.
  • Balance Your Flavors: Taste before serving and adjust seasoning as needed—sometimes a pinch more salt makes all the difference!

Avoid These Common Mistakes

To ensure your potato salad is a hit, steer clear of these pitfalls:

  • Overcooking Potatoes: Boiling them too long can make them mushy. Aim for fork-tender!
  • Skipping the Chill: Don’t skip chilling your salad. It allows flavors to meld beautifully.
  • Using Low-Quality Ingredients: With few ingredients, quality matters! Invest in good mayo and fresh vegetables.
  • Forgetting Seasonings: Salt and pepper are crucial! Always taste and adjust before serving.

Delicious Variations

Feel free to switch things up with these tasty variations:

  • Loaded Potato Salad: Add bacon bits, cheddar cheese, and green onions for a hearty twist.
  • Herbed Greek Potato Salad: Swap mayo for Greek yogurt and add feta, olives, and oregano for a Mediterranean flair.
  • Spicy Chipotle Potato Salad: Mix in chipotle mayo and diced jalapeños for a spicy kick!
  • Vegan Potato Salad: Use avocado instead of mayonnaise and add chickpeas for protein.

Storage and Make-Ahead Instructions

This potato salad is perfect for meal prep! Here’s how to store it:

  • Refrigeration: Store in an airtight container in the refrigerator for up to 3-4 days.
  • Make-Ahead: Prepare it a day in advance. The flavors only get better!
  • Freezing: Not recommended, as it can alter the texture of the potatoes and dressing.

Frequently Asked Questions

Got questions? We’ve got answers!

  • Can I use different types of potatoes? Absolutely! Red potatoes and fingerlings work well too.
  • How can I make it healthier? Use Greek yogurt instead of mayo and add more veggies!
  • Can I customize the veggies? Yes! Feel free to add in your favorite chopped veggies or herbs.
  • What’s the best way to serve it? It’s great chilled or at room temperature, making it perfect for outdoor events.
  • Can I add more protein? Certainly! Consider adding diced chicken or chickpeas for extra protein.
  • How long should I chill it? Chill for at least 4 hours for the best flavor.
  • Can I make it vegan? Yes! Substitute mayo with avocado or a vegan mayo alternative.
  • What can I serve it with? It pairs well with grilled meats, sandwiches, or as a standalone dish!

Nutrition Tips and Dietary Adaptations

If you’re watching your diet, here are some adaptations:

  • Low-Carb: Replace potatoes with cauliflower for a low-carb version.
  • Gluten-Free: This recipe is naturally gluten-free; just ensure your mayo is too!
  • Low-Fat: Use low-fat mayo or Greek yogurt to cut back on calories.

Equipment Recommendations

To make this recipe, you’ll need:

  • Large Pot: For boiling potatoes.
  • Mixing Bowl: To combine all your ingredients.
  • Chopping Board and Knife: For prepping your veggies.

Serving Suggestions

This potato salad shines as a side dish for various meals. Here are some ideas:

  • Perfect Picnic Companion: Serve alongside sandwiches or wraps for a complete meal.
  • Barbecue Essential: It pairs wonderfully with grilled meats and veggies.
  • Potluck Favorite: Bring it to gatherings and watch it disappear!

In Conclusion

Are you ready to whip up a batch of this Easy Potato Salad? With its vibrant flavors and simple ingredients, it’s bound to be a hit at your next gathering. Remember, cooking should be fun and creative, so don’t hesitate to make it your own! Dive in and enjoy the deliciousness—your taste buds will thank you!

Easy Potato Salad

Prep Time 20 minutes
Cook Time 15 minutes
Total Time 35 minutes
Servings 8 servings
Calories 250
A classic and simple potato salad perfect for picnics and gatherings, combining tender potatoes with a creamy dressing and fresh herbs.

Ingredients

Potatoes

  • 3 pounds potatoes (peeled, such as Yukon gold)
  • 1 cup mayonnaise
  • 3 eggs hard boiled, peeled and chopped
  • 2 stalks celery (chopped)
  • 1 medium onion (chopped)
  • 1/2 cup sweet pickle relish
  • 1/2 teaspoon salt (or to taste)
  • 1 tablespoon mustard (regular prepared yellow mustard)
  • 1/4 teaspoon black pepper
  • 1 tablespoon dill (fresh, chopped)

Instructions 

  • Cut potatoes into quarters, boil in salted water until fork-tender, about 13-15 minutes.
  • Drain potatoes and let cool. Chop into bite-sized pieces and place in a large bowl.
  • Mix mayonnaise, relish, mustard, salt, and pepper until smooth. Add to potatoes and toss gently.
  • Add chopped eggs, celery, onions, dill, and mix well. Garnish with extra dill if desired.
  • Cover and chill for at least 4 hours before serving.

Notes

For best flavor, prepare the salad a few hours ahead to allow flavors to meld.
Calories: 250kcal
Cost: $10
Course: Side Dish
Cuisine: American
Keyword: Potato

Unlock the Flavor: Your Guide to Crunchy Apple Quinoa Salad

Welcome to a vibrant culinary adventure! In this article, we’re going to dive into the delightful world of Crunchy Apple Quinoa Salad, a dish that’s not just a feast for the eyes but also a powerhouse of nutrition. This salad is perfect for anyone looking to elevate their meal prep with an explosion of flavors while keeping things healthy and exciting. Whether you’re a busy professional or a home chef looking to impress, this apple quinoa salad is your new go-to! Let’s get started on making this scrumptious salad.

Why You’ll Love This Recipe

  • Quick to Prepare: With simple ingredients and easy steps, you can have this dish ready in under 30 minutes!
  • Nutritious Ingredients: Packed with protein-rich quinoa, sweet apples, and healthy fats from pecans, it’s the perfect balance for your diet.
  • Meal Prep Friendly: Make it ahead and enjoy it throughout the week; it stays fresh and flavorful in the fridge!
  • Versatile Dish: Whether as a side or a main, this salad suits any occasion—from lunch at your desk to dinner with friends.
  • Kid-Friendly: The sweet and crunchy components make this a hit with kids, ensuring they get their nutrients without fuss!

Recipe Breakdown: Ingredients You’ll Need

Let’s break down the vibrant ingredients that make this salad not just healthy but also an explosion of flavors. Here’s what you’ll need:

  • 1 cup quinoa: Rinsed and ready to cook, this whole grain acts as the hearty base of our salad.
  • 2 cups water: Essential for cooking the quinoa to fluffy perfection.
  • 1 medium apple: Diced for that sweet crunch; Honeycrisp or Fuji varieties work wonderfully!
  • 1/2 cup dried cranberries: For a touch of sweetness that complements the tartness of the apple.
  • 1/2 cup pecans: Roughly chopped to add a satisfying crunch and healthy fats.
  • 1/4 cup red onion: Finely chopped to give a bit of zing to the flavor profile.
  • Fresh herbs: 2 tablespoons each of chopped mint and parsley for freshness.
  • 1/4 cup olive oil: A healthy fat that helps in making the dressing smooth and rich.
  • 2 tablespoons apple cider vinegar: This adds a tangy twist that brightens the flavors.
  • 1 tablespoon honey: Natural sweetness to balance the acidity of the vinegar.
  • Salt and pepper: To taste, enhancing all the wonderful flavors.

Substitutions and Variations

If you want to customize your salad, here are some substitutions and variations:

  • Quinoa Alternatives: Use farro or barley for a different grain experience.
  • Nut-Free Version: Swap pecans for sunflower seeds or omit nuts entirely.
  • Vegan Option: Replace honey with maple syrup for a fully plant-based recipe.
  • Fruit Variety: Toss in some diced pears or pomegranate seeds for added sweetness and color.

How to Make Crunchy Apple Quinoa Salad

A detailed side view of a colorful Apple Quinoa Salad featuring fresh ingredients and textures.

Now that we have all our ingredients, let’s take a look at how to bring this salad to life!

  1. Cook the Quinoa: In a medium saucepan, bring 2 cups of water to a boil. Add the rinsed quinoa, reduce the heat to low, cover, and let it simmer for about 15 minutes or until the quinoa is fluffy. Remove from heat and let it cool to room temperature.
  2. Mix the Ingredients: In a large mixing bowl, combine the cooled quinoa, diced apple, dried cranberries, chopped pecans, red onion, mint, and parsley.
  3. Make the Dressing: In a small bowl, whisk together the olive oil, apple cider vinegar, honey, salt, and pepper. Taste and adjust the seasoning as desired.
  4. Toss Together: Pour the dressing over the quinoa mixture and toss everything together until well coated.
  5. Chill: Refrigerate the salad for at least 30 minutes to allow the flavors to meld together.
  6. Serve: Enjoy your salad chilled or at room temperature, garnished with extra mint or parsley if desired!

Pro Tips for the Best Salad

  • Fluff the Quinoa: Let the quinoa cool completely before mixing to keep the salad fresh.
  • Prevent Browning: Toss the diced apples in a bit of lemon juice if you’re not serving immediately.
  • Texture Matters: Use a mix of crunchy and soft ingredients for an exciting texture.
  • Let It Chill: Always let the salad sit in the fridge to let the flavors meld beautifully.
  • Mind the Seasoning: Don’t skimp on salt and pepper; they elevate all the flavors!
  • Dress Just Before Serving: If making ahead, keep the dressing separate until ready to serve.

Common Mistakes and Troubleshooting

Here are some common pitfalls to avoid when making this salad:

  • Overcooking Quinoa: Keep an eye on the cooking time to avoid mushiness; perfectly cooked quinoa is fluffy!
  • Too Much Dressing: Start with a little and add more as needed; you can always add, but you can’t take away!
  • Skipping the Chill: Don’t skip the chilling time; it’s crucial for flavor development.
  • Ignoring Texture: Ensure your apple pieces are not too small to maintain a crunchy bite.

Storage and Make-Ahead Instructions

This salad is perfect for meal prep! Here’s how to store it:

  • Refrigeration: Store in an airtight container in the fridge for up to 3 days.
  • Make Ahead: You can make the salad a day in advance. Just keep the dressing separate until ready to serve!
  • Freezing: Not recommended as the texture of the apples will change, but the quinoa can be frozen separately.

Frequently Asked Questions

  • Can I use other fruits? Absolutely! Pears, grapes, or even citrus can work wonderfully.
  • Is this salad gluten-free? Yes, quinoa is naturally gluten-free!
  • Can I add cheese? Feta or goat cheese can add a creamy element if you like!
  • How do I make it spicier? Add a pinch of chili flakes or a dash of hot sauce to the dressing!
  • What’s the best apple for this salad? Honeycrisp or Fuji apples provide the perfect balance of sweetness and crunch.
  • Can I use fresh herbs? Yes! Fresh herbs greatly enhance the flavor profile of this salad.
  • How long does it last in the fridge? It’s best consumed within 3 days for optimal freshness.
  • Is it kid-friendly? Most definitely! The sweet and crunchy nature makes it appealing to kids.

Nutritional Benefits and Dietary Adaptations

This salad is not just a treat for your taste buds; it’s packed with nutritional benefits:

  • Protein Power: Quinoa is a complete protein, making it an excellent choice for vegetarians.
  • Healthy Fats: The pecans provide omega-3 fatty acids, contributing to heart health.
  • Rich in Fiber: Apples and cranberries are high in fiber, aiding digestion and keeping you full.
  • Vitamins Galore: Fresh herbs and apples are loaded with vitamins and antioxidants.

Equipment Recommendations

Here are some tools that will make your salad-making experience easier:

  • Medium Saucepan: For cooking the quinoa perfectly.
  • Large Mixing Bowl: To combine all your beautiful ingredients.
  • Small Bowl: For whisking together your dressing without mess.
  • Measuring Cups and Spoons: Precision is key to getting the right balance of flavors.
  • Knife and Cutting Board: For chopping your fruits and vegetables with ease.

Serving Suggestions

Wondering how to serve your Crunchy Apple Quinoa Salad? Here are a few ideas:

  • As a Side Dish: Perfect alongside grilled chicken or fish for a balanced meal.
  • For Lunch: Pack it in a lunchbox for a filling and nutritious midday meal.
  • Potluck Favorite: Bring it to gatherings; it’s always a hit!
  • Garnish: Top with extra nuts or seeds for added crunch and visual appeal.

Now that you have the ultimate guide to making Crunchy Apple Quinoa Salad, it’s time to unleash your inner chef! This recipe is not just about nourishment; it’s about celebrating the joy of cooking and sharing delicious food with loved ones. So grab your ingredients, put on your apron, and let’s make mealtime fun again!

Apple Quinoa Salad

Prep Time 10 minutes
Cook Time 15 minutes
Total Time 25 minutes
Servings 4 servings
Calories 250
A fresh and nutritious salad combining quinoa, crisp apples, dried cranberries, and herbs, perfect for a light meal or side dish.

Ingredients

quinoa and water

  • 1 cup quinoa, rinsed
  • 2 cups water

salad ingredients

  • 1 medium apple, diced
  • 1/2 cup dried cranberries
  • 1/2 cup pecans, roughly chopped
  • 1/4 cup red onion, finely chopped
  • 2 tablespoons fresh mint leaves, chopped
  • 1/4 cup fresh parsley, chopped
  • 1/4 cup olive oil
  • 2 tablespoons apple cider vinegar
  • 1 tablespoon honey

seasoning

  • to taste Salt and pepper

Instructions 

  • Bring 2 cups water to a boil, add quinoa, reduce heat, cover, and simmer for 15 minutes. Cool.
  • Combine cooled quinoa, apple, cranberries, pecans, onion, mint, and parsley in a bowl.
  • Whisk together olive oil, vinegar, honey, salt, and pepper. Pour over salad and toss.
  • Refrigerate for 30 minutes to meld flavors. Serve chilled or at room temperature.

Notes

For extra flavor, garnish with additional herbs before serving.
Calories: 250kcal
Cost: $12
Course: Salad
Cuisine: international
Keyword: apple, Healthy, Quinoa

Why This Fresh Fruit Salad is a Must-Try

Welcome to the vibrant world of fresh fruit salads! If you’re looking for a dish that radiates color, flavor, and health, you’ve just hit the jackpot. This Vibrant Fresh Fruit Salad with a Dreamy Creamy Dressing is not just a meal; it’s a celebration on your plate! Bursting with juicy oranges, strawberries, blueberries, and a luscious creamy dressing, this salad is perfect for any occasion. Whether you’re hosting a summer BBQ, preparing a light dessert, or simply craving a refreshing snack, this recipe is going to become your go-to.

In this article, we’ll dive deep into everything you need to know about making this fresh fruit salad, from ingredient breakdowns to expert tips, variations, and even storage advice. Let’s get started!

Why You’ll Love This Recipe

  • Colorful Presentation: A feast for the eyes, this fruit salad features a stunning array of colors that make it an attractive addition to any table.
  • Nutrient-Packed: Loaded with vitamins and minerals, each fruit brings unique health benefits to the mix.
  • Easy to Prepare: With just a few simple steps, you can whip up this salad in no time, making it perfect for those busy days.
  • Customizable to Your Taste: Feel free to swap in your favorite fruits, making this a versatile dish for any palate.
  • Deliciously Creamy Dressing: The creamy dressing takes this salad to the next level, adding richness and depth that balances the fruit’s natural sweetness.

Ingredient Breakdown

Let’s take a closer look at the ingredients you’ll need for this fresh fruit salad, along with some fantastic substitutions for those moments when you’re out of something!

Main Ingredients

  • 1 cup cut-up orange segments: Use 2 small oranges, peeled and segmented for the best flavor.
  • 1 cup sliced strawberries: Make sure they are ripe to ensure maximum sweetness.
  • 1 cup blueberries: Fresh is best, but frozen blueberries can work in a pinch.
  • 1 cup diced apple: Choose your favorite variety, peeled or unpeeled!
  • 1 cup banana slices: About 1.5 bananas will do the trick.
  • 1 cup grapes: Halve them for easy eating.
  • 1 cup diced pineapple chunks: Fresh or canned, just ensure it’s in juice, not syrup.

For the Creamy Dressing

  • 1 tablespoon lemon juice: Freshly squeezed adds brightness.
  • ½ cup whipping cream: For a lighter option, consider using Greek yogurt.
  • 3 packages Stevia sweetener: Or swap for 1 tablespoon powdered sugar if you prefer.
  • 3 ounces softened cream cheese: This gives the dressing its creamy texture.
  • Lemon zest from ½ lemon: Adds an extra zing!

Pro Tips for the Perfect Fruit Salad

Close-up of a fresh fruit salad with colorful fruits and a creamy dressing, including oranges, strawberries, and grapes.
  • Choose Ripe Fruits: The quality of your fruit directly affects the taste of the salad, so opt for the ripest options available.
  • Use Fresh Ingredients: Freshly squeezed lemon juice and ripe fruits make a world of difference in flavor.
  • Prep Ahead: You can chop fruits in advance to save time, but wait to mix the dressing until just before serving to keep everything fresh.
  • Adjust Sweetness: Taste your dressing and adjust the sweetness level according to your preference.
  • Don’t Overmix: Gently toss your salad to keep the fruits intact and visually appealing.
  • Chill Before Serving: Allow your salad to sit in the refrigerator for about 30 minutes before serving to let the flavors meld.
  • Experiment with Garnishes: A sprinkle of mint or a handful of nuts can elevate the presentation and flavor.
  • Use Seasonal Fruits: Tailor your salad to the season for the freshest and most delicious results.

Avoid Common Mistakes

Even the best chefs can make mistakes! Here are some common pitfalls to avoid:

  • Choosing Overripe or Underripe Fruits: Always select fruits at their peak ripeness to ensure the best flavor.
  • Mixing the Dressing Too Early: Wait until just before serving to mix in the dressing to avoid soggy fruit.
  • Ignoring Flavor Pairings: Certain fruits pair better together, so think about balance when selecting your ingredients.
  • Using Canned Fruit in Syrup: Opt for fruit canned in juice or fresh for the best taste and health benefits.

Delicious Variations to Try

Feel free to make this fresh fruit salad your own! Here are some delightful variations:

  • Tropical Twist: Add diced mango, kiwi, and shredded coconut for a tropical flavor explosion.
  • Berry Medley: Swap in raspberries and blackberries for a mixed berry delight.
  • Nutty Addition: Toss in some chopped nuts or seeds for a satisfying crunch.
  • Herb-Infused: Add a few fresh mint or basil leaves to give your salad a refreshing twist.

Storage and Make-Ahead Instructions

If you want to prepare this salad ahead of time, here’s how you can do it:

  • Refrigerator Storage: Store the fruit salad in an airtight container for up to 2 days. Note that some fruits may start to brown or lose texture over time.
  • Make-Ahead Tips: Chop fruits ahead of time and store them in separate containers. Mix the dressing just before serving to maintain freshness.

FAQs: Your Burning Questions Answered

  • Can I use frozen fruits? Yes! Just remember to thaw them completely and drain excess moisture before mixing.
  • How can I make this salad vegan? Substitute cream cheese and whipping cream with coconut cream and a plant-based sweetener.
  • What fruits work best? Any fresh fruit works, but avoid those that brown quickly, like bananas and apples, if you’re serving later.
  • Is this salad good for meal prep? Absolutely! Just keep the dressing separate until you’re ready to enjoy.
  • Can I add other ingredients? Yes! Consider adding yogurt, granola, or even a splash of fruit juice for extra flavor.
  • What’s the best way to serve this salad? Serve chilled in a large bowl or in individual cups for a fun presentation.
  • How do I prevent apples from browning? Toss apple slices in a bit of lemon juice before adding them to your salad.
  • Can I make this salad for a crowd? Certainly! Just double the recipe and prepare a larger bowl to serve.

Nutrition Tips and Dietary Adaptations

This fresh fruit salad is not only delicious but also offers a wealth of nutritional benefits. To maximize the health factor:

  • Choose Organic Fruits: Whenever possible, select organic fruits to minimize pesticide exposure.
  • Balance Your Dressing: Opt for a lighter dressing made from yogurt for fewer calories and added protein.
  • Include High-Fiber Fruits: Apples and berries pack in fiber, making the salad more filling and beneficial for digestion.

Essential Equipment for Making Fruit Salad

Before you start, make sure you have the right tools handy:

  • Sharp Knife: For easy chopping and slicing of all your fruits.
  • Cutting Board: A sturdy surface for prepping your ingredients.
  • Mixing Bowl: A large bowl for tossing the salad together.
  • Measuring Cups: To ensure you get the right amounts of each fruit and dressing.
  • Whisk: For mixing your creamy dressing until smooth.

Serving Suggestions

This fresh fruit salad is incredibly versatile and can be served in numerous ways:

  • As a Side Dish: Pair it with grilled meats or fish for a refreshing complement.
  • For Breakfast: Top your morning oatmeal with a generous helping of this salad.
  • Light Dessert: Serve it with a dollop of whipped cream for a guilt-free treat.
  • At Picnics: Pack it in a cooler for a refreshing snack on the go.

Conclusion

There you have it! A comprehensive guide to making the most vibrant, delicious, and healthy fresh fruit salad you’ll ever enjoy. With its colorful array of fruits, creamy dressing, and endless customization possibilities, this recipe is bound to become a staple in your kitchen. So grab your fruits, gather your ingredients, and let’s make some magic happen in the kitchen! Remember, eating healthy can be fun and satisfying, and this fruit salad is proof of that. Happy cooking!

Best Fresh Fruit Salad with a Creamy Dressing

Prep Time 15 minutes
Total Time 15 minutes
Servings 4 servings
Calories 250
A vibrant and refreshing fruit salad topped with a creamy, sweet dressing, perfect for any occasion.

Ingredients

Fruits

  • 1 cup cut-up orange segments, 2 small oranges
  • 1 cup sliced strawberries
  • 1 cup blueberries
  • 1 cup diced apple, 1 apple peeled or unpeeled
  • 1 cup banana slices, 1-½ bananas
  • 1 cup grapes, each cut in half
  • 1 cup diced pineapple chunks
  • 1 tablespoon lemon juice
  • ½ cup whipping cream
  • 3 packages Stevia sweetener, or other sweetener, or 1 tablespoon of powdered sugar
  • 1 tablespoon lemon juice
  • 3 ounces softened cream cheese
  • lemon zest from 1/2 of a lemon lemon zest

Instructions 

  • Combine all fruit in a large bowl.
  • In a separate bowl, whisk together lemon juice, whipped cream, cream cheese, sweetener, and lemon zest until smooth.
  • Gently fold the creamy dressing into the fruit mixture.
  • Chill for 10-15 minutes before serving.

Notes

Use fresh, ripe fruits for the best flavor.
Calories: 250kcal
Cost: $12
Course: Dessert, Salad
Cuisine: American
Keyword: Cream, fruit

Welcome to the ultimate guide for creating a **Classic Macaroni Salad** that’s not just a side dish, but a celebration of flavors! Whether it’s a summer BBQ, a picnic in the park, or a cozy family gathering, this dish is sure to impress. In this article, we’ll dive deep into everything you need to know about making the best macaroni salad, from ingredient breakdowns to pro tips and variations that will keep your taste buds tingling.

Why You’ll Love This Recipe

This macaroni salad is more than just a classic; it’s a **masterpiece of flavor** and a breeze to whip up! Here are five reasons why you’ll adore this recipe:

  • Quick and Easy: With straightforward steps, you can have this delicious salad ready in no time, making it perfect for busy days.
  • Customizable: Feel free to throw in your favorite veggies or proteins to make it your own!
  • Make-Ahead Friendly: It tastes even better after chilling in the fridge, allowing the flavors to meld beautifully.
  • Perfect for Any Occasion: Whether it’s a picnic, potluck, or family gathering, this salad shines as a delightful side dish.
  • Kid-Friendly: With its creamy texture and fun flavors, kids love it, making it a hit among families!

Ingredient Breakdown

Let’s get into the nitty-gritty! Here are the ingredients you’ll need to create this **delicious macaroni salad**:

  • 8 ounces elbow macaroni: The star of the show! This pasta is perfect for holding onto that creamy dressing.
  • 3 celery stalks (sliced thin): Provides a refreshing crunch that complements the creamy elements.
  • 1/2 red onion (diced): Adds a zingy bite and vibrant color; soak in cold water for a milder flavor.
  • 1 bell pepper (diced small): Choose your favorite color for a sweet, crunchy addition.
  • 1 1/2 cups mayonnaise: The creamy base! You can use Greek yogurt for a lighter version.
  • 1/4 cup pickle juice (or white vinegar): For that tangy kick that elevates the flavors.
  • 1 tsp celery seed: Infuses a subtle celery flavor that enhances the overall taste.
  • 1 tbsp sugar: Balances the tanginess of the dressing.
  • 1 tsp salt: Essential for enhancing all the flavors.
  • 1 tsp pepper: Adds a mild kick!
  • 2 tsp mustard powder: Offers a delightful depth and a hint of spice.

Pro Tips for the Perfect Macaroni Salad

Ready to master this recipe? Here are some expert insights to elevate your macaroni salad game:

  • Cook pasta al dente: This ensures the pasta holds its shape and texture when mixed with the dressing.
  • Rinse with cold water: After cooking, rinse the macaroni in cold water to stop the cooking process and keep it from sticking together.
  • Chill before serving: Refrigerating the salad for at least an hour allows flavors to meld beautifully.
  • Experiment with herbs: Fresh dill or parsley can add a lovely freshness to your salad.
  • Consider protein: Add diced chicken, tuna, or chickpeas for a heartier dish.
  • Use quality mayo: A good quality mayonnaise makes a world of difference in flavor.
  • Adjust seasoning: Taste before serving and adjust the salt, pepper, or pickle juice as needed.
  • Presentation matters: Garnish with fresh herbs or a sprinkle of paprika for a pop of color.

Common Mistakes and Troubleshooting

Side view of a creamy macaroni salad featuring elbow macaroni and diced vegetables served in a bowl.

Here are some common pitfalls to avoid when making your macaroni salad:

  • Overcooking the pasta: Make sure to adhere to the recommended cooking time for perfect texture.
  • Too much dressing: Start with less dressing; you can always add more if needed.
  • Skipping the chill time: Don’t rush the chilling process; it’s key for flavor development.
  • Not tasting before serving: Always taste your salad to ensure the seasoning is just right!

Delicious Variations

Feel like shaking things up? Here are some fantastic variations to try:

  • Italian Macaroni Salad: Add Italian dressing, cherry tomatoes, olives, and mozzarella for a Mediterranean twist.
  • Spicy Southwest Salad: Mix in black beans, corn, diced jalapeños, and a chipotle dressing for a kick!
  • Greek Macaroni Salad: Incorporate feta cheese, cucumber, and Kalamata olives with a simple olive oil dressing.
  • Veggie-Packed Salad: Toss in your favorite veggies like spinach, carrots, or zucchini for extra nutrition.

Storage and Make-Ahead Instructions

This macaroni salad is perfect for meal prep or making ahead of time:

  • Store in the fridge: Keep any leftovers in an airtight container for up to 3 days.
  • Make-ahead: Prepare the salad a day before your event for optimal flavor.
  • Don’t freeze: Macaroni salad does not freeze well due to the mayonnaise and texture changes.

Comprehensive FAQ

Got questions? We’ve got answers! Here are some frequently asked questions about macaroni salad:

  • Can I use whole wheat pasta? Yes! Whole wheat pasta adds fiber and a nutty flavor.
  • How long can I leave macaroni salad out? It’s best to keep it chilled, especially in warm weather; don’t let it sit out for more than 2 hours.
  • Can I use Greek yogurt instead of mayonnaise? Absolutely! Greek yogurt provides creaminess with added protein.
  • What can I substitute for pickle juice? White vinegar or lemon juice work well if you don’t have pickle juice on hand.
  • Is macaroni salad vegan-friendly? You can make a vegan version using plant-based mayo!
  • Can I add fruit to my macaroni salad? Yes! Diced apples or grapes can add a sweet crunch.
  • What’s the best way to serve macaroni salad? Serve chilled as a side dish or on a bed of lettuce for a refreshing presentation.
  • Can I prepare it without mustard? Yes, if you prefer, you can omit the mustard without losing too much flavor.

Nutrition Tips and Dietary Adaptations

This macaroni salad can fit into various dietary needs:

  • Low-Calorie Option: Use fat-free mayonnaise or Greek yogurt to reduce calories.
  • Gluten-Free: Substitute regular elbow macaroni with gluten-free pasta.
  • Vegan-Friendly: Use plant-based mayonnaise and add roasted chickpeas for protein.
  • Low-Carb: Substitute pasta with spiralized zucchini or cauliflower for a lighter option.

Essential Equipment Recommendations

For the best results, here are some tools you might need:

  • Large pot: For boiling the macaroni.
  • Colander: To drain the pasta effectively.
  • Mixing bowls: Having a couple of sizes is handy for mixing ingredients.
  • Whisk: Perfect for blending the dressing smoothly.
  • Measuring cups and spoons: For accurate ingredient measurements.

Serving Suggestions

How you present your macaroni salad can enhance the experience:

  • Garnish: Top with chopped fresh herbs or a sprinkle of paprika for color.
  • Serve chilled: Ensure it’s served at a refreshing temperature to bring out the flavors.
  • Pair with proteins: It goes wonderfully with grilled chicken, burgers, or hot dogs!

In conclusion, this **Classic Macaroni Salad** is not just a dish; it’s a canvas for your culinary creativity! With the tips and variations provided, you’ll be able to craft a salad that not only satisfies but also excites. So grab your ingredients and channel your inner chef—let’s make this summer delicious!

Classic Macaroni Salad

Prep Time 10 minutes
Cook Time 10 minutes
Total Time 20 minutes
Servings 6 servings
Calories 350
A creamy and flavorful macaroni salad perfect for picnics and gatherings.

Ingredients

Pasta

  • 8 ounces elbow macaroni

Vegetables

  • 3 stalks celery stalks (sliced thin)
  • 1/2 red onion (diced)
  • 1 bell pepper (diced small)

Dressing

  • 1 1/2 cups mayonnaise
  • 1/4 cup pickle juice (or white vinegar)
  • 1 tsp celery seed
  • 1 tbsp sugar
  • 1 tsp salt
  • 1 tsp pepper
  • 2 tsp mustard powder

Instructions 

  • Cook macaroni in boiling salted water until al dente, then drain and rinse in cold water.
  • Combine cooked macaroni with sliced celery, diced red onion, and diced bell pepper in a large bowl.
  • Whisk together mayonnaise, pickle juice, celery seed, sugar, salt, pepper, and mustard powder in a separate bowl.
  • Pour dressing over the pasta and vegetables, then mix until evenly coated.
  • Refrigerate for at least 1 hour before serving. Store leftovers in an airtight container up to 3 days.

Notes

For extra flavor, add chopped herbs or a dash of paprika before serving.
Calories: 350kcal
Cost: $10
Course: Salad
Cuisine: American
Keyword: macaroni

Discover the Zesty Mango Melange: A Vibrant Salad Recipe!

Welcome to the colorful world of the Zesty Mango Melange! This refreshing mango salad, combined with a tangy lime dressing, is more than just a dish; it’s an explosion of flavors that brings a piece of sunshine to your table. In this article, we dive deep into why this salad is the ultimate choice for your next meal, whether you’re looking for a light lunch, a side dish at a barbecue, or a vibrant addition to your holiday spread. Let’s explore how to make this salad a star in your kitchen!

Why You’ll Love This Recipe

  • Flavor Explosion: The combination of juicy mangoes, zesty lime, and fresh herbs creates an unforgettable taste sensation.
  • Quick and Easy: This salad comes together in less than 30 minutes, making it perfect for busy weeknights or last-minute gatherings.
  • Health Benefits: Packed with vitamins, minerals, and antioxidants, this salad supports overall health and wellness.
  • Versatile Dish: Whether served as a light lunch or a colorful side, it complements a variety of cuisines.
  • Make-Ahead Friendly: Prepare it in advance for a hassle-free meal that tastes even better after the flavors meld.

Ingredients: A Deep Dive

Let’s break down the ingredients that make up this vibrant mango salad. Each component plays a vital role in creating the perfect balance of flavors and textures.

  • 2 ripe mangoes: Choose mangoes that are slightly soft to the touch for the best sweetness.
  • 1 small red onion: Adds a mellow sweetness; soak in cold water for a milder flavor if desired.
  • 1 small cucumber: Crisp and refreshing, it balances the sweetness of the mango.
  • 1 red bell pepper: Adds a pop of color and crunch!
  • 1 cup cherry tomatoes: Halved for bursts of juiciness.
  • 1/4 cup fresh cilantro: Offers a bold, herbal flavor that brightens the dish.
  • 1/4 cup fresh mint: Adds a refreshing twist that complements the lime dressing.
  • 3 tablespoons fresh lime juice: The star of the dressing, providing that zesty kick!
  • 2 tablespoons honey: Sweetens the dressing; feel free to substitute with agave syrup for a vegan option.
  • 1 tablespoon olive oil: Adds richness to the dressing.
  • 1/2 teaspoon salt: Enhances all the flavors.
  • 1/4 teaspoon black pepper: A hint of spice to round it all out.

How to Make the Zesty Mango Melange

Close-up view of a refreshing mango salad with colorful ingredients and a shiny lime dressing.

Follow these steps to create your delicious mango salad:

  1. Prepare the Mango and Vegetables: Peel the mangoes and cut them into thin slices. Thinly slice the red onion, cucumber, and red bell pepper. Halve the cherry tomatoes. Set all the prepared ingredients aside.
  2. Make the Dressing: In a small bowl, whisk together the fresh lime juice, honey, olive oil, salt, and black pepper until well combined and smooth.
  3. Combine Ingredients: In a large salad bowl, combine the sliced mango, red onion, cucumber, red bell pepper, and cherry tomatoes. Add the chopped cilantro and mint leaves.
  4. Dress the Salad: Pour the lime dressing over the salad mixture. Gently toss all the ingredients together until they are well coated with the dressing.
  5. Chill and Serve: Allow the salad to chill in the refrigerator for at least 15 minutes before serving to help the flavors meld together.
  6. Enjoy!: Serve it as a refreshing side dish or a light main course.

Pro Tips for the Perfect Salad

  • Choose Ripe Mangoes: Look for mangoes that yield slightly to pressure. This ensures they are sweet and juicy!
  • Optimize Your Dressing: Adjust the sweetness of the dressing by varying the amount of honey based on your taste preference.
  • Experiment with Herbs: Try adding basil or parsley for a different herbal twist.
  • Texture Matters: For a crunchier salad, add diced bell peppers or radishes.
  • Colorful Variations: Consider adding corn or black beans for a more filling salad.
  • Make it a Meal: Add grilled chicken or shrimp on top for a protein boost!
  • Use Fresh Ingredients: Always opt for fresh vegetables and herbs for the best flavor.
  • Marinate Longer: Letting the salad sit in the dressing for longer enhances the flavor.

Common Mistakes and Troubleshooting

Here are some common pitfalls to avoid when making this salad:

  • Overripe Mangoes: Ensure your mangoes are ripe but not overly soft; they should still hold their shape.
  • Too Much Dressing: Start with a little dressing and add more as needed to avoid overpowering the salad.
  • Skipping the Chill: Chilling the salad allows the ingredients to meld together, enhancing the taste significantly.

Variations You Can Try

  • Spicy Mango Salad: Add diced jalapeños for a spicy kick.
  • Quinoa Mango Salad: Mix in cooked quinoa for added protein and texture.
  • Avocado Mango Salad: Incorporate diced avocado for creaminess.
  • Fruit Fusion Salad: Add sliced strawberries or pineapples for a tropical twist!

Storage and Make-Ahead Instructions

This salad is perfect for meal prep! Here’s how to store it:

  • Refrigerator Storage: Store in an airtight container in the fridge for up to 2 days.
  • Make-Ahead Tips: Prepare the ingredients a day in advance, and toss with the dressing just before serving to maintain freshness.

Frequently Asked Questions

  • Can I use frozen mango? Yes, thaw and drain excess water before adding to the salad.
  • What can I use instead of lime juice? Lemon juice is a great substitute!
  • Is this salad vegan? Yes, it’s vegan-friendly!
  • How can I make it gluten-free? All ingredients are naturally gluten-free, so you’re good to go!
  • Can I add nuts? Absolutely! Chopped cashews or almonds add a delightful crunch.
  • What’s the best way to slice mangoes? Use a sharp knife and follow the pit to get the most flesh out of the fruit.
  • Can I use dried herbs? Yes, but fresh herbs provide a much bolder flavor.
  • How many servings does this recipe yield? This recipe serves 4-6 as a side dish.

Nutrition Tips and Dietary Adaptations

This salad is not only delicious but also packed with nutrients!

  • Low Calorie: Perfect for those watching their calories, yet filling enough to satisfy.
  • Rich in Antioxidants: Mangoes and tomatoes are high in vitamins A and C, essential for a healthy immune system.
  • Low Fat: With minimal oil, this salad is a heart-healthy option.

Essential Equipment for Making This Salad

  • Sharp Knife: Essential for slicing the mango and vegetables.
  • Cutting Board: A sturdy board to prepare your ingredients.
  • Large Salad Bowl: For mixing and serving the salad.
  • Whisk: For blending the dressing smoothly.

Serving Suggestions

This Zesty Mango Melange pairs wonderfully with various dishes:

  • Grilled Chicken: The salad adds a refreshing contrast to smoky flavors.
  • Fish Tacos: A flavorful topping that complements the spices.
  • Rice Bowls: Serve it over brown rice or quinoa for a complete meal.
  • On Its Own: Enjoy it chilled as a light lunch or snack.

Conclusion

The Zesty Mango Melange isn’t just a salad; it’s a celebration of vibrant flavors and healthy living. With its easy preparation and endless variations, it’s the perfect recipe to add to your culinary repertoire. So grab those ripe mangoes and get ready to delight your taste buds with this refreshing dish!

Refreshing Mango Salad Recipe with Lime Dressing

Prep Time 15 minutes
Total Time 15 minutes
Servings 4 servings
Calories 150
A vibrant and refreshing mango salad with a zesty lime dressing, perfect for a light and healthy meal or side dish.

Ingredients

Fruits and Vegetables

  • 2 pieces ripe mangoes, peeled, pitted, and thinly sliced
  • 1 small red onion, thinly sliced
  • 1 small cucumber, thinly sliced
  • 1 red bell pepper red bell pepper, thinly sliced
  • 1 cup cherry tomatoes, halved
  • 1/4 cup fresh cilantro leaves, chopped
  • 1/4 cup fresh mint leaves, chopped
  • 3 tablespoons fresh lime juice
  • 2 tablespoons honey
  • 1 tablespoon olive oil
  • 1/2 teaspoon salt
  • 1/4 teaspoon black pepper

Instructions 

  • Peel and thinly slice the mangoes and vegetables; halve the cherry tomatoes.
  • Whisk lime juice, honey, olive oil, salt, and black pepper to make the dressing.
  • Combine mango, vegetables, cilantro, and mint in a large bowl.
  • Pour dressing over the salad and toss gently to coat.
  • Chill for at least 15 minutes before serving.

Notes

This salad is best enjoyed fresh and chilled for maximum flavor.
Calories: 150kcal
Cost: $10
Course: Salad
Cuisine: fusion
Keyword: Fresh, Healthy, Mango

Discover the Refreshing World of Cucumber Yogurt Salad!

Welcome to a vibrant culinary adventure! If you’re ready to dive into a dish that’s not only refreshing but also bursting with flavor, you’re in the right place. Our Cool & Creamy Cucumber Yogurt Salad is the perfect balance of crisp, creamy, and zesty, making it a must-have side dish for any occasion. Packed with nutrient-dense ingredients and an easy-to-follow recipe, this cucumber salad is designed to energize your meals. Let’s whip up something delicious!

Why You’ll Love This Recipe

Here are some irresistible reasons to make this cucumber yogurt salad your new go-to dish:

  • Quick and Easy: With just a few simple steps, you can create a delightful salad that’s perfect for any meal.
  • Nutritious Ingredients: This salad features fresh cucumbers and Greek yogurt, both of which are packed with vitamins and minerals.
  • Perfectly Versatile: Serve it as a side dish, a dip, or even a light lunch on its own. The possibilities are endless!
  • Refreshing Flavor: The combination of zesty lemon and aromatic dill elevates this salad to a whole new level of deliciousness.
  • Make-Ahead Friendly: Prepare it in advance and let the flavors meld together in the fridge for an even tastier experience.

Ingredients You’ll Need

Gather these fresh ingredients to create your salad masterpiece!

  • 2 English cucumbers: These are ideal for this recipe due to their crisp texture and minimal seeds.
  • 1/2 cup Greek yogurt: Adds creaminess and a rich flavor. Feel free to opt for plain yogurt or a dairy-free alternative!
  • 2 tablespoons finely chopped fresh dill: This herb brings a burst of freshness that complements the cucumbers beautifully.
  • 1 tablespoon extra virgin olive oil: A touch of healthy fat that enhances flavor.
  • 1 clove garlic, minced: For a subtle kick that rounds out the flavors.
  • 1/2 lemon, zested and juiced: The perfect tangy addition that brightens the dish.
  • 1 teaspoon salt: Adjust to taste, using pink Himalayan or sea salt for a gourmet touch.
  • Freshly ground pepper: Just a pinch to enhance the overall flavor.

How to Make Cucumber Yogurt Salad

Side view of a cucumber yogurt salad featuring vibrant green cucumbers and creamy yogurt.

Follow these simple steps to create your salad:

  • Slice the Cucumbers: Thinly slice the cucumbers using a mandoline, box grater, or sharp knife. Aim for even slices to ensure a consistent texture.
  • Mix the Dressing: In a small bowl, whisk together the Greek yogurt, olive oil, minced garlic, lemon zest, lemon juice, salt, and pepper.
  • Combine: In a large mixing bowl, toss the cucumber slices with the dressing until evenly coated.
  • Chill: For optimal flavor, chill the salad in the refrigerator for about 30 minutes before serving.

Pro Tips for the Best Cucumber Yogurt Salad

Enhance your salad-making skills with these expert insights:

  • Use Fresh Ingredients: Always opt for the freshest cucumbers and herbs to maximize flavor and nutrition.
  • Make Ahead: Prepare the dressing in advance and store it separately. Combine just before serving for optimal crunch.
  • Experiment with Herbs: Try adding mint or parsley for a different flavor profile!
  • Texture Matters: If you prefer a chunkier salad, dice the cucumbers instead of slicing them.
  • Flavor Boost: Add a pinch of cayenne pepper or a drizzle of honey for an unexpected twist!
  • Serving Temperature: Serve chilled for a refreshing treat, especially on hot summer days.
  • Garnish Ideas: Top with additional dill or even some toasted pine nuts for a delightful crunch.
  • Pairing Perfection: This salad pairs beautifully with grilled meats, sandwiches, or even as a topping for baked potatoes!

Common Mistakes and Troubleshooting

Avoid these common pitfalls to ensure your salad turns out perfect:

  • Over-Salting: Start with less salt, as you can always add more later, but you can’t take it out!
  • Soggy Cucumbers: For crunchier cucumbers, sprinkle them with salt and let them sit for 10-15 minutes before adding to the salad to draw out excess moisture.
  • Too Much Dressing: Ensure the dressing is just enough to coat the cucumbers without drowning them.
  • Skip the Chill: Don’t skip refrigerating the salad! Chilling allows the flavors to meld beautifully.

Variations to Try

Mix things up with these exciting variations of cucumber yogurt salad:

  • Spicy Twist: Add a dash of sriracha or chopped jalapeños for a spicy kick.
  • Greek Style: Toss in halved cherry tomatoes, olives, and feta cheese for a Mediterranean flair.
  • Asian Inspiration: Incorporate sesame oil, soy sauce, and chopped green onions for an Asian twist.
  • Fruit Fusion: Add diced watermelon or mango for a sweet contrast to the savory flavors.

Storage and Make-Ahead Instructions

Want to prep ahead? Here’s how to store your salad:

  • Refrigeration: Store any leftovers in an airtight container in the fridge for up to 3 days.
  • Make-Ahead: Keep the dressing and cucumbers separate until just before serving to maintain crispness.

Nutrition Tips and Dietary Adaptations

Make this salad work for your dietary needs by following these tips:

  • Low-Calorie Option: Use non-fat Greek yogurt to reduce calories while keeping the creaminess.
  • Dairy-Free: Substitute Greek yogurt with coconut yogurt or any plant-based yogurt for a vegan version.
  • Low-Sodium: Adjust the amount of salt or use a salt substitute to suit your dietary restrictions.
  • Gluten-Free: This recipe is naturally gluten-free, making it a safe choice for gluten-sensitive individuals.

Comprehensive FAQ

Got questions? We’ve got answers!

  • How long does this salad last? The salad can be stored in the fridge for up to 3 days, but best enjoyed fresh.
  • Can I use regular cucumbers instead of English cucumbers? Yes, but be sure to peel them and remove the seeds for the best texture.
  • Is this salad suitable for meal prep? Absolutely! Just store the dressing separately until ready to serve.
  • What can I serve this salad with? It pairs well with grilled meats, pita bread, or as a refreshing side at barbecues.
  • Can I make this salad vegan? Yes! Simply use a plant-based yogurt and skip the garlic if desired.
  • How can I add more protein? Incorporate chickpeas or grilled chicken slices for a filling meal.
  • Can I freeze this salad? Freezing is not recommended as it can change the texture of the cucumbers.
  • What’s the best way to slice cucumbers? A mandoline slicer produces the most uniform slices, but a sharp knife works just as well!

Equipment Recommendations

Here’s what you’ll need to create this salad:

  • Mandoline Slicer: For perfectly thin cucumber slices.
  • Mixing Bowls: A large bowl for mixing and a smaller one for the dressing.
  • Whisk: To combine the dressing ingredients smoothly.
  • Cutting Board: A sturdy surface for slicing cucumbers and mincing garlic.

Serving Suggestions

How to elevate your salad experience:

  • Garnish: Top with additional fresh dill or a sprinkle of paprika for color and flavor.
  • Accompaniments: Serve alongside grilled fish or chicken for a balanced meal.
  • Dip: Use this salad as a dip for fresh veggies or pita chips for a fun appetizer.

Wrap Up

There you have it! Your ultimate guide to making the Cool & Creamy Cucumber Yogurt Salad. Whether you’re looking for a quick side dish, a refreshing dip, or a light lunch, this recipe has got you covered. Embrace the flavors, get creative with variations, and most importantly, enjoy your time in the kitchen. Let’s make healthy eating fun and exciting!

Cucumber Yogurt Salad

Prep Time 10 minutes
Total Time 10 minutes
Servings 4 servings
Calories 120
A refreshing and light salad combining crisp cucumbers with creamy yogurt and fresh dill, perfect for a quick snack or side dish.

Ingredients

Vegetables

  • 2 pieces English cucumbers
  • 1/2 cup Greek yogurt ((or plain yogurt))
  • 2 tablespoons finely chopped fresh dill
  • 1 tablespoon extra virgin olive oil
  • 1 clove garlic, minced
  • 1/2 lemon lemon, zested and juiced ((approx. 1 tablespoon lemon juice))
  • 1 teaspoon salt, or to taste ((I use pink Himalayan or sea salt))
  • to taste pepper freshly ground pepper

Instructions 

  • Thinly slice the cucumbers using a mandoline or sharp knife.
  • Whisk together yogurt, dill, olive oil, garlic, lemon juice, salt, and pepper.
  • Combine cucumber slices with the dressing and toss gently.
  • Serve immediately or chill for up to 30 minutes before serving.

Notes

This salad is best enjoyed fresh but can be refrigerated for up to 30 minutes.
Calories: 120kcal
Cost: $5
Course: Side Dish
Cuisine: Mediterranean
Keyword: cucumber