Author

Ryan

Browsing

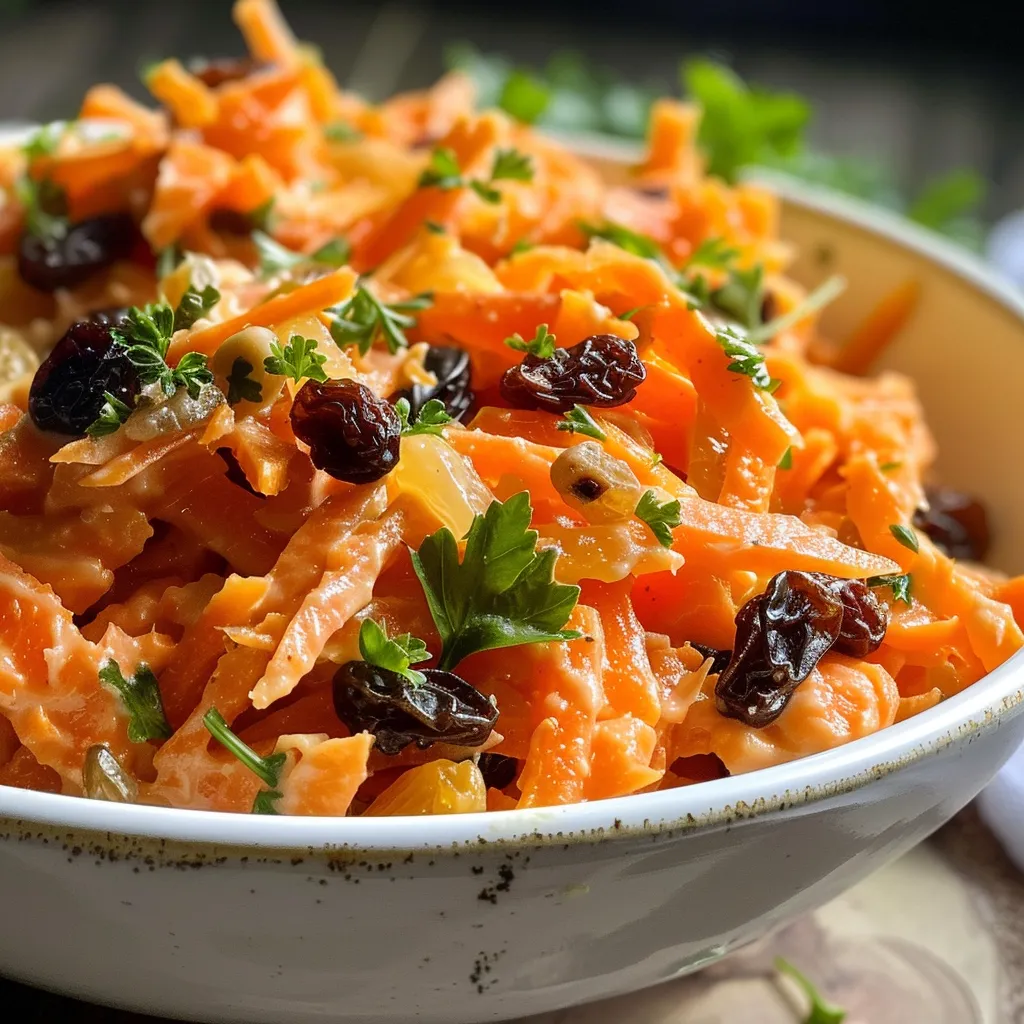
Introducing the Crunchy Carrot Raisin Salad: A Fresh Take on a Classic

Welcome to your new favorite side dish: the **Crunchy Carrot Raisin Salad**! This vibrant and delightful salad is a perfect blend of flavors and textures, making it not only a visual feast but also a taste sensation. Whether you’re looking to add a touch of color to your dinner plate or whip up something quick for a potluck, this salad is a winner. With its **natural sweetness** from carrots and raisins, combined with a creamy dressing, it’s a dish that’ll brighten any meal!

Why You’ll Love This Recipe

  • Quick and Easy: This salad comes together in just 15 minutes, making it perfect for busy weeknights or last-minute gatherings.
  • Nutritious and Delicious: Packed with vitamins from fresh carrots and the natural sweetness of raisins, it’s a guilt-free treat that your taste buds will thank you for.
  • Versatile Side Dish: This carrot raisin salad pairs beautifully with grilled meats, sandwiches, or as a refreshing snack on its own.
  • Customizable: With numerous variations and substitutions, you can make this salad your own based on your dietary preferences!
  • Family-Friendly: Even the pickiest eaters will love the sweet crunch of this salad, making it a hit with kids and adults alike.

Ingredient Breakdown and Substitutions

Let’s dive into the ingredients that make this carrot raisin salad a standout dish. Here’s what you’ll need:

  • 4 cups fresh carrots: Peeled and grated, about 5 large carrots. For a twist, consider using colorful carrots for a stunning presentation.
  • 3/4 cup raisins: Choose either golden or regular raisins. For a different flavor, swap them for dried cranberries or chopped dried apricots.
  • 1/2 cup mayonnaise or Greek yogurt: This creamy base can be adjusted for health preferences—try using low-fat mayonnaise or plain Greek yogurt for a lighter option.
  • 1 tablespoon lemon juice or apple cider vinegar: This adds a zesty kick! Lemon juice brightens the flavors, while vinegar offers a tangy contrast.
  • 1 teaspoon sugar (optional): Depending on your sweetness preference, this can enhance the natural flavors of the salad.
  • 1/4 teaspoon salt: A pinch of salt elevates all the flavors.

Pro Tips for the Perfect Crunchy Carrot Raisin Salad

Side view of a colorful salad with grated carrots and raisins.

Ready to go? Here are some expert insights to ensure your salad is top-notch:

  • Grate with Care: Use a box grater for the freshest carrots. A food processor can make it quicker, but the texture might vary.
  • Chill for Flavor: Allow the salad to chill in the refrigerator for at least 30 minutes before serving. This lets the flavors meld beautifully!
  • Mix Gently: When combining ingredients, use a folding motion to keep the carrots from getting mushy.
  • Balance the Sweetness: If you prefer a less sweet salad, reduce the amount of raisins or sugar.
  • Texture Matters: For an extra crunch, add nuts like walnuts or pecans just before serving.
  • Make It Ahead: This salad can be prepared a day in advance, but hold off on adding nuts or delicate ingredients until right before serving.
  • Dress Smart: If using Greek yogurt, consider thinning it out with a little water or additional lemon juice for a smoother dressing.
  • Season to Taste: Always taste before serving; adjust salt or acidity as needed!

Avoiding Common Mistakes

Even the best recipes can go awry! Here are some common pitfalls and how to avoid them:

  • Too Watery: Ensure your grated carrots are dry before mixing. Excess moisture can lead to a soggy salad.
  • Overmixing: Be gentle when combining ingredients to maintain the salad’s texture.
  • Skipping the Chill: Don’t skip the chilling step; it’s crucial for flavor development!
  • Using Old Ingredients: Fresh ingredients yield the best flavors; check the quality of your carrots and raisins.

Delicious Variations on Carrot Raisin Salad

Feeling adventurous? Here are some fun twists to try:

  • Tropical Carrot Raisin Salad: Add diced pineapple and shredded coconut for a tropical flair!
  • Vegan Delight: Substitute Greek yogurt with **vegan mayonnaise** or a cashew cream for a creamy vegan version.
  • Spicy Kick: Toss in some chopped jalapeños or a dash of cayenne pepper for an unexpected heat!
  • Nutty Crunch: Incorporate toasted walnuts or sunflower seeds for added texture and flavor.

Storing and Make-Ahead Instructions

This salad is perfect for meal prep! Here’s how to store it:

  • Refrigeration: Store in an airtight container in the refrigerator where it can stay fresh for up to 3 days.
  • Freezing: While it’s best enjoyed fresh, you can freeze the salad without the dressing for up to 1 month. Thaw and add dressing before serving!
  • Make-Ahead: Prepare the salad up to 24 hours in advance. Just add any crunchy toppings right before serving for the best texture!

Frequently Asked Questions

Got questions? We’ve got answers! Here are some common queries about carrot raisin salad:

  • Can I use other dried fruits? Absolutely! Try dried cranberries or apricots for different flavors.
  • Is this salad gluten-free? Yes, all ingredients are naturally gluten-free!
  • How do I keep it from getting watery? Make sure to drain any excess moisture from the grated carrots.
  • Can I make this salad vegan? Yes! Substitute the mayonnaise with vegan options or a creamy avocado dressing.
  • How long does the salad last? It stays fresh in the fridge for about 3 days when stored properly.
  • What can I serve with this salad? It pairs well with grilled chicken, fish, or as part of a picnic spread.
  • Can I add other vegetables? Sure! Chopped celery or bell peppers can add a nice crunch.
  • Is it okay to use pre-grated carrots? Yes, but fresh grated carrots offer the best flavor and texture.

Nutritional Benefits and Dietary Adaptations

This salad isn’t just a treat for your taste buds—it’s packed with nutrients!

  • Vitamin A: Carrots are a fantastic source of beta-carotene, which supports eye health.
  • Fiber: This dish provides dietary fiber, aiding in digestion and keeping you feeling full.
  • Low-Calorie Option: By using Greek yogurt instead of mayonnaise, you can cut down on calories and increase protein.
  • Heart-Healthy Fats: Including nuts adds healthy fats that are great for heart health.

Essential Equipment for Making Carrot Raisin Salad

Here’s what you’ll need to whip up this delicious salad:

  • Box Grater or Food Processor: Essential for grating the carrots.
  • Mixing Bowl: A large bowl for easy mixing.
  • Whisk: For blending the dressing smoothly.
  • Measuring Cups and Spoons: To ensure accurate ingredient measurements.

Serving Suggestions

This salad is incredibly versatile! Here are some ideas for serving:

  • As a Side Dish: Serve alongside grilled chicken or fish for a colorful plate.
  • In a Wrap: Use it as a filling for wraps or sandwiches for added crunch.
  • On a Bed of Greens: Serve over mixed greens for a refreshing salad bowl.
  • As a Snack: Perfect on its own for a healthy afternoon pick-me-up!

Conclusion

The **Crunchy Carrot Raisin Salad** is not just a dish; it’s an experience that combines nutrition, flavor, and creativity. With its bright colors and delightful textures, this salad is sure to become a staple in your healthy cooking repertoire. Remember, cooking should be fun, and this salad proves that healthy eating can be both exciting and delicious! So grab your grater, gather your ingredients, and let’s make some magic in the kitchen!

Carrot Raisin Salad: A Sweet and Crunchy Classic Side Dish

Prep Time 10 minutes
Total Time 10 minutes
Servings 4 servings
Calories 150
A refreshing and crunchy side dish combining sweet carrots and raisins with a creamy dressing, perfect for any meal.

Ingredients

Vegetables

  • 4 cups fresh carrots, peeled and grated (about 5 large carrots)
  • 3/4 cup raisins (golden or regular)
  • 1 tablespoon lemon juice or apple cider vinegar
  • 1/2 cup mayonnaise or Greek yogurt
  • 1 teaspoon sugar (optional)
  • 1/4 teaspoon salt

Instructions 

  • Peel and grate the carrots.
  • Mix mayonnaise, lemon juice, sugar, and salt to make the dressing.
  • Combine carrots and raisins, then toss with the dressing.
  • Refrigerate for at least 30 minutes before serving.
  • Serve chilled as a side or snack.

Notes

For a healthier option, substitute Greek yogurt for mayonnaise.
Calories: 150kcal
Cost: $8
Course: Side Dish
Cuisine: American
Keyword: Carrots, Raisins, Salad

Welcome to Your New Favorite Garlic Chicken Recipe!

If you’re on the hunt for a savory dish that embodies comfort and flavor, look no further! This Garlic Chicken recipe is a delightful combination of creamy goodness and zesty garlic, perfect for a cozy dinner. Let’s dive into the world of this irresistible chicken recipe that promises to impress your family and friends while being simple enough to whip up on a weeknight.

Why You’ll Love This Recipe

  • Quick and Easy: Ready in under 30 minutes, this dish is perfect for busy weeknights when you want something delicious without the fuss.
  • Flavor-Packed: The creamy garlic sauce is rich and indulgent, transforming simple chicken breasts into a gourmet meal.
  • Versatile Pairings: Serve with mashed potatoes, rice, or pasta, making it great for any occasion.
  • Meal Prep Friendly: This recipe can be made ahead, stored, and reheated, making it a great choice for meal prep enthusiasts.
  • Customizable: With ingredient swaps and variations, you can tailor the recipe to fit dietary needs and preferences.

Ingredient Breakdown

Here’s what you’ll need to create this delectable creamy garlic chicken:

  • 2 boneless, skinless chicken breasts: For the best results, choose fresh chicken breasts for optimal flavor and texture.
  • 1 tsp salt: Enhances the natural flavors of the chicken.
  • 1/4 tsp freshly cracked black pepper: Adds a mild heat.
  • 1 tsp sweet paprika: For a touch of sweetness and color.
  • 1 tsp onion powder: Complements the garlic flavor beautifully.
  • 1 tsp dried thyme: Introduces an earthy note.
  • 1/4 cup all-purpose flour: For coating the chicken, giving it a lovely crust.
  • 1 tbsp olive oil: To sear the chicken and add healthy fats.
  • 2 tbsp unsalted butter: One for cooking the chicken and another for the sauce for a rich flavor.
  • 1 tbsp freshly minced garlic: The star of the show, giving the dish its signature flavor.
  • 1/2 cup chicken stock: Provides depth to the sauce.
  • 300 ml thickened cream: Creates the creamy sauce.
  • 1 tsp Dijon mustard: Adds a tangy kick.
  • 1/2 cup grated parmesan: For savory richness.
  • Sea salt flakes and freshly cracked black pepper: To taste.
  • Mashed potatoes, rice, or pasta: Perfect sides to soak up the creamy sauce.
  • Steamed greens: For a nutritious touch.
  • 1 tbsp finely chopped flat-leaf parsley: For garnish.
  • Lemon wedges: To serve, adding brightness to each bite.

Step-by-Step Instructions

Side angle of garlic chicken garnished with parsley and lemon wedges.

Now, let’s get cooking! Follow these simple steps to create the perfect garlic chicken:

  1. Cut the chicken breasts in half horizontally to make 4 thin steaks. Season with salt, pepper, paprika, onion powder, and thyme.
  2. Press each piece into the flour until evenly coated.
  3. Heat olive oil and 1 tbsp of butter in a skillet over medium-high heat. Cook chicken for 5–6 minutes, turning once until golden and just cooked through. Remove and set aside.
  4. In the same skillet, add 1 tbsp of butter and minced garlic. Cook for 30 seconds until fragrant.
  5. Add chicken stock and simmer for 1–2 minutes, reducing by at least half.
  6. Stir in heavy cream and Dijon mustard. Reduce heat to medium and simmer for 2 minutes until slightly thickened.
  7. Stir in grated parmesan, seasoning with salt and pepper to taste.
  8. Return chicken to the pan and simmer for 2–3 minutes until heated through.
  9. Serve with mashed potatoes, rice, or pasta, and steamed greens. Garnish with parsley and a squeeze of lemon juice.

Pro Tips for Perfect Garlic Chicken

To ensure your garlic chicken turns out perfectly every time, consider these expert insights:

  • Use fresh garlic: Freshly minced garlic gives the best flavor compared to pre-minced options.
  • Don’t overcrowd the pan: Cook the chicken in batches if necessary to achieve a nice golden-brown crust.
  • Rest the chicken: Allowing the chicken to rest after cooking helps retain moisture.
  • Adjust thickness: If the sauce is too thick, add a splash more chicken stock; if too thin, let it simmer longer.
  • Experiment with herbs: Try adding fresh basil or oregano for a different flavor twist!
  • For a kick: Add red pepper flakes to the sauce for a little heat.
  • For a health boost: Incorporate spinach or kale into the sauce for extra nutrients.
  • Storage tips: Store leftovers in an airtight container in the fridge for up to 3 days.

Common Mistakes and Troubleshooting

Even the best chefs can run into issues. Here’s how to avoid common pitfalls:

  • Overcooked chicken: Ensure the chicken reaches an internal temperature of 165°F to stay juicy.
  • Too salty sauce: Balance with a splash of cream or additional chicken stock.
  • Garlic bitterness: Avoid cooking garlic for too long; it should be fragrant but not browned.

Variations of Garlic Chicken

Mix things up with these delicious variations:

  • Garlic Lemon Chicken: Add zest and juice of a lemon for a fresh twist.
  • Cheesy Garlic Chicken: Incorporate mozzarella or cheddar for an extra cheesy delight.
  • Spicy Garlic Chicken: Use chili garlic sauce in the cream for a spicy kick.
  • Herb-Infused Garlic Chicken: Add fresh rosemary or thyme for a fragrant touch.

Storage and Make-Ahead Instructions

This creamy garlic chicken recipe is perfect for meal prep! Here’s how to store and reheat:

  • Refrigerate: Store leftovers in an airtight container for up to 3 days.
  • Reheat: Warm in a skillet over low heat, adding a splash of chicken stock or cream to bring back the sauce’s consistency.

Comprehensive FAQ

Got questions? We’ve got answers!

  • How long does it take to cook chicken in a skillet? Typically, 5-6 minutes per side is sufficient for thinly sliced breasts.
  • Can I use frozen chicken? Yes, but ensure it’s completely thawed before cooking for even results.
  • Can I make this dish dairy-free? Substitute heavy cream with coconut cream and omit the cheese.
  • What can I serve with garlic chicken? It pairs wonderfully with mashed potatoes, rice, or roasted vegetables.
  • How do I know when the chicken is cooked? Use a meat thermometer; it should read 165°F at the thickest part.
  • Can I use chicken thighs instead? Absolutely! Just adjust the cooking time as needed.
  • Can I freeze garlic chicken? While the chicken can be frozen, the cream sauce may separate upon reheating.
  • Is this dish suitable for meal prep? Yes! It’s perfect for make-ahead meals.

Nutritional Tips and Dietary Adaptations

Looking to make this dish fit your dietary preferences? Here are some tips:

  • Low-carb option: Serve with steamed vegetables instead of carbs.
  • Gluten-free: Use gluten-free flour to coat the chicken.
  • High-protein: Add chickpeas or quinoa to the sides for an extra protein boost.

Essential Equipment Recommendations

To make this garlic chicken recipe, you’ll need:

  • Skillet: A good non-stick skillet ensures even cooking and easy cleanup.
  • Meat thermometer: For perfectly cooked chicken every time.
  • Knife: A sharp knife for easy chicken slicing and ingredient prep.

Serving Suggestions

Enhance your meal with these serving ideas:

  • Pair with garlic bread: It’s a match made in heaven!
  • Add a side salad: Fresh greens with a light vinaigrette balance the richness of the dish.
  • Top with fresh herbs: Garnish with basil or cilantro for a burst of freshness.

Wrapping It Up

This Garlic Chicken recipe is not just a meal; it’s an experience! It brings joy, comfort, and satisfaction to your dinner table. So roll up your sleeves and get ready to savor this creamy, garlic-infused delight that proves healthy eating can be both exciting and flavorful. Happy cooking!

Garlic Chicken

Prep Time 10 minutes
Cook Time 20 minutes
Total Time 30 minutes
Servings 4 servings
Calories 650
A flavorful and creamy garlic chicken dish perfect for a comforting meal. Quick to prepare with simple ingredients.

Ingredients

Chicken

  • 2 pieces boneless, skinless chicken breasts, halved horizontally
  • 1 tsp salt
  • 1/4 tsp freshly cracked black pepper
  • 1 tsp sweet paprika
  • 1 tsp onion powder
  • 1 tsp dried thyme
  • 1/4 cup all-purpose flour
  • 1 tbsp olive oil
  • 1 tbsp unsalted butter (for cooking chicken)
  • 1 tbsp unsalted butter (for sauce)
  • 1 tbsp freshly minced garlic
  • 1/2 cup chicken stock
  • 300 ml thickened (heavy) cream
  • 1 tsp Dijon mustard
  • 1/2 cup grated parmesan

Sea salt flakes, to taste

  • to taste Sea salt flakes

Freshly cracked black pepper, to taste

  • to taste Black pepper

Served with

  • Mashed potatoes, rice, or pasta (to serve)
  • Steamed greens (to serve)
  • 1 tbsp finely chopped flat-leaf parsley
  • for serving Lemon wedges

Instructions 

  • Slice chicken breasts horizontally, season with salt, pepper, paprika, onion powder, and thyme.
  • Coat chicken in flour. Cook in oil and butter until golden, 5–6 minutes. Remove and set aside.
  • In the same pan, sauté garlic in butter, add chicken stock, then cream and mustard. Simmer until thickened.
  • Stir in parmesan, season, return chicken, and heat through for 2–3 minutes.
  • Serve with sides, garnish with parsley, and squeeze lemon over.

Notes

Ensure not to overcook the chicken to keep it tender.
Calories: 650kcal
Cost: $15
Course: Main Course
Cuisine: Western
Keyword: Chicken, Cream, garlic

Welcome to a culinary adventure where flavor meets simplicity! This creamy garlic chicken recipe is not just a meal; it’s an experience that will elevate your cooking game and impress your family and friends. Whether you’re a seasoned chef or a kitchen novice, you’ll find that this dish is packed with bold flavors and delightful textures. In just under 30 minutes, you can whip up this creamy, garlicky goodness that will leave your taste buds dancing! Get ready to indulge in a delicious dish that combines tender chicken breasts with a rich, flavorful garlic sauce.

Why You’ll Love This Recipe

This creamy garlic chicken is a true crowd-pleaser! Here are five reasons why you’ll adore this recipe:

  • Quick and Easy: This dish comes together in about 30 minutes, making it perfect for busy weeknights or last-minute dinner parties.
  • Flavor Explosion: The combination of garlic, cream, and Parmesan creates a savory sauce that elevates the humble chicken breast into a gourmet experience.
  • Versatile Pairings: Serve this creamy garlic chicken with rice, pasta, or your favorite vegetables for a complete meal that everyone will love.
  • Nutritious and Satisfying: Packed with protein and healthy fats, this dish not only satisfies your cravings but also provides essential nutrients.
  • Impressive Presentation: With its golden-brown chicken and luscious sauce, this dish looks as good as it tastes—perfect for impressing guests!

Ingredients for Creamy Garlic Chicken

Here’s what you’ll need to create this delectable dish:

  • 4 boneless, skinless chicken breasts (about 1.5 lbs): Choose fresh chicken for the best flavor.
  • 4 cloves fresh garlic, minced: Fresh garlic gives the best flavor; avoid pre-minced for optimal taste.
  • 1 cup heavy cream: This adds a rich creaminess; you can substitute with half-and-half for a lighter version.
  • 1 cup low-sodium chicken broth: This keeps the dish flavorful without overwhelming saltiness.
  • 2 tablespoons butter: For cooking the chicken and creating a luxurious sauce.
  • 1 teaspoon Italian seasoning: A blend of herbs that complements the garlic beautifully.
  • ½ cup grated Parmesan cheese: This adds a salty, nutty flavor; feel free to use nutritional yeast for a vegan option.

How to Make Creamy Garlic Chicken

Ready to dive into cooking? Follow these simple steps to create your creamy garlic chicken:

  1. Pat chicken breasts dry with paper towels and season both sides with salt and pepper.
  2. In a large skillet over medium-high heat, melt butter until bubbly. Sear the chicken for 6-7 minutes on each side until golden brown. Remove and set aside.
  3. In the same skillet, add minced garlic and sauté for 30 seconds until fragrant. Pour in heavy cream and chicken broth; stir to combine.
  4. Add Italian seasoning to the sauce and simmer for about 5 minutes until slightly thickened.
  5. Stir in grated Parmesan cheese until melted and combined. Return chicken to the skillet, coating it in the sauce, and simmer for an additional minute.

Pro Tips for Perfect Creamy Garlic Chicken

A plated dish of juicy creamy garlic chicken garnished with herbs.

To elevate your cooking, here are some expert insights:

  • Don’t Rush the Searing: Allow the chicken to sear properly for a golden crust that locks in moisture.
  • Use Fresh Ingredients: Fresh garlic and quality chicken make a noticeable difference in flavor.
  • Adjust the Consistency: If the sauce is too thick, add a splash more chicken broth to reach your desired creaminess.
  • Experiment with Herbs: Try adding fresh thyme or rosemary for an aromatic twist.
  • Allow the Sauce to Simmer: Letting the sauce simmer enhances the flavors and creates a more cohesive dish.
  • Serve Immediately: This dish is best enjoyed fresh; reheat gently if needed.
  • Don’t Skip the Cheese: Parmesan not only adds flavor but also thickens the sauce beautifully.
  • Make it a Meal: Pair with sautéed vegetables or a fresh salad for a balanced dinner.

Common Mistakes and Troubleshooting

Even the best chefs make mistakes! Here are some common pitfalls and how to avoid them:

  • Overcooking Chicken: Keep an eye on cooking time to ensure juicy, tender chicken. Use a meat thermometer to check for doneness (165°F).
  • Burning Garlic: Garlic can burn quickly; add it after the chicken is browned to prevent bitterness.
  • Too Thick Sauce: If your sauce is too thick, add a little more broth or cream to loosen it up.
  • Not Enough Flavor: Adjust seasoning to taste; don’t be afraid to add more Italian seasoning or salt.

Variations to Try

Make this creamy garlic chicken your own with these fun variations:

  • Mushroom Lovers: Add sautéed mushrooms for an earthy flavor boost.
  • Spicy Kick: Mix in red pepper flakes for a spicy twist that liven up the dish.
  • Veggie Delight: Stir in spinach or sun-dried tomatoes for added nutrition and color.
  • Lemon Zest: Squeeze fresh lemon juice over the dish before serving for a zesty finish.

Storage and Make-Ahead Instructions

Planning ahead? Here’s how to store your creamy garlic chicken:

  • Refrigeration: Store any leftovers in an airtight container in the fridge for up to 3 days.
  • Freezing: Freeze in a sealable bag for up to 2 months. Thaw in the fridge before reheating.
  • Reheating: Gently reheat on the stove over low heat, adding a splash of chicken broth to maintain creaminess.

Frequently Asked Questions

Got questions? We’ve got answers!

  • What is creamy garlic chicken? A rich and flavorful dish featuring chicken breasts cooked in a creamy garlic sauce.
  • Can I use different types of chicken? Absolutely! Thighs or drumsticks work well, but cooking time may vary.
  • How can I make it healthier? Substitute heavy cream with Greek yogurt or coconut milk for a lighter option.
  • What can I serve with creamy garlic chicken? Pair with rice, pasta, roasted vegetables, or a fresh salad for a complete meal.
  • How long does this dish last? It lasts up to 3 days in the fridge and can be frozen for 2 months.
  • Can I make this dish in advance? Yes! Prepare the sauce ahead of time and reheat with chicken when ready to serve.
  • What’s the best way to store leftovers? Store in airtight containers in the fridge or freezer to maintain freshness.
  • Can I add other flavors? Yes! Experiment with different herbs, spices, or add-ins to customize your dish.

Nutrition Tips and Dietary Adaptations

Want to make this dish fit your dietary needs? Here are some options:

  • Low-Carb: Serve over zucchini noodles or cauliflower rice instead of traditional pasta or rice.
  • Dairy-Free: Use coconut cream and nutritional yeast in place of heavy cream and cheese.
  • Gluten-Free: Ensure chicken broth and any side dishes are gluten-free.
  • Paleo-Friendly: Substitute with almond milk and skip cheese for a paleo-compliant meal.

Equipment Recommendations

To make this creamy garlic chicken, you’ll need:

  • A large skillet: For searing and sauce preparation.
  • Meat thermometer: To ensure chicken is perfectly cooked.
  • Wooden spoon: For stirring the sauce without scratching your skillet.

Serving Suggestions

To elevate your meal experience, consider the following serving ideas:

  • Garnish: Sprinkle chopped parsley or extra Parmesan on top for a fresh touch.
  • Pairing: Serve with crusty bread to soak up the delicious sauce.
  • Complete the Meal: Add a side of garlic bread and a crisp salad for a well-rounded dinner.

In conclusion, this creamy garlic chicken recipe is a sure-fire way to impress anyone at your dinner table. Not only is it easy to make, but it also delivers on taste and satisfaction. So, roll up your sleeves, grab your ingredients, and let’s make this bold and flavorful dish a part of your culinary repertoire. Happy cooking!

Creamy Garlic Chicken

Prep Time 10 minutes
Cook Time 20 minutes
Total Time 30 minutes
Servings 4 servings
Calories 550
A rich and flavorful chicken dish with a creamy garlic sauce, perfect for a comforting dinner.

Ingredients

Chicken

  • 4 pieces boneless, skinless chicken breasts (about 1.5 lbs)
  • 4 cloves fresh garlic, minced
  • 1 cup heavy cream
  • 1 cup low-sodium chicken broth
  • 2 tablespoons butter
  • 1 teaspoon Italian seasoning
  • ½ cup grated Parmesan cheese

Instructions 

  • Pat chicken dry and season with salt and pepper.
  • In a skillet, melt butter and sear chicken 6-7 minutes per side until golden. Remove and set aside.
  • Sauté garlic in the same skillet for 30 seconds. Add cream and broth, stir.
  • Add Italian seasoning and simmer 5 minutes. Stir in Parmesan cheese.
  • Return chicken to skillet, coat with sauce, and simmer 1 minute.

Notes

For a richer flavor, let the sauce simmer longer to thicken.
Calories: 550kcal
Cost: $15
Course: Main Course
Cuisine: Italian
Keyword: Chicken

Unleash the Vibrance of the Viral Green Goddess Salad!

Welcome to a world where healthy eating meets sheer delight! The Viral Green Goddess Salad is not just another salad; it’s an explosion of color and flavor that dances on your taste buds. Packed with vibrant greens and a zesty, creamy dressing, this salad proves that eating well can be both indulgent and nutritious. Whether you’re looking for a quick lunch or a fantastic side dish, this recipe is your ticket to creating a meal that’s as energizing as it is satisfying. Let’s dive into the magic of this salad!

Why You’ll Love This Recipe

This salad isn’t just a feast for the eyes; it’s a powerhouse of benefits that will make you want to whip it up again and again. Here are just a few reasons why this Green Goddess Salad has captured hearts everywhere:

  • Flavor Explosion: With fresh herbs and a tangy dressing, every bite is bursting with flavor.
  • Nutrient-Dense: This salad is loaded with vitamins A and C, antioxidants, and healthy fats—perfect for fueling your day!
  • Quick and Easy: Ready in under 30 minutes, it’s perfect for busy weeknights or meal prep.
  • Customizable: Adjust ingredients based on what you have at home. It’s versatile and accommodating!
  • Meal Prep Friendly: This salad holds up well in the fridge, making it ideal for lunches throughout the week.

Ingredient Breakdown and Substitutions

The secret to the best Green Goddess Salad lies in its fresh ingredients. Here’s what you’ll need:

  • 1 small head green cabbage: Finely chopped for crispness. Substitution: Kale or romaine works too!
  • 1 large cucumber: Finely diced for crunch. Substitution: Zucchini for a twist.
  • 4 green onions: Thinly sliced for a mild onion flavor.
  • 1 cup fresh basil: Packed for a fragrant kick. Substitution: Use parsley or cilantro.
  • 1 cup fresh spinach: Packed for extra nutrients.
  • 1/4 cup chives: Adds a subtle onion flavor.
  • 2 cloves garlic: For a bold taste.
  • Juice of 1 lemon: Brightness and acidity.
  • 1/4 cup olive oil: Rich in healthy fats.
  • 2 tablespoons rice vinegar: Tangy depth.
  • 3 tablespoons nutritional yeast: For a savory, cheesy vibe. Substitution: Vegan Parmesan.
  • 1/4 cup walnuts: Crunch and omega-3s. Substitution: Almonds or sunflower seeds.
  • 1/2 teaspoon salt: To taste.

How to Make the Green Goddess Salad

Side view of a fresh green salad composed of chopped cabbage, diced cucumber, and sliced green onions.

Creating this vibrant salad is a breeze with these simple steps:

  1. In a blender, combine basil, spinach, chives, garlic, lemon juice, olive oil, rice vinegar, walnuts, nutritional yeast, and salt. Blend until smooth and creamy.
  2. In a large mixing bowl, add the chopped cabbage, cucumber, and green onions.
  3. Pour the dressing over the chopped veggies and toss well to combine.
  4. Taste and adjust seasoning with more salt or lemon if needed.
  5. Let sit for 10 minutes to let the flavors mingle before serving.

Pro Tips for Perfect Results

Want to elevate your Green Goddess Salad game? Check out these pro tips:

  • Freshness is Key: Use fresh, high-quality ingredients for the best flavor.
  • Let It Chill: Allow the salad to sit for at least ten minutes before serving to enhance flavor melding.
  • Blend It Smooth: Ensure your dressing is blended until creamy for a luxurious texture.
  • Chop Finely: A fine chop ensures that every bite is packed with flavor and texture.
  • Adjust to Taste: Don’t be afraid to tweak the dressing ingredients to fit your palate.
  • Make Ahead: This salad can be made a day in advance—just keep the dressing separate until ready to serve.
  • Explore Variations: Try adding roasted veggies or proteins like chickpeas or grilled chicken for a heartier meal.
  • Presentation Matters: Serve in a colorful bowl to make the dish visually appealing.

Common Mistakes and Troubleshooting

Even the best chefs have mishaps! Here are some common mistakes to avoid:

  • Over-Processing the Dressing: If it’s too runny, add more nutritional yeast or nuts to thicken it up.
  • Using Old Ingredients: Always check for freshness—wilted greens can ruin the crunch.
  • Not Letting It Sit: Skipping the resting time can lead to a less flavorful salad.
  • Overdressing: Start with less dressing and add more as needed to avoid sogginess.

Variety is the Spice of Life

Feel free to mix and match with these delightful variations:

  • Protein-Packed: Add grilled chicken or chickpeas for a more filling option.
  • Nutty Delight: Replace walnuts with toasted almonds or pecans for a different crunch.
  • Seasonal Twist: Incorporate seasonal vegetables like bell peppers or radishes.
  • Fruit Fusion: Toss in some sliced apples or pears for a sweet contrast to the savory flavors.

Storage and Make-Ahead Instructions

This salad is perfect for meal prep! Here’s how to make it last:

  • Refrigeration: Store in an airtight container in the fridge for up to 3 days. The dressing can be stored separately to keep the salad crisp.
  • Make-Ahead: Prepare the salad ingredients and dressing separately. Combine just before serving for maximum freshness.

Comprehensive FAQ

Have questions about the Viral Green Goddess Salad? Here are some answers:

  • Can I make this salad vegan? Absolutely! All ingredients are plant-based!
  • How long does this salad last in the fridge? It stays fresh for up to 3 days if stored correctly.
  • Can I freeze the dressing? Yes, you can freeze the dressing in ice cube trays for easy portioning.
  • What can I serve this salad with? It pairs wonderfully with grilled meats, sandwiches, or as a standalone lunch.
  • Is this salad gluten-free? Yes! All ingredients are gluten-free.
  • Can I add cheese? Yes! Crumbled feta or goat cheese can add a delightful tang.
  • What’s the best way to chop cabbage? Use a sharp knife or food processor for even, fine pieces.
  • How can I make it spicier? Add sliced jalapeños or a dash of hot sauce to the dressing!

Nutrition Tips and Dietary Adaptations

This salad is not only delicious but also adaptable to fit various dietary needs:

  • Low-Carb: Skip the walnuts and focus on the greens and dressing.
  • High-Protein: Add grilled chicken, tofu, or quinoa for a protein boost.
  • Nut-Free: Omit the nuts and use seeds like pumpkin or sunflower instead.
  • Low-Fat: Reduce the olive oil and nutritional yeast to lower fat content.

Essential Equipment Recommendations

To make your cooking experience smooth and enjoyable, consider these kitchen essentials:

  • High-Powered Blender: For a creamy dressing that blends effortlessly.
  • Sharp Chef’s Knife: For precise chopping of veggies and herbs.
  • Large Mixing Bowl: To comfortably toss all your ingredients together.
  • Cutting Board: A sturdy surface for efficient chopping.

Serving Suggestions

Wondering how to present your Green Goddess Salad? Here are some fun serving ideas:

  • On a Bed of Greens: Serve on a bed of mixed greens for added texture.
  • As a Wrap: Use large lettuce leaves to wrap the salad for a fresh, handheld meal.
  • Garnished with Herbs: Top with extra herbs for an aromatic finish.
  • With Whole Grains: Serve alongside quinoa or brown rice for a wholesome meal.

In conclusion, the Viral Green Goddess Salad is your gateway to a healthy, vibrant lifestyle. With its bright flavors, nutrient-rich ingredients, and endless customization options, this salad is sure to become a staple in your kitchen. So grab your ingredients, unleash your creativity, and enjoy the delicious journey into healthy eating!

Viral Green Goddess Salad

Prep Time 15 minutes
Total Time 15 minutes
Servings 4 servings
Calories 250
A vibrant, healthy salad packed with fresh greens and a creamy, flavorful dressing. Perfect for a quick, nutritious meal or side dish.

Ingredients

Vegetables

  • 1 small head green cabbage, finely chopped
  • 1 large cucumber, finely diced
  • 4 green onions green onions, thinly sliced

Herbs & Nuts

  • 1 cup fresh basil (packed)
  • 1 cup fresh spinach (packed)
  • 1/4 cup chives
  • 2 cloves garlic
  • Juice of 1 lemon lemon juice
  • 1/4 cup olive oil
  • 2 tablespoons rice vinegar
  • 3 tablespoons nutritional yeast
  • 1/4 cup walnuts
  • 1/2 teaspoon salt (or to taste)

Instructions 

  • Blend basil, spinach, chives, garlic, lemon juice, olive oil, rice vinegar, walnuts, nutritional yeast, and salt until smooth.
  • Combine chopped cabbage, cucumber, and green onions in a large bowl.
  • Pour dressing over veggies and toss to combine.
  • Adjust seasoning if needed and let sit for 10 minutes before serving.

Notes

This salad is best enjoyed fresh and can be customized with your favorite herbs or additional toppings.
Calories: 250kcal
Cost: $12
Course: Salad
Cuisine: Healthy
Keyword: vegetarian

Get Ready to Sizzle: The Ultimate Air Fryer Chicken Kebabs!

Welcome to the world of air fryer chicken kebabs, where flavor meets fun in the kitchen! If you’ve ever dreamt of crafting a dish that’s not only healthy but also incredibly tasty, you’re in for a treat with this recipe. Bursting with colorful veggies and juicy chicken, these kebabs are perfect for any day of the week. Whether you’re whipping up a quick weeknight dinner or planning a weekend barbecue, this recipe has got you covered!

In this comprehensive guide, we’ll walk you through everything you need to create mouthwatering air fryer chicken kebabs. From the ingredients to expert tips, we’ve got all the details to ensure your kebabs turn out deliciously every time. Let’s jump in!

Why You’ll Love These Air Fryer Chicken Kebabs

This recipe isn’t just about cooking; it’s about enjoying the process and the results! Here are five reasons you’ll love making these kebabs:

  • Quick and Easy: With a preparation time of just 15 minutes and cooking time of 10-14 minutes, you’ll have a delicious meal ready in no time!
  • Flavor Explosion: The marinade packs a punch, ensuring every bite is bursting with delicious flavors that will have your taste buds dancing.
  • Healthier Alternative: Air frying significantly reduces the amount of oil needed compared to traditional frying, making these kebabs a healthier choice.
  • Versatile Ingredients: Customize with your favorite vegetables or proteins, making it easy to cater to your family’s preferences.
  • Perfect for Meal Prep: These kebabs can be made ahead of time, stored, and reheated for easy lunches or dinners!

Ingredient Breakdown

Let’s dive into the ingredients that make these air fryer chicken kebabs a flavorful delight:

  • 16 oz skinless chicken breasts: Cut into 1-inch cubes. This lean protein forms the heart of the dish, providing a satisfying base.
  • 2 tablespoons soy sauce or liquid aminos: This adds depth to the flavor and helps tenderize the chicken.
  • 1 tablespoon Chicken Rub Seasoning: A blend of spices that enhances the overall taste.
  • 1 teaspoon BBQ Rub/Seasoning: For that sweet and smoky flavor that pairs beautifully with chicken.
  • Salt and pepper to taste: Essential seasonings that elevate all the other flavors.
  • ½ green pepper (sliced), ½ red pepper (sliced), ½ yellow pepper (sliced): Colorful and nutritious, these bell peppers add crunch and sweetness.
  • ½ zucchini (sliced): A great way to sneak in more veggies!
  • ¼ red onion (sliced): Adds a mild sweetness and a pop of color.
  • 4-5 grape tomatoes: These can be added for a burst of juicy sweetness.
  • Cooking oil spray (optional): Use this for added moisture and to ensure perfect cooking.

How to Make Air Fryer Chicken Kebabs

Close-up view of air-fried chicken kebabs featuring peppers and tomatoes.

Ready to get cooking? Follow these simple steps to create your air fryer chicken kebabs:

  1. Marinate the Chicken: While marinating is optional, it enhances the flavor! Combine the chicken with soy sauce, chicken seasoning, BBQ seasoning, and salt and pepper in a sealable bag or bowl. Marinate for at least one hour, or up to overnight in the fridge.
  2. Prepare the Skewers: Remove the chicken from the marinade and thread it onto skewers. This can get messy, so keep a towel handy!
  3. Layer with Veggies: Alternate chicken pieces with slices of peppers, zucchini, and onions. Top each skewer with a grape tomato for extra flavor!
  4. Spray with Oil: Lightly spray the kebabs with cooking oil to keep them juicy.
  5. Preheat the Air Fryer: If your air fryer requires preheating, set it to 370°F.
  6. Air Fry: Place the skewers in the air fryer basket (make sure not to overcrowd). Cook for 10-14 minutes, flipping halfway through. Ensure the chicken reaches an internal temperature of 165°F.

Expert Tips for Perfect Kebabs

Here are some pro tips to guarantee your kebabs are a hit:

  • Even Sizing: Cut your chicken and veggies into uniform sizes to ensure even cooking.
  • Soak Wooden Skewers: If using wooden skewers, soak them in water for 30 minutes prior to avoid burning in the air fryer.
  • Check for Doneness: Use a meat thermometer to check the chicken’s internal temperature.
  • Don’t Overcrowd: Give your kebabs enough space in the air fryer basket for optimal air circulation.
  • Experiment with Marinades: Try different marinades like teriyaki or lemon herb for varied flavors.
  • Vegetable Variations: Mix in other vegetables like mushrooms or cherry tomatoes for different tastes.
  • Storage Tips: Leftover kebabs can be stored in an airtight container in the fridge for up to 3 days.
  • Reheat Rights: Reheat leftover kebabs in the air fryer for about 5 minutes to regain their crispiness.

Common Mistakes and Troubleshooting

Even the best cooks can face challenges. Here’s how to troubleshoot some common mistakes:

  • Dry Chicken: Ensure you marinate properly and don’t overcook the chicken. Always check internal temperature.
  • Burnt Veggies: If your veggies are burning, reduce cooking time or increase the size of the pieces.
  • Skewers Sticking: Use a cooking spray or oil to prevent sticking to the air fryer basket.
  • Uneven Cooking: Ensure the air fryer isn’t overcrowded to allow for even air circulation.

Flavor Variations

Get creative with these flavor variations for your air fryer chicken kebabs:

  • Mediterranean Twist: Swap the BBQ seasoning for a blend of oregano, basil, and lemon zest.
  • Spicy Kick: Add some cayenne pepper or chili flakes to the marinade for heat.
  • Sweet and Sour: Use a teriyaki marinade and include pineapple chunks on the skewers.
  • Herbaceous Delight: Incorporate fresh herbs like rosemary or thyme into the marinade for a fresh flavor boost.

Storage and Make-Ahead Instructions

If you want to prepare ahead of time, here’s how to store your kebabs:

  • Make-Ahead: Marinate the chicken the night before and store it in the fridge until you’re ready to cook.
  • Refrigeration: Store leftover kebabs in an airtight container in the fridge for up to 3 days.
  • Freezing: Freeze the marinated chicken (without the veggies) for up to 3 months. Thaw before cooking.

Comprehensive FAQs

Got questions? We’ve got answers! Here are some frequently asked questions about air fryer chicken kebabs:

  • Can I use frozen chicken for this recipe? Yes, but it’s best to thaw it first for even cooking.
  • What vegetables can I use? You can use any veggies you like, but bell peppers, zucchini, and onions work best!
  • How do I know when the chicken is done? Use a meat thermometer to ensure the chicken reaches 165°F.
  • Can I make these kebabs on the grill? Absolutely! Just adjust the cooking time according to the grill’s heat.
  • What if I don’t have skewers? You can use a grill basket or just cook the marinated chicken and veggies directly in the air fryer.
  • Are these kebabs gluten-free? Yes, by using gluten-free soy sauce or liquid aminos!
  • How can I make these kebabs spicier? Add cayenne pepper or hot sauce to the marinade for an extra kick!
  • Can I use chicken thighs instead of breasts? Yes! Just note that thighs may take slightly longer to cook.

Nutrition Tips and Dietary Adaptations

These air fryer chicken kebabs are not just delicious; they’re also nutritious! Here are some tips to maximize their health benefits:

  • Go Lean: Use skinless chicken breasts for a lean source of protein.
  • Load on Veggies: Feel free to add more vegetables to boost fiber and nutrients.
  • Low-Sodium Options: Choose low-sodium soy sauce to keep your meal heart-healthy.
  • Plant-Based Options: Substitute chicken with tofu or tempeh for a vegetarian version!

Equipment Recommendations

To make your air fryer chicken kebabs, here are some essential tools:

  • Air Fryer: Choose a reliable air fryer with sufficient space for skewers.
  • Skewers: Use metal skewers for easy cleaning, or soak wooden skewers before use.
  • Meat Thermometer: An invaluable tool to ensure your chicken is cooked perfectly.
  • Mixing Bowls: For marinating and combining your ingredients.

Serving Suggestions

Serve your air fryer chicken kebabs with these delicious side dishes:

  • Quinoa Salad: A refreshing quinoa salad with herbs and lemon complements the flavors beautifully.
  • Grilled Corn: Grilled corn on the cob adds a sweet crunch to your meal.
  • Pita Bread: Pair with warm pita bread and a yogurt dip for a Mediterranean flair.
  • Rice: Serve over a bed of fluffy rice or cauliflower rice for a complete meal.

Conclusion

If you’re ready to take your cooking game to the next level, these air fryer chicken kebabs are your ticket to a flavorful, healthy, and fun dish! With easy-to-follow steps, expert tips, and endless variations, you’ll never tire of this recipe. So gather your ingredients, fire up that air fryer, and get ready to enjoy a colorful feast that’s as delightful to make as it is to eat. Happy cooking!

Air Fryer Chicken Kebabs

Prep Time 15 minutes
Cook Time 12 minutes
Total Time 27 minutes
Servings 4 servings
Calories 250
Enjoy flavorful and juicy chicken kebabs cooked to perfection in your air fryer, packed with colorful vegetables and easy to prepare.

Ingredients

Protein

  • 16 oz skinless chicken breasts (Cut into 1-inch cubes)
  • 2 tablespoons soy sauce or liquid aminos
  • 1 tablespoon Chicken Rub Seasoning
  • 1 teaspoon BBQ Rub/Seasoning
  • to taste Salt and pepper
  • ½ green pepper sliced
  • ½ red pepper sliced
  • ½ yellow pepper sliced
  • ½ zucchini sliced
  • ¼ red onion sliced
  • optional cooking oil spray (For spraying chicken and veggies)

Instructions 

  • Marinate chicken with soy sauce, seasonings, and salt for at least 1 hour.
  • Thread chicken and vegetables onto skewers, topping with a grape tomato.
  • Spray skewers with cooking oil if desired.
  • Air fry at 370°F (188°C) for 10–14 minutes, flipping halfway, until chicken reaches 165°F (74°C).
  • Serve hot, optionally adding cooked grape tomatoes.

Notes

Use a meat thermometer to ensure chicken is fully cooked.
Calories: 250kcal
Cost: $15
Course: Main Course
Cuisine: American
Keyword: air fryer, Chicken, kebabs

Experience a Flavorful Journey with Vibrant Carrots and Zesty Lentils!

Welcome to a culinary adventure that celebrates the vibrant world of healthy eating! Get ready to dive into the delicious harmony of spiced oven-roasted carrots and a sweet, tangy lentil salad. This dish isn’t just about nutrition; it’s about flavor, color, and joy on your plate. Packed with nutrients and bursting with flavor, this recipe proves that healthy eating can be exciting and fulfilling!

Let’s embark on this journey together and explore why this recipe deserves a spot in your kitchen. Whether you’re a seasoned chef or a cooking novice, you’ll find that creating this delightful meal is not only easy but also incredibly rewarding. So, grab your apron, and let’s get cooking!

Why You’ll Love This Recipe

  • Flavor Explosion: The combination of sweet roasted carrots and tangy lentils creates a mouthwatering medley that dances on your taste buds.
  • Nutrient-Packed: This dish is rich in vitamins, fiber, and protein, making it an excellent choice for a balanced meal.
  • Quick & Easy: With simple ingredients and straightforward steps, you can whip up this meal in under an hour.
  • Versatile & Adaptable: Customize the recipe with your favorite veggies or spices to make it uniquely yours.
  • Perfect for Meal Prep: Prepare it in advance for healthy lunches or dinners throughout the week, saving you time and effort!

Ingredient Breakdown

Let’s take a closer look at the star players in this recipe:

  • Carrots: 4 cups of vibrant, peeled, and sliced carrots. Fresh carrots not only provide natural sweetness but also add a beautiful color to your dish. Want to mix it up? Consider using rainbow carrots for a visually stunning plate!
  • Olive Oil: 2 tablespoons of olive oil help to roast the carrots to perfection. If you’re looking for a lighter alternative, avocado oil works beautifully too!
  • Seasonings: 1 teaspoon each of salt and pepper enhances the flavors, while 1 teaspoon of cumin adds a warm, earthy aroma. Feel free to swap cumin for paprika or turmeric for a different twist!
  • Lentils: 1 cup of green or brown lentils forms the hearty base of the salad. They’re packed with protein and fiber, making them a satisfying addition to your meal.
  • Fresh Vegetables: Add 1 cup each of diced red onion and bell pepper for crunch and freshness.
  • Citrus & Sweetness: 2 tablespoons of lemon juice and 1 tablespoon of honey or maple syrup balance the dish with a zesty and sweet contrast.
  • Hummus: 1 cup of hummus serves as a creamy base to tie all the flavors together. For a dairy-free option, try using tahini or a plant-based spread!

How to Make Spiced Oven-Roasted Carrots with Sweet and Tangy Lentil Salad

A side angle showcasing juicy carrots and a tangy lentil salad on a plate.

Ready to bring these ingredients together? Follow these simple steps to create your masterpiece:

  1. Prep the Carrots: Preheat your oven to 425°F (220°C). Peel and slice the carrots into even pieces to ensure they roast evenly.
  2. Toss with Oil & Spices: In a large bowl, combine the sliced carrots with olive oil, salt, pepper, and cumin. Toss until the carrots are well coated.
  3. Roast the Carrots: Spread the carrots out on a baking sheet in a single layer. Roast for 25-30 minutes, or until they are golden brown and tender.
  4. Cook the Lentils: While the carrots are roasting, rinse the lentils under cold water. In a pot, add the lentils and 2 cups of water. Bring to a boil, then reduce heat and simmer for about 20 minutes, or until tender.
  5. Mix the Salad: Once the lentils are cooked, drain any excess water and transfer them to a bowl. Add the diced red onion, bell pepper, lemon juice, and honey or maple syrup. Toss to combine.
  6. Combine & Serve: Once the carrots are done roasting, add them to the lentil salad. Serve over a generous dollop of hummus for a creamy finish!

Pro Tips for the Perfect Dish

  • Uniform Slices: Ensure your carrot pieces are sliced uniformly for even roasting.
  • Season Generously: Don’t be shy with the spices! They enhance the natural flavors of the dish.
  • Let It Cool: Allow the roasted carrots to cool slightly before mixing them with the salad to keep the textures intact.
  • Experiment with Flavors: Try adding spices like smoked paprika or fresh herbs for an exciting twist!
  • Make-Ahead Magic: Prepare the lentil salad and roasted carrots in advance for a quick meal during busy weekdays.
  • Storage Savvy: Store leftovers in an airtight container in the fridge for up to 3 days, and enjoy cold or reheated!
  • Pair It Right: This dish pairs wonderfully with grilled chicken or fish for added protein, or enjoy it as a hearty vegetarian option.
  • Check for Doneness: Always taste the lentils and carrots before serving to ensure they are cooked to your liking!

Common Mistakes and Troubleshooting

Even the best chefs make mistakes! Here are some common pitfalls and how to avoid them:

  • Overcrowding the Baking Sheet: If the carrots are too close together, they will steam instead of roast. Give them space!
  • Undercooked Lentils: Always check the lentils for doneness; they should be tender but not mushy. Adjust cooking time as needed.
  • Forgetting to Season: Seasoning is key! Don’t skip the salt and spices—they elevate the flavors.
  • Not Tasting as You Go: Make it a habit to taste your dish at various stages to adjust flavors according to your preference.

Variations to Spice Things Up

Want to switch things up? Here are a few fun variations you can try:

  • Spicy Kick: Add chopped jalapeños or a pinch of red pepper flakes for a spicy version of this dish.
  • Nutty Crunch: Incorporate chopped nuts like almonds or walnuts for added texture and nutrition.
  • Herb Infusion: Mix in fresh herbs like parsley, cilantro, or basil for a burst of freshness.
  • Grains Galore: Substitute lentils with quinoa or farro for a different grain base that adds extra chewiness!

Storage and Make-Ahead Instructions

This dish is perfect for meal prepping! Here’s how to store and reheat it:

  • Refrigeration: Store leftovers in an airtight container in the fridge for up to 3 days.
  • Freezing: For longer storage, freeze the roasted carrots and lentil salad in separate containers for up to a month.
  • Reheating: Gently reheat in the microwave or on the stovetop. Add a splash of water or broth to keep it moist.

Frequently Asked Questions

Got questions? We’ve got answers! Here are some common inquiries about this recipe:

  • Can I use different types of lentils? Absolutely! Green or brown lentils work best, but you can also use red lentils for a softer texture.
  • How do I make this dish vegan? Simply use maple syrup instead of honey and dairy-free hummus!
  • Can I roast the carrots ahead of time? Yes! Roast the carrots a day in advance and store them in the fridge until you’re ready to assemble the salad.
  • What can I serve with this dish? It pairs well with grilled proteins, or enjoy it as a hearty vegetarian meal on its own.
  • How do I prevent my carrots from burning? Ensure they are evenly spaced on the baking sheet and keep an eye on them during the last few minutes of roasting.
  • Is this dish gluten-free? Yes! All the ingredients are naturally gluten-free, making it a great option for those with dietary restrictions.
  • Can I add cheese? Yes! Crumbled feta or goat cheese can add a lovely creaminess to the salad.
  • How long does it take to cook lentils? Typically, green or brown lentils take about 20-25 minutes to cook until tender.

Nutritional Tips and Dietary Adaptations

This recipe is not only delicious but also packed with health benefits:

  • High Fiber: Lentils and carrots provide a rich source of dietary fiber, promoting digestive health.
  • Low Calorie: This dish is low in calories yet filling, making it great for weight management.
  • Rich in Vitamins: Carrots are an excellent source of vitamin A, while lentils offer B vitamins and iron.

Essential Equipment for Success

To make this recipe a breeze, here are some tools you’ll need:

  • Sharp Knife: For slicing the carrots and chopping vegetables with ease.
  • Cutting Board: A sturdy surface to prep your ingredients.
  • Baking Sheet: A large, rimmed baking sheet for roasting the carrots.
  • Medium Pot: To cook the lentils perfectly without burning.
  • Mixing Bowl: For tossing your ingredients together.

Serving Suggestions

Present your dish beautifully with these serving ideas:

  • Layer It Up: Serve the lentil salad on a bed of hummus, topped with roasted carrots, and garnish with fresh herbs.
  • Brighten It Up: Add a squeeze of fresh lemon juice just before serving for an extra zing!
  • Pair with Protein: Complement the dish with grilled chicken, fish, or chickpeas for added protein.

In conclusion, the Vibrant Carrots Meet Zesty Lentils recipe is a celebration of flavor, nutrition, and creativity in the kitchen. This dish is perfect for busy weeknights or as a delightful centerpiece for gatherings. With its simplicity and versatility, it makes healthy eating feel like an exciting adventure. So, go ahead and create your version of this vibrant dish—your taste buds will thank you! Happy cooking!

Spiced Oven-Roasted Carrots with Sweet and Tangy Lentil Salad

Prep Time 15 minutes
Cook Time 30 minutes
Total Time 45 minutes
Servings 4 servings
Calories 450
A flavorful and healthy dish combining roasted spiced carrots with a vibrant lentil salad, perfect for a nutritious meal.

Ingredients

Vegetables

  • 4 cups Carrots, peeled and sliced (Opt for fresh, vibrant carrots)
  • 1 tablespoon Olive oil (Can be substituted with avocado oil)
  • 1 teaspoon Salt
  • 1 teaspoon Pepper
  • 1 teaspoon Cumin (Can substitute with paprika or turmeric)

Salad ingredients

  • 1 cup Lentils (Green or brown varieties are best)
  • 1 cup Red onion, diced
  • 1 cup Bell pepper, diced
  • 2 tablespoons Lemon juice
  • 1 tablespoon Honey or maple syrup (Agave nectar can be used as a low-calorie alternative)

Dips

  • 1 cup Hummus (Can be substituted with dairy-free options if needed)

Instructions 

  • Preheat oven to 400°F (200°C). Toss carrots with olive oil, salt, pepper, and cumin. Roast for 25-30 minutes until tender.
  • Cook lentils in boiling water until tender, about 20 minutes. Drain and let cool.
  • In a bowl, combine cooked lentils, diced red onion, bell pepper, lemon juice, and honey. Mix well.
  • Serve roasted carrots alongside the lentil salad with hummus on the side.

Notes

For added flavor, sprinkle fresh herbs like parsley or cilantro before serving.
Calories: 450kcal
Cost: $15
Course: Main Course
Cuisine: fusion
Keyword: Carrots, Lentils

Unlock a Flavor Explosion with This Zesty Lemon Tahini Chicken Power Bowl!

Welcome to a culinary adventure that will transform your dinner routine! If you’re looking to spice things up with a nutritious meal that’s not only vibrant but also loaded with flavor, look no further than the Lemon Tahini Chicken Power Bowl. This dish combines succulent roasted chicken, crunchy roasted chickpeas, nutty tahini, and fresh greens, all beautifully arranged in a bowl that’s as delightful to the eyes as it is to the taste buds. Not only is it a feast for the senses, but it’s also packed with energy-boosting nutrients. Let’s dive into why you’ll absolutely love this recipe!

Why You’ll Love This Recipe

  • Quick and Easy: This meal comes together in less than an hour, perfect for busy weeknights when you want something delicious without a ton of fuss.
  • Flavor-Packed: The creamy lemon tahini sauce elevates the entire bowl, making even the simplest ingredients sing with taste.
  • Versatile and Customizable: You can easily swap out ingredients based on what you have on hand or your dietary preferences—make it gluten-free or plant-based!
  • Meal Prep Friendly: Ideal for meal prepping, this bowl can be made ahead and stored, with flavors that actually improve after a day in the fridge.
  • Balanced Nutrition: This dish is a powerhouse of protein, healthy fats, and fiber, ensuring you’ll feel satisfied and energized!

Ingredients Breakdown

Let’s explore each component of our Lemon Tahini Chicken Power Bowl, including some handy substitutions to suit your taste and pantry needs.

  • Chicken: Use boneless, skinless chicken breasts for a lean protein source. For a vegetarian option, substitute with grilled tofu or chickpeas.
  • Olive Oil: Essential for roasting and enhancing flavor. You can also use avocado oil for a different twist.
  • Farro: This nutty grain serves as a hearty base. Quinoa or brown rice are great gluten-free alternatives!
  • Mixed Greens: Spinach, arugula, or kale add freshness and crunch. Feel free to use any salad greens you enjoy.
  • Cherry Tomatoes and Cucumber: These add a refreshing crunch. Substitute with bell peppers or radishes if desired.
  • Chickpeas: Roasted chickpeas add protein and texture. You can replace them with roasted sweet potatoes for a different flavor profile.
  • Tahini: This creamy sesame paste is the star of the show. If you’re out, peanut butter can work in a pinch, though the flavor will differ.
  • Lemon Juice: Freshly squeezed lemon juice brightens the dish. Lime juice can be used as an alternative.

Step-by-Step Instructions

Side view of a vibrant Lemon Tahini Chicken Power Bowl with mixed greens, cherry tomatoes, and tahini dressing.

Ready to whip up this delicious Lemon Tahini Chicken Power Bowl? Follow these simple steps for a flawless result!

  1. Preheat your oven: Set your oven to 400°F (200°C).
  2. Prepare the chicken: Rub the chicken breasts with olive oil, cumin, paprika, salt, and pepper. Place them on a parchment-lined baking sheet and roast for 20 to 25 minutes until cooked through. Allow to rest for 5 minutes, then slice into bite-sized pieces.
  3. Cook the farro: In a saucepan, combine farro, water, and salt. Bring to a boil, then reduce heat and simmer for 25 to 30 minutes until tender. Drain any excess water.
  4. Roast the chickpeas: On a separate baking sheet, toss drained chickpeas with olive oil, cumin, and salt. Roast for 15 to 20 minutes until golden and slightly crispy.
  5. Make the tahini sauce: In a bowl, whisk together tahini, lemon juice, water, olive oil, minced garlic, salt, and pepper until smooth. Adjust water content as needed for your desired consistency.
  6. Assemble the bowls: Distribute cooked farro evenly among 4 bowls. Layer with mixed greens, sliced chicken, roasted chickpeas, cherry tomatoes, cucumber, and red onion.
  7. Drizzle with sauce: Generously drizzle each bowl with lemon tahini sauce. Serve immediately!

Expert Tips for Perfecting Your Bowl

Here are some insider tips to ensure your Lemon Tahini Chicken Power Bowl is a smashing success!

  • Let the chicken rest: Allowing the chicken to rest after roasting helps retain its juices, ensuring every bite is tender and flavorful.
  • Soak the farro: If you soak the farro for a few hours or overnight, it will cook faster and have a better texture.
  • Customize the tahini sauce: Adjust the thickness of your tahini sauce by adding more water for a drizzle or less for a thicker dressing.
  • Mix and match veggies: Don’t hesitate to add seasonal veggies or whatever you have at home—zucchini, bell peppers, or even roasted mushrooms!
  • Store properly: Keep leftover bowls in airtight containers in the fridge for up to 3-4 days. Reheat gently to preserve flavor and texture.
  • Make it spicy: Add a sprinkle of red pepper flakes or a dash of hot sauce to the tahini sauce for some heat!
  • Experiment with grains: Try swapping farro with quinoa or barley for a new flavor and texture experience.
  • Garnish with herbs: Fresh herbs like parsley or cilantro can elevate the flavor profile and add a pop of color!

Common Mistakes and Troubleshooting

Here are some common pitfalls and how to avoid them!

  • Overcooking the chicken: Always check the internal temperature of the chicken, aiming for 165°F (75°C) to avoid dryness.
  • Undercooked farro: Make sure the farro is tender before serving; undercooked grains can ruin your bowl experience.
  • Tahini sauce too thick: If your sauce is too thick, simply whisk in a bit more water until it reaches your desired consistency.
  • Too salty: If any component is too salty, balance it out with fresh lemon juice or a touch of honey to offset the saltiness.

Variations on the Classic Bowl

Feel like switching things up? Here are some fun variations to try:

  • Breakfast Bowl: Use scrambled eggs instead of chicken and top with avocado and salsa for a zesty morning meal.
  • Vegan Delight: Swap chicken for roasted tofu or tempeh, and use a plant-based yogurt in the tahini sauce.
  • Spicy Southwest Bowl: Add black beans, corn, and diced jalapeños, and use a chipotle tahini sauce for a smoky twist.
  • Asian-Inspired Bowl: Serve with sesame oil, edamame, and a drizzle of sriracha for a fusion take!

Storage and Make-Ahead Instructions

This power bowl is perfect for meal prepping! Here’s how to store and make it ahead:

  • Refrigeration: Store components separately in airtight containers. The chicken, farro, and chickpeas will last up to 4 days in the fridge.
  • Make-ahead tahini sauce: Prepare the tahini sauce in advance and store it in the refrigerator for up to a week!
  • Assemble fresh: For the best texture and flavor, assemble the bowls just before serving.

Comprehensive FAQ

You’ve got questions, and we’ve got answers! Here are some common questions about the Lemon Tahini Chicken Power Bowl:

  • Can I make this dish gluten-free?
    Absolutely! Just substitute farro with quinoa or brown rice.
  • How can I make this dish vegan?
    Swap the chicken for roasted chickpeas or tofu, and use plant-based yogurt for the tahini sauce.
  • What can I use instead of tahini?
    If you’re out of tahini, you can use peanut butter or sunflower seed butter, but the flavor will change.
  • How do I store leftovers?
    Keep leftovers in airtight containers in the refrigerator for up to 4 days. Reheat gently!
  • Can I freeze this bowl?
    It’s best to freeze components separately (like the chicken and grains) and assemble fresh.
  • What’s the best way to reheat this bowl?
    Gently reheat in the microwave or on the stovetop, adding a splash of water to retain moisture.
  • Is this meal suitable for kids?
    Yes! The flavors are mild and appealing to children, plus it’s nutritious!
  • How can I increase the protein content?
    Consider adding extra chickpeas or a side of Greek yogurt for a protein boost!

Nutritional Benefits and Dietary Adaptations

This Lemon Tahini Chicken Power Bowl is not just delicious; it’s also packed with nutrients:

  • High in Protein: The chicken and chickpeas make this bowl a fantastic source of protein for muscle repair and growth.
  • Rich in Fiber: The farro, chickpeas, and mixed greens provide a hearty dose of dietary fiber, promoting digestive health.
  • Healthy Fats: Olive oil and tahini contribute healthy fats that are essential for heart health and satiety.
  • Vitamins and Minerals: Fresh veggies like tomatoes and greens are loaded with vitamins A, C, and K, supporting overall health.

Must-Have Equipment for Your Kitchen

To make your Lemon Tahini Chicken Power Bowl, here’s what you’ll need:

  • Sheet Pan: Perfect for roasting chicken and chickpeas.
  • Medium Saucepan: For cooking the farro or quinoa.
  • Mixing Bowls: Useful for preparing the tahini sauce and tossing the chickpeas.
  • Whisk: For mixing the tahini sauce until creamy and smooth.
  • Sharp Knife: For slicing the chicken and veggies with precision.

Serving Suggestions

Serve your Lemon Tahini Chicken Power Bowl with a side of crusty whole grain bread or a light soup for a complete meal. You can also pair it with a refreshing beverage like iced herbal tea or infused water to complement the vibrant flavors!

Conclusion

There you have it—the ultimate guide to crafting an unforgettable Lemon Tahini Chicken Power Bowl! With its vibrant flavors, balanced nutrition, and endless customization options, this dish is sure to become a staple in your culinary repertoire. So, grab your ingredients, unleash your creativity, and let this bowl elevate your dinner game to new heights. Happy cooking!

Lemon Tahini Chicken Power Bowl

Prep Time 15 minutes
Cook Time 40 minutes
Total Time 55 minutes
Servings 4 servings
Calories 550
A vibrant and nutritious bowl combining roasted chicken, hearty farro, fresh vegetables, and a tangy lemon tahini sauce for a wholesome meal.

Ingredients

Chicken

  • 2 large boneless, skinless chicken breasts (approximately 1.1 lbs)
  • 1 tablespoon olive oil
  • 1 teaspoon ground cumin
  • 1/2 teaspoon smoked paprika
  • 1/2 teaspoon salt
  • 1/4 teaspoon black pepper

Farro

  • 1 cup uncooked farro
  • 3 cups water
  • 1/2 teaspoon salt

Vegetables & Legumes

  • 4 cups mixed baby greens (spinach, arugula, kale)
  • 1 cup cherry tomatoes (halved)
  • 1 cup cucumber (diced)
  • 1/2 red onion red onion (thinly sliced)
  • 1 can (14 oz) chickpeas (drained and rinsed)

Lemon Tahini Sauce

  • 1 tablespoon olive oil
  • 1/2 teaspoon ground cumin
  • 1/4 teaspoon salt
  • 1/3 cup tahini
  • 1/4 cup fresh lemon juice
  • 2 tablespoons water (plus additional as needed)
  • 1 tablespoon olive oil
  • 1 garlic clove garlic (finely minced)
  • 1/2 teaspoon salt
  • 1/4 teaspoon ground black pepper

Instructions 

  • Preheat oven to 400°F (200°C).
  • Rub chicken with olive oil, cumin, paprika, salt, and pepper; roast for 20-25 minutes. Rest, then slice.
  • Cook farro in water with salt for 25-30 minutes until tender. Drain.
  • Roast chickpeas with olive oil, cumin, and salt for 15-20 minutes until crispy.
  • Whisk tahini, lemon juice, water, olive oil, garlic, salt, and pepper to make sauce. Adjust water for desired consistency.
  • Assemble bowls with farro, greens, chicken, chickpeas, tomatoes, cucumber, onion, and drizzle with sauce. Serve immediately.

Notes

For extra flavor, add fresh herbs or a squeeze of lemon on top.
Calories: 550kcal
Cost: $15
Course: Main Course
Cuisine: Mediterranean
Keyword: Chicken, Healthy, Vegetables

Welcome to Your New Favorite Recipe: Garlic Butter Shrimp Rice Bowls!

Are you ready to elevate your weeknight dinners with a dish that’s as easy to make as it is delicious? Look no further than these Garlic Butter Shrimp Rice Bowls! Packed with juicy shrimp, aromatic jasmine rice, and a savory garlic-infused sauce, this meal is a symphony of flavors that will have your taste buds dancing. Whether you’re a busy professional or a home-cooking enthusiast, this recipe is designed to make healthy eating both fun and accessible. Let’s dive into the magic of this dish and discover why it’s destined to become your go-to meal!

Why You’ll Love This Recipe

  • Quick & Easy: With shrimp cooking in just minutes, you can whip up this dish in under 30 minutes. Perfect for busy weeknights!
  • Flavor Explosion: The combination of garlic, soy sauce, and honey creates a rich, savory sauce that coats the shrimp beautifully.
  • Nutritious & Balanced: This meal is high in protein and paired with fiber-rich jasmine rice, making it a well-rounded dish.
  • Customizable: Add your favorite vegetables or grains to make it your own. Think zucchini, bell peppers, or even quinoa!
  • Family-Friendly: The mild flavors appeal to all ages, making it a surefire hit at the dinner table.

Ingredients You’ll Need

Here’s what you’ll need to create these delicious bowls:

  • 1 lb shrimp: Peeled and deveined for quick cooking. Fresh or frozen works!
  • 1 large shallot: Thinly sliced for a sweet, mild flavor that complements the shrimp.
  • 1 cup scallions: Chopped into 1-inch pieces for a pop of freshness.
  • 1 cup uncooked jasmine rice: The base of the bowl, fluffy and aromatic.
  • 3/4 cup chicken stock: The sauce base that adds savory depth.
  • 3 tbsp low sodium soy sauce: For that umami flavor (use GF tamari if needed).
  • 2 tbsp honey: Balances the flavors with a touch of sweetness.
  • 1 tbsp rice vinegar: Adds brightness and tang to the dish.
  • 2 tbsp avocado oil: A high smoke point oil perfect for sautéing.
  • 1 tbsp cornstarch: Thickens the sauce to perfection.
  • 4-6 large garlic cloves: Pressed for a bold garlic flavor.

Pro Tips for Perfect Garlic Butter Shrimp Rice Bowls

Juicy shrimp mixed with fluffy jasmine rice and fresh scallions in a cozy bowl.
  • Prep Ahead: Cook your jasmine rice in advance and store it in the fridge. This cuts down on your cooking time significantly.
  • Don’t Overcook the Shrimp: Shrimp cooks quickly; remove them from heat as soon as they turn opaque to keep them juicy.
  • Thicken the Sauce: If using cornstarch, make sure to mix it with a bit of cold chicken stock before adding it to the pan to prevent lumps.
  • Experiment with Flavors: Feel free to add a splash of lime juice for extra brightness or a dash of red pepper flakes for heat!
  • Storage Tips: Store leftovers in an airtight container in the refrigerator for up to 2 days.
  • Freezing Options: You can freeze the shrimp and sauce separately for up to 3 months; just reheat when ready to enjoy!
  • Cooking Rice in Broth: For extra flavor, cook your jasmine rice in chicken or vegetable broth instead of water.
  • Ingredient Substitutions: Swap out shrimp for chicken or tofu to create a different protein experience!

Common Mistakes and Troubleshooting

Even the best chefs face challenges! Here are some common mistakes to avoid:

  • Overcrowding the Pan: Cooking shrimp in batches ensures they sear properly instead of steaming.
  • Not Prepping Sauce Ahead: Make the sauce in advance to save time and ensure even flavor distribution.
  • Using Too Much Heat: Medium heat is perfect for sautéing; too high and your garlic will burn!

Variations to Try

Here are some fun twists on the classic Garlic Butter Shrimp Rice Bowl:

  • Spicy Garlic Shrimp: Add sliced jalapeños or red pepper flakes for a kick!
  • Vegetable-Packed Bowls: Toss in broccoli, bell peppers, or snap peas for added nutrition.
  • Coconut Curry Version: Swap soy sauce for coconut milk and add curry powder for an exotic twist.
  • Herb & Lemon Shrimp: Finish with fresh herbs like parsley or cilantro and a squeeze of lemon for brightness.

Storage and Make-Ahead Instructions

Want to make this meal in advance? Here’s how:

  • Make Ahead: Cook shrimp and sauce in advance, store separately, and reheat when ready to serve.
  • Fridge Life: Leftover shrimp can last up to 2 days in the refrigerator.
  • Freezing Instructions: Freeze shrimp and sauce in a freezer-safe bag for up to 3 months.

Frequently Asked Questions

Curious about garlic butter shrimp rice bowls? Here are some common questions:

  • Can I use frozen shrimp? Yes! Just thaw them before cooking for optimal texture.
  • What can I substitute for jasmine rice? Brown rice, basmati, or even quinoa can be great alternatives.
  • Is this recipe gluten-free? Absolutely! Use gluten-free soy sauce or tamari for a gluten-free option.
  • How can I make this dish spicier? Add crushed red pepper flakes or fresh chopped chili peppers to the sauce.
  • Can I use other proteins? Yes! Chicken, tofu, or even scallops can be delicious substitutes.
  • What’s the best way to reheat leftovers? Use a skillet over medium heat for the best results, adding a splash of water or broth to keep it moist.
  • Can I add vegetables? Absolutely! Adding vegetables like bell peppers or snap peas can enhance the dish.
  • How do I know when the shrimp are done? They should be opaque and slightly firm to the touch—cooking time is usually just a few minutes.

Nutrition Tips and Dietary Adaptations

Make this dish fit your dietary needs:

  • Low-Calorie Version: Use less oil and serve with a larger portion of vegetables.
  • High-Protein Boost: Pair with a side of edamame or chickpeas for added protein.
  • Vegan Adaptation: Substitute shrimp for marinated tofu and use vegetable broth.

Essential Kitchen Equipment

Here’s what you’ll need to create your garlic butter shrimp rice bowls:

  • Large Skillet: A non-stick skillet is ideal for sautéing the shrimp.
  • Mixing Bowl: For whisking the sauce ingredients together.
  • Rice Cooker: Optional but simplifies the rice cooking process!
  • Cutting Board: For easy prep of your shallots and scallions.
  • Chef’s Knife: A sharp knife will make slicing and dicing a breeze!

Serving Suggestions

How to make your bowls shine:

  • Garnish: Top with sesame seeds or fresh herbs for an added touch of flavor.
  • Pair with a Salad: A light cucumber salad can complement the dish beautifully.
  • Serve with Lime Wedges: The citrus adds a zesty kick to each bite!

Wrapping It Up: Your New Go-To Meal

These Garlic Butter Shrimp Rice Bowls are not just a meal; they’re a celebration of flavor, nutrition, and ease. Whether you’re cooking for yourself or feeding a crowd, this recipe promises satisfaction and joy. So, grab your ingredients, channel your inner chef, and let the kitchen be your playground! Enjoy every bite, and remember—healthy can be delicious, exciting, and oh-so-easy!

Garlic Butter Shrimp Rice Bowls: The Ultimate Weeknight Comfort Food

Prep Time 10 minutes
Cook Time 15 minutes
Total Time 25 minutes
Servings 4 servings
Calories 450
Enjoy a quick and flavorful shrimp rice bowl with garlic, scallions, and a savory sauce, perfect for weeknights.

Ingredients

Protein

  • 1 lb shrimp (peeled and deveined for quick cooking)

Vegetables

  • 1 large shallot (thinly sliced for sweet, mild flavor)
  • 1 cup scallions (chopped into 1-inch pieces for freshness)

Grains

  • 1 cup uncooked jasmine rice (fluffy and aromatic)

Broth & Sauces

  • 3/4 cup chicken stock (sauce base with savory depth)
  • 3 tbsp low sodium soy sauce (umami and saltiness (use GF tamari if needed))
  • 2 tbsp honey (balances flavors with sweetness)
  • 1 tbsp rice vinegar (adds brightness)
  • 2 tbsp avocado oil (high smoke point for sautéing)
  • 1 tbsp cornstarch (thickens the sauce)
  • 4-6 cloves garlic (pressed for bold flavor)

Instructions 

  • Cook jasmine rice according to package instructions.
  • Whisk together chicken stock, soy sauce, honey, rice vinegar, avocado oil, cornstarch, and pressed garlic. Set aside.
  • Preheat skillet, sauté shallots until browned, then add scallions and shrimp. Cook until shrimp turn opaque.
  • Pour in prepared sauce, simmer 1-2 minutes until thickened, then serve over rice.

Notes

Use fresh garlic for the best flavor and adjust sauce thickness as needed.
Calories: 450kcal
Cost: $15
Course: Main Course
Cuisine: Asian
Keyword: shrimp

Unleash the Flavors: Your Guide to California Chicken Salad

Welcome to the vibrant world of California Chicken Salad, where fresh ingredients and bold flavors collide to create a dish that’s not just a meal, but an experience! This salad is a delightful fusion of crunchy pecans, juicy grapes, and creamy Greek yogurt, making it a perfect choice for a quick lunch, a picnic, or a family dinner. In this guide, we’ll explore everything you need to know about making the best California Chicken Salad that’s both healthy and delicious!

Why You’ll Love This Recipe

This California Chicken Salad is more than just a pretty plate; it’s packed with benefits that make it a must-try recipe:

  • Quick and Easy: With minimal prep time and straightforward steps, you can whip up this salad in under 30 minutes!
  • Flavor Explosion: The combination of sweet grapes, crunchy celery, and nutty pecans creates a delicious medley that tantalizes your taste buds.
  • Nutritious Goodness: Packed with protein from chicken and healthy fats from Greek yogurt and nuts, this salad fuels your body with essential nutrients.
  • Versatile Meal: Enjoy it on its own, as a sandwich filling, or served on a bed of greens for a refreshing twist.
  • Meal Prep Friendly: Make a batch ahead of time and store it in the fridge for quick, healthy meals throughout the week!

Ingredients Breakdown

Let’s dive into what you’ll need to create this colorful dish. Here’s the full list of ingredients for the Ultimate California Chicken Salad:

  • ⅓ cup pecans (chopped)
  • 3 cups cooked chicken (cut into ¼” cubes; about 1-2 chicken breasts, rotisserie chicken works great!)
  • 1-2 stalks celery (cut in half lengthwise and sliced; about 1 cup)
  • 1 cup seedless red grapes (quartered)
  • 1-2 green onion (thinly sliced)
  • ½ cup full-fat Greek yogurt
  • 2 tsp dijon mustard
  • 2 tbsp honey
  • 1½ tsp apple cider vinegar
  • ½ tsp poppy seeds
  • ½ tsp salt (plus more to taste)
  • ¼ tsp pepper

Ingredient Substitutions: Don’t have all the ingredients? Here are some tasty alternatives:

  • Chicken: Use canned chicken or tofu for a vegetarian option.
  • Pecans: Swap with walnuts or almonds for a different nutty flavor.
  • Greek Yogurt: Substitute with mayo or a plant-based yogurt for a dairy-free version.
  • Grapes: Diced apples or dried cranberries can add a sweet touch.
  • Honey: Agave syrup or maple syrup work beautifully as substitutes.

How to Make the Best California Chicken Salad

Side view of a colorful California Chicken Salad with green onions and celery.

Ready to get cooking? Follow these simple steps to create a salad that will become a staple in your kitchen:

  1. Toast the Pecans: Heat a small skillet over medium-low heat. Add the chopped pecans and toast for 4-5 minutes, stirring often. Let them cool completely.
  2. Prepare the Dressing: In a large bowl, combine Greek yogurt, dijon mustard, honey, vinegar, poppy seeds, salt, and pepper. Whisk until smooth and season to taste.
  3. Combine Ingredients: To the same bowl, add the chicken, celery, grapes, green onion, and toasted pecans. Stir everything together until well combined, and adjust seasoning if necessary.
  4. Chill and Serve: Let the salad chill in the fridge for at least 30 minutes, but it’s even better if you let it marinate overnight. Serve chilled and enjoy!

Pro Tips for Perfecting Your Salad

Want to elevate your chicken salad game? Check out these expert insights:

  • Choose Quality Chicken: For best results, use high-quality rotisserie chicken or poach your own for fresh flavor.
  • Don’t Skip the Chill: Allowing the salad to chill helps the flavors meld beautifully together.
  • Texture is Key: Ensure a mix of crunchy and creamy elements by balancing celery, nuts, and dressing.
  • Adjust Sweetness: Feel free to tweak the honey level to match your taste preferences.
  • Fresh Ingredients Matter: Use the freshest veggies and fruits for a vibrant and crisp salad.
  • Experiment with Herbs: Fresh herbs like dill or parsley can add an aromatic touch to your salad.
  • Serving Ideas: Serve over mixed greens, in lettuce wraps, or even as a sandwich filling!
  • Store Properly: Keep leftovers in an airtight container in the fridge for up to 3 days.

Common Mistakes and Troubleshooting

Avoid these pitfalls to ensure your chicken salad turns out perfectly every time:

  • Overmixing: Gently fold ingredients together to maintain crunchy textures.
  • Too Much Dressing: Start with less dressing and add more as needed to prevent sogginess.
  • Using Old Ingredients: Fresh ingredients make all the difference; don’t skimp on quality!

Variations to Try

Feeling adventurous? Here are some fun variations to switch things up:

  • Fruit-Loaded Salad: Add diced apples and dried cranberries for a fruity twist.
  • Spicy Kick: Toss in some diced jalapeños or a dash of hot sauce for heat.
  • Avocado Delight: Mix in diced avocado for a creamy texture and healthy fats.
  • Herbaceous Greens: Add fresh herbs like cilantro or basil for a fragrant boost.

Storing and Make-Ahead Instructions

This California Chicken Salad is perfect for meal prep! Here’s how to store it:

  • Refrigerate: Store in an airtight container in the fridge for up to 3 days.
  • Freezing: It’s best enjoyed fresh, but if you need to freeze it, do so without the dressing. Thaw in the fridge and mix in the dressing before serving.
  • Make-Ahead: Prepare the salad a day ahead of time for flavors to develop and make mealtime a breeze!

Frequently Asked Questions

Got questions? We’ve got answers! Here are some common queries about California Chicken Salad:

  • Can I use canned chicken? Absolutely! It’s a great time-saver and works perfectly in this salad.
  • How long does this salad last? It will stay fresh in the fridge for about 3 days when stored properly.
  • Can I make it dairy-free? Yes! Substitute Greek yogurt with a dairy-free yogurt or mayo.
  • What can I serve with this salad? It’s fantastic on its own, but pairs well with whole grain bread or a side of fresh fruit.
  • How can I make it lower in calories? Use less dressing and opt for leaner chicken options.
  • Is it gluten-free? Yes, as long as you ensure that all ingredients are gluten-free.
  • Can I use other fruits? Yes! Feel free to experiment with different fruits to find your favorite combination.
  • What’s the best way to serve it? Chill and serve it in a lettuce wrap or on a bed of greens for a refreshing touch!

Nutrition Tips and Dietary Adaptations

This California Chicken Salad can easily fit into various dietary needs:

  • High Protein: The chicken and Greek yogurt provide a protein-rich base that supports muscle health.
  • Low Carb Option: Serve it in lettuce wraps instead of bread for a low-carb meal.
  • Heart-Healthy: Nuts and healthy fats from avocado can help promote heart health.
  • Vegetarian Version: Substitute chicken with chickpeas or tofu for a plant-based alternative.

Essential Equipment for Your Kitchen

To make your California Chicken Salad, you’ll need these kitchen essentials:

  • Cutting board: For chopping all your fresh ingredients with ease.
  • Sharp knife: A good knife is crucial for clean cuts on chicken and vegetables.
  • Mixing bowl: A large bowl is essential for combining all ingredients smoothly.
  • Whisk: Perfect for mixing the dressing until smooth and creamy.
  • Skillet: For toasting the pecans to bring out their flavor.

Serving Suggestions

Now that your California Chicken Salad is ready, here are some tasty ways to serve it:

  • On a bed of greens: Serve over mixed greens for a fresh and healthy meal.
  • As a sandwich filling: Use it as a delectable filling for sandwiches or wraps.
  • On crackers: Spread it on whole-grain crackers for a crunchy snack.
  • With fruit: Pair with a side of fresh fruit for a balanced meal.

In conclusion, the California Chicken Salad is not just a meal; it’s a colorful, flavorful adventure that delights the senses. With this comprehensive guide, you’re all set to create the most delicious chicken salad ever. So grab your ingredients, put on your apron, and let’s get cooking! Here’s to making healthy food fun, exciting, and, most importantly, delicious!

California Chicken Salad

Prep Time 15 minutes
Cook Time 10 minutes
Total Time 25 minutes
Servings 4 servings
Calories 350
A fresh and flavorful chicken salad with grapes, pecans, and a creamy yogurt dressing, perfect for a quick lunch or light dinner.

Ingredients

Nuts and Seeds

  • cup pecans (chopped)
  • 3 cups cooked chicken (cut into ¼" cubes; about 1-2 chicken breasts)
  • 1-2 stalks celery (cut in half lengthwise and sliced; about 1 cup)
  • 1 cup seedless red grapes (quartered)
  • 1-2 green onions green onion (thinly sliced)
  • ½ cup full-fat Greek yogurt
  • 2 tsp dijon mustard
  • 2 tbsp honey
  • tsp apple cider vinegar
  • ½ tsp poppy seeds
  • ½ tsp salt (plus more to taste)
  • ¼ tsp pepper

Instructions 

  • Toast pecans in a skillet over medium-low heat for 4-5 minutes, then let cool.
  • Mix Greek yogurt, mustard, honey, vinegar, poppy seeds, salt, and pepper in a bowl.
  • Add chicken, celery, grapes, green onion, and pecans to the dressing; stir to combine. Chill for at least 30 minutes before serving.

Notes

Chill the salad for best flavor. Adjust seasoning as needed.
Calories: 350kcal
Cost: $15
Course: Salad
Cuisine: American
Keyword: Chicken

Are you ready to experience a game-changer in your kitchen? These 2-ingredient cottage cheese wraps are more than just a quick meal; they’re a delightful way to enjoy healthy, protein-packed snacks that can be customized to suit your taste buds. Whether you’re on the go or looking for a fun and nutritious meal, these wraps are here to elevate your culinary experience. Let’s dive into why you’ll love this recipe and how easy it is to make!

Why You’ll Love This Recipe

  • Quick and Easy: With just two main ingredients, this recipe comes together in mere minutes, making it perfect for busy days.
  • Protein-Packed: Each wrap is loaded with protein from the cottage cheese and eggs, keeping you fueled and satisfied.
  • Customizable: You can easily adapt the flavors to fit your mood or dietary needs by adding your favorite spices or fillings.
  • Low-Carb Alternative: Ditch the bread without sacrificing flavor! These wraps are a fantastic low-carb option.
  • Great for Meal Prep: Prepare a batch ahead of time, and you’ll have nutritious wraps ready to grab and go all week long.

Ingredients Breakdown

Let’s take a closer look at the ingredients that make these wraps so special:

  • 1 cup cottage cheese: Fresh and at room temperature, this creamy cheese is the star ingredient. For a different texture, you can try ricotta or Greek yogurt instead.
  • 2 large eggs: These act as a binder and provide additional protein. If you’re looking for a vegan option, consider using flax eggs (1 tablespoon ground flaxseed mixed with 2.5 tablespoons water).
  • 1/2 teaspoon salt (optional): Enhances the flavor; adjust to taste.
  • 1/4 teaspoon garlic powder, pepper, or dried herbs (optional): Feel free to spice things up with your favorite seasonings!

How to Make Cottage Cheese Wraps

Follow these simple steps to create your delicious wraps:

  1. Combine the cottage cheese, eggs, and any optional seasonings in a blender. Blend for about 30 seconds until you have a smooth, pourable batter that’s ready to be cooked.
  2. Place a nonstick skillet over low heat and lightly grease it with cooking spray or a dab of oil. Allow it to warm for 1-2 minutes until it’s ready for cooking.
  3. Pour approximately ⅓ cup of the batter into the center of the pan. Gently tilt and swirl the skillet to spread the batter into a thin, even circle.
  4. Let the wrap cook for 3-5 minutes, watching for the surface to look dry and the edges to start lifting. Carefully flip with a spatula and cook the other side for 1-2 minutes until it’s lightly golden.
  5. Gently remove the wrap from the skillet and let it cool on a plate. Repeat with the remaining batter to yield 4-5 wraps.

Pro Tips for Perfect Wraps

Side view of cottage cheese wraps on a plate, looking fresh and appetizing.
  • Use room temperature ingredients: This helps achieve a smoother batter.
  • Don’t overcook: Keep an eye on the wraps; they should be golden and slightly soft, not crispy.
  • Experiment with flavors: Add fresh herbs like basil or cilantro to the batter for a fresh twist.
  • Storage matters: Store leftovers in an airtight container with parchment paper between layers to prevent sticking.
  • Check for doneness: The surface should be dry and the edges should lift easily before flipping.
  • Don’t rush the flip: Allow the first side to set properly before trying to flip to avoid tearing.
  • Use a nonstick skillet: This is crucial to ensure easy release of the wraps.
  • Make a double batch: These wraps are perfect for meal prep, and they freeze well!

Common Mistakes and Troubleshooting

Even the best chefs make mistakes! Here are a few common pitfalls and how to avoid them:

  • Too thick batter: If your batter is too thick, add a splash of milk to achieve a smoother consistency.
  • Wraps falling apart: This can happen if they’re undercooked. Make sure to let them cook long enough for the edges to lift.
  • Sticking to the pan: Ensure your skillet is properly greased, and use a nonstick pan for the best results.
  • Flavorless wraps: Don’t skip the seasoning! A little salt and spice go a long way in enhancing flavor.

Delicious Variations

Switch things up with these fun variations of the basic recipe:

  • Veggie Delight: Mix in finely chopped spinach, bell peppers, or zucchini to the batter for added nutrients.
  • Cheesy Wraps: Add shredded cheese such as mozzarella or cheddar to the batter for a cheesy twist.
  • Spicy Kick: Incorporate diced jalapeños or crushed red pepper flakes for a spicy flavor boost.
  • Sweet Treat: For a dessert version, add a tablespoon of vanilla extract and a pinch of cinnamon to the batter, then fill with fruit.

Storage and Make-Ahead Instructions

Ready to make-ahead? Here’s how to store and reheat your wraps:

  • Refrigeration: Store wraps in an airtight container in the fridge for up to 3 days.
  • Freezing: To freeze, layer parchment paper between wraps and store in a freezer-safe container for up to 2 months. Reheat in the skillet or microwave when ready to enjoy.
  • Make ahead: Prepare the batter in advance and store it in the fridge for up to 24 hours before cooking.

Frequently Asked Questions

  • Can I use different types of cheese? Yes! Ricotta or Greek yogurt can be great alternatives.
  • What can I fill my wraps with? The possibilities are endless! Try lean meats, veggies, hummus, or even breakfast ingredients like scrambled eggs.
  • Are these wraps gluten-free? Yes, they are naturally gluten-free as long as you use gluten-free seasonings.
  • Can I make these vegan? Absolutely! Substitute eggs with flax eggs or a vegan egg replacement.
  • How do I reheat leftover wraps? You can reheat in a skillet over low heat or in the microwave for a quick option.
  • Are cottage cheese wraps healthy? Yes! They are rich in protein, low in carbs, and can be filled with nutritious ingredients.
  • How long do they take to cook? Each wrap takes about 3-5 minutes per side.
  • Can I make them ahead of time? Yes, they store well in the fridge and can be frozen for later use!

Nutrition Tips and Dietary Adaptations

These wraps can easily fit into various dietary lifestyles:

  • Keto-Friendly: These low-carb wraps are perfect for a ketogenic diet.
  • High-Protein: With cottage cheese and eggs, these wraps offer a great protein boost for active individuals.
  • Gluten-Free: Naturally free from gluten, making them a safe option for those with gluten sensitivities.
  • Vegetarian-Friendly: With the right fillings, these wraps can easily fit into a vegetarian diet.

Equipment Recommendations

To make these wraps, you’ll need:

  • Blender: For a smooth batter, a good quality blender is essential.
  • Nonstick Skillet: This ensures your wraps cook evenly and don’t stick.
  • Spatula: A flexible spatula helps you flip the wraps without tearing.
  • Measuring Cups: Accurate measurements are key to the perfect batter consistency.

Serving Suggestions

These wraps are versatile! Here are some serving ideas:

  • Breakfast: Fill with scrambled eggs, avocado, and salsa for a hearty start to your day.
  • Lunch: Stuff with grilled chicken, spinach, and hummus for a filling meal.
  • Dinner: Use as a base for stir-fried vegetables and tofu or shrimp.
  • Snack: Enjoy with a side of fresh fruit or yogurt for a refreshing treat!

With these 2-ingredient cottage cheese wraps, you’re not just making a meal; you’re embracing a healthier lifestyle full of flavor and creativity. So grab your apron, mix up that batter, and let your cooking adventure begin!

Quick 2-Ingredient Cottage Cheese Wraps You'll Crave Daily

Prep Time 5 minutes
Cook Time 10 minutes
Total Time 15 minutes
Servings 4 wraps
Calories 150
These easy, protein-packed wraps are perfect for a quick snack or meal, requiring just two main ingredients and minimal effort.

Ingredients

Main ingredients

  • 1 cup cottage cheese (fresh and at room temperature)
  • 2 large eggs eggs
  • 0.5 teaspoon salt (optional)
  • 0.25 teaspoon garlic powder, pepper, or dried herbs (optional)

Instructions 

  • Blend cottage cheese, eggs, and seasonings until smooth.
  • Heat a nonstick skillet over low heat and lightly grease.
  • Pour ⅓ cup batter into skillet, spread into a thin circle.
  • Cook for 3-5 minutes, flip, then cook 1-2 minutes until golden.
  • Remove wraps and cool; repeat with remaining batter.

Notes

For extra flavor, add herbs or spices to the batter.
Calories: 150kcal
Cost: $5
Course: Breakfast, Snack
Cuisine: American
Keyword: cottage cheese, easy, Quick