Author

Ryan

Browsing

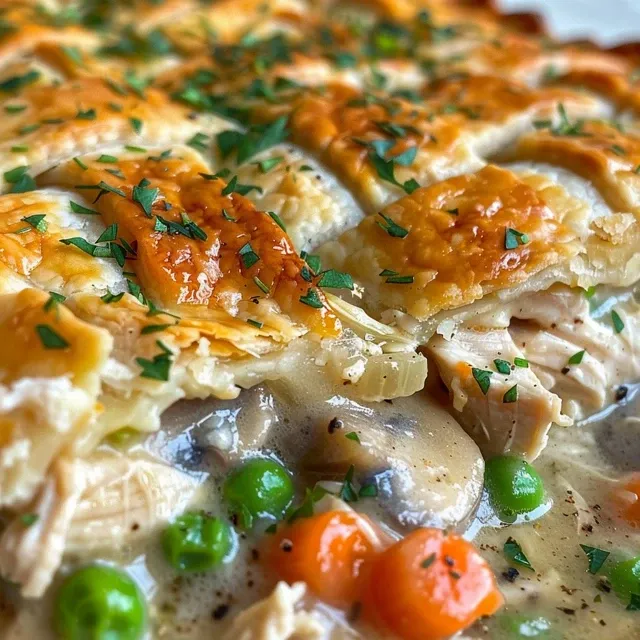
Unleash the Comfort of Homemade Chicken Pot Pie

Welcome to the ultimate Chicken Pot Pie experience! This is not just any recipe; it’s a timeless classic that marries tender chicken with vibrant vegetables in a creamy sauce, all encased in a flaky, golden pie crust. In this article, we’ll explore everything you need to know to make a perfect Chicken Pot Pie, from selecting the best ingredients to troubleshooting common issues. So, roll up your sleeves and get ready to create a dish that’s as comforting as a warm hug on a chilly day!

Why You’ll Love This Recipe

This Chicken Pot Pie recipe is a culinary adventure that you’ll want to embark on time and time again. Here are just a few reasons why this dish will become a favorite in your home:

  • Comfort Food Delight: Nothing says “home” quite like a slice of chicken pot pie fresh from the oven. It’s the perfect dish for cozy family dinners or a gathering with friends.
  • Customizable Ingredients: You can easily swap out ingredients based on what you have on hand, making this recipe incredibly versatile.
  • Nutritious Filling: Packed with lean protein and colorful vegetables, this dish is both hearty and healthy.
  • Make-Ahead Magic: The pie can be made ahead of time and stored for later, making weeknight dinners a breeze.
  • Fun Cooking Experience: Whether you’re a seasoned chef or a beginner, making homemade chicken pot pie is a fun and rewarding experience that brings everyone together.

Ingredients for the Perfect Chicken Pot Pie

Gathering the right ingredients is key to creating a delicious Chicken Pot Pie. Here’s what you’ll need:

  • 1 homemade pie crust: You can make this from scratch or use store-bought for convenience.
  • 4 cups cooked chicken (shredded): Rotisserie chicken works wonderfully for a quick option.
  • 6 Tbsp unsalted butter: This adds richness to the filling.
  • 1 medium yellow onion (chopped): For flavor and depth.
  • 2 medium carrots (thinly sliced): Adds sweetness and color.
  • 8 oz mushrooms (sliced): Choose white or brown mushrooms for a savory kick.
  • 3 garlic cloves (minced): Essential for aromatic flavor.
  • 1/3 cup all-purpose flour: This thickens the filling.
  • 2 cups chicken stock: For a rich, savory base.
  • 1/2 cup heavy cream: To create a luscious, creamy texture.
  • 2 tsp fine sea salt: Adjust to taste.
  • 1/4 tsp black pepper: For seasoning.
  • 1 cup frozen peas: No need to thaw; they’ll cook perfectly in the pie.
  • 1/4 cup parsley (finely chopped): For a fresh, herbal note.
  • 1 egg (beaten for egg wash): This gives the crust a beautiful, golden finish.

Step-by-Step Guide: How to Make Chicken Pot Pie

Side profile of a delectable chicken pot pie showcasing its flaky top crust and savory filling.

Creating the perfect Chicken Pot Pie involves a few simple steps. Let’s break it down:

  1. Prepare the Filling: In a dutch oven, melt the butter over medium heat. Add onions and carrots, sautéing for about 8 minutes until softened. Then, stir in the mushrooms and garlic, cooking for an additional 5 minutes.
  2. Create the Gravy: Sprinkle the flour over the vegetable mixture and stir continuously for 2 minutes. Gradually mix in the chicken stock and heavy cream, bringing to a simmer. Cook until the mixture thickens into a creamy gravy.
  3. Season the Filling: Stir in the shredded chicken, frozen peas, and parsley. Season with salt and pepper to taste. Remove from heat and let it cool slightly.
  4. Roll Out the Crusts: Roll one pie crust into a 12-inch circle and place it in a deep 9-inch pie dish. Spoon the filling into the crust.
  5. Seal the Pie: Roll out the second crust into a 10-inch circle. Place it over the filling, fold the excess dough behind the bottom crust, and crimp the edges to seal. Cut slits in the top crust for steam to escape, then brush with the beaten egg.
  6. Bake the Pie: Preheat your oven to 425°F (220°C) and bake for 30-35 minutes until the crust is golden brown. If the edges brown too quickly, cover them with foil. Allow the pie to rest for 15 minutes before slicing.

Pro Tips for Chicken Pot Pie Mastery

Elevate your Chicken Pot Pie game with these expert insights:

  • Choosing Chicken: Use a mix of white and dark meat for a richer flavor profile.
  • Keep it Creamy: For an extra creamy filling, add more heavy cream or even a dollop of sour cream.
  • Herbs & Spices: Experiment with rosemary, thyme, or even a dash of cayenne pepper for a flavor twist.
  • Vegetable Variety: Feel free to toss in other veggies like corn, green beans, or even potatoes to customize your filling.
  • Check for Doneness: Ensure the internal temperature reaches 165°F (74°C) for safe consumption.
  • Golden Crust: For a perfectly golden crust, brush with egg wash and sprinkle with coarse sea salt before baking.
  • Resting Time: Letting the pie rest is crucial for easier slicing and serving.
  • Freezing Tips: If you’re freezing the pie, make sure it’s completely cooled before wrapping it tightly in foil.
  • Leftover Love: Use leftover pie filling as a filling for pot pie empanadas or turnovers!

Common Mistakes and Troubleshooting

Avoid these pitfalls for a flawless Chicken Pot Pie:

  • Overcooked Veggies: Don’t sauté vegetables too long; they should remain tender-crisp.
  • Too Watery Filling: If your filling is too runny, try adding a bit more flour or cornstarch to thicken it.
  • Crust Issues: If the crust is soggy, try blind-baking the bottom crust for 10-15 minutes before adding the filling.
  • Burnt Edges: Use a pie shield or foil to protect the crust edges from burning.

Delicious Variations to Try

Get creative with these Chicken Pot Pie variations:

  • Cheddar Herb Crust: Add shredded cheddar and herbs like thyme to your pie crust for an extra flavor kick.
  • Vegetarian Pot Pie: Substitute chicken with hearty vegetables like lentils, chickpeas, or mushrooms for a plant-based option.
  • Buffalo Chicken Pot Pie: Mix in some buffalo sauce with the chicken for a spicy twist that’s sure to please!
  • Mexican-Inspired Pot Pie: Use shredded chicken, black beans, corn, and a sprinkle of taco seasoning for a zesty take.

Storage and Make-Ahead Instructions

Planning ahead? Here’s how to store and prepare your Chicken Pot Pie:

  • Refrigerator: Store leftovers in an airtight container in the fridge for up to 3 days.
  • Freezer: Freeze the unbaked pie for up to 3 months. Thaw in the fridge overnight before baking.
  • Make-Ahead: You can prepare the filling a day in advance and assemble the pie right before baking.

Frequently Asked Questions (FAQ)

Here are some common questions about Chicken Pot Pie:

  • Can I use store-bought pie crust? Yes! A store-bought crust can save time while still delivering delicious results.
  • What can I use instead of heavy cream? You can substitute with half-and-half or a non-dairy alternative like coconut cream.
  • How do I reheat leftover pot pie? Reheat in the oven at 350°F (175°C) for about 20-25 minutes until heated through.
  • Can I make mini pot pies? Absolutely! Use muffin tins to create individual servings.
  • What if my filling is too salty? Balance it out with a splash of cream or serve with a side of unsalted vegetables.
  • How do I know when the pot pie is done? The crust should be golden brown, and the filling should be bubbling gently.
  • Is it okay to use leftover chicken? Yes! Leftover or rotisserie chicken is perfect for making pot pie.
  • Can I make this recipe gluten-free? Yes! Use a gluten-free pie crust and flour to adapt the recipe.

Nutritional Tips and Dietary Adaptations

For a healthier Chicken Pot Pie, consider these adaptations:

  • Lower Fat: Use low-fat milk instead of heavy cream, and opt for a whole wheat crust.
  • Increased Fiber: Incorporate more vegetables or use a whole grain crust for added fiber.
  • Protein Boost: Add beans or lentils for an additional source of plant-based protein.

Essential Equipment for Success

Here’s what you’ll need to make your Chicken Pot Pie:

  • 9-inch pie dish: A deep dish works best for holding all the delicious filling.
  • Dutch oven or large pot: Ideal for cooking the filling.
  • Rolling pin: For rolling out your pie crust.
  • Pastry brush: To apply the egg wash for a golden crust.

Serving Suggestions

Here are some ideas for what to serve with your Chicken Pot Pie:

  • Fresh Salad: Pair with a light green salad for a refreshing contrast.
  • Steamed Vegetables: Broccoli or green beans complement the rich pie beautifully.
  • Crusty Bread: Serve with a side of warm, crusty bread for dipping.

Now that you have all the tools to create your own Chicken Pot Pie, it’s time to get cooking! This recipe isn’t just food; it’s a way to bring warmth and joy to your table. Happy cooking!

Chicken Pot Pie Recipe

Prep Time 30 minutes
Cook Time 35 minutes
Total Time 1 hour 5 minutes
Servings 6 servings
Calories 650
A comforting homemade chicken pot pie with a flaky crust and savory filling, perfect for cozy dinners.

Ingredients

Pie Crusts

  • 1 piece homemade pie crust (2 round)

Chicken

  • 4 cups cooked chicken (shredded)

Vegetables and Aromatics

  • 6 Tbsp unsalted butter
  • 1 medium yellow onion (chopped)
  • 2 medium carrots (thinly sliced)
  • 8 oz white or brown mushrooms (sliced, stems discarded)
  • 3 cloves garlic (minced)
  • 1/3 cup all-purpose flour

Broth and Dairy

  • 2 cups chicken stock
  • 1/2 cup heavy cream

Seasonings and Garnishes

  • 2 tsp fine sea salt (or to taste, plus kosher salt to garnish)
  • 1/4 tsp black pepper (plus more to garnish)
  • 1 cup frozen peas (do not thaw)
  • 1/4 cup parsley (finely chopped, plus more to garnish)
  • 1 egg beaten for egg wash

Instructions 

  • Melt butter, then sauté onions and carrots 8 minutes until soft.
  • Add mushrooms and garlic, cook 5 minutes until mushrooms soften.
  • Stir in flour, cook 2 minutes, then add chicken stock and cream, simmer until thickened. Season well.
  • Combine shredded chicken, peas, and parsley. Fill prepared pie crust with filling.
  • Cover with second crust, seal edges, cut slits, brush with egg wash, and sprinkle with salt and pepper.
  • Bake at 425°F (220°C) for 30-35 minutes until golden. Rest 15 minutes before slicing.

Notes

Use a pie shield or foil to prevent edges from over-browning.
Calories: 650kcal
Cost: $15
Course: Main Course
Cuisine: American
Keyword: Chicken, pot pie

Dive into a Colorful World of Flavor

Welcome to the Indulgent Fruit Fiesta! If you’re ready to explore a deliciously creamy twist on the classic fruit salad, you’re in for a treat. This fruit salad with condensed milk combines a medley of vibrant fruits, coated in a luscious dressing, making it not just an easy salad, but a delightful experience. Whether it’s a summer picnic, a family gathering, or simply a refreshing snack, this recipe is designed to impress and bring smiles to every table!

In this article, we’ll cover everything from the essential ingredients to expert tips, variations, and even the best ways to store your creation. So, let’s get chopping and mixing!

Why You’ll Love This Recipe

This is not just any ordinary salad; it’s a celebration of flavors and textures! Here are some reasons why this creamy fruit salad will become a staple in your kitchen:

  • Quick and Easy: With minimal prep time, this salad can be whipped up in just minutes. Perfect for those busy days when you want something refreshing without the fuss.
  • Versatile Ingredients: You can mix and match your favorite fruits! If you have seasonal produce or leftovers, toss them in!
  • Irresistibly Creamy: The dressing made from sweetened condensed milk and heavy cream gives a rich, velvety texture that complements the fresh fruits beautifully.
  • Perfect for Any Occasion: Whether it’s a barbecue, a brunch, or a simple family dinner, this fruit salad is a crowd-pleaser.
  • Healthy Indulgence: Packed with vitamins from the fruits and a touch of sweetness from the dressing, it’s a guilt-free dessert or snack that feels indulgent.

Ingredients You’ll Need

Let’s dive into the vibrant world of fruits and creamy goodness! Here’s what you’ll need:

  • 1 cup strawberries: Fresh and juicy, strawberries add a sweet burst of flavor.
  • 1/2 cup grapes: Halved for easy eating, they provide a delightful crunch.
  • 1 cup blueberries: These tiny gems offer a slightly tart balance to the sweetness.
  • 1-2 kiwi: Their unique flavor and texture elevate the salad.
  • 1 apple: Crisp and refreshing, apples add a nice crunch.
  • 2 bananas: Sweet and creamy, bananas help bind the flavors together.

For the Dressing:

  • 200 grams sweetened condensed milk: This is the star of the show, giving the salad its creamy richness.
  • 200 ml heavy cream: Adds a luxurious feel to the dressing.
  • 1/4 cup milk: To thin out the dressing to your desired consistency.

How to Make Fruit Salad with Condensed Milk

Side perspective of a vibrant fruit salad featuring various fruits and creamy dressing.

Ready to bring this salad to life? Follow these simple steps:

Step 1: Prep and Chop Your Fruit

Start by washing your fruits thoroughly. Then, chop them into bite-sized pieces. Aim for uniform sizes to ensure an even mix.

Step 2: Make the Creamy Condensed Milk Dressing

In a mixing bowl, combine the sweetened condensed milk, heavy cream, and milk. Whisk until smooth and creamy. If you prefer a thicker dressing, reduce the amount of milk.

Step 3: Combine Fruit and Dressing

In a large mixing bowl, add the chopped fruits, then pour the dressing over them. Gently toss until the fruits are evenly coated in the creamy goodness.

Step 4: Optional Garnishes

For an extra touch, consider adding a sprinkle of chopped mint or a handful of nuts for crunch!

Serving Suggestions

This creamy fruit salad can be served immediately or chilled for an hour to allow the flavors to meld. Here are some ideas to enhance your presentation:

  • Layered Parfait Style: Serve in clear glasses for a stunning visual effect.
  • Fruit Cups: Use hollowed-out fruit (like watermelon) to serve individual portions.
  • On a Buffet Table: Place in a large bowl surrounded by additional fruits for a colorful display.

Pro Tips for the Best Salad

To ensure your fruit salad turns out perfectly every time, keep these expert tips in mind:

  • Choose Ripe Fruits: Use fruits that are at their peak ripeness for the best flavor.
  • Don’t Overmix: Gently toss the salad to avoid mashing the fruits.
  • Chill Before Serving: A chilled salad is refreshing and enhances the flavors.
  • Experiment with Flavors: Feel free to add a splash of vanilla extract or a squeeze of lemon for extra zest.
  • Use Seasonal Fruits: Customize based on what’s fresh and available in your area.
  • Make It Ahead: Prepare the dressing and chop the fruits separately. Combine them just before serving for maximum freshness.
  • Consider Dietary Restrictions: Substitute dairy with coconut cream or almond milk for a dairy-free version.
  • Keep it Colorful: Aim for a rainbow of fruits to make your salad visually appealing and nutrient-rich.

Common Mistakes and Troubleshooting

Here are some pitfalls to avoid and solutions to ensure your salad shines:

  • Fruit Browning: To prevent apples and bananas from browning, toss them in a little lemon juice before combining.
  • Too Runny Dressing: If your dressing is too thin, add more sweetened condensed milk to thicken it.
  • Overripe Fruits: Avoid using overripe fruits that may mush easily by selecting firm options.
  • Unbalanced Sweetness: Taste your dressing and adjust the sweetness with more condensed milk or a pinch of salt to balance flavors.

Storage and Make-Ahead Instructions

To keep your fruit salad fresh and delicious:

  • Refrigerator Storage: Store leftovers in an airtight container in the fridge for up to 2 days.
  • Make-Ahead Tips: Prepare the dressing a day in advance and chop the fruits a few hours before serving. Just mix them right before serving!
  • Freezing: This salad is best enjoyed fresh, but if you have leftovers, you can freeze the fruits separately for smoothies or other recipes.

Nutrition Tips and Dietary Adaptations

For those looking to tailor this recipe to fit specific dietary needs:

  • Low-Calorie Option: Use a lighter version of heavy cream or substitute it with Greek yogurt.
  • Vegan Version: Swap condensed milk with coconut condensed milk and use coconut cream for the dressing.
  • Gluten-Free: This recipe is naturally gluten-free, making it a safe choice for gluten-sensitive individuals.

FAQs About Fruit Salad with Condensed Milk

Got questions? Here are some common inquiries:

  • Can I use canned fruit? Yes! Canned fruits can be a great alternative; just drain them well before adding.
  • How do I make it less sweet? Adjust the amount of condensed milk to your liking or add more fruits.
  • Can I add nuts or seeds? Absolutely! Nuts like almonds or walnuts add a great crunch and flavor.
  • What fruits work best? You can use any combination of your favorites—bananas, peaches, and mangoes work wonderfully!
  • Is this salad good for meal prep? Yes, just prepare the dressing and fruits separately and combine before serving.
  • How long does it last? Best enjoyed within 1-2 days for freshness.
  • Can I add yogurt? Yes! Mixing in some yogurt can enhance the creaminess and add probiotics.
  • What if my dressing is too thick? Thin it out with a little milk until you reach your desired consistency.

Now, you’re equipped with everything you need to create a show-stopping fruit salad with condensed milk that’s sure to be the highlight of any meal. So get excited, get cooking, and enjoy every delicious bite!

Thank you for joining me on this fruity adventure! Remember, cooking is all about experimenting and having fun. Share your creations with friends and family, and let the joy of healthy eating radiate from your kitchen!

Fruit Salad with Condensed Milk

Prep Time 10 minutes
Total Time 10 minutes
Servings 4 people
Calories 250
A delicious and refreshing fruit salad drizzled with a sweet condensed milk dressing, perfect for a quick dessert or snack.

Ingredients

Fruits

  • 1 cup strawberries
  • 1/2 cup grapes
  • 1 cup blueberries
  • 1-2 pieces kiwi
  • 1 piece apple
  • 2 pieces bananas

Dressing

  • 200 grams sweetened condensed milk
  • 200 ml heavy cream
  • 1/4 cup milk

Instructions 

  • Chop all fruits into bite-sized pieces and combine in a large bowl.
  • In a separate bowl, mix condensed milk, heavy cream, and milk until smooth.
  • Pour the dressing over the mixed fruits and gently toss to coat evenly.
  • Refrigerate for at least 30 minutes before serving for best flavor.

Notes

Use fresh, ripe fruits for the best taste and texture.
Calories: 250kcal
Cost: $10
Course: Dessert
Cuisine: international
Keyword: condensed milk, fruit

Welcome to a culinary fiesta that’s about to elevate your dinner game! This Easy Taco Salad Recipe is a vibrant explosion of flavors and nutrition, perfect for busy weeknights when you crave something delicious yet simple to whip up. Packed with lean ground beef, fresh veggies, and zesty toppings, this dish is not just a meal; it’s an experience! Let’s dive into this delicious journey and discover why you’ll love every bite.

Why You’ll Love This Recipe

This taco salad isn’t just your average salad; it’s a delightful bowl of goodness that brings together a medley of flavors and textures. Here are five reasons why this recipe will win your heart:

  • Quick and Easy: Ready in just 30 minutes, perfect for a weeknight dinner.
  • Customizable: Change up the ingredients to suit your taste or dietary needs.
  • Nutrient-Packed: Loaded with fresh veggies and lean protein for a satisfying meal.
  • Meal Prep Friendly: Make it ahead of time for a quick grab-and-go lunch or dinner.
  • Family Approved: Kids and adults alike will love the fun, flavorful combination!

Ingredients Breakdown

Here’s what you’ll need to create this delightful taco salad:

  • 1 lb lean ground beef (90/10): Provides a hearty base with plenty of protein. You can substitute with ground turkey or plant-based meat for a lighter option.
  • 3 Tbsp Taco Seasoning: Use a packet or homemade blend. For a healthier option, make your own seasoning with chili powder, cumin, garlic powder, and paprika.
  • 1 medium head iceberg lettuce (chopped): Crisp and refreshing, this forms the salad’s base. You can swap it with romaine or spinach for added nutrients.
  • 1 avocado (peeled, pitted, and sliced): Adds creaminess and healthy fats. If you’re not a fan of avocado, try diced mango or cucumber.
  • 1 cup diced tomatoes (or Pico de Gallo): Juicy and flavorful, tomatoes add freshness. You can also use cherry tomatoes for a sweeter taste.
  • 1/2 cup Mexican cheese blend: Provides a cheesy finish; feel free to use dairy-free cheese alternatives.
  • 1/2 cup tortilla strips or chips: For that satisfying crunch! Baked chips are a healthier choice.
  • 1/2 cup sour cream (or Taco Salad Dressing): Creamy and tangy, it complements the salad perfectly. Greek yogurt is a great low-fat alternative.
  • 1/4 cup cilantro: Fresh herbs elevate the dish with flavor. If you’re not a fan, consider using green onions or fresh parsley.
  • Toppings (as desired): Lime wedges, jalapenos, guacamole, salsa, olives—add your favorites for a personalized touch!

Pro Tips for the Perfect Taco Salad

Let’s take your taco salad to the next level with these expert tips:

  • Brown the Beef Properly: Ensure the beef is well-browned for maximum flavor. Don’t rush this step!
  • Let the Beef Cool: Allow the cooked beef to cool slightly before assembling to prevent wilting the lettuce.
  • Chill Your Dressing: If making your own dressing, let it chill in the fridge to meld the flavors beautifully.
  • Layer Wisely: For the best presentation, layer the ingredients rather than mixing everything. It looks stunning and keeps textures intact.
  • Experiment with Dressings: Try different dressings like ranch or a creamy avocado dressing for a twist.
  • Make Ahead: Prepare the components separately and assemble just before serving for optimal freshness.
  • Use Fresh Ingredients: Fresh produce makes all the difference in flavor and nutrition.
  • Garnish Creatively: Give your salad a visual boost with fresh herbs and colorful toppings.

Common Mistakes and Troubleshooting

A colorful bowl of easy taco salad featuring avocado, tomatoes, and cheese.

Even the best chefs make mistakes! Here are some common pitfalls and how to avoid them:

  • Overcooking the Beef: Keep an eye on the beef to avoid drying it out. Once there’s no pink left, it’s ready to go!
  • Wilty Lettuce: Avoid overloading the salad with warm ingredients. Always let hot components cool first.
  • Too Much Dressing: Start with a little dressing; you can always add more, but you can’t take it away!
  • Skipping the Seasoning: Don’t forget to season your beef! It’s the key to a flavorful dish.

Delicious Variations

Why not mix it up? Here are some fun variations to try:

  • Vegetarian Taco Salad: Replace the ground beef with black beans or quinoa for a hearty, meatless option.
  • Southwestern Taco Salad: Add corn, black beans, and a chipotle dressing for a smoky twist.
  • Breakfast Taco Salad: Use scrambled eggs instead of beef and top with salsa and avocado for a morning delight!
  • Asian-Inspired Taco Salad: Swap beef for teriyaki chicken and add sesame dressing, crunchy wontons, and edamame.

Storage and Make-Ahead Instructions

Planning ahead? Here’s how to store your taco salad:

  • Refrigerate Components: Store each component in airtight containers for up to 3 days.
  • Assemble Just Before Serving: Keep lettuce and toppings separate until you’re ready to eat to maintain freshness.
  • Freezing Not Recommended: It’s best to avoid freezing as the texture of the lettuce and dressing won’t hold up.

FAQs About Taco Salad

Got questions? We’ve got answers!

  • Can I make taco salad ahead of time? Yes, prepare the components and store them separately. Assemble just before serving.
  • What sides go well with taco salad? Chips and salsa, corn on the cob, or a light fruit salad are great companions!
  • Can I use different meats? Absolutely! Ground turkey, chicken, or even shredded beef work well.
  • How do I make it gluten-free? Use corn tortilla chips and ensure your taco seasoning is gluten-free.
  • Is taco salad healthy? Yes! It’s packed with nutrients, especially when loaded with veggies.
  • How can I make it spicier? Add jalapenos, spicy salsa, or a dash of hot sauce to kick it up a notch!
  • What’s the best way to store leftover taco salad? Store in an airtight container in the fridge for up to 3 days.
  • Can I use lettuce wraps instead of a bowl? Definitely! Use large lettuce leaves as wraps for a fun, low-carb twist.

Nutrition Tips and Dietary Adaptations

Eating healthy doesn’t mean sacrificing flavor! Here are some tips:

  • Lean Proteins: Opt for lean meats or plant-based proteins to keep your meal light.
  • Load Up on Veggies: The more colorful, the better! Add bell peppers, zucchini, or radishes for extra crunch and nutrients.
  • Healthy Fats: Avocados and nuts add essential fatty acids without the guilt.
  • Whole Grains: Swap regular chips for whole-grain or baked options for a healthier crunch.

Equipment Recommendations

Here’s what you’ll need to get started:

  • Skillet: A good non-stick skillet is essential for browning your meat.
  • Chopping Board: For all that fresh produce you’ll be chopping!
  • Mixing Bowls: Useful for preparing your dressing and mixing ingredients.
  • Serving Bowls: Beautiful bowls make serving your taco salad feel special!

Serving Suggestions

Ready to dig in? Here’s how to serve your taco salad:

  • Family Style: Present all components in bowls and let everyone build their own creation!
  • Individual Bowls: For a more personal touch, serve each guest their pre-assembled bowl.
  • Add Lime Wedges: A squeeze of lime over the top adds a burst of flavor that brightens the entire dish.
  • Pair with a Drink: A refreshing iced tea or a light beer complements the flavors beautifully.

Now that you have all the tools and tips needed, it’s time to get cooking! This Easy Taco Salad is more than just a meal; it’s a celebration of flavors, colors, and fun! So roll up your sleeves and get ready to bring joy to your dinner table—your taste buds will thank you!

Easy Taco Salad Recipe

Prep Time 10 minutes
Cook Time 10 minutes
Total Time 20 minutes
Servings 4 servings
Calories 550
A quick and flavorful taco salad perfect for a satisfying meal or side dish, combining seasoned beef with fresh toppings.

Ingredients

Meat

  • 1 lb lean ground beef (90/10)
  • 3 Tbsp Taco Seasoning (or 1 packet*, plus 1/2 cup water)

Vegetables & Toppings

  • 1 medium head iceberg lettuce (chopped)
  • 1 each avocado (peeled, pitted and sliced)
  • 1 cup diced tomatoes (or Pico de Gallo)
  • 0.5 cup Mexican cheese blend (or to taste)
  • 0.5 cup tortilla strips or chips
  • 0.5 cup sour cream (or Taco Salad Dressing*)
  • 0.25 cup cilantro

Toppings

  • as desired lime wedges, jalapenos, guacamole, salsa, olives

Instructions 

  • Cook the beef: Brown the ground beef in a skillet over medium-high heat, then add taco seasoning and water. Cook for 3-5 minutes, then cool slightly.
  • Prepare toppings: Chop lettuce, slice avocado, dice tomatoes, and gather other desired toppings.
  • Assemble: Divide lettuce into bowls, top with cooked beef, cheese, tortilla chips, and other toppings. Garnish with cilantro and add dollops of sour cream or dressing.
  • Serve with lime wedges for squeezing over the salad.

Notes

Feel free to customize toppings to your preference for added flavor and texture.
Calories: 550kcal
Cost: $15
Course: Main Course, Salad
Cuisine: Mexican
Keyword: Beef, Salad, Tacos

Discover the Tropical Bliss of Hawaiian Chicken Salad

Welcome to a culinary journey that brings the vibrant flavors of Hawaii right to your kitchen! This Hawaiian Chicken Salad is not just a meal; it’s an experience bursting with juicy pineapple, creamy avocado, and succulent chicken. If you’re looking for a gluten-free, nutritious dish that’s as easy to prepare as it is delicious, you’ve landed in the right place. In this article, we’ll delve into everything you need to know about this salad, ensuring you’re equipped to create a tropical masterpiece that will impress family and friends alike.

Eating healthy doesn’t have to be boring! Let’s explore why this recipe is a must-try and how it fits into a balanced, flavor-packed lifestyle.

Why You’ll Love This Recipe

  • Flavor Explosion: The combination of sweet pineapple and savory chicken creates a delicious balance that dances on your taste buds!
  • Nutrient-Rich Ingredients: Packed with vitamins and minerals, this salad contributes to your overall health while keeping your energy levels high.
  • Meal Prep Friendly: Perfect for busy weekdays, this dish can be made ahead of time and stored, making lunch a breeze.
  • Customizable: Easily adapt this recipe to suit your taste preferences or dietary needs, ensuring that everyone can enjoy it.
  • Gluten-Free Goodness: With gluten-free ingredients, this salad fits perfectly into various diets without sacrificing flavor.

Ingredient Breakdown

Let’s take a closer look at the ingredients that make this salad shine. Each component plays a vital role in creating a dish that is not just tasty but also nutritious.

  • 1/3 cup light coconut milk: Adds creaminess and a hint of tropical flavor.
  • 1/4 cup fresh pineapple juice: Enhances sweetness and moisture, making the salad juicy and vibrant.
  • 1 tbsp gluten-free tamari sauce: Provides a savory depth that complements the other flavors.
  • Zest of 1 lime: Infuses a fresh, zesty aroma that brightens the dish.
  • 2 garlic cloves: Adds a fragrant kick that elevates the overall taste.
  • 1 large chicken breast: The protein powerhouse that makes this salad satisfying and filling.
  • 3/4 cup fresh pineapple pieces: Adds texture and sweetness, making every bite a delight.
  • 6 cups chopped romaine lettuce: Provides a crisp base that balances the creamy elements.
  • 1/2 avocado: Brings healthy fats and a smooth texture to the mix.
  • 1 1/2 cups cooked quinoa: A source of complex carbohydrates that keeps your energy stable.

Substitutions and Variations

Side view of a delicious Hawaiian chicken salad featuring chicken, pineapple, and greens.

Don’t hesitate to get creative with this recipe! Here are some fantastic substitutions and variations you can try:

  • Chicken Alternatives: Swap chicken for shredded turkey or chickpeas for a plant-based option.
  • Different Greens: Use spinach or kale for a nutrient boost, or even a mixed greens blend for more variety.
  • Fruit Variations: Experiment with mango or papaya for a different tropical twist.
  • Nuts and Seeds: Add toasted almonds or sunflower seeds for a crunchy texture and extra nutrition.

Cooking Instructions

Ready to dive into the cooking process? Here’s how to make this Hawaiian Chicken Salad step-by-step:

  1. Marinate Chicken: Combine coconut milk, pineapple juice, tamari sauce, lime zest, garlic, and spices in a bowl. Add chicken and marinate for at least 3 hours, preferably overnight for maximum flavor.
  2. Prepare Dressing: In a mason jar, mix olive oil, lime juice, honey, and salt. Shake well and set aside for at least 15 minutes.
  3. Cook Chicken: Heat oil in a skillet over medium-high heat. Add chicken and cook each side for about 3-4 minutes or until golden brown and fully cooked. Allow to rest before slicing.
  4. Sear Pineapple: In the same skillet, add pineapple pieces and sear until golden, enhancing their natural sweetness.
  5. Assemble Salad: On a large platter, layer romaine lettuce, avocado, onion, tomatoes, quinoa, and top with sliced chicken and seared pineapple.
  6. Serve: Drizzle the dressing over the salad and enjoy immediately!

Pro Tips for the Perfect Salad

  • Marinate Longer: For deeper flavors, marinate the chicken overnight.
  • Fresh Ingredients: Use fresh, ripe fruits and vegetables for the best taste and nutritional value.
  • Chill Before Serving: Allow the salad to chill in the fridge for 30 minutes before serving for optimal flavor.
  • Adjust Seasoning: Taste and adjust the seasoning in your dressing as needed to suit your palate.
  • Presentation Counts: Arrange the salad with an eye for color and texture to make it visually appealing.

Common Mistakes and Troubleshooting

Let’s avoid those kitchen blunders! Here are some common mistakes and how to fix them:

  • Overcooking Chicken: Keep an eye on your chicken to prevent it from becoming dry. Use a meat thermometer for accuracy.
  • Too Much Dressing: Start with a small amount of dressing and add more as needed; you can always add but can’t take away!
  • Watery Salad: If your salad is too watery, drain excess liquid from the marinated chicken and pineapple before assembly.

Storage and Make-Ahead Instructions

This salad is perfect for meal prep! Here’s how to store and prepare ahead of time:

  • Storage: Keep the salad in an airtight container in the fridge for up to 3 days. Keep the dressing separate until ready to serve.
  • Make-Ahead: Prepare the chicken and dressing a day ahead, and assemble the salad just before serving for maximum freshness.

Frequently Asked Questions

  • Can I use canned pineapple? Yes, just make sure to drain it well to avoid excess moisture.
  • Is this salad suitable for a gluten-free diet? Absolutely! All the ingredients used are gluten-free.
  • How can I make this recipe vegan? Substitute the chicken with chickpeas or tofu and ensure all sauces are vegan-friendly.
  • Can I freeze this salad? It’s best enjoyed fresh, but you can freeze the marinated chicken. Cooked chicken should not be frozen.
  • What can I serve with this salad? Pair it with whole-grain rolls or a light soup for a complete meal.
  • How do I add more protein? Consider adding nuts, seeds, or even a side of edamame to boost protein content.
  • What dressing works best? The lime-honey dressing is fantastic, but a light vinaigrette or a yogurt-based dressing would work too!
  • Can I make this salad without quinoa? Absolutely! You can replace quinoa with brown rice or omit it entirely.

Nutritional Tips and Dietary Adaptations

This salad is not just a flavor bomb; it’s also a nutritional powerhouse. Here are some tips:

  • Healthy Fats: Avocado provides essential fatty acids that are crucial for heart health.
  • Complex Carbohydrates: Quinoa is a great source of fiber, helping to regulate blood sugar levels and keep you feeling full.
  • Vitamins and Minerals: Fresh vegetables and fruits contribute to your daily intake of vitamins, making this salad a wholesome choice.

Equipment Recommendations

Here’s what you’ll need to make this Hawaiian Chicken Salad:

  • Non-Stick Skillet: For cooking the chicken and searing the pineapple.
  • Mason Jar: Perfect for shaking up the dressing ingredients.
  • Chef’s Knife: Essential for chopping and slicing ingredients efficiently.
  • Cutting Board: A stable surface for all your chopping needs.

Serving Suggestions

Ready to serve? Here are some creative ideas:

  • Platter Style: Serve the salad on a large platter for a beautiful presentation.
  • Wrap It Up: Use the salad filling in a tortilla or lettuce wrap for a delightful twist.
  • Pair with Grains: Serve alongside brown rice or whole-grain bread for a complete meal.

Conclusion

This Hawaiian Chicken Salad is more than just a meal; it’s a celebration of flavors, textures, and healthy eating. With its tropical vibes and nutritional benefits, it’s perfect for any occasion—be it a quick lunch, a picnic, or a family gathering. So grab your ingredients, unleash your inner chef, and enjoy a bowl of pure joy. Eating healthy should always feel this exciting!

Hawaiian Chicken Salad: Gluten-Free & Whole Health Flexi-Plan

Prep Time 20 minutes
Cook Time 15 minutes
Total Time 35 minutes
Servings 4 servings
Calories 450
A vibrant and healthy Hawaiian-inspired chicken salad featuring fresh pineapple, quinoa, and a zesty dressing, perfect for a nutritious meal.

Ingredients

Marinade

  • 1/3 cup light coconut milk
  • 1/4 cup fresh pineapple juice
  • 1 tbsp gluten-free tamari sauce
  • Zest of 1 lime lime zest
  • 2 cloves garlic
  • 1/4 tsp onion powder
  • 1/4 tsp cumin
  • 1/4 tsp paprika
  • 1/4 tsp ginger powder
  • 1/4 tsp salt
  • 1/2 tbsp olive oil
  • 1 large chicken breast
  • 3/4 cup fresh pineapple pieces
  • 6 cup chopped romaine lettuce
  • 1/2 avocado avocado
  • 1/2 red onion red onion
  • 1/2 cherry tomatoes cherry tomatoes
  • 1 1/2 cup cooked quinoa
  • 1 1/2 tbsp lime juice
  • 2 1/2 tbsp olive oil
  • 2 tbsp finely chopped cilantro
  • 1/2 tsp honey
  • 1/4 tsp salt

Black pepper

Instructions 

  • Marinate chicken with ingredients and refrigerate for at least 3 hours.
  • Mix dressing ingredients in a jar and set aside for 15 minutes.
  • Cook chicken in a skillet until golden, then rest and slice.
  • Sear pineapple in the same skillet until golden.
  • Assemble salad with lettuce, avocado, onion, tomatoes, quinoa, chicken, and pineapple. Drizzle with dressing and serve.

Notes

Use fresh ingredients for best flavor and texture.
Calories: 450kcal
Cost: $15
Course: Salad
Cuisine: Hawaiian
Keyword: Chicken, Pineapple, Quinoa

Dive into the delightful crunch of our Cucumber Caprese Salad, a refreshing twist on the classic Italian favorite! Made with juicy cucumbers, creamy mozzarella, and fragrant basil, all drizzled with rich balsamic glaze—this salad is a quick, nutritious burst of flavor that will elevate any meal. Perfect for busy days or leisurely lunches, this easy-to-make dish is not just a salad; it’s an experience! Let’s jump into why this recipe will become a staple in your kitchen.

Why You’ll Love This Recipe

This Cucumber Caprese Salad isn’t just another dish; it’s a celebration of fresh ingredients and vibrant flavors! Here are five reasons why you’ll absolutely adore it:

  • Quick and Easy: With just a few fresh ingredients and minimal prep time, this salad comes together in under 30 minutes!
  • Light and Refreshing: Perfect for warm weather, this salad is a refreshing dish that’s light on the stomach yet bursting with flavor.
  • Nutritious Ingredients: Packed with vitamins, fiber, and protein, this salad supports a healthy lifestyle while satisfying your taste buds.
  • Versatile Pairing: Whether as a side for grilled meats or a light lunch on its own, this salad fits seamlessly into any meal plan.
  • Customizable: Feel free to switch up ingredients based on your preferences or what you have on hand!

Ingredient Breakdown

Let’s break down the key elements of this delicious Cucumber Caprese Salad, along with some tasty substitutions to elevate your dish!

  • 2 large English cucumbers: Opt for firm, unwaxed cucumbers for the best crunch. Persian cucumbers work as an excellent substitute, offering a sweeter flavor.
  • 8 oz fresh mozzarella balls: Choose high-quality, creamy mozzarella. For a dairy-free twist, vegan mozzarella is a great alternative!
  • 1/2 cup fresh basil leaves: Fresh basil adds a delightful aroma and flavor. Try using Thai basil for a unique spin!
  • 3 tablespoons high-quality balsamic glaze: A rich balsamic vinegar works too! You can make a simple balsamic reduction at home for a fresh touch.

Step-by-Step Instructions

Follow these easy steps to create your Cucumber Caprese Salad:

  • Step 1: Wash the cucumbers thoroughly under cold running water. Using a sharp knife or mandoline slicer, cut the cucumbers into 1/4-inch thick rounds. Pat the cucumber slices dry with paper towels.
  • Step 2: If using larger mozzarella balls, slice them into 1/4-inch thick rounds. Gently pat the mozzarella dry with paper towels to remove excess moisture.
  • Step 3: On a large serving platter or individual plates, arrange the cucumber and mozzarella slices in an alternating pattern for a beautiful presentation.
  • Step 4: Gently tear the basil leaves by hand and scatter them evenly across the arranged cucumber and mozzarella.
  • Step 5: Drizzle the balsamic glaze in a zigzag pattern across the entire salad. Allow the salad to rest for 5-10 minutes before serving to let the flavors meld.

Pro Tips for the Perfect Salad

Side angle of a vibrant Cucumber Caprese Salad with fresh ingredients displayed artistically.

To ensure your Cucumber Caprese Salad turns out perfectly every time, check out these expert insights:

  • Use fresh ingredients: For the best flavor, choose the freshest cucumbers, mozzarella, and basil you can find. Local farmer’s markets are a great source!
  • Texture matters: Make sure to pat down your ingredients with paper towels where indicated. This helps avoid a watery salad.
  • Experiment with flavors: Don’t be afraid to add a sprinkle of salt or a dash of pepper for extra flavor. A squeeze of lemon can also brighten up the dish!
  • Make it colorful: Add cherry tomatoes or sliced bell peppers for a pop of color and additional nutrients.
  • Serving temperature: Serve the salad cold or at room temperature for the best experience. Chilling it slightly enhances the refreshing qualities.
  • Balance your balsamic: If the glaze is too thick, you can dilute it with a little olive oil for a smoother finish.
  • Presentation is key: Arrange the salad artfully; it not only makes it visually appealing but also enhances the dining experience.
  • Store properly: If you have leftovers, store them in an airtight container in the refrigerator, but consume them within a day for the best taste.

Common Mistakes and Troubleshooting

Even the best chefs make mistakes! Here are some common pitfalls when making this salad and how to avoid them:

  • Watery salad: To prevent excess moisture, always pat dry your cucumbers and mozzarella before assembling.
  • Too much balsamic: Drizzle sparingly! You can always add more, but you can’t take it away.
  • Flavorless salad: Don’t skip the seasoning! A little salt can enhance the flavors immensely.
  • Overly soggy basil: Add the basil right before serving to keep it fresh and vibrant.

Delicious Variations

Want to mix things up? Here are four fantastic variations to try:

  • Caprese Skewers: Assemble cucumber and mozzarella on skewers for a fun appetizer! Add cherry tomatoes for a colorful touch.
  • Grilled Cucumber Caprese: Grill the cucumber slices for a smoky flavor and enhanced texture. Just brush lightly with olive oil and grill until charred.
  • Avocado Twist: Add creamy avocado slices for a richer taste and extra healthy fats.
  • Pesto Infusion: Drizzle with pesto instead of balsamic glaze for a flavorful alternative that sings Italian!

Storage and Make-Ahead Instructions

Want to prep ahead? Here’s how to store your salad for optimal freshness:

  • Make-Ahead: You can prepare the cucumber and mozzarella ahead of time. Store them separately in airtight containers in the fridge for up to 2 days.
  • Storage: If you have leftovers, keep the salad in an airtight container in the refrigerator. Consume within 24 hours for the best quality.
  • Reassembly: If the salad has been stored, reassemble by adding fresh basil and balsamic glaze just before serving.

Nutrition Tips and Dietary Adaptations

Looking to boost the nutritional profile or accommodate dietary needs? Here’s what to consider:

  • Low-Carb Option: Simply omit the mozzarella and add more cucumbers for a refreshing, keto-friendly version!
  • Vegan Variation: Use vegan mozzarella or skip the cheese altogether and add chickpeas for protein.
  • Gluten-Free: This salad is naturally gluten-free, making it perfect for gluten-sensitive diets.
  • Low-Sodium: Opt for a salt-free balsamic glaze or make your own to control sodium levels.

Equipment Recommendations

Get the right tools for a seamless cooking experience:

  • Mandoline Slicer: For perfectly uniform cucumber slices that enhance presentation and texture.
  • Sharp Knife: A good chef’s knife is essential for clean cuts on mozzarella and cucumbers.
  • Cutting Board: Use a sturdy cutting board for safe chopping.
  • Serving Platter: A beautiful platter will elevate the dish and impress your guests!

Serving Suggestions

This salad is incredibly versatile! Here are a few ideas for serving:

  • As a Side Dish: Serve alongside grilled chicken, fish, or steak for a colorful plate.
  • In Wraps: Use as a filling in wraps or sandwiches for a fresh crunch.
  • With Toast: Serve on toasted bread for a delightful bruschetta-style appetizer.
  • On a Buffet Table: Perfect for parties, this salad can stand on its own or be part of a larger spread.

FAQs About Cucumber Caprese Salad

Got questions? Here are some common inquiries about making this delicious salad:

  • Can I make Cucumber Caprese Salad ahead of time? Yes! Prep the ingredients and store them separately until ready to serve.
  • Can I substitute the mozzarella in this recipe? Absolutely! Use vegan mozzarella or even feta cheese for a different flavor profile.
  • How long can I store leftovers? Store in an airtight container in the refrigerator for up to 24 hours.
  • Is this salad gluten-free? Yes, this Cucumber Caprese Salad is naturally gluten-free!
  • Can I use other herbs instead of basil? Yes! Fresh mint or parsley can be used for a different flavor twist.
  • What’s the best way to slice cucumbers? A mandoline slicer gives you the most uniform slices, but a sharp knife works just fine!
  • Can I add protein to the salad? Certainly! Grilled shrimp or chicken can turn this salad into a heartier meal.
  • What should I do if I don’t have balsamic glaze? You can use plain balsamic vinegar or make a quick reduction by simmering balsamic vinegar until it thickens.

Conclusion

This Cucumber Caprese Salad is not just a dish; it’s a vibrant celebration of fresh, wholesome ingredients. Bursting with flavor and color, it’s perfect for any occasion—from casual lunches to elegant dinners. Remember, cooking should be fun and creative, so don’t hesitate to experiment with your ingredients! Now grab your cucumbers, and let’s get cooking—your taste buds will thank you!

Cucumber Caprese Salad

Prep Time 10 minutes
Total Time 10 minutes
Servings 4 people
Calories 250
A fresh and light salad combining crisp cucumbers, creamy mozzarella, and fragrant basil, drizzled with balsamic glaze.

Ingredients

Cucumbers

  • 2 large English cucumbers

Mozzarella

  • 8 oz fresh mozzarella balls

Basil

  • 1/2 cup fresh basil leaves

Balsamic Glaze

  • 3 tablespoons high-quality balsamic glaze

Instructions 

  • Slice cucumbers into 1/4-inch rounds and pat dry.
  • Slice mozzarella into 1/4-inch rounds and pat dry.
  • Arrange cucumber and mozzarella slices alternately on a platter.
  • Tear basil leaves and scatter over the salad.
  • Drizzle balsamic glaze over the salad and let rest for 5 minutes before serving.

Notes

Use high-quality balsamic glaze for the best flavor.
Calories: 250kcal
Cost: $12
Course: Salad
Cuisine: Italian
Keyword: cucumber

Discover the Joy of 10-Minute Caprese Skewers!

Welcome to a vibrant culinary adventure that takes just 10 minutes! Imagine a dish that bursts with flavor, showcasing the classic Italian Caprese salad, but presented as delightful skewers. These Caprese skewers serve as an ideal appetizer or a colorful side dish, combining the freshness of cherry tomatoes, the creaminess of fresh mozzarella, and the aromatic touch of fresh basil. Whether you’re hosting a gathering or simply looking for a quick, nutritious snack, this recipe is your go-to solution for a health-packed, flavor-rich treat.

In this article, we’ll dive deep into every aspect of making these skewers, from ingredient selection to troubleshooting tips, ensuring your culinary experience is both enjoyable and rewarding. Let’s get started!

Why You’ll Love This Recipe

Caprese skewers are not just about great taste; they’re about convenience and versatility. Here’s why you’ll adore this recipe:

  • Super Quick Preparation: Ready in just 10 minutes, perfect for last-minute gatherings or busy weeknights.
  • Fresh Ingredients: Utilizing seasonal tomatoes and fresh basil gives these skewers a vibrant flavor profile.
  • Nutrition Packed: Each skewer is loaded with vitamins and antioxidants from fresh produce, making them a healthy choice.
  • Customizable: Feel free to mix and match ingredients to suit your taste or dietary preferences.
  • Stunning Presentation: The colorful layers make for an eye-catching dish that’s sure to impress your guests.

Essential Ingredients for Caprese Skewers

Creating the perfect Caprese skewers starts with selecting the right ingredients. Here’s a breakdown of what you need:

  • Balsamic Vinegar: 2 cups, for creating a sweet and tangy glaze.
  • Fresh Mozzarella: 12 oz. of sliced mozzarella cheese or mini mozzarella balls for easy assembly.
  • Tomatoes: 3 ripe tomatoes sliced thick or 1 pint of cherry tomatoes sliced in half.
  • Fresh Basil Leaves: For a fragrant touch and vibrant color.
  • Olive Oil: A drizzle adds richness and depth.
  • Kosher Salt and Freshly Ground Black Pepper: Essential for seasoning and enhancing flavors.

Ingredient Substitutions

Colorful Caprese skewers arranged on a plate with basil leaves and drizzled olive oil.

If you’re looking to tweak the recipe to fit your dietary needs or preferences, here are some great substitutions:

  • Cheese Alternatives: Swap mozzarella for burrata or dairy-free cheese for a vegan option.
  • Tomato Variations: Use heirloom tomatoes or even roasted tomatoes for a different flavor experience.
  • Herb Substitutions: Try using fresh mint or arugula if you’re out of basil.
  • Gluten-Free Options: This dish is naturally gluten-free, making it suitable for various diets.

How to Make Caprese Skewers

Let’s get to the fun part—making your skewers! Follow these simple steps for a delicious result:

  1. In a small saucepan, pour in the balsamic vinegar and bring it to a boil over medium-low heat. Allow it to cook until it reduces to a glaze, about 10 to 20 minutes.
  2. Once reduced, remove the saucepan from the heat and let the balsamic glaze cool.
  3. On a platter, arrange slices of tomato and mozzarella, alternating them. Place fresh basil leaves between each.
  4. Drizzle the arranged slices with olive oil and the cooled balsamic reduction, ensuring even coverage.
  5. Season with kosher salt and freshly ground black pepper to taste.
  6. Serve immediately as a delicious appetizer or side dish.

Pro Tips for Perfect Skewers

Here are some expert insights to elevate your Caprese skewers:

  • Use Fresh Ingredients: Always opt for the freshest mozzarella and basil for the best flavor.
  • Skewer Size Matters: Choose skewers that are not too long to make serving and eating easier.
  • Make Ahead: You can prepare the balsamic glaze in advance to save time.
  • Chill the Ingredients: Keep your mozzarella and tomatoes chilled before assembling for a refreshing taste.
  • Experiment with Flavors: Add a sprinkle of chili flakes for a spicy kick or a drizzle of pesto for extra flavor.
  • Artful Arrangement: A visually appealing presentation can enhance your dining experience.
  • Balance the Flavors: Taste as you go to ensure the perfect blend of sweet, savory, and tangy.

Common Mistakes and Troubleshooting

Even the best chefs can make mistakes. Here’s how to avoid common pitfalls:

  • Overcooking the Balsamic: Monitor the glaze closely; it should be thick but not burnt.
  • Using Old Ingredients: Freshness is key; check your herbs and cheese for quality.
  • Poor Assembly: Don’t overpack the skewers; allow room for flavors to meld.
  • Skipping the Seasoning: Always season to taste for the best flavor profile.

Delicious Variations

Feel free to switch things up! Here are some fun variations you can try:

  • Caprese Salad Bowls: Serve the ingredients in a bowl instead of skewers for a family-style dish.
  • Grilled Caprese Skewers: Grill the skewers for a smoky flavor—perfect for summer barbecues.
  • Caprese Pasta Salad: Toss the ingredients with cooked pasta for a hearty version.
  • Fruit-Infused Skewers: Add pieces of watermelon or peaches for a refreshing twist.

Storage and Make-Ahead Instructions

If you have leftovers or want to prepare ahead of time, here’s how to store them:

  • Refrigeration: Store skewers in an airtight container in the fridge for up to 2 days.
  • Assemble Just Before Serving: For the best flavor and freshness, assemble the skewers shortly before serving.
  • Leftover Ingredients: Use any leftover ingredients in salads or wraps for another meal!

Frequently Asked Questions

Here are some common questions about Caprese skewers:

  • Can I use different types of cheese? Absolutely! Burrata or feta can also work beautifully.
  • What can I serve with Caprese skewers? They pair wonderfully with crusty bread, olives, or a light salad.
  • Are Caprese skewers healthy? Yes! They are low in calories and high in nutrients.
  • How do I make the balsamic glaze thicker? Cook it longer until it reaches your desired consistency.
  • Can I prepare these skewers in advance? Yes, but assemble them just before serving for the best taste.
  • What if I don’t have skewers? No worries! You can arrange all the ingredients on a platter.
  • How do I store leftovers? Keep them in an airtight container in the fridge for up to 2 days.
  • What are some good sides for a Caprese meal? Consider a light pasta salad or a refreshing cucumber salad.

Nutrition Tips and Dietary Adaptations

To make these skewers fit various diets, consider the following:

  • Vegan Option: Substitute mozzarella with vegan cheese alternatives.
  • Low-Carb Version: Skip the balsamic reduction or use a sugar-free version.
  • Gluten-Free: This dish is naturally gluten-free; enjoy without worry!

Equipment Recommendations

To make your cooking experience smooth, here’s what you’ll need:

  • Small Saucepan: For reducing the balsamic vinegar.
  • Wooden or Metal Skewers: Choose based on preference; soak wooden skewers in water beforehand to prevent burning.
  • Cutting Board and Knife: For slicing tomatoes and mozzarella with ease.

Serving Suggestions

When it comes to serving, presentation is key! Here are some creative ideas:

  • Platter Arrangement: Serve skewers on a beautiful platter with fresh herbs for decoration.
  • Pair with Dips: Add a side of pesto or hummus for extra flavor.
  • Make it a Meal: Serve alongside grilled chicken or fish for a complete dinner.

In conclusion, these 10-minute Caprese skewers are not just a recipe—they are a celebration of fresh, vibrant flavors that anyone can enjoy. Whether you’re hosting a party, looking for a quick snack, or simply wanting to enjoy the beauty of fresh ingredients, this dish is your ticket to deliciousness. So grab your ingredients, let your creativity flow, and make your next meal a colorful and tasty adventure!

Quick & Easy Caprese Skewers: Perfect Recipe for a Classic 10-Minute Salad

Prep Time 10 minutes
Cook Time 15 minutes
Total Time 25 minutes
Servings 4 servings
Calories 250
Enjoy these simple and delicious Caprese skewers, perfect for a quick appetizer or side dish in just 10 minutes.

Ingredients

Balsamic Vinegar

  • 2 cups balsamic vinegar

Tomatoes

  • 3 ripe tomatoes ripe tomatoes, sliced thick (or 1 pint cherry tomatoes sliced in half)
  • 12 oz fresh mozzarella cheese (sliced thick or mini mozzarella balls)

Fresh Basil Leaves

  • to taste Fresh basil leaves

Olive Oil

  • for drizzling Olive oil

Kosher Salt and Black Pepper

  • to taste Kosher salt and freshly ground black pepper

Instructions 

  • Simmer balsamic vinegar until reduced to a glaze, about 10-20 minutes, then cool.
  • Arrange tomato and mozzarella slices on a platter, alternating and adding basil leaves.
  • Drizzle with olive oil and balsamic glaze, then season with salt and pepper.
  • Serve immediately as a fresh appetizer or side.

Notes

Use mini mozzarella balls for easier assembly.
Calories: 250kcal
Cost: $15
Course: Appetizer
Cuisine: Italian
Keyword: caprese, Salad, Skewers

Elevate Your Meals with a Fresh Mediterranean Quinoa Salad

Welcome to the vibrant world of healthy cooking! Today, we’re diving into a dish that’s not just a salad, but a celebration of flavors and nutrition—the Mediterranean Quinoa Salad. Packed with fresh vegetables, fluffy quinoa, and a zesty dressing, this salad is a versatile meal that’s perfect for any occasion. Whether you’re meal prepping for the week or looking for a quick lunch, this salad will become your new go-to. Let’s explore why this dish deserves a spot on your table!

Why You’ll Love This Recipe

This Mediterranean Quinoa Salad is not just delicious; it’s also bursting with benefits that will make your taste buds dance and your body thrive. Here’s why you’ll fall in love:

  • Nutritious Powerhouse: Quinoa is a complete protein, providing all nine essential amino acids, making it a perfect choice for plant-based diets.
  • Vibrant Flavors: The combination of fresh parsley, juicy tomatoes, and crisp cucumbers creates a refreshing flavor profile that brightens your plate.
  • Quick and Easy: With simple ingredients and straightforward steps, this salad can be whipped up in no time—ideal for busy lifestyles!
  • Meal Prep Friendly: Make a big batch at the beginning of the week, and enjoy it for lunches or dinners, keeping your meals fresh and exciting.
  • Customizable: This salad is a blank canvas—add your favorite veggies, proteins, or grains for a personalized touch!

Ingredients for Your Mediterranean Quinoa Salad

Let’s gather the ingredients to create this delightful salad. Here’s what you’ll need:

  • 1 cup uncooked quinoa: The star of the dish, quinoa provides a nutty flavor and a fluffy texture when cooked.
  • 2 cups water or vegetable broth: Using broth enhances the flavor of the quinoa.
  • 1/2 teaspoon salt (for cooking quinoa): Essential for seasoning the quinoa as it cooks.
  • 1 cup chopped fresh parsley: Adds a burst of freshness and color.
  • 1 1/2 cups chopped tomatoes: Use a mix of red and yellow tomatoes for sweetness and visual appeal.
  • 1 cup chopped cucumber: Provides a refreshing crunch.
  • 1/2 cup thinly sliced red onion: For a mild bite and beautiful color.
  • 1/4 cup olive oil: Rich in healthy fats, it adds richness to the dressing.
  • 2 tablespoons fresh lemon juice: Brightens the flavors and adds acidity.
  • 1/2 teaspoon salt (for dressing): Enhances the flavor of the dressing.
  • 1/4 teaspoon black pepper: Adds a touch of warmth.

Cooking Perfect Quinoa: The Key to Fluffiness

A side view of a fresh quinoa salad with parsley, tomatoes, and cucumber.

Cooking quinoa is straightforward, but a few tips can help you achieve that perfect, fluffy texture:

  • Rinse the Quinoa Thoroughly: Place the uncooked quinoa in a fine-mesh sieve and rinse it under cold running water for at least 1 minute to remove saponins, which can impart a bitter taste.
  • Cook the Quinoa Perfectly: Combine the rinsed quinoa, water or broth, and salt in a saucepan. Bring to a boil, reduce heat to low, cover, and simmer for 15 minutes.
  • Crucial Steaming: After cooking, let the quinoa sit covered for an additional 10 minutes to steam. This step ensures each grain is fluffy and fully cooked.
  • Fluff with a Fork: Once cooled, use a fork to fluff the quinoa gently before adding it to your salad bowl.

Crafting Your Fresh Mediterranean Quinoa Salad

Now that your quinoa is perfectly cooked and cooled, let’s put this salad together:

  • Prepare the Vegetables: While your quinoa is cooling, chop your parsley, tomatoes, cucumber, and slice the red onion.
  • Make the Dressing: In a small bowl, whisk together olive oil, fresh lemon juice, salt, and pepper until well blended.
  • Combine Ingredients: In a large bowl, combine the cooled quinoa and all your chopped vegetables. Pour the dressing over the mixture and toss gently to coat.
  • Tweak to Taste: Don’t forget to taste your salad! Adjust seasoning as needed; a little extra salt or lemon juice can elevate the flavors.

Expert Tips for the Best Mediterranean Quinoa Salad

To ensure your salad is a hit, here are some pro tips:

  • Use Fresh Ingredients: Fresh vegetables and herbs make a huge difference in flavor. Choose ripe, seasonal produce for the best results.
  • Chill for Flavor: Letting the salad chill in the fridge for at least 30 minutes allows the flavors to meld beautifully.
  • Mix Up Your Veggies: Feel free to add bell peppers, olives, or even avocado for added flavor and nutrition.
  • Grilled Proteins: For a heartier meal, top your salad with grilled chicken, shrimp, or chickpeas.
  • Experiment with Grains: Try substituting quinoa with farro, bulgur, or even brown rice for a different texture.
  • Storage Tips: Store leftovers in an airtight container in the fridge for up to 3 days. Stir well before serving!

Variations to Spice Things Up

Get creative with your Mediterranean Quinoa Salad! Here are some delicious variations to try:

  • Greek Twist: Add feta cheese, kalamata olives, and oregano for a classic Greek flavor.
  • Southwest Style: Incorporate black beans, corn, avocado, and a lime-cilantro dressing for a zesty twist.
  • Asian Fusion: Mix in edamame, shredded carrots, and a sesame-ginger dressing for an Asian-inspired salad.
  • Roasted Veggie Delight: Toss in roasted vegetables like zucchini, bell peppers, and eggplant for added depth and flavor.

Common Mistakes and Troubleshooting

Even the best cooks can run into issues. Here are some common mistakes and how to avoid them:

  • Overcooked Quinoa: Keep an eye on the cooking time! Overcooked quinoa can become mushy. Follow the timing precisely.
  • Not Rinsing Quinoa: Skipping the rinse can lead to a bitter flavor. Always rinse thoroughly before cooking.
  • Too Much Dressing: Start with less dressing and add more as needed. It’s easier to add than to take away!
  • Storing with Dressing: If you plan to have leftovers, store the dressing separately to avoid sogginess.

FAQs About Mediterranean Quinoa Salad

Got questions? Let’s answer some common queries about this delightful dish:

  • Can I make this salad ahead of time? Yes! It’s great for meal prep. Just store the dressing separately until ready to serve.
  • Is quinoa gluten-free? Absolutely! Quinoa is a gluten-free grain, making it perfect for those with gluten sensitivities.
  • What can I substitute for quinoa? You can use farro, couscous, or bulgur if quinoa isn’t your thing.
  • How can I make this salad vegan? The recipe is already vegan! Just ensure any additional toppings are plant-based.
  • Can I freeze this salad? It’s not recommended to freeze quinoa salads, as the texture can change when thawed.
  • What’s the best way to store leftovers? Keep leftovers in an airtight container in the fridge for up to 3 days.
  • Can I add protein to this salad? Yes! Grilled chicken, chickpeas, or tofu are excellent additions.
  • How long does quinoa take to cook? Quinoa typically takes about 15 minutes to cook, plus an additional 10 minutes of steaming.

Nutritional Benefits and Dietary Adaptations

This Mediterranean Quinoa Salad is not only delicious but also loaded with nutritional benefits:

  • High in Protein: Quinoa provides a complete protein source, making it perfect for vegetarians and vegans.
  • Rich in Fiber: The combination of quinoa and fresh vegetables promotes digestive health and keeps you feeling full.
  • Heart-Healthy Fats: Olive oil is rich in monounsaturated fats, promoting heart health and reducing inflammation.
  • Vitamin-Packed: Fresh veggies like tomatoes and cucumbers are rich in vitamins and antioxidants.

Equipment Recommendations

Before you start cooking, here are some essential kitchen tools that will help you create this salad effortlessly:

  • Fine-Mesh Sieve: Perfect for rinsing quinoa thoroughly.
  • Medium Saucepan: Essential for cooking your quinoa perfectly.
  • Large Mixing Bowl: Use for combining all ingredients.
  • Whisk: Great for mixing the dressing smoothly.

Serving Suggestions

Serve your Mediterranean Quinoa Salad as a vibrant side dish or a main course. It pairs wonderfully with:

  • Grilled Meats: Chicken, lamb, or fish complement the freshness of the salad.
  • Wraps and Sandwiches: A perfect accompaniment to your favorite wraps or sandwiches.
  • Soup: Serve alongside a light soup for a complete meal.

Wrap Up and Enjoy!

There you have it! A comprehensive guide to making the ultimate Mediterranean Quinoa Salad that’s bursting with flavor and nutrition. Whether you’re preparing for a summer picnic or just looking to brighten your daily meals, this salad is your ticket to culinary happiness. Enjoy the process, get creative, and most importantly, savor every bite of this delicious journey!

Fresh Mediterranean Quinoa Salad

Prep Time 10 minutes
Cook Time 15 minutes
Total Time 25 minutes
Servings 4 servings
Calories 250
A vibrant and healthy quinoa salad packed with fresh vegetables and a zesty lemon dressing, perfect for a light lunch or side dish.

Ingredients

Quinoa

  • 1 cup uncooked quinoa
  • 2 cups water or vegetable broth
  • 0.5 teaspoon salt (for cooking quinoa)

Vegetables

  • 1 cup chopped fresh parsley
  • 1.5 cups chopped tomatoes (mix of red and yellow)
  • 1 cup chopped cucumber
  • 0.5 cup thinly sliced red onion

Dressing

  • 0.25 cup olive oil
  • 2 tablespoons fresh lemon juice
  • 0.5 teaspoon salt (for dressing)
  • 0.25 teaspoon black pepper

Instructions 

  • Rinse the quinoa under cold water for 1 minute, then drain.
  • Cook the quinoa with water and salt for 15 minutes, then let it steam covered for 10 minutes and cool.
  • Chop the parsley, tomatoes, cucumber, and red onion. Mix with cooled quinoa.
  • Whisk together olive oil, lemon juice, salt, and pepper to make the dressing.
  • Pour dressing over the salad and toss to combine. Serve immediately or chill.

Notes

For extra flavor, add some crumbled feta or olives.
Calories: 250kcal
Cost: $15
Course: Salad
Cuisine: Mediterranean
Keyword: Quinoa

Freshness in a Flash: Discover the Joy of a 10-Minute Caprese Salad!

Welcome to the vibrant world of the Caprese salad, where fresh ingredients dance together in a delightful symphony of flavor! This 10-Minute Caprese Salad is not just a dish; it’s a celebration of simplicity and nutrition that will tantalize your taste buds and elevate your culinary game. Perfect for busy weeknights, impromptu gatherings, or a quick lunch, this recipe brings the essence of Italy right to your kitchen! In this article, we’ll take a deep dive into everything you need to know about making the perfect Caprese salad, including its rich history, health benefits, and tips for crafting an unforgettable experience.

Why You’ll Love This Recipe

This Caprese salad recipe is not only quick to prepare but also packed with benefits that make it a must-try. Here are five reasons to get excited:

  • Time-Saving Delight: Ready in just 10 minutes, this salad is your go-to solution for last-minute meals.
  • Fresh and Flavorful: Experience the vibrant taste of ripe tomatoes, creamy mozzarella, and fragrant basil in every bite.
  • Nutritious Goodness: With fresh ingredients, this salad is rich in vitamins and antioxidants, making it a healthy choice.
  • Versatile Serving Options: Enjoy it as a starter, side dish, or even a light main course!
  • Easy Customization: With simple substitutions and variations, you can make this salad your own!

Ingredients Breakdown

Let’s explore the key ingredients that make this Caprese salad shine:

  • Tomatoes: Use 3 ripe tomatoes, sliced. Opt for heirloom or vine-ripened tomatoes for the best flavor. If you’re looking for alternatives, cherry tomatoes are a great option!
  • Fresh Mozzarella: An essential component, 8 oz of fresh mozzarella should be sliced. Look for “bocconcini” for small balls or a larger ball that can be sliced. Avoid pre-shredded varieties for the freshest taste.
  • Basil Leaves: A handful of fresh basil leaves adds aromatic freshness. Choose vibrant green leaves, avoiding any wilted ones. Italian basil is traditional, but feel free to explore other varieties.
  • Balsamic Glaze: Two tablespoons of balsamic glaze add a tangy sweetness that complements the salad beautifully.
  • Olive Oil: Drizzle two tablespoons of high-quality olive oil over the top for a rich flavor boost.
  • Salt and Pepper: Season to taste! These simple additions enhance the flavors of the fresh ingredients.

Feel free to get creative! You can substitute the mozzarella with burrata for an ultra-creamy texture or add a sprinkle of crushed red pepper for a kick.

Step-by-Step Instructions

Colorful layers of sliced tomatoes and mozzarella drizzled with balsamic glaze and olive oil.

Creating your Caprese salad is a breeze! Follow these simple steps:

  1. Layer the sliced tomatoes, mozzarella, and basil leaves on a serving platter in an alternating pattern.
  2. Drizzle the olive oil and balsamic glaze over the salad generously.
  3. Season with salt and pepper, adjusting to your personal taste.
  4. Serve immediately as a starter or a light snack. Enjoy the fresh flavors!

Expert Pro Tips for the Perfect Caprese

To take your Caprese salad to the next level, consider these expert tips:

  • Choose Seasonal Ingredients: Fresh, in-season tomatoes and basil will elevate the flavor profile immensely.
  • Slice with Care: Use a sharp knife to slice tomatoes and mozzarella for clean cuts and a beautiful presentation.
  • Experiment with Oils: While olive oil is traditional, consider flavored oils like basil-infused or garlic oil for a unique twist.
  • Chill Ingredients: For an extra refreshing bite, chill your tomatoes and mozzarella before assembly.
  • Balance Flavors: Don’t be shy with the salt and pepper; they bring out the flavors of your ingredients!
  • Garnish Wisely: Finish off your salad with a sprinkle of sea salt or a few microgreens for an elegant touch.
  • Presentation Matters: Arrange your ingredients artfully for a stunning visual appeal.
  • Go Gourmet: Add a sprinkle of pine nuts or a few olives for an upscale touch!

Common Mistakes and Troubleshooting

Even the best of us make mistakes in the kitchen! Here are common pitfalls to avoid:

  • Using Low-Quality Ingredients: The Caprese salad is all about freshness. Avoid using old or out-of-season produce.
  • Skipping the Seasoning: Don’t forget the salt and pepper! They are essential for enhancing the dish’s overall taste.
  • Overdressing the Salad: While olive oil and balsamic glaze are delicious, too much can overwhelm the delicate flavors.
  • Not Layering Correctly: Make sure to alternate your layers for a balanced bite every time.

Delicious Variations to Try

Looking for something a bit different? Here are some fun variations to consider:

  • Caprese Skewers: Thread cherry tomatoes, mozzarella balls, and basil leaves onto skewers for a fun appetizer.
  • Grilled Caprese Salad: Grill the tomatoes and mozzarella for a smoky flavor that adds depth to the dish.
  • Caprese Pasta Salad: Toss the ingredients with cooked pasta for a hearty meal that’s perfect for potlucks.
  • Avocado Caprese: Add sliced avocado for a creamy texture and additional nutrients!

Storage and Make-Ahead Instructions

Want to prepare your salad in advance? Here’s how to store it properly:

  • Refrigerate: Store any leftover salad in an airtight container in the fridge for up to two days. Keep the dressing separate to prevent sogginess.
  • Make Ahead: You can slice the ingredients a few hours in advance; just wait to assemble until you’re ready to serve.

Frequently Asked Questions

Here are some common questions about Caprese salad:

  • What is the best type of tomato for Caprese salad? Heirloom or vine-ripened tomatoes are ideal due to their rich flavor.
  • Can I use dried basil instead of fresh? While fresh is best, dried basil can be used in a pinch, though the flavor will be less vibrant.
  • How can I make this salad vegan? Swap the mozzarella for a vegan cheese alternative or use marinated tofu.
  • What type of olive oil should I use? A high-quality extra virgin olive oil will provide the best flavor.
  • Can I add other ingredients? Absolutely! Feel free to add olives, artichokes, or even grilled chicken for added flavor!
  • Is Caprese salad gluten-free? Yes, all the ingredients are naturally gluten-free!
  • How do I prevent my salad from getting soggy? Keep the dressing separate until you’re ready to serve.
  • How many servings does this recipe make? This recipe serves 2-3 as a starter or side dish.

Nutritional Information and Dietary Adaptations

This Caprese salad is not only delicious but also nutritious! Here’s a quick overview:

  • Low-Calorie Option: Each serving is approximately 200 calories, making it a great light meal.
  • Rich in Antioxidants: Tomatoes and basil are loaded with vitamins and minerals, particularly vitamin C.
  • Healthy Fats: Olive oil provides heart-healthy monounsaturated fats.
  • Low-Carb Friendly: Perfect for those following a low-carb diet.

Incorporate this salad into a balanced diet, pairing it with whole grains or lean proteins for a complete meal.

Essential Equipment for Making Caprese Salad

While this recipe is simple, having the right tools can make a difference:

  • Sharp Knife: A good chef’s knife is essential for cleanly slicing tomatoes and mozzarella.
  • Cutting Board: Use a sturdy cutting board to prepare your ingredients.
  • Serving Platter: A beautiful serving platter enhances presentation.

Serving Suggestions

Caprese salad is versatile and pairs wonderfully with many dishes:

  • As a Starter: Serve it before a main course for a refreshing beginning.
  • Alongside Grilled Meats: It complements grilled chicken, steak, or fish beautifully.
  • With Crusty Bread: Pair it with fresh bread for a delightful texture contrast.

Now that you’re well-equipped with all the knowledge to create the ultimate 10-Minute Caprese Salad, it’s time to roll up your sleeves and get cooking! Remember, cooking is all about fun and creativity, so don’t hesitate to make this recipe your own. Enjoy the fresh flavors and the joy of sharing this delightful dish with friends and family!

10-Minute Caprese Salad

Prep Time 5 minutes
Total Time 5 minutes
Servings 4 people
Calories 250
A quick and delicious Italian-inspired salad featuring fresh tomatoes, mozzarella, and basil, perfect for a light snack or starter.

Ingredients

Main

  • 3 pieces ripe tomatoes (sliced)
  • 8 oz fresh mozzarella (sliced)
  • to taste Fresh basil leaves
  • 2 tablespoons balsamic glaze
  • 2 tablespoons olive oil
  • to taste Salt and pepper (to taste)

Instructions 

  • Layer tomato slices, mozzarella, and basil leaves on a serving platter.
  • Drizzle olive oil and balsamic glaze over the top.
  • Season with salt and pepper.
  • Serve immediately as a starter or light snack.

Notes

Use fresh ingredients for the best flavor.
Calories: 250kcal
Cost: $10
Course: Appetizer
Cuisine: Italian
Keyword: Basil, Mozzarella, tomato

Get Ready to Elevate Your Picnic Game with Guy Fieri’s Macaroni Salad!

If you’re looking to add a burst of flavor to your next picnic or BBQ, then look no further! This Guy Fieri Macaroni Salad is a vibrant and delicious dish that combines creamy textures with crunchy vegetables. In just a few simple steps, you’ll have a crowd-pleasing salad that’s perfect for any summer gathering. Let’s dive into why this recipe is not just any macaroni salad, but a game-changer that will keep everyone coming back for more!

Why You’ll Love This Guy Fieri Macaroni Salad

  • Flavor Explosion: The combination of creamy mayo and tangy apple cider vinegar creates a symphony of flavors that dance on your palate.
  • Easy to Prepare: With just a handful of ingredients and simple steps, you can whip this up in no time!
  • Perfect for Any Occasion: Whether it’s a picnic, BBQ, or potluck, this salad fits seamlessly into any menu.
  • Customizable: Feel free to mix in your favorite veggies or proteins to make it your own—there are no rules here!
  • Make-Ahead Friendly: This mac salad can be made ahead of time, allowing the flavors to meld together while chilling in the fridge.

Ingredients for Guy Fieri Macaroni Salad

Gather these fresh ingredients for a salad that’s bursting with color and flavor:

  • 2 cups elbow macaroni: The classic choice for macaroni salad, offering the perfect bite.
  • 1/2 cup mayonnaise: The creamy base that provides richness and smoothness.
  • 1/4 cup sour cream: Adds a delightful tang that balances the richness of the mayo.
  • 2 tbsp apple cider vinegar: For that zesty kick that brightens up the salad.
  • 1 tbsp Dijon mustard: Enhances the flavor profile with a subtle spiciness.
  • 1/2 cup diced red bell pepper: Adds sweetness and a pop of color.
  • 1/2 cup diced celery: Introduces a satisfying crunch.
  • 1/4 cup diced red onion: Provides sharpness that complements the other flavors.
  • 1/4 cup chopped fresh parsley: Freshens up the dish with an herbal note.
  • 1/2 tsp salt: Essential for enhancing the overall flavor.
  • 1/4 tsp black pepper: Adds just the right amount of heat.

How to Make Guy Fieri Macaroni Salad

Side view of creamy macaroni salad with vibrant vegetables.

Follow these simple steps to create your own delicious macaroni salad:

Step 1: Cook the Macaroni

In a large pot, bring salted water to a boil. Add the elbow macaroni and cook for about 7-8 minutes until al dente. Drain and rinse under cold water to stop the cooking process.

Step 2: Prepare the Dressing

In a large mixing bowl, combine the mayonnaise and sour cream, whisking until smooth. Add the apple cider vinegar and Dijon mustard, blending until fully incorporated.

Step 3: Combine Ingredients

Add the cooled macaroni to the dressing. Fold in the diced red bell pepper, celery, red onion, and parsley until everything is well coated.

Step 4: Chill Before Serving

Cover the bowl with plastic wrap and refrigerate for at least one hour. This allows the flavors to meld beautifully!

Pro Tips for the Best Guy Fieri Macaroni Salad

  • Don’t Overcook the Pasta: Aim for al dente macaroni to keep the salad from becoming mushy.
  • Chill Well: Letting the salad chill not only enhances the flavors but also makes it refreshingly cool.
  • Experiment with Add-ins: Try adding diced pickles, olives, or even cooked bacon for an extra flavor twist.
  • Keep it Colorful: Use a variety of colorful veggies to make the salad visually appealing.
  • Adjust the Creaminess: Feel free to use Greek yogurt instead of sour cream for a lighter version.
  • Use Fresh Ingredients: Fresh veggies will elevate the taste and texture of your salad.
  • Don’t Skip the Vinegar: It adds the necessary zing that balances the richness of the mayo and sour cream.
  • Mix Before Serving: Give the salad a good stir before serving to redistribute the dressing.

Common Mistakes and Troubleshooting

Even the best chefs can run into a few hiccups! Here are some common pitfalls to avoid:

  • Overcooked Pasta: This can lead to a mushy salad. Always cook pasta according to package instructions.
  • Too Much Dressing: If your salad feels overly creamy, start with less dressing and add more as needed.
  • Not Chilling Long Enough: If you serve it right away, the flavors won’t have enough time to meld.
  • Underseasoned Salad: Taste and adjust the seasoning, adding more salt and pepper if necessary.

Variations of Guy Fieri Macaroni Salad

Feel free to customize this mac salad to suit your taste preferences:

  • Tuna Macaroni Salad: Add a can of drained tuna for a protein-packed twist.
  • Veggie-Packed Mac Salad: Toss in peas, corn, or shredded carrots for added nutrition.
  • Spicy Mac Salad: Stir in some chopped jalapeños or a dash of hot sauce for a kick.
  • Herbed Mac Salad: Add fresh dill or basil for an aromatic boost.

Storage and Make-Ahead Instructions

This macaroni salad is perfect for meal prep! Here’s how to store it:

  • In the Fridge: Store leftovers in an airtight container for up to 3 days.
  • Make Ahead: Prepare the salad a day in advance for optimal flavor.
  • Freezing Not Recommended: Creamy salads don’t freeze well, so it’s best enjoyed fresh.

Comprehensive FAQ about Guy Fieri Macaroni Salad

  • What ingredients are in Guy Fieri’s macaroni salad? This salad features elbow macaroni, mayonnaise, sour cream, and a mix of crunchy veggies.
  • Can I customize this salad? Absolutely! Feel free to add your favorite ingredients.
  • How long can I store macaroni salad? It can last in the fridge for up to 3 days.
  • Can I use Greek yogurt instead of sour cream? Yes, Greek yogurt is a great substitute for a lighter option.
  • Is this salad gluten-free? You can make it gluten-free by using gluten-free pasta.
  • Can I make this salad vegan? Yes, substitute mayo with vegan mayo, and omit the sour cream.
  • How do I make it spicier? Add chopped jalapeños or a splash of hot sauce to the dressing.
  • What should I serve with this salad? It pairs well with grilled meats, sandwiches, or as part of a buffet spread!

Nutritional Tips and Dietary Adaptations

This macaroni salad can be adapted to fit various dietary needs:

  • Low-Fat Version: Use low-fat mayo and Greek yogurt.
  • Gluten-Free Option: Swap the pasta for gluten-free varieties.
  • Vegan Alternative: Use vegan mayo and omit dairy products.
  • Protein Boost: Add cooked chickpeas or shredded chicken for extra protein.

Essential Equipment for Making Macaroni Salad

To create this delightful salad, you’ll need:

  • Large Pot: For boiling the macaroni.
  • Mixing Bowl: A big bowl for combining all the ingredients.
  • Whisk: For blending the dressing smoothly.
  • Measuring Cups and Spoons: To ensure accurate measurements for your ingredients.

Serving Suggestions

To truly make this salad shine, consider these serving ideas:

  • Garnish: Top with fresh parsley or a sprinkle of paprika for color.
  • Pair with Proteins: Serve alongside grilled chicken or burgers for a complete meal.
  • Buffet Style: Place in a large bowl at your next gathering for guests to serve themselves.
  • On a Bed of Greens: Serve over a bed of lettuce for a fresh twist.

Now that you have everything you need to create this unforgettable Guy Fieri Macaroni Salad, grab your ingredients and get ready to impress your friends and family. Cooking can be a fun adventure, and with this recipe, you’re bound to have an exciting culinary experience. Enjoy every bite, and remember – the kitchen is your playground!

Guy Fieri Macaroni Salad

Prep Time 15 minutes
Cook Time 10 minutes
Total Time 25 minutes
Servings 6 servings
Calories 350
A creamy and flavorful macaroni salad perfect for picnics and gatherings, with fresh vegetables and a tangy dressing.

Ingredients

Pasta

  • 2 cups elbow macaroni

Dressing

  • 1/2 cup mayonnaise
  • 1/4 cup sour cream
  • 2 tbsp apple cider vinegar
  • 1 tbsp Dijon mustard

Vegetables and herbs

  • 1/2 cup diced red bell pepper
  • 1/2 cup diced celery
  • 1/4 cup diced red onion
  • 1/4 cup chopped fresh parsley
  • 1/2 tsp salt
  • 1/4 tsp black pepper

Instructions 

  • Cook the macaroni in boiling salted water for 7-8 minutes, then drain and rinse with cold water.
  • Mix mayonnaise, sour cream, vinegar, and mustard until smooth.
  • Combine cooled pasta with dressing and fold in vegetables and parsley.
  • Cover and refrigerate for at least an hour before serving.

Notes

For extra flavor, add a dash of paprika or chopped pickles.
Calories: 350kcal
Cost: $15
Course: Salad
Cuisine: American
Keyword: macaroni, Salad