Author

Ryan

Browsing

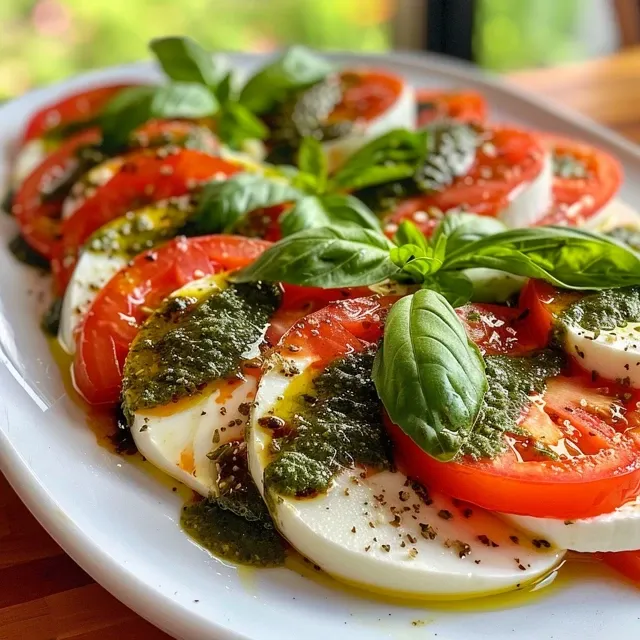
Welcome to a culinary adventure that celebrates simplicity and flavor! This Caprese Salad with Pesto is not just any salad; it’s a vibrant celebration of fresh ingredients that come together to create a dish bursting with flavor. Layered with juicy tomatoes, creamy mozzarella, and aromatic basil, this quick and easy recipe takes minimal time to prepare, making it perfect for any occasion—from a casual weeknight dinner to a festive gathering. Let’s dive into why this recipe deserves a spot in your kitchen!

Why You’ll Love This Recipe

This Caprese Salad with Pesto is not just a feast for the eyes; it’s also a powerhouse of benefits! Here are some reasons to fall in love with this dish:

  • Quick Preparation: Ready in just 10 minutes, this salad is perfect for busy weeknights or when unexpected guests arrive.
  • Fresh and Flavorful: The combination of juicy tomatoes and creamy mozzarella drizzled with zesty pesto creates a delightful explosion of flavors.
  • Healthy and Nutritious: Packed with vitamins and healthy fats, this salad is a guilt-free indulgence that nourishes your body.
  • Versatile Dish: Serve it as a standalone dish, a side for grilled meats, or toss in some pasta for a complete meal.
  • Easy Ingredient Swaps: Customizable with whatever fresh ingredients you have on hand, ensuring nothing goes to waste!

Ingredient Breakdown

To create this delicious Caprese Salad with Pesto, you’ll need the following fresh ingredients:

  • Tomatoes: 2 large tomatoes, sliced lengthwise into 1/4-inch thick slices. Choose ripe, juicy tomatoes for the best flavor.
  • Fresh Mozzarella: 6 oz (170 g) of fresh mozzarella cheese, sliced into 1/4-inch thick rounds. Look for high-quality, soft mozzarella to enhance the creaminess of the salad.
  • Basil Leaves: A handful of fresh basil leaves adds a fragrant touch, elevating the dish.
  • Pesto Sauce: The star of the show! Use store-bought or homemade pesto for a rich, herby flavor.

### Ingredient Substitutions

  • Tomatoes: Substitute with heirloom or cherry tomatoes for a different flavor profile.
  • Fresh Mozzarella: Use burrata if you want an extra creamy texture.
  • Basil: Feel free to replace basil with arugula or spinach for a different green.
  • Pesto: Use sun-dried tomato pesto or a dairy-free version for a unique twist.

How to Make Caprese Salad with Pesto

Creating this salad is a breeze! Just follow these simple steps:

  1. Assemble the salad on a plate by layering the tomato slices, mozzarella, and basil leaves in an alternating pattern.
  2. Drizzle the pesto generously over the salad, or serve it on the side for your guests to add as they wish.
  3. Enjoy immediately, savoring the fresh flavors!

Pro Tips for the Perfect Caprese Salad

Juicy slices of tomato and mozzarella drizzled with pesto, presented in a close-up style.

Get ready to impress your friends with these expert tips:

  • Use Room Temperature Ingredients: Allow your mozzarella to sit at room temperature for about 30 minutes before serving. This enhances the flavors!
  • Quality Matters: Opt for high-quality, fresh ingredients. The better the ingredients, the better the salad!
  • Don’t Overdress: Less is more with pesto. Start with a small amount and add more to taste.
  • Chill Your Bowls: For an extra refreshing salad, chill your serving bowls beforehand.
  • Experiment with Textures: Add some toasted pine nuts or walnuts for a delightful crunch.
  • Make it a Meal: Toss in cooked pasta or grilled chicken to transform this salad into a hearty main course.
  • Pairing is Key: Serve with a glass of chilled white wine or sparkling water with lemon for a refreshing meal.
  • Presentation Matters: Arrange the salad artistically for a beautiful presentation that’s sure to impress.

Common Mistakes and Troubleshooting

Even the best chefs encounter challenges! Here are some common pitfalls and how to avoid them:

  • Overripe Tomatoes: Ensure your tomatoes are ripe but not overly soft. They should hold their shape when sliced.
  • Soggy Salad: Avoid overdressing the salad. Add pesto sparingly to prevent sogginess.
  • Flavor Imbalance: Taste as you go! Adjust the seasoning and pesto to your preference.
  • Wrong Cheese: Don’t use pre-shredded mozzarella; it lacks the creamy texture that fresh mozzarella brings.

Delicious Variations

Don’t be afraid to mix it up! Here are some fun variations to try:

  • Pesto Pasta Salad: Combine cooked pasta with the salad ingredients for a filling and satisfying dish.
  • Caprese Skewers: Thread tomato halves, mozzarella balls, and basil onto skewers for a fun appetizer.
  • Grilled Caprese Salad: Grill the tomatoes and mozzarella for a smoky flavor twist.
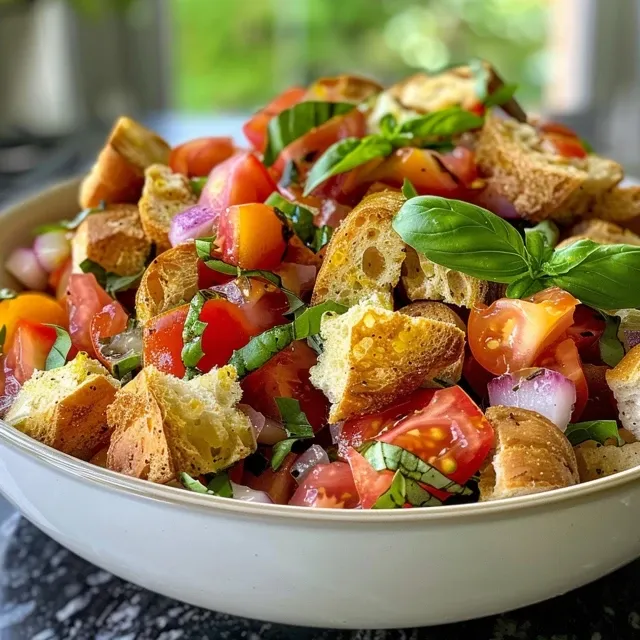
  • Caprese Bruschetta: Serve the salad mix on toasted baguette slices for a delicious appetizer.

Storage and Make-Ahead Instructions

This salad is best enjoyed fresh, but here’s how to store it for later:

  • Refrigerate: Store leftover salad in an airtight container for up to 2 days. The flavors will meld together even more!
  • Prep Ahead: You can slice the tomatoes and mozzarella ahead of time but wait to dress the salad until just before serving to maintain freshness.
  • Pesto Storage: If you have leftover pesto, keep it in a sealed container in the fridge for up to a week, or freeze it for longer storage.

Frequently Asked Questions

Here are answers to some of the most common questions about this tasty dish:

  • Can I use dried basil instead of fresh? Fresh basil provides the best flavor, but in a pinch, dried can work.
  • Is this salad gluten-free? Yes! The Caprese salad is naturally gluten-free, making it suitable for various diets.
  • Can I make my own pesto? Absolutely! Homemade pesto is easy to make and adds a personal touch to your salad.
  • What cheese can I substitute for mozzarella? Burrata, goat cheese, or feta can be excellent alternatives.
  • How do I keep my salad from getting soggy? Serve the pesto on the side and add it just before eating to maintain the salad’s texture.
  • What’s the best way to slice mozzarella? Use a sharp knife and slice gently to keep the cheese intact.
  • Can I add other vegetables? Absolutely! Feel free to add sliced cucumbers, bell peppers, or avocados for extra flavor and nutrition.
  • How can I make this salad vegan? Substitute mozzarella with a vegan cheese or skip it altogether and add more veggies!

Nutrition Tips and Dietary Adaptations

This Caprese Salad is not only delicious but can also cater to various dietary needs:

  • Low-Carb: Keep it low-carb by skipping the pasta variations and focusing on fresh veggies.
  • Dairy-Free: Use a dairy-free pesto and non-dairy cheese alternatives for a dairy-free option.
  • Nut-Free: If you have a nut allergy, avoid pesto with nuts and opt for a nut-free version.
  • Boost Fiber: Add some chickpeas or lentils to the salad for an extra fiber boost!

Equipment Recommendations

While making this salad is straightforward, having the right tools can enhance your experience:

  • Sharp Chef’s Knife: For clean cuts of tomatoes and mozzarella.
  • Cutting Board: A sturdy board to prepare your ingredients safely.
  • Salad Bowl: A large bowl for tossing ingredients if you choose to mix everything together.
  • Measuring Cups: To ensure you have just the right amount of pesto when dressing the salad.

Serving Suggestions

Ready to serve? Here are some delightful ideas to elevate your dining experience:

  • Pair with Wine: A crisp white wine or rosé complements the flavors beautifully.
  • Accompany with Bread: Serve with crusty bread or garlic knots for a complete meal.
  • Make it a Platter: Add assorted olives, artichokes, or roasted red peppers for a Mediterranean-inspired platter.
  • Perfect for Picnics: This salad travels well, making it an excellent choice for a picnic or outdoor gathering.

Let’s wrap this up with a fresh perspective on how to enjoy your healthy food journey! This Caprese Salad with Pesto is more than a dish; it’s a vibrant expression of health and flavor that invites you to explore your culinary creativity. So grab your ingredients, get cooking, and enjoy every colorful bite!

Caprese Salad with Pesto

Prep Time 10 minutes
Total Time 10 minutes
Servings 2 people
Calories 350
A fresh and flavorful Italian salad featuring ripe tomatoes, mozzarella, basil, and pesto sauce.

Ingredients

Main ingredients

  • 2 large tomatoes (sliced into 1/4-inch thick slices)
  • 6 oz fresh mozzarella cheese (sliced into 1/4-inch thick slices)
  • 1 handful fresh basil leaves
  • Pesto sauce Pesto sauce

Instructions 

  • Layer tomato slices, mozzarella, and basil on a plate.
  • Drizzle pesto over the salad.
  • Serve immediately.

Notes

Use high-quality ingredients for the best flavor.
Calories: 350kcal
Cost: $12
Course: Salad
Cuisine: Italian
Keyword: Basil, Mozzarella, Pesto, tomato

Welcome to Your New Favorite Healthy Brunch Delight!

Are you ready to elevate your brunch game with a dish that’s not only vibrant and delicious but also chock-full of nutrients? Say hello to the Vibrant Fruit Fiesta, your go-to healthy brunch fruit salad! This refreshing recipe is perfect for those lazy Sunday mornings or as a delightful addition to any brunch gathering. Packed with a colorful assortment of fruits and a zesty sauce, it’s a feast for both the eyes and the palate. Let’s dive into why this fruit salad will become a staple in your kitchen!

Why You’ll Love This Recipe

  • Quick and Easy: This fruit salad comes together in just 15-20 minutes, making it a breeze for last-minute brunch plans or busy weekday breakfasts.
  • Vibrant Flavors: The combination of fresh fruits with a zesty dressing creates a burst of flavor that will awaken your taste buds.
  • Nutritious Delight: Packed with vitamins and minerals from a variety of fruits, this salad is a guilt-free indulgence.
  • Make-Ahead Friendly: Prep it the night before, and the citrus dressing keeps the fruits fresh in the fridge, ready to enjoy!
  • Customizable: Feel free to swap out fruits based on what’s in season or what you have on hand.

Ingredients Breakdown

To create this delicious salad, you will need the following ingredients:

  • 1 can pineapple chunks (20 ounces): Adds sweetness and juiciness.
  • 2 large firm bananas: These bananas from your fridge add creaminess.
  • 1 cup green grapes: A pop of crunch and sweetness.
  • 1 can mandarin oranges (15 ounces, drained): Citrus zing that enhances flavor.
  • 1 medium red apple: For a crisp texture and sweet-tart flavor.
  • 1 medium green apple: Adds a tangy crunch.
  • 1/2 cup sugar: Adjust for sweetness to complement the fruits.
  • 2 tablespoons cornflour: Helps thicken the sauce.
  • 1/3 cup orange juice: Freshness boost and flavor.
  • 1 tablespoon lemon juice: Prevents browning and adds zest.

Pro Tips for a Perfect Fruit Salad

Close-up view of a colorful fruit salad with various fruits and a glossy dressing.
  • Choose Seasonal Fruits: Using fruits that are in season ensures maximum flavor and freshness.
  • Prevent Browning: Toss apples and bananas with lemon juice immediately after cutting to maintain their crisp and vibrant look.
  • Mixing Textures: Incorporate a variety of textures—crunchy, soft, and juicy—to make each bite exciting.
  • Chill Before Serving: Let the salad chill in the fridge for at least 30 minutes to meld the flavors.
  • Serve in Style: Presentation matters! Use a clear bowl to showcase the colorful fruits.
  • Experiment with Dressings: Try a yogurt-based dressing for a creamy twist or a mint-infused syrup for added freshness.
  • Include Herbs: Fresh mint or basil can elevate the flavor profile and add a delightful aroma.
  • Don’t Overmix: Toss gently to avoid bruising the fruits.

Avoid These Common Mistakes

Even the best chefs make mistakes! Here are some pitfalls to avoid when preparing your fruit salad:

  • Using Overripe Fruit: Always select firm, fresh fruits to ensure the best texture and flavor.
  • Forgetting the Dressing: The sauce is key! Don’t skip it, as it ties all the flavors together.
  • Not Chilling: Serving at room temperature can dull the flavors; chilling enhances them.
  • Excessive Sugar: Adjust sweetness based on the fruit’s natural sugars to avoid an overly sweet salad.

Variations to Try

Get creative with your fruit salad! Here are a few variations to inspire your culinary adventures:

  • Tropical Twist: Add diced mango, kiwi, and coconut flakes for a tropical vacation in a bowl.
  • Berry Delight: Swap in strawberries, blueberries, and raspberries for a berry-packed version.
  • Nutty Crunch: Sprinkle chopped nuts like almonds or walnuts for added crunch and healthy fats.
  • Protein Boost: Mix in Greek yogurt or cottage cheese for a protein-rich breakfast option.

Storage and Make-Ahead Instructions

This fruit salad is perfect for meal prep! Here’s how to store it:

  • In the Fridge: Store in an airtight container to keep the fruits fresh for up to 3 days.
  • Make-Ahead: Prepare the salad up to a day in advance; just add bananas shortly before serving to keep them from browning.

Frequently Asked Questions

  • Can I use frozen fruits? Yes! Just ensure they are thawed and well-drained to prevent excess moisture.
  • What can I serve with this fruit salad? It pairs beautifully with yogurt, pancakes, or as a side dish for savory meals.
  • Is this recipe vegan? Absolutely! It’s entirely plant-based.
  • Can I make this salad without sugar? You can substitute with honey, agave syrup, or a sugar alternative, or skip it entirely if your fruits are sweet enough.
  • What’s the best way to cut fruit? Use a sharp knife and a steady cutting board; chop into similar sizes for even mixing.
  • How do I make it less sweet? Reduce the amount of sugar or use tart fruits to balance the sweetness.
  • Can I add other fruits? Definitely! Feel free to mix and match based on your preferences and what’s in season.
  • How long can I store it? Best consumed within 3 days when stored properly in the fridge.

Nutritional Tips and Dietary Adaptations

This fruit salad is not just delicious; it’s also nutritious. Here are some tips to enhance its health benefits:

  • Boost Fiber: Include more fiber-rich fruits like pears or blackberries.
  • Lower Sugar: Opt for fruits like berries or citrus, which are lower in sugar compared to bananas or grapes.
  • Add Protein: Pair with a dollop of low-fat yogurt or cottage cheese for a well-rounded meal.
  • Stay Hydrated: Fruits with high water content, like watermelon and cucumber, can help keep you hydrated.

Essential Equipment Recommendations

To make this fruit salad, you’ll need:

  • Sharp Knife: For clean cuts of your fruits.
  • Cutting Board: A stable surface for chopping.
  • Mixing Bowl: To combine all ingredients.
  • Airtight Container: For storing leftovers in the fridge.

Serving Suggestions

Now that your salad is ready, here are some fun serving ideas:

  • Brunch Buffet: Serve it alongside pancakes, waffles, and omelets.
  • Picnic Perfect: Pack it in a cooler for a refreshing addition to your outdoor meals.
  • Sweet Treat: Top it with a scoop of vanilla ice cream for a fruity dessert.
  • On-the-Go: Portion it into jars for quick grab-and-go breakfasts.

With this Vibrant Fruit Fiesta, you’re not just making a dish; you’re creating an experience. It’s colorful, it’s nourishing, and it’s oh-so-delicious. So roll up your sleeves, grab those fruits, and let’s make brunch exciting again!

Healthy Brunch Fruit Salad

Prep Time 10 minutes
Cook Time 5 minutes
Total Time 15 minutes
Servings 4 people
Calories 180
A vibrant and refreshing fruit salad perfect for a healthy brunch. Packed with a variety of fruits and a light citrus glaze, it's both delicious and nutritious.

Ingredients

Canned Fruits

  • 20 ounces pineapple chunks
  • 15 ounces mandarin oranges (drained)

Fresh Fruits

  • 2 large firm bananas (sliced into 1/4-inch pieces)
  • 1 cup green grapes
  • 1 medium red apple (sliced)
  • 1 medium green apple (sliced)

Sweetener and Juice

  • 0.5 cup sugar
  • 2 tablespoons cornflour
  • 1/3 cup orange juice
  • 1 tablespoon lemon juice

Instructions 

  • Drain canned fruits and combine all fruits in a large bowl.
  • In a small saucepan, mix sugar, cornflour, orange juice, and lemon juice. Heat gently until thickened, then let cool.
  • Pour the citrus glaze over the fruit mixture and toss gently to coat.
  • Chill in the refrigerator for at least 30 minutes before serving.

Notes

Use fresh, ripe fruits for the best flavor.
Calories: 180kcal
Cost: $12
Course: Breakfast, Brunch
Cuisine: Healthy
Keyword: fruit salad

Unleash the Vibrant Flavors of Quinoa Apple Salad!

Welcome to a culinary adventure where healthy meets delicious! This Quinoa Apple Salad is not just a dish; it’s a celebration of flavors and textures that energize your day. With juicy apples, crunchy walnuts, and nutrient-packed quinoa, this salad is perfect for a light lunch or a side at dinner. Whether you’re busy or just want something fresh, this recipe will keep you satisfied and coming back for more!

Why You’ll Love This Recipe

This salad is not just a meal; it’s a powerhouse of nutrition and flavor! Here are some reasons why this Quinoa Apple Salad is a must-try:

  • Nutritious Boost: Packed with high-quality protein, fiber, and essential vitamins, this salad supports your overall health.
  • Flavor Explosion: The combination of sweet apples, tart cranberries, and crunchy walnuts creates a delightful medley that will excite your taste buds.
  • Versatile Meal Prep: Great for meal prep! This salad stores well, making it perfect for quick lunches throughout the week.
  • Customization Galore: Feel free to mix and match ingredients based on what you love or have on hand!
  • Quick and Easy: In just about 30 minutes, you can whip up this refreshing salad that’s sure to impress your friends and family.

Essential Ingredients for Your Quinoa Apple Salad

Let’s dive into the ingredients you’ll need to make this delicious salad. Feel free to substitute based on your preferences!

Main Ingredients

  • Tricolor quinoa: 3/4 cup, rinsed. It adds a beautiful color and texture!
  • Vegetable broth: 1 1/2 cups, for cooking the quinoa and infusing flavor.
  • Apples: 1 gala apple, diced into 1/4 inch cubes. Choose crispy varieties for the best crunch!
  • Dried cranberries: 1/2 cup, for a sweet, tangy pop.
  • Celery: 1/4 cup, diced into 1/4 inch cubes for crunch.
  • Fresh parsley: 1/4 cup, chopped for a fresh flavor.
  • Candied walnuts: 1/4 cup, for added sweetness and crunch.

For the Maple Dijon Vinaigrette

  • Extra virgin olive oil: 3 tablespoons, for creaminess and healthy fats.
  • Maple syrup: 1 teaspoon, for a touch of natural sweetness.
  • Dijon mustard: 1 tablespoon, for a tangy kick.
  • Apple cider vinegar: 1 tablespoon, for acidity and brightness.
  • Garlic clove: 1, minced, for flavor depth.
  • Ground allspice: 1/4 teaspoon, for warmth.
  • Kosher salt: 1/4 teaspoon, to taste.
  • Black pepper: 1/4 teaspoon, to taste.

How to Make Your Apple Quinoa Salad

A delicious quinoa apple salad featuring diced apples, cranberries, and walnuts.

Follow these simple steps to whip up this vibrant salad:

  1. In a medium-sized saucepan, bring the vegetable broth to a boil. Add the rinsed quinoa and dried cranberries. Cover, remove from heat, and let it sit for 15 minutes.
  2. In the meantime, whisk together the olive oil, maple syrup, dijon mustard, apple cider vinegar, minced garlic, ground allspice, salt, and pepper in a bowl.
  3. Once the quinoa is fluffy, transfer it to a large salad bowl. Mix in the dressing, followed by the diced apple, celery, parsley, and candied walnuts.
  4. Serve warm, at room temperature, or cold. This salad pairs wonderfully with grilled chicken or air-fried tofu!

Pro Tips for the Perfect Salad

Here are some expert insights to elevate your salad-making game:

  • Rinse your quinoa: This step removes the bitter coating, ensuring a delicious flavor.
  • Chill for fluffiness: Allow quinoa to cool before mixing to keep the salad light and fresh.
  • Mix ingredients gently: This helps maintain the integrity of the apple and walnuts, keeping them crunchy.
  • Make ahead: Prepare the salad a day in advance, but add the apples and walnuts just before serving to avoid sogginess.
  • Experiment with spices: Feel free to add cinnamon or nutmeg for a warm twist!
  • Use seasonal fruits: Substitute apples with pears or add pomegranate for a seasonal flair.
  • Store properly: Keep leftovers in an airtight container in the fridge for up to 3 days.

Common Mistakes to Avoid

Let’s ensure your salad turns out perfect every time! Here’s what to watch out for:

  • Overcooking quinoa: Follow the cooking times closely to avoid mushy quinoa.
  • Skipping the rinse: Don’t skip rinsing! It makes all the difference in taste.
  • Too much dressing: Start with less dressing; you can always add more to your liking.
  • Ignoring ingredient ratios: Stick to the recipe for balance; adjust only after trying it first.

Delicious Variations to Try

Feeling adventurous? Here are some fun twists on this classic salad:

  • Protein-Packed: Add grilled chicken or chickpeas for extra protein.
  • Nut-Free: Substitute walnuts with sunflower seeds or pumpkin seeds.
  • Vegan Delight: Ensure all ingredients are plant-based, and replace honey with agave syrup.
  • Cheesy Addition: Crumble feta cheese or goat cheese on top for a creamy touch.

Storage and Make-Ahead Instructions

This salad is not only quick to prepare but also versatile in storage:

  • Refrigerate leftovers: Store in an airtight container for up to 3 days.
  • Make-ahead options: Prepare the quinoa and dressing in advance; combine just before serving.

Nutritional Benefits and Dietary Adaptations

This salad isn’t just tasty; it’s loaded with health benefits:

  • High in protein: Quinoa provides all nine essential amino acids.
  • Rich in fiber: Keeps you full and aids digestion.
  • Low in cholesterol: A heart-healthy choice for everyone.
  • Gluten-free: Perfect for those with gluten sensitivities.

Must-Have Kitchen Equipment

Here’s what you’ll need to create this salad:

  • Medium saucepan: For cooking the quinoa.
  • Whisk: To mix up the vinaigrette smoothly.
  • Large salad bowl: For tossing all the ingredients together.

Serving Suggestions

Pair your salad with these delightful options:

  • Protein options: Serve with grilled chicken, tofu, or beans for a complete meal.
  • Side dishes: This salad complements roasted vegetables or whole grain bread perfectly.

Frequently Asked Questions

Got questions? We’ve got answers! Here are some common queries about the Quinoa Apple Salad:

  • Can I use other fruits? Yes! Pears, grapes, or berries are great alternatives.
  • How do I keep the apples from browning? Toss them in lemon juice to prevent oxidation.
  • Is this salad suitable for meal prep? Absolutely! It holds up well in the fridge, just add fresh ingredients before serving.
  • Can I make this salad vegan? Yes, just ensure any sweeteners or add-ins are plant-based.
  • How long can I store leftovers? In an airtight container, it lasts up to 3 days.
  • Can I make it ahead of time? Yes! Prepare the quinoa and dressing beforehand, but mix in apples right before serving.
  • What can I add for extra crunch? Try adding cucumber or bell peppers for an additional crunch.
  • Is there a nut-free version? Yes! Substitute nuts with seeds like sunflower or pumpkin.

Now you’re all set to create this amazing Quinoa Apple Salad that’s not only delicious but also nutritious! Dive into the world of flavor, color, and health, and enjoy every bite! Don’t forget to share this recipe with your friends and family to spread the joy of healthy eating!

Quinoa Apple Salad

Prep Time 10 minutes
Cook Time 20 minutes
Total Time 30 minutes
Servings 4 servings
Calories 350
A fresh and hearty quinoa salad with crisp apples, dried cranberries, and candied walnuts, perfect for any meal.

Ingredients

Broth and grains

  • 1 1/2 cups vegetable broth
  • 3/4 cup tricolor quinoa, (rinsed)

Dried cranberries

  • 1/2 cup dried cranberries

Fruits and vegetables

  • 1 gala apple apple, (diced into 1/4 inch cubes)
  • 1/4 cup celery, (diced into 1/4 inch cubes)

Herbs and nuts

  • 1/4 cup fresh parsley, (chopped)
  • 1/4 cup candied walnuts

Dressing

  • 3 tablespoons extra virgin olive oil
  • 1 teaspoon maple syrup
  • 1 tablespoon dijon mustard
  • 1 tablespoon apple cider vinegar
  • 1 clove garlic, (minced)
  • 1/4 teaspoon ground allspice
  • 1/4 teaspoon kosher salt
  • 1/4 teaspoon black pepper

Instructions 

  • Bring broth and quinoa to a boil, add cranberries, cover, and remove from heat. Let stand 15 minutes, then fluff and transfer to a bowl.
  • Whisk together olive oil, maple syrup, mustard, vinegar, garlic, allspice, salt, and pepper to make the vinaigrette.
  • Mix the cooked quinoa with the vinaigrette, then add diced apple, celery, parsley, and walnuts. Serve at desired temperature.

Notes

For added flavor, toast the walnuts before adding.
Calories: 350kcal
Cost: $12
Course: Salad
Cuisine: American
Keyword: apple, Quinoa, Salad

Welcome to the Flavorful World of Marry Me Chicken Pasta!

Are you ready to whip up a dish that not only tantalizes your taste buds but also has the power to sweep someone off their feet? Look no further! This Marry Me Chicken Pasta is not just a meal; it’s an experience that embodies love, flavor, and simplicity—all in just 30 minutes!

In this guide, you’ll discover everything you need to make this creamy, dreamy dish that will have everyone asking for seconds. Whether it’s a romantic dinner or a casual meal with friends, this recipe is perfect for any occasion. So, let’s dive in and explore the magic of Marry Me Chicken Pasta!

Why You’ll Love This Marry Me Chicken Pasta Recipe

  • Quick and Easy: Ready in just 30 minutes, this dish is a lifesaver for busy weeknights or spontaneous dinner dates.
  • Creamy and Delicious: The rich sauce made with sun-dried tomatoes and Parmesan creates a flavor explosion that’s simply irresistible.
  • Customizable: Whether you’re a meat lover or a vegetarian, there are plenty of ways to make this recipe your own.
  • Impressive Presentation: The vibrant colors and creamy texture make this dish not only delicious but also visually stunning.
  • Perfect for Any Occasion: From intimate dinners to family gatherings, this pasta dish suits every setting, making it a versatile recipe in your culinary arsenal.

Gather Your Ingredients

To create this mouthwatering Marry Me Chicken Pasta, you’ll need the following ingredients:

  • 12 oz pasta: Any sturdy pasta like penne or fusilli works great.
  • 1.5 lbs chicken breasts: Skinless and boneless, cut into bite-sized pieces.
  • 3 garlic cloves: Freshly minced for that aromatic flavor kick.
  • 1 cup sun-dried tomatoes: Adds sweetness and depth to the dish.
  • 1.5 cups heavy cream: The creamy base that makes this dish so indulgent.
  • 1/2 cup chicken broth: Enhances the overall flavor profile.
  • 1 tsp Italian seasoning: A blend of herbs that brings everything together.
  • 1/2 cup grated Parmesan: For that cheesy goodness.
  • 2 tbsp olive oil: Essential for sautéing and flavor.
  • Salt, pepper, red pepper flakes: To taste, giving the dish a flavorful kick.

How to Make Marry Me Chicken Pasta

Close-up view of Marry Me Chicken Pasta featuring tender chicken and pasta coated in a rich sauce.

Step-by-Step Instructions

  1. Cook the Pasta: In a large pot, boil salted water and cook your pasta according to package instructions until al dente. Drain and set aside.
  2. Sauté the Chicken: In a large skillet, heat the olive oil over medium heat. Add the chicken pieces, seasoning them with salt and pepper. Cook until browned and cooked through, about 5-7 minutes.
  3. Add Garlic and Tomatoes: Stir in the minced garlic and sun-dried tomatoes, cooking for an additional 2 minutes until fragrant.
  4. Create the Sauce: Pour in the heavy cream and chicken broth, followed by the Italian seasoning. Stir well and let simmer for 5 minutes.
  5. Mix in the Pasta: Add the cooked pasta to the skillet, tossing to coat it in the creamy sauce. Stir in the grated Parmesan until melted and creamy.
  6. Season to Taste: Adjust seasoning with salt, pepper, and red pepper flakes as desired.
  7. Serve and Enjoy: Plate your delicious Marry Me Chicken Pasta and garnish with extra Parmesan and fresh basil if desired.

Pro Tips for the Perfect Marry Me Chicken Pasta

  • Don’t Overcook the Pasta: Aim for al dente to ensure it holds up in the sauce without becoming mushy.
  • Use Quality Ingredients: Fresh, high-quality sun-dried tomatoes and Parmesan make a noticeable difference in flavor.
  • Customize Your Proteins: Feel free to swap chicken for shrimp or even tofu for a vegetarian option!
  • Make it Spicy: Add a pinch of cayenne or more red pepper flakes for those who love a kick.
  • Garnish with Fresh Herbs: A sprinkle of fresh parsley or basil elevates the dish visually and adds freshness.

Common Mistakes and Troubleshooting

Even the best chefs can hit a snag! Here are some common mistakes and how to avoid them:

  • Overcooking the Chicken: Cook just until no longer pink; it will continue to cook slightly after removed from heat.
  • Too Thick Sauce: If your sauce becomes too thick, thin it out with a little more chicken broth or pasta water.
  • Insufficient Seasoning: Always taste and adjust your seasonings before serving to ensure maximum flavor.
  • Burnt Garlic: Add garlic towards the end of sautéing the chicken to prevent it from burning and becoming bitter.

Variations to Try

Mix things up with these creative variations:

  • Marry Me Shrimp Pasta: Swap chicken for shrimp for a seafood twist.
  • Vegan Marry Me Pasta: Use chickpeas and coconut cream for a plant-based version that’s equally delicious.
  • One-Pot Wonder: Combine everything in one pot to cut down on cleanup while still delivering incredible flavor.
  • Marry Me Chicken Bake: Transfer to a baking dish, top with mozzarella, and bake until bubbly for a comforting casserole.

Storing and Make-Ahead Instructions

This dish can be made ahead and stored easily:

  • Refrigerate: Store in an airtight container for up to 3 days.
  • Freeze: You can freeze the pasta (without the sauce) for up to 2 months. Reheat and add the sauce fresh.
  • Reheat: Warm gently on the stove with a splash of chicken broth or cream to keep it creamy.

FAQs About Marry Me Chicken Pasta

  • Can I use different types of pasta? Absolutely! Any sturdy pasta like farfalle, rotini, or even whole wheat will work.
  • What can I substitute for heavy cream? You can use half-and-half or a dairy-free cream alternative for a lighter version.
  • Is this dish gluten-free? Use gluten-free pasta for a delicious gluten-free option!
  • Can I prepare this dish in advance? Yes, follow the cooking instructions but add the pasta just before serving to keep it fresh.
  • What pairs well with Marry Me Chicken Pasta? A fresh green salad or garlic bread is perfect to complement the meal.
  • Can I add vegetables? Definitely! Spinach, bell peppers, or zucchini can be added for extra nutrition.
  • How do I make this spicier? Add more red pepper flakes or a splash of hot sauce for heat!
  • Is this an ideal date night meal? Absolutely! Its creamy, luscious flavors are sure to impress!

Nutritional Tips and Dietary Adaptations

Eating healthy doesn’t mean sacrificing flavor. Here are some tips:

  • Protein Options: Opt for lean chicken breast or grill salmon for a healthier protein choice.
  • Whole Grains: Use whole grain or legume-based pasta for added fiber and nutrients.
  • More Veggies: Toss in some spinach or broccoli to boost the nutrition without sacrificing flavor.

Essential Equipment for Success

Ensure you have the right tools for a smooth cooking experience:

  • Large Pot: For boiling pasta.
  • Skillet: A large skillet for sautéing and mixing.
  • Wooden Spoon: For stirring and combining ingredients.
  • Measuring Cups and Spoons: To ensure accurate ingredient measurements.

Serving Suggestions

This dish shines on its own, but here are some fun ways to elevate your dining experience:

  • Serve with Garlic Bread: Perfect for soaking up that delicious creamy sauce.
  • Add a Side Salad: A simple green salad with vinaigrette complements the richness of the pasta.
  • Pair with Wine: A crisp white wine or a light red can enhance the meal beautifully.

Conclusion

And there you have it! Your ultimate guide to making the irresistible Marry Me Chicken Pasta. With its creamy texture, vibrant flavors, and quick preparation time, this dish is bound to become a staple in your kitchen. So gather your ingredients, follow the steps, and get ready to impress your loved ones with a meal that’s as enchanting as it is delicious. Happy cooking!

How to Make the Best Marry Me Chicken Pasta in 30 Minutes

Prep Time 10 minutes
Cook Time 20 minutes
Total Time 30 minutes
Servings 4 servings
Calories 650
This creamy, flavorful Marry Me Chicken Pasta can be prepared in just 30 minutes, making it perfect for a quick and impressive dinner.

Ingredients

Pasta

  • 12 oz pasta

Chicken breasts

  • 1.5 lbs chicken breasts

Garlic cloves

  • 3 cloves garlic

Sun-dried tomatoes

  • 1 cup sun-dried tomatoes

Heavy cream

  • 1.5 cups heavy cream

Chicken broth

  • 1/2 cup chicken broth

Italian seasoning

  • 1 tsp Italian seasoning

Grated Parmesan

  • 1/2 cup Parmesan

Olive oil

  • 2 tbsp olive oil

Salt, pepper, red pepper flakes

  • Salt, pepper, red pepper flakes (to taste)

Instructions 

  • Cook pasta according to package instructions. Drain and set aside.
  • Sauté chicken breasts in olive oil until cooked through. Remove and set aside.
  • In the same pan, sauté garlic and sun-dried tomatoes until fragrant.
  • Add heavy cream, chicken broth, Italian seasoning, salt, and pepper. Simmer until slightly thickened.
  • Return chicken to the pan, add Parmesan, and stir until combined. Serve over cooked pasta.

Notes

For extra flavor, sprinkle with fresh basil or parsley before serving.
Calories: 650kcal
Cost: $15
Course: Main Course
Cuisine: Italian-American
Keyword: Chicken, Creamy, pasta

Discover the Joy of Vegan Potato Salad: A Flavorful Twist on a Classic

When you think of potato salad, what comes to mind? Creamy textures, fresh herbs, and a zesty kick that makes every bite a delight! This Vegan Potato Salad is not just another side dish; it’s a celebration of flavors that will elevate your meals. Perfect for picnics, barbecues, or a simple dinner at home, this dish is designed to be both nutritious and satisfying, proving that healthy eating can be delicious and fun. Dive into this vibrant recipe that’s bursting with flavor!

Why You’ll Love This Recipe

  • Easy Preparation: With simple steps, this recipe can be whipped up in no time, allowing you to enjoy a delightful dish without stress.
  • Flavor Explosion: Combining creamy vegan mayo with fresh herbs and a zing of apple cider vinegar creates a taste sensation that is both refreshing and satisfying.
  • Make-Ahead Convenience: This vegan potato salad can be prepared in advance and stored in the refrigerator, making it a perfect dish for meal prep!
  • Customizable Ingredients: Feel free to adapt the recipe with your favorite vegetables and herbs, ensuring every bite is tailored to your taste.
  • Plant-Based Goodness: Packed with wholesome ingredients, this salad is a guilt-free way to enjoy a classic favorite while sticking to a plant-based lifestyle.

Ingredient Breakdown

Let’s dive into the ingredients that make this vegan potato salad so special:

  • Potatoes: Use 2½ pounds of Yukon Gold potatoes for their creamy texture. You can substitute with red potatoes or sweet potatoes if preferred.
  • Salt: A teaspoon of salt enhances the flavor of the potatoes while cooking.
  • Apple Cider Vinegar: This adds a tangy kick; we use it twice in the recipe—first for the potatoes and again in the dressing.
  • Vegan Mayo: ¾ cup gives the salad its creamy texture. Brands like Just Mayo or Vegenaise work great, or make your own!
  • Celery: A stalk adds crunch, and you can sprinkle in celery seeds for extra flavor.
  • Shallots: ½ cup of finely chopped shallots provides a mild onion flavor without overwhelming the dish.
  • Mustard: 2 tablespoons of your favorite mustard (Dijon or yellow) give a tasty depth of flavor.
  • Fresh Herbs: 1 cup of mixed herbs like dill, parsley, and chives brighten up the salad.
  • Pickled Cucumbers: 4 finely chopped pickles add a delightful tartness.
  • Black Pepper: A touch of seasoning to enhance the overall flavor.
  • Paprika: A sprinkle of paprika not only adds color but a subtle smokiness.

Pro Tips for Perfecting Your Vegan Potato Salad

Side view of a creamy Vegan Potato Salad garnished with fresh herbs.
  • Choose the Right Potatoes: Yukon Gold potatoes hold their shape well and have a creamy texture, making them ideal for potato salad.
  • Cook Until Fork-Tender: Boil the potatoes for about 30 minutes until they are tender but not mushy.
  • Dress While Warm: Drizzling the warm potatoes with vinegar helps them absorb the flavors better.
  • Chill for Best Flavor: Let your salad sit in the refrigerator for a few hours or overnight for the flavors to meld beautifully.
  • Experiment with Herbs: Try different fresh herbs like basil or cilantro for unique flavor profiles.
  • Use Quality Vegan Mayo: The creaminess of your salad will depend heavily on the quality of your vegan mayo, so choose one you love!
  • Don’t Skip the Mustard: It adds a tangy element that balances the creaminess of the mayo.
  • Adjust Seasoning to Taste: Always taste your salad before serving and adjust the seasoning as needed.

Avoid These Common Mistakes

  • Overcooking Potatoes: This can lead to mushy potatoes that don’t hold their shape. Aim for just fork-tender.
  • Forgetting to Cool Before Mixing: Adding hot potatoes to the dressing can cause it to separate; let them cool slightly first.
  • Skipping the Vinegar: This crucial ingredient adds flavor and helps the potatoes absorb the dressing.
  • Neglecting to Chill: Serving immediately is okay, but chilling enhances the flavor significantly.

Variations to Spice Things Up

Looking to switch things up? Here are a few variations you can try:

  • Greek-Style Potato Salad: Add olives, sun-dried tomatoes, and feta-style vegan cheese for a Mediterranean twist.
  • Spicy Potato Salad: Incorporate diced jalapeños or a splash of hot sauce for an extra kick.
  • Curried Potato Salad: Mix in curry powder and raisins for a sweet and savory dish.
  • Loaded Potato Salad: Add vegan bacon bits, scallions, and cheese for a loaded version.

Storage and Make-Ahead Instructions

This vegan potato salad is perfect for meal prep! After preparing, store it in an airtight container in the refrigerator for up to 5 days. The flavors only get better over time. If you plan to make it ahead of time, consider these tips:

  • Make the salad a day in advance for optimal flavor.
  • Stir in fresh herbs right before serving to keep them vibrant.
  • If the salad seems dry after a few days, mix in a little extra vegan mayo or a splash of vinegar.

Frequently Asked Questions

  • Can I use different types of potatoes? Absolutely! While Yukon Gold is preferred, red or sweet potatoes work well too.
  • How do I make this salad gluten-free? Ensure the mustard and mayo are gluten-free brands.
  • Can I freeze vegan potato salad? It’s not recommended as the texture may change after thawing.
  • What can I serve it with? This salad pairs well with grilled veggies, veggie burgers, or as a side for any summer dish.
  • Is this salad suitable for kids? Yes! The creamy texture and mild flavors make it kid-friendly.
  • How spicy can I make it? You can adjust the spice level by adding more mustard or including jalapeños.
  • Can I add other vegetables? Definitely! Feel free to mix in peas, bell peppers, or corn!
  • What’s the best way to serve it? Serve chilled or at room temperature for the best flavor.

Nutritional Insights and Dietary Adaptations

This vegan potato salad is not only delicious but also nutritious! Each serving is packed with vitamins and minerals from the potatoes and fresh vegetables. Here’s what you need to know:

  • Low in Saturated Fat: Perfect for heart health as it uses plant-based ingredients.
  • High in Fiber: The potatoes and veggies contribute to your daily fiber intake, aiding digestion.
  • Rich in Antioxidants: Fresh herbs and vegetables are loaded with antioxidants, supporting overall health.
  • Customizable for Dietary Needs: Easily adapt for gluten-free or nut-free diets.

Essential Kitchen Equipment

Before you start, make sure you have the right tools on hand:

  • Large Pot: For boiling the potatoes.
  • Mixing Bowl: A big bowl to combine everything together.
  • Knife: For chopping the potatoes, veggies, and herbs.
  • Measuring Cups/Spoons: To ensure accurate ingredient amounts.
  • Whisk: Perfect for combining the dressing ingredients smoothly.

Serving Suggestions

Now that you’ve created your masterpiece, how do you serve it? Here are some ideas:

  • Picnic Perfection: Pack it in reusable containers for a perfect picnic side dish.
  • BBQ Sidekick: Pair it with grilled veggies or burgers at your next barbecue.
  • Meal Prep Hero: Add it to your weekly meal prep containers alongside grains and protein.
  • Garnish with Fresh Herbs: Top with extra herbs for a fresh presentation.

Conclusion

There you have it! A vibrant, flavorful, and easy vegan potato salad that’s sure to impress your family and friends. With its creamy texture and zesty flavor, this dish is not only a delicious addition to your meals but also a testament to how exciting healthy eating can be. Whether you’re hosting a summer gathering or simply want to enjoy a nutritious meal, this potato salad is your go-to recipe. So grab your ingredients and get ready to whip up a batch that will have everyone asking for seconds!

Vegan Potato Salad

Prep Time 15 minutes
Cook Time 30 minutes
Total Time 45 minutes
Servings 6 servings
Calories 250
A creamy and flavorful vegan potato salad perfect for picnics and gatherings, packed with fresh herbs and tangy dressing.

Ingredients

Main

  • 2.5 pounds potatoes (Yukon Gold)
  • 0.5 gallon cold water
  • 1 teaspoon salt
  • 2 tablespoons apple cider vinegar
  • 0.75 cup vegan mayo
  • 1 stalk celery (2 oz) (thinly sliced)
  • 0.5 cup shallot (finely chopped)
  • 2 tablespoons mustard
  • 1 cup fresh herbs (dill, parsley, chives, or a mix) (finely chopped)
  • 4 pickled cucumbers pickled cucumbers (finely chopped)
  • 1 teaspoon salt
  • 0.25 teaspoon black pepper
  • 0.5 teaspoon paprika

Instructions 

  • Boil potatoes in water with salt for 30 minutes until fork-tender. Drain, cool, peel, and chop into bite-sized pieces. Toss with 2 tbsp vinegar.
  • Mix vegan mayo, vinegar, celery, shallot, mustard, herbs, cucumbers, salt, and pepper to make the dressing.
  • Combine potatoes with dressing, toss gently, sprinkle with paprika, and serve immediately or chill.

Notes

For best flavor, let the salad sit in the fridge for a few hours before serving.
Calories: 250kcal
Cost: $15
Course: Side Dish
Cuisine: Vegan
Keyword: Potatoes

Welcome to the World of Nourishing Warm Quinoa Salad!

Are you ready to dive into a delicious, healthy adventure? This warm quinoa salad is not just a meal; it’s a vibrant celebration of flavors, colors, and nutrients that will make your taste buds dance! Perfect for a quick lunch or a cozy dinner, this recipe comes together in just 25 minutes, making it your go-to dish when you crave something nourishing and satisfying. Let’s explore why this salad is your new best friend and how you can whip it up in no time!

Why You’ll Love This Recipe

Here are five compelling reasons to make this warm quinoa salad a staple in your kitchen:

  • Quick and easy: Ready in under 30 minutes, it’s the perfect solution for your busy days when time is of the essence, but you still want something wholesome.
  • Nourishing goodness: Packed with protein, fiber, and healthy fats, this salad keeps you full and focused throughout the day.
  • Versatile ingredients: Customize with whatever veggies you have on hand, adding grilled chicken or chickpeas for that extra protein punch!
  • Flavor explosion: The combination of fresh veggies, olive oil, and lemon juice creates a vibrant flavor profile that makes every bite a delight.
  • Visual feast: Bursting with colors from fresh ingredients, this dish not only tastes amazing but looks stunning on your plate!

Ingredients for Your Nourishing Warm Quinoa Salad

Before we get cooking, let’s gather our ingredients. Here’s what you’ll need:

  • 1 cup quinoa, rinsed
  • 2 cups water or vegetable broth
  • 1 cup cherry tomatoes, halved
  • 1 cucumber, diced
  • 1 avocado, sliced
  • 1/4 cup red onion, finely chopped
  • 1/4 cup fresh parsley, chopped
  • 1/4 cup feta cheese (optional)
  • 2 tbsp olive oil
  • 1 tbsp lemon juice
  • Salt and pepper to taste

How to Make Your Warm Quinoa Salad

Side view of a vibrant quinoa salad with cherry tomatoes, cucumber, and avocado.

Ready to get your cook on? Follow these simple steps:

  1. Rinse quinoa under cold water and drain. This step is essential to remove any bitterness.
  2. Cook quinoa in water or vegetable broth according to package instructions, then let it cool slightly.
  3. In a large bowl, combine cooked quinoa, cherry tomatoes, cucumber, avocado, red onion, and parsley.
  4. Drizzle with olive oil and lemon juice, then toss gently to combine all the flavors.
  5. Season with salt and pepper to taste.
  6. Top with feta cheese if desired and serve warm. Enjoy your creation!

Pro Tips for Perfect Quinoa Salad

Want to elevate your salad game? Here are some expert tips:

  • Rinse well: Always rinse quinoa before cooking to ensure it’s fluffy and free from bitterness.
  • Flavor boost: Use vegetable broth instead of water for a more flavorful base.
  • Make it your own: Feel free to add in your favorite vegetables or proteins—this salad is super customizable!
  • Chill for flavor: Let the salad sit for a few minutes after mixing to allow the flavors to meld beautifully.
  • Perfect portions: This recipe serves 2-4, but you can easily double it for meal prep or a gathering!
  • Fresh is best: Use the freshest ingredients you can find for the best flavor and nutrition.
  • Experiment with herbs: Try adding fresh basil or mint for a different flavor profile.
  • Check your seasoning: Taste before serving; a little more salt or lemon can elevate the dish!

Common Mistakes and Troubleshooting

Even the most seasoned cooks can make errors. Here’s how to avoid common pitfalls:

  • Overcooking quinoa: Ensure you follow cooking times carefully; overcooked quinoa can become mushy.
  • Not rinsing: Skipping the rinse can lead to a bitter taste.
  • Too much dressing: Start with a little olive oil and lemon juice, adding more as needed to avoid sogginess.
  • Ignoring texture: Mix ingredients gently; you want to keep the avocado and tomatoes intact for that delightful texture.

Variations to Spice Things Up!

Want to switch things up? Here are some fun variations to try:

  • Spicy Southwest Quinoa Salad: Add black beans, corn, and a hint of lime for a south-of-the-border twist.
  • Mediterranean Delight: Incorporate olives, sun-dried tomatoes, and a splash of balsamic vinegar.
  • Asian Inspired: Toss in edamame, shredded carrots, and sesame dressing for an Asian flair.
  • Breakfast Bowl: Top with a poached egg for a hearty breakfast option!

Storage and Make-Ahead Instructions

Planning ahead? Here’s how to store and reheat your quinoa salad:

  • Refrigeration: Store leftovers in an airtight container in the fridge for up to 3 days.
  • Make-ahead: You can prepare the quinoa and chop the veggies a day in advance—just mix before serving.
  • Freezing: While not ideal for all ingredients, cooked quinoa can be frozen for up to 2 months. Just thaw and add fresh toppings when ready to eat.

Frequently Asked Questions

Got questions? We’ve got answers! Here are some common inquiries about this warm quinoa salad:

  • Can I use other grains? Absolutely! Try farro, bulgur, or brown rice for a different grain experience.
  • Is this salad vegan? Yes, simply omit the feta cheese for a fully vegan dish.
  • What can I substitute for quinoa? Look for other protein-rich grains like quinoa or amaranth.
  • How can I add more protein? Consider adding grilled chicken, chickpeas, or tofu for a protein boost.
  • Can I make this salad ahead of time? Yes! Just keep the dressing separate until ready to serve.
  • What if I don’t like avocado? Feel free to replace it with diced bell pepper or a handful of nuts for crunch!
  • How do I make it gluten-free? Quinoa is naturally gluten-free, and all other ingredients in this recipe are as well!
  • Can I add fruit? Yes! Fruits like diced apples or pomegranate seeds can add a sweet touch.

Nutritional Tips and Dietary Adaptations

This salad isn’t just about taste; it’s also about nutrition! Here’s how to adapt it for various dietary needs:

  • Low-carb option: Swap quinoa for cauliflower rice or spiralized zucchini.
  • Keto-friendly: Use olive oil, nuts, and low-carb veggies like spinach and zucchini.
  • High-protein: Add protein-rich toppings like grilled shrimp, chicken, or tofu.

Essential Equipment for Success

To make your cooking journey a breeze, here’s what you’ll need:

  • Medium saucepan: For cooking your quinoa perfectly.
  • Cutting board and knife: Essential for prepping your fresh veggies.
  • Mixing bowl: A large bowl for combining all your delicious ingredients.
  • Measuring cups and spoons: To ensure you get the quantities just right!

Serving Suggestions

Ready to serve? Here are some fun ideas:

  • On a bed of greens: Serve this salad on a bed of leafy greens for an extra crunch!
  • In a wrap: Use it as a filling in whole-grain wraps for a portable lunch option.
  • As a side dish: Pair it with grilled meats or fish for a delightful meal.

Conclusion

This warm quinoa salad is not just a dish; it’s a celebration of health, flavor, and creativity in the kitchen. Whether you’re looking for a quick lunch or a hearty dinner, this recipe has you covered. Remember, the kitchen is your playground—don’t hesitate to experiment and make this salad your own. Happy cooking, and enjoy every colorful bite!

Warm Quinoa Salad: A 25-Minute Heartfelt Self-Care Lunch

Prep Time 10 minutes
Cook Time 15 minutes
Total Time 25 minutes
Servings 4 servings
Calories 350
This vibrant quinoa salad is quick to prepare and perfect for a nourishing, self-care lunch that can be enjoyed warm or at room temperature.

Ingredients

Main

  • 1 cup quinoa, rinsed
  • 2 cups water or vegetable broth
  • 1 cup cherry tomatoes, halved
  • 1 cucumber diced cucumber
  • 1 avocado sliced avocado
  • 1/4 cup red onion, finely chopped
  • 1/4 cup fresh parsley, chopped
  • 1/4 cup feta cheese (optional)
  • 2 tbsp olive oil
  • 1 tbsp lemon juice
  • to taste Salt and pepper

Instructions 

  • Rinse quinoa and cook in water or broth, then let cool slightly.
  • Combine cooked quinoa with cherry tomatoes, cucumber, avocado, red onion, and parsley in a large bowl.
  • Drizzle with olive oil and lemon juice, then toss gently.
  • Season with salt and pepper to taste.
  • Top with feta cheese if desired and serve warm.

Notes

Feel free to add more herbs or adjust seasonings to taste.
Calories: 350kcal
Cost: $15
Course: Lunch
Cuisine: international
Keyword: Quinoa

Unleash the Flavors of Summer with Panzanella Salad

Welcome to a vibrant culinary journey where the freshness of summer meets the comforting crunch of bread! This Panzanella Salad is not just a dish; it’s a celebration of colors, textures, and flavors that dance on your palate. If you’re craving a dish that’s not only delicious but also quick to whip up, this salad is your answer. With juicy heirloom tomatoes, crusty bread, and aromatic herbs, every bite is a reminder that healthy eating can be both fun and exciting!

Why You’ll Love This Recipe

This Panzanella Salad is a powerhouse of flavor and nutrition, and here’s why:

  • Simple Preparation: With just a handful of ingredients, this salad comes together in under 30 minutes, making it perfect for busy weeknights.
  • Seasonal Freshness: Utilizing ripe, garden-fresh tomatoes brings a burst of flavor that’s hard to resist. It’s a great way to showcase summer produce!
  • Customizable: The beauty of a Panzanella Salad lies in its versatility. You can swap ingredients based on what you have on hand or your dietary preferences.
  • Perfect for Sharing: Whether it’s a picnic, a barbecue, or a family dinner, this salad is a crowd-pleaser that everyone will love.
  • Healthy and Wholesome: Packed with vitamins, minerals, and healthy fats, this dish supports your well-being without sacrificing taste.

Ingredient Breakdown

Let’s dive into the ingredients that make this Panzanella Salad a summer classic:

  • 6-inch French Baguette: You can use any bread you have on hand, like ciabatta or sourdough. Stale bread works best as it absorbs the dressing without getting too soggy.
  • 2 tablespoons Olive Oil: Opt for high-quality extra virgin olive oil for the best flavor.
  • 1 teaspoon Salt: Enhances all the flavors—don’t skip this essential ingredient!
  • 4 Heirloom Tomatoes: Choose a mix of colors for visual appeal and a range of flavors.
  • Basil Leaves (chopped): Fresh basil adds an aromatic touch that’s quintessential in summer dishes.
  • 1/4 Red Onion (thinly sliced): Adds a mild sweetness and crunch.
  • 1/2 clove Garlic: A little raw garlic can elevate the flavor profile beautifully.

Pro Tips for the Perfect Panzanella

Side view of a vibrant Panzanella Salad with bread and vegetables arranged beautifully.

Here are some expert insights to elevate your Panzanella Salad game:

  • Use Day-Old Bread: Drier bread soaks up the juices from the tomatoes without turning mushy.
  • Salt Your Tomatoes: This draws out their juices and intensifies their flavor—let them sit for 10-15 minutes before mixing.
  • Let It Rest: Allow the salad to sit for 20-30 minutes before serving. This gives the bread time to absorb all the delicious flavors.
  • Dress It Right: Make your vinaigrette using a mix of olive oil, vinegar, and seasonings to enhance the dish.
  • Add Cheese: For a creamy element, consider adding burrata or feta cheese just before serving.
  • Experiment with Add-Ins: Try adding olives, capers, or even grilled vegetables for a unique twist!
  • Fresh Herbs: Incorporate other herbs like parsley or mint for a refreshing taste.
  • Season to Taste: Always taste your salad after mixing and adjust seasoning as needed.

Common Mistakes and Troubleshooting

Here are some pitfalls to avoid while making your Panzanella Salad:

  • Using Fresh Bread: Fresh bread can become soggy too quickly. Opt for stale or toasted bread.
  • Not Salting Tomatoes: Skipping the salting step can lead to bland tomatoes; don’t skip it!
  • Serving Immediately: This salad is best after it sits for a bit, allowing flavors to meld.
  • Overdressing: A little goes a long way—start with less dressing and add more if needed.

Delicious Variations

Don’t be afraid to mix things up! Here are some tasty variations to try:

  • Caprese Panzanella: Add fresh mozzarella and a drizzle of balsamic glaze for a Caprese twist.
  • Grilled Vegetable Panzanella: Toss in grilled zucchini, eggplant, or bell peppers for a smoky flavor.
  • Protein-Packed Panzanella: Add shredded chicken or chickpeas to make it a complete meal.
  • Fruit-Infused Panzanella: Incorporate diced peaches or nectarines for a sweet contrast to the savory elements.

Storage and Make-Ahead Instructions

This salad is best enjoyed fresh, but here’s how to prep ahead:

  • Prep Ingredients: Chop your vegetables and store them in airtight containers in the fridge.
  • Make the Dressing: Prepare your vinaigrette ahead of time and refrigerate it until ready to use.
  • Assemble Just Before Serving: Combine everything right before serving to ensure the bread stays crunchy.

Frequently Asked Questions

Here are some common questions about Panzanella Salad:

  • Can I use different types of bread? Absolutely! Ciabatta, sourdough, or even pita works well.
  • Is this salad gluten-free? You can make it gluten-free by using gluten-free bread.
  • How long can I store leftovers? This salad is best enjoyed fresh, but if you need to store it, keep it in the fridge for up to one day.
  • What’s the best vinegar for the dressing? Red wine vinegar is traditional, but you can also use balsamic or white wine vinegar.
  • Can I add protein? Yes! Grilled chicken, shrimp, or chickpeas are great additions.
  • What other vegetables can I use? Feel free to experiment with cucumbers, radishes, or bell peppers.
  • Is Panzanella Salad vegan? Yes, as long as you skip the cheese or use a dairy-free alternative.
  • How can I make it more filling? Add quinoa or farro for a heartier salad.

Nutrition Tips and Dietary Adaptations

This Panzanella Salad is not only delicious but also nutritious! Here are some tips:

  • Boost Fiber: Add beans or lentils for extra fiber and protein.
  • Watch the Dressing: Use less oil if you’re watching your fat intake, or opt for a lighter dressing like lemon juice and vinegar.
  • Calorie Control: Keep an eye on cheese portions if you’re monitoring calories.
  • Fresh Ingredients: Always use the freshest ingredients for maximum nutrients and flavor.

Essential Equipment Recommendations

To make your Panzanella Salad, you’ll need:

  • Cutting Board: A sturdy board for chopping vegetables and bread.
  • Chef’s Knife: A sharp knife makes prep a breeze.
  • Mixing Bowl: A large bowl for combining all your ingredients.
  • Grill Pan or Oven: For toasting your bread to perfection.

Serving Suggestions

This salad can stand alone or complement a variety of dishes:

  • Perfect Pairings: Serve alongside grilled meats, fish, or as part of a summer buffet.
  • Garnish: Top with extra basil or a sprinkle of feta for added flair.
  • Presentation: Serve in a large, colorful bowl to showcase the vibrant ingredients.

In conclusion, this Panzanella Salad is your ticket to a delightful summer meal that bursts with flavor. With its ease of preparation and endless customization options, it’s bound to become a staple in your kitchen. So, what are you waiting for? Grab those fresh ingredients and let’s get cooking!

Panzanella Salad

Prep Time 15 minutes
Cook Time 10 minutes
Total Time 25 minutes
Servings 4 servings
Calories 250
A fresh and flavorful Italian bread salad with ripe tomatoes, basil, and toasted baguette slices.

Ingredients

Bread

  • 1 piece 6 inch french baguette (or any bread cut into slices)
  • 2 tablespoons olive oil
  • 1 teaspoon salt
  • 4 heirloom tomatoes heirloom tomatoes
  • basil leaves basil leaves (chopped)
  • 0.25 red onion red onion (thinly sliced)
  • 0.5 clove garlic

Instructions 

  • Slice the baguette, brush with olive oil, and toast on a grill pan until charred. Rub with halved garlic cloves for aroma.
  • Cut tomatoes into quarters, thinly slice onion, and combine in a bowl. Add basil, salt, and olive oil, then toss.
  • Add grilled bread pieces to the bowl and toss again. Serve immediately.

Notes

Best enjoyed immediately to prevent sogginess. You can prepare the bread in advance and assemble just before serving.
Calories: 250kcal
Cost: $12
Course: Salad
Cuisine: Italian
Keyword: Bread, Tomatoes

Unleash Your Taste Buds with Zesty Chipotle Lime Chicken Salad

Are you ready to dive into a flavor fiesta? This Chipotle Lime Keto Chicken Salad is bursting with zesty goodness, making it the perfect low-carb meal that doesn’t skimp on taste! Whether you’re a keto enthusiast or someone simply looking to enjoy a nutritious, satisfying dish, this recipe has got you covered. Packed with protein, healthy fats, and fresh veggies, it’s a colorful, vibrant option that can be whipped up in no time. Let’s embark on this culinary adventure together!

Why You’ll Love This Recipe

  • Flavor Explosion: The combination of chipotle peppers and lime juice creates a zesty dressing that brings your chicken salad to life!
  • Quick & Easy: This salad can be prepped and ready to serve in under 30 minutes, making it a go-to for busy weeknights.
  • Meal Prep Friendly: Perfect for batch cooking, this salad stays fresh for several days, making it ideal for lunch or quick dinners.
  • Nutritious & Satisfying: Loaded with proteins, healthy fats, and a rainbow of vegetables, it’s a balanced meal that fuels your body right.
  • Customizable: Whether you’re following a keto diet or just looking for a healthy meal, you can easily swap ingredients to cater to your preferences.

Ingredients Breakdown

Here’s what you need for this delightful salad:

  • 1 pound chicken breasts: Provides lean protein, essential for muscle repair and overall health.
  • Salt and pepper: Simple seasonings that enhance the flavors of the chicken.
  • 1 tablespoon olive oil: Adds healthy fats and helps in cooking the chicken perfectly.
  • 2 chipotle peppers in adobo sauce: These give the salad its signature smoky heat.
  • 2 tablespoons lime juice: Brightens up the flavors with a refreshing zing.
  • 3 tablespoons olive oil: Used in the dressing, providing richness and creaminess.
  • 1 clove garlic: Adds depth and aroma to the dressing.
  • 1 teaspoon cumin: A warm spice that complements the chipotle flavor.
  • 1/2 teaspoon smoked paprika: Enhances the smoky flavor profile of the salad.
  • 6 cups mixed salad greens: A mix of textures and nutrients for a wholesome base.
  • 1 avocado: Creamy and rich in healthy fats, adding a luxurious texture.
  • 1/4 cup red onion: Crunchy and slightly sweet, it adds flavor and color.
  • 1/4 cup fresh cilantro: A burst of freshness that balances the dish.
  • 1/2 cup cherry tomatoes: Juicy and sweet, they give a pop of color and flavor.
  • 1/4 cup shredded cheddar cheese: For a cheesy element that melds beautifully with the dressing.
  • 1/2 cup mayonnaise: Creates a creamy dressing that ties all the flavors together.
  • 1 tablespoon lime juice: Enhances the dressing with additional tang.
  • 1 teaspoon chipotle chili powder: Extra heat and smokiness to elevate the flavor.
  • 1/2 teaspoon garlic powder: For a subtle garlicky flavor without the bulk.

How to Make Your Chipotle Lime Chicken Salad

Side view of a vibrant chicken salad garnished with lime and fresh herbs on a white plate.

Ready to enjoy a delicious meal? Follow these simple steps:

  1. Prepare the Chicken: Season the chicken breasts with salt and pepper.

  2. Make the Marinade: In a bowl, whisk together the chipotle peppers, lime juice, olive oil, garlic, cumin, and smoked paprika. Coat the chicken breasts with the marinade and let sit for at least 10 minutes.

  3. Cook the Chicken: Heat a tablespoon of olive oil in a grill pan or skillet over medium-high heat. Add the chicken and cook for about 5 minutes on each side, or until the internal temperature reaches 165°F (74°C). Once cooked, let the chicken rest for a few minutes before slicing it thinly.

  4. Prepare the Salad: While the chicken is cooking, toss the mixed greens, avocado, red onion, cilantro, cherry tomatoes, and cheddar cheese in a large salad bowl.

  5. Whisk the Dressing: In a small bowl, combine mayonnaise, lime juice, chipotle chili powder, garlic powder, salt, and pepper. Whisk until smooth.

  6. Combine & Serve: Add the sliced chicken to the salad and drizzle with the chipotle lime dressing. Toss everything to combine. Serve immediately, garnished with extra cilantro if desired.

Pro Tips for Perfecting Your Salad

  • Marinate Longer: For deeper flavor, marinate the chicken for up to 24 hours in the refrigerator.
  • Use Fresh Ingredients: Fresh, high-quality veggies make a world of difference in taste and nutrition.
  • Adjust the Heat: If you prefer a milder salad, reduce the number of chipotle peppers or omit the chili powder.
  • Texture Matters: For added crunch, consider adding nuts or seeds like sunflower seeds or sliced almonds.
  • Layer Your Salad: For a beautiful presentation, layer the salad ingredients in a clear bowl.
  • Dress Right Before Serving: To keep the greens crisp, drizzle dressing just before serving.
  • Switch Up the Greens: Try different greens like spinach, arugula, or kale for variety.
  • Experiment with Proteins: This recipe is also delicious with grilled shrimp or tofu for a vegetarian option.

Common Mistakes to Avoid

  • Overcooking Chicken: Be careful not to overcook the chicken, as it can become dry. Always use a meat thermometer!
  • Skipping the Resting Time: Allowing the meat to rest before slicing helps retain moisture.
  • Too Much Dressing: Start with a smaller amount of dressing and add more as needed to avoid sogginess.
  • Ignoring Flavor Balance: Taste and adjust seasonings throughout the cooking process for the best flavor.

Storage and Make-Ahead Instructions

This salad is perfect for meal prep! Store the chicken and salad components separately to maintain freshness. In an airtight container, the chicken can last in the fridge for up to 4 days, while the salad can be kept for 2-3 days. The dressing can be stored separately and will keep well for about a week.

Frequently Asked Questions

  • Is this salad keto-friendly? Yes, this salad is low in carbs, making it perfect for a keto diet!
  • Can I use leftover chicken? Absolutely! Leftover grilled chicken works great in this salad.
  • What can I substitute for mayonnaise? Greek yogurt or avocado can be used as a healthier alternative to mayonnaise.
  • How spicy is this salad? The spice level can be adjusted based on your preference by modifying the amount of chipotle peppers.
  • Can I make this salad vegan? Yes! Substitute chicken with grilled tofu or chickpeas and use a plant-based mayo.
  • What are great side dishes? Pair this salad with low-carb sides like cauliflower rice or zucchini noodles for a complete meal.
  • How do I make this salad even more filling? Add nuts, seeds, or additional protein sources like bacon or hard-boiled eggs!
  • Can this salad be frozen? It’s best enjoyed fresh, but you can freeze the chicken separately for later use.

Nutritional Benefits & Dietary Adaptations

This salad is not only a feast for the eyes but also for your body! It’s rich in protein, healthy fats, vitamins, and minerals. If you’re looking for dietary adaptations, consider the following:

  • Low-Carb: Perfect for keto dieters, this salad is low in carbohydrates while still being filling.
  • Paleo-Friendly: Made with whole foods and no processed ingredients, it fits well within a paleo lifestyle.
  • Gluten-Free: Naturally gluten-free, this dish is safe for those with gluten intolerance.
  • High in Healthy Fats: Thanks to the olive oil and avocado, this salad supports heart health and keeps you feeling satisfied.

Equipment Recommendations

Here’s what you’ll need:

  • Grill Pan or Skillet: For cooking the chicken to perfection.
  • Mixing Bowls: Essential for combining ingredients and preparing the dressing.
  • Whisk: A simple tool for emulsifying the dressing.
  • Meat Thermometer: Ensures your chicken is cooked to the right temperature.

Serving Suggestions

This zesty salad can stand alone as a filling meal or be paired with various sides:

  • Cauliflower Rice: A fantastic low-carb side that complements the salad beautifully.
  • Zucchini Noodles: For an extra veggie boost, serve alongside spiralized zucchini.
  • Grilled Veggies: Roasted or grilled vegetables can add even more flavor and texture.
  • Avocado Toast: Serve with a slice of whole-grain or keto-friendly bread topped with avocado.

Now it’s time to enjoy your culinary creation! This Zesty Chipotle Lime Chicken Salad will surely become a staple in your kitchen. Remember, cooking should be fun and adventurous, so feel free to get creative with your ingredients. Happy cooking!

Chipotle Lime Keto Chicken Salad

Prep Time 15 minutes
Cook Time 10 minutes
Total Time 25 minutes
Servings 4 servings
Calories 450
A flavorful, low-carb chicken salad with smoky chipotle and zesty lime, perfect for a quick and healthy meal.

Ingredients

Protein

  • 1 pound chicken breasts
  • Salt and pepper

Marinade

  • 1 tablespoon olive oil
  • 2 chipotle peppers in adobo sauce chipotle peppers in adobo sauce
  • 2 tablespoons lime juice
  • 3 tablespoons olive oil
  • 1 clove garlic
  • 1 teaspoon cumin
  • 0.5 teaspoon smoked paprika
  • to taste Salt

Salad

  • 6 cups mixed salad greens
  • 1 avocado avocado
  • 0.25 cup red onion
  • 0.25 cup fresh cilantro
  • 0.5 cup cherry tomatoes
  • 0.25 cup shredded cheddar cheese

Dressing

  • 0.5 cup mayonnaise
  • 1 tablespoon lime juice
  • 1 teaspoon chipotle chili powder
  • 0.5 teaspoon garlic powder
  • to taste Salt and pepper

Instructions 

  • Season chicken with salt and pepper.
  • Whisk marinade ingredients, coat chicken, and let sit for 10 minutes.
  • Cook chicken in a skillet over medium-high heat for 5 minutes per side, then rest and slice.
  • Toss greens, avocado, red onion, cilantro, tomatoes, and cheese in a bowl.
  • Mix mayonnaise, lime juice, chili powder, garlic powder, salt, and pepper for dressing.
  • Add chicken to salad, drizzle with dressing, toss, and serve.

Notes

Use fresh ingredients for best flavor. Adjust seasoning to taste.
Calories: 450kcal
Cost: $15
Course: Salad
Cuisine: Mexican
Keyword: Chicken, Keto

Unleash the Comfort of Homemade Chicken Pot Pie

Welcome to the ultimate Chicken Pot Pie experience! This is not just any recipe; it’s a timeless classic that marries tender chicken with vibrant vegetables in a creamy sauce, all encased in a flaky, golden pie crust. In this article, we’ll explore everything you need to know to make a perfect Chicken Pot Pie, from selecting the best ingredients to troubleshooting common issues. So, roll up your sleeves and get ready to create a dish that’s as comforting as a warm hug on a chilly day!

Why You’ll Love This Recipe

This Chicken Pot Pie recipe is a culinary adventure that you’ll want to embark on time and time again. Here are just a few reasons why this dish will become a favorite in your home:

  • Comfort Food Delight: Nothing says “home” quite like a slice of chicken pot pie fresh from the oven. It’s the perfect dish for cozy family dinners or a gathering with friends.
  • Customizable Ingredients: You can easily swap out ingredients based on what you have on hand, making this recipe incredibly versatile.
  • Nutritious Filling: Packed with lean protein and colorful vegetables, this dish is both hearty and healthy.
  • Make-Ahead Magic: The pie can be made ahead of time and stored for later, making weeknight dinners a breeze.
  • Fun Cooking Experience: Whether you’re a seasoned chef or a beginner, making homemade chicken pot pie is a fun and rewarding experience that brings everyone together.

Ingredients for the Perfect Chicken Pot Pie

Gathering the right ingredients is key to creating a delicious Chicken Pot Pie. Here’s what you’ll need:

  • 1 homemade pie crust: You can make this from scratch or use store-bought for convenience.
  • 4 cups cooked chicken (shredded): Rotisserie chicken works wonderfully for a quick option.
  • 6 Tbsp unsalted butter: This adds richness to the filling.
  • 1 medium yellow onion (chopped): For flavor and depth.
  • 2 medium carrots (thinly sliced): Adds sweetness and color.
  • 8 oz mushrooms (sliced): Choose white or brown mushrooms for a savory kick.
  • 3 garlic cloves (minced): Essential for aromatic flavor.
  • 1/3 cup all-purpose flour: This thickens the filling.
  • 2 cups chicken stock: For a rich, savory base.
  • 1/2 cup heavy cream: To create a luscious, creamy texture.
  • 2 tsp fine sea salt: Adjust to taste.
  • 1/4 tsp black pepper: For seasoning.
  • 1 cup frozen peas: No need to thaw; they’ll cook perfectly in the pie.
  • 1/4 cup parsley (finely chopped): For a fresh, herbal note.
  • 1 egg (beaten for egg wash): This gives the crust a beautiful, golden finish.

Step-by-Step Guide: How to Make Chicken Pot Pie

Side profile of a delectable chicken pot pie showcasing its flaky top crust and savory filling.

Creating the perfect Chicken Pot Pie involves a few simple steps. Let’s break it down:

  1. Prepare the Filling: In a dutch oven, melt the butter over medium heat. Add onions and carrots, sautéing for about 8 minutes until softened. Then, stir in the mushrooms and garlic, cooking for an additional 5 minutes.
  2. Create the Gravy: Sprinkle the flour over the vegetable mixture and stir continuously for 2 minutes. Gradually mix in the chicken stock and heavy cream, bringing to a simmer. Cook until the mixture thickens into a creamy gravy.
  3. Season the Filling: Stir in the shredded chicken, frozen peas, and parsley. Season with salt and pepper to taste. Remove from heat and let it cool slightly.
  4. Roll Out the Crusts: Roll one pie crust into a 12-inch circle and place it in a deep 9-inch pie dish. Spoon the filling into the crust.
  5. Seal the Pie: Roll out the second crust into a 10-inch circle. Place it over the filling, fold the excess dough behind the bottom crust, and crimp the edges to seal. Cut slits in the top crust for steam to escape, then brush with the beaten egg.
  6. Bake the Pie: Preheat your oven to 425°F (220°C) and bake for 30-35 minutes until the crust is golden brown. If the edges brown too quickly, cover them with foil. Allow the pie to rest for 15 minutes before slicing.

Pro Tips for Chicken Pot Pie Mastery

Elevate your Chicken Pot Pie game with these expert insights:

  • Choosing Chicken: Use a mix of white and dark meat for a richer flavor profile.
  • Keep it Creamy: For an extra creamy filling, add more heavy cream or even a dollop of sour cream.
  • Herbs & Spices: Experiment with rosemary, thyme, or even a dash of cayenne pepper for a flavor twist.
  • Vegetable Variety: Feel free to toss in other veggies like corn, green beans, or even potatoes to customize your filling.
  • Check for Doneness: Ensure the internal temperature reaches 165°F (74°C) for safe consumption.
  • Golden Crust: For a perfectly golden crust, brush with egg wash and sprinkle with coarse sea salt before baking.
  • Resting Time: Letting the pie rest is crucial for easier slicing and serving.
  • Freezing Tips: If you’re freezing the pie, make sure it’s completely cooled before wrapping it tightly in foil.
  • Leftover Love: Use leftover pie filling as a filling for pot pie empanadas or turnovers!

Common Mistakes and Troubleshooting

Avoid these pitfalls for a flawless Chicken Pot Pie:

  • Overcooked Veggies: Don’t sauté vegetables too long; they should remain tender-crisp.
  • Too Watery Filling: If your filling is too runny, try adding a bit more flour or cornstarch to thicken it.
  • Crust Issues: If the crust is soggy, try blind-baking the bottom crust for 10-15 minutes before adding the filling.
  • Burnt Edges: Use a pie shield or foil to protect the crust edges from burning.

Delicious Variations to Try

Get creative with these Chicken Pot Pie variations:

  • Cheddar Herb Crust: Add shredded cheddar and herbs like thyme to your pie crust for an extra flavor kick.
  • Vegetarian Pot Pie: Substitute chicken with hearty vegetables like lentils, chickpeas, or mushrooms for a plant-based option.
  • Buffalo Chicken Pot Pie: Mix in some buffalo sauce with the chicken for a spicy twist that’s sure to please!
  • Mexican-Inspired Pot Pie: Use shredded chicken, black beans, corn, and a sprinkle of taco seasoning for a zesty take.

Storage and Make-Ahead Instructions

Planning ahead? Here’s how to store and prepare your Chicken Pot Pie:

  • Refrigerator: Store leftovers in an airtight container in the fridge for up to 3 days.
  • Freezer: Freeze the unbaked pie for up to 3 months. Thaw in the fridge overnight before baking.
  • Make-Ahead: You can prepare the filling a day in advance and assemble the pie right before baking.

Frequently Asked Questions (FAQ)

Here are some common questions about Chicken Pot Pie:

  • Can I use store-bought pie crust? Yes! A store-bought crust can save time while still delivering delicious results.
  • What can I use instead of heavy cream? You can substitute with half-and-half or a non-dairy alternative like coconut cream.
  • How do I reheat leftover pot pie? Reheat in the oven at 350°F (175°C) for about 20-25 minutes until heated through.
  • Can I make mini pot pies? Absolutely! Use muffin tins to create individual servings.
  • What if my filling is too salty? Balance it out with a splash of cream or serve with a side of unsalted vegetables.
  • How do I know when the pot pie is done? The crust should be golden brown, and the filling should be bubbling gently.
  • Is it okay to use leftover chicken? Yes! Leftover or rotisserie chicken is perfect for making pot pie.
  • Can I make this recipe gluten-free? Yes! Use a gluten-free pie crust and flour to adapt the recipe.

Nutritional Tips and Dietary Adaptations

For a healthier Chicken Pot Pie, consider these adaptations:

  • Lower Fat: Use low-fat milk instead of heavy cream, and opt for a whole wheat crust.
  • Increased Fiber: Incorporate more vegetables or use a whole grain crust for added fiber.
  • Protein Boost: Add beans or lentils for an additional source of plant-based protein.

Essential Equipment for Success

Here’s what you’ll need to make your Chicken Pot Pie:

  • 9-inch pie dish: A deep dish works best for holding all the delicious filling.
  • Dutch oven or large pot: Ideal for cooking the filling.
  • Rolling pin: For rolling out your pie crust.
  • Pastry brush: To apply the egg wash for a golden crust.

Serving Suggestions

Here are some ideas for what to serve with your Chicken Pot Pie:

  • Fresh Salad: Pair with a light green salad for a refreshing contrast.
  • Steamed Vegetables: Broccoli or green beans complement the rich pie beautifully.
  • Crusty Bread: Serve with a side of warm, crusty bread for dipping.

Now that you have all the tools to create your own Chicken Pot Pie, it’s time to get cooking! This recipe isn’t just food; it’s a way to bring warmth and joy to your table. Happy cooking!

Chicken Pot Pie Recipe

Prep Time 30 minutes
Cook Time 35 minutes
Total Time 1 hour 5 minutes
Servings 6 servings
Calories 650
A comforting homemade chicken pot pie with a flaky crust and savory filling, perfect for cozy dinners.

Ingredients

Pie Crusts

  • 1 piece homemade pie crust (2 round)

Chicken

  • 4 cups cooked chicken (shredded)

Vegetables and Aromatics

  • 6 Tbsp unsalted butter
  • 1 medium yellow onion (chopped)
  • 2 medium carrots (thinly sliced)
  • 8 oz white or brown mushrooms (sliced, stems discarded)
  • 3 cloves garlic (minced)
  • 1/3 cup all-purpose flour

Broth and Dairy

  • 2 cups chicken stock
  • 1/2 cup heavy cream

Seasonings and Garnishes

  • 2 tsp fine sea salt (or to taste, plus kosher salt to garnish)
  • 1/4 tsp black pepper (plus more to garnish)
  • 1 cup frozen peas (do not thaw)
  • 1/4 cup parsley (finely chopped, plus more to garnish)
  • 1 egg beaten for egg wash

Instructions 

  • Melt butter, then sauté onions and carrots 8 minutes until soft.
  • Add mushrooms and garlic, cook 5 minutes until mushrooms soften.
  • Stir in flour, cook 2 minutes, then add chicken stock and cream, simmer until thickened. Season well.
  • Combine shredded chicken, peas, and parsley. Fill prepared pie crust with filling.
  • Cover with second crust, seal edges, cut slits, brush with egg wash, and sprinkle with salt and pepper.
  • Bake at 425°F (220°C) for 30-35 minutes until golden. Rest 15 minutes before slicing.

Notes

Use a pie shield or foil to prevent edges from over-browning.
Calories: 650kcal
Cost: $15
Course: Main Course
Cuisine: American
Keyword: Chicken, pot pie

Dive into a Colorful World of Flavor

Welcome to the Indulgent Fruit Fiesta! If you’re ready to explore a deliciously creamy twist on the classic fruit salad, you’re in for a treat. This fruit salad with condensed milk combines a medley of vibrant fruits, coated in a luscious dressing, making it not just an easy salad, but a delightful experience. Whether it’s a summer picnic, a family gathering, or simply a refreshing snack, this recipe is designed to impress and bring smiles to every table!

In this article, we’ll cover everything from the essential ingredients to expert tips, variations, and even the best ways to store your creation. So, let’s get chopping and mixing!

Why You’ll Love This Recipe

This is not just any ordinary salad; it’s a celebration of flavors and textures! Here are some reasons why this creamy fruit salad will become a staple in your kitchen:

  • Quick and Easy: With minimal prep time, this salad can be whipped up in just minutes. Perfect for those busy days when you want something refreshing without the fuss.
  • Versatile Ingredients: You can mix and match your favorite fruits! If you have seasonal produce or leftovers, toss them in!
  • Irresistibly Creamy: The dressing made from sweetened condensed milk and heavy cream gives a rich, velvety texture that complements the fresh fruits beautifully.
  • Perfect for Any Occasion: Whether it’s a barbecue, a brunch, or a simple family dinner, this fruit salad is a crowd-pleaser.
  • Healthy Indulgence: Packed with vitamins from the fruits and a touch of sweetness from the dressing, it’s a guilt-free dessert or snack that feels indulgent.

Ingredients You’ll Need

Let’s dive into the vibrant world of fruits and creamy goodness! Here’s what you’ll need:

  • 1 cup strawberries: Fresh and juicy, strawberries add a sweet burst of flavor.
  • 1/2 cup grapes: Halved for easy eating, they provide a delightful crunch.
  • 1 cup blueberries: These tiny gems offer a slightly tart balance to the sweetness.
  • 1-2 kiwi: Their unique flavor and texture elevate the salad.
  • 1 apple: Crisp and refreshing, apples add a nice crunch.
  • 2 bananas: Sweet and creamy, bananas help bind the flavors together.

For the Dressing:

  • 200 grams sweetened condensed milk: This is the star of the show, giving the salad its creamy richness.
  • 200 ml heavy cream: Adds a luxurious feel to the dressing.
  • 1/4 cup milk: To thin out the dressing to your desired consistency.

How to Make Fruit Salad with Condensed Milk

Side perspective of a vibrant fruit salad featuring various fruits and creamy dressing.

Ready to bring this salad to life? Follow these simple steps:

Step 1: Prep and Chop Your Fruit

Start by washing your fruits thoroughly. Then, chop them into bite-sized pieces. Aim for uniform sizes to ensure an even mix.

Step 2: Make the Creamy Condensed Milk Dressing

In a mixing bowl, combine the sweetened condensed milk, heavy cream, and milk. Whisk until smooth and creamy. If you prefer a thicker dressing, reduce the amount of milk.

Step 3: Combine Fruit and Dressing

In a large mixing bowl, add the chopped fruits, then pour the dressing over them. Gently toss until the fruits are evenly coated in the creamy goodness.

Step 4: Optional Garnishes

For an extra touch, consider adding a sprinkle of chopped mint or a handful of nuts for crunch!

Serving Suggestions

This creamy fruit salad can be served immediately or chilled for an hour to allow the flavors to meld. Here are some ideas to enhance your presentation:

  • Layered Parfait Style: Serve in clear glasses for a stunning visual effect.
  • Fruit Cups: Use hollowed-out fruit (like watermelon) to serve individual portions.
  • On a Buffet Table: Place in a large bowl surrounded by additional fruits for a colorful display.

Pro Tips for the Best Salad

To ensure your fruit salad turns out perfectly every time, keep these expert tips in mind:

  • Choose Ripe Fruits: Use fruits that are at their peak ripeness for the best flavor.
  • Don’t Overmix: Gently toss the salad to avoid mashing the fruits.
  • Chill Before Serving: A chilled salad is refreshing and enhances the flavors.
  • Experiment with Flavors: Feel free to add a splash of vanilla extract or a squeeze of lemon for extra zest.
  • Use Seasonal Fruits: Customize based on what’s fresh and available in your area.
  • Make It Ahead: Prepare the dressing and chop the fruits separately. Combine them just before serving for maximum freshness.
  • Consider Dietary Restrictions: Substitute dairy with coconut cream or almond milk for a dairy-free version.
  • Keep it Colorful: Aim for a rainbow of fruits to make your salad visually appealing and nutrient-rich.

Common Mistakes and Troubleshooting

Here are some pitfalls to avoid and solutions to ensure your salad shines:

  • Fruit Browning: To prevent apples and bananas from browning, toss them in a little lemon juice before combining.
  • Too Runny Dressing: If your dressing is too thin, add more sweetened condensed milk to thicken it.
  • Overripe Fruits: Avoid using overripe fruits that may mush easily by selecting firm options.
  • Unbalanced Sweetness: Taste your dressing and adjust the sweetness with more condensed milk or a pinch of salt to balance flavors.

Storage and Make-Ahead Instructions

To keep your fruit salad fresh and delicious:

  • Refrigerator Storage: Store leftovers in an airtight container in the fridge for up to 2 days.
  • Make-Ahead Tips: Prepare the dressing a day in advance and chop the fruits a few hours before serving. Just mix them right before serving!
  • Freezing: This salad is best enjoyed fresh, but if you have leftovers, you can freeze the fruits separately for smoothies or other recipes.

Nutrition Tips and Dietary Adaptations

For those looking to tailor this recipe to fit specific dietary needs:

  • Low-Calorie Option: Use a lighter version of heavy cream or substitute it with Greek yogurt.
  • Vegan Version: Swap condensed milk with coconut condensed milk and use coconut cream for the dressing.
  • Gluten-Free: This recipe is naturally gluten-free, making it a safe choice for gluten-sensitive individuals.

FAQs About Fruit Salad with Condensed Milk

Got questions? Here are some common inquiries:

  • Can I use canned fruit? Yes! Canned fruits can be a great alternative; just drain them well before adding.
  • How do I make it less sweet? Adjust the amount of condensed milk to your liking or add more fruits.
  • Can I add nuts or seeds? Absolutely! Nuts like almonds or walnuts add a great crunch and flavor.
  • What fruits work best? You can use any combination of your favorites—bananas, peaches, and mangoes work wonderfully!
  • Is this salad good for meal prep? Yes, just prepare the dressing and fruits separately and combine before serving.
  • How long does it last? Best enjoyed within 1-2 days for freshness.
  • Can I add yogurt? Yes! Mixing in some yogurt can enhance the creaminess and add probiotics.
  • What if my dressing is too thick? Thin it out with a little milk until you reach your desired consistency.

Now, you’re equipped with everything you need to create a show-stopping fruit salad with condensed milk that’s sure to be the highlight of any meal. So get excited, get cooking, and enjoy every delicious bite!

Thank you for joining me on this fruity adventure! Remember, cooking is all about experimenting and having fun. Share your creations with friends and family, and let the joy of healthy eating radiate from your kitchen!

Fruit Salad with Condensed Milk

Prep Time 10 minutes
Total Time 10 minutes
Servings 4 people
Calories 250
A delicious and refreshing fruit salad drizzled with a sweet condensed milk dressing, perfect for a quick dessert or snack.

Ingredients

Fruits

  • 1 cup strawberries
  • 1/2 cup grapes
  • 1 cup blueberries
  • 1-2 pieces kiwi
  • 1 piece apple
  • 2 pieces bananas

Dressing

  • 200 grams sweetened condensed milk
  • 200 ml heavy cream
  • 1/4 cup milk

Instructions 

  • Chop all fruits into bite-sized pieces and combine in a large bowl.
  • In a separate bowl, mix condensed milk, heavy cream, and milk until smooth.
  • Pour the dressing over the mixed fruits and gently toss to coat evenly.
  • Refrigerate for at least 30 minutes before serving for best flavor.

Notes

Use fresh, ripe fruits for the best taste and texture.
Calories: 250kcal
Cost: $10
Course: Dessert
Cuisine: international
Keyword: condensed milk, fruit