Author

Ryan

Browsing

Are you ready to transform your gatherings with a dish that’s not just a side but a star? Welcome to the world of potato salad, where creamy goodness meets vibrant veggies and zesty flavors! This ultimate potato salad recipe is perfect for picnics, BBQs, or simply as a delightful side dish to elevate any meal. Let’s dive into how to make this simple, bold, and fun dish that everyone will love!

Why You’ll Love This Recipe

This potato salad isn’t just any recipe; it’s a celebration of flavors and textures. Here are five reasons why this dish will become a staple at your table:

  • Flavor-packed: Each bite combines the creaminess of Yukon Gold potatoes with the crunch of fresh veggies, making it a delightful experience.
  • Versatile: Perfect for any occasion—summer BBQs, holiday gatherings, or casual dinners. It’s a crowd-pleaser!
  • Easy to make: With straightforward instructions, you can whip this up in no time, perfect for busy lifestyles.
  • Customizable: Add your favorite ingredients or adjust to accommodate dietary needs and preferences.
  • Make-ahead friendly: This salad gets even better after chilling in the fridge, allowing the flavors to meld beautifully.

Ingredient Breakdown

Let’s explore the ingredients that make this potato salad a winner, along with some fun substitutions!

  • Yukon Gold potatoes: These creamy potatoes are ideal for salads. Want to switch it up? Try red potatoes for a firmer texture or fingerling potatoes for a unique presentation.
  • Hard-boiled eggs: They add a rich creaminess. If you’re looking for a vegan option, you can substitute with diced avocado for that buttery texture.
  • Celery: Adds a nice crunch. For a twist, consider jicama for extra sweetness or cucumber for a refreshing bite.
  • Green onions: These give a gentle onion flavor. Chives or shallots work beautifully if you want something milder.
  • Fresh herbs: Parsley and dill brighten up the salad. Feel free to experiment with basil or cilantro for a fresh twist!
  • Mayonnaise: A classic base for creaminess. For a lighter version, consider Greek yogurt or a mix of mayo and yogurt.
  • Sweet pickle relish: It adds a touch of sweetness and tang. You can swap it with chopped pickles or capers for a bolder flavor.
  • Apple cider vinegar: This is key for a zing! White vinegar or lemon juice are great alternatives.
  • Yellow mustard: Adds a subtle tang. Use Dijon mustard for a sharper taste.
  • Sugar: Balances the acidity. You can omit it if you prefer a less sweet salad.
  • Salt and black pepper: Essential for seasoning. Adjust to taste!

Step-by-Step Instructions

Ready to create your masterpiece? Follow these straightforward steps to whip up your ultimate potato salad:

  1. Peel the potatoes and cut them into 1-inch cubes.
  2. Add the potatoes to a large pot and cover them with 1 inch of cold salted water. Bring to a boil and cook for about 15 minutes, or until fork-tender. Drain in a colander and let them cool completely.
  3. In a large bowl, whisk together the dressing ingredients: mayonnaise, sweet pickle relish, apple cider vinegar, yellow mustard, and sugar.
  4. Add the cooled potatoes, diced eggs, celery, green onions, and herbs to the dressing. Fold gently until just combined—be careful not to overmix or the potatoes will disintegrate!
  5. Enjoy immediately or refrigerate for at least two hours before serving. This allows the flavors to develop beautifully!

Pro Tips for Perfect Potato Salad

A vibrant potato salad topped with fresh herbs and hard-boiled eggs.

Want to take your potato salad to the next level? Here are some expert insights:

  • Use cold water: Starting with cold water helps the potatoes cook evenly and prevents them from becoming mushy.
  • Don’t skip the chill: Allowing the salad to sit in the fridge enhances the flavors, making it even more delicious.
  • Adjust seasoning: Taste before serving! You might want to add a pinch more salt or pepper after chilling.
  • Mix in textures: For added crunch, consider folding in some diced bell peppers or chopped nuts!
  • Herb substitutions: Experiment with seasonal herbs to keep it fresh and exciting.
  • Potato skins: Leaving the skins on adds color and nutrients—just give them a good wash!
  • Leftovers: This salad keeps well in the fridge for up to 3 days, making it perfect for meal prep.
  • Pairing: Serve it alongside grilled meats or veggie burgers for a complete meal!

Common Mistakes and Troubleshooting

Let’s tackle some common pitfalls to ensure your potato salad is a hit every time:

  • Overcooking potatoes: Keep an eye on them! Fork-tender is the goal, not mushy.
  • Skimping on seasoning: Don’t be shy! The salad needs seasoning to bring out the flavors of the ingredients.
  • Not letting it chill: Skipping the chill time can result in a bland salad. Patience is key!
  • Too much mayo: If you find it too creamy, you can always add a little more vinegar or mustard to balance it out.

Potato Salad Variations

Looking to switch things up? Here are four delicious variations to keep your potato salad game strong:

  • Loaded Baked Potato Salad: Add crispy bacon, shredded cheese, and green onions for a twist on the classic!
  • Vegan Potato Salad: Swap mayonnaise with avocado or a vegan mayo alternative for a creamy yet plant-based option.
  • Spicy Potato Salad: Mix in diced jalapeños or a splash of hot sauce for those who love a kick!
  • Herbed Potato Salad: Experiment with different herbs like tarragon or mint for a fresh and unique flavor!

Storage and Make-Ahead Instructions

This potato salad is perfect for meal prep! Here’s how to store it:

  • Refrigeration: Store in an airtight container in the fridge for up to 3 days.
  • Make-ahead: Prepare it a day in advance for best flavor. Just give it a good stir before serving!
  • Freezing: Not recommended, as potatoes can become grainy when thawed.

Comprehensive FAQ

Got questions? We’ve got answers! Here are some frequently asked questions about potato salad:

  • Can I use different types of potatoes? Absolutely! Yukon Gold and red potatoes are great choices. Just avoid starchy varieties like russets.
  • How do I make it healthier? Consider using Greek yogurt instead of mayo or adding more veggies.
  • Can I add fruits? Yes! Diced apples or grapes can add a sweet crunch that’s delightful!
  • What can I serve potato salad with? It pairs wonderfully with grilled meats, sandwiches, or on its own as a light meal.
  • How do I prevent the potatoes from browning? Use cold water when boiling and serve immediately after cooling.
  • Is potato salad gluten-free? Yes, as long as all your ingredients are gluten-free, this dish is safe!
  • Can I make it without eggs? Yes! Simply omit the eggs or substitute with diced avocado for creaminess.
  • How do I know when the potatoes are done cooking? They should be fork-tender but not falling apart. Test with a fork around the 15-minute mark.

Nutrition Tips and Dietary Adaptations

Whether you’re watching your calories or following a specific diet, here are some tips:

  • Low-calorie option: Use a low-fat mayo or Greek yogurt to reduce calories.
  • Protein boost: Add shredded chicken or chickpeas for added protein.
  • Low-carb version: Swap potatoes with steamed cauliflower for a lighter, low-carb alternative.

Equipment Recommendations

To make your potato salad-making process seamless, here are some helpful tools:

  • Large pot: For boiling the potatoes.
  • Colander: For draining the potatoes after cooking.
  • Mixing bowl: A large bowl for mixing your ingredients.
  • Whisk: For blending your dressing ingredients smoothly.
  • Spatula: For gently folding your salad ingredients together.

Serving Suggestions

Here are some fun ways to serve your potato salad:

  • On a bed of greens: Serve it over fresh lettuce or spinach for added nutrition.
  • In a sandwich: Use it as a filling for delicious veggie or protein-packed sandwiches.
  • As a side dish: Pair it with grilled chicken, burgers, or hot dogs for a classic summer meal!

Now that you have the ultimate guide to creating a delicious potato salad, it’s time to get cooking! Embrace the flavors, enjoy the process, and most importantly, have fun in the kitchen. Happy cooking!
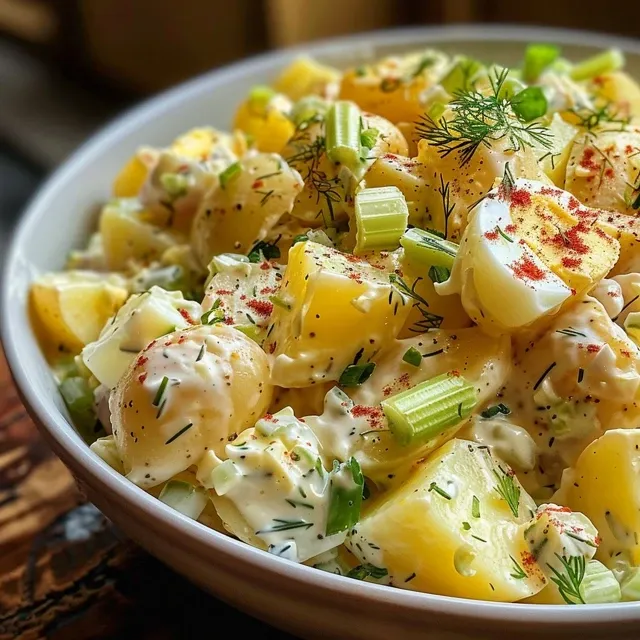
Potato Salad

Prep Time 15 minutes
Cook Time 15 minutes
Total Time 30 minutes
Servings 8 servings
Calories 350
A classic and creamy potato salad perfect for picnics and gatherings, combining tender potatoes with eggs, herbs, and a tangy dressing.

Ingredients

Potatoes

  • 3 pounds Yukon Gold potatoes (about 5 large)
  • 5 pieces hard-boiled eggs (diced)
  • 2 ribs celery (diced)
  • 2 green onions green onions (sliced)
  • 0.25 small bunch fresh parsley or dill (or a combination of both)
  • 1.25 cups mayonnaise
  • 0.25 cup sweet pickle relish
  • 1 tablespoon apple cider vinegar
  • 1 tablespoon yellow mustard
  • 1 tablespoon sugar
  • to taste salt and black pepper

Instructions 

  • Peel and cube the potatoes, then boil until fork-tender. Drain and cool.
  • Whisk together mayonnaise, relish, vinegar, mustard, and sugar to make the dressing.
  • Combine cooled potatoes, eggs, celery, green onions, and herbs. Mix with dressing.
  • Season with salt and pepper, then serve immediately or refrigerate for 2 hours.

Notes

For best flavor, refrigerate for a couple of hours before serving.
Calories: 350kcal
Cost: $15
Course: Side Dish
Cuisine: American
Keyword: Potatoes

Unleash the Flavor: Taco Salad Bowls Made Easy

Hey there, food lovers! Are you ready to take your taco game to the next level? Dive into a vibrant world of flavors with our Taco Salad Bowls! Packed with protein, fresh veggies, and zesty toppings, these bowls are not just a feast for the eyes but also a quick and nutritious meal perfect for any day of the week. Say goodbye to boring meals and hello to bold, mouthwatering tastes!

Why You’ll Love This Recipe

This Taco Salad Bowl recipe is more than just a meal; it’s an experience! Here are five reasons why this dish will become a staple in your kitchen:

  • Quick & Easy: Ready in under 30 minutes, this meal is perfect for busy weeknights.
  • Customizable: You can tailor each bowl to suit your tastes or dietary needs, making it a hit for everyone.
  • Health-Packed: Loaded with fresh veggies and lean proteins, these bowls are a nutritious choice.
  • Meal Prep Friendly: Make a big batch and store it for easy lunches throughout the week.
  • Flavor Explosion: Each bite is a burst of flavors with a perfect balance of savory, spicy, and fresh.

Ingredients You’ll Need

To create the best taco salad bowls, gather the following ingredients:

  • 1 lb (450g) ground beef or turkey: For a leaner option, use ground turkey or plant-based protein.
  • 1 tbsp olive oil: Essential for sautéing your meat and adding flavor.
  • 2 tbsp taco seasoning: You can make your own with spices like cumin, paprika, and chili powder.
  • 2 tbsp tomato paste: This helps deepen the flavor of your meat.
  • ¼ cup water: To help mix the flavors.
  • 6 cups chopped romaine or iceberg lettuce: This is your fresh base.
  • 1 cup cherry tomatoes, halved: For a juicy burst of flavor.
  • 1 cup canned black beans, rinsed: A great source of protein and fiber.
  • 1 cup corn: You can use fresh, canned, or grilled corn.
  • 1 avocado, diced: Adds creaminess and healthy fats.
  • ½ red onion, finely diced: For a sharp flavor contrast.
  • 1 cup shredded cheddar or Mexican cheese blend: Because what’s a taco without cheese?
  • Optional toppings: Jalapeños, lime wedges, cilantro, crushed tortilla chips, pickled onions, salsa, sour cream, or Greek yogurt.

How to Make Taco Salad Bowls

Close-up image showcasing a taco salad bowl featuring beef, vegetables, and toppings.

Ready to assemble your taco salad bowls? Follow these simple steps:

  1. Cook the Protein: In a skillet over medium heat, warm olive oil. Add ground beef or turkey and cook until browned, breaking it up with a spoon as it cooks. Drain excess fat if needed. Add taco seasoning, tomato paste, and water. Simmer for 5–7 minutes until the meat is well coated and flavorful. Set aside to cool slightly.
  2. Prepare the Base: In a large bowl or individual serving bowls, arrange a generous layer of chopped lettuce. This is your salad foundation.
  3. Layer the Ingredients: Top the lettuce with cooked taco meat, black beans, corn, tomatoes, avocado, onion, and cheese.
  4. Whisk the Dressing: In a small bowl, whisk together sour cream, salsa, lime juice, salt, and pepper. Drizzle over each bowl or serve on the side.
  5. Finish with Crunch: Top with crushed tortilla chips, a wedge of lime, and fresh cilantro for that final burst of flavor.

Pro Tips for Perfect Taco Salad Bowls

Want to elevate your taco salad experience even further? Check out these expert insights:

  • Choose the Right Cheese: For that melty goodness, opt for a cheese that melts well, like Monterey Jack.
  • Make It Spicy: If you love heat, add diced jalapeños or a splash of hot sauce to the meat.
  • Fresh Herbs: Fresh cilantro or parsley can brighten up the flavors significantly.
  • Perfect Texture: Layering ingredients helps maintain the crunch of the lettuce and chips.
  • Dress It Up: Experiment with different dressings—try a creamy avocado dressing for a twist!
  • Mind Your Crunch: Add tortilla chips just before serving to keep them crispy.
  • Customize Your Beans: Black beans are great, but try pinto beans or chickpeas for a different flavor.
  • Chill Your Ingredients: For a refreshing twist, serve your salad bowls chilled on hot days.

Common Mistakes and Troubleshooting

Even the best chefs make mistakes! Here are some common pitfalls and how to avoid them:

  • Too Soggy: To prevent soggy salads, keep dressing on the side until just before serving.
  • Overcooked Meat: Keep an eye on the cooking time; meat should be browned but not dry.
  • Unbalanced Flavors: Taste as you go! Adjust seasonings in your meat and dressing to your preference.
  • Too Much Lettuce: Balance your ingredients so each bite has a bit of everything.

Variations to Try

Love this recipe? Switch it up with these tasty variations:

  • Vegetarian Delight: Substitute the meat with black beans or quinoa for a hearty, plant-based bowl.
  • Southwest Chicken Salad: Use shredded rotisserie chicken and add corn salsa for a southwestern twist.
  • Fiesta Taco Bowl: Add pineapple salsa for a sweet and tangy flavor boost.
  • Quinoa Taco Bowl: Replace lettuce with quinoa for a filling, gluten-free base.

Storage and Make-Ahead Instructions

Want to prep ahead of time? Here’s how to store your taco salad bowls:

  • Make Ahead: Prepare the meat and toppings in advance, storing each component separately in airtight containers in the fridge.
  • Storage: Keep assembled salads in the fridge for up to 2 days, but remember to store dressings and crunchy toppings separately to maintain freshness.
  • Freezing: You can freeze cooked taco meat for up to 3 months; just reheat and assemble when ready to serve.

Frequently Asked Questions

Got questions? Here are some FAQs about taco salad bowls:

  • Can I use a different protein? Absolutely! Ground chicken, turkey, or even plant-based options work great.
  • What can I use instead of lettuce? Try kale, spinach, or even cabbage for a different crunch.
  • How do I make it spicier? Add hot sauce or spicy salsa to the dressing or meat.
  • Can I make this gluten-free? Yes! Use gluten-free taco seasoning and ensure your toppings are gluten-free.
  • Is there a low-carb option? Yes! Use cauliflower rice instead of lettuce for a low-carb base.
  • How do I store leftovers? Keep them in the fridge in an airtight container for up to 2 days.
  • Can I use fresh herbs? Definitely! Fresh cilantro or parsley can enhance the flavor.
  • What’s the best way to serve it? Serve it in a large bowl for sharing or individual bowls for a personalized touch.

Nutritional Tips and Dietary Adaptations

Making healthy choices is easy with taco salad bowls! Here are some tips:

  • Go Lean: Choose lean ground meats or plant-based proteins to cut down on fat.
  • Increase Fiber: Loading up on beans, veggies, and whole grains boosts fiber content.
  • Watch Your Portions: Be mindful of cheese and dressings; a little goes a long way!
  • Fresh Over Processed: Use fresh ingredients whenever possible to maximize nutrients.

Equipment Recommendations

To make the process smoother, here’s some kitchen gear you might find helpful:

  • Non-stick skillet: For easy cooking of your protein without sticking.
  • Cutting board: Essential for chopping veggies.
  • Sharp knife: A good knife makes prepping a breeze.
  • Mixing bowls: For tossing ingredients together.
  • Measuring cups and spoons: Precision is key in cooking!

Serving Suggestions

Want to impress? Here are some fun serving ideas:

  • DIY Taco Bar: Set up a taco bar with all the toppings for a fun, interactive meal.
  • Pair with Chips: Serve with tortilla chips or nachos for a crunchy side.
  • Complement with a Drink: A refreshing limeade or a Mexican beer pairs perfectly.

Conclusion

There you have it! Taco Salad Bowls that are not only delicious but also nutritious and easy to make. So gather your ingredients, channel your inner chef, and let your culinary creativity shine. Remember, cooking should be fun, and these bowls make healthy eating a vibrant celebration of flavors. Enjoy your culinary adventure!

Taco Salad Bowls

Prep Time 10 minutes
Cook Time 15 minutes
Total Time 25 minutes
Servings 4 servings
Calories 650
A flavorful and customizable taco salad served in bowls, perfect for a quick and satisfying meal.

Ingredients

Meat and Seasonings

  • 1 lb ground beef or turkey
  • 1 tbsp olive oil
  • 2 tbsp taco seasoning
  • 2 tbsp tomato paste
  • ¼ cup water

Salad Base

  • 6 cups chopped romaine or iceberg lettuce
  • 1 cup cherry tomatoes, halved
  • 1 cup canned black beans, rinsed
  • 1 cup corn (fresh, canned, or grilled)
  • 1 avocado diced avocado
  • ½ red onion finely diced red onion
  • 1 cup shredded cheddar or Mexican cheese blend

Optional Toppings

  • Jalapeños optional Jalapeños
  • Lime wedges optional Lime wedges
  • Cilantro optional Cilantro
  • Crushed tortilla chips or taco shells optional Tortilla chips or taco shells, crushed
  • Pickled onions optional Pickled onions
  • Salsa or pico de gallo optional Salsa or pico de gallo
  • ½ cup sour cream or Greek yogurt
  • ¼ cup salsa
  • 1 tbsp lime juice

Seasoning

  • to taste Salt and pepper

Instructions 

  • Cook ground meat with olive oil, taco seasoning, tomato paste, and water until browned and flavorful. Set aside to cool slightly.
  • Arrange chopped lettuce in bowls, then top with cooked meat, beans, corn, tomatoes, avocado, onion, and cheese.
  • Mix sour cream, salsa, lime juice, salt, and pepper; drizzle over bowls or serve on the side.
  • Finish with crushed tortilla chips, lime wedges, and cilantro for added flavor.

Notes

Feel free to customize toppings and adjust seasoning to taste.
Calories: 650kcal
Cost: $15
Course: Main Course
Cuisine: Mexican
Keyword: Beef, Salad, Tacos

Welcome to Your Tropical Fruit Paradise!

Get ready to dive into a bowl of sunshine with this vibrant Tropical Fruit Salad that bursts with flavor and color! Packed with juicy watermelon, exotic dragon fruit, and sweet mango, this delicious salad is not just a treat for your taste buds, but also a feast for your eyes. Perfect for a refreshing snack or a dazzling dessert, this salad is a delightful way to enjoy healthy eating! In this article, we’ll explore everything you need to know to make this salad the best it can be—from ingredients to tips, variations, and storage suggestions. Let’s get started!

Why You’ll Love This Recipe

This fruit salad isn’t just pretty; it’s packed with benefits that make it a must-try!

  • Nutritious and Delicious: Each ingredient is rich in vitamins and minerals, making this salad a powerhouse of nutrition.
  • Versatile: Perfect for breakfast, a snack, or dessert, this tropical fruit salad can fit into any meal plan.
  • Easy to Prepare: With just a few simple steps, you can whip up this salad in no time!
  • Make-Ahead Friendly: Prepare the salad ahead of time for easy entertaining or meal prep.
  • Customizable: Feel free to mix and match fruits to suit your taste or what you have on hand.

Ingredients That Make the Magic Happen

Here’s what you’ll need for this flavorful creation:

  • 2 cups watermelon (¾-inch dice): Refreshing and hydrating, watermelon is the perfect base for any fruit salad.
  • 2 dragon fruits (pitaya, ¾-inch dice, about 2 cups): Adds a unique look and mild sweetness.
  • 1 papaya (¾-inch dice, about 1 ½ cups): Soft and sweet, papaya brings a tropical flair.
  • 1 mango (¾-inch dice, about 1 ½ cups): Sweet and juicy, mango is a classic tropical fruit.
  • 1 cup pineapple (wedges, ½-inch thick): Adds a tangy sweetness that complements the other fruits.
  • 3 kiwis (quartered, ¼-inch thick slices, about 1 cup): The tartness of kiwi adds a nice balance.
  • 1 large banana (½-inch thick slices, about ¾ cup): Creamy and sweet, banana adds body and texture.
  • ¼ cup honey (or pure maple syrup): To drizzle for sweetness.
  • 1 teaspoon lime zest: Brings out the flavors of the fruits.
  • 2 tablespoons lime juice: Adds a refreshing tang.
  • ¼ cup coconut chips or shreds (optional): For garnish and added texture.
  • 1 tablespoon thinly sliced mint: For garnish and a fresh aroma.

Feel free to substitute any of these fruits with your favorites or whatever is in season! You can swap papaya for honeydew, or add some berries for a pop of color.

How to Make Your Perfect Tropical Paradise

Vibrant tropical fruit salad displayed in a bowl, showcasing a mix of diced watermelon, papaya, mango, and dragon fruit.

Making this Tropical Fruit Salad is as easy as 1-2-3! Follow these simple steps:

  • In a large bowl, add watermelon, dragon fruit, papaya, mango, pineapple, kiwi, and banana. If using red-fleshed dragon fruit, wait to add it on top after mixing to prevent staining the other pieces.
  • In a small bowl, whisk together honey, lime zest, and lime juice.
  • Drizzle the dressing mixture over the fruit. Gently toss to combine. Cover and refrigerate if not serving immediately.
  • Optional: Heat a small pan over medium heat. Add the coconut, shake, and toast until lightly browned, about 2 to 4 minutes. Immediately transfer to a bowl to cool.
  • Right before serving, garnish the salad with some toasted coconut and mint.

Pro Tips for Tropical Fruit Success

To elevate your Tropical Fruit Salad and ensure it dazzles, check out these expert tips:

  • Choose Ripe Fruits: Ripe fruits not only taste better but will enhance the overall flavor of your salad.
  • Cut Uniformly: Aim for uniform sizes when cutting fruit to ensure even distribution and a beautiful presentation.
  • Make It Ahead: This salad can be made a few hours in advance; just keep the dressing separate until serving to prevent sogginess.
  • Add a Crunch: Sprinkle some nuts or seeds on top for added texture and a nutritional boost.
  • Experiment with Dressings: Besides honey-lime, try a yogurt dressing or a light balsamic glaze for a different flavor profile.
  • Keep It Cool: Serve your salad in a chilled bowl to keep it fresh and crisp.
  • Fresh Herbs: Mint isn’t the only option; try basil or cilantro for a unique twist.
  • Taste Balance: Adjust sweetness and acidity by adding more honey or lime juice to fit your preference.

Common Mistakes and Troubleshooting

Avoid these common pitfalls to make your Tropical Fruit Salad a hit:

  • Overripe Fruits: Ensure your fruits are ripe but not overly soft to maintain texture.
  • Too Much Dressing: Less is more! Start with a small amount of dressing and add more as needed.
  • Chopping Technique: Avoid crushing the fruits; a gentle toss is all you need after adding the dressing.
  • Serving Temperature: Serve chilled to enhance the freshness of the fruits.

Variations to Keep Things Exciting

Mix it up with these fun variations:

  • Berry Bliss: Add strawberries, blueberries, and raspberries for a berry twist.
  • Citrus Burst: Incorporate oranges and grapefruits for a zesty flavor.
  • Nutty Delight: Toss in chopped walnuts or almonds for added crunch and nutrition.
  • Spicy Kick: Add a sprinkle of chili powder or cayenne pepper for a surprising heat.

Storage and Make-Ahead Instructions

This salad is best enjoyed fresh, but if you have leftovers, here’s how to store them:

  • Refrigeration: Store in an airtight container in the fridge for up to 2 days. The fruit may soften, but the flavors will still be delicious.
  • Make-Ahead: Prepare the salad up to a day in advance, but keep the dressing separate until just before serving.

Frequently Asked Questions

Here are some common questions about this Tropical Fruit Salad:

  • Can I use frozen fruit? Yes! Just ensure it’s thawed and well-drained before using.
  • How do I prevent browning? Toss fruits like banana and apple in a little lime juice to keep them fresh.
  • What can I serve with this salad? It pairs beautifully with grilled chicken, fish, or as part of a brunch spread.
  • Can I make it vegan? Absolutely! Use maple syrup instead of honey for a vegan-friendly option.
  • What’s the best way to cut dragon fruit? Cut in half lengthwise, scoop out the flesh with a spoon, and dice it!
  • Is it okay to mix different fruits? Yes! Feel free to add or substitute any fruits you love.
  • How do I enhance the flavor? Add a splash of orange juice or flavored syrup for an extra kick!
  • Can I add yogurt? Yes! A dollop of yogurt can make a delicious addition.

Nutrition Tips and Dietary Adaptations

This fruit salad is naturally healthy, but you can further enhance its nutritional profile:

  • Low Sugar Option: Use less honey or opt for a sugar substitute.
  • Protein Boost: Add a scoop of Greek yogurt or cottage cheese to increase protein content.
  • Gluten-Free: This salad is naturally gluten-free, making it suitable for those with dietary restrictions.
  • Dairy-Free: Skip dairy toppings for a completely dairy-free dish.

Equipment Recommendations

For the best results, here’s what you’ll need:

  • Sharp Knife: A quality knife makes cutting fruits easier and safer.
  • Large Mixing Bowl: For combining all your delicious fruits.
  • Whisk: Essential for mixing your dressing smoothly.
  • Airtight Container: For storing any leftovers and keeping them fresh.

Serving Suggestions

To enhance your presentation and enjoyment, consider these serving ideas:

  • In a Pineapple Boat: Hollow out a pineapple half and serve the salad inside for a stunning centerpiece.
  • With a Scoop of Sorbet: Serve alongside a scoop of coconut or mango sorbet for a refreshing treat.
  • As a Topping: Use it as a topping for pancakes or yogurt bowls for breakfast.
  • In Mason Jars: Layer in mason jars for a fun, portable snack option.

And there you have it! Your guide to creating an unforgettable Tropical Fruit Salad that’s as nutritious as it is delightful. Now, let’s get cooking and bring a splash of tropical joy to your table!

Tropical Fruit Salad

Prep Time 15 minutes
Cook Time 5 minutes
Total Time 20 minutes
Servings 4 servings
Calories 250
A vibrant and refreshing mix of tropical fruits, perfect for a light, healthy snack or dessert.

Ingredients

Fruits

  • 2 cups watermelon (¾-inch dice)
  • 2 cups dragon fruit (pitaya, ¾-inch dice) (about 2 cups)
  • 1.5 cups papaya (¾-inch dice) (about 1½ cups)
  • 1.5 cups mango (¾-inch dice) (about 1½ cups)
  • 1 cup pineapple (wedges, ½-inch thick)
  • 3 kiwi quartered, ¼-inch thick slices (about 1 cup)
  • 1 large banana (½-inch thick slices) (about ¾ cup)
  • 0.25 cup honey (or pure maple syrup)
  • 1 teaspoon lime zest
  • 2 tablespoons lime juice
  • 0.25 cup coconut chips or shreds (optional for garnish)
  • 1 tablespoon thinly sliced mint

Instructions 

  • Combine all fruits in a large bowl, adding dragon fruit last if red-fleshed.
  • Whisk honey, lime zest, and lime juice in a small bowl.
  • Drizzle dressing over fruit and gently toss. Chill if not serving immediately.
  • Optional: Toast coconut in a pan until lightly browned, then cool.
  • Garnish with toasted coconut and mint before serving.

Notes

Use fresh, ripe fruits for the best flavor and color.
Calories: 250kcal
Cost: $15
Course: Dessert
Cuisine: Tropical
Keyword: fruit

Unleash the Flavors: A Journey into Spicy Creamy Garlic-Parmesan Chicken Fillet

Welcome to the world of culinary delight, where Spicy Creamy Garlic-Parmesan Chicken Fillet reigns supreme! This dish is not just a meal; it’s a celebration of flavors that tantalizes your taste buds and nourishes your body. Imagine succulent chicken fillets bathed in a rich, garlicky, and slightly spicy sauce that dances with every bite. Whether you’re whipping it up on a busy weeknight or impressing guests at a dinner party, this dish is the epitome of quick yet elegant cooking. Let’s dive into this mouthwatering experience!

Why You’ll Love This Recipe

This recipe is a game changer for anyone looking to elevate their cooking without spending hours in the kitchen. Here are just a few reasons why you’ll be head over heels for this dish:

  • Quick & Easy: With only a few simple steps, you can have this dish on the table in under 30 minutes, making it perfect for busy weeknights.
  • Flavor Explosion: The combination of garlic, parmesan, and a hint of spice creates a flavor profile that’s both comforting and exciting.
  • Versatile Pairings: Serve it with crispy fries, fresh salads, or a side of roasted vegetables to suit your mood and occasion.
  • Healthy & Nutritious: Packed with protein and essential nutrients, this dish supports a balanced diet without compromising on taste.
  • Impress Your Guests: The rich and creamy sauce gives the impression of a gourmet meal, perfect for entertaining without the fuss.

Ingredients You’ll Need

Gather your ingredients and let’s get cooking! Here’s what you’ll need to create this incredible dish:

  • Chicken fillets: 4 pieces (about 1.5 lbs or 680 g) – Choose boneless and skinless for the best results.
  • Garlic: 4 cloves, minced – Fresh garlic is a must for that bold flavor.
  • Heavy cream: 1 cup (240 ml) – This adds richness to the sauce.
  • Parmesan cheese: 1 cup, grated – The star of the sauce; make sure it’s freshly grated for maximum flavor.
  • Red pepper flakes: 1 teaspoon (adjust to taste) – For that spicy kick you crave.
  • Olive oil: 2 tablespoons – Essential for cooking the chicken.
  • Salt & pepper: to taste – Seasoning is key!
  • Fresh parsley: for garnish, chopped – Adds a pop of color and freshness.
  • Fries: 1 bag (frozen or homemade, about 32 oz or 900 g) – Crispy fries are the perfect sidekick.

Ingredient Substitutions

If you need to make adjustments, here are some great alternatives:

  • Chicken: Use chicken breasts or thighs if you prefer.
  • Heavy cream: Substitute with half-and-half or coconut cream for a lighter option.
  • Parmesan: Grana Padano or Pecorino Romano can be used if you’re out of parmesan.
  • Red pepper flakes: Sriracha or chili powder can offer a different kind of heat.

How to Make Spicy Creamy Garlic-Parmesan Chicken Fillet

Close-up view of spicy chicken in a rich garlic-parmesan sauce, garnished with parsley.

Now that we’ve got our ingredients ready, let’s get cooking! Follow these simple steps for a delicious outcome:

  • Prepare the fries: Cook according to package instructions for frozen fries, or bake homemade fries at 425°F (220°C) for 30-35 minutes until golden and crispy.
  • Cook the chicken fillets: Heat olive oil in a large skillet over medium heat. Season chicken fillets with salt and pepper, then cook for 6-7 minutes on each side until golden brown and fully cooked.
  • Make the sauce: In the same skillet, sauté minced garlic for 1 minute until fragrant. Add heavy cream and bring to a gentle simmer.
  • Add cheese and spice: Stir in grated Parmesan cheese and red pepper flakes, cooking for 2-3 minutes until the sauce thickens slightly.
  • Combine chicken with sauce: Return the cooked chicken to the skillet, spoon the sauce over it, and let simmer for an additional 2-3 minutes to absorb flavors.
  • Serve: Plate the chicken alongside fries, drizzling the sauce over the chicken and garnishing with chopped parsley.

Pro Tips for Perfection

Elevate your dish with these expert tips and tricks:

  • Use a meat thermometer: Ensure chicken is cooked to an internal temperature of 165°F (74°C) for safety.
  • Fresh ingredients: Always opt for fresh garlic and high-quality parmesan for the best flavor.
  • Don’t rush the sauce: Allow the cream to simmer gently to prevent curdling.
  • Customize the spice: If you love heat, add more red pepper flakes or a dash of hot sauce.
  • Make it creamy: For an extra creamy sauce, add more heavy cream or a splash of chicken broth.
  • Herb it up: Fresh thyme or basil can enhance the flavor profile beautifully.
  • Let it rest: Allow the chicken to rest for a few minutes after cooking for juicier results.
  • Pair wisely: Consider serving with a side salad for a fresh contrast to the creamy dish.

Common Mistakes & Troubleshooting

Here are some pitfalls to watch out for:

  • Overcooking the chicken: Keep an eye on the time and use a thermometer to avoid dry chicken.
  • Burning the garlic: Garlic can go from perfect to burnt quickly; sauté it just until fragrant.
  • Curdled sauce: If your sauce curdles, try adding a splash of broth and whisking vigorously.
  • Too thick sauce: If your sauce is too thick, thin it out with extra cream or broth.

Delicious Variations to Try

Feeling adventurous? Here are some variations to keep things exciting:

  • Lemon Garlic Chicken: Add fresh lemon juice and zest for a citrusy twist.
  • Mushroom Cream Sauce: Sauté sliced mushrooms with garlic for an earthy flavor.
  • Spinach & Artichoke: Stir in fresh spinach and artichoke hearts for added nutrition and flavor.
  • Buffalo Chicken Style: Mix in buffalo sauce for a spicy, tangy flavor that’s sure to please.

Storage & Make-Ahead Instructions

If you want to prepare this dish ahead of time or save leftovers, follow these guidelines:

  • Refrigeration: Store leftovers in an airtight container in the fridge for up to 3 days.
  • Freezing: The chicken can be frozen for up to 2 months. Thaw in the fridge overnight before reheating.
  • Reheating: Gently reheat in a skillet over low heat, adding a splash of cream to restore creaminess.

Nutritional Insights & Dietary Adaptations

This dish is not only delicious but can also be tailored to meet various dietary needs:

  • Low Carb: Serve with cauliflower rice or zoodles instead of fries.
  • Gluten-Free: Ensure your fries are gluten-free or make your own from scratch.
  • Dairy-Free: Substitute heavy cream with coconut cream and use nutritional yeast instead of parmesan.
  • High Protein: Pair with quinoa or lentils to boost protein content.

Equipment Recommendations

For this recipe, having the right tools can make all the difference:

  • Skillet: A non-stick skillet is ideal for cooking the chicken and sauce.
  • Meat Thermometer: Ensures perfectly cooked chicken every time.
  • Sharp Knife: For easy garlic mincing and chicken fillet preparation.
  • Spatula: Essential for flipping the chicken and combining the sauce.

Serving Suggestions

To make your meal even more delightful, consider these serving ideas:

  • Garnish: A sprinkle of fresh parsley or basil adds a beautiful touch.
  • Side Dishes: Pair with a refreshing salad or roasted veggies for a well-rounded meal.
  • Beverage Pairing: A crisp white wine or sparkling water with lemon complements the dish beautifully.

FAQs About Spicy Creamy Garlic-Parmesan Chicken Fillet

Got questions? We’ve got answers!

  • Can I use chicken breast instead of fillet? Yes, chicken breast works perfectly in this recipe.
  • What if I don’t have heavy cream? You can substitute with half-and-half or coconut cream.
  • How can I make it less spicy? Reduce the amount of red pepper flakes or omit them entirely.
  • Can I prep this dish in advance? Yes, you can marinate the chicken ahead of time for enhanced flavor.
  • What sides go well with this dish? Crispy fries, a fresh salad, or steamed broccoli are great options.
  • How do I store leftovers? Keep in an airtight container in the fridge for up to 3 days.
  • Can I freeze this dish? Yes, you can freeze the chicken and sauce separately for up to 2 months.
  • What’s the best way to reheat it? Gently reheat in a skillet with a splash of cream to restore creaminess.

We hope this comprehensive guide inspires you to dive into the delightful world of Spicy Creamy Garlic-Parmesan Chicken Fillet. With its rich flavors and quick preparation, this dish is sure to become a beloved staple in your kitchen. So roll up your sleeves, grab your apron, and let’s get cooking!

Chicken Fillet in Spicy, Creamy Garlic-Parmesan Sauce

Prep Time 10 minutes
Cook Time 30 minutes
Total Time 40 minutes
Servings 4 servings
Calories 650
A delicious and creamy chicken dish with a spicy garlic-Parmesan sauce, served with crispy fries for a satisfying meal.

Ingredients

Protein

  • 4 pieces Chicken fillets (about 1.5 lbs or 680 g)

Seasonings

  • 4 cloves Garlic (minced)
  • 1 cup Heavy cream (240 ml)
  • 1 cup Parmesan cheese (grated)
  • 1 teaspoon Red pepper flakes (adjust to taste)

Cooking Oil

  • 2 tablespoons Olive oil

Salt and Pepper

  • to taste Salt
  • to taste Pepper

Garnish

  • for garnish Fresh parsley (chopped)

Fries

  • 1 bag Fries (about 32 oz or 900 g)

Instructions 

  • Prepare fries according to package or bake at 425°F (220°C) for 30-35 minutes.
  • Heat olive oil in a skillet, season chicken with salt and pepper, and cook 6-7 minutes per side until golden.
  • Sauté garlic for 1 minute, add heavy cream, and simmer gently.
  • Stir in Parmesan and red pepper flakes, cook 2-3 minutes until sauce thickens.
  • Return chicken to skillet, spoon sauce over, and simmer 2-3 minutes. Serve with fries, garnished with parsley.

Notes

Adjust red pepper flakes for desired spice level.
Calories: 650kcal
Cost: $15
Course: Main Course
Cuisine: American
Keyword: Chicken, Creamy Sauce, Spicy

Elevate Your Meal Game with This Colorful Quinoa Salad Explosion!

Dive into this deliciously refreshing quinoa salad, packed with protein and bursting with flavor! Perfect for a quick meal that’s both nutritious and satisfying. Get ready to elevate your lunch game with this colorful medley of wholesome ingredients!

Why You’ll Love This Recipe

  • Nutritious Powerhouse: This quinoa salad is not only delicious but also packed with protein and fiber, making it a perfect meal to keep you energized throughout the day.
  • Quick and Easy: With simple steps and minimal prep, this recipe is perfect for busy individuals or families seeking a healthy meal in no time.
  • Versatile Dish: Enjoy it as a side dish or a main course—the possibilities are endless! Customize it to fit your taste preferences!
  • Meal Prep Friendly: Prepare a big batch at the start of the week, and you’ll have healthy lunches ready to go!
  • Flavor Explosion: Bursting with fresh vegetables and a zesty homemade dressing, this salad is sure to please your taste buds!

Ingredients Breakdown

To make this vibrant salad, gather the following ingredients:

  • 1 cup uncooked quinoa (or 2 cups cooked quinoa)
  • 15 oz canned chickpeas (drained and rinsed)
  • 1 cup chopped red onion
  • 1 cup chopped cucumber
  • 1 cup chopped tomatoes
  • 1 cup chopped baby spinach (or salad greens)
  • 1 cup chopped flat leaf parsley
  • 1 large carrot (chopped)
  • ½ cup olive oil
  • 3 Tbsp lemon juice
  • 3 Tbsp white vinegar (or apple cider vinegar)
  • 1 Tbsp maple syrup (or honey)
  • 3 cloves garlic (minced)
  • ½ tsp salt
  • ¼ tsp ground black pepper

How to Make This Vibrant Quinoa Salad

A close-up view of a nutritious quinoa salad with fresh ingredients in a bowl.

Follow these simple steps to whip up this salad:

  1. Cook 1 cup of uncooked quinoa according to package instructions (this yields about 2 cups of cooked quinoa). Let it cool completely.
  2. Chop the red onion, cucumber, and tomatoes into small pieces—aim for bite-sized!
  3. Roughly chop the spinach and parsley.
  4. In a bowl, whisk together the dressing: combine ½ cup olive oil, 3 Tbsp lemon juice, 3 Tbsp vinegar, 1 Tbsp maple syrup, 3 minced garlic cloves, ½ tsp salt, and ¼ tsp black pepper.
  5. In a large salad bowl, mix the cooled quinoa, chickpeas, spinach, parsley, cucumber, tomatoes, red onion, and carrot. Pour the dressing over the top and toss everything together until well coated.
  6. Serve immediately or store in the fridge until ready to enjoy!

Pro Tips for Quinoa Salad Perfection

  • Perfectly Cooked Quinoa: Rinse quinoa under cold water before cooking to remove bitterness. Follow the package instructions for the best results.
  • Texture Matters: For extra crunch, consider adding raw vegetables like bell peppers or radishes.
  • Make It Ahead: This salad tastes even better the next day! The flavors meld beautifully when stored overnight.
  • Herb Power: Fresh herbs can elevate the flavor—experiment with dill or cilantro for a unique twist!
  • Dress to Impress: The dressing can be adjusted! Add more lemon juice for a tangier taste or a pinch of red pepper flakes for a spicy kick.
  • Chickpeas Are Key: For added protein, consider using roasted chickpeas for a delightful crunch.
  • Seasoning is Everything: Don’t forget to taste and adjust seasoning as needed! A little extra salt or pepper can make a huge difference.
  • Serving Style: Serve this salad on a bed of greens for an impressive presentation, or in individual bowls for a fun meal prep option!

Common Mistakes and Troubleshooting

  • Under-cooked Quinoa: Ensure quinoa is fully cooked and fluffy; it should not be crunchy.
  • Too Much Dressing: Start with less dressing; you can always add more to suit your taste.
  • Over-chopping Vegetables: Ensure your veggies are chopped evenly for the best texture and bite.
  • Skipping the Rinse: Always rinse quinoa before cooking to avoid a bitter taste.
  • Storing Too Long: While this salad lasts in the fridge, try to consume it within 3-4 days for the best flavor.

Delicious Variations to Try

Feel free to customize your quinoa salad with these fun variations:

  • Southwestern Twist: Add black beans, corn, diced avocado, and a sprinkle of cumin for a southwestern flair.
  • Greek Style: Incorporate feta cheese, Kalamata olives, diced bell peppers, and a splash of red wine vinegar.
  • Asian Fusion: Mix in edamame, shredded carrots, and sesame dressing for a refreshing Asian-inspired salad.
  • Fruit-Fusion: Throw in some diced mango or strawberries for a sweet twist!

Storage and Make-Ahead Instructions

This quinoa salad is perfect for meal prep! Here’s how to store it:

  • Refrigeration: Store in an airtight container in the fridge for up to 4 days.
  • Freezing: Not recommended due to the fresh vegetables; they may become soggy upon thawing.
  • Make-Ahead: Prepare the quinoa and dressing ahead of time, then just chop the veggies fresh before serving.

FAQs About Quinoa Salad

  • Can I use other grains instead of quinoa? Absolutely! Try farro, brown rice, or bulgur for a different texture.
  • Is this salad vegan? Yes, this salad is naturally vegan and can be modified to fit various dietary needs.
  • Can I add meat to this salad? Certainly! Grilled chicken, shrimp, or tofu would be great additions.
  • How do I make this salad gluten-free? Quinoa is naturally gluten-free, but ensure all other ingredients are certified gluten-free.
  • How can I enhance the flavor? Marinating the salad for a few hours can deepen the flavors significantly.
  • What can I serve with this salad? Pair it with grilled proteins or serve it as a side dish for your favorite mains.
  • Can I use frozen vegetables? Yes! Just make sure to thaw and drain them before adding to the salad.
  • What’s the best way to chop vegetables? Use a sharp knife and a cutting board for even, bite-sized pieces.

Nutrition Tips and Dietary Adaptations

This quinoa salad offers a nutritious base, but here are some tips to enhance its health benefits:

  • Boost Fiber: Add additional veggies or a side of fruit to increase fiber content.
  • Healthy Fats: Use avocado or nuts for an extra dose of healthy fats!
  • Protein Punch: For a higher protein intake, consider adding hemp seeds or nutritional yeast.

Essential Equipment for Your Quinoa Salad

Gather these kitchen tools to make your salad preparation a breeze:

  • Measuring Cups: For precise ingredient measurements.
  • Sharp Knife: Essential for chopping vegetables quickly and evenly.
  • Cutting Board: A stable surface for chopping.
  • Mixing Bowl: A large bowl for combining all ingredients.
  • Whisk: For blending the salad dressing smoothly.

Serving Suggestions

This colorful quinoa salad is perfect for any occasion! Here are some serving ideas:

  • Serve it as a light lunch with a side of crusty bread.
  • Pair it with grilled chicken or fish for a nutritious dinner.
  • Use it as a filling for wraps or pita pockets.
  • Present it on a bed of arugula or mixed greens for a visually appealing dish.

Conclusion

With its vibrant colors, delightful flavors, and endless customization options, this colorful quinoa salad is sure to become a staple in your kitchen. So gather your ingredients, unleash your creativity, and enjoy a meal that’s not just nutritious, but also a feast for the senses!

Quinoa Salad

Prep Time 15 minutes
Cook Time 20 minutes
Total Time 35 minutes
Servings 4 servings
Calories 350
A fresh and nutritious quinoa salad packed with vegetables and herbs, perfect for a light lunch or side dish.

Ingredients

Grains

  • 1 cup uncooked quinoa (or 2 cups cooked quinoa)
  • 15 oz chickpeas (drained and rinsed)

Vegetables

  • 1 cup chopped red onion
  • 1 cup chopped cucumber
  • 1 cup chopped tomatoes
  • 1 cup chopped baby spinach (or chopped salad greens)
  • 1 cup flat leaf parsley (chopped)
  • 1 large carrot (chopped)

Dressing

  • 0.5 cup olive oil
  • 3 Tbsp lemon juice
  • 3 Tbsp white vinegar (or apple cider vinegar)
  • 1 Tbsp maple syrup (or honey)
  • 3 cloves garlic (minced)
  • 0.5 tsp salt
  • 0.25 tsp ground black pepper

Instructions 

  • Cook quinoa as per package instructions; let cool.
  • Chop vegetables and herbs; prepare dressing by whisking oil, lemon juice, vinegar, syrup, garlic, salt, and pepper.
  • Combine cooled quinoa, chickpeas, vegetables, and herbs in a bowl. Toss with dressing.

Notes

Best served fresh or chilled. Store leftovers in the fridge.
Calories: 350kcal
Cost: $12
Course: Salad
Cuisine: Mediterranean
Keyword: Quinoa

Welcome to the Vibrant World of Fruit Cream Salad!

Dive into the delightful experience of our Fruit Cream Salad, a dish that’s not just a feast for the eyes but also a treat for your taste buds! Bursting with fresh, colorful fruits and a luscious blend of whipped cream, this recipe proves that healthy eating can be both exciting and satisfying. Whether you’re looking for a refreshing dessert, a quick snack, or a show-stopper at your next gathering, this fruit salad with cream is perfect for any occasion. Let’s embark on this delicious journey together!

Why You’ll Love This Recipe

  • Flavor Explosion: The combination of sweet and tangy fruits mixed with creamy whipped cream creates a delightful contrast that dances on your palate.
  • Quick and Easy: With just a handful of ingredients and a few simple steps, you can whip up this dessert in no time!
  • Customizable: You can easily adapt this recipe to include your favorite fruits or nuts, making it perfect for any season or occasion.
  • Healthy Indulgence: Packed with vitamins and nutrients from the fresh fruits, this dessert is a guilt-free treat that nourishes your body.
  • Visually Stunning: The vibrant colors of the fruits make this salad a real show-stopper, perfect for impressing guests at parties!

Ingredients Breakdown

Here’s what you’ll need to create this stunning fruit cream:

  • 3/4 cup whipping cream (chilled): Essential for achieving that light, fluffy texture.
  • 1/4 cup icing sugar (sifted): Adds just the right amount of sweetness without overpowering the flavors.
  • 1/2 teaspoon pure vanilla extract: Enhances the flavor and adds a lovely aroma.
  • 1 cup diced mangoes: For a tropical twist that brings sweetness.
  • 1 cup sliced bananas: Adds creaminess and a lovely texture.
  • 1 cup diced apples: Provides a crunchy contrast to the creaminess.
  • 1 cup green grapes (halved): Juicy and refreshing, they balance the dish beautifully.
  • 1/2 cup diced kiwi: For a zingy kick that brightens the salad.
  • 1/2 cup pomegranate arils: Adds a burst of color and a delightful crunch.
  • 2 tablespoons slivered pistachios: For an extra crunch and nutritional boost.
  • 2 tablespoons sliced almonds: Adds a nutty flavor that complements the fruits.
  • 2 tablespoons raisins/cranberries: A touch of sweetness and chewiness.
  • Few cherries (for garnishing, optional): Makes the dish even more appealing!

Substitutions: If you want to make this recipe vegan, you can substitute the whipping cream with coconut cream and the icing sugar with maple syrup. You can also use any fruits you prefer or have on hand, like berries or stone fruits.

How to Make Your Fruit Cream Salad – Step by Step

Close-up view of a creamy fruit salad topped with slivered pistachios and cherries for garnish.

Get ready to create a masterpiece! Follow these easy steps:

  • Step 1: In a sufficiently large bowl, add the chilled whipping cream, icing sugar, and vanilla extract.
  • Step 2: Using a hand mixer, start beating on low speed to incorporate all the ingredients.
  • Step 3: Once combined, increase the speed to medium-high, and beat until soft peaks form. We don’t need stiff peaks for this recipe.
  • Step 4: Gently fold in the diced fruits and nuts, reserving some for garnishing.
  • Step 5: Mix gently using a spatula until the fruits are coated with the whipped cream. You can serve immediately or cover the bowl and refrigerate for 1 to 2 hours to let the flavors meld.
  • Step 6: Transfer to serving bowls, top with reserved fruits and nuts, and garnish with cherries if desired.

Pro Tips for the Perfect Fruit Cream

  • Chill Your Ingredients: Make sure your whipping cream is chilled for the fluffiest texture.
  • Soft Peaks are Key: Beat until soft peaks form to ensure a light and airy cream.
  • Mix Gently: When combining the fruits with the cream, be gentle to avoid breaking the fruits apart.
  • Flavor Boost: Adding a splash of lemon juice can brighten the flavors of the fruits.
  • Experiment: Feel free to mix and match fruits based on what you love or what’s in season!
  • Presentation Matters: Use clear serving dishes to showcase the beautiful colors of the fruits.
  • Make-Ahead Option: You can prepare the whipped cream the night before and add the fruits the next day.
  • Layer it Up: For a fun twist, layer the cream and fruits in a glass for a parfait-style dessert.

Common Mistakes and Troubleshooting

Don’t let a few hiccups ruin your culinary fun! Here’s how to avoid common pitfalls:

  • Too Watery?: If your fruits are too juicy, pat them dry with a paper towel before adding them to the cream.
  • Overbeaten Cream?: If you accidentally beat the cream too much, you can fold in a little fresh cream to salvage it.
  • Flavor Lacking?: Adjust sweetness by adding more icing sugar or a drizzle of honey if needed.
  • Fruits Browning?: To keep apples and bananas from browning, toss them in a little lemon juice before adding them.

Delicious Variations to Try

Switch it up and keep things exciting! Here are some fun variations to consider:

  • Tropical Twist: Use pineapple, coconut, and mango for a beachy vibe.
  • Berry Blast: Replace the fruits with a mix of strawberries, blueberries, and raspberries for a berry explosion.
  • Nutty Delight: Add a mix of your favorite nuts like walnuts and hazelnuts for extra crunch.
  • Chocolate Drizzle: Drizzle some melted dark chocolate over the top for a decadent touch.

Storage and Make-Ahead Instructions

This fruit cream salad is best enjoyed fresh, but here are some tips for storing and prepping ahead:

  • Refrigeration: If you have leftovers, store them in an airtight container in the fridge for up to 2 days.
  • Make Ahead: Prepare the whipped cream a day in advance and add the fruits just before serving for the best texture.

Frequently Asked Questions

Got questions? We’ve got answers!

  • Can I make this vegan? Yes! Substitute the whipping cream with coconut cream and use maple syrup instead of icing sugar.
  • What fruits can I use? You can use any fruits you love, such as berries, peaches, or pears!
  • Can I use store-bought whipped cream? Absolutely, if you’re short on time, store-bought whipped cream can be a great shortcut.
  • How long can I refrigerate the fruit salad? It can last up to 2 days in the fridge, but it’s best enjoyed fresh.
  • What should I do if the cream separates? Gently stir it to bring it back together; it may lose some volume but will still taste great.
  • Can I freeze fruit cream salad? Freezing is not recommended as it can change the texture of the fruits and cream.
  • How can I make it more nutritious? Add chia seeds or flaxseeds for an extra health boost!
  • What’s the best way to serve it? Serve it chilled in individual bowls or glasses for a fun presentation!

Nutrition Tips and Dietary Adaptations

This fruit salad with cream is not only delicious but can also fit into various dietary needs:

  • Low-Calorie Option: Use low-fat whipping cream or Greek yogurt as a creamy base.
  • Nut-Free: Omit nuts if you have allergies or sensitivities; the salad will still be delightful!
  • Low-Sugar Option: Reduce the icing sugar or substitute with a sugar alternative to make it lower in sugar.

Equipment Recommendations

Here’s what you’ll need to make this recipe a breeze:

  • Hand Mixer: Essential for whipping the cream to perfection.
  • Large Mixing Bowl: To combine all your ingredients easily.
  • Spatula: Perfect for gently folding the fruits into the cream.
  • Serving Bowls: Use clear bowls to show off the colorful layers!

Serving Suggestions

This fruit cream can be served in various delightful ways:

  • Parfait Style: Layer the cream and fruits in a glass for a beautiful presentation.
  • With Ice Cream: Serve alongside a scoop of your favorite ice cream for an indulgent treat.
  • As a Breakfast Topping: Add it to pancakes or waffles for a nutritious breakfast boost.

In conclusion, our Fruit Cream Salad is a celebration of flavors, colors, and textures that brings joy to every bite. Whether you’re enjoying it on a sunny day or serving it at a family gathering, this dish is sure to impress. So roll up your sleeves, gather your ingredients, and let’s make some magic happen in the kitchen today! Enjoy your culinary adventure and remember, healthy food can be exciting and fun!

Fruit Cream | Fruit Salad With Cream

Prep Time 15 minutes
Total Time 15 minutes
Servings 4 servings
Calories 250
A delightful and refreshing fruit salad topped with whipped cream and nuts, perfect for a quick dessert or snack.

Ingredients

Dairy

  • 3/4 cup whipping cream (chilled)
  • 1/4 cup icing sugar (sifted)
  • 1/2 teaspoon pure vanilla extract

Fruits

  • 1 cup diced mangoes
  • 1 cup sliced banana
  • 1 cup diced apples
  • 1 cup green grapes (halved)
  • 1/2 cup diced kiwi
  • 1/2 cup pomegranate arils

Nuts & Dried Fruits

  • 2 tablespoons slivered pistachios
  • 2 tablespoons sliced almonds
  • 2 tablespoons raisins or cranberries
  • Few pieces cherries (for garnishing, optional)

Instructions 

  • In a large bowl, combine chilled whipping cream, icing sugar, and vanilla extract.
  • Beat with a hand mixer on low, then medium-high until soft peaks form.
  • Gently fold in diced fruits and nuts, reserving some for garnish.
  • Mix until fruits are coated, then serve immediately or chill for 1-2 hours.
  • Transfer to bowls, top with reserved fruits and nuts, and garnish with cherries if desired.

Notes

Use fresh, ripe fruits for the best flavor and texture.
Calories: 250kcal
Cost: $10
Course: Dessert
Cuisine: international
Keyword: Cream, fruit, Salad

Discover the Delicious World of Crispy Smashed Potato Salad!

Welcome, fellow food lovers! If you’re ready to elevate your side dish game, you’re in the right place. Say hello to crispy smashed potato salad—the ultimate combination of creamy and crunchy, this dish is sure to steal the show at any gathering. In this article, we’ll dive deep into everything you need to know about making this viral recipe, from ingredient breakdowns to expert tips, and even some fun variations to keep things exciting. So, grab your apron, and let’s get started!

Why You’ll Love This Recipe

  • Flavor explosion: The combination of herbs, pickles, and creamy dressing creates a bold flavor profile that will have everyone reaching for seconds!
  • Texture contrast: Enjoy the satisfying crunch of crispy potatoes paired with the creaminess of the dressing—it’s a harmonious blend!
  • Customizable: This recipe is super versatile, allowing you to add your favorite ingredients or adjust flavors to your liking.
  • Perfect for any occasion: Whether it’s a backyard barbecue or a holiday gathering, this salad is a crowd-pleaser.
  • High in nutrients: Packed with fiber and healthy fats, this dish is as nutritious as it is delicious!

Ingredient Breakdown

Let’s explore the ingredients that make this crispy smashed potato salad a must-try:

  • Potatoes: 1.5 lb baby gold or yellow potatoes (or baby red potatoes)—these varieties are perfect for achieving that crispy exterior and fluffy interior.
  • Olive oil: 2 Tbsp of extra-virgin olive oil helps to achieve a golden, crispy finish.
  • Salt: Use 2 tsp kosher salt (plus more for salting the water) to enhance the flavor of the potatoes.
  • Black pepper: ½ tsp black pepper (more to taste) adds a nice kick.
  • Picks and onions: ½ cup finely chopped dill pickles and ½ cup finely chopped red onions provide a tangy crunch.
  • Fresh herbs: ¼ cup each of fresh dill and parsley adds brightness and freshness.
  • Greek yogurt: ¾ cup Greek yogurt serves as a creamy base while adding protein and probiotics.
  • Mayo: 2 Tbsp mayo (preferably made with avocado or olive oil) brings richness.
  • Lemon juice: 3.5 Tbsp of fresh lemon juice (about 1 large lemon) adds acidity to balance the flavors.
  • Garlic: 2 cloves finely minced garlic for an aromatic kick.
  • Dijon mustard: 1 Tbsp Dijon mustard enhances the overall flavor.

How to Make Crispy Smashed Potato Salad Step-by-Step

Side view of a deliciously creamy potato salad featuring chopped pickles and herbs.

Follow these simple steps to create your own crispy smashed potato salad:

  1. Preheat the oven to 425℉ (218°C) and prep a baking sheet with parchment paper sprayed with olive oil spray for easy cleanup.
  2. Wash your potatoes and bring them to a boil in a large pot of cold water with a generous amount of salt. Boil for 10-15 minutes until fork-tender.
  3. Drain the potatoes and let them cool to room temperature.
  4. Once cooled, place the potatoes on the baking tray and smash them with the bottom of a sturdy glass or small bowl to increase surface area.
  5. Drizzle with olive oil, salt, and pepper, then roast in the oven for 40-50 minutes until golden and crispy.
  6. Meanwhile, mix the dressing ingredients in a large bowl, then stir in the red onions, chives, dill, parsley, and pickles.
  7. When the potatoes are done, combine them with the dressing mix in the bowl and gently stir to combine.

Pro Tips for Ultimate Crisp and Flavor

  • Don’t overcrowd the baking sheet: Leave space between the smashed potatoes for even crisping. You may need two trays!
  • Use room temperature potatoes: This helps them crisp up better in the oven.
  • Experiment with different herbs: Try adding fresh basil or cilantro for a unique twist.
  • Try different dressings: Swap Greek yogurt for tahini or even a vegan mayo for a different flavor profile.
  • For extra crunch: Broil the potatoes for the last 2-3 minutes of cooking—just keep an eye on them!
  • Adjust seasoning: Taste and tweak the salt, pepper, and lemon to suit your preferences.
  • Make it ahead: You can prepare the potatoes and dressing separately in advance to save time.
  • Mix in protein: Add shredded chicken or chickpeas for a heartier salad!

Common Mistakes and Troubleshooting

Here are some common mistakes to avoid when making this recipe:

  • Under-seasoning: Don’t forget to salt the water when boiling potatoes for flavor absorption.
  • Not roasting long enough: If the potatoes aren’t crispy, they likely need more time in the oven—keep an eye on them!
  • Using cold potatoes: Always ensure potatoes are at room temperature before smashing to maximize crispiness.

Variations and Creative Twists

Feeling adventurous? Here are some fun variations to try:

  • Spicy Smashed Potato Salad: Add diced jalapeños or a splash of hot sauce for a kick!
  • Loaded Baked Potato Style: Top with crumbled bacon, shredded cheese, and green onions.
  • Herbed Yogurt Dressing: Use a mix of Greek yogurt and your favorite fresh herbs for a creamy dressing.
  • Maple Dijon Vinaigrette: Swap the dressing for a tangy vinaigrette made with maple syrup and Dijon mustard for a sweet twist.

Storage and Make-Ahead Instructions

This crispy smashed potato salad can be made ahead of time and stored for later enjoyment:

  • In the fridge: Store in an airtight container for up to 3 days. The flavors will meld and get even better!
  • For meal prep: Roast potatoes and make the dressing separately. Combine when ready to serve.
  • Freezing: Not recommended, as the potatoes lose their texture after thawing.

Comprehensive FAQ

Here are some frequently asked questions about this recipe:

  • Can I make this ahead of time? Absolutely! It tastes great made a day in advance.
  • Can I use an air fryer? Yes! Cook at 400℉ (200℃) for about 25-30 minutes, checking for crispiness.
  • Can I add protein? Definitely! Shredded chicken, bacon, or chickpeas work well.
  • What type of potatoes work best? Baby gold or red potatoes yield the best results for this recipe.
  • Can I omit the mayo? Sure! You can replace it with more Greek yogurt or a vegan mayo alternative.
  • How do I serve it? It pairs perfectly with grilled meats, sandwiches, or as a stand-alone dish.
  • Can I use different herbs? Yes! Feel free to mix and match your favorite herbs.
  • Is this recipe gluten-free? Yes! All ingredients used are naturally gluten-free.

Nutrition Tips and Dietary Adaptations

This crispy smashed potato salad is not only delicious but also packed with nutritious benefits:

  • High in dietary fiber: Potatoes contribute fiber, which helps support gut health.
  • Rich in healthy fats: Olive oil and Greek yogurt provide heart-healthy fats.
  • Customizable for dietary needs: Easily make it vegan by substituting Greek yogurt and mayo for plant-based alternatives.

Equipment Recommendations

Here’s what you’ll need to create this masterpiece:

  • Large pot: For boiling the potatoes.
  • Baking sheet: A sturdy baking sheet lined with parchment paper is essential for roasting.
  • Mixing bowl: For combining the dressing and vegetables.
  • Glass or small bowl: To smash the potatoes and create that crispy texture.

Serving Suggestions

Elevate your meal with these serving ideas:

  • Pair with grilled chicken: The crispiness of the potato salad complements the smoky flavors of grilled meats.
  • Perfect for picnics: Serve it alongside sandwiches or wraps for a delightful outdoor meal.
  • Goes well with seafood: Try it with grilled shrimp or fish tacos for a refreshing side.

And there you have it—your definitive guide to making the ultimate crispy smashed potato salad! With its vibrant flavors, delightful textures, and endless customization possibilities, this dish is sure to become a favorite for all occasions. So, what are you waiting for? Get in the kitchen and let your culinary creativity shine!

BEST Crispy Smashed Potato Salad (Viral Recipe, Easy)

Prep Time 15 minutes
Cook Time 50 minutes
Total Time 1 hour 5 minutes
Servings 4 servings
Calories 350
This crispy smashed potato salad combines crunchy roasted potatoes with a flavorful, fresh dressing for a delicious and easy dish.

Ingredients

Potatoes

  • 1.5 lb baby gold or yellow potatoes, whole and unpeeled (or baby red potatoes)
  • 2 Tbsp extra-virgin olive oil
  • 2 tsp kosher salt (plus more for salting water)
  • ½ tsp black pepper (more to taste)
  • ½ cup dill pickles, finely chopped
  • ½ cup red onions, finely chopped
  • ¼ cup fresh dill, finely chopped
  • ¼ cup fresh parsley, finely chopped
  • 1 Tbsp chives, chopped
  • ¾ cup Greek yogurt
  • 2 Tbsp mayo (made with avocado or olive oil)
  • 3.5 Tbsp lemon juice (from 1 large lemon)
  • 2 cloves garlic, finely minced
  • 1 Tbsp Dijon mustard
  • ¼ tsp kosher salt (more to taste)
  • ¼ tsp black pepper (more to taste)

Instructions 

  • Preheat oven to 425℉ (218°C). Boil potatoes in salted water for 10-15 minutes until fork-tender, then drain and cool.
  • Once cooled, smash potatoes on a baking sheet, coat with olive oil, salt, and pepper, then roast for 40-50 minutes until crispy.
  • Meanwhile, mix dressing ingredients in a large bowl, then add chopped red onions, dill, parsley, and pickles.
  • When potatoes are crispy, add them to the bowl and toss to combine.
  • Serve immediately for best crispiness. Tips: leave space between potatoes on the baking sheet for better crisping.

Notes

Leave space between potatoes on the baking sheet to ensure they crisp up well.
Calories: 350kcal
Cost: $15
Course: Side Dish
Cuisine: American
Keyword: Potatoes

Discover the Vibrant World of Greek Salad

Welcome to the ultimate celebration of freshness and flavor—the Greek salad! This dish isn’t just a side; it’s a vibrant explosion of colors and tastes that dances on your taste buds. Packed with garden-fresh ingredients like juicy tomatoes, crisp cucumbers, and creamy feta, our Perfect Greek Salad is a quick, delightful meal that energizes your day and brings a taste of the Mediterranean right to your table. In this article, we’ll dive deep into everything you need to know about creating the best Greek salad, from ingredient substitutions to pro tips, variations, and more!

Why You’ll Love This Recipe

  • Quick and Easy: In just 15 minutes, you can whip up a delicious Greek salad, making it perfect for busy weeknights or last-minute gatherings.
  • Nutritious and Wholesome: Packed with vitamins and minerals from fresh vegetables, this salad is a great way to boost your health without sacrificing flavor.
  • Versatile Dish: Enjoy it as a light meal, side dish, or even as a filling for wraps or pitas. It’s perfect for any occasion!
  • Customizable: With so many ingredient variations, you can easily adapt this salad to your taste preferences and dietary needs.
  • Perfect for Meal Prep: This salad stores well, making it ideal for meal prep or make-ahead lunches that stay fresh for days!

Ingredient Breakdown

Let’s explore the ingredients that make up this incredible Greek salad, along with some tasty substitutions you can use to customize it!

  • Red Onion: A small red onion adds a mild sweetness. For a milder flavor, soak the slices in cold water.
  • English Cucumber: Crisp and refreshing, English cucumbers are perfect for salads. You can substitute with regular cucumbers, but be sure to peel them to avoid bitterness.
  • Mixed Tomatoes: Use a mix of heirloom or vine-ripened tomatoes for a pop of color and flavor. Cherry tomatoes work brilliantly too!
  • Dried Black Olives: Kalamata olives are traditional, but feel free to mix it up with green olives for a different taste.
  • Feta Cheese: Creamy and tangy, feta is essential! Crumbled goat cheese or even vegan feta can be used for a dairy-free option.
  • Extra Virgin Olive Oil: A must for dressing; it adds depth and richness. Look for high-quality oil for the best flavor.
  • Lemon Juice: Freshly squeezed lemon juice brightens up the salad. Lime juice is a zesty alternative!
  • Fresh Oregano: Adds an aromatic touch. Dried oregano can be used in a pinch, but fresh is always better!

Pro Tips for the Perfect Greek Salad

Juicy Greek salad featuring tomatoes, cucumbers, olives, and feta in a bowl.

Let’s ensure you create a Greek salad that’s not just good but *great*! Here are some expert insights:

  • Use Fresh Ingredients: Fresh, in-season vegetables make a world of difference in flavor and texture.
  • Cut Vegetables Right: For the best presentation, cut your vegetables into uneven chunks for a rustic look that’s visually appealing.
  • Don’t Skimp on the Dressing: A generous drizzle of olive oil and lemon juice enhances the flavors of the salad.
  • Serve at Room Temperature: Allowing the salad to sit for a few minutes before serving lets the flavors meld beautifully.
  • Experiment with Seasoning: Taste as you go! Adjust the salt and pepper to your liking for the perfect flavor balance.
  • Don’t Overmix: Gently toss the salad to keep the integrity of the vegetables intact.
  • Add Proteins: To make your salad heartier, consider adding grilled chicken, shrimp, or chickpeas.
  • Make It Ahead: Prepare the salad a few hours in advance for the flavors to develop, but add dressing just before serving to keep the veggies crisp.

Avoid These Common Mistakes

Even the best recipes can go wrong! Here are some common pitfalls and how to avoid them:

  • Using Dull Ingredients: Always opt for fresh and vibrant produce. Stale or wilted vegetables can ruin the salad’s appeal.
  • Too Much Dressing: While dressing is important, too much can make the salad soggy. Start with a little and adjust to taste.
  • Overcomplicating the Recipe: Keep it simple! The beauty of a Greek salad lies in its straightforwardness.
  • Ignoring Texture: Aim for a mix of crunchy (cucumber) and creamy (feta) textures for an enjoyable eating experience.

Variations to Try

Get creative with your Greek salad! Here are some fun variations:

  • Quinoa Greek Salad: Add cooked quinoa for a protein boost and a nutty flavor.
  • Greek Pasta Salad: Toss in some cooked pasta for a filling twist—perfect for potlucks!
  • Chickpea Greek Salad: Incorporate canned chickpeas for added protein and fiber.
  • Grilled Vegetable Greek Salad: Add grilled zucchini, bell peppers, or eggplant for a smoky flavor.

Storage and Make-Ahead Instructions

This salad is ideal for meal prep! Here’s how to store it:

  • Refrigeration: Store the salad in an airtight container in the fridge for up to 3 days. Keep the dressing separate to maintain crunchiness.
  • Make-Ahead: Prepare all ingredients in advance, and mix just before serving to keep everything fresh.

Frequently Asked Questions

Got questions? We’ve got answers! Here are some common queries about Greek salad:

  • Can I use different types of cheese? Absolutely! Feta is traditional, but you can try goat cheese, mozzarella, or even vegan options.
  • How do I make it vegan? Simply omit the cheese or use a vegan feta alternative, and you’re good to go!
  • What’s the best way to cut cucumbers? Slice them into half-moons or chunks for a satisfying bite, and consider leaving the skin on for extra crunch.
  • Can I add fruits? Yes! Fresh fruits like watermelon or strawberries can add a delightful sweetness to the salad.
  • Is it gluten-free? Yes, this salad is gluten-free, making it perfect for those with dietary restrictions.
  • How can I make it spicier? Add chopped jalapeños or a dash of red pepper flakes for a kick!
  • What should I serve with Greek salad? This salad pairs perfectly with grilled meats, seafood, or as a refreshing side to any Mediterranean dish.
  • Can I use canned olives? Yes, canned olives are a convenient option, but always rinse them to reduce sodium!

Nutrition Tips and Dietary Adaptations

Greek salad is not only delicious but also packed with nutrients. Here are some tips to enhance its nutritional value:

  • Increase Fiber: Add more veggies like bell peppers or carrots for extra fiber.
  • Lower Sodium: Use low-sodium olives and feta to keep the dish heart-healthy.
  • Boost Healthy Fats: Include avocado for additional healthy fats and a creamy texture.

Essential Equipment for Making Greek Salad

You’ll need a few tools to make your salad-making experience seamless:

  • Cutting Board: A sturdy cutting board for chopping vegetables.
  • Sharp Knife: A sharp chef’s knife makes cutting easier and safer.
  • Mixing Bowl: A large bowl for tossing all your fresh ingredients together.
  • Measuring Cups and Spoons: For accurate measurements of your dressing ingredients.

Serving Suggestions

Ready to enjoy your Greek salad? Here’s how to serve it for maximum impact:

  • Presentation: Serve on a large platter for a family-style meal, or in individual bowls for a more elegant touch.
  • Pair with Proteins: Consider serving it alongside grilled chicken, shrimp, or falafel for a complete meal.
  • Finish with Fresh Herbs: Garnish with additional fresh oregano or parsley for a burst of color and flavor.

With its bright colors and bold flavors, this Greek salad is sure to impress at any gathering or meal. So gather your fresh ingredients, channel your inner chef, and let’s create a dish that’s not just good for you, but also a joy to eat!

The Perfect Greek Salad

Prep Time 10 minutes
Total Time 10 minutes
Servings 2 people
Calories 250
A fresh and vibrant Greek salad with crisp vegetables, creamy feta, and a tangy lemon-olive oil dressing.

Ingredients

Vegetables

  • 1/2 small red onion (finely sliced into half moons)
  • 1/2 English cucumber English cucumber (peeled and cut into half moon chunks)
  • 200 g mixed tomatoes (cut into uneven chunks)
  • handful dried black olives
  • 60 g feta (broken into chunks)

Seasoning

  • to taste sea salt & black pepper
  • 1 tbsp extra virgin olive oil
  • 1 tbsp freshly squeezed lemon juice

Herbs

  • small handful fresh oregano leaves (picked)

Instructions 

  • Slice the onion and soak in cold water; drain and set aside.
  • Peel and chop the cucumber; scatter on a platter.
  • Cut tomatoes and add to the platter with olives.
  • Drain onion slices and scatter over the salad, then add feta, salt, and pepper.
  • Whisk olive oil and lemon juice, drizzle over salad, scatter oregano, and serve.

Notes

Use fresh ingredients for best flavor.
Calories: 250kcal
Cost: $12
Course: Salad
Cuisine: Greek
Keyword: Vegetables

Welcome to Your Tropical Fruit Salad Adventure!

Are you ready to embark on a delicious journey that tantalizes your taste buds and invigorates your spirit? Dive into a bowl of sunshine with our Best Fruit Salad Recipe! Bursting with vibrant flavors from strawberries, pineapple, blueberries, and more, this quick and easy dish is your ticket to a refreshing, nutritious treat that’s perfect for any occasion. Whether it’s a summer barbecue, a family brunch, or a simple snack, this fruit salad is sure to be a hit!

Why You’ll Love This Recipe

This fruit salad isn’t just a dish; it’s a celebration of flavor and nutrition. Here are five reasons why you’re going to love making it:

  • Quick and Easy: With just a few simple steps, you can whip up a colorful fruit salad that requires minimal prep time.
  • Nutritious Boost: Packed with vitamins and minerals, every bite is a step towards better health.
  • Perfect for Meal Prep: Make it in advance for busy days—just add bananas before serving to keep them fresh!
  • Customizable: Use fruits available in your pantry or switch things up with seasonal picks!
  • A Feast for the Eyes: The colorful array of fruits makes this salad not only delicious but also visually stunning!

Ingredient Breakdown: What You’ll Need

Let’s talk about the stars of this fruit salad! Here’s what you need:

  • 2 cups strawberries: Hulled and sliced for that sweet-tart flavor.
  • 2 cups pineapple chunks: Fresh is preferred, but canned works too—just watch the added sugars!
  • 2 cups seedless grapes: Halved for easy snacking.
  • 2 cups blueberries: These little gems are packed with antioxidants!
  • 2 cups kiwi: Peeled and sliced for a tropical twist.
  • 2 oranges: Peeled and segmented to add a citrusy zing.
  • 1 banana: Sliced and added just before serving to prevent browning.
  • 3 tbsp honey: A natural sweetener that complements the fruits beautifully.
  • Juice of 1 fresh lime: For a refreshing kick!
  • 1 tsp orange zest: To enhance the citrus flavor.

Pro Tips for the Perfect Fruit Salad

Close-up view of a colorful fruit salad with fresh strawberries, blueberries, pineapple, kiwi, grapes, oranges, and banana slices.

Want to make this recipe even better? Check out these expert insights:

  • Choose ripe fruits: Selecting perfectly ripe fruits will enhance the flavor and sweetness of your salad.
  • Wash your fruits: Always wash fruits thoroughly before cutting to remove any pesticides or dirt.
  • Mix textures: Combine different textures (crunchy, soft, juicy) for a more enjoyable eating experience.
  • Mind the acidity: If you’re using very acidic fruits, like pineapple, balance them with milder ones, like bananas.
  • Chill before serving: Letting the salad sit in the fridge for 30 minutes allows the flavors to meld.
  • Brighten it up: Adding a few mint leaves can give your salad a fresh twist.
  • Presentation matters: Serve in a clear bowl to show off those beautiful colors—people eat with their eyes first!
  • Use citrus dressing wisely: Be careful not to drown the fruits; a light drizzle is all you need!

Common Mistakes & Troubleshooting

Even the best chefs face challenges! Here are some common pitfalls to avoid:

  • Overripe fruits: Using overly ripe fruits can lead to mushiness. Check for firmness!
  • Neglecting to balance flavors: Ensure a mix of sweet and tart fruits to keep things interesting.
  • Not using enough dressing: A little dressing goes a long way in bringing the flavors together.
  • Forgetting to add bananas last: They brown quickly; add them right before serving for the best presentation!

Delicious Variations to Try

Feeling adventurous? Try these fun variations to switch things up:

  • Berry Blast: Replace pineapple with mixed berries for a berry-centric salad.
  • Coconut Paradise: Add shredded coconut for a tropical flair!
  • Nutty Delight: Sprinkle some chopped nuts for an extra crunch.
  • Minty Fresh: Infuse with mint leaves for a refreshing twist that brightens every bite.

Storage & Make-Ahead Instructions

Want to prepare this salad in advance? Here’s how:

  • Make-ahead: You can prepare the salad a day prior, just hold off on adding bananas until serving.
  • Storage: Store leftovers in an airtight container in the fridge for up to 2 days, but expect some texture changes.

Frequently Asked Questions

Got questions? We’ve got answers! Here are some of the most commonly asked queries:

  • Can I use frozen fruits?: Yes! Just make sure they’re thawed before mixing in.
  • What’s the best fruit for a salad?: It depends on personal preference—mix sweet and tart fruits for the best flavor.
  • How long will the salad last?: It can last up to 2 days in the fridge, but the fresher, the better!
  • Can I add yogurt?: Absolutely! A dollop of yogurt can add creaminess.
  • Is this recipe gluten-free?: Yes, it’s naturally gluten-free!
  • Can I make a dressing with something other than honey?: Yes! Maple syrup or agave nectar can work as a great alternative.
  • How do I prevent browning in fruits?: Use citrus juice, like lemon or lime, to coat cut fruits.
  • What’s the best way to serve it?: A clear bowl showcases the colorful fruits beautifully!

Nutrition Tips & Dietary Adaptations

This fruit salad is not only delicious but also nutritious! Here are some tips for different dietary needs:

  • Low-sugar option: Use less honey or switch to a sugar substitute.
  • Vegan-friendly: This recipe is naturally vegan; just ensure your sweetener is plant-based.
  • High-protein twist: Add Greek yogurt or cottage cheese for a protein boost.

Essential Equipment for Success

Here’s what you need to make this salad:

  • Sharp knife: For easy and safe cutting of fruits.
  • Cutting board: A sturdy surface to prep your ingredients.
  • Mixing bowl: A large bowl to combine all your delicious fruits.
  • Whisk: For mixing your dressing smoothly.
  • Airtight container: For storing leftovers or meal prep.

Serving Suggestions

Want to elevate your fruit salad experience? Pair it with these delicious ideas:

  • Quinoa salad: Serve alongside a quinoa salad for a complete meal.
  • Granola topping: Add a scoop of granola on top for crunch.
  • Beverage pairings: Pair it with iced tea or a light, fruity beverage.

Conclusion: Your Tropical Bliss Awaits!

There you have it—the ultimate fruit salad adventure! With its vibrant colors, refreshing flavors, and numerous health benefits, this salad is sure to become a staple in your kitchen. Remember, cooking should be fun and creative, so feel free to customize this recipe to your liking. Enjoy the process, share it with friends and family, and most importantly, savor every delicious bite. Happy cooking!

The Best Fruit Salad Recipe

Prep Time 15 minutes
Total Time 15 minutes
Servings 8 servings
Calories 150
A vibrant and refreshing fruit salad perfect for any occasion, combining sweet and tangy flavors with a honey-lime dressing.

Ingredients

Fruits

  • 2 cups strawberries (hulled and sliced)
  • 2 cups pineapple chunks (fresh preferred)
  • 2 cups seedless grapes (halved)
  • 2 cups blueberries
  • 2 cups kiwi (peeled and sliced)
  • 2 pieces oranges (peeled and segmented)
  • 1 piece banana (sliced, added just before serving)
  • 3 tbsp honey
  • 1 piece juice of 1 fresh lime
  • 1 tsp orange zest

Instructions 

  • Wash all fruit thoroughly. Slice strawberries, halve grapes, peel and slice kiwis, and segment the oranges.
  • Whisk together honey, lime juice, and orange zest in a small bowl.
  • Gently toss all fruits except banana in a large bowl. Pour dressing over and toss lightly.
  • Just before serving, slice the banana and fold it into the salad.

Notes

Use fresh, ripe fruits for the best flavor.
Calories: 150kcal
Cost: $15
Course: Dessert
Cuisine: international
Keyword: fruit, Salad

Are you ready to transform your lunch routine into a vibrant culinary adventure? Our Santa Fe Chicken Salad is not just any salad—it’s a fiesta of flavors and textures that will tantalize your taste buds! Packed with protein, fresh veggies, and a zesty dressing, this salad is perfect for busy weekdays or casual gatherings. Let’s dive into this delicious recipe that proves healthy eating can be exciting and satisfying!

Why You’ll Love This Recipe

  • Flavor Explosion: The combination of cumin and chili powder brings a smoky, Southwest flair that’ll have your palate dancing.
  • Fresh Ingredients: This salad is loaded with crisp romaine, ripe tomatoes, creamy avocado, and sweet corn—each bite is a burst of fresh goodness!
  • Quick and Easy: With just a few simple steps, you can whip up this nutritious meal in less than 30 minutes.
  • Meal Prep Friendly: Perfect for meal prep, this salad stays delicious even after a day in the fridge, making it ideal for busy lifestyles.
  • Customizable: Mix and match ingredients to suit your taste. Add more veggies, switch proteins, or try a different dressing!

Ingredients You’ll Need

This Santa Fe Salad is made with wholesome, easily accessible ingredients. Here’s what you’ll need:

  • 2 boneless skinless chicken breasts (about 1 pound): Lean protein that keeps you full and satisfied.
  • 2 teaspoons chili powder: Adds a warm, earthy flavor to the chicken.
  • 2 teaspoons cumin: Enhances the Southwest essence of this salad.
  • 1 tablespoon olive oil: Helps cook the chicken to perfection and adds a touch of richness.
  • 6 cups chopped romaine lettuce: The crunchy base of your salad, full of nutrients.
  • 1 avocado, diced: Creamy texture that balances the crunchiness of the veggies.
  • 1 cup canned corn, drained: Sweetness that complements the savory flavors.
  • 1 cup diced Roma tomatoes: Fresh and juicy, adding vibrant color.
  • ⅓ cup chopped cilantro: Brightens up the salad with its fresh herbaceous flavor.
  • Tortilla strips: For that delightful crunch on top!
  • ½ cup mayonnaise: The base for a creamy dressing.
  • 1 tablespoon lime juice: Adds a zesty kick to the dressing.
  • 1 tablespoon water, or more if needed: Adjusts the consistency of the dressing.
  • ½ teaspoon chili powder: For extra flavor in the dressing.
  • ¼ teaspoon cumin: To echo the spices used in the chicken.
  • ½ teaspoon onion powder: For a subtle depth of flavor.
  • Salt & pepper, to taste: Essential for seasoning!

How to Make Santa Fe Salad

Creating your Santa Fe Chicken Salad is a breeze! Just follow these simple steps:

  1. Slice the Chicken: Begin by slicing the chicken breasts in half horizontally to make 4 thin cutlets. This ensures even cooking.
  2. Season the Chicken: In a small bowl, mix together 2 teaspoons of chili powder and 2 teaspoons of cumin. Rub this seasoning generously over both sides of the chicken cutlets.
  3. Cook the Chicken: Heat 1 tablespoon of olive oil in a large skillet over medium-high heat. Add the seasoned chicken and cook, covered, for 5-6 minutes on each side until cooked through (165°F). Let the chicken rest for 10 minutes before slicing into strips.
  4. Prepare the Dressing: While the chicken is cooking, mix the mayonnaise, lime juice, water, and remaining spices in a bowl or jar. Adjust the water until you reach your desired dressing consistency.
  5. Assemble the Salad: In a large bowl, combine the romaine lettuce, avocado, corn, tomatoes, and cilantro. Drizzle with your desired amount of dressing and toss gently to combine.
  6. Finish with Tortilla Strips: Top your salad with tortilla strips for that perfect crunch and, if desired, a sprinkle of extra lime juice and freshly cracked black pepper.

Pro Tips for the Perfect Santa Fe Salad

Juicy chicken slices atop a colorful salad featuring romaine lettuce, avocado, corn, and tomatoes.
  • Let the Chicken Rest: Always let your cooked chicken rest before slicing to retain its juices.
  • Customize the Dressing: Feel free to add Greek yogurt for a tangy twist or throw in some diced jalapeños for extra heat!
  • Use Rotisserie Chicken: For a faster option, swap in rotisserie chicken—just shred and toss!
  • Fresh Herbs: Experiment with different herbs like parsley or mint for a unique flavor profile.
  • Consider Beans: For a vegetarian version, replace chicken with black beans or chickpeas for protein.
  • Fresh Lime Juice: Always use fresh lime juice for the best flavor in your dressing.
  • Chill Your Salad: If you prefer a cold salad, chill the salad ingredients before mixing.
  • Batch Prep: Prepare the dressing in advance and store it in the fridge for up to a week to save time!

Common Mistakes and Troubleshooting

Even the best chefs make mistakes! Here are some common pitfalls and how to avoid them:

  • Overcooking the Chicken: Always use a meat thermometer to ensure the chicken reaches 165°F without drying out.
  • Too Much Dressing: Start with a small amount and add more gradually; you can always add more, but you can’t take it away!
  • Unseasoned Ingredients: Always season each component, especially the chicken, to build layers of flavor.
  • Ignoring Texture: Balance is key—add elements that provide crunch, creaminess, and freshness for a well-rounded salad.

Variations on the Santa Fe Salad

Feel free to mix things up! Here are some delicious variations:

  • Tropical Twist: Add diced pineapple and swap cilantro for mint for a refreshing, tropical vibe.
  • Spicy Chipotle: Incorporate chipotle peppers in adobo sauce into your dressing for a smoky, spicy kick.
  • Grain Bowl: Serve your salad over a bed of quinoa or brown rice for added fiber and texture.
  • Vegan Delight: Replace chicken with grilled tofu or tempeh and use a plant-based mayo for the dressing.

Storage and Make-Ahead Instructions

This salad is great for meal prep! Here’s how to store it:

  • Storing Leftovers: Keep the salad in an airtight container in the fridge for up to 3 days. Store the dressing separately to keep the salad fresh.
  • Make-Ahead: Prepare all ingredients in advance, and store them separately. Assemble the salad just before serving to maintain crispness.
  • Freezing: It’s not recommended to freeze this salad as it can affect the texture of the ingredients.

Frequently Asked Questions

Got questions? We’ve got answers!

  • Can I make this salad ahead of time? Yes, just store the dressing separately until you are ready to serve!
  • What other toppings can I add to the salad? Try adding sliced jalapeños, shredded cheese, or pumpkin seeds for extra flavor!
  • How can I make the dressing spicier? Increase the chili powder or add a dash of hot sauce to kick it up!
  • Can I use a different type of lettuce? Absolutely! Feel free to use spinach, kale, or mixed greens.
  • Is this salad gluten-free? Yes, as long as you use gluten-free tortillas or omit the strips.
  • Can I add fruits? Sure! Diced mango or strawberries can add a sweet twist!
  • How do I make this salad vegetarian? Substitute the chicken with chickpeas or grilled veggies!
  • What can I serve with this salad? Pair it with a side of garlic bread or a light soup for a complete meal!

Nutrition Tips and Dietary Adaptations

This Santa Fe Salad is nutritious, but here are some tips to make it even healthier:

  • Increase Fiber: Add beans or legumes for a fiber boost that helps keep you full longer.
  • Reduce Calories: Opt for Greek yogurt in place of mayonnaise for a lighter dressing option.
  • Boost Nutrients: Incorporate a variety of colorful vegetables to enhance vitamins and minerals.
  • Watch Portion Sizes: Be mindful of ingredients like avocado and dressing, as they can be calorie-dense.

Equipment Recommendations

Here’s what you need to make this fabulous salad:

  • Sharp Knife: For easily slicing chicken and vegetables.
  • Cutting Board: A sturdy surface to prep your ingredients.
  • Skillet: A non-stick or cast-iron skillet works wonders for cooking the chicken.
  • Bowl: A large mixing bowl to toss your salad ingredients together.
  • Meat Thermometer: For ensuring your chicken is cooked perfectly every time!

Serving Suggestions

This Santa Fe Chicken Salad is a star on its own, but here are some delicious pairing ideas:

  • Serve with Tortilla Chips: Crunchy chips are a great side for scooping up the salad!
  • Pair with a Cold Drink: A refreshing iced tea or sparkling water complements the zesty flavors perfectly.
  • Offer a Side of Fruit: Fresh fruit like watermelon or berries can provide a sweet contrast to the savory salad.

Now that you have the ultimate guide to creating a delicious Santa Fe Chicken Salad, it’s time to roll up your sleeves and get cooking! Remember, the kitchen is your playground—have fun and experiment with flavors! Enjoy your vibrant, healthy meal!