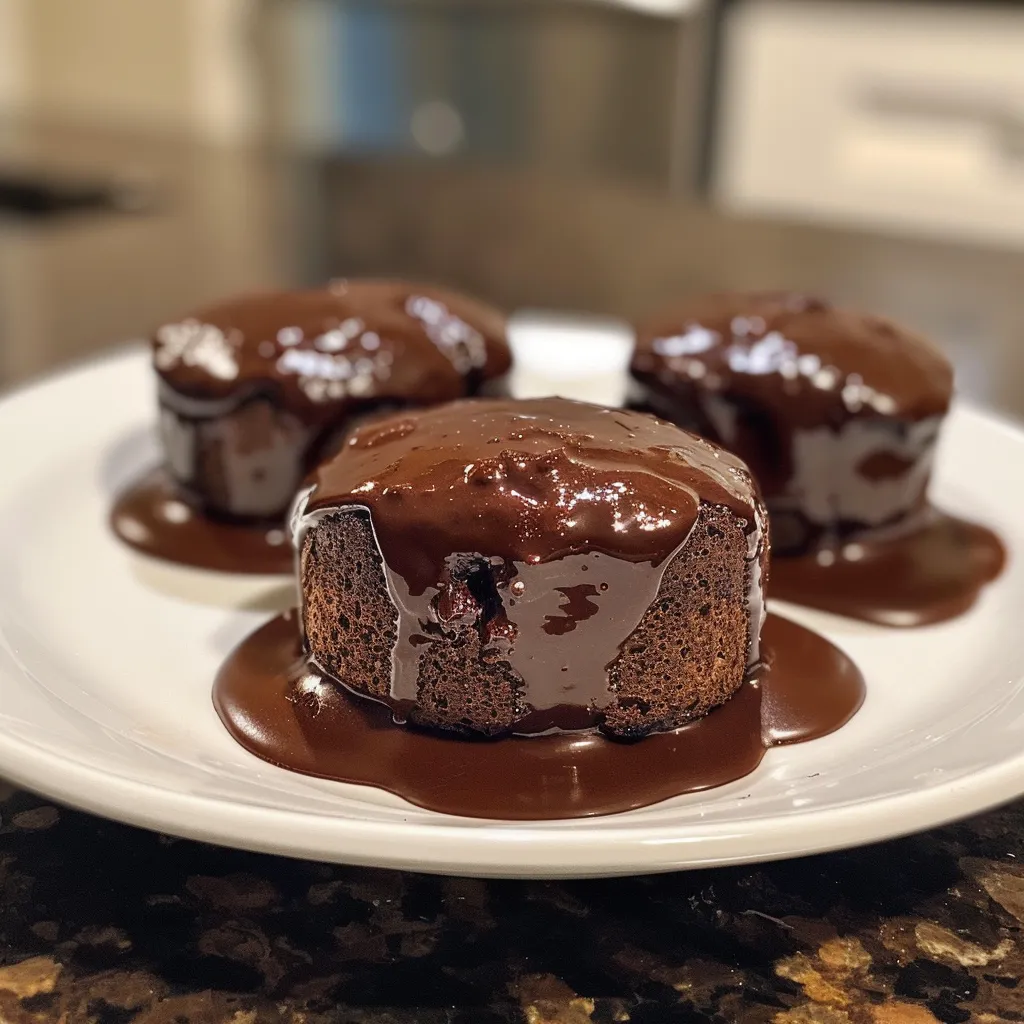
Indulge in Decadence: The Ultimate Guide to Bite-Sized Chocolate Lava Cakes That Wow!
Welcome to your culinary playground! If you’re ready to explore the rich, gooey goodness of chocolate lava cakes, you’ve come to the right place. These delightful desserts are not only a feast for the eyes but also promise a mouthwatering experience that’s both indulgent and simple to create. A chocolate lover’s dream, these molten cakes are perfect for any occasion—be it a romantic Valentine’s Day dinner, a celebratory gathering, or a cozy night in. So, roll up your sleeves, and let’s get baking!
Why You’ll Love This Recipe
- Quick and Easy: With just a handful of ingredients and minimal prep, you’ll have these decadent treats ready in no time.
- Perfect for Any Occasion: Whether it’s a holiday, date night, or just because, these cakes will impress your guests and delight your taste buds.
- Customizable: With various toppings and fillings, you can make each cake unique to suit your preferences.
- Decadent Flavor: The combination of rich chocolate and the molten center creates a flavor sensation that’s simply irresistible.
- Impressive Presentation: Serve them right from the ramekin or inverted onto a plate for a stunning dessert that looks as good as it tastes!
Ingredients Breakdown
Here’s what you’ll need to whip up these molten chocolate lava cakes:
- 2-3 tablespoons cocoa powder: For dusting the ramekins and enhancing the chocolate flavor.
- 6 ounces semi-sweet or bittersweet chocolate, chopped: Choose high-quality chocolate for the best results.
- 1/2 cup unsalted butter, cubed: Adds richness and moisture to the cakes.
- 1/4 cup granulated sugar: Sweetens the batter while balancing the chocolate’s bitterness.
- 2 large eggs: Provides structure and helps the cakes rise perfectly.
- 2 large egg yolks: For added richness and a velvety texture.
- 1/4 cup all-purpose flour: Just enough to give the cakes a tender crumb without making them dense.
- Pinch of salt: Enhances the chocolate flavor.
Substitutions
- Gluten-Free: Substitute all-purpose flour with a 1:1 gluten-free baking mix.
- Vegan: Use plant-based butter, dairy-free chocolate, and aquafaba (whipped chickpea water) in place of eggs.
- Low-Sugar: Replace granulated sugar with coconut sugar or a sugar substitute like erythritol.
- Flavor Enhancements: Add a splash of vanilla extract or a pinch of espresso powder to deepen the chocolate flavor.
How to Make Chocolate Lava Cakes
Ready to dive into the baking process? Follow these simple steps:
- Preheat your oven to 425°F (220°C). Lightly coat four 6-ounce ramekins with cooking spray. Dust with cocoa powder to prevent sticking, then set aside on a baking sheet.
- In a heatproof bowl, combine the chopped chocolate and butter. Microwave in 20-second intervals, stirring well between each, until smooth. Set aside to cool slightly.
- In a separate bowl, beat the sugar, eggs, and egg yolks with an electric mixer until pale and thick, about 2-3 minutes.
- Add the cooled chocolate mixture and sprinkle the flour and salt over the top. Fold gently by hand until just combined.
- Divide the batter evenly into the ramekins and smooth the tops. Bake for 9-12 minutes until the edges are firm but the centers are slightly jiggly.
- Let the cakes rest for 1 minute, then carefully run a knife around the edge of each ramekin to loosen them. Invert onto dessert plates and serve with powdered sugar, a scoop of vanilla ice cream, or fresh berries.
Pro Tips for Perfect Lava Cakes
- Test for Doneness: The cakes should have firm edges and a soft, molten center. If you want to ensure a gooey center, bake them for the minimum time.
- Use Quality Chocolate: The better the chocolate, the richer the flavor. Opt for chocolate that’s at least 60% cocoa.
- Don’t Overmix: When combining the ingredients, mix just until incorporated to keep the cakes light and fluffy.
- Temperature Matters: Make sure your eggs are at room temperature for better emulsification and fluffiness.
- Experiment with Flavors: Consider adding a splash of orange zest or a dash of peppermint extract for a unique twist.
- Chill the Batter: If you’re making the batter ahead of time, chill it for no more than an hour before baking to maintain the molten center.
- Don’t Skip the Resting Time: Allowing the cakes to rest for a minute helps them set while retaining that luscious center.
- Serve Warm: For the ultimate experience, enjoy your lava cakes warm right out of the oven!
Common Mistakes and Troubleshooting
Even the best bakers can run into hiccups! Here’s how to avoid common pitfalls:
- Overbaking: This results in a dry cake rather than a molten center. Keep an eye on the timer and test for doneness.
- Sticking Ramekins: Ensure you grease and dust with cocoa powder thoroughly to prevent sticking.
- Too Much Mixing: Overmixing the batter can lead to dense cakes. Mix just until combined!
- Cold Ingredients: Using cold eggs or butter can affect the batter’s texture. Always use room temperature ingredients.
- Incorrect Oven Temperature: Invest in an oven thermometer to ensure accurate temperature readings.
Variations on the Classic Lava Cake
Why not switch things up? Here are some tantalizing variations:
- Nutty Surprise: Add chopped nuts (like hazelnuts or walnuts) into the batter for a delightful crunch.
- Raspberry Lava: Incorporate a spoonful of raspberry jam in the center for a fruity twist.
- Peanut Butter Delight: Add a dollop of creamy peanut butter to the center before baking for a rich flavor combo.
- Espresso Infusion: Mix in espresso powder to the batter for a mocha-inspired cake.
Storage and Make-Ahead Instructions
Want to prepare these in advance? Here’s how:
- Refrigerate: Unbaked batter can be stored in the refrigerator for up to 2 days. Just remember to bring it back to room temperature before baking.
- Freeze: Freeze unbaked lava cakes in ramekins for up to 2 months. Bake from frozen, adding a couple of extra minutes to the cooking time.
- Store Baked Cakes: Leftover baked cakes can be stored in the refrigerator for up to 3 days. Reheat gently in the microwave but be careful not to overdo it!
Comprehensive FAQ
1. Can I use different types of chocolate?
Absolutely! Feel free to experiment with milk chocolate for a sweeter dessert or dark chocolate for a more intense flavor.
2. What’s the best way to serve lava cakes?
These cakes shine when served warm, topped with vanilla ice cream, whipped cream, or fresh berries.
3. How do I know when the cakes are done?
The edges should be firm, while the center remains slightly jiggly. Trust your instincts!
4. Can I make these gluten-free?
Yes! Just replace all-purpose flour with a gluten-free flour blend.
5. What can I use instead of ramekins?
You can use muffin tins or silicone molds, but adjust baking time accordingly.
6. How do I prevent my cakes from sticking?
Greasing and dusting with cocoa powder is key! Make sure to coat your ramekins thoroughly.
7. Can I double the recipe?
Yes! Just be sure to bake the cakes in batches to ensure even cooking.
8. What’s the secret to a gooey center?
Bake them just until the edges are set and the centers are still slightly jiggly.
Nutritional Tips and Dietary Adaptations
Here are some health-conscious ideas:
- Portion Control: Consider making mini lava cakes in smaller ramekins for a lighter treat.
- Swap Sugar: Use natural sweeteners like honey or maple syrup for a healthier option.
- Boost Nutrition: Add ground chia or flax seeds for extra fiber and omega-3s.
- Pair with Fruit: Serve with fresh fruit to add vitamins and balance the sweetness.
Essential Equipment Recommendations
To make your baking experience seamless, here’s what you’ll need:
- Ramekins: Opt for 6-ounce ramekins for ideal portion sizes.
- Mixing Bowls: A set of mixing bowls in various sizes will help you manage your ingredients.
- Electric Mixer: A handheld or stand mixer makes it easier to achieve that perfect batter consistency.
- Microwave-Safe Bowl: For melting chocolate, use a bowl that’s safe for microwave use.
Serving Suggestions
Elevate your dessert game with these serving ideas:
- Garnishes: Dust with powdered sugar or drizzle chocolate sauce for a fancy finish.
- Pairings: Serve alongside a scoop of rich vanilla ice cream or a dollop of whipped cream for added indulgence.
- Fresh Fruits: Top with fresh berries or a fruit compote to provide a refreshing contrast to the rich chocolate.
Conclusion
You’ve now unlocked the secrets to making the most delightful chocolate lava cakes that are sure to impress! With a little practice, you’ll have these delicious treats down to a science, ready to wow friends and family alike. Remember, cooking should always be fun and creative. So, get into the kitchen, have a blast, and enjoy every ooey-gooey bite of your chocolate masterpieces. Happy baking!
Chocolate Lava Cakes
Ingredients
Dry ingredients
- 2-3 tablespoons cocoa powder
- 6 ounces semi-sweet or bittersweet chocolate, chopped
- 1/2 cup unsalted butter, cubed
- 1/4 cup granulated sugar
- 2 large eggs
- 2 large egg yolks
- 1/4 cup all-purpose flour
- pinch salt
Instructions
- Preheat oven to 425°F (220°C). Coat ramekins with spray and dust with cocoa powder.
- Combine chopped chocolate and butter; microwave until smooth, then cool.
- Beat sugar, eggs, and yolks until pale, then fold in cooled chocolate, flour, and salt.
- Divide batter into ramekins and bake for 9-12 minutes until edges are firm.
- Let rest 1 minute, then invert onto plates and serve immediately.