
![['Close-up of Frankenstein-themed Rice Krispie treats decorated with green and black candy melts.', "Side view of Halloween Rice Krispie treats resembling Frankenstein's monster, with candy eyes and sprinkles.", 'Juicy Halloween Rice Krispie treats in the shape of Frankenstein, showcasing vibrant green and black colors.', 'Detailed view of Rice Krispie treats styled for Halloween, featuring bright green candy and spooky decorations.']](https://recipessalads.com/wp-content/uploads/2026/07/frankenstein-halloween-rice-krispie-treats_1_U1-1.webp "Monstrously Delicious: Crafting Frankenstein Halloween Rice Krispie Treats")
Unleash Your Inner Mad Scientist with Frankenstein Halloween Rice Krispie Treats!
Are you ready to elevate your Halloween festivities with a deliciously creepy twist? These Frankenstein Halloween Rice Krispie Treats are not just a treat; they’re a fun culinary adventure! Packed with vibrant colors, gooey marshmallows, and a sprinkle of creativity, these treats are perfect for kids and adults alike. In this guide, we’ll dive into everything you need to know to make these eye-popping snacks that will steal the show at your Halloween gathering. Let’s get started!
Why You’ll Love This Recipe
- Quick and Easy: With just a few simple steps, you can whip up these treats in no time—perfect for last-minute Halloween parties!
- Customizable: Feel free to get creative! Change the colors, add different toppings, or even switch up the base ingredients to suit your taste.
- Fun for All Ages: This recipe is a fantastic opportunity to involve kids in the kitchen, making it a fun family activity.
- Ghoulishly Good Presentation: These treats are not just delicious; they’re visually appealing, making them a hit at any Halloween gathering.
- Make Ahead: You can prepare these treats in advance and store them, ensuring you’re ready for any surprise guests or parties!
Ingredient Breakdown
Let’s take a closer look at what you’ll need to create these monster delights:
- 6 cups rice krispie cereal: The classic base for any Rice Krispie treat! You can use gluten-free cereal if needed.
- 10 oz bag mini marshmallows: These provide the gooey sweetness. If you want to experiment, try using flavored marshmallows!
- 4 tbsp unsalted butter: Essential for adding richness. If you prefer a dairy-free option, you can substitute with coconut oil.
- 10 oz green candy melts: These will give your treats that iconic Frankenstein color. You can also use white chocolate with green food coloring if candy melts aren’t available.
- 3 oz black candy melts: Perfect for adding details like stitches to your Frankenstein face.
- Royal icing eyes: These bring your monsters to life! You can find them at most baking supply stores or make your own.
- Black jimmies sprinkles: Use these for added texture and decoration—who doesn’t love a little crunch?
How to Make Frankenstein Halloween Rice Krispie Treats
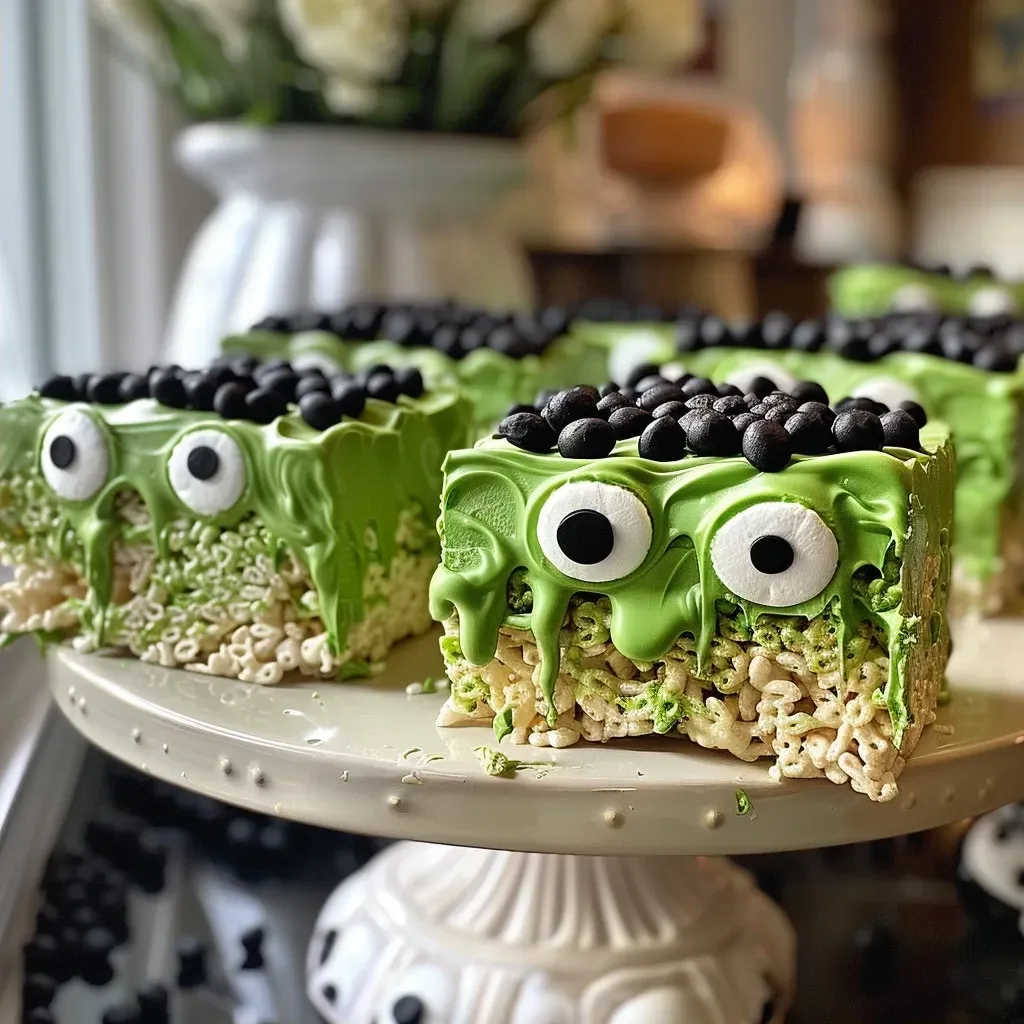
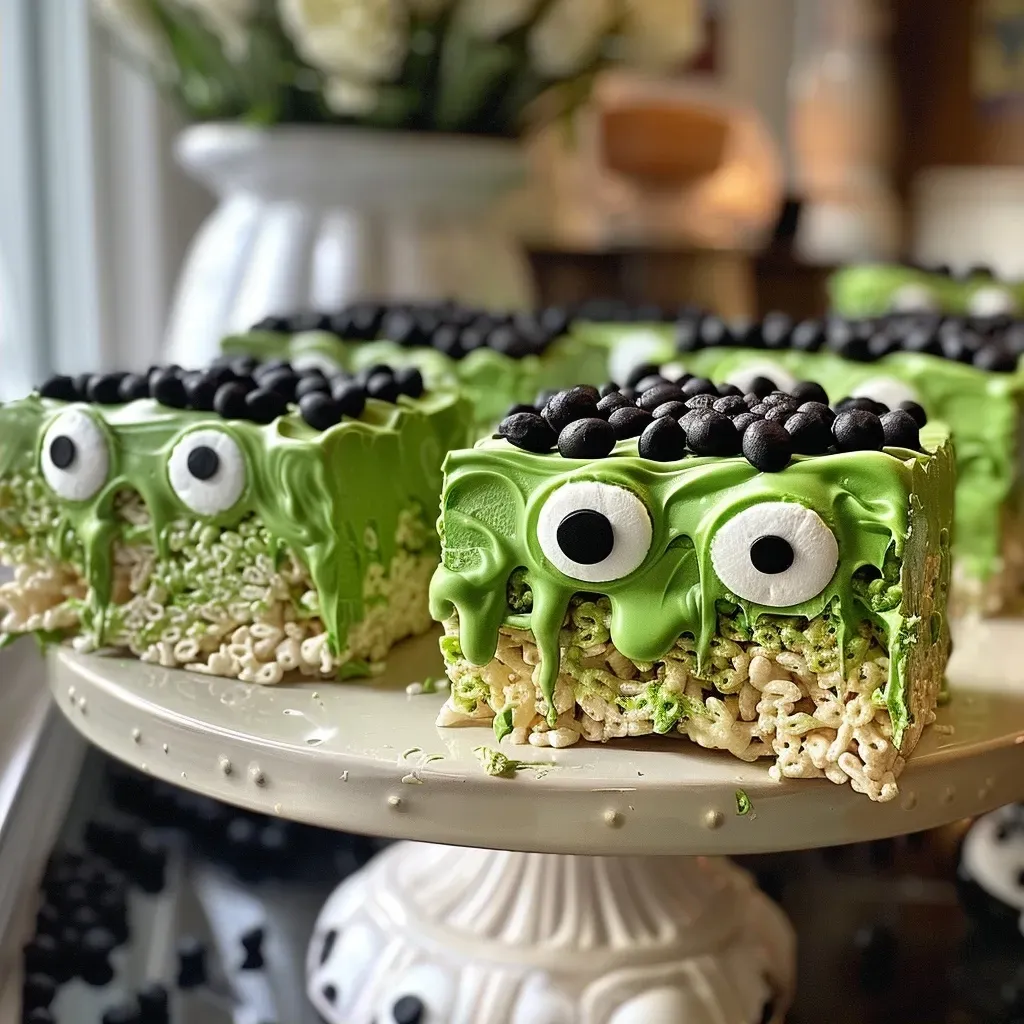
Time to get cooking! Follow these simple steps to create your spooky treats:

★ Recommended Kitchen Tool
Meal Prep Container Set
Make this recipe even easier with a quality Meal Prep Container Set — a must-have kitchen staple!
- Step 1: Butter a 9″ x 13″ casserole dish.
- Step 2: In a large pot over low-medium heat, melt the butter.
- Step 3: Add the marshmallows and stir until completely smooth.
- Step 4: Pour in the rice krispie cereal and, using a spatula, stir until the cereal is evenly coated.
- Step 5: Spoon the mixture into the prepared casserole dish and press down until flat. Let it set for about 30 minutes.
- Step 6: Once set, remove the treats from the dish and cut them into rectangles of varying sizes.
- Step 7: Melt the green candy melts in a bowl over a small pot of boiling water. Stir until smooth. If too thick, add a teaspoon of vegetable shortening.
- Step 8: Dip the top of each treat into the green candy melts and then into the black jimmies sprinkles.
- Step 9: Place two royal icing eyes on each treat.
- Step 10: Melt the black candy melts in the microwave, then use a piping bag to add stitches on the treats.
- Step 11: Let everything set completely before serving or packaging.
Pro Tips for Making the Best Rice Krispie Treats
- Use Fresh Ingredients: Ensure your marshmallows are fresh for the best texture and flavor.
- Press Firmly: When packing the mixture into the dish, make sure to press it down firmly to prevent the treats from crumbling.
- Experiment with Flavors: You can add different extracts, like vanilla or almond, for a unique twist.
- Control the Heat: Keep the heat low to avoid burning the marshmallows. Patience is key!
- Store Properly: Keep your treats in an airtight container at room temperature to maintain their freshness.
- Try Different Shapes: Use cookie cutters to create fun shapes for different occasions!
- Chill for Ease: If you find the mixture too sticky, pop it in the fridge for a bit to make it easier to shape.
- Use Gel Food Coloring: For vibrant colors, gel food coloring works better than liquid.
- Have Fun! This recipe is all about creativity—let your imagination run wild!
Common Mistakes and Troubleshooting
Even the best chefs have mishaps! Here are some common mistakes and how to avoid them:
- Too Sticky: If your mixture is too sticky, try adding a bit more cereal or letting it cool slightly before pressing into the dish.
- Not Setting Properly: Ensure your treats are packed tightly into the dish and allowed enough time to set before cutting.
- Melting Candy Coating: If your candy melts aren’t melting smoothly, try using a double boiler instead of the microwave.
- Crumbly Treats: This can happen if you don’t press down firmly enough. Don’t be shy—apply some pressure!
Fun Variations to Try
- Monster Mash: Add colorful candy eyes and use different colors of candy melts for a variety of monsters.
- Spooky Sprinkles: Top with Halloween-themed sprinkles for an extra festive flair!
- Chocolate Drizzle: Drizzle with melted chocolate for added decadence and a beautiful finish.
- Nutty Frankenstein: Incorporate chopped nuts or seeds for a crunchy texture that complements the chewy marshmallows.
Storage and Make-Ahead Instructions
Your Frankenstein Halloween Rice Krispie Treats can be made ahead of time and stored properly to maintain freshness:
- Room Temperature: Store in an airtight container at room temperature for up to 5 days.
- Refrigeration: If you prefer a chewier texture, store in the fridge for up to 7 days.
- Freezing: For longer storage, wrap individual treats in plastic wrap and place them in a freezer bag. They can be frozen for up to 3 months. Thaw at room temperature before serving.
Comprehensive FAQ
- Can I use regular marshmallows instead of mini ones? Yes, but you will need to cut them into smaller pieces for even melting.
- What can I substitute for candy melts? You can use white chocolate chips or make your own colored chocolate with food coloring.
- How do I prevent my treats from getting hard? Make sure not to overcook the marshmallows and store them properly.
- Can these treats be made vegan? Yes! Substitute the butter with coconut oil and use vegan marshmallows.
- How can I make these treats gluten-free? Use gluten-free rice krispie cereal and ensure all other ingredients are certified gluten-free.
- Can I add flavorings to the marshmallow mixture? Absolutely! Vanilla or almond extract can add a delightful twist.
- How do I store leftovers? Keep them in an airtight container to maintain their texture and flavor.
- Can I make the mixture in advance? You can prepare the base mixture ahead of time, but it’s best to coat and decorate just before serving.
Nutrition Tips and Dietary Adaptations
While these treats are a fun indulgence, here are some tips to keep them a bit healthier:
- Use Whole Grain Cereal: Opt for whole grain rice krispie cereal for added fiber.
- Lower Sugar Options: Consider using sugar-free candy melts or reducing the quantity of candy used.
- Portion Control: Cut treats into smaller sizes to enjoy without overindulging.
Essential Equipment Recommendations
To make your experience smooth and enjoyable, here are a few tools you’ll need:
- Large Pot: A heavy-bottomed pot ensures even melting of the marshmallows and butter.
- Spatula: A silicone spatula will help with mixing and scraping the sides of the pot.
- Casserole Dish: A 9″ x 13″ dish is perfect for shaping your treats.
- Piping Bag: For decorating with melted chocolate or frosting.
Serving Suggestions
These Frankenstein treats are perfect for any Halloween gathering! Here are a few fun serving ideas:
- Halloween Parties: Serve on a spooky platter with other Halloween-themed snacks.
- School Events: Individually wrap them in clear bags tied with Halloween ribbon for easy sharing.
- Movie Night: Pair with popcorn and spooky drinks for a fun movie marathon.
Now that you have all the tips, tricks, and insights, you’re ready to make these Frankenstein Halloween Rice Krispie Treats a star at your next celebration! Remember, cooking is all about joy and creativity, so have fun with it. Happy Halloween!
Frankenstein Halloween Rice Krispie Treats
Ingredients
Main ingredients
- 6 cups rice krispie cereal
- 10 oz mini marshmallows
- 4 tbsp unsalted butter
- 10 oz green candy melts
- 3 oz black candy melts
Royal icing eyes
- as needed Royal icing eyes
Sprinkles
- as needed Black jimmies sprinkles
Instructions
- Melt butter and marshmallows in a large pot over low-medium heat.
- Mix in rice krispie cereal until evenly coated, then press into a prepared dish and let set for 30 minutes.
- Melt green and black candy melts separately; dip treats in green melts, then add sprinkles and royal icing eyes.
- Pipe stitches with black candy melts and allow to set before serving.

![["A close-up side view of a Vegan Pumpkin and Lentil Shepherd's Pie, showcasing a golden crust and vibrant filling.", "A detailed side profile of a Vegan Pumpkin and Lentil Shepherd's Pie, highlighting the layers of lentils and squash.", "An enticing image of Vegan Pumpkin and Lentil Shepherd's Pie with a crispy topping and hearty vegetables inside.", "A visually appealing shot of a slice of Vegan Pumpkin and Lentil Shepherd's Pie, revealing its colorful ingredients."]](https://recipessalads.com/wp-content/uploads/2026/07/vegan-pumpkin-and-lentil-shepherds-pie_1_U1-150x150.webp)
![['Close-up shot of crunchy pumpkin spice granola with visible oats, nuts, and cranberries.', 'Side view of granola featuring pumpkin seeds, shredded coconut, and a golden brown color.', 'Textured close-up of homemade pumpkin spice granola showing various ingredients.', 'Detailed view of a bowl of pumpkin spice granola highlighting its crunchy texture and seasonings.']](https://recipessalads.com/wp-content/uploads/2026/07/crunchy-pumpkin-spice-granola_1_U1-150x150.webp)