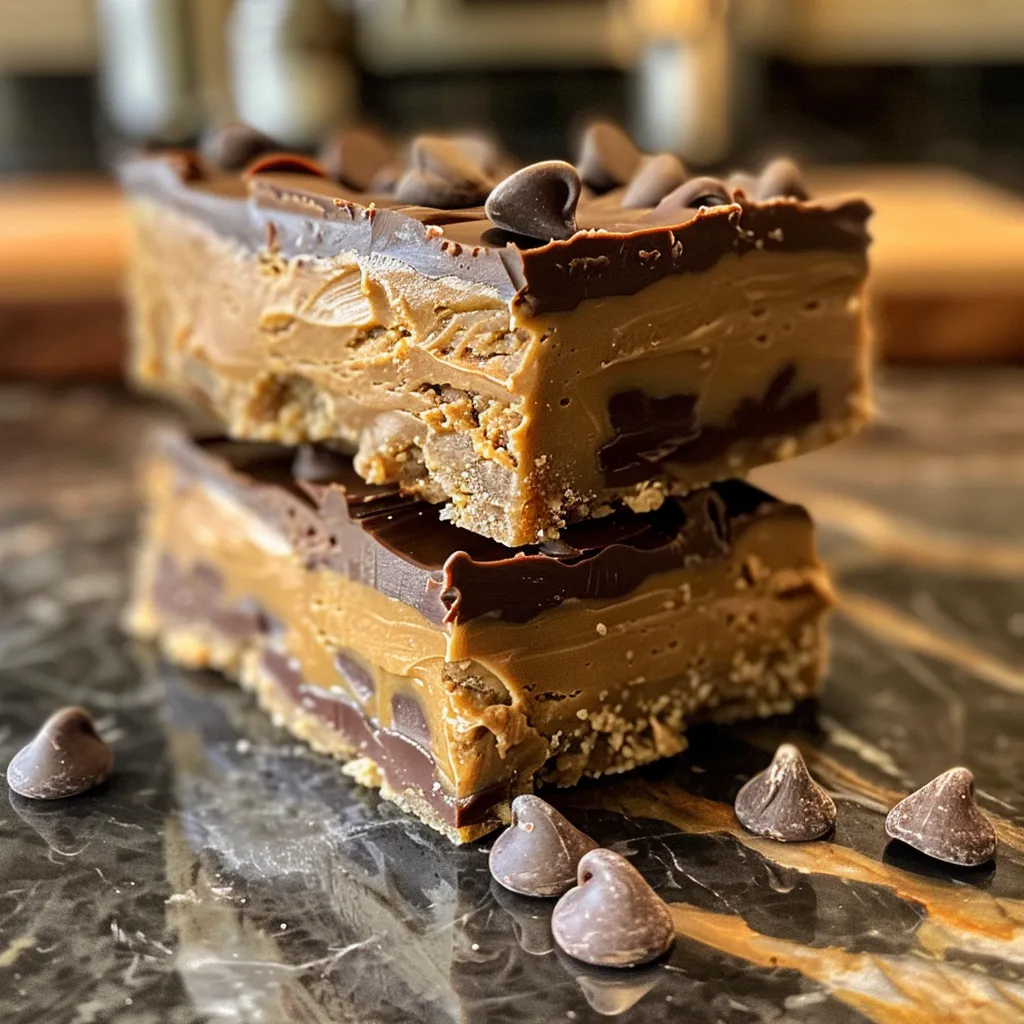
Why These No Bake Chocolate Peanut Butter Bars Will Become Your New Favorite Treat
If you’re in search of a dessert that’s as easy to make as it is delicious, look no further! These no bake chocolate peanut butter bars are not only a crowd-pleaser, but they also come together in a flash. With just a few ingredients, you can whip up a batch that’s perfect for any occasion—be it a family gathering, a snack for the kids, or a late-night indulgence. Let’s dive into why this recipe is a must-try!
- Quick and Easy: No need to preheat the oven or deal with complicated steps. Just mix, press, and chill!
- Minimal Ingredients: With only four simple ingredients, you likely have everything you need on hand.
- Decadent Flavor: The rich combination of creamy peanut butter and chocolate will satisfy your sweetest cravings.
- Versatile Treat: Perfect as a snack, dessert, or even a gift. Customize it with your favorite toppings!
- Healthy-ish Indulgence: Packed with protein from peanut butter, these bars offer a balanced treat that still feels indulgent.
Essential Ingredients for Your No Bake Bars
Before you get started, let’s look at what you’ll need to make these scrumptious peanut butter bars.
- 1 cup creamy peanut butter: Choose a natural peanut butter for a wholesome flavor. If you prefer crunchy, go for it!
- 1 cup powdered sugar: This provides the sweetness and helps achieve that smooth texture.
- 1/2 cup butter, melted: Adds richness and helps bind the ingredients together.
- 1 1/2 cups semi-sweet chocolate chips: For that irresistible chocolate layer on top.
How to Make These Irresistible Bars
Follow these simple steps to create your no bake chocolate peanut butter bars!
- Melt the butter and stir it into the peanut butter until smooth.
- Add the powdered sugar and mix until thick and creamy.
- Press the peanut butter mixture firmly into a parchment-lined 8×8 pan.
- Melt the chocolate chips and spread evenly over the peanut butter layer.
- Refrigerate for 1–2 hours until fully set.
- Let rest briefly at room temperature, then slice into bars and serve.
Expert Tips for Perfecting Your Bars
To ensure your chocolate peanut butter bars turn out perfectly every time, keep these tips in mind:
- Use quality ingredients: The better the peanut butter and chocolate, the richer the flavor.
- Don’t skip the chilling: Allowing the bars to set in the fridge ensures they hold their shape when sliced.
- Line your pan: Parchment paper not only makes for easy removal but also minimizes cleanup!
- Adjust sweetness to taste: Depending on your preference, feel free to tweak the powdered sugar amount.
- Use a firm hand: When pressing the mixture into the pan, make sure it’s compact for a good texture.
- Experiment with chocolate: Dark or white chocolate can be used for a different flavor profile.
Common Mistakes to Avoid
Even the best chefs make mistakes! Here are some pitfalls to avoid:
- Overmixing the peanut butter: This can lead to a grainy texture. Mix just until combined.
- Not letting them chill long enough: If you slice too soon, the bars will crumble instead of holding together.
- Skipping the parchment paper: This can lead to a sticky situation when you try to remove the bars from the pan!
Delicious Variations to Try
Feeling adventurous? Here are some fun ways to customize your bars:
- Nutty Addition: Add chopped nuts like almonds or walnuts for an extra crunch.
- Nut-Free Version: Substitute sunflower seed butter for a nut-free option that’s just as delicious.
- Fruit & Nut Bars: Mix in dried fruits like cranberries or raisins for a chewy component.
- Cookie Crust: Use crushed graham crackers or Oreos as a base for an added flavor twist.
Storage and Make-Ahead Tips
These bars are perfect for meal prep! Here’s how to store them:
- Refrigerate: Store in an airtight container in the fridge for up to a week.
- Freeze: For longer storage, these bars can be frozen for up to 3 months. Just slice and wrap individually!
- Thawing: Let them sit at room temperature for a few minutes before enjoying frozen bars.
Frequently Asked Questions
Got questions? We’ve got answers! Here are some common queries about no bake chocolate peanut butter bars.
- Can I use natural peanut butter? Absolutely! Just ensure it’s well-stirred to avoid separation.
- What if I’m allergic to peanuts? Use sunflower seed butter or almond butter as a delicious alternative!
- Are these bars gluten-free? Yes, as long as you use gluten-free ingredients.
- How can I make these bars vegan? Substitute butter with coconut oil and make sure to use dairy-free chocolate chips.
- Can I double the recipe? Yes! Just use a larger pan and increase the chilling time accordingly.
- What’s the best way to cut these bars? Use a sharp knife and wipe it clean between cuts for neat slices.
- Can I add protein powder? Yes! Just mix it into the peanut butter for an added protein boost.
- What should I serve with these bars? They pair well with a glass of almond milk or a scoop of ice cream!
Nutritional Insights and Dietary Adaptations
These peanut butter bars not only taste amazing but can also fit into various dietary preferences:
- Protein Power: Packed with protein from peanut butter, making them a great post-workout snack.
- Balanced Sweetness: Adjust the sugar to suit your taste and dietary needs.
- Healthy Fats: Contains healthy monounsaturated fats from peanut butter, perfect for heart health.
Essential Equipment for Making Your Bars
Before you start whipping up these delicious treats, gather the following:
- 8×8 baking pan: The perfect size for this recipe.
- Parchment paper: Makes for easy removal and cleanup.
- Mixing bowl: A good-sized bowl for combining all your ingredients.
- Rubber spatula: Great for mixing and spreading the peanut butter mixture evenly.
Serving Suggestions to Elevate Your Experience
Once your bars are ready, consider these fun serving ideas:
- Garnish with sea salt: A sprinkle of flaky sea salt on top enhances the flavor.
- Top with whipped cream: A dollop of whipped cream adds a nice touch.
- Pair with fresh fruit: Serve alongside sliced strawberries or bananas for a refreshing contrast.
- Chocolate drizzle: Melt additional chocolate chips and drizzle over the top for an elegant finish.
With these tips and tricks, you’re all set to create the most delicious no bake chocolate peanut butter bars ever! Remember, cooking should be fun, so don’t be afraid to experiment and make this recipe your own. Enjoy every delicious bite!
No Bake Chocolate Peanut Butter Bars Recipe
Ingredients
Dough
- 1 cup creamy peanut butter
- 1 cup powdered sugar
- 0.5 cup butter, melted
Chocolate topping
- 1.5 cups semi-sweet chocolate chips
Instructions
- Melt the butter and mix it into the peanut butter until smooth.
- Add powdered sugar and mix until thick.
- Press mixture into a parchment-lined 8x8 pan.
- Melt chocolate chips and spread over the peanut butter layer.
- Refrigerate for 1-2 hours until set, then slice and serve.