

Transform Your Leftover Chili into Delicious Chili Mac and Cheese!
Are you tired of the same old dishes made from leftover chili? Look no further! In this guide, we’ll explore how to turn your leftover chili into a mouth-watering bowl of Chili Mac and Cheese. This dish is not only quick and easy to prepare, but it also combines the bold flavors of your chili with creamy cheese and pasta for a comforting meal that’s sure to impress. Perfect for busy weeknights or when you’re craving something hearty, this recipe will show you just how exciting cooking can be!
Why You’ll Love This Recipe
- Quick and Easy: This dish comes together in under 30 minutes, making it ideal for a speedy dinner solution.
- Flavor Explosion: Combining chili, cheese, and pasta creates a symphony of flavors that will tantalize your taste buds.
- Versatile Ingredients: Use any type of leftover chili you have on hand—beef, turkey, or vegetarian options work wonderfully!
- Kid-Friendly: The cheesy goodness makes it a hit with kids, ensuring they’ll ask for seconds.
- Budget-Friendly: Maximize your leftovers and save money by transforming yesterday’s meal into something new!
Ingredients Breakdown
Here’s what you need to make this hearty Chili Mac and Cheese:
- Leftover chili: Any variety works—beef, turkey, or vegetarian chili. If it’s too spicy for your taste, consider adding a dollop of sour cream to mellow the heat.
- Cooked pasta: Use elbow macaroni for a classic touch, or switch it up with penne or fusilli for a fun twist.
- Cheese sauce: A homemade cheese sauce is fantastic, but store-bought cheese sauce or a simple mix of shredded cheese and milk can save time.
- Extra grated cheese: For that gooey, cheesy topping, opt for a mix of cheddar and Monterey Jack.
How to Make Chili Mac and Cheese
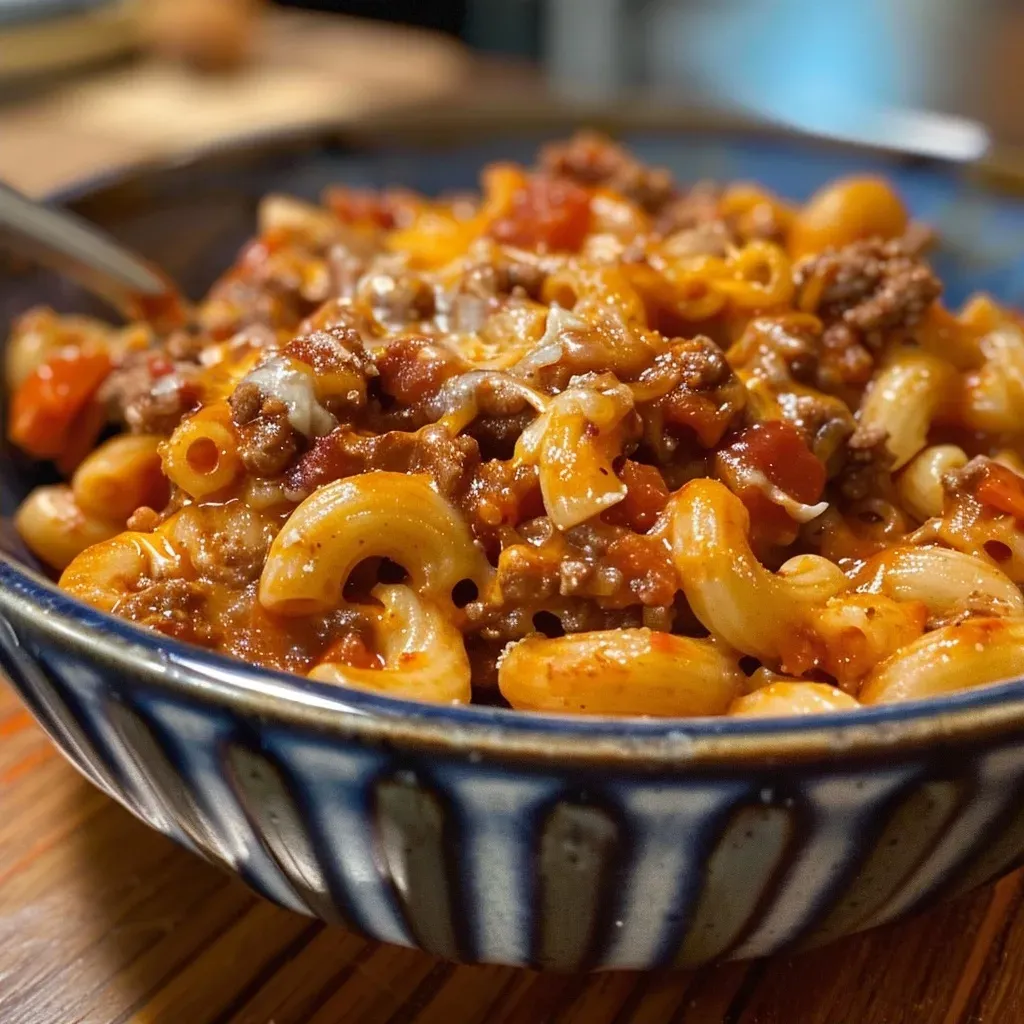
Follow these simple steps to whip up your own bowl of deliciousness:
- Preheat your oven to 350°F (175°C).
- In a large mixing bowl, combine your leftover chili, cooked pasta, and cheese sauce. Stir until everything is well-coated.
- Transfer the mixture to a baking dish, spreading it out evenly.
- Add extra grated cheese on top for a cheesy crust.
- Bake in the oven for about 20 minutes, or until bubbly and golden brown.
Pro Tips for Perfect Chili Mac
- Cheese Choices: Mix different cheeses like gouda or pepper jack for a more complex flavor profile.
- Layering Flavors: Add spices like cumin or smoked paprika to enhance the chili flavor.
- Mix It Up: Toss in some veggies like bell peppers or corn for added nutrition and crunch.
- Make It Spicy: If you love heat, add diced jalapeños or hot sauce to your chili mix.
- Servings: This recipe is easy to double or halve depending on your needs, perfect for meal prepping!
- Freezer-Friendly: Make a larger batch and freeze leftovers in individual portions for quick meals later.
- Garnish Ideas: Top your Chili Mac with fresh cilantro, diced green onions, or a drizzle of sour cream before serving.
- Serving Size: A single serving is about one cup, but it’s so good you might want a little more!
Common Mistakes and Troubleshooting
Here are some common pitfalls to avoid while making your Chili Mac:
- Overcooking the Pasta: Make sure your pasta is al dente before mixing it with the chili to prevent mushiness.
- Too Much Liquid: If your chili is very watery, consider draining some liquid before mixing it with pasta.
- Uneven Cheese Distribution: Ensure the cheese is evenly spread over the top for that perfect cheesy crust.
Variations to Try
Feeling adventurous? Here are some fun variations to switch things up:
- Buffalo Chili Mac: Use buffalo chicken chili and mix in blue cheese for a zesty kick.
- Vegetarian Delight: Substitute your chili with a hearty bean chili for a satisfying meat-free option.
- Southwestern Style: Add black beans, corn, and jalapeños for a southwestern flair.
- Mac and Cheese Bake: Mix in some breadcrumbs with herbs and spices for a crunchy topping.
Storage and Make-Ahead Instructions
You can make this dish ahead of time or store leftovers for later:
- To Store: Keep your Chili Mac in an airtight container in the fridge for up to 3 days.
- To Freeze: Portion into freezer-safe containers, and it can be stored for up to 3 months.
- Reheating: Reheat in the oven or microwave until heated through, adding a splash of milk if it appears dry.
Frequently Asked Questions
Here are some common questions about making Chili Mac:
- Can I use uncooked pasta? It’s best to use cooked pasta, as uncooked will absorb too much moisture and become mushy.
- Can I use non-dairy cheese? Absolutely! Non-dairy cheeses work great for this recipe.
- How can I make it gluten-free? Use gluten-free pasta and ensure your chili is gluten-free as well.
- What type of chili works best? Any chili will work, but traditional beef or turkey chili provides the richest flavor.
- Can I add vegetables? Yes! Bell peppers, zucchini, or spinach make great additions.
- What’s the best way to serve it? Serve hot, garnished with fresh herbs or a dollop of sour cream.
- Can I make it ahead of time? Yes, it can be prepared in advance and stored in the fridge or freezer.
- How long does it keep? It can be stored in the fridge for 3 days or frozen for 3 months.
Nutrition Tips and Dietary Adaptations
This Chili Mac can easily be adapted to fit various dietary preferences:
- Low-Carb: Substitute pasta with spiralized zucchini or cauliflower rice.
- High-Protein: Add cooked chicken or turkey for an extra protein boost.
- Low-Fat: Use reduced-fat cheese and a leaner chili option.
Equipment Recommendations
To make the best Chili Mac, consider these kitchen essentials:
- Baking Dish: A 9×13 inch baking dish is perfect for this recipe.
- Mixing Bowls: Have a couple of large mixing bowls for combining ingredients.
- Measuring Cups and Spoons: Ensure accurate ingredient measurements for consistent results.
Serving Suggestions
Once your Chili Mac is baked to perfection, consider these serving ideas:
- Pair with a Side Salad: A fresh green salad complements the richness of the Chili Mac.
- Top with Avocado: Slices of avocado add creaminess and healthy fats.
- Serve with Tortilla Chips: Crunchy tortilla chips are great for scooping up the Chili Mac.
Wrap Up
And there you have it! With this comprehensive guide, you’re now equipped to transform your leftover chili into a delightful Chili Mac and Cheese that everyone will love. Not only is it a great way to use up leftovers, but it also brings excitement back into your kitchen. Get creative, have fun, and enjoy every cheesy bite!
Chilli Mac and Cheese
Ingredients
Main
- 2 cups leftover chili
- 2 cups cooked pasta
- 1 cup cheese sauce
- 0.5 cup extra grated cheese
Instructions
- Combine leftover chili, cooked pasta, and cheese sauce in a baking dish.
- Sprinkle extra grated cheese on top.
- Bake at 375°F (190°C) until bubbly, about 15-20 minutes.